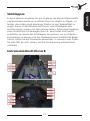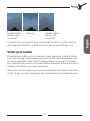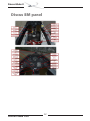
1
Add-on for Microsoft
Flight Simulator
Handbuch/Manual/Manuel
Discus Glider X
Concept:
Models/Textures:
XML/ gauges:
Flight modelling:
Flight modelling testing:
C4 Competition:
Project Management:
Manual, documentation: Sounds:
Images:
Installer:
Testing:
Joachim Schweigler
Joachim Schweigler
Thorsten Reichert, Finn Jacobsen,
Scott Printz
John Cagle
Joachim Schweigler
Ian Lewis
Mathijs Kok (Aerosoft), Joachim Schweigler
Mathijs Kok (Aerosoft), Ian Lewis,
Christoph Beck
Nick Schreger (Meatwater Studios),
Alexander Burkhardt and Aerosoft
Nick Churchill
Andreas Mügge (Aerosoft)
Several good folks who will all be getting
a free copy
Copyright:
© 2009/ Aerosoft GmbH
Flughafen Paderborn/Lippstadt
D-33142 Bueren, Germany
Tel: +49 (0) 29 55 / 76 03-10
Fax: +49 (0) 29 55 / 76 03-33
E-Mail: Internet: [email protected]
www.aerosoft.de
www.aerosoft.com
All trademarks and brand names are trademarks or registered of their
respective owners. All rights reserved. / Alle Warenzeichen und Markennamen sind Warenzeichen oder eingetragene Warenzeichen ihrer jeweiligen
Eigentümer. Alle Urheber- und Leistungsschutzrechte vorbehalten.
Aerosoft GmbH 2009
2
Discus
Glider X
Handbuch/Manual/Manuel
Erweiterung zum /
Add-on for
Add-on pour
Microsoft Flight Simulator X
3
Discus Glider X
Inhalt
Einleitung....................................................................6
Systemanforderungen......................................................... 7
Credits................................................................................... 8
Urheberrechte....................................................................... 9
Wenn Sie Hilfe benötigen.................................................... 9
Aufbau des Benutzerhandbuches...........................10
Modelle und Ausführungen.....................................11
Aerosoft Sound Control...........................................15
Instrumente..............................................................16
WinchX! und andere Zusatzprogramme
für Segelflugzeuge...................................................24
FSX Einstellungen.....................................................26
Weitere Handbücher und Anleitungen...................30
Content
Introduction..............................................................31
System requirements.......................................................... 32
Credits................................................................................. 33
Copyrights........................................................................... 34
Contact support.................................................................. 34
Setup of the manual.................................................35
Models and versions................................................36
Aerosoft Sound Control...........................................40
Aerosoft GmbH 2009
4
Instruments...............................................................41
WinchX! And other addon programs for gliders......48
FSX Settings..............................................................49
Additional Manuals..................................................53
Sommaire
Introduction..............................................................54
Configuration requise........................................................ 55
Credits................................................................................. 56
Copyrights........................................................................... 57
Contacter le support........................................................... 57
Organisation du manuel..........................................58
Modèles et versions.................................................59
Aerosoft Sound Control...........................................63
Instruments...............................................................64
WinchX! Et autres addon pour les planeurs...........72
Réglages dans FSX....................................................74
Manuels Additionnels..............................................78
5
Discus Glider X
Einleitung
Viele Menschen die noch nie mit modernen Segelflugzeugen geflogen
sind glauben, dass diese in absoluter Stille von Thermik zu Thermik
gleiten. Segelflugzeuge können das und machen das auch bisweilen,
aber sie sind auch in der Lage atemberaubende Kunstflugfiguren und
Manöver mit hohen G-Kräften und Geschwindigkeiten zu fliegen. Das
Rauschen der Luft, welche die Cockpithaube umströmt, erstickt oft
den Ton des Variometers und die Schreie des Passagiers. Segelflugzeuge werden in der Regel näher am Erdboden geflogen als viele
andere Flugzeugtypen, gerade wenn sie im hangnahen Aufwind einer
Berg- oder Hügelkette segeln. Auch wenn man sich das Leistungsspektrum von ihnen ansieht wird offensichtlich, dass heutige Hochleistungssegler nahezu jedes motorgetriebene Flugzeug in den Schatten
stellen. Gibt es ein Flugzeug der allgemeinen Luftfahrt mit einer
Reichweite von 3009 km, einer Höchstgeschwindigkeit von 306 km/h
und einer Dienstgipfelhöhe von 15.460 Metern? Auch wenn dieses
alles Segelflug-Weltrekorde darstellen ist die Performance eines
normalen Segelflugzeugs einfach „der Wahnsinn“.
Umso überraschter waren wir als wir merkten, dass bisher noch kein
„richtiges“ Segelflugzeug für den Flugsimulator entwickelt wurde. Wir
fanden jedoch auch schnell den Grund dafür heraus, als wir mit
diesem Projekt begannen. Schon die einfachsten Dinge stellten sich als
problematisch dar: Von den Instrumenten (die sehr speziell sind) bis zu
den Flugeigenschaften (ebenso speziell) gab es nichts worauf wir
hätten aufbauen können, so dass alles erst entwickelt werden musste.
So dauerte es auch fast 18 Monate und viele schlaflose Nächte um
dieses Projekt fertig zu stellen. Aber nun ist es fertig, hier ist es, die
erste High-End Simulation eines Segelflugzeugs für den FSX.
Aerosoft GmbH 2009
6
• Microsoft Flight Simulator FSX (mit SP2 oder Acceleration Pack)
• Dual Core CPU
• 2 GB RAM Arbeitsspeicher
• 512 MB Grafikkarte
• min. Adobe Acrobat® Reader 8 um die Handbücher lesen und
drucken zu können (1)
(1) Kann kostenlos heruntergeladen werden unter:
http://www.adobe.com/prodindex/acrobat/readstep.html
7
Deutsch
Systemanforderungen
Discus Glider X
Credits
Konzept:
Joachim Schweigler
Modell/ Texturen:
Joachim Schweigler
XML/ Instrumente:
Thorsten Reichert, Finn Jacobsen,
Scott Printz
Flugeigenschaften:
John Cagle
Flugeigenschaften Tests:
Joachim Schweigler
C4 Competition:
Ian Lewis
Projektleitung:
Mathijs Kok (Aerosoft),
Joachim Schweigler
Handbücher/ Dokumentation:
Mathijs Kok (Aerosoft), Ian Lewis,
Christoph Beck
Übersetzung:
Sebastian Ilse ([email protected])
Ton:
Nick Schreger (Meatwater Studios),
Alexander Burkhardt und Aerosoft
Bilder:
Nick Churchill
Installer:
Andreas Mügge (Aerosoft)
Tests:
Viele tolle Leute die alle ein
kostenloses Exemplar erhalten
Ein besonderer Dank an Franz Pöschl für die Informationen zum C4
Competition und die freundliche Erlaubnis, das originale Handbuch
nutzen zu dürfen. Weiterhin sind wir überaus dankbar für die große
Unterstützung von Schempp Hirth Flugzeugbau (Christoph Wannenmacher und Ewald Malcik) – nette Leute, tolles Flugzeug!
Bitte beachten Sie auch, dass wir eine Lizenz erworben haben, um
WinchX! in unsere Simulation einbinden zu können. Vielen Dank an
Peter Lürkens, der dieses möglich gemacht hat.
Aerosoft GmbH 2009
8
Anleitungen, Handbücher, Dokumentationen, Software und sonstiges
zugehöriges Material ist durch Urheberrechtsgesetze geschützt und darf
nicht kopiert, fotokopiert, übersetzt, zurückentwickelt, dekompiliert, in
anderer Form für elektronische Maschinen lesbar gemacht oder in sonst
irgendeiner Form vervielfältigt werden, weder im Gesamten noch teilweise,
ohne die vorherige ausdrückliche und schriftliche Zustimmung der
Aerosoft GmbH. Die Software wird in ihrem momentanen Zustand ohne
jegliche Garantieansprüche verkauft. Der Urheber weißt jegliche Verantwortung für mögliche Fehlfunktionen, Verlangsamung oder entstandene
Nachteile die durch den Gebrauch dieser Software entstehen von sich.
Copyright © 2009 AEROSOFT. Alle Rechte vorbehalten. Alle Markenund Warenzeichen sind gesetzlich geschützt und Markenzeichen der
entsprechenden Eigentümer.
Nehmen Sie Urheberrechte ernst. Sollten Sie auf irgendwelche
Raubkopien dieser Software stoßen informieren Sie uns bitte unter
[email protected]. Wir werden sicher stellen, dass Ihre Meldung
einer Raubkopie entsprechend honoriert wird.
Aerosoft GmbH
Lindberghring 12
D-33142 Büren, Germany
www.aerosoft.com
www.aerosoft-shop.com
Wenn Sie Hilfe benötigen
Aerosoft bietet Ihnen technische Unterstützung für dieses Produkt.
Dafür haben wir ein Support - Forum eingerichtet, aus dem einfachen
Grund weil es schnell und effizient funktioniert, da Kunden anderen
Kunden helfen während wir schlafen.
Aerosoft Forum: http://forum.aerosoft-shop.com
Wir nehmen unseren Support sehr ernst. Wenn Sie eines unserer
Produkte erwerben gibt Ihnen dies das Recht unsere Zeit auch für
Fragen in Anspruch zu nehmen, von denen sie glauben, sie könnten
dumm sein. Sie sind es nicht.
9
Deutsch
Urheberrechte
Discus Glider X
Aufbau des
Benutzerhandbuches
Wir haben das Benutzerhandbuch, wie auch schon in früheren Projekten,
in mehrere Bereiche gegliedert. Dieser Teil behandelt das Flugzeug im
FSX und einige Besonderheiten des Projekts. Bei den weiteren Teilen
handelt es sich um die „echten“ Betriebshandbücher und Anleitungen
für das Flugzeug und die Instrumente. Wir sind der Überzeugung mit
den „echten“ Handbüchern und Anleitungen eine gute Wahl getroffen
zu haben, da dieses Projekt ist so detailgetreu und realistisch ist. Der
Bonus für Sie als Kunden ist noch mehr Realismus.
Alle Handbücher und Anleitungen befinden sich im gleichen Ordner
(FSXMainFolder\Aerosoft\Discus\) unter folgenden Bezeichnungen:
•
Manual.pdf
Dieses Handbuch
•
EN_Discus_AB_FlightManual.pdf
Betriebshandbuch für das Discus B Modell (Englisch)
•
DE_Discus_AB_FlightManual.pdf
Betriebshandbuch für das Discus B Modell (Deutsch)
•
EN_Discus_BT_FlightManual.pdf
Betriebshandbuch für das Discus Bt Modell(Englisch)
•
DE_Discus_BT_FlightManual.pdf
Betriebshandbuch für das Discus Bt Modell(Deutsch)
•
EN_C4-V4.06.pdf
Handbuch für das C4 Competition (Englisch)
•
DE_C4-V4.06.pdf
Handbuch für das C4 Competition (Deutsch)
•
EN_WinchXHelp
Anleitung für WinchX! (Englisch)
•
DE_WinchXHelp
Anleitung für WinchX! (Deutsch)
Die Betriebshandbücher für die BT Modelle gelten auch für die BM
Modelle. Da es hiervon nur so wenige Exemplare gibt, wurde hierfür
kein eigenes Handbuch geschrieben.
Das Urheberrecht für alle Handbücher und Anleitungen abgesehen
von diesem Teil liegt bei den Unternehmen (und Personen) des
entsprechenden Produkts.
10
Aerosoft GmbH 2009
Drei verschiedene Segelflugzeuge der Firma Schempp-Hirth, alle aus
der Modellreihe Discus, wurden in diesem Projekt entwickelt. Der
Discus ist weit verbreitet in Vereinen auf der ganzen Welt. Er ist stabil
und relativ einfach zu fliegen, dennoch ist die Leistung beachtlich
wenn ein guter Pilot am Steuer sitzt.
Das Hauptmodell ist der Discus B, ein reines Segelflugzeug. Dieses
Projekt beinhaltet zusätzlich zwei weitere Modelle mit Hilfsmotor. Der
Discus BM kann sein Triebwerk zum Starten verwenden, wohingegen
der BT ein kleineres Triebwerk besitzt welches nur während des Fluges
genutzt werden kann, so dass er in die Luft geschleppt werden muss.
Discus B
Discus BT
Discus BM
Spannweite
15.0 m
15.0 m
15.0 m
Länge
6.58 m
Flügelfläche
10.58 m
10.58 m
10.58 m2
Max Gewicht
525 kg
450 kg
450 kg
Va (maneuver speed)
180 km/h
180 km/h
180 km/h
Vne (never exceed speed)
250 km/h
250 km/h
250 km/h
Vra (rough air speed)
200 km/h
180 km/h
180 km/h
Vt (max aerotow speed)
180 km/h
180 km/h
180 km/h
Vw (max winch speed)
150 km/h
150 km/h
150 km/h
Max Geschwindigkeit /
Triebwerk ausgefahren
-
160 km/h
160 km/h
Geschwindigkeit zum
Triebwerk ausfahren
-
90 <>120
km/h
90 <>120
km/h
Sollbruchstelle Flugzeugschlepp
max 680
daN
max 680
daN
max 680
daN
6.58 m
2
11
6.58 m
2
Deutsch
Modelle und
Ausführungen
Discus Glider X
Sollbruchstelle Windenschlepp
max 680
daN
max 680
daN
max 680
daN
Triebwerk
-
Solo type
2350
Rotax 463
Max Dauerleistung
-
16.3 kW
(5500 rpm)
35 Kw
(6100 rpm)
Max Drehzahl
-
5800 rpm
6500 rpm
geringstes Sinken
0.59 m/s
0.61 m/s
0.62 m/s
Gleitzahl
1 : 43
1 : 43
1 : 43
Stall Geschwindigkeit
66 Km/h
70 km/h
71 km/h
Anlassen und Abstellen des
Triebwerks
Die Triebwerke dieser Flugzeuge sind eher einfach gehalten (aber sehr
leicht und leistungsstark). Sie besitzen nur wenige Bedienelemente
und es müssen lediglich ein paar Schalter betätigt werden, um sie
nutzen zu können. Beide Triebwerke sind extrem laut und verursachen
beängstigende Vibrationen. Wer nicht daran gewöhnt ist glaubt
schnell, das Triebwerk verschlinge erst seine Zylinderkopfdichtung
bevor es sich daran macht den Zylinderkopf in seine Einzelteile zu
zerlegen. Kein Grund beunruhigt zu sein. Versuchen Sie nur nicht den
Funk zu benutzen, während das Triebwerk läuft.
Aerosoft GmbH 2009
12
Um das Triebwerk zu starten:
1. Geschwindigkeit unter 100 km/h
2. Ausfahrschalter betätigen (AUSF)
3. Zündung einschalten (Zünd EIN)
4. Statikport (Drucksensor) auf Motorbetrieb schalten (MOTOR)
5. Warten bis das grüne Licht aufleuchtet
6. Brandhahn (Treibstoffventil) öffnen
7. Beschleunigung auf 120 km/h
8. Dekompressionshebel ziehen
Das Triebwerk sollte jetzt starten. Um die beste Steigrate zu erreichen
halten sie die Geschwindigkeitsnadel nahe der blauen Linie. Es gibt
keine Drosselklappe bzw. Schubhebel, dass heißt das Triebwerk läuft
ständig mit maximaler Leistung.
Um das Triebwerk abzustellen:
1. Zündung ausschalten (Zünd AUS)
2. Brandhahn (Treibstoffventil) schließen
3. Triebwerk einfahren (EINF)
4. Statikport (Drucksensor) auf Segelbetrieb schalten ( SEGEL)
Discus BM
Um das Triebwerk zu starten:
1. Befindet sich der Segler in der Luft, Geschwindigkeit unter 100
km/h
2. Triebwerk ausfahren
3. Brandhahn (Treibstoffventil) öffnen
4. Die Kompensationsdüse auf Motorbetrieb stellen (MOTOR)
5. Propellerbremse öffnen (sollte beim ersten Starten geöffnet sein)
6. Zündung einschalten
7. Drosselklappe (Schubhebel) HALB ÖFFNEN
13
Deutsch
Discus BT
Discus Glider X
8. Auf dem Boden: Steuerhebel GANZ ZURÜCK
9. Auf dem Boden: Bremsen EIN
10.Anlasser betätigen
Das Triebwerk sollte nun starten. Bitte warten Sie bis sich die Drehzahl
stabilisiert hat bevor Sie losfliegen.
Um das Triebwerk abzustellen:
1. Befindet sich der Segler in der Luft, Geschwindigkeit unter 100 km/h
2. Schubhebel auf LEERLAUF
3. Zündung ausschalten
4. Warten Sie, bis der Propeller aufgehört hat, sich zu drehen
5. Propellerbremse EIN
6. Treibwerk einfahren
7. Brandhahn (Treibstoffventil) schließen
8. Kompensationsdüse auf Segelbetreib stellen (SEGEL)
Start mit eigenem Triebwerk Discus BM.
Das BM Modell ist in der Lage mit Hilfe seines eigenen Triebwerks vom
Boden abzuheben. Nachdem der Segler auf der Piste ausgerichtet
wurde (wird i.d.R. von Helfern erledigt, die den Segler auf die Piste
ziehen) wird vorsichtig Gas gegeben, damit die Nase nicht den Boden
berührt, da das Triebwerk sehr hoch über dem Schwerpunkt (CoG)
angebracht ist. Sobald der Segler genügend Fahrt hat, wird die
hängende Tragfläche vom Boden gehoben, während die Richtung mit
dem Seitenruder gehalten wird. Der Segler entscheidet nun selbst,
wann er bereit ist abzuheben, der Pilot braucht ihn lediglich auf dem
einen Hauptrad zu balancieren. Das ist nicht leicht und erfordert
einiges an Erfahrung.
Aerosoft GmbH 2009
14
Dieses Flugzeug ist mit Aerosoft Sound Control ausgerüstet welche die
Toneinstellungen für dieses Flugzeug in FSX verbessert. Bis zu 200
zusätzliche Sounds können abhängig vom Produkt hinzugefügt
werden. ASC basiert auf einem speziellen Instrument welches aus der
PANEL.cfg geladen und von der ASC.cfg Datei kontrolliert wird. Das
Modul besitzt einen ID Code, der mit diesem Flugzeug verknüpft ist.
Sollten Sie eine Fehlermeldung erhalten, dass das Modul nicht in der
Lage ist dieses Flugzeug zu finden, dann wenden Sie sich bitte an
unseren Support unter [email protected].
Dieses Modul dürfte keinen Konflikt mit irgendeinem anderen FSX
Produkt verursachen, denn die zusätzlichen Sounds beziehen sich nur
auf das Flugzeug, nicht jedoch auf die simulierte Pilotenstimme,
Flugsicherung (ATC) oder die Umgebungsgeräusche. Das Modul kann
natürlich auch im Cockpit angezeigt werden (fügen Sie // am Beginn
der Zeile gauge**=ASC!MAIN, 0,0, 10, 10, 1 ein)
Sollten Sie eine Fehlermeldung bekommen, die dieses Modul als
Ursache anführt, dann handelt es sich sehr wahrscheinlich um ein
Problem in Verbindung mit Microsoft.VC90.CRT. Es ist bekannt, dass
manchmal ein Problem mit den C++ 2008 runtime Dateien auftritt. Ein
einwandfreies Dateipaket finden Sie unter: http://www.microsoft.com/
downloads/details.aspx?FamilyID=9b2da534-3e03-4391-8a4d074b9f2bc1bf&displaylang=en
Flugeigenschaften
In diesem Projekt haben wir ein ganz besonderes Augenmerk auf die
Flugeigenschaften gelegt. Die Entwicklung dieses zentralen Aspekts
mussten wir dreimal neu beginnen, denn obwohl die Flugeigenschaften gut waren, waren sie nicht so perfekt wie wir sie haben
wollten. Wir können nun schlicht und ergreifend sagen, dass die 5
Flugmodelle dieses Projekts dem neusten Stand der Technik entsprechen,
so dass Sie dieses Segelflugzeug EXAKT so fliegen können wie sein
„echtes“ Gegenstück. Stall, Spins und Slips funktionieren genau so,
wie es sein sollte. Dieses haben uns Piloten bestätigt, die den echten
Discus und jetzt dieses simulierte Modell geflogen sind.
15
Deutsch
Aerosoft Sound Control
Discus Glider X
Instrumente
Die Fluginstrumente im Cockpit sind hochrealistisch und ziemlich
kompliziert. Wenn Sie mit Segelflugzeugen bisher wenig Erfahrung
haben, könnten Sie überrascht sein, wie komplex das Cockpits eines
modernen Segelflugzeugs ist. Hier die Instrumente im Einzelnen.
Variometer
Die Variometer, oder kurz „Varios“ sind vertikale Geschwindigkeitsmesser (VSI = vertical speed indicator) welche die Veränderung des
statischen Luftdruckes (Umgebungsluftdruck) während einer Höhenänderung messen und anzeigen. Der Umgebungsdruck außerhalb eines
Flugzeugs verändert sich sobald ein Flugzeug steigt oder sinkt.
Innerhalb des Flugzeugs befindet sich eine isolierte und luftdichte sog.
Druckdose, ähnlich einer Thermosflasche. Wenn ein Flugzeug steigt
nimmt der Umgebungsdruck ab und die Luft innerhalb der Druckdose
dehnt sich aus. Die Druckdose ist an das Variometer angeschlossen in
dessen Inneren sich eine hochempfindliche Membrane befindet, die
durch den Luftzug in die und aus der Druckdose gebogen wird. An
diese Membrane ist der Zeiger des Variometers angeschlossen, welcher
„Steigen“ anzeigt, sobald der Umgebungsdruck abnimmt und die Luft
aus der Druckdose durch die Membrane herausfließt und umgekehrt.
Ohne weitere Hilfsmittel zeigt ein solches (auch als „unkompensiert“
bezeichnetes) Variometer jede Höhenänderung als „Steigen“ oder
„Sinken“ an, egal ob sich diese aus aufsteigender oder absinkender
Luft oder einfach nur aus dem Ziehen oder Drücken des Piloten am
Steuerknüppel (Knüppelthermik) ergibt. Für einen Segelflugpiloten, der
bewusst nach dem besten Steigen in einem Aufwind sucht ist es
natürlich verwirrend, wenn die Anzeige des Steigens überlagert wird
von seinen Flugmanövern. Daher haben moderne Segelflugzeuge sog.
„fahrtkompensierte“ Variometer, welche die Variometerreaktion
aufgrund von Flugmanövern beseitigen (siehe im folgenden Kapitel).
Im Cockpit des Discus gibt es 3 verschiedene Variometer - von oben
links nach unten rechts sind dies das „Vario SC“ als Nebengerät des
SDI C4 Flugcomputers, das digitale „LCD Vario“ des SDI C4 HauptAerosoft GmbH 2009
16
Fahrtkompensiertes Variometer
Das mechanische „Winter“ Vario im Aerosoft Discus
unten rechts vom SDI C4 ist so ausgelegt, dass es
kontinuierlich die „fahrtkompensierte“ (oder
„Totalenergie“-) vertikale Geschwindigkeit anzeigt.
Hierbei handelt es sich um einen traditionellen Wert
auf welchen Segelflieger seit über 50 Jahren vertrauen, da er ihnen eine Steig- bzw. Sinkrate liefert, unabhängig davon ob sie gerade am Steuerknüppel ziehen
oder drücken. Bspw. bewirkt das Ziehen des Steuerhebels ein Steigen des
Segelflugzeugs, aber auch eine Geschwindigkeitsabnahme. Durch die
Verwendung sowohl des statischen Luftdrucks (Höhe) als auch des
Staudruckes (Geschwindigkeit) kann jede Steuerbewegung entsprechend kompensiert werden, daher spricht man von "Fahrtkompensation".
Solange sich die Fluggeschwindigkeit nicht ändert, entspricht eine
fahrtkompensierte Steig- bzw. Sinkrate der tatsächlichen vertikalen Rate.
Dieser Wert ist weitaus nützlicher als die einfachere tatsächliche
vertikale Rate. Die essentielle Information für einen Segelflieger der
„oben“ bleiben möchte, ist der momentane Energiestatus seines
Fluggerätes, entweder als kinetische Energie (Höhe) oder als potentielle
Energie (Geschwindigkeit). Fliegt er tief und schnell, kann er
Geschwindigkeit in Höhe umsetzen, fliegt er hoch und langsam hat er
17
Deutsch
instrumentes und das mechanische „Winter“ Variometer. Die Ausrüstung an Variometern in heutigen Hochleistungsseglern ist technisch
ausgereift und ausgeklügelt. Es gibt eine Reihe verschiedener Kompensationsmöglichkeiten, um die Anzeigen für den Piloten so aussagekräftig
wie möglich zu gestalten. Wenn Sie im Folgenden die Beschreibungen
der Variometer durchlesen, sollten Sie jedoch einen einfachen Grundsatz nicht vergessen: Jedes Variometer versucht eine bestimmte
vertikale Geschwindigkeit darzustellen. Und wenn Sie in der Thermik
kreisen oder im Hangaufwind „soaren“ ist eine nach oben gerichtete
Nadel schon mal eine gute Sache, während ein sich schnell nach links
in die negative untere Hälfte drehender Zeiger ein Zeichen dafür ist,
dass Sie Geschwindigkeit aufnehmen sollten um aus dem „Sinken“ in
dem Sie sich befinden heraus zu kommen.
Discus Glider X
die Möglichkeit Höhe in Geschwindigkeit umzuwandeln. Vernachlässigt man der Einfachheit wegen den Energieverlust durch den Luftwiderstand, bleibt die „Totalenergie“ gleich. Was der Segelflugpilot
wissen muss, ist ob er Totalenergie gewinnt oder verliert. Befindet er
sich in einer Thermik und macht Höhe ohne die Flugzeugnase zu
heben, gewinnt er Totalenergie dazu (in Form von kinetischer Energie).
Fliegt er in einer sinkenden Luftmasse verliert er Energie.
Das fahrtkompensierte Variometer stellt genau diese Information dar:
„Es zeigt die vertikale Geschwindigkeit während die Auswirkungen
von Flugmanövern beseitigt werden. Bei einem mechanischen
Membrane-Variometer wird dies durch die Verwendung spezieller
Druckabnahmedüsen („Kompensationsdüsen“) erreicht, die statischen
Druck und Staudruck kombinieren.“
Dies kann am besten an folgenden Beispielen veranschaulicht werden:
• Konstante Geschwindigkeit, abnehmende Höhe ->
fahrtkompensiertes Vario zeigt SINKEN
• Konstante Geschwindigkeit, zunehmende Höhe ->
fahrtkompensiertes Vario zeigt STEIGEN
• Zunehmende Geschwindigkeit, konstante Höhe ->
fahrtkompensiertes Vario zeigt STEIGEN
• Abnehmende Geschwindigkeit, Konstante Höhe ->
fahrtkompensiertes Vario zeigt SINKEN
Der SDI C4 Flugcomputer hat außerdem eine akustische Anzeige der
fahrtkompensierten Rate: ein helles unterbrochenes „Piep-piep-piep“
bedeutet „Steigen“, ein tiefer ununterbrochener Piepton „Sinken“. Sie
werden schnell lernen diese akustischen Signale zu interpretieren und
umzusetzen indem Sie Fahrt aufnehmen sobald Sie sinken und langsamer
werden wenn Sie steigen. Diese Art zu Fliegen (auch „Delphinfliegen“
genannt) wird die Effizienz Ihrer Cross-Country Flüge deutlich steigern.
Bitte beachten Sie, dass der McCeady Ring am einfachen und dem
fahrtkompensierten Variometer in unseren Cockpits nicht benutzt werden
kann. Die Informationen die er darstellen könnte werden weit genauer
und zuverlässiger vom C4 Competition angezeigt.
Aerosoft GmbH 2009
18
Das elektronische „Vario SC“ Variometer befindet
sich oberhalb oder links des SDI C4 im Aerosoft
Discus und ist so eingestellt, dass es kontinuierlich
die Netto-Steigrate anzeigt. Es fungiert als Nebengerät und wird gespeist vom SDI C4 Flugcomputer.
Es handelt sich hierbei um ein modifiziertes
fahrtkompensiertes Variometer (siehe oben) mit
einer weiteren Kompensation, die das „Eigensinken“ des Segelflugzeugs heraus rechnet. Demzufolge zeigt dieses Vario das Steigen und
Sinken der Luftmasse an, durch die bzw. in der das Flugzeug gerade
fliegt. Das Eigensinken des Seglers wird aus seinen spezifischen
Leistungsdaten ermittelt. Das funktioniert gut solange sich die Leistung
des Seglers nicht durch Insekten oder Wassertropfen auf den Tragflächen verringert. Aber auch für diesen Fall gibt es eine Einstellung im
SDI C4, die es erlaubt den Wert für das Eigensinken so anzupassen,
dass das Netto Vario wieder korrekte Werte anzeigt (siehe SDI C4
Handbuch, welches diesem Produkt beigefügt ist).
Während die Berechnungen für den Nettowert sehr kompliziert sind,
ist das Ablesen dieses Instrumentes leicht: Zeigt die Nadel nach oben
bedeutet dies die Luftmasse die den Segler umgibt steigt. Dies gilt
analog für das Sinken. Dieses Instrument hat seine ganz besondere
Bedeutung wenn es um das Hangaufwindfliegen geht, da es bereits
Nuancen der vertikalen Luftbewegungen anzeigt, verursacht vom
Wind der über hügeliges Gebiet weht. So erlaubt es Ihnen den
Flugweg relativ zur Geländebeschaffenheit zu optimieren.
19
Deutsch
Netto Variometer
Discus Glider X
Sollfahrt Variometer
Das Hauptinstrument des SDI C4 zeigt standardmäßig die fahrtkompensierte (oder Totalenergie-) vertikale Geschwindigkeit an. Jedoch kann
mittels des VARIO/SOLLF Schalters weiter unten
auf dem Instrumentenbrett die Anzeige in den
fortschrittlichsten Modus von allen geschaltet
werden: die „Sollfahrtanzeige“.
Wie schon zuvor erwähnt lernt ein Segelflieger,
Geschwindigkeit aufzunehmen wenn das fahrtkompensierte Variometer „Sinken“ anzeigt (um schnell aus dem Abwind herauszufliegen)
und langsamer zu fliegen sobald ein „Steigen“ angezeigt wird (um im
Aufwind herum zu trödeln und so den größten Nutzen aus diesem zu
ziehen). Allerdings weiß er nicht um wie viel er beschleunigen oder
bremsen soll, wenn er nur ein fahrtkompensiertes oder Netto Variometer hat. Da ein Segelflugzeug bei hohen Geschwindigkeiten zudem
weniger effektiv ist, wird sich die Sinkrate noch erhöhen je schneller es
fliegt, so dass es nochmals schwieriger wird zu entscheiden, ob man
beschleunigen oder lieber bremsen sollte.
Das Sollfahrt Variometer nimmt dem Piloten diese komplizierte
Aufgabe ab. Obwohl die Anzeige aussieht, als würde sie sich ähnlich
wie die eines fahrtkompensierten Variometers verhalten, liegt ihr eine
Berechnung mit einer dreifachen Kompensation zu Grunde. Anzeigenadel nach OBEN bedeutet ganz einfach FLIEG LANGSAMER und die
Nadel nach UNTEN heißt FLIEG SCHNELLER. Dies ist übereinstimmend
mit der Richtung in welche die Nadel wandern würde, würde sie ein
„Steigen“ oder „Sinken“ anzeigen, jedoch muss sich der Pilot keinerlei
Gedanken mehr darüber machen, um wie viel er schneller oder
langsamer werden sollte - zeigt die Nadel „Null“ an, hat er die
optimale Geschwindigkeit erreicht.
Funkgerät
Das Funkgerät ist sehr einfach gehalten und hat nur eine begrenzte
Reichweite. Mit Hilfe des unteren und oberen Teils des großen Knopfs
in der Ecke unten rechts kann die Frequenz eingestellt werden.
Aerosoft GmbH 2009
20
Der Geschwindigkeitsmesser
besitzt eine 510 Grad Skala und
erlaubt das genaue Ablesen der
angezeigten Geschwindigkeit
(IAS) in km/h oder Knoten, je
nachdem welche Einstellung Sie
im FSX vorgenommen haben.
Höhenmesser
Beim Höhenmesser handelt es sich um ein eher einfaches Gerät. Wie
auch beim Geschwindigkeitsmesser basieren seine Anzeigewerte
entweder auf dem metrischen oder dem U.S. System (im Instrument
wird automatisch die richtige Bitmap angezeigt). Hier sollte vor dem
Start das korrekte QFE eingestellt werden. Da das C4 Competition
unabhängig von diesem Instrument arbeitet, kann hier das QFE und im
C4 das QNH eingestellt werden.
C4 Competition Flugcomputer
Der Flugcomputer „C4 Competition“ ist ohne Zweifel das Herzstück
dieses Produktes. Er wird für Segelflugwettbewerbe benutzt (und auch
von Hobbypiloten). Aufgrund des geladenen Flugplanes, der GPSPosition und der Leistungsdaten des Segelflugzeugs kann er zahlreiche
Berechnungen durchführen. Es wäre zu kompliziert diese hier im
Einzelnen aufzuführen. Darum sind wir glücklich, die Erlaubnis der
Herstellers (Franz Pöschl GmbH) zu haben, das echte Handbuch für
unser Produkt verwenden zu dürfen. Sie werden feststellen, dass
unsere Ausführung dieses Instruments in fast allen Funktionen genau
und detailgetreu ist. Weiterhin werden Sie merken wie leistungsstark
das C4 Competition ist, auch wenn es sicherlich eine gute halbe
Stunde in Anspruch nehmen wird, bis Sie mit diesem Instrument
vertraut sind. Wir können Ihnen versichern, es lohnt sich.
21
Deutsch
Geschwindigkeitsmesser
Discus Glider X
GPS
Unser Discus besitzt ein PDA basiertes
GPS. Hier handelt es sich nicht um die
Nachbildung eines echten Geräts,
aber es verhält sich sehr ähnlich wie
die Software die von vielen Segelfliegern benutzt wird und sieht auch so
aus. Es wird mittels des GPS Schalter
auf dem Instrumentenbrett eingeschaltet. Es kann mit [Umsch]+[2] als
großes Gerät eingeblendet werden.
Dieses Fenster lässt sich falls nötig auch abkoppeln.
Ist ein Standard FSX Flugplan geladen, wird dieser auf dem Display
angezeigt. Ebenso werden geschützte Lufträume angezeigt um sicher
zu stellen, dass Sie sich nicht in die Kontrollzone eines großen
Flughafens verirren, während Sie auf Thermiksuche sind. Wir empfehlen
wann immer möglich einen Flugplan geladen zu haben.
Schalter für Sollfahrt
Der C4 Flugcomputer stellt entweder die (fahrtkompensierte) vertikale
Geschwindigkeit oder die optimale Sollfahrt dar. Dies kann über den
Sollfahrt - Schalter gewählt werden. Beide Einstellungen bieten die
Möglichkeit einer akustischen Anzeige: Im Sollfahrtmodus bedeutet
ein tiefer durchgehender Piepton, Sie sollten beschleunigen und ein
heller, unterbrochener Piepton, Sie sollten Geschwindigkeit abbauen.
Im Modus „vertikale Geschwindigkeit“ bedeutet ein heller, unterbrochener Ton, Sie steigen und gewinnen an Totalenergie, ein tiefer
ununterbrochener Ton, dass Sie sinken und Energie verlieren.
Aerosoft GmbH 2009
22
Es ist selten, dass ein Instrument von so großer Bedeutung in einem
Flugzeug nicht viel mehr kostet als ein einfaches Stück Schnur oder
Faden. Viele Segelflieger werden Ihnen bestätigen können, dass der
„rote Faden“ das wichtigste Instrument ist das sie haben und in der
Tat zur Hauptinstrumentengruppe dazu gehört. Er ist auf die Kabinenhaube aufgeklebt und bewegt sich im Luftstrom. Befindet sich der
Faden mittig, fliegt das Segelflugzeug so effizient wie möglich (ohne
irgendeine Slip - oder Gierbewegung).
Seitenruder links Optimale
oder Querruder
Position
rechts zum
korrigieren
Seitenruder rechts
oder Querruder links
zum korrigieren
Piloten, die es gewohnt sind motorgetriebene Flugzeuge zu fliegen,
haben es oft nicht leicht sich in einem Segelflugzeug zurecht zu
finden. Dabei hilft der Faden.
Schalter für Statikport
Es gibt zwei sog. Statikports (Öffnungen, um den statischen Druck zu
messen) am Discus. Einer ist fahrtkompensiert und an der Seitenflosse
angebracht, während der andere aus kleinen Öffnungen besteht, die
sich im Rumpf des Flugzeugs unterhalb der Tragflächen befinden. Der
Schalter für den Statikport schaltet die Quelle für die Variometer
zwischen diesen zwei Möglichkeiten hin und her und bietet eine
Stellung für Segel- und eine für Motorbetrieb.
Soll das Hilfstriebwerk verwendet werden, müssen die Statikports
unter den Flügeln verwendet werden, um eine korrekte Variometeranzeige zu erhalten und Aussetzer zu vermeiden.
23
Deutsch
Der „rote Faden“
Discus Glider X
WinchX! und andere
Zusatzprogramme für
Segelflugzeuge
Es gab ein ernsthaftes Problem als wir mit diesem Projekt begannen.
Segelflugzeuge mit Hilfsmotor können nicht in die Luft geschleppt
werden. FSX erlaubt dieses Verfahren einfach nicht mehr sobald ein
Segelflugzeug ein Triebwerk besitzt. Also hatten wir tolle Segelflugzeuge und keine Möglichkeit sie in die Luft zu bekommen. Mit der
Veröffentlichung von WinchX! war dieses Problem behoben. Wir
haben mit dessen Entwickler Kontakt aufgenommen und uns schließlich
geeinigt, dieses wunderbare Programm unserem Produkt beizufügen.
Es ist nicht sehr schwierig das Programm zu bedienen und dennoch ist
es äußerst realitätsnah. Eine vollständige Anleitung für WinchX!
befindet sich in folgendem Ordner: FSXMainFolder\Aerosoft\Discus\
Weiterhin möchten wir Ihnen ein weiteres kostenloses Programm für
den Segelflug sehr ans Herz legen: CumulusX!. Der Entwickler Peter
Lürkens beschreibt sein Programm wie folgt:
CumulusX! ist eine Erweiterung des Microsoft Flight Simulator X, die
eine für Segelfliegen geeignete Umgebung erzeugt. Es wurde inspiriert
von der bekannten Ergänzung Cross Country Soaring 2004 von Eric
Carden für den früheren Flight Simulator 2004. CumulusX! erzeugt
thermische Aufwinde mit den entsprechenden Wolken, entweder
während des Fluges in der näheren Umgebung des Segelflugzeuges
mit weiten Variationen, oder basierend auf einer vom Anwender
bereitgestellten Liste von Aufwinden. Beide Möglichkeiten erlauben
auch den Online-Flug, wobei eine gleiche Thermiksituation für alle
Teilnehmer erreicht werden kann. CumulusX! passt sich automatisch
und kontinuierlich den vorherrschenden Wetterbedingungen im
Simulator an, auch im Modus mit realem Wetter.
Aerosoft GmbH 2009
24
Alle Informationen zu CumulusX! sowie den Download link finden sie
hier: http://www.luerkens.homepage.t-online.de/peter/
(Eine Empfehlung ist das Simprobe Tool welches eine Verbindung zu
CumulusX aufnimmt. Dieses generiert hochrealistische Winde über
hügeliges Gelände und Berge. Alle Information hierüber und die
entsprechenden Downloads auf: http://carrier.csi.cam.ac.uk/forsterlewis/
soaring/sim/fsx/dev/sim_probe/ )
25
Deutsch
Mit Hilfe des zusätzlichen Slope Data Base Tool(nicht diesem Produkt
enthalten) produziert CumulusX! außerdem variierende Hangaufwinde
in allen Teilen der Welt. Im Gebirge werden thermische Aufwinde
passend zu den Hangausrichtungen in Bezug auf Wind und Sonneneinstrahlung platziert.
Discus Glider X
FSX Einstellungen
Um die bestmögliche Kontrolle über das Segelflugzeug zu haben ist es
notwendig, einige Anpassungen an den FSX Einstellungen vorzunehmen.
Ton
Unsere Empfehlung ist, alle Schieberegler ganz nach rechts zu stellen.
Realitätsgrad
Wir raten Ihnen dazu die Einstellungen der Flugeigenschaften auf
„realistisch“ zu stellen um die bestmöglichen Flugeigenschaften zu
erhalten. Natürlich ist es nicht sehr realitätsnah ein Segelflugzeug ohne
irgendeine Form von Seitenruder (und angeschaltetem autom.
Seitenruder) zu fliegen.
Aerosoft GmbH 2009
26
Es kann überaus schwierig sein ein Flugzeug, das keinen Motor besitzt
und konstruiert wurde um so effizient wie nur möglich zu fliegen, zu
landen, da es dazu neigt eine lange Strecke im sog. Bodeneffekt zu
segeln. Somit ist das Benutzen der Brems- oder Störklappen sehr
wichtig und sie müssen sich fein justieren lassen. Sofern Ihre Hardware
einen zusätzlichen Schieberegler (wie z.B. beim Saitek X52) besitzt,
empfehlen wir diesen den Störklappen zuzuordnen, um sie stufenlos
kontrollieren zu können. Hat Ihre Hardware keinen zusätzlichen Regler
hierfür, sollten Sie die Schubachse verwenden. In unseren Foren finden
Sie Hilfe falls Sie nicht wissen, wie Sie Ihre Steuerung entsprechend
umstellen.
Instrumentenbrett Discus B
27
Deutsch
Störklappen
Discus Glider X
Instrumentenbrett Discus BT
Aerosoft GmbH 2009
28
29
Deutsch
Instrumentenbrett Discus BM
Discus Glider X
Weitere Handbücher
und Anleitungen
Neben diesem Handbuch gehören weitere 4 englischsprachige und 4
deutschsprachige Handbücher und Anleitungen zu diesem Produkt.
Sie befinden sich alle in folgendem Ordner: [FSXHauptverzeichnis]\
Aerosoft\Discus. Die jeweiligen Handbücher und Anleitung unterliegen
dem Urheberrecht der jeweiligen Verfasser und wurden uns von diesen
mit freundlicher Genehmigung zur Verfügung gestellt.
• EN_Discus_AB_FlightManual.pdf
Betriebshandbuch für das Discus B Modell (Englisch)
• DE_Discus_AB_FlightManual.pdf
Betriebshandbuch für das Discus B Modell (Deutsch)
• EN_Discus_BT_FlightManual.pdf
Betriebshandbuch für das Discus Bt Modell(Englisch)
• DE_Discus_BT_FlightManual.pdf
Betriebshandbuch für das Discus Bt Modell(Deutsch)
• EN_C4-V4.06.pdf
Handbuch für das C4 Competition (Englisch)
• DE_C4-V4.06.pdf
Handbuch für das C4 Competition (Deutsch)
• EN_WinchXHelp
Anleitung für WinchX! (Englisch)
• DE_WinchXHelp
Anleitung für WinchX! (Deutsch)
Aerosoft GmbH 2009
30
Most people who have not been in a modern glider think that they
glide from thermal to thermal in total silence. They can and they do,
but they are also capable of the most amazing aerobatics and high
speed high G maneuvers. Often the roar of the air flowing over the
canopy drowns out the sound of the variometer and the screams of
the passenger. They are often flown closer to the ground than most
other aircraft, certainly when they are flown using the wind flow rising
over mountain slopes. Even if you look at simple performance you see
that modern gliders outperform many serious motorized aircraft.
Name one general aviation aircraft with a range of 3.009 km, a speed
of 306 kmh, and a ceiling of 15,460 meters. And although these are
world records for gliders, the actual performance of standard gliders is
amazing.
We were surprised to find that no serious glider has ever been done
for Flight Simulator but when we started with this project we soon
found out why. Every bit was problematic. From the gauges (they are
very special) to the flight model (equally special), we had nothing to
build on and had to invent everything. That’s why it took nearly 18
months and a lot of sleepless nights to complete the project. But it’s
done, here it is, the first high end simulation of a glider in FSX.
31
English
Introduction
Discus Glider X
System requirements
• Microsoft Flight Simulator FSX (with SP2 or Acceleration Pack)
• Dual Core CPU
• 2 GB RAM internal memory
• 512 MB graphic card
• Adobe Acrobat® Reader 8 minimal to read and print the manual (1)
(1) Available for free, download at:
http://www.adobe.com/prodindex/acrobat/readstep.html
Aerosoft GmbH 2009
32
Concept:
Joachim Schweigler
Models/Textures:
Joachim Schweigler
XML/ gauges:
Thorsten Reichert, Finn Jacobsen,
Scott Printz
Flight modelling:
John Cagle
Flight modelling testing:
Joachim Schweigler
C4 Competition:
Ian Lewis
Project Management:
Mathijs Kok (Aerosoft), Joachim Schweigler
Manual, documentation:
Mathijs Kok (Aerosoft), Ian Lewis,
Christoph Beck
Sounds:
Nick Schreger (Meatwater Studios),
Alexander Burkhardt and Aerosoft
Images:
Nick Churchill
Installer:
Andreas Mügge (Aerosoft)
Testing:
Several good folks who will all be
getting a free copy
Special thanks to Franz Pöschl for the information on the C4 Competition
and for allowing us to use the real manuals. Check out his website at:
sdi-variometer.de. We also appreciate the great assistance from
Schempp Hith Flugzeugbau (Christoph Wannenmacher and Ewald
Malcik) nice people, great aircraft!
Please note that we got a commercial license to include WinchX! We
thank Peter Lürkens for making this possible.
33
English
Credits
Discus Glider X
Copyrights
The manual, documentation, video images, software, and all the related
materials are copyrighted and cannot be copied, photocopied, translated
or reduced to any electronic medium or machine legible form, neither
completely nor in part, without the previous written consent of AEROSOFT.
THE SOFTWARE IS FURNISHED «AS IS» AND IT DOES NOT COME
FURNISHED WITH ANY GUARANTEE IMPLICIT OR EXPRESS. THE AUTHOR
DECLINES EVERY RESPONSIBILITY FOR CONTINGENT MALFUNCTIONS,
DECELERATION, AND ANY DRAWBACK THAT SHOULD ARISE, USING THIS
SOFTWARE.
Copyright © 2009 AEROSOFT. All rights reserved. All trademarks and
brand names are trademarks or registered trademarks of the respective
owners.
Copyrights are serious stuff. If you find any pirated copies of this software
please notify us at info@aerosoft-shop. We will make sure reports of
copyrights violation are rewarded.
Aerosoft GmbH
Lindberghring 12
D-33142 Bueren, Germany
www.aerosoft.com
www.aerosoft-shop.com
Contact support
Support for this product is offered by Aerosoft. We prefer to have a
support forum for the simple reason that it is fast and efficient
because customers help customers when we are sleeping.
Aerosoft forums: http://forum.aerosoft-shop.com
We feel strongly about support. Buying one of our products gives you
the right to waste our time with questions you feel might be silly. They
are not.
Aerosoft GmbH 2009
34
Setup of the manual
You will find all the manuals in the same directory (FSXMainFolder\
Aerosoft\Discus\) with these names:
•
•
•
•
•
•
•
•
•
Manual.pdf
What you are reading now
EN_Discus_AB_FlightManual.pdf
Flight manual for the Discus B model (English)
DE_Discus_AB_FlightManual.pdf
Flight manual for the Discus B model (German)
EN_Discus_BT_FlightManual.pdf
Flight Manual for the Discus Bt model (English)
DE_Discus_BT_FlightManual.pdf
Flight Manual for the Discus Bt model (German)
EN_C4-V4.06.pdf
Manual for C4 Competition (English)
DE_C4-V4.06.pdf
Manual for C4 Competition (German)
EN_WinchXHelp
Manual for WinchX! (English)
DE_WinchXHelp
Manual for WinchX! (German)
Please note the BT manual is also intended for the BM models. As there
were so few copies there never was a complete flight manual created.
The copyrights for all manuals expect this section remains with the
companies (and individuals) who created the products.
35
English
As with previous projects we divided this manual into separate sections.
This section is about the aircraft in FSX and about some of the special
features of the project. The other sections are actual real life manuals of
the aircraft and the instrumentation. This project is so accurate and
realistic that we feel confident giving you the actual manuals. The bonus
for you, the customer, is added realism. What can be more realistic than
the manual used by the real pilots?
Discus Glider X
Models and versions
There are three different gliders by the firm Schempp-Hirth modeled in
this project, all from their Discus line. The Discus is popular with clubs
all over the world. They are strong and relatively easy to fly but the
performance is amazing when they are flown by a good pilot.
The base model is the Discus B that is a pure glider. But we included
two models with auxiliary engines. The Discuss BM can use its engine
to take-off, the BT has a smaller engine that is only used in flight and
needs to be towed or pulled into the air. Note that the BM is rare, only
9 or 10 of these have been built.
Discus B
Discus BT
Discus BM
Span
15.0 m
15.0 m
15.0 m
Length
6.58 m
6.58 m
Wing Area
10.58 m
10.58 m
10.58 m2
Max mass
525 kg
450 kg
450 kg
Va (maneuver speed)
180 km/h
180 km/h
180 km/h
Vne (never exceed speed)
250 km/h
250 km/h
250 km/h
Vra (rough air speed)
200 km/h
180 km/h
180 km/h
Vt (max aerotow speed)
180 km/h
180 km/h
180 km/h
Vw (max winch speed)
150 km/h
150 km/h
150 km/h
Max speed extended engine
-
160 km/h
160 km/h
Speed engine extension
-
90 <>120
km/h
90 <>120
km/h
Weak links Aero tow
max 680
daN
max 680
daN
max 680
daN
Weak links Winch launch
max 680
daN
max 680
daN
max 680
daN
Engine
-
Solo type
2350
Rotax 463
Aerosoft GmbH 2009
2
36
6.58 m
2
-
16.3 kW
(5500 rpm)
35 Kw
(6100 rpm)
Max RPM
-
5800 rpm
6500 rpm
Min Sink rate
0.59 m/s
0.61 m/s
0.62 m/s
Best L/D
~43
~43
~43
Stall speed
66 Km/h
70 km/h
71 km/h
Starting and stopping the engines
The engines in these aircraft are rather basic (but very light and
powerful). They have very few controls and using them is a matter of
just pressing a few buttons. Both engines are extremely noisy and
cause an alarming amount of vibration. If you are not used to it you
are sure the engine is eating its own head gasket before starting on
ripping the cylinder head to bits. Don’t be alarmed. And don’t try to
use the radio with the engine on.
Discus BT
To start the engine:
1. Keep speed below 100 km/h
2. Retract switch to EXTEND (AUSF)
3. Engine ignition ON (Zünd EIN)
4. Set Static source for engine operation ( MOTOR)
5. Wait until green light is shown
6. Fuel Switch valve to OPEN
7. Increase speed to 120 km/h
8. Pull Decompression lever
Engine should now start. Keep the speed at the blue line to get best
climb rate. There are no throttle controls, i.e. the engine always runs at
maximum power.
37
English
Max continuous power
Discus Glider X
To shut down the engine:
1. Engine ignition to OFF (Zünd AUS)
2. Fuel Valve switch to OFF
3. Retract switch to IN (EINF)
4. Set Static source for glider operation ( SEGEL)
Discus BM
To start the engine:
1. When in air; keep speed below 100 km/h
2. Extend the engine
3. Fuel Switch OPEN
4. Set Flight Pressure nozzle to motor setting (MOTOR)
5. Propeller brake RELEASE (should be released at first start)
6. Ignition ON
7. Throttle HALF OPEN
8. When on ground: Stick FULLY BACK
9. When on ground: keep brakes ON
10.Starter button PUSH
Engine should now start. Wait for RPM to stabilize before starting.
To shut down the engine:
1. When in air; keep speed below 100 km/h
2. Throttle IDLE
3. Engine ignition OFF
4. Wait for propeller to stop
5. Propeller brake SET
6. Retract the engine
7. Fuel Switch CLOSED
8. Set Flight Pressure nozzle to glider setting (SEGEL)
Aerosoft GmbH 2009
38
Powered Take-off Discus BM:
English
The BM model can take off using its own engine. After aligning the
aircraft (mostly done manually) on the runway, apply smooth power to
prevent the aircraft from pitching down because of the engine being
mounted so high above the CoG. As soon as possible lift the lower
wing from the ground while keeping direction with the rudders. The
aircraft will decide when it is ready to fly, the pilot just needs to keep
aircraft in a stable attitude balanced on the single wheel. This is not
easy and you will need some experience.
39
Discus Glider X
Aerosoft Sound Control
This aircraft is equipped with Aerosoft Sound Control that enhances
the sound options of this aircraft in FSX. Depending on the product up
to 200 additional sounds can be added. ASC is based on a special
gauge that is loaded from the PANEL.cfg and is controlled by an ASC.
cfg file in the panel folder. The module is linked to the aircraft and we
added it with an ID code. Should you see an error that the module
does not recognize the aircraft, please contact us on support@
aerosoft.com.
The module should not conflict with any other FSX product and the
sounds are always expanding the aircraft and not the simulated pilot,
ATC or external environment. Of course the module can be disabled
by commenting the load line (adding // in front of
gauge**=ASC!MAIN, 0,0, 10, 10, 1 in the panel.cfg)
If you get an error pointing to this module it is most likely caused by a
problem related to Microsoft.VC90.CRT.It is known that some people
got a problem in the C++ 2008 runtime files. You can find a correct
set here: http://www.microsoft.com/downloads/details.
aspx?FamilyID=9b2da534-3e03-4391-8a4d074b9f2bc1bf&displaylang=en
Flight model
The flight model has been one of the focal points of this project and
has in fact been started three times because though good it was not
as perfect as we wanted it to be. We can honestly say that the 5 flight
models in this product are state of the art, allowing you to fly the
gliders EXACTLY as the real gliders. Stall, spins, side slips, they are all
exactly as they should be. There are a good number of pilots who have
flown the real Discus gliders that have also flown this simulated model
and can confirm that.
Aerosoft GmbH 2009
40
Instruments
There is a highly realistic and rather complex set of instruments in
these cockpits. If you are not used to gliders you might be surprised
about the complexity of modern glider cockpits. All the instruments
are described in some details.
Variometers or, in short, varios are vertical speed indicators (VSI) which
show change of altitude by measuring the change in air pressure
(static pressure) as altitude changes. As the aircraft climbs or descends
the pressure outside the aircraft changes. Inside the aircraft there is an
isolated, airtight container, something like a thermos. When the
aircraft climbs, outer pressure decreases, and the air in the thermos
expands to the outside. The thermos is connected to the variometer. In
the variometer there is a highly sensitive vane which is deflected by the
flow in and out of the thermos. The vane is connected to a needle
which indicates climb, when the outer pressure decreases and the air
flows out of the thermos and vice versa.
Without further means, this variometer shows any change of altitude
as climb or sink, regardless if it results from up- or downstreaming air,
or just from pulling or pushing the stick by the pilot. Of course, it is
confusing for a glider pilot, if climb indication is superimposed by
aircraft maneuvers, when he is deliberately trying to find the best part
of the thermal. Therefore modern gliders have all compensated
variometers that eliminate the variometer reaction on aircraft maneuvers (see next chapters).
There are three variometers in these cockpits - from top-left to bottom
right they are the „vario SC“ slave vario of the SDI C4, the digital „lcd
petal“ gauge of the main SDI C4 unit, and the „Winter“ mechanical
variometer. The modern installation of variometers in gliders is very
sophisticated, with a variety of compensations possible to make the
reading as meaningful to the pilot as possible. In reading the descriptions below the simple point to remember is that each vario is trying to
give an indication of the rate of climb, and when you are thermalling
41
English
Variometer
Discus Glider X
or ridge flying a needle pointing upwards is generally a good thing,
while the needle rapidly rotating anti-clockwise around the dial
heading towards the negative lower half is a sign that you should
speed up and get out of the sinking air you are in.
Total Energy Compensated variometer
The mechanical ‚Winter‘ variometer in the Aerosoft
Discus below and to the right of the SDI C4 has been
configured to continuously display your ‚Total Energy
Compensated Climb Rate‘. This is the traditional
value that has been relied upon by glider pilots for
over fifty years, giving the climb rate of the glider
after removing the effects of the pilot pulling or
pushing on the joystick. Pulling back on the stick causes the glider to
climb, but also to decelerate, and by reading both the static air
pressure (altitude) and the pitot pressure (airspeed), the effect of the
joystick movement can be compensated for, hence „Total Energy Compensation“. If your airspeed is not changing, the Total Energy climb
rate will equal your true climb rate.
This reading is far more useful than the simpler true climb rate, as the
information that glider pilots really need to stay in air is the change in
energy stored in the aircraft, either in kinetic (altitude) or in potential
energy (speed). If he is low and fast he can exchange speed for
altitude, if he is high and slow he can exchange altitude for speed.
Excluding the loss of energy due to drag for simplicity, the total energy
stays the same. What the glider pilot needs to know is if he losing or
gaining Total Energy. If he is in a thermal and gaining altitude without
pitching up he gains energy (in the form of altitude), if he is in
descending air he is losing energy.
The Total Energy Compensated variometer provides that information
„It shows the vertical speed while effects of aircraft maneuvers are
eliminated. For a mechanical vane vario this is achieved by using
special static pick-up nozzles which combine static pressure and pitot
pressure“.
Aerosoft GmbH 2009
42
Perhaps best explained with these examples:
• Speed constant, altitude descending -> TEC variometer will
read SINK
• Speed constant, altitude climbs-> TEC variometer will read CLIMB
• Speed increase, altitude constant -> TEC variometer will read CLIMB
The SDI C4 also provides an audible indication of the Total Energy
climb rate, with a broken beep-beep-beep indicating lift, and a
continuous beep indicating sink. You learn quickly to recognize and
respond to these sounds, speeding up when you hear sink and
slowing down when you hear lift. This behavior (called ‚dolphin flying‘)
makes a huge difference to the efficiency of your cross-country flying.
Please note that the McCready ring on the variometer in the TEC
variometer on our panel cannot be used. The information it can offer
is presented far more detailed and reliably by the C4 Competition.
Netto Variometer
The electronic ‚vario SC‘ variometer above and to
the left of the SDI C4 in the Aerosoft Discus has
been configured to continuously display the ‚Netto
climb rate‘, operating as a slave dial driven by the
SDI C4. It is a modified Total Energy variometer (see
above) with one additional compensation where the
intrinsic sink rate of the glider is also compensated.
Thus, this vario shows basically the ascent and descent of the external
air mass. As the intrinsic sink rate is obtained from performance data
of the glider, this works well only as long as the performance of the
real glider is not reduced, e.g. by flies or water drops on the wings - in
this case there is a setting within the main SDI C4 flight computer
where you can adjust its value for the glider performance of the glider,
to restore the accuracy of the Netto reading (see the SDI C4 manual
included in this package).
43
English
• Speed decrease, altitude constant -> TEC variometer will read SINK
Discus Glider X
While the calculation to provide the netto value is complex, the
reading of the gauge is the most simple of all: if the needle goes up it
means the air outside the glider is rising, and similarly for sink. For
ridge flying the gauge comes into its own, continuously indicating the
nuances of the vertical air movement as the wind passes over the hilly
terrain, allowing you to optimize your flight relative to the landscape.
Speed-to-fly variometer
The main ‚petal lcd‘ gauge of the SDI C4
displays the total energy climb reading by
default (see above). However, the „VARIO/
SOLLF.“ switch lower down on the panel allows
you to switch the gauge into the most advanced
mode of all, i.e. „speed-to-fly“.
As mentioned earlier, the pilot learns to speed
up when the total energy variometer is indicating sink (to fly quickly out of the sink) and to slow down when lift is
indicated (to loiter in the lift to take the most advantage of it). But
with a total energy or netto variometer the pilot does not necessarily
know how much to speed up or slow down. Indeed you will learn that
speeding up causes the sink reading on a TE vario to increase, as the
glider is less efficient at higher speeds, making it even more difficult to
decide whether to speed up or slow down.
The „speed-to-fly“ variometer takes the burden of this complex
calculation away from the pilot, and although the needle looks like it is
behaving in a similar way to a TE or netto vario it is actually performing the triple compensation calculations so the needle UP simply
means SLOW DOWN, and the needle DOWN means SPEED UP. This is
consistent with the direction the needle would move if it were
indicating underlying lift or sink, but the pilot no longer needs to
consider how much to accelerate or decelerate - the needle reads zero
when the optimal airspeed is reached.
Aerosoft GmbH 2009
44
Communication radio
The communication radio is very simple and has limited range. The
frequency is set with the lower and upper section of the large knob on
the right lower section of the gauge panel.
The 510 degree scale on the
airspeed indicator allows for a
precise reading of the indicated
airspeed in km/h or knots
depending on your FSX setting.
Altimeter
The altimeter is rather standard and like the Airspeed indicator can be
switched between metric and US settings. The gauge will automatically show the correct bitmap. Make sure you set the correct QFE before
take-off. As the C4 Competition works independently from this gauge
you could set QFE in this gauge and QNH in the C-4.
C4 competition
Without a doubt the heart of this product, the C4 competition is a
flight computer that is used in glider competition (but also for
recreational flights). It is capable of using the loaded flightplan, your
GPS-determined position and the performance of the glider to make
many calculations. It is far too complex to describe them here and we
are happy to have permission of the manufacturer (Franz Pöschl
GmbH) to include the actual manual. You will find our representation
of the instrument to be accurate and detailed in almost all functions.
You will find the C4 Competition powerful but you have to spend half an
hour of getting to know it. We assure you this will be time well spent.
45
English
Airspeed indicator
Discus Glider X
GPS
There is a PDA based GPS device
included. This is not an actual one but
it looks and behaves very much like
the software used by many glider
pilots. If it is not on you can activate it
with the GPS switch on the panel.
You can open it as a bigger function
with [shift][2] and can undock that
window when needed.
When you have a standard FSX flight
plan loaded it will be shown on the display. At the same time closed
airspace is also shown so you can prevent straying into the control
zone of a major airport in your attempt to find that perfect thermal.
We strongly recommend having a flight plan loaded whenever possible.
Speed to fly switch
The C4 flight computer can either indicate your (total energy compensated) vertical speed or the optimal speed to fly. This is selected with
the Speed to Fly switch. Both modes have the option to get audio
feedback, in the Speed to Fly mode a lower beep means you need
more speed and a higher broken beep means you should slow down
for optional performance. In the Vertical speed mode higher broken
beeps mean you are gaining energy and low beeps mean you are
losing energy.
Yaw string
It’s rare that the most important instrument in an aircraft does not cost
more than a simple piece of tuft or yarn. But many glider pilots will tell
you that the yaw string (also called slip string) is the most important
gauge they have and it is in fact considered part of the primary flight
reference instruments. It is taped to the canopy and it simply moves in
the airstream. If it is centered you are flying the glider as efficiently as
possible (without any slip and a yaw angle as small as possible).
Aerosoft GmbH 2009
46
Rudder right or
aileron left
to correct
For pilots that are used to flying motorized aircraft it is often hard to
stay fully coordinated in a glider, but the yaw string will help a lot.
Static port switch
There are two static ports (to measure static pressure), one the Discus.
One total energy compensated mounted on the Vertical stabilizer and
the others are little holes in the fuselage below the wings. The Static
Port switches the source of the variometers between these ports and is
marked with glider and motor operation.
When you use the engine you need to select the static port under the
wings to get a correct reading of the variometers and prevent failures.
47
English
Rudder left or
Optimal
aileron right
to correct
Discus Glider X
WinchX! And other addon
programs for gliders
There was one serious problem when we started with this project.
Motorized gliders cannot be towed into the air. FSX simply will not
start this process when the glider has an engine. So we had great
gliders but no way to launch them. With the release of WinchX! this
problem was solved. We contacted the developer and we agreed on
including his great software. Though highly realistic the product is not
overly complex to use. You will find a complete manual for CumulusX!
in the FSXMainFolder\Aerosoft\Discus\ folder.
We also strongly advise you to check out another of his free utilities
for gliders, CumulusX!. Peter Lürkens describes this products like this:
CumulusX! is an add-on for Microsoft Flight Simulator X for the
creation of a soaring environment. It stands in the tradition of the
famous Cross Country Soaring 2004 of Eric Carden. CumulusX!
creates thermal lift with appropriate clouds either on the fly every time
new in the environment of your glider with a wide variety of characteristics, or based on custom-tailored lists of thermals. Both allow joining
in online sessions, with the guarantee of equal conditions for all
participants. It adapts automatically and continuously to the FSX
internal weather conditions even under real-weather-mode.
With the help of an additional slope data base (not included), it
produces also widely varying ridge-lift conditions in large areas of the
world. It also tries to place thermals in mountain areas according to
slope conditions and sun irradiation.
You will find all information and the download link for CumulusX!
here: http://www.luerkens.homepage.t-online.de/peter/
Simprobe is another tool that is strongly recommended. It connects to
CumulusX! and creates highly realistic winds over hills and mountains.
All information and downloads can be found at http://carrier.csi.cam.
ac.uk/forsterlewis/soaring/sim/fsx/dev/sim_probe/
Aerosoft GmbH 2009
48
FSX Settings
English
This product needs a few tweaks to the FSX settings to allow you full
control over the glider..
Sound
We advise you to move all sound slider to the maximum setting.
Realism
We strongly advise the flight model settings to be set to fully realistic
to get the best flight model. Of course flying the glider without any
form of rudder (and autorudder activated) is not very realistic.
49
Discus Glider X
Spoiler
In an aircraft that has no engine and is designed to glide as efficiently
as possible it can be amazingly hard to land as the aircraft will tend to
glide a long way in the ground effect. Thus the use of the spoiler is
very important and you will need smooth control over it. If your
control hardware has an additional slider (like for example the Saitek
X52) we strongly advise you to assign that to the spoilers so you can
control the spoilers in small steps. When your hardware does not have
any additional slider, we advise you to use the throttle axis for this. We
can offer help on the forums if you need to know how this can be
done on your stick.
Discus B panel
Aerosoft GmbH 2009
50
English
Discus BT panel
51
Discus Glider X
Discus BM panel
Aerosoft GmbH 2009
52
Additional Manuals
Please note that there are four more English and 4 more German
language manuals include in this product. They are all stored in the
[FSXMainDir]\Aerosoft\Discus folder. These manuals have been kindly
made available by the copyright holders.
• DE_Discus_AB_FlightManual.pdf
Flight manual for the Discus B model (German)
• EN_Discus_BT_FlightManual.pdf
Flight Manual for the Discus Bt model (English)
• DE_Discus_BT_FlightManual.pdf
Flight Manual for the Discus Bt model (German)
• EN_C4-V4.06.pdf
Manual for C4 Competition (English)
• DE_C4-V4.06.pdf
Manual for C4 Competition (German)
• EN_WinchXHelp
Manual for WinchX! (English)
• DE_WinchXHelp
Manual for WinchX! (German)
53
English
• EN_Discus_AB_FlightManual.pdf
Flight manual for the Discus B model (English)
Discus Glider X
Introduction
La plupart des gens qui n‘ont jamais pris place dans un planeur moderne pensent qu‘il se contente de planer d‘une ascendance à l‘autre
dans un silence total. C‘est tout à fait possible et cela arrive, mais ils
sont aussi capables des acrobaties les plus extraordinaires et de manoeuvres à grande vitesse. Souvent, le bruit de l‘air qui s‘écoule sur la
verrière couvre le son du variomètre et les cris des passagers. Ils volent
souvent plus près du sol que n‘importe quel autre appareil, surtout
quand ils sont menés en utilisant le flux d‘air montant le long les pentes des montagnes. Même si vous prenez en compte la performance
simple, vous pouvez vous rendre compte que les planeurs modernes
dépassent beaucoup d‘avions motorisés reconnus. Citez un appareil
d‘aviation générale avec un rayon de 3.009 km, une vitesse de 306
km/h, et plafond de 15,460 mètres. Et bien que ces chiffres soient des
records du monde concernant les planeurs, la performance actuelle
des planeurs standards est étonnante.
Nous avons été surpris de voir qu‘aucun planeur n‘avait été sérieusement reproduit pour Flight Simulator mais quand nous nous sommes
lancés dans ce projet, nous avons vite compris pourquoi. Chaque
partie était problématique. Depuis les jauges (qui sont très spécifiques)
jusqu‘au modèle de vol (lui aussi particulier), nous n‘avions pas de
bases à partir desquelles commencer, et nous avons dû tout inventer.
Voilà pouquoi cela a nécessité près de 18 mois et un bon nombre de
nuits blanches pour mener ce projet à bout. Mais ça y est, la voilà, la
première simulation haut de gamme d‘un planeur dans FSX.
Aerosoft GmbH 2009
54
Configuration requise
• Microsoft Flight Simulator FSX (avec SP2 ou Acceleration Pack)
• Dual Core CPU
• 2 GB RAM de mémoire interne
• Carte Graphique 512 MB
• Adobe Acrobat® Reader 8 minimum pour lire et imprimer le manuel
(1) (
1) Disponible gratuitement à l‘adresse suivante :
Français
http://www.adobe.com/prodindex/acrobat/readstep.html
55
Discus Glider X
Credits
Conception:
Joachim Schweigler
Modèles/Textures:
Joachim Schweigler
XML / jauges:
Thorsten Reichert, Finn Jacobsen,
Scott Printz
Modèle de vol:
John Cagle
Test du modèle de vol:
Joachim Schweigler
C4 Competition:
Ian Lewis
Gestion de Projet:
Mathijs Kok (Aerosoft),
Joachim Schweigler
Manuel, documentation: Christoph Beck
Mathijs Kok (Aerosoft), Ian Lewis,
Son:
Nick Schreger (Meatwater Studios),
Alexander Burkhardt et Aerosoft
Images:
Nick Churchill
Installateur:
Andreas Mügge (Aerosoft)
Tests:
Plusieurs bonnes connaissances qui
auront chacune leur copie gratuite
Remerciements particuliers à Franz Pöschl pour les informations sur le C4
Competition et pour nous avoir permis d‘utiliser les manuels réels. Allez
visiter son site internet: sdi-variometer.de. Nous avons également
beaucoup apprécié la grande aide de Schempp Hith Flugzeugbau
(Christoph Wannenmacher et Ewald Malcik), sympathiques personnages,
fabuleux appareils !
Notez que nous avons une licence commerciale afin d‘inclure WinchX!
Nous remercions Peter Lürkens qui a rendu cela possible.
Aerosoft GmbH 2009
56
Copyrights
Le manuel, la documentation, les images, videos, programmes, et tous les
produits mentionnés sont sous Copyright et ne peuvent pas être copiés,
photocopiés, traduits ou réduits par quelque moyen électronique ou
machine de reproduction que ce soit, ni en partie, ni en totalité, sans
l‘autorisation écrite préalable d‘AEROSOFT. LE PROGRAMME EST FOURNI
“TEL QUEL” ET N‘INCLUT EN AUCUN CAS DE GARANTIE IMPLICITE OU
EXPLICITE. L‘AUTEUR DECLINE TOUTE RESPONSABILITE QUAND A
D‘EVENTUELLES DEFAILLANCES, RALENTISSEMENT OU TOUT INCOVENIENT
QUI POURRAIT SURVENIR LORS DE L‘UTILISATION DE CE PROGRAMME;
Copyright © 2009 AEROSOFT. Tous droits réservés. Toutes marques ou
noms de marques sont des marques ou marques déposées appartenant à
leurs propriétaires respectifs.
Français
Les Copyrights sont des choses importantes. Si vous constatez des copies
piratées de ce programme, merci de nous en informer à l‘adresse suivante :
info@aerosoft-shop. Nous veillerons à ce que les rapports concernant des
violations de copyright soient récompensés.
Aerosoft GmbH
Lindberghring 12
D-33142 Bueren, Allemagne
www.aerosoft.com
www.aerosoft-shop.com
Contacter le support
Le support pour ce produit est fourni par Aerosoft. Nous préférons utiliser
un forum d‘aide pour la simple raison que cela est rapide et efficace, car
les clients peuvent s‘entraider quand nous ne sommes pas présents.
Aerosoft forums: http://forum.aerosoft-shop.com
Nous croyons fortement à l‘importance du support. L‘achat d‘un de
nos produits vous donne le droit d‘attendre de notre part que nous
prenions du temps pour répondre à toute question, même si elle vous
parait idiote. Ce n‘est jamais le cas.
57
Discus Glider X
Organisation du manuel
Tout comme avec des projets antérieurs, nous avons divisé ce manuel en
sections distinctes. Cette section traite de l‘appareil dans FSX ainsi que de
certaines caractéristiques du projet. Les autres sections sont des manuels
actuels réels concernant l‘appareil et son instrumentation. Ce projet est si
pointu et réaliste que nous sommes confiants dans le fait de vous fournir
les manuels réels. Le bonus qui vous est offert, en tant que client, est un
réalisme accru. Qu‘y a t‘il de plus réaliste que les manuels utilisés par les
vrais pilotes ?
Vous trouverez tous les manuels dans le même répertoire (FSX Répertoire
Principal\Aerosoft\Discus\) sous les noms suivants:
•
•
•
•
•
•
•
•
•
Manual.pdf
Ce que vous êtes en train de lire
EN_Discus_AB_FlightManual.pdf
Manuel de vol pour le modèle Discus B (Anglais)
DE_Discus_AB_FlightManual.pdf
Manuel de vol pour le modèle Discus B (Allemand)
EN_Discus_BT_FlightManual.pdf
Manuel de vol pour le modèle Discus Bt (Anglais)
DE_Discus_BT_FlightManual.pdf
Manuel de vol pour le modèle Discus Bt (Allemand)
EN_C4-V4.06.pdf
Manuel pour le C4 Competition (Anglais)
DE_C4-V4.06.pdf
Manuel pour le C4 Competition (Allemand)
EN_WinchXHelp
Manuel pour WinchX! (Anglais)
DE_WinchXHelp
Manuel pour WinchX! (Allemand)
Notez que le manuel BT est aussi destiné aux modèles BM. Etant donné
qu‘il n‘y a eu que peu d‘exemplaires, il n‘y a jamais eu de manuel
complet proposé. Les copyrights pour tous ces manuels, excepté cette
section, restent aux compagnies (et personnes) qui ont créé les produits.
Aerosoft GmbH 2009
58
Modèles et versions
Il existe trois différents planeurs de la firme Schempp-Hirth modélisés
dans ce projet, tous issus de leur gamme Discus. Le Discus est populaire dans les clubs du monde entier. Ils sont solides et relativement
faciles à piloter mais leurs performances sont étonnates quand ils sont
menés par un bon pilote.
Discus B
Discus BT
Discus BM
Envergure
15.0 m
15.0 m
15.0 m
Longueur
6.58 m
6.58 m
6.58 m
Surface des ailes
10.58 m2
10.58 m2
10.58 m2
Masse max
525 kg
450 kg
450 kg
Va (vitesse de manoeuvre)
180 km/h
180 km/h
180 km/h
Vne (Vitesse à ne jamais
dépasser)
250 km/h
250 km/h
250 km/h
Vra (vitesse brute)
200 km/h
180 km/h
180 km/h
Vt (vitesse max de
remorquage en l'air)
180 km/h
180 km/h
180 km/h
Vw (vitesse max treuil)
150 km/h
150 km/h
150 km/h
Vitesse max moteur sorti
-
160 km/h
160 km/h
Vitesse de sortie du
moteur
-
90 <>120
km/h
90 <>120
km/h
Weak links Aero tow
max 680
daN
max 680
daN
max 680
daN
59
Français
Le modèle de base est le Discus B qui est un pur planeur. Mais nous
avons aussi inclus deux modèles avec des moteurs auxiliaires. Le
Discuss BM peut utiliser son moteur pour décoller, le BT a un moteur
plus petit qui est unqiuement utilisé en vol et il doit être remorqué ou
tiré pour prendre l‘air. Notez que le BM est rare, et seuls 9 ou 10
exemplaires ont été construits.
Discus Glider X
Weak links Winch launch
max 680
daN
max 680
daN
max 680
daN
Moteur
-
Solo type
2350
Rotax 463
Puissance continue Max
-
16.3 kW
(5500 rpm)
35 Kw
(6100 rpm)
Max RPM
-
5800 rpm
6500 rpm
Taux de descente Min
0.59 m/s
0.61 m/s
0.62 m/s
Meilleur L/D
~43
~43
~43
Vitesse de décrochage
66 Km/h
70 km/h
71 km/h
Démarrage et arrêt des moteurs
Les moteurs sur ces appareils sont plutôt basiques (mais très légers et
puissants). Ils ont peu de commandes et leur utilisation se résume à
presser quelques boutons. Ces moteurs sont extrèmement bruyants et
sont à l‘origine d‘un grand nombre de vibrations alarmantes. Si vous
n‘êtes pas habitués à cela, vous allez être sûr que le moteur est en
train de manger son joint principal avant de démarrer et de s‘attaquer
à réduire le cylindre en morceaux. Ne vous inquiétez pas. Et n‘essayez
pas d‘utiliser la radio avec le moteur en marche.
Discus BT
Pour démarrer le moteur:
1. Maintenez la vitesse en-dessous de 100 km/h
2. Ramenez l‘interrupteur sur EXTEND (AUSF)
3. “Engine ignition” ON (Zünd EIN)
4. Réglez “Static source” pour opération moteur ( MOTOR)
5. Attendez que le voyant vert apparaisse
6. Valve “Fuel Switch” sur OPEN
7. Augmentez la vitesse jusqu‘à 120 km/h
Aerosoft GmbH 2009
60
8. Poussez le levier “Decompression”
Le moteur devrait maintenant démarrer. Gardez la vitesse sur la ligne
bleue afin de mlaintenir le meilleur taux de montée. Il n‘y a pas de
contrôle des gaz, c‘est à dire que le moteur fonctionne toujours à sa
puissance maximum.
Pour arrêter le moteur:
1. “Engine ignition” sur OFF (Zünd AUS)
2. Commutateur “Fuel Valve” sur OFF
3. Ramenez le commutateur sur IN (EINF)
4. Réglez “Static source” pour opérations planeur ( SEGEL)
Discus BM
Pour démarrer le moteur:
1. Dans les airs; maintenez la vitesse en-dessous de 100 km/h
3. “Fuel Switch” OPEN
4. Réglez le bec “Flight Pressure” pour réglage moteur (MOTOR)
5. Frein du propulseur “RELEASE” (devrait être libéré au premier
démarrage)
6. “Ignition” ON
7. Manette des gaz HALF OPEN
8. Au sol : manche FULLY BACK (ramené arrière)
9. Au sol : gardez les freins activés / ON
10.Interrupteur “Starter” PUSH / appuyé
Le moteur devrait maintenant se lancer. Attendez que les RPM se
stabilisent avant de démarrer.
Pour stopper le moteur:
1. Dans les airs : maintenez la vitesse en-dessous de 100 km/h
2. Manette des gaz IDLE / ralenti
3. Moteur “ignition” OFF
61
Français
2. Déployez le moteur
Discus Glider X
4. Attendez que le propulseur s‘arrête
5. Frein de propulseur SET / enclenché
6. Rétractez le moteur
7. Fuel Switch CLOSED
8. Réglez le bec “Flight Pressure” pour réglage planeur (SEGEL)
Décollage par propulsion du Discus BM:
Le modèle BM peut décoller grâce à son propre moteur. Après avoir
aligné l‘appareil (en général manuellement) sur la piste, montezz la
puissance en douceur pour éviter que le planeur ne pique trop à cause
du moteur situé en hauteur au-dessus du CoG. Dès que possible,
faites quitter le sol à l‘aile la plus basse tout en contrôlant la direction
à l‘aide de la gouverne de direction. L‘appareil décidera à quel
moment il sera prêt à voler, le pilote devra se contenter de maintenir
une attitude stable en gradant l‘équilibre sur l‘unique roue. Cela n‘est
pas facile et nécessite un peu d‘entrainement.
Aerosoft GmbH 2009
62
Aerosoft Sound Control
Cet appareil est équipé avec l‘Aerosoft Sound Control qui améliore les
options sonores de cet appareil dans FSX. En fonction du produit,
jusqu‘à 200 sons additionnels peuvent être ajoutés. ASC est basé sur
une jauge spéciale qui est chargée depuis le PANEL.cfg et qui est
contrôlée par un fichier ASC.cfg dans le dossier “panel”. Le module
est relié à l‘appareil et nous l‘avons ajouté avec un code ID. Si vous
rencontriez une erreur indiquant que le module ne reconnait pas
l‘appareil, merci de nous contacter à [email protected].
Si vous avez une erreur renvoyant à ce module, elle est probablement
causée par un problème lié à Microsoft.VC90.CRT. Il est connu que
certaines personnes ont un problème avec les fichiers de C++ 2008
runtime. Vous pouvez trouver un ensemble correct ici : http://www.
microsoft.com/downloads/details.aspx?FamilyID=9b2da534-3e034391-8a4d-074b9f2bc1bf&displaylang=en
Modèle de vol
Le modèle de vol a été l‘un des points principaux de ce projet et a en
fait été recommencé à trois reprises car bien qu‘étant réussi, il n‘était
pas aussi parfait que nous le souhaitions. Nous pouvons honnêtement
dire que les cinq modèles de vol dans ce produit sont dernier cri, vous
permettant de voler avec les planeurs EXACTEMENT comme s‘il
s‘agissait de vrais planeurs. Décrochage, vrilles, glissades, ils sont tous
exactement comme ils devraient être. Ils y a un certain nombre de
pilotes ayant volé sur les vrais planeurs Discus qui ont aussi piloté ce
modèle simulé et qui ont confirmé cela.
63
Français
Le module ne devrait pas entrer en conflit avec d‘autres produits pour
FSX et les sons améliorent toujours l‘avion et n‘agissent pas sur le
pilote simulé, l‘ATC ou l‘environnement externe. Bien entendu, le
module peut être déconnecté en passant par la ligne de commande
(en ajoutant // devant gauge**=ASC!MAIN, 0,0, 10, 10, 1 dans le
panel.cfg)
Discus Glider X
Instruments
Il y a un set d‘instruments hautement réalistes et plutôt complexes
dans ces cockpits. Si vous n‘êtes pas habitués aux planeurs, vous
pourriez être surpris par la complexité des cockpits des planeurs
modernes. Tous les instruments sont décrits en quelques détails.
Variomètres
Les variomètres, appelés communément varios, sont des indicateurs de
vitesse verticale (VSI) qui indiquent le changement d‘altitude en
mesurant le changement de pression dans l‘air (pression statique)
lorsque l‘altitude change. Quand l‘appareil monte ou descend, la
pression à l‘extérieur de l‘avion change. A l‘intérieur de l‘appareil, il y a
un container isolé et hermétique, un peu comme une thermos. Quand
l‘avion monte, la pression extérieure diminue et l‘air contenu dans la
thermos se dilate vers l‘extérieur. La thermos est connectée au
variomètre. A l‘intérieur du variomètre on trouve une „ailette“ qui est
déviée par le flux entrant et sortant de la thermos. L‘ailette est
connectée à une aiguille qui indique la montée, quand la pression
extérieure diminue et que l‘air s‘écoule de la thermos et vice versa.
Sans plus de moyens, ce variomètre indique tout changement
d‘altitude tel que montée ou descente, sans tenir compte du fait que
cela provienne de courant ascendants ou descendants, ou juste du
pilote qui tire ou pousse sur le manche. Bien entendu, cela est
embarrassant pour un pilote de planeur, quand l‘indication de montée
est tronquée par les manoeuvres de l‘appareil, au moment où il est
délibérément en train d‘essayer de trouver la meilleur partie de
l‘ascendance. Les planeurs modernes ont donc tous des variomètres
compensés qui éliminent la réaction du variomètre aux manoeuvres de
l‘appareil (voir chapitres suivats).
Il y a trois variomètres dans ces cockpits – depuis la partie en haut à
gauche, jusqu‘à la partie en bas à droite, on trouve le „vario SC“, vario
esclave du SDI C4, le cadran digital „lcd petal“ de l‘unité principale SDI
C4, et le variomètre mécanique „Winter“. L‘installation moderne de
variomètres dans les planeurs est très sophistiquée, avec une variété de
Aerosoft GmbH 2009
64
compensations possibles pour rendre les informations aussi significatives que possible pour le pilote. Dans la lecture des descriptions
ci-dessous, le point élémentaire dont il faut se souvenir est que chaque
vario tente de donner une indication sur le taux de montée et quand
vous êtes dans une ascendance ou en vol de crêtes, une aiguille
pointant vers le haut est généralement une bonne chose, alors qu‘une
aiguille tournant rapidement dans le sens inverse des aiguilles d‘une
montre autour du cadran et se dirigeant vers la partie basse négative
est signe que vous devriez accélérer et sortir du flux d‘air descendant
dans lequel vous vous trouvez.
Le variomètre mécanique ‚Winter‘ dans le Discus
d‘Aerosoft Discus en bas à droite du SDI C4 a été
configuré pour afficher en permanence votre ‚Total
Energy Compensated Climb Rate‘ ou taux de montée
compensé. Il s‘agit de la valeur traditionnelle sur
laquelle les pilotes de planeur ont compté pendant
plus de cinquante ans, et donnant le taux de montée
du planeur une fois supprimés les effets des actions du pilote tirant ou
poussant sur le manche. Tirer sur le manche fait monter le planeur,
mais en même temps lui fait perdre de la vitesse, et en regardant à la
fois la pression d‘air statique (altitude) et la pression du pitot (vitesse),
l‘effet du mouvement du manche peut être compensé, d‘où la „Total
Energy Compensation“ / compensation totale d‘énergie. Si votre
vitesse n‘est pas modifiée, le taux de montée “Total Energy” sera
équivalent à votre taux de montée réel.
Cette lecture est beaucoup plus utile que le taux de montée réel
basique, car l‘information dont les pilotes de planeur on vraiment
besoin pour rester en l‘air concerne le changement d‘énergie emmagasiné par l‘avion, que ce soit en cinétique (altitude) ou en énergie
potentielle (vitesse). S‘il est bas et rapide il peut changer de la vitesse
en altitude, s‘il est haut et lent, il peut changer de l‘altitude pour
prendre de la vitesse. Pour faire simple, à l‘exclusion de la perte
d‘énergie due à la traînée, l‘énergie totale reste la même. Ce que le
pilote de planeur a besoin de savoir, c‘est s‘il est en train de perdre ou
65
Français
Variomètre Total Energy Compensated
Discus Glider X
de gagner de cette “Total Energy”. S‘il est dans une ascendance et
qu‘il prend de l‘altitude sans cabrage, il gagne de l‘énergie (sous forme
d‘altitude), s‘il est en descente d‘air, il perd de l‘énergie.
Le variomètre “Total Energy Compensated” fournit cette information
“il indique la vitesse verticale alors que les effets des manoeuvres de
l‘appareil sont éliminés. Pour un vario mécanique à “ailette” cela est
réalisé grâce à l‘utilisation de capteurs statiques spéciaux qui combinent la pression statique et la pression pitot“.
Cela sera peut-être plus clair avec ces exemples:
• Vitesse constante, altitude qui diminue -> variomètreTEC
indiquera SINK
• Vitesse constant, altitudes qui augmente-> variomètre TEC
indiquera CLIMB
• Vitesse qui augmente, altitude constante -> variomètreTEC
indiquera CLIMB
• Vitesesse qui diminue, altitude constante -> variomètreTEC
indiquera SINK
Le SDI C4 fournit aussi une indication sonore relative au taux de
montée “Total Energy”, avec un bip-bip-bip intermittent qui indique la
portance, et un bip continu qui indique que l‘appareil s‘enfonce. Vous
apprendrez vite à reconnaître et à réagir à ces sons, accélérant quand
vous entendrez celui indiquant que le planeur s‘enfonce et ralentissant
quand vous entendrez celui indiquant la portance. Ce comportement
(appelé ‚dolphin flying‘, vol du dauphin) fait une grosse différence
quand à l‘efficacité de votre vol à travers champs. Notez que l‘anneau
McCready sur le variomètre du variomètre TEC sur notre planche de
bord ne peut pas être utilisé. Les informations qu‘il pourrait fournir
sont présentées de manière bien plus détaillée et de façon fiable par le
Compétition C4.
Aerosoft GmbH 2009
66
Le variomètre ‚vario SC‘ électronique en haut à
gauche du SDI C4 dans le Discus d‘Aerosoft a été
configuré pour afficher en permanence le ‚Netto
climb rate‘ (taux de montée Netto), fonctionnant
comme un cadran esclave dirigé par le SDI C4. C‘est
un variomètre “Total Energy” (voir plus haut)
modifié, avec une compensation supplémentaire où
le taux de descente intrinsèque du planeur est aussi compensé. Ainsi,
ce vario indique essentiellement la montée et la descente de la masse
d‘air externe. Comme le taux de descente intrinsèque est obtenu à
partir des données de performance du planeur, cela fonctionne
correctement seulement lorsque la performance du planeur réel n‘est
pas minorée, c‘est à dire par des insectes ou des chutes d‘eau sur les
ailes – dans ce cas, il y a un réglage dans l‘ordinateur de vol principal
du SDI C4 où vous pouvez ajuster cette valeur concernant la performance du planeur, afin de rétablir l‘exactitude de la lecture du Netto
(reportez-vous au manuel du SDI C4 inlus dans ce package).
Alors que le calcul pour founir les valeurs netto est complexe, la lecture
du cadran est des plus simples : si l‘aiguille monte, cela signifie que
l‘air à l‘extérieur du planeur s‘élève, et de la même manière pour la
descente. Pour un vol sur une crête, le cadran continue tout seul,
indiquant en permanence les nuances dans le mouvement vertical de
l‘air quand le vent passe sur le terrain vallonné, vous permettant
d‘optimiser votre vol en fonction du relief.
Variomètre “speed-to-fly”
The main ‚petal lcd‘ gauge of the SDI C4
displays the total energy climb reading by
default (see above). However, the „VARIO/
SOLLF.“ switch lower down on the panel allows
you to switch the gauge into the most advanced
mode of all, i.e. „speed-to-fly“.
67
Français
Variomètre Netto
Discus Glider X
As mentioned earlier, the pilot learns to speed up when the total
energy variometer is indicating sink (to fly quickly out of the sink) and
to slow down when lift is indicated (to loiter in the lift to take the
most advantage of it). But with a total energy or netto variometer the
pilot does not necessarily know how much to speed up or slow down.
Indeed you will learn that speeding up causes the sink reading on a TE
vario to increase, as the glider is less efficient at higher speeds, making
it even more difficult to decide whether to speed up or slow down.
The „speed-to-fly“ variometer takes the burden of this complex
calculation away from the pilot, and although the needle looks like it is
behaving in a similar way to a TE or netto vario it is actually performing the triple compensation calculations so the needle UP simply
means SLOW DOWN, and the needle DOWN means SPEED UP. This is
consistent with the direction the needle would move if it were
indicating underlying lift or sink, but the pilot no longer needs to
consider how much to accelerate or decelerate - the needle reads zero
when the optimal airspeed is reached.
Communication radio
La communication radio est très simple et a une portée limitée. La
fréquence est réglée à l‘aide des parties basse et haute du bouton sur
la section en bas à droite du panneau des cadrans.
Indicateur de vitesse
L‘échelle de 510 degrés du badin
permet une lecture précise de la
vitesse indiquée en km/h ou en
knots (noeuds) selon vos
réglages dans FSX.
Aerosoft GmbH 2009
68
Altimètre
L‘altimètre est plutôt standard et, comme l‘indicateur de vitesse, peut
être basculé entre réglage métrique ou US. Le cadran affichera
automatiquement l‘image adéquate. Faites en sorte de sélectionner le
QFE correct avant le décollage. Etant donné que le C4 Competition
fonctionne indépendamment de ce cadran, vous pouvez régler le QFE
sur cette jauge et le QNH dans le C-4.
Sans aucun doute le coeur de ce produit, le C4 competition est un
ordinateur de vol qui est utilisé en compétition de planeurs (mais aussi
pour des vols de loisirs). Il est capable d‘utiliser le plan de vol chargé,
votre position déterminée par le GPS et les performances du planeur
pour réaliser de nombreux calculs. IL serait trop compliqué de les
décrire ici et nous sommes heureux d‘avoir la permission du fabricant
(Franz Pöschl GmbH) d‘inclure le manuel actuel. Vous trouverez la
représentation de l‘instrument précise et détaillée dans presque toutes
ses fonctions. Vous verrez que le C4 Competition est puissant, mais
vous aurez besoin d‘une petite demi-heure afin de vous familiriser avec
lui. Nous vous assurons que ce temps ne sera pas perdu.
GPS
Est inclus un PDA basé sur un
dispositif GPS. Il ne s‘agit pas d‘un
appareil actuel, mais il ressemble et se
comporte comme le logiciel utilisé par
de nombreux pilotes de planeurs. S‘il
n‘est pas allumé, vous pouvez l‘activer
à l‘aide de l‘interrupteur GPS de la
planche de bord. Vous pouvez l‘ouvrir
en tant que fonctionnalité plus
grande avec [shift][2] et vous pouvez
détacher cette fenêtre si nécessaire.
69
Français
C4 competition
Discus Glider X
Si vous avez un plan de vol standard FSX chargé, il apparaîtra sur
l‘écran. En même temps, l‘espace aérien interdit sera aussi affiché afin
de vous permettre d‘éviter de dévier dans la zone de contrôle d‘un
aéroport important lors de votre recherche de l‘ascendance parfaite.
Nous vous recommandons fortement d‘avoir un plan de vol chargé
aussi souvent que possible.
Commutateur “Speed to fly”
L‘ordinateur de vol C4 flight peut soit indiquer votre vitesse verticale
(énergie totale compensée), soit la vitesse optimale pour voler. Cela
peut être sélectionné à l‘aide du commutateur “Speed to Fly”. Les
deux modes ont une option pour fournir un retour sonore
d‘information, dans le mode Speed to Fly, un signal sonore bas signifie
que vous avez besoin de prendre de la vitesse et un signal haut
intermittent indique que vous devriez ralentir pour une meilleure
preformance. Dans le mode “Vertical Speed”, un signal sonore
intermittent aigu indique que vous gagnez de l‘énergie et un signal
grave que vous en perdez.
Fil de laine (yaw string)
Il est rare que l‘instrument le plus important dans un avion ne coûte
pas plus qu‘un simple morceau de tissus ou de fil. Mais beaucoup de
pilotes de planeurs vous diront que le fil de laine est l‘indicateur le plus
important qu‘il puissent avoir et qu‘il est en fait considéré comme
faisant partie des principaux instruments de vol de référence. Il est fixé
sur la bulle et se déplace simplement dans le courant d‘air. S‘il est au
centre, cela veut dire que vous êtes au maximum d‘efficacité du
planeur (sans glissade et avec un angle de lacet aussi réduit que
possible).
Aerosoft GmbH 2009
70
Palonnier à Optimal
gauche ou
aileron droit à corriger
Palonnier à
droite ou
aileron gauche
à corriger
Pour les pilotes qui sont habitués à voler sur des appareils motorisés, il
est souvent difficile de rester entièrement coordonné sur un planeur,
mais le fil de laine leur sera d‘une grande utilité.
Il y a deux ports statiques (pour mesurer la pression statique), sur le
Discus. L‘un en énergie totale compensée monté sur le stabilisateur
vertical et le second constitué de petits trous dans le fuselage, sous les
ailes. Le Port Statique bascule la source des variomètres entre ces ports
et il est indiqué “glider” (planeur) et “motor” (moteur) opération.
Quand vous utilisez le moteur vous devez sélectionner le port statique
sous les ailes pour obtenir une lecture correcte sur les variomètres et
éviter les pannes.
71
Français
Interrupteur “Static port”
Discus Glider X
WinchX! Et autres addon
pour les planeurs
Il y avait un sérieux problème lorsque que nous avons débuté ce projet.
Les planeurs motorisés ne pouvaient pas être remorqués dans les airs.
FSX ne lancera tout simplement pas ce processus quand le planeur est
équipé d‘un moteur. Nous avions de formidables planeurs, mais aucun
moyen de les lancer. Avec la sortie de WinchX! ce problème fut résolu.
Nous avons contacté le développeur et nous avons convenu d‘inclure
son fabuleux programme. Bien qu‘étant hautement réaliste, le produit
n‘est pas excessivement complexe à utiliser. Vous trouverez un manuel
complet dans le dossier FSXMainFolder\Aerosoft\Discus\.
Nous vous recommandons aussi fortement de jeter un coup d‘oeil à
une autre de ces créations gratuites destinée aux planeurs, CumulusX!. Peter Lürkens décrit ce produit comme cela :
CumulusX! est un add-on pour Microsoft Flight Simulator X pour la
création d‘un environnement destiné au vol à voile. Il s‘inscrit dans la
tradition du fameux Cross Country Soaring 2004 d‘Eric Carden. CumulusX! Crée des courant ascendants avec les nuages appropriés à
chaque vol, à chaque fois renouvellés dans l‘environnement de votre
planeur, avec une large variété de caractéristiques, ou basée sur une
liste de courants élaborée sur mesure. Les deux permettant de
rejoindre des sessions en ligne, avec une garantie de conditions
équivalentes pour tous les participants. Il s‘adapte automatiquement et
en permanence aux conditions météo internes de FSX, même en mode
de météo réelle.
Avec l‘aide d‘une base de donnée additionnelle des pentes (non
incluse), il fournit aussi de larges conditions variables d‘ascendances de
crêtes dans de grandes parties du monde. Il tente aussi de placer des
courants dans des zones montagnes en fonction des conditions de
pente et de l‘ensoleillement.
Vous trouverez toute l‘information ainsi que le lien de téléchargement
pour CumulusX! ici: http://www.luerkens.homepage.t-online.de/peter/
Aerosoft GmbH 2009
72
Français
Simprobe est un autre outil qui est fortement recommandé. Il se
connecte à CumulusX! Et crée des vents hautement réalistes sur les
collines et les montagnes. Toutes les informations et téléchargements
peuvent être trouvés à l‘adresse suivante : http://carrier.csi.cam.ac.uk/
forsterlewis/soaring/sim/fsx/dev/sim_probe/
73
Discus Glider X
Réglages dans FSX
Ce produit nécessite quelques modifications dans les réglages de FSX
afin de vous permettre d‘avoir un contrôle complet du planeur.
Son
Nous vous conseillons de régler tous les curseurs à leur maximum.
Réalisme
Nous recommandons fortement de paramétrer les options du modèle
de vol au maximum de leur réaslime afin d‘obtenir le meilleur modèle
de vol possible. Bien entendu, voler avec le planeur sans gouverne de
direction (et avec la gouverne de direction automatique activée) n‘est
pas très réaliste.
Aerosoft GmbH 2009
74
Spoiler
Sur un appareil ne possédant pas de moteur et qui est destiné à planer
aussi efficacement que possible, il peut se révéler incroyablement
difficile d‘atterrir car l‘avion aura tendance à planer sur une longue
distance en raison de l‘effet de sol. Ainsi, l‘utilisation des “spoiler” est
très importante et vous devrez les contrôler avec finesse. Si votre
contrôleur de jeu possède une “molette” supplémentaire (comme par
exemple le Saitek X52) nous vous conseillons vivement de l‘assigner
aux spoilers de façon à ce que vous puissiez les contrôler par petites
touches. Si votre contrôleur n‘est pas équipé de mollette supplémentaire, nous vous recommandons d‘utiliser l‘axe de la manette des gaz.
Nous pouvons vous apporter de l‘aide sur les forums si vous avez
besoin de savoir comment cela peut-être réalisé sur votre manche.
Français
Panel du Discus B
75
Discus Glider X
Panel du Discus BT
Aerosoft GmbH 2009
76
Français
Panel du Discus BM
77
Discus Glider X
Manuels Additionnels
Veuillez noter que sont proposés dans ce produit quatre manuels
supplémentaires en anglais et quatre autres en allemand. Ils sont tous
placés dans le dossier [FSXMainDir]\Aerosoft\Discus folder. Ces
manuels ont été gracieusement mis à disposition par leurs propriétaires
qui sont détenteurs de droits d‘auteurs (copyright).
• EN_Discus_AB_FlightManual.pdf
Manuel de vol pour le modèle Discus B (Anglais)
• DE_Discus_AB_FlightManual.pdf
Manuel de vol pour le modèle Discus B (Allemand)
• EN_Discus_BT_FlightManual.pdf
Manuel de vol pour le modèle Discus Bt (Anglais)
• DE_Discus_BT_FlightManual.pdf
Manuel de vol pour le modèle Discus Bt (Allemand)
• EN_C4-V4.06.pdf
Manual pour le C4 Competition (Anglais)
• DE_C4-V4.06.pdf
Manuel pour le C4 Competition (Allemand)
• EN_WinchXHelp
Manuel pour WinchX! (Anglais)
• DE_WinchXHelp
Manuel pour WinchX! (Allemand)
Aerosoft GmbH 2009
78
Rise of Flight
The First Great Air War
To use the simulator it is
absolutely necessary to
have a Internet connection
for any type of play!
Rise of Flight puts you in the air over the Western Front in the
final years of the First World War. As aircraft were used more
and more for reconnaissance the need to shoot them down became
clear and aircraft rapidly evolved into machines of war. The
pilots fought each other to gain dominance of the skies over the
muddy trenches. While some became aces and famous, most were
not so lucky. Will you be the next ace?
· Includes the Albatros D5, Nieuport 28, Spad S13 and Fokker Dr.7
(with more aircraft available online) in very high detail.
· 125.000 km2 of French landscape (including Lille, Cambrai, Reims and
Verdun) to fly over and dozens of small front line airfields to explore.
· The world below you is filled with the first tanks, trucks, trains and many
other moving objects.
· Engines and weapons are highly realistic (so not very reliable!)
· Join other pilots in fighter sweeps, bomber escort, bomber interception, balloon attack and ground strikes.
· Includes Training, Single Mission, Career, Campaign and Online modes to keep you flying for a long time.
· Makes full use of modern hardware like TrackIR
www.riseofflight.eu
39,99 €
Aerosoft GmbH
Airport Paderborn/Lippstadt, • Lindberghring 12, D-33142 Bueren, Germany
• Tel: +49 2955 7603-10, Fax: -33 • www.aerosoft.de