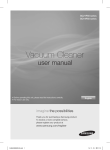
1
DJ68-00359L (EN)-0.0 12/7/06 1:15 PM Page 1 Operating Instructions VACUUM CLEANER ❈ Before ❈ Indoor operating this unit, please read the instructions carefully. use only. Register your product at www.samsung.com/global/register DJ68-00359L REV(0.0) DJ68-00359L (EN)-0.0 12/7/06 1:15 PM Page 2 IMPORTANT SAFEGUARDS 1. Read all instructions carefully. Before switching on, make sure that the voltage of your electricity supply is the same as that indicated on the rating plate on the bottom of the cleaner. 2. WARNING: Do not use the vacuum cleaner when rug or floor is wet. Do not use to suck up water. 3. Close supervision is necessary when any appliance is used by or near children. Do not allow the vacuum cleaner to be used as a toy. Do not allow the vacuum cleaner to run unattended at any time. Use the vacuum cleaner only for its intended use as described in these instructions. 4. Do not use the vacuum cleaner without a dust bin. Empty the dust bin before it is full in order to maintain the best efficiency. 5. Do not use the vacuum cleaner to pick up matches, live ashes or cigarette butts. Keep the vacuum cleaner away from stoves and other heat sources. Heat can deform and discolour the plastic parts of the unit. 6. Avoid picking up hard, sharp objects with the vacuum cleaner as they may damage the cleaner parts. Do not stand on the hose assembly. Do not put weight on the hose. Do not block the suction or the exhaust port. 7. Switch the vacuum cleaner off on the body of the machine before unplugging from the electrical outlet. Disconnect the plug from the electrical outlet before changing the dust bag or dust container. To avoid damage, please remove the plug by grasping the plug itself, not by pulling on the cord. 8. This appliance is not intended for use by young persons or infirm persons without supervision unless they are adequately supervised by a responsible person to ensure that they can use the appliance safely. Young children should be supervised to ensure that they do not play with the appliance. 9. The plug must be removed from the socket outlet before cleaning or maintaining the appliance. 10. The use of an extension cord is not recommended. 11. If your vacuum cleaner is not operating correctly, switch off the power supply and consult an authorized service agent. 12. If the supply cord is damaged, it must be replaced by the manufacturer or its service agent or a similarly qualified person in order to avoid a hazard. 13. Don’t carry the vacuum cleaner by holding the hose. Use the handle on the vacuum cleaner set. 1 DJ68-00359L (EN)-0.0 12/7/06 1:15 PM Page 3 1 ASSEMBLING THE CLEANER ▼ OPTION Features may vary according to model. CAUTION Please do not press the button of dust bin handle when carrying machine. For storage, park the floor nozzle. 2 DJ68-00359L (EN)-0.0 12/7/06 1:15 PM Page 4 2 OPERATING THE CLEANER 2-1 POWER CORD NOTE When removing the plug from the electrical outlet, grasp the plug, not the cord. 2-2 POWER CONTROL (INFRARED CONTROL) - HOSE SENDER 1. Vacuum cleaner ON/OFF Press the ON/OFF button to operate the vacuum cleaner. Press again to stop the vacuum cleaner. 2. Vacuum cleaner MODE (MIN/MID,MAX) Press the MODE button repeatedly to select the correct mode. (ON) MIN → MID → MAX HANDLE CONTROL [The cleaner is controlled by using infrared signals.] - BODY Press the power control button repeatedly to select the correct mode. (ON(MAX) → OFF) NOTE : If the remote handle control is not working, the cleaner can be operated using the control button on the body of the machine. The filter light is illuminated when the dust pack requires checking or emptying. An audio signal will also sound. The IR light indicates the part that receives the infra-red signal from the handle control. 3 DJ68-00359L (EN)-0.0 12/7/06 1:15 PM Page 5 ▼ 2-3 HOW TO USE AND MAINTAIN THE ACCESSORIES Features may vary according to model. PIPE Adjust the length of the telescopic pipe by sliding the length control button locat- To check for blockages, separate the teleed in the center of the telescopic pipe scopic pipe and adjust to shorten. This allows back and forth. for easier removal of waste clogging the tube. ACCESSORY Push the accessory on to the end of the hose handle. Pull out and turn the dusting brush for cleaning delicate areas. To use the upholstery tool, push the accessory on to the end of the hose handle in the opposite direction. OPTION - Carpet Cleaning - Floor Cleaning Adjust the inlet lever according to the floor surface. 4 Remove waste matter completely if the inlet is blocked. DJ68-00359L (EN)-0.0 OPTION 12/7/06 1:16 PM Page 6 Frequent vacuuming of hair or pet fur may cause a falling-off of the rotation due to matters tangled around the drum. In this case, clean the drum with care. 1 2 3 Remove waste matter Remove the brushbar such as dust and hair Push the Open button of from the transparent tangled around the the transparent screen brushbar using scissors. cover to separate the cover. screen. For improved pickup of pet hair and fibre on carpets OPTION 4 5 Remove dust inside the brush housing using a dry duster or crevice tool. Insert brushbar into rotating belt and assemble. 6 Click the transparent screen cover back into place to reassemble. Clogs on turbine keeps brush from turning, and in this case, take care of it. Turbine Brush Remove waste To reassemble, align the cover to the matter comfront of the main body and close. After Turn the lock button to closing the cover, ensure that the lock ‘UNLOCK’, and remove For picking up pet hair pletely when button is turned to the ‘LOCK’ position. and fibre on upholstery inlet is blocked. waste matter. Warning : Use for bedclothes only. Be cautious not to damage brush during unclogging. and bed linen. Brush for blanket 5 DJ68-00359L (EN)-0.0 12/7/06 1:16 PM Page 7 3 EMPTYING THE DUST BIN 1 2 Option Once dust reaches the dust full mark, or once the dust full light is on, empty the dust bin. 3 Take the dust bin out by pressing the button. Separate the dust bin cover. CLICK 4 5 Throw away dust in the bin. 6 Close the dust bin cover. Before use, push the dust bin into the main body of the vacuum cleaner until you hear the "click" sound. - Empty into a plastic bag (recommended for asthma/allergy sufferers) NOTE You may rinse the dust bin with cold water 6 DJ68-00359L (EN)-0.0 12/7/06 1:16 PM Page 8 4 CLEANING THE DUST PACK 4-1. WHEN TO CLEAN THE DUST PACK - If suction is noticeably reduced during cleaning, please check the dust pack as indicated below. Turn the vacuum power to 'MAX' HANDLE CONTROL If the filter check indicator turns red with the inlet floating 10 cm above flat floor, clean it. When the indicator light comes on, please empty the Dust Pack(4-2) as shown in the following illustrations. 7 DJ68-00359L (EN)-0.0 12/7/06 1:16 PM Page 9 4-2 CLEANING THE DUST PACK 2 1 Remove the dust bin and dust pack as shown. 3 Remove the fixed frame of the dust pack cover. 4 Remove the sponge pad from the dust pack. 5 Wash the sponge and the filter of the dust pack with water. 7 6 Let the sponge and dust pack dry in the shade for more than 12 hours. Put the sponge into the dust pack. 8 Before reassembly, align the dust pack cover and dust pack correctly. Put the assembled dust pack into the main body. NOTE : Make sure the filter is completely dry before putting it back into the vacuum cleaner. Allow 12 hours for it to dry. 8 DJ68-00359L (EN)-0.0 12/7/06 1:16 PM Page 10 5 CLEANING THE MOTOR PROTECTION FILTER Remove the motor protection filter from the vacuum cleaner. Shake and tap the dust from it and put back in machine. Take out both the dust bin and the dust pack. 6 CLEANING THE OUTLET FILTER Press the fixed frame part at the back of the main body to remove. Pull out the HEPA Filter Dust the HEPA filter. using the tab. Put the HEPA filter into the main body until you hear a ‘click’ sound. 7 CHANGE THE BATTERY(OPTIONAL) BATTERY TYPE : AA Size NOTE 1. When the vacuum cleaner does not work, replace the batteries. If the problem persists, please contact our authorized dealer. 2. Use 2 batteries of size AA. WARNING 1. Never disassemble or recharge the batteries. 2. Never heat up the batteries or throw them into fire. 3. Do not reverse (+),(-) poles. 4. Dispose of the batteries properly. 9 DJ68-00359L (EN)-0.0 12/7/06 1:16 PM Page 11 - IF YOU HAVE A PROBLEM PROBLEM Motor does not start. CAUSE REMEDY 0 No power supply. Thermal cut-out. Nozzle, suction hose or tube is blocked. Check cable, plug and socket. Leave to cool. Check for blockage and remove it. Check that the cord is not twisted or wound unevenly. Pull the cord out 2-3m and push the cord rewind button. Vacuum cleaner does not pick up dirt. Crack or hole in hose. Check hose and replace if required. Low or decreasing suction Filter is full of dust. Please check filter and, if necessary, clean as illustrated in the instructions. Suction force is gradually decreasing. Cord does not rewind fully. 10 إرشادات التشغيل املكنسة الكهربائية ❈ الرجاء قراءة اإلرشادات بعناية قبل تشغيل هذه الوحدة. ❈ لالستخدام الداخلي فقط www.samsung.com/global/register قم بتسجيل منتجك على )DJ68-00359L REV(0.0 2006.12.7 3:20:53 PM DJ68-00359A-A-1123-ARABIC.indd 1 إجراءات وقائية هامة .1اقرأ كافة اإلرشادات بعناية .قبل التشغيل ،تأكد من أن جهد التيار الكهربائي لديك مطابق للجهد املذكور على لوحة التصنيف املوجودة أسفل املكنسة. .2حتذير:ال تستخدم املكنسة الكهربائية إذا كان البساط أو األرضية مبللة. ال تستخدم املكنسة في شفط املاء. .3من الضروري أن يخضع األطفال للمراقبة املكثفة عند استخدامهم املكنسة أو وجودهم بالقرب منها .ال تتهاون في استخدام املكنسة .ال تسمح بتشغيل املكنسة الكهربائية بدون مراقبة .استخدم املكنسة الكهربائية وفقًا لالستخدام املُعدة من أجله فقط كما هو موضح في هذه اإلرشادات. .4ال تستخدم املكنسة الكهربائية بدون صندوق األتربة .قم بإفراغ صندوق األتربة قبل امتالءه للحفاظ على أعلى مستوى من الفاعلية. .5ال تستخدم املكنسة الكهربائية في التقاط الثقاب أو الرماد الساخن أو أعقاب السجائر .احتفظ باملكنسة الكهربائية بعي ًدا عن املواقد واملصادر الساخنة األخرى .حيث تتسبب احلرارة في تشويه وتغيير لون األجزاء البالستيكية في الوحدة. .6جتنب التقاط األجسام الصلبة احلادة باستخدام املكنسة الكهربائية ألنها قد تُتلف أجزاء املكنسة .ال تقف على اخلرطوم. ال تضع أثقاال ً على اخلرطوم .ال تعيق فتحة الشفط أو منفذ التفريغ. .7قم بإيقاف تشغيل املكنسة الكهربائية من على جسم اجلهاز قبل نزع توصيالتها من منفذ التيار الكهربي .افصل املقبس من منفذ التيار الكهربي قبل تغيير كيس أو حاوية األتربة .لتجنب تلف املكنسة ،الرجاء إزالة املقبس عن طريق اإلمساك باملقبس ذاته وليس سحب السلك. .8لم يتم إعداد هذا اجلهاز لالستخدام من قبل الصغار أو املسنني دون مراقبة ،ما لم يتم اإلشراف عليهم بشكل واف من قبل أشخاص مسئولني لضمان استخدامهم اجلهاز بأمان. يجب مراقبة األطفال الصغار لضمان عدم عبثهم باجلهاز. .9يجب نزع املقبس من منفذ مأخذ التيار قبل تنظيف أو صيانة اجلهاز. .10ال يوصى باستخدام كابل استطالة. .11إن لم تعمل املكنسة الكهربائية بشكل صحيح ،قم بإيقاف تشغيل الطاقة واستشر أحد وكالء اخلدمة املعتمدين. .12إذا تعرض سلك التيار للتلف ،فيجب استبداله لدى الشركة املصنعة أو وكيل اخلدمة اخلاص بها أو أي شخص آخر مؤهل على نحو مماثل من أجل جتنب اخملاطر. .13ال حتمل املكنسة الكهربائية عن طريق اإلمساك باخلرطوم. استخدم املقبض املوجود على املكنسة الكهربائية. 2006.12.7 3:20:53 PM DJ68-00359A-A-1123-ARABIC.indd 1 1 جتميع املكنسة قطعة امللحقات قد تتفاوت امليزات باختالف الطراز. تنبيه الرجاء عدم الضغط على زر مقبض صندوق األتربة عند حمل اجلهاز. للتخزين ،قم بإزالة فوهة تنظيف األرضية. 2006.12.7 3:20:56 PM DJ68-00359A-A-1123-ARABIC.indd 2 2 تشغيل املكنسة الكهربائية 1-2سلك الطاقة مالحظة عند نزع املقبس من منفذ التيار الكهربي ،امسك باملقبس وليس السلك. 2-2التحكم في الطاقة (التحكم في األشعة حتت احلمراء) -اخلرطوم .1تشغيل /إيقاف تشغيل املكنسة الكهربائية اضغط على زر ( ON/OFFتشغيل /إيقاف تشغيل) لتشغيل املكنسة الكهربائية. اضغط عليه مرة أخرى إليقاف تشغيل املكنسة الكهربائية. املرسل .2أوضاع املكنسة الكهربائية (( )MIN/ MID، MAXدنيا /متوسطة، قصوى) اضغط على زر ( MODEالوضع) بشكل متكرر الختيار الوضع الصحيح. (( )ONتشغيل) ( MINدنيا) ( MIDمتوسطة) ( MAXقصوى) التحكم في املقبض [يتم التحكم في املكنسة عن طريق استخدام إشارات األشعة حتت احلمراء]. جسم املكنسةاضغط على زر التحكم في الطاقة بشكل متكرر الختيار الوضع الصحيح. (( ONتشغيل) (( )MAXقصوى) ( OFFإيقاف تشغيل) التحكم في الطاقة مالحظة :إذا كانت وحدة التحكم في املقبض عن بعد ال تعمل ،فإنه ميكن تشغيل املكنسة باستخدام زر التحكم املوجود على جسم اجلهاز. يشير مصباح ( IRاألشعة حتت احلمراء) إلى اجلزء الذي تلقى إشارة األشعة حتت احلمراء من وحدة التحكم في املقبض. يضيء مصباح الفلتر عند احلاجة إلى فحص كيس األتربة أو تفريغه. كما ستُسمع إشارة صوتية. 2006.12.7 3:20:59 PM DJ68-00359A-A-1123-ARABIC.indd 3 3-2كيفية استخدام وصيانة امللحقات قد تتفاوت امليزات باختالف الطراز. األنبوب اضبط طول األنبوب املتراكب عن طريق حتريك زر التحكم في الطول ،املوجود في وسط األنبوب املتراكب ،إلى اخللف واألمام. قطعة امللحقات للتأكد من عدم وجود انسدادات ،افصل األنبوب املتراكب واضبط لتقصيره .ألن ذلك يتيح إزالة الفضالت التي تسد األنبوب. ادفع قطعة امللحقات حتى طرف مقبض اخلرطوم. اسحب فرشاة األتربة وقم بإدارتها لتنظيف املناطق الرقيقة. الستخدام أداة املفروشات ،ادفع قطعة امللحقات حتى طرف مقبض اخلرطوم في االجتاه املعاكس. ملحقات اختيارية تنظيفالسجاد تنظيفاألرضية اضبط ذراع املدخل تب ًعا لسطح األرضية. قم بإزالة الفضالت بالكامل في حالة انسداد املدخل. 2006.12.7 3:21:2 PM DJ68-00359A-A-1123-ARABIC.indd 4 قطعة امللحقات التنظيف املتكرر للشعر أو فراء احليوانات األليفة قد يتسبب في قلة الدوران بسبب األجسام العالقة حول االسطوانة .في هذه احلالة ،قم بتنظيف االسطوانة بعناية. 1 إلزالة شعر احليوانات األليفة واأللياف من على السجاد على نحو أفضل 2 قم بإزالة الفضالت مثل األتربة والشعر العالق حول قضيب الفرشاة باستخدام مقص. انزع قضيب الفرشاة من الشاشة الشفافة. اضغط على زر ( Openفتح) اخلاص بغطاء الشاشة الشفافة لفصل الغطاء. 5 4 قم بإزالة األتربة املوجودة داخل جتويف الفرشاة باستخدام ممسحة جافة أو أداة تنظيف األركان. قطعة امللحقات 3 6 أدخل قضيب الفرشاة في السير الدائري وقم بالتركيب. اضغط على غطاء الشاشة الشفافة إلرجاعه إلى مكانه إلعادة التركيب. من شأن العوائق املوجودة على التوربني أن تعيق دوران الفرشاة ،لذلك كن حذرًا في هذه احلالة. التوربني فرشاة للبطاطني اللتقاط شعر احليوانات األليفة واأللياف من على املفروشات واملالءات. الفرشاة قم بإزالة الفضالت بالكامل عند انسداد املدخل. أدر زر القفل على الوضع ‘( ’UNLOCKإلغاء القفل) وقم بإزالة الفضالت. إلعادة تركيب األجزاء ،قم مبحاذاة الغطاء أمام جسم املكنسة وقم بالغلق .بعد غلق الغطاء ،تأكد من أن زر القفل في الوضع ‘’LOCK (قفل). حتذير :استخدمها لتنظيف أغطية الفراش فقط.كن حذرا ً حتى ال تتلف الفرشاة أثناء إزالة االنسدادات. 2006.12.7 3:21:10 PM DJ68-00359A-A-1123-ARABIC.indd 5 3 تفريغ صندوق األتربة 2 1 3 ملحقات اختيارية قم بتفريغ صندوق األتربة مبجرد وصول األتربة إلى عالمة االمتالء باألتربة أو مبجرد إضاءة مصباح االمتالء باألتربة. أخرج صندوق األتربة بالضغط على الزر. 5 4 تخلص من األتربة في الصندوق. 6 اغلق غطاء صندوق األتربة. افصل غطاء صندوق األتربة. CLICK قبل االستخدام ادفع صندوق األتربة داخل جسم املكنسة الكهربائية حتى تسمع صوت “طقطقة”. -قم بتفريغ األتربة داخل كيس بالستيكي (يوصى به لوقاية مرضى الربو /احلساسية) مالحظة ميكنك شطف صندوق األتربة باملاء البارد. 2006.12.7 3:21:22 PM DJ68-00359A-A-1123-ARABIC.indd 6 4 تنظيف كيس األتربة 1-4متى يتعني تنظيف كيس األتربة -الرجاء فحص كيس األتربة كما هو موضح أدناه في حالة انخفاض كفاءة الشفط بشكل ملحوظ. أدر مفتاح الطاقة اخلاص باملكنسة الكهربائية على الوضع “( ”MAXقصوى) التحكم في الطاقة التحكم في املقبض 10 إذا حتول مؤشر فحص الفلتر إلى اللون األحمر مع ارتفاع املدخل مبقدار 10سم فوق أرضية مسطحة ،قم بتنظيف الفلتر. سم الرجاء تفريغ كيس األتربة ( )2-4عند إضاءة مصباح املؤشر كما هو موضح في الرسوم التوضيحية التالية. 2006.12.7 3:21:25 PM DJ68-00359A-A-1123-ARABIC.indd 7 2-4تنظيف كيس األتربة 1 2 1 3 2 انزع صندوق األتربة وكيس األتربة كما هو موضح. انزع اإلطار املثبت اخلاص بغطاء كيس األتربة. انزع البطانة اإلسفنجية من كيس األتربة. 5 4 اغسل اإلسفنجة وفلتر كيس األتربة باملاء. 6 اترك اإلسفنجة وكيس األتربة يجفان في الظل ملدة تزيد عن 12ساعة. ضع اإلسفنجة في كيس األتربة. 8 7 قبل التركيب ،قم مبحاذاة غطاء كيس األتربة وكيس األتربة بشكل صحيح. ضع كيس األتربة بعد تركيبه في جسم املكنسة. مالحظة تأكد من أن الفلتر جاف متا ًما قبل إعادته إلى املكنسة الكهربائية .اتركه 12ساعة حتى يجف. 2006.12.7 3:21:29 PM DJ68-00359A-A-1123-ARABIC.indd 8 5 تنظيف فلتر حماية املوتور 1 2 انزع فلتر حماية املوتور من املكنسة الكهربائية. اضرب الفلتر برفق وانفضه من األتربة ثم أعده إلى اجلهاز. أخرج كل من صندوق األتربة وكيس األتربة. 6 تنظيف فلتر املنفذ اضغط على اإلطار املثبت في اجلزء اخللفي من جسم املكنسة إلزالته. 7 قم بنفض الغبار من فلتر .HEPA اسحب فلتر HEPA باستخدام املقبض. أعد فلتر HEPAإلى جسم املكنسة حتى سماع صوت “طقطقة”. تغيير البطارية (اختياري) نوع البطارية :حجم AA مالحظة .1استبدل البطاريات عند توقف املكنسة الكهربائية عن العمل. إذا استمرت املشكلة ،يرجى االتصال بوكيلنا املعتمد. .2استخدم بطاريتني من احلجم .AA حتذير .1ال تقم مطلقا ً بفك البطاريات أو إعادة شحنها. .2ال تقم مطلقا ً بتسخني البطاريات أو إلقاءها في النار. .3ال تعكس القطبني (.)-(،)+ .4تخلص من البطاريات بشكل مالئم. 2006.12.7 3:21:32 PM DJ68-00359A-A-1123-ARABIC.indd 9 إذا صادفتك مشكلة.املشكلة السبب احلل املوتور ال يعمل. عدم وجود تيار كهربي. قطع املفتاح احلراري للطاقة. افحص الكابل واملقبس ومأخذ التيار. اتركه حتى يبرد. انخفاض قوة االمتصاص تدريج ًيا. انسداد الفوهة أو خرطوم االمتصاص أو األنبوب. تأكد من عدم وجود عوائق وتخلص منها في حالة العثور عليها. عدم إعادة لف الشريط بشكل كامل. تأكد من أن السلك ليس ملويًا أو ملفو ًفا بشكل غير منتظم. اسحب السلك للخارج مسافة 3-2 متر وادفع زر إعادة لف السلك. املكنسة الكهربائية ال تلتقط األوساخ. وجود شق أو ثقب باخلرطوم. افحص اخلرطوم واستبدله إذا لزم األمر. قلة أو انخفاض كفاءة الشفط امتالء الفلتر باألتربة. يرجى فحص الفلتر وتنظيفه ،إذا لزم األمر ،كما هو موضح في اإلرشادات. جنوسماس ةكرش ءالمع ةمدخب لاصتإلا ىجري جنوسماس تاجتنملل ةقالع ال ةلئسأ. Country ☎ Customer Care Center Web Site U.A.E )800SAMSUNG (7267864 www.samsung.com/mea 10 2006.12.7 3:21:32 PM DJ68-00359A-A-1123-ARABIC.indd 10