1
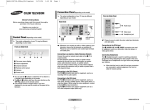
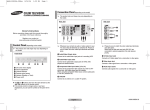
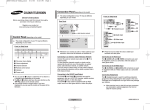
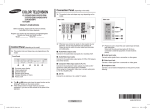
AA68-03591B-01Eng_TM85 8/9/06 11:38 AM Page 1 COLOR TELEVISION TX-R2028/TX-R2035/TX-R1635 Connection Panel (depending on the model) ➢ The product color and shape may vary depending on the model. Rear Jack Side Jack Œ Owner’s Instructions ´ Before operating, please read this manual thoroughly, and retain it for future reference. ˇ ¨ Œ ˆ ˇ ¨ ´ Register your product at www.samsung.com/global/register Control Panel (depending on the model) ➢ The product color and shape may vary depending on the model. Front Panel Œ ´ ˇ ¨ ˆ Ø On-screen menu display Volume adjustment Channel selection Remote control sensor Indicator (Standby) Power on/off ◆ The ´ and ˇ buttons also have the same function as the œ/√/†/… buttons on the remote control. ◆ If the remote control no longer works or you have misplaced it, you can use the controls on the panel of the TV. ➢ Whenever you connect an audio or video system to your TV, ensure that all elements are switched off. Please be sure to match the color coded input terminals and cable jacks. ➢ Please be sure to match the color coded input terminals and cable jacks. When both the side and rear jacks are connected to external equipment, the side receives priority. Œ Audio/Video Output Jacks Connect to the audio/video input jacks of a recording VCR. Œ Audio Input Jacks Connect audio signals from a camcorder or video game. ´ Audio/Video Input Jacks Connect to the audio/video output jacks of VCRs, DVD players and similar devices. ´ Video Input Jack Connect a video signal from a camcorder or video game. ˇ S-Video Input Jack Connect to S-Video output jack of an S-VHS VCR or DVD player. When using the S-Video, connect audio jacks to “AV IN 2 (AUDIO-L/R)”. ¨ Component Video Input Jacks (Y, Pb, Pr) Connect to the Component video outputs of a DVD or DTV set-top box. 480i video signal input is available. When using the Component Video input, connect audio jacks to “AV IN 2 (AUDIO-L/R)”. ˆ VHF/UHF Connect to an antenna or to a cable TV system. English - 1 AA68-03591B-01 AA68-03591B-01Eng_TM85 8/9/06 11:38 AM Page 2 Remote Control ➢ You can use the remote control up to a distance of about 23 feet from the TV. When using the remote, always point it directly at the TV. Œ POWER Turns the TV on and off. ˝ SLEEP Press to select a preset time interval for automatic shut off. ´ Number buttons Press to select channels directly on the TV. ˇ +100 Press to select channels over 100. For example, to select channel 121, press “+100”, then press “2” and “1”. ¨ VOL +, VOL Press to increase or decrease the volume. ˆ MENU Displays the main onscreen menu. Installing Batteries Remove the cover. Install two AAA size batteries, then replace the cover. When the remote control does not operate normally, check that the “+” and “-” ends of the batteries are inserted correctly or the batteries are drained. ➢ Do not mix battery types, i.e. alkaline and manganese. Press the POWER button on the remote control. You can also use the POWER button on the TV. Ô TV/VIDEO Press to display all of the available video sources. INFO Press to display information on the TV screen. Ò PRE-CH Tunes to the previous channel. Ú CH , CH Press to change channels. Viewing the Menus 1 Press the MENU button. The main menu is displayed on the screen. Its left side has four icons: Picture, Sound, Channel and Function. 2 Press the … or † button to select one of the icons. Press the œ or √ button to access the icon’s sub-menu. 3 Press the … or † button to move to items in the menu. 4 Press the …/†/œ/√ button to change the selected items. 5 Press the EXIT button to exit from the menu. Æ EXIT Press to exit the menu. Ø…/†/œ/√ Controls the cursor in the menu. ı MUTE Press to temporarily cut off the sound. ∏ ENTER While using the onscreen menus, press ENTER to activate (or change) a particular item. ˜ R.SURF Press to automatically return to a preferred channel after a userpreset time delay. ” MTS (Multi-channel Television Sound) Press to choose “Stereo”, “Mono”, or “SAP” (Secondary Audio Program). Turning the TV On and Off ¯ CH.SCAN Press to have the TV automatically scan all of the channels it has memorized. ’ TURBO Press to turn the TURBO sound On or Off. English - 2 eft e ed AA68-03591B-01Eng_TM85 8/9/06 11:38 AM Page 3 Channel - Memorizing the Channels Your TV can memorize and store all of the available channels for both “off-air” (antenna) and cable channels. After the available channels are memorized, use the CH and CH buttons to scan through the channels. This eliminates the need to change channels by entering the channel digits. There are three steps for memorizing channels: “ANT/CATV”, “Auto Program” and “Add/Erase”. ◆ ANT/CATV Channel Before your TV can begin memorizing the available œ √ ANT/CATV ANT √ Auto Program channels, you must œ √ TV/AV TV √ Fine Tune specify the type of signal √ Add/Erase source that is connected to the TV (i.e., an Move Select Exit antenna or a cable system). Select “ANT” (antenna), “STD”, “HRC”, or “IRC” (all cable TV) by pressing the œ or √ button. Channel - TV/AV (depending on the model) ◆ Add/Erase You can add or erase a Channel channel to display the Channel : ANT 12 Select : Added channels you want only. To use the Add/Erase function, first run Auto Program. Select Exit Press the œ/√ or number Move buttons to select the channel you want added or erased. Press the … or † button to select “Select”. Press the œ or √ button to select “Added” or “Erased”. Channel You can switch between œ ANT/CATV ANT viewing signal from Auto Program connected equipment, such œ TV/AV AV1 Fine Tune as a VCR, Camcorder, and Add/Erase the TV source (broadcast or cable). Move Select Exit ➢ Press the TV/VIDEO button on the remote control repeatedly to select the desired signal source. √ √ √ √ √ Channel - Fine Tune Channel The Fine Tuning function lets Fine Tune :+ 3 you manually adjust the TV’s Select : Added tuner if you have difficulty tuning channels. Adjust the fine tuning by pressing the œ or √ button. Move Select Exit To store the fine tuning setting in the TV’s memory, press the … or † button to select “Select”. Press the œ or √ button to select “Added”. To reset the fine tuning to “0”, press the œ or √ button to select “Erased”. ➢ After you adjust the fine tuning, “*” will appear when you press the INFO button while watching this channel. ◆ Auto Program All available channels are Auto Program automatically stored in ANT 30 memory when channels are selected by the direct tuning function. Exit Press the MENU button at any time to interrupt the memorization process. ➢ Press the CH.SCAN button on the remote control to TV automatically scan all of the channels it has memorized. English - 3 AA68-03591B-01Eng_TM85 8/9/06 11:38 AM Page 4 Function - Time ◆ Clock Setting the clock is necessary in order to use the various timer features of the TV. Also, you can check the time while watching the TV. (Just press the INFO button.) Function Time Clock - - : - - am On time Off time - - : - - am - - : - - am Move Select Exit ◆ On time / Off time You can set the On/Off timers so that the TV will switch on or off automatically at the time you select. ➢ You must set the clock first. ◆ Sleep Timer You can select a time period of between 10 and 180 minutes after which the TV automatically switches to standby mode. ➢ Press the SLEEP button on the remote control repeatedly until the appropriate time interval appears (any of the preset values from “Off” to “180”). Off Off ◆ Function - Caption Function - V-Chip Function Your TV decodes and Caption : On displays the closed captions Mode : Caption Channels :1 that are broadcast with Field :1 certain TV shows. These captions are usually subtitles for the hearing impaired or Move Select Exit foreign-language translations. All VCRs record the closed caption signal from TV programs, so home-recorded video tapes also provide closed captions. Most pre-recorded commercial video tapes provide closed captions as well. Check for the closed caption symbol in your TV schedule and on the tape’s packaging: . The V-Chip feature automatically locks out programming that is deemed inappropriate for children. The user must first enter a PIN (personal ID number) before any of the V-Chip restrictions can be set up or changed. Function The “Enter Pin” screen appear Enter Pin after entering the V-chip menu. Enter Pin : - - - Enter your 4-digit PIN number. ➢ The default PIN number for a new TV set is “0-0-0-0.” ◆ Caption: On/Off You can activate or deactivate the Caption function. ◆ Mode - In “Caption” mode, captions appear at the bottom of the screen, and they usually cover only a small portion of the picture. - In “Text” mode, information unrelated to the program, such as news or weather, is displayed. Text often covers a large portion of the screen. ◆ Channels / Field Depending on the particular broadcast, it might be necessary to make changes to “Channels” and “Field”. Different channels and fields display different information: Field 2 carries additional information that supplements the information in Field 1. (For example, Channel 1 may have subtitles in English, while Channel 2 has subtitles in Spanish.) ◆ Change pin Choose any 4 digits for your PIN and enter them. As soon as the 4 digits are entered, “Confirm new PIN” screen appears. Re-enter the same 4 digits. When the Comfirm screen disappears, your PIN has been memorized. ➢ If you forget the PIN, press the remotecontrol keys in the following sequence, which resets the pin to 0-0-0-0: POWER OFF MUTE 824 POWER ON. ◆ V-chip Lock: Yes/No You can activate or deactivate the V-chip Lock function. Function V-chip Lock : Yes TV guidelines √ MPAA rating √ Change pin √ Move Select Exit Function Change pin Enter new pin : - - - - Function Confirm new pin Confirm new pin : - - - - Function V-chip Lock : Yes TV guidelines √ MPAA rating √ Change pin √ ☛ Misspellings and unusual characters sometimes occur during closed caption transmissions, especially those of live events. There may be a small delay before captions appear when you change channels. These are not malfunctions of the TV. English - 4 Move Select U.S.A Only This product is covered by the following U.S. patents : US4,930,158 US4,930,160 Exit D e s Exit s Exit AA68-03591B-01Eng_TM85 8/9/06 ◆ TV guidelines First, set up a personal identification number (PIN), and enable the V-Chip. (See previous section.) Parental restrictions can be set up using either of two methods: The TV guidelines or the MPAA rating. 11:38 AM Page 5 Function TV-Y TV-Y7 √ √ TV-G TV-PG TV-14 TV-MA √ √ √ √ Move ALL FV U U U U U U U Select V S L D U: Unblocked B: Blocked U U U U U U U U U U U Exit TV-Y Young children TV-Y7 Children 7 and over --------------------------------------------TV-G General audience TV-PG Parental guidance TV-14 Viewers 14 and over TV-MA Mature audience ➢ These categories consist of two separate groups: TV-Y and TV-Y7 (young children through age 7), and TV-G through TV-MA (everybody else). The restrictions for these two groups work independently: If a household includes very young children as well as young adults, the TV guidelines must be set up separately for each age group. ➢ The TV-Y7, TV-PG, TV-14 and TV-MA have additional options: FV: Fantasy violence D: Dialog L: Offensive language S: Sexual situation V: Violence The V-Chip will automatically block certain categories that are “more restrictive.” For example, if you block “TV-Y” category, then “TV-Y7” will automatically be blocked. Similarly, if you block the TV-G category, then all the categories in the “young adult” group will be blocked (TV-G, TV-PG, TV-14 and TVMA). The sub-ratings (D, L, S, V) work together similarly. ◆ MPAA rating Function The MPAA rating system B/U √ uses the Motion Picture G U √ PG U U: Unblocked Association of America PG-13 √ U B: Blocked √ R U (MPAA) system, and its NC-17 √ U √ X U √ main application is for NR U movies. (Eventually, movie Move Select Exit videocassettes will be encoded with MPAA ratings.) When the V-chip Lock is on, the TV will automatically block any programs that are coded with objectionable ratings (either MPAA or TV-Ratings). G PG PG-13 R NC-17 X NR ➢ General audience (no restrictions). Parental guidance suggested. Parents strongly cautioned. Restricted. Children under 17 should be accompanied by an adult. No children under age 17. Adults only. Not rated. The V-Chip will automatically block any category that is “more restrictive.” For example, if you block the “PG-13” category, then “R,” “NC-17,” and “X” will automatically be blocked also. English - 5 ◆ How to Reset the TV after the V-Chip Blocks a Channel (“Emergency Escape”) If the TV is tuned to a restricted channel, the VChip will block it. The screen will go black and the following message will appear: “Excessive rating”. To resume normal viewing, tune to a different channel using the number buttons. Under certain conditions (depending on the rating of the local TV programs) the V-Chip might lock out all the channels. In this case, use the V-Chip function for an “emergency escape”: Press the MENU button to display the menu. Press the … or † button three times to select the “Function” menu and press the œ or √ button. Press the … or † button to highlight the “V-Chip” menu and press the œ or √ button. Enter your PIN number, and press the √ button to temporarily disable the V-chip Lock. AA68-03591B-01Eng_TM85 8/9/06 11:38 AM Page 6 Function - Language When you start using the TV for the first time, you must select the language which will be used for displaying menus and indications. Function Language Time Caption V-chip Move œ Select English √ √ √ √ Exit Picture Mode / Adjust / Color Tone / Size ◆ Mode: Dynamic/Standard Movie/Custom You can select the type of picture which best corresponds to your viewing requirements. ◆ Adjust: Contrast/Brightness/ Sharpness/Color/Tint The TV has several settings which allow you to control the picture quality. R.Surf Feature This feature allows you to set Surf 1 : 30 the TV to return to a particular channel after a certain amount of time. For example, you may be watching a channel when commercials start. You can set the R.Surf to “5 minutes”, then switch channels. After minutes, the TV will return to the original channel. Press the R.SURF button repeatedly to set the timer in thirty second intervals, up to five minutes. Sound Mode / Adjust / Auto Volume / Melody / Surround / Turbo Sound / MTS Picture Mode Adjust Color Tone Size Move œ Dynamic : Cool : Normal Select Exit Picture Adjust Contrast Brightness Sharpness Color Tint Move 100 50 70 50 G 50 R 50 Select ◆ Color Tone: Cool/Normal/Warm You can change the color of the entire screen according to your preference. ◆ Size: Normal/Zoom You can select the picture size which best corresponds to your viewing requirements. Exit √ √ ◆ Mode: Standard/Music/Movie/ Speech/Custom You can select the type of special sound effect to be used when watching a given broadcast. Sound Mode Adjust Auto Volume Melody Surround Turbo Sound MTS Move œ Custom œ : Off : On : Off : Off Stereo Select √ √ √ Exit ◆ Adjust: Bass/Treble/Balance The TV has several settings which allow you to control the sound quality. ➢ If you make any changes to these settings, the sound mode is automatically switched to “Custom”. ◆ Auto Volume Each broadcasting station has its own signal conditions, and so it is not easy to adjust the volume every time the channel is changed. This feature lets you automatically adjust the volume of the desired channel by lowering the sound output when the modulation signal is high or by raising the sound output when the modulation signal is low. ◆ Melody You can set a melody to sound when the TV is powered “On” or “Off”. ◆ Surround “Surround” converts a mono or stereo signal into simulated surround sound. Once the “Surround” is set to “On”, the setting applies to sound effects such as Standard, Music, Movie and Speech. English - 6 AA68-03591B-01Eng_TM85 8/9/06 11:38 AM Page 7 Troubleshooting If the TV seems to have a problem, first try this list of possible problems and solutions. If none of these troubleshooting tips apply, then call your nearest Samsung authorized service center. √ √ √ o of ut c, ◆ Turbo Sound This feature emphasizes the bass and treble frequencies to add fullness to the sound. ➢ Press the TURBO button on the remote control repeatedly to select “On” or “Off”. ◆ MTS (Multi-channel Television Sound) Depending on the particular program being broadcast, you can listen to Mono, Stereo, or SAP. ➢ Press the MTS button on the remote control repeatedly to select “Stereo”, “Mono”, or “SAP” (Secondary Audio Program). Poor picture. ◆ Try another channel. ◆ Adjust the antenna. ◆ Check all wire connections. The TV won’t turn on. ◆ Make sure the wall outlet is working. ◆ Make sure the TV is plugged in. ◆ Make sure the remote has batteries. Poor sound quality. ◆ Try another channel. ◆ Adjust the antenna. Remote control malfunctions ◆ Replace the remote control batteries. ◆ Clean the upper edge of the remote control (transmission window). ◆ Check that the “+” and “-” ends of the batteries are inserted correctly. ◆ Check that the batteries are drained. No picture or sound. ◆ Try another channel. ◆ Press the TV/VIDEO button. ◆ Make sure the TV is plugged in. ◆ Check the antenna connections. ◆ Make sure the MUTE button is off. No color, wrong colors or tints. ◆ Make sure the program is broadcast in color. ◆ Adjust the picture settings. Picture rolls vertically. ◆ Adjust the antenna. ◆ Check all wire connections. ◆ If you are using a VCR, check the tracking. The TV operates erratically. ◆ Unplug the TV for 30 seconds, then try operating it again. Your remote control does not operate your TV. ◆ Make sure the remote has batteries. ◆ Check that the “+” and “-” ends of the batteries are inserted correctly. ◆ Check that the batteries are drained. English - 7 AA68-03591B-01Eng_TM85 8/9/06 11:46 AM Page 8 OSD Map Picture ✽ : It is variable depending on the model. - Mode Adjust Color Tone Size - Dynamic / Standard / Movie / Custom Contrast / Brightness / Sharpness / Color / Tint Cool / Normal / Warm Normal / Zoom Sound - Mode Adjust Auto Volume Melody Surround Turbo Sound MTS - Standard / Music / Movie / Speech / Custom Bass / Treble / Balance Off / On Off / On Off / On Off / On Mono / Stereo / SAP Channel - ANT/CATV Auto Program TV/AV ✽ Fine Tune - ANT / STD / HRC / IRC - Add/Erase Function - Language - Time - Caption - V-Chip - Fine Tune Select Channel Select - English / Spanish / French Clock On time Off time Caption - Off / On Mode - Caption / Text Channels - 1/2 Field - 1/2 V-chip Lock - Yes / No TV guidelines MPAA rating Change pin Important Warranty Information Regarding Television Format Viewing Standard screen format televisions (4:3, the aspect ratio of the screen width to height) are primarily designed to view standard format full-motion video. The images displayed on them should primarily be in the standard 4:3 ratio format and constantly moving. Displaying stationary graphics and images on screen, such as the dark top and bottom letterbox bars (wide screen pictures), should be limited to no more than 15% of the total television viewing per week. Wide screen format televisions (16:9, the aspect ratio of the screen width to height) are primarily designed to view wide screen format full-motion video. The images displayed on them should primarily be in the wide screen 16:9 ratio format, or expanded to fill the screen if your model offers this feature, and constantly moving. Displaying stationary graphics and images on screen, such as the dark side-bars on non-expanded standard format television video and programming, should be limited to no more than 15% of the total television viewing per week. - Added / Erased - Added / Erased Additionally, viewing other stationary images and text such as stock market reports, video game displays, station logos, web sites or computer graphics and patterns, should be limited as described above for all televisions. Displaying any stationary images that exceed the above guidelines can cause uneven aging of picture tubes (CRTs) that leave subtle, but permanent burned-in ghost images in the television picture. To avoid this, vary the programming and images, and primarily display full screen moving images, not stationary patterns or dark bars. On television models that offer picture sizing features, use these controls to view the different formats as a full screen picture. Be careful in the selection and duration of television formats used for viewing. Uneven CRT aging as a result of format selection and use, as well as other burned-in images, is not covered by your Samsung limited warranty. English - 8