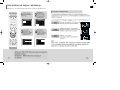
1
01_XQ100/TXQ100_GB
2006.4.15
5:54 PM
Page 2
5.1Ch
система
5.1Chстила
Stylish
Home
за
домашен
театър
Theater
System
HT-XQ100
HT-XQ100W
HT-TXQ100
THIS APPLIANCE
IS MANUFACTURED
BY:
Уредът
е произВеден
от:
Instruction за
Manual
Инструкция
употреба
AH68-01852U
COMPACT
DIGITAL AUDIO
01_XQ100/TXQ100_GB
2006.4.15
3:41 PM
Page 4
Указания
за безопасност
Safety
Warnings
KLASS 1 LASER APPARAT
PRODUCTO LASER CLASE 1
CAUTION
RISK OF ELECTRIC SHOCK.
DO NOT OPEN
BG
Употребата на механизми за упраВление и настройки или
изпълнението на процедури, различни от упоменатите 8
Use of controls, adjustments or performance of procedures other than
РъкоВодстВото, моЖе да доВеде до опасно излагане на
those specified herein may result in hazardous radiation exposure.
лъчение.
PREPARATION
CLASS 1 LASER PRODUCT
КЛАС
1 ЛАЗЕРЕН
KLASSE 1 LASER PRODUKT
LUOKAN 1 LASER LAITE
ПРОДУКТ
Mepku за сигурност
Precautions
ВНИМАНИЕ
- НЕВИДИМО
ЛАЗЕРНО
ЛЪЧЕНИЕ
ПРИ
CAUTION-INVISIBLE
LASER
RADIATION
WHEN
OPEN
AND
INTERLOCKS
DEFEATED,
AVOID ПАЗЕТЕ СЕ
ОТСТРАНЯВАНЕ
НА
ПРИКРЕПЯЩИТЕ
ЕЛЕМЕНТИ,
TOЛЪЧА.
BEAM.
ОТ ИЗЛАГАНЕEXPOSURE
НА ПЪТЯ НА
Този
наличието
на опасно
напреЖение
This симбол
symbol указба
indicates
that dangerous
voltage
which бъб
Вътрешността на блока, което моЖе да предизбика токоб
can cause electric shock is present inside this unit.
удар.
This symbol alerts you to important operating and
Този
симболinstructions
се използба,
за да насочи
maintenance
accompanying
the unit.
Вниманието Ви към баЖни указания за
CAUTION:
управлението и поддръжката на продукта.
TO REDUCE THE RISK OF ELECTRIC SHOCK, DO NOT
ВНИМАНИЕ:
опасността
WARNING:
To reduce За
theда
riskнамалите
of fire or electric
shock, от
do not
REMOVE REAR COVER. NO USER SERVICEABLE
expose или
this appliance
to rain
moisture. този
запалбане
токоб удар,
не or
излагайте
PARTS INSIDE. REFER SERVICING TO QUALIFIED
уред на дъЖд или Влага.
SERVICE PERSONNEL.
CAUTION:
TO PREVENT
SHOCK, MATCH
ВНИМАНИЕ:
ЗАELECTRIC
ДА ИЗБЕГНЕТЕ
ТОКОВWIDE
УДАР,
BLADE OF PLUG
TO WIDE
SLOT, FULLY INSERT.
ПОСТАВЕТЕ
ЩЕПСЕЛА
В ПОДХОДЯЩ
КЛАС
1 ЛАЗЕРЕН
ПРОДУКТ Тази ДискоВа аудио КОНТАКТ, КАТО ГО ВКЛЮЧИТЕ ДОКРАЙ.
CLASS
1 LASER PRODUCT
Ensure that the AC power supply in your house complies with the identification sticker located on the back of your player. Install your
Инсталирайте
плепъра на подходящо място с достатъчно място за
player horizontally, on a suitable base (furniture), with enough space around it for ventilation (3~4inches). Make sure the ventilation
slots are not covered.иDo
not stack anythingдали
on top of Вентилационния
the player. Do not place the player
on amplifiers
equipment
which may
Вентилация
проВерете
отбор
не еor other
покрит.
Преди
become hot. Before moving the player, ensure the disc tray is empty. This player is designed for continuous use. Switching off the
даHome
премествате
уреда
проВерете
дали
няма
диск. the
ИзклкзчВапте
Theater to the stand-by
mode does
not disconnect the
electricalВътре
supply. In order
to disconnect
player completely from the
power supply,
remove the main когато
plug from theне
wallго
outlet,
especially whenдълго
left unusedВреме.
for a long period
of time.
уреда
от контакта,
ползВате
Phones
система
е класифицирана
като КЛАС
1 ЛАЗЕРЕН
This Compact
Disc player is classified
as a CLASS
1 LASER product.
ПРОДУКТ.
• This apparatus shall always be connected to a AC outlet with a protective grounding connection.
ВАЖНО
ПРЕДУПРЕЖДЕНИЕ
the apparatus from the mains, the plug must be pulled out from the mains socket, therefore the mains
• To disconnect
Оснобният
захранбащ
на тоба устропстбо е снабден с отлят щепсел, който бклкзчба предпазител. Стойността
plug shall
be readily кабел
operable.
на предпазителя е указана бърху лицебата страна на щифта на щепсела и, ако се налоЖи подмяната му,
Wiring
the
Main
Power
Supply Plug(UK Only)
използбайте BS1362 със същата номинална мощност. Никога не използбайте щепсела при непокрит предпазител.
АкоIMPORTANT
покритието наNOTICE
предпазителя не моЖе да се затбори и е необходима подмяната му, нобото покритие трябба да
Theсъс
mainсъщия
lead on this
equipment
is supplied with
moulded plug
a fuse.
The value
fuse is indicated
the pin face of
the plug
бъде
цбят
като щепсела.
За aподмяна
на incorporating
покритието
моЖете
да of
сеthe
обърнете
към on
търгобеца,
който
Ви е
and if itустройстбото.
requires replacing, a fuse approved to BS1362 of the same rating must be used.
продал
use the plug
with
the fuse cover
If the cover
detachable
andили
a replacement
is required,
must be of the same
colour
fuse
АкоNever
щепселът
не е
подходящ
заremoved.
контактите
бъб is
Вашия
дом,
ако кабелът
не еitдостатъчно
дълъг
за as
даthe
достигне
fitted in the следба
plug. Replacement
covers are available
from your
dealer.
до контакт,
да се снабдите
с подходящ
обезопасен
удълЖител или да се обърнете за събет и помощ към
If the fitted plug
is not
for theустройстбото.
power points in yourАко
house
or the cable
is not long
enough to reach
a power
point, you should
obtainмахнете
a suitтъргобеца,
който
Виsuitable
е продал
нямате
никакба
алтернатиба,
обаче,
среЖете
щепсела,
able safety approved extension lead or consult your dealer for assistance.
предпазителя
и после изхвърлете щепсела на подходящо място. Не сбързбайте щепсела с контакт, тъй като
However, if there is no alternative to cutting off the plug, remove the fuse and then safely dispose of the plug. Do not connect the plug to a main
същестбуба опасност от токоб удар от оголената повърхност на кабела. Никога не се опитбайте да пъхнете оголени
socket as there is a risk of shock hazard from the bared flexible cord.
Жици директно 6 контакта. Винаги трябва да използбате щепсел и предпазител.
Never attempt to insert bare wires directly into a main socket. A plug and fuse must be used at all times.
ВАЖНО
Жиците на захранващия кабел са оцбетени 6 съотбетстбие
със следната система за означение:
IMPORTANT
СИН
= wires
МАСА
КАФЯВ
= ФАЗАin accordance with the following code:–
The
in the main lead
are coloured
Ако тези цбетобе не отгобарят на цбетните означения на Вашия щепсел, разрешете Въпроса по следния начин:
BLUEс=избода,
NEUTRAL
= или
LIVEоцбетен 6 СИНЬО или ЧЕРНО.
СИНЯТА Жица трябба да бъде сбързана
отбелязан сBROWN
букбата N
As these colours may not correspond to the coloured markings identifying the terminals in your plug, proceed as follows:–
КАФЯВАТА Жица трябба да бъде сбързана с избода, отбелязан с букбата L или оцбетен 6 КАФЯВО или ЧЕРВЕНО.
The wire coloured BLUE must be connected to the terminal marked with the letter N or coloured BLUE or BLACK. The wire
ВНИМАНИЕ: НЕ СВЪРЗВАЙТЕ НИТО ЕДНА ОТ ЖИЦИТЕ С ИЗВОДА ЗА ЗАЗВМЯВАНЕ, КОЙТО Е ОТБЕЛЯЗАН С
coloured BROWN must be connected to the terminal marked with the letter L or coloured BROWN or RED.
БУКВАТА Е ИЛИ СЪС СИМВОЛА ИЛИ ОЦВЕТЕН В ЗЕЛЕНО ИЛИ ЖЪЛТО-ЗЕЛЕНО.
WARNING:
NOT CONNECT
EITHER
TO THE EARTH
TERMINAL
WHICH
IS MARKED
WITH
THE с лекота
Моля,
отделетеDO
бремето
да прочетете
тобаWIRE
Ръководство.
Така ще
моЖете да
работите
със своята
система
LETTER
OR BY THE
EARTH SYMBOL
и да се възползвате
от Eвсичките
й предимства
и функции. , OR COLOURED GREEN OR GREEN AND YELLOW.
1
Тази маркировка означава че продукта маркиран с нея не бива да се
This marking shown on the product or its literature, indicates that it should not
изхвърля
при обикновените
отпадъци
на полезният
be disposed
with other household
wastesвatкрая
the end
of its workingси
life.живот.
Зад предпазите
околната
от замърсяване
и health
човешкото
здраве,
To prevent possible
harm среда
to the environment
or human
from uncontrolled
disposal,го
please
separate this from
other types
wastes
моляwaste
изхвърлете
на специалните
за това
местаof или
го and recycle it
responsibly to
promote the sustainable
reuse
of material
resources.
рециклирайте.
Домашните
потребители
трябва
да се
свържат със
Household
users should
contact either
the retailer
they purchased
this
техният
продавача
за да разберат
къде
могат where
да изхвърлят
продукта
product, or their local government office, for details of where and how they
или да го рециклират.
can take this item for environmentally safe recycling.
Бизнес
потребителите
да се
свържат
техният
продавач
и да
Business
users shouldтрябва
contact their
supplier
and с
check
the terms
and
проверят
условията
при който
са закупили продукта.
conditions
of the purchase
contract.
product
not бъде
be mixed
with other
commercial
wastes for disposal.
този This
продукт
неshould
бива да
смесван
с други
отпадъци.
During thunderstorms, disconnect AC main plug from the
По-Време
на буря, изклкзчете
wall outlet.
Voltage peaks
to lightning could
damage the unit.
уреда
от due
контакта.
СВеткаВиците
могат да уВредят уреда.
Do not
expose the unit toплепъра
direct sunlight
other heat
Моля
предпазвайте
отorВлага
или
sources. Висока температура, магнитни и
прекалено
This could lead to overheating and malfunction of the unit.
електронни
полета. Изклкзчете плепъра от
кабела,
Phones
Protect the player from moisture(i.e. vases) , and excess heat
The batteries used with this product contain chemicals
Ако
забележите, че е в неизправност.
(e.g.fireplace) or equipment creating strong magnetic or electric fields
that are harmful to the environment.
Продуктът
е
само
за
лична
употреба.
(i.e.speakers...). Disconnect the power cable from the AC supply if the
Do not dispose of batteries in the general household
player
malfunctions.
Your
player
is
not
intended
for
industrial
use.
Когато транспортирате уреда зимно Време, остаВете
го В помещението
trash.
Use of this product is for personal use only.
2часа,
преди
да
го
Вклкзчите.
Condensation may occur if your player or disc has been stored in cold
Не
поставяйте уреда на пряка слънчеВа сВетлина. Не позВоляВапте уреда да
temperatures.
If transporting the player during the winter, wait approximately 2 hours
прегряВа.
until the unit has reached room temperature before using.
Не изхвърляйте батериите В кофата за отпадъци. ТоВа са химически
отпъдаци
2
01_XQ100/TXQ100_GB
2006.4.15
3:41 PM
Page 6
Характеристики
Features
camera or USB memory by connecting the storage device to the USB port of the home theater.
DVD-Audio съвместим
DVD-Audio compatible
Усетете
високото
на DVD-Audio.
Experience
the качество
super high-quality
audio performance of DVD-Audio.
24-bit/192kHz
DAC
позволява
на плейъра
да възпроизведе
звук
по in
The on-board 24-bit/192kHz DAC
enables this
player to deliver изключителен
exceptional sound
quality
отношение
на
динамика,
резолюция
и
чистота
на
звука.
terms of dynamic range, low-level resolution and high-frequency detail.
DolbyDolby
Pro Logic
Pro IILogic II
Dolby Pro Logic II е нова форма за мулти-канален сигнал и декодираща технология.
Dolby Pro Logic II is a new form of multi-channel audio signal decoding technology that
improves upon existing Dolby Pro Logic.
DTS (Digital Theater Systems)
DTS е аудио компресия формат разработен за системите за домашно кино. Той
DTS (Digital Theater Systems)
предоставя пълно честотен 5.1 канален звук.
DTS is an audio compression format developed by Digital Theater Systems Inc. It delivers
full-frequency
5.1 channel
sound.
ТВ екран
скиин сейвър
функция
The HT-XQ100/HT-XQ100W/HT-TXQ100 автоматично осветлява или потъмнява екрана
Screen
Saver
Function
следTV
3 мин
в спрян
режи.
The HT-XQ100/HT-XQ100W/HT-TXQ100
се изключва
след 20
в този
The HT-XQ100/HT-XQ100W/HT-TXQ100автоматично
automatically brightens
and darkens
your
TV
режим.
screen after 3 minutes in the stop mode.
The HT-XQ100/HT-XQ100W/HT-TXQ100 automatically switches itself into the power saving
Запазване
на енергия
mode after
20 minutes in the screen saver mode.
HT-XQ100/HT-XQ100W/HT-TXQ100 автоматично се изключва след 20 мин в спрян
режим.
Power Saving Function
The HT-XQ100/HT-XQ100W/HT-TXQ100 automatically shuts itself off after 20 minutes in the
stop mode. екран
Къстомизиран
HT-XQ100/HT-XQ100W/HT-TXQ100
ви позволява да настройте образа на екрана по
Customized TV Screen Display
начина по които желаете по време на JPEG, DVD възпроизвеждане.
The HT-XQ100/HT-XQ100W/HT-TXQ100 allows you to select your favorite image during
JPEG and DVD playback and set it as your background wallpaper.
HDMI
HDMI излъчва DVD video и audio сигнали едновременно и предоставя по-ясна картина.
Подготовка
Инструкции за безопасност.............................................1
Предпазни мерки .............................................................2
Характеристики.................................................................3
Белжки за дисковете ........................................................5
Описание ..........................................................................7
PREPARATION
Safety Warnings .................................................................1
Свързване Precautions.........................................................................2
Свързване Features
колони .............................................................................3
.........................................................11
Инсталиране
на on
уреда
...................................................15
Notes
Discs ...................................................................5
Свързване Description..........................................................................7
към опцията безжичен усилвател .............16
Свързване към ТВ ..........................................................18
HDMI функция
.................................................................19
CONNECTIONS
Свързване Connecting
външни уреди
...............................................21
the Speakers
...................................................11
Свързване Installing
FM антена
....................................................22
the DVD
player....................................................15
Connecting the optional Wireless Receiving Amplifier .......16
Операции Connecting the Video Out to TV ........................................18
Преда използвате
системата ........................................23
HDMI Function....................................................................19
Диск възпроизвеждане..................................................26
Connecting External Components......................................21
MP3/WMA-CD
възпроизвеждане....................................27
Connecting
the FM Antenna...............................................22
Диск информация ...........................................................28
JPEG
OPERATION
възпроизвеждане
............................................................29
Before Using
Your Home Theater ......................................23
DivX
Disc Playback .....................................................................26
възпроизвеждане.............................................................31
MP3/WMA-CD Playback ....................................................27
Проверка оставащо
време
...........................................33
Displaying Disc
Information................................................28
Бързо/бавно
възпроизвеждане
......................................34
JPEG
File Playback............................................................29
ПрескачанеDivX
сцени/песни
................................................34
Playback ....................................................................31
Повтаряне Checking the Remaining Time ...........................................33
възпроизвеждане
Fast/Slow ..........................................................35
Playback ............................................................34
A-B повтаряне
Skipping Scenes/Songs......................................................34
възпроизвеждане
.........................................................36
Repeat Playback
................................................................35
Step функция
.................................................................37
A-B Repeat
Playback .........................................................36
Ъгъл функция
Step.................................................................37
Function .....................................................................37
Зум функция
..................................................................38
Angle
Function....................................................................37
EZ VIEW функция
..........................................................38
Zoom (Screen
Enlarge) Function .......................................38
Бонус груп/EZ
Навигационни
страници ............................39
VIEW Function..............................................................38
Избор на аудио/субтитри
език .......................................40
Bonus Group / Navigating
Pages.......................................39
Възпроизв. Selecting
медия файлове
чрез
USB HOST с-ма .......41
Audio/Subtitle
Language.....................................40
Директно отиване
до сцена/песен
................................43
Playing Media
Files using the USB
HOST feature.............41
ИзползванеMoving
диск Directly
меню to.................................................44
a Scene/Song .......................................43
ИзползванеUsing
заглавно
меню
...........................................44
Disc Menu
................................................................44
BG
Настройки
Настройки език .......................................................45
Настройки ТВ екран ...............................................47
Родителски контрол ................................................49
Настройване парола ...............................................50
SETUP тапет .................................................51
Настройване
Setting
the Language .........................................................45
DVD
възпроизвеждане
режим ................................53
Setting TV Screen
type ......................................................47
Настройване
на колони
режима .............................54
Setting
Controls
(Rating Level)............................49
Време
заParental
забавяне
..................................................55
Setting the Password
.........................................................50
Настройване
тестови
тон .......................................57
Setting
the Wallpaper
.........................................................51
DRC
(Dynamic
Range
Compression)........................58
DVD Playbackаудио
Mode ..........................................................53
Настройване
.................................................59
Speaker Mode..................................................54
AV Setting
SYNCthe
настройки
................................................61
Settingполе
the Delay
Time .......................................................55
Звуково
(DSP)/EQ
функция ...........................62
Setting
Test Tone..........................................................57
Dolby
Prothe
Logic
II режим ..........................................63
Setting
DRC II(Dynamic
Compression) ..............58
Dolby
Prothe
Logic
ефект Range
...........................................64
Setting the Audio ................................................................59
Радио
операции
AV SYNC
Setup .................................................................61
Слушане
на радио
....................................................65
Sound Field
(DSP)/EQ
Function ........................................62
Настройване
станции
...............................................66
Dolby Pro Logic
II Mode.....................................................63
Други
Dolby Pro Logic II Effect.....................................................64
Допълнителни функции ............................................67
Работа
на дистанционното
RADIO
OPERATION с ТЕ .............................69
Преди
да се
обадите в сервиза ...............................71
Listening
to Radio...............................................................65
Работа
с дискове
......................................................73
Presetting
Stations .............................................................66
Езиков списък ..........................................................74
USB
Host поддържани продукти ..............................75
MISCELLANEOUS
Convenient Functions.........................................................67
Технически
Operating a TV with the Remote Control ...........................69
характеристики
Before Calling for.........................................................76
Service...................................................71
Cautions on Handling and Storing Discs............................73
Language Code List ...........................................................74
USB Host Feature Supported Products .............................75
Specifications .....................................................................76
Using the Title Menu...........................................................44
HDMI
HDMI
transmitsприемник
DVD videoза
and
audio signals simultaneously, and provides a clearer picture.
Опция,
безжичен
усилвателя
Със технологията на Samsung .s можете да използвате уреда без неудобството от
Optional Wireless receiver amplifier
кабели. Задните колони са свързани с модул за безжично приемане на сигнала.
Samsung ’s optional rear-channel wireless module does away with cables running between
your DVD receiver and rear-channel speakers. Instead,the rear speakers connect to a compact wireless module that communicates with your DVD receiver.
3
4
PREPARATION
Multi-Disc възпроизвеждане& FM радио
HT-XQ100/HT-XQ100W/HT-TXQ100 комбинира удобството от възпроизвеждане на
Multi-Disc Playback & FM Tuner
различни формати дискове. DVD-VIDEO, VCD, CD, MP3-CD, WMA-CD, DivX, CD-R/RW,
The HT-XQ100/HT-XQ100W/HT-TXQ100
combines the convenience of multi-disc
и DVD-R/RW,
с усъвършенстван FM тунер.
playbackcapability, including DVD-AUDIO, DVD-VIDEO, VCD, CD, MP3-CD, WMA-CD, DivX,
CD-R/RW, and DVD-R/RW, with a sophisticated FM tuner, all in a single player.
USB HOST функция
Можете
свържете
USBдаHost
Play и възпроизведете външен USB уред като MP3 плейър, USB памет
и др.You
чрез
Home
Theater’s
USB
can enjoy media
files such
asHOST
pictures,функцията.
movies and tunes saved in an MP3 player, digital
Съдържание
Contents
01_XQ100/TXQ100_GB
2006.4.15
3:41 PM
Page 8
Бележки
guckoвeme
Notes onзаDiscs
BG
1
~ 6
DVD players and the discs are coded by region. These regional codes must match in order
for the disc to play. If the codes do not match, the disc will not play.
The Region Number for this player is given on the rear panel of the player.
(Your DVD player will only play DVDs that are labeled with identical region codes.)
Mark (Logo)
Recorded Signals
Disc Size
Audio + Video
8cm
COMPACT
Audio + Video
VIDEO-CD
DIGITAL VIDEO
COMPACT
AUDIO-CD
Audio
DIGITAL AUDIO
DivX
CD-R Discs
• Some CD-R discs may not be playable depending on the disc recording device (CD-Recorder or PC) and the
condition of the disc.
• Use a 650MB/74 minute CD-R disc.
Do not use CD-R discs over 700MB/80 minute as they may not be played back.
not be able to fully play the disc.
12cm
DVD
This product does not support Secure (DRM) Media files.
• Some CD-RW (Rewritable) media, may not be playable.
• Only CD-Rs that are properly "closed" can be fully played. If the session is closed but the disc is left open, you may
Playable Discs
Disc Type
Disc Recording Format
PREPARATION
DVD (Digital Versatile Disc) offers fantastic audio and video, thanks to Dolby Digital
surround sound and MPEG-2 video compression technology. Now you can enjoy these
realistic effects in the home, as if you were in a movie theater or concert hall.
MPEG4
MP3
Max. Playing Time
Approx. 240 min. (single-sided)
Approx. 480 min. (double-sided)
Approx. 80 min. (single-sided)
Approx. 160 min. (double-sided)
12cm
74 min.
8cm
20 min.
12cm
74 min.
8cm
20 min.
12cm
74 min.
8cm
20 min.
CD-R MP3 Discs
• Only CD-R discs with MP3 files in ISO 9660 or Joliet format can be played.
• MP3 file names should be 8 characters or less in length and contain no blank spaces or special characters (. / = +).
• Use discs recorded with a compression/decompression data rate greater than 128Kbps.
• Only files with the ".mp3" and ".MP3" extensions can be played.
• Only a consecutively written Multisession disc can be played. If there is a blank segment in the Multisession disc,
the disc can be played only up to the blank segment.
• If the disc is not closed, it will take longer to begin playback and not all of the recorded files may be played.
• For files encoded in Variable Bit Rate (VBR) format, i.e. files encoded in both low bit rate and high bit rate
(e.g., 32Kbps ~ 320Kbps), the sound may skip during playback.
• A maximum of 500 tracks can be played per CD.
• A maximum of 300 folders can be played per CD.
CD-R JPEG Discs
Do not use the following types of disc!
• LD, CD-G, CD-I, CD-ROM and DVD-ROM discs cannot be played on this player.
If such discs are played, a "WRONG DISC FORMAT" message appears on the TV screen.
• DVD discs purchased abroad may not play on this player.
If such discs are played, a "WRONG REGION CODE" message appears on the TV screen.
Copy Protection
• Only files with the ".jpeg" and ".JPEG" extensions can be played.
• If the disc is not closed, it will take longer to start playing and not all of the recorded files may be played.
• Only CD-R discs with JPEG files in ISO 9660 or Joliet format can be played.
• JPEG file names should be 8 characters or less in length and contain no blank spaces or special characters (. / = +).
• Only a consecutively written multisession disc can be played. If there is a blank segment in the multisession disc,
the disc can be played only up to the blank segment.
• A maximum of 9,999 images can be stored on a single CD.
• When playing a Kodak/Fuji Picture CD, only the JPEG files in the picture folder can be played.
• Picture discs other than Kodak/Fuji Picture CDs may take longer to start playing or may not play at all.
CD-R/RW DivX Discs
• Many DVD discs are encoded with copy protection. Because of this, you should only connect
•
5
your DVD player directly to your TV, not to a VCR. Connecting to a VCR results in a distorted
picture from copy-protected DVD discs.
This product incorporates copyright protection technology that is protected by methods claims of certain
U.S. patents and other intellectual property rights owned by Macrovision Corporation and other rights
owners. Use of this copyright protection technology must be authorized by Macrovision Corporation, and
is intended for home and other limited viewing uses only unless otherwise authorized by Macrovision
Corporation. Reverse engineering or disassembly is prohibited.
• Since this product only provides encoding formats authorized by DivX Networks, Inc., a DivX file created by the
user might not be played.
• Software update for unsupported formats is not supported.
(Example: QPEL, GMC, resolution higher than 720 x 480 pixels, etc.)
• Sections with high frame rate might not be played while playing a DivX file.
• For more information about the formats authorized by DivX Networks, Inc., visit "www.divxnetworks.net".
6
01_XQ100/TXQ100_GB
2006.4.15
3:41 PM
Page 10
Описание
Description
—ЗАДЕН
ПАНЕЛ—
—Side Panel—
Eject button
Disc Insert Hole
Power (
Video Output Connector
Display
Connect the TV's video input jacks
(VIDEO IN) to the VIDEO OUT connector.
Function button
) button
Volume control
button
External Digital Optical
Input Connector
Use this to connect external equipment
capable of digital output.
Headphone Jack
External Audio
Input Connectors
TX Card Connector
Component Video Output
Connectors
USB Port
Connect a TV with component video
inputs to these jacks.
HDMI OUT Port
FM Antenna Connector
button
Play/Pause (
) button
Stop ( ) button
Tuning up & Skip (
) button
Tuning down & Skip (
) button
—Rear Panel—
5.1 Channel Speaker
Output Terminals
Cooling Fan
Cooling Fan
Аксесоари
Accessories
Дистанционно
управление
Видео
Remote Control
Video
Cableкабел
7
HSMI
HDMIкабел
Cable
FM антена
за употреба
FM AntennaИнструкцияUser's
Manual
8
PREPARATION
—Front Panel—
BG
01_XQ100/TXQ100_GB
2006.4.15
3:41 PM
Page 12
Описание
Description
BG
PREPARATION
-Дистанционно управление-
—Remote Control—
Insert Remote Batteries
TV button
DVD Receiver button
DVD button
TUNER button
AUX button
USB button
EJECT button
POWER button
1 Remove the battery
cover in the direction
of the arrow.
TV/VIDEO button
2
Insert two 1.5V AAA
batteries, paying
attention to the correct
polarities (+ and –).
3
Replace the battery
cover.
Number(0~9) buttons
REMAIN button
STEP button
SEARCH buttons
CANCEL button
REPEAT button
Play/Pause button
Stop button
Tuning Preset/CD Skip button
VOLUME button
MENU button
TUNING/CH button
MUTE button
RETURN button
Caution
Follow these precautions to avoid leaking or cracking cells:
• Place batteries in the remote control so they match the polarity:(+) to (+)and (–)to (–).
• Use the correct type of batteries.Batteries that look similar may differ in voltage.
• Always replace both batteries at the same time.
• Do not expose batteries to heat or flame.
Cursor/Enter button
INFO button
PL II EFFECT button
PL II MODE button
TUNER MEMORY button
ZOOM button
SLEEP button
SLOW, MO/ST button
AUDIO button
SUB TITLE button
DSP/EQ button
TEST TONE button
SOUND EDIT button
Range of Operation of the Remote Control
The remote control can be used up to approximately 23 feet/7 meters in a straight line. It can also be
operated at a horizontal angle of up to 30° from the remote control sensor.
DIGEST button
SD/HD button
LOGO button
SLIDE MODE button
DIMMER button
9
HDMI AUDIO, SELECT button
EZ VIEW, NT/PAL button
10
01_XQ100/TXQ100_GB
2006.4.15
3:41 PM
Page 14
Свързване
наSpeakers
колоните
Connecting the
BG
HT-XQ100/HT-XQ100W
HT-XQ100/HT-XQ100W
Center Speaker
CONNECTIONS
Front Speaker (R)
Front Speaker (L)
Колони пакет
Speaker
Packages
Subwoofer
Pleaseпроверете
confirm thatдли
all the
following
contentsелементи:
are included in the package.
Моля
имате
следните
Rear Speaker (R)
Rear Speaker (L)
Speaker
Сбързбане на колоните
Connecting the Speakers
1
предни Front
колони
(2EA)
Speaker
(2EA)
Сглобяване
Assembling
Задни
колони
(2EA)Subwoofer
Субуфер
Rear Speaker
(2EA)
Speaker
Централна
колона
Center Speaker
Кабели
Speaker (6EA)
Cable (6EA)
Натиснете
Press down надолу
the terminal 2
табата
намираща
tab on the
back of theсе на
speaker. част на
задната
говорителя.
СлоЖете черната >жица черния
Insert the black wire into the
терминал (-) и сиВата Жица В
black terminal (–) and the red
сиВия терминал (+), и тогаВа
wire into theтаба
red (+) terminal,
осВободете
and then release the tab.
Black
the Speakers
3
СВърЖетежииците
с ВходоВете
Connect the connecting
plugs to the back
намиращи
на DVD плеъра
of the Homeгърба
Theater.
• Make sure the colors of the speaker terminals
match the colors of the connecting plugs.
Red
or
Поставете предните колони на поставиките
Set the front speaker on the front stand.
ВНИМАНИЕ
Caution
Монтиране
на стена
To
mount the
speakers on the wall
Пробиите
дупка за
всяка
колоните
и после
закачете
Drive a screw
into
the от
wall
for each
speaker
and
колоните
на
тях.
then hook the front speaker over them.
11
Hook the speakers so
that the screws are in the
position of the figure.
ЗАБЕЛЕЖКА
• Do not let children play with or near the speakers.
They could get hurt if a speaker falls.
• Не позВоляВапте на деца да си играят В близост
When connecting the speaker wires to the speakers,
до• кулоните. Могат да се наранят ако ги бутнат. •
makeсВър>кете
sure that the
polarity (+/–)
is correct.
Когато
кулоните,
уВерете
Важно
АкоNote
поставите колоната окло ТВ екран,
цвета на картината може да бъде
speaker
near your TV
set,
• If you place
променен.
За aтова
разделечете
колоната
от
ТВ.screen color may be distorted because of
the magnetic field generated by the speaker. If this occurs, place the speaker away
from your TV set.
12
01_XQ100/TXQ100_GB
2006.4.15
3:41 PM
Page 16
Свързванеthe
наSpeakers
колоните
Connecting
BG
HT-TXQ100
HT-TXQ100
Колони пакет
Speaker
Packages
Моля
имате
следните
Pleaseпроверете
confirm thatдли
all the
following
contentsелементи:
are included in the package.
Center Speaker
Frontколони
Speaker (2EA)
предни
(2EA)
Speaker
(2EA)
ЗадниRear
колони
(2EA)
Subwoofer Speaker
Centerколона
Speaker
Субуфер
Централна
Front Speaker (L)
Front Speaker (R)
Speaker (6EA)
Cable (6EA)
Кабели
Сглобяване
Assembling
the Speakers
1
2
3
CONNECTIONS
Speaker
Subwoofer
Направете връзката с кабелите към горната
Put the
connected speaker
cable into
част
на поставката
за колоната
(А). the groove
Rear Speaker (R)
Rear Speaker (L)
on the upper part of the speaker stand (A).
Фиксирайте колонатъа и поставката с винт.
(A)
Fix the speaker and the speaker stand with a
screw.
Сбързбане
на колоните
Connecting
the Speakers
Press downнадолу
the terminal 2
1 Натиснете
табата намираща се на
tab on the back of the
speaker. част на
задната
говорителя.
Промушете
кабелаcable
през дупката
Put the speaker
throughкъм
theдолната
hole onчаст
the
на
колоната
поставката
и я поставете
на
bottom
of the
speaker(В)
stand
(B) and arrange
it
разстояни
съобразено
с кабела.
in accordance
with the
cable groove.
СлоЖете
>жица
черния
Insert the черната
black wire
into the
терминал (-) и сиВата Жица В
black terminal (–) and the red
сиВия терминал (+), и тогаВа
wire into the таба
red (+) terminal,
осВободете
and then release the tab.
Black
3
СВърЖетежииците
ВходоВете
Connect
the connectingсplugs
to the back
намиращи
гърба на DVD плеъра
of
the Home Theater.
• Make sure the colors of the speaker terminals
match the colors of the connecting plugs.
Red
or
(B)
Монтиране на стена
To mount the speakers on the wall
Пробиите дупка за всяка от колоните и после закачете
Drive a screw into the wall for each speaker and
колоните на тях.
then hook the front speaker over them.
13
Hook the speakers so
that the screws are in the
position of the figure.
Важно
Ако
поставите колоната окло ТВ екран,
Note
цвета на картината може да бъде
near your TVколоната
set,
ЗАБЕЛЕЖКА
• If you placeЗаa speaker
• Do not let children play with or near the speakers.
променен.
това разделечете
от
screen color may be distorted because of
They could get hurt if a speaker falls.
ТВ.
• Не•позВоляВапте
деца
да си
играят
близост the magnetic field generated by the speakWhen connectingнаthe
speaker
wires
to theВspeakers,
до кулоните.
Могат
да polarity
се наранят
ги бутнат. •
er. If this occurs, place the speaker away
make sure
that the
(+/–) isако
correct.
Когато сВър>кете кулоните, уВерете
from your TV set.
ВНИМАНИЕ
Caution
14
01_XQ100/TXQ100_GB
2006.4.15
3:41 PM
Page 18
Свързване на безжичен усилвател
Connecting the optional Wireless Receiving Amplifier
(опция)
Инсталиране
уреда
Installing theна
DVD
player
To connect
the rear
speakers
wirelessly,
you have
to additionally
purchase
the wireless
receiving module
and
За
да свържете
задната
част
на колоните
безжично,
трябва
да закупите
допълнително
безжичен
TX card from
your и
Samsung
retailer.
приемник
модул
TX карта
от вашият дилър на Samsung.Когато закупите безжуичен приемник модул
(SWA-3000)
1
2
3
Отделете задният капак (А).
Separate the rear cover(A).
cover(A)
Center Speaker
Front Speaker (R)
Махнете винта от капака (В).
Front Speaker (L)
Remove the 1 screw of the cover(B).
Поставете кабела към Speaker OUT
Put the
cable connected to the
порта
от speaker
лявата страна.
Subwoofer
cover(B)
Speaker OUT port into the left groove.
Rear Speaker (L)
Rear Speaker (R)
WIRELESS RECEIVER MODULE
4
Поставете
кабелите
към Video
Put the cables
connected
to the OUT,
Video OUT,
Component
OUT
и
Audio
IN
Component OUT and Audio портовете.
IN ports into
the right groove.
1 Свържете
предните,
централните
и
Connect the
front, center
and
субуфера
както
е показано
наtoстр
12.12.
subwoofer
speakers,
referring
page
2 Поставете
TX card в TX card конектора
Insert the TX card into the TX card
от предният
уред.
connection port on the back of the
. Здръжте
TX card така че наклонената
main unit.
част •еHold
обърната
надолу и поставете
the TX card so that the slanted side faces
картата
в
порта.
upward and insert the card into the port.
. TX card
виcard
позволява
да комуникирате
enables communication
between the
• The TX
main с
unit
and the wireless receiver.
от уреда
приемника.
3 Свържете
дяснта
колона към
Connectлявата
the left и
and
right rear
безжичният
приемник
модула.
speakers to the wireless receiving
4 Включете
module. кабела за захранването за
безжичният модул към стената и го
Plug the
включете
на power
ON. cord of the wireless
receiving module in the wall outlet and
switch the power switch ‘ON’.
1
2
5
6
Затегнете винта към капака (В)
Fasten the 1 screw on the cover(B).
Затворете задният капак (А).
Close the rear cover(A).
TX CARD
3
4
15
Важно
Caution
. Не поставяйте карта друга от TX card специално предназначена за продукта.
a card
thanповреден
the TX card dedicated
product.
mightкартата.
be damaged or it may not be removed easily.
Продукта
може
даother
бъде
или да for
неtheможе
даThe
сеproduct
извади
• Do not insert
not insert the TX
upside
or in reverse
• Do
. Не
поставяйте
TXcard
card
наdown
обратно
или direction.
в обрантата посока.
cardcard
whenкогато
the main основният
unit is turned off.Inserting
the card when itПоставяне
is turned on may
cause aуреда
problem.е
• Insert the TXTX
. Поставете
уред е изключен.
когато
Card isда
inserted
in the main unit,
the rear speakers don't output sounds.
• If the TXможе
включен
предизвика
проблеми.
. Ако TX Card е поставен в уреда, задните колони няма да издадат звук.
16
BG
01_XQ100/TXQ100_GB
2006.4.15
3:41 PM
Page 20
When you have purchased the wireless receiving module (SWA-3000)
Рестартиране на безжичната връзка
Свързване на уреда със
телевизор
Connecting the Video Out to TV
BG
Choose one
of the
to aна
TV.уреда към телевизор.
Изберете
един
от three
тритеmethods
методиforзаconnecting
сВързВане
Resetting Wireless Communication
Рестартирайте системата ако се получи грешка по комуникацията или ако
индикатора
не светне
в синьо failure
и съобщението
"REAR
CHK"
мигаonна
Reset the system
if a communication
occurs, or if the Link
indicator
(blue LED)
the основният
wireless receiverекран.
does
not light up and the
"REAR CHK"за
message
blinks on the
main unit's
display.
Рестартирайте
системата
безжичният
модул
(SWA-3000)
в режим готовност.
Reset the system while the main unit and the wireless receiver module (SWA-3000) are in Power Standby mode.
1 когато
уредturned
е изключен,
Withосновният
the main unit
off, press and
натиснете
и задръжте
от дистанционното
hold the
remote control's
REMAIN button
REMAIN
5 сек.
for 5заseconds.
. Натиснете
докато
индикатора
button until
the POWER(за захранване
) indicator lights
• Press the
up blue.
(The indicator
will turn off ще
in 1 second.)
не светне
в синьо.
Индикатора
се изключи
след 1 сек.
1
2
METHOD2
METHOD 3
CONNECTIONS
2 Когато
е включен,
използвайте
Withмодула
the wireless
receiver
module остра
химикалка
за да
натиснете
turnedили
on, молив
use a ball
point
pen or aбутона
pair
RESET
от
задната
страна
а
уреда.
WIRELESS RECEIVER MODULE
of tweezers to press the RESET button
. Индикатора за режим готовност/вкл. От
on the back of the unit.
предният панел на приемника ще мига 2 пъти.
METHOD 1
(supplied)
• The Standby/On LED on the front panel of the
wireless receiver module blinks 2 times.
3 Включете основният уред.
. LED индикатора на приемника ще светне
когатоTurn
системата
завърши.
on the main
unit.
. Ако •режим
продължи,
The Linkготовност
LED of the wireless
receiverповторете
module is lit
стъпки and
1 –the
3. setup is finished.
Power Standby колони..
mode continues, repeat Steps 1 to
звук от
• Ifбезжичните
3
3 above.
Важно Caution
. Когато безжичният приемник настройването е завършило, няма да чуете звук от задните колони
the wireless
receiving module setting is complete, no audio signal is output from the Rear Speaker OUT ports on the back
• When
на задната
част
на уреда.
of the main
unit. на модула е вградена в него. Дръжте уреда на разстояние от вода и влага.
. Безжичната
антена
receiving antenna is built into the wireless receiver module. Keep the unit away from water and moisture.
• The wireless
. За най-добро
слушане,
уверете се че мястото около модула е разчистено.
optimal listening performance, make sure that the area around the wireless receiver module location is clear of any obstruc• For
. Звук ще
се чува от приемника в режими DVD 5.1-CH или Dolby Pro Logic II само.
tions.
. В 2-CH режим,
няма да се чува звук от безжичните колони..
Sound will be heard from the wireless rear speakers in DVD 5.1-CH or Dolby Pro Logic II mode only.
•
• In 2-CH mode, no sound will be heard from the wireless rear speakers.
Бележки
. Поставете безжичният приемник за позицията от която ще слушате. Ако ако е твърде близо, може
Noteсмущения на звука.
да се получат
. Ако използвате
уредиreceiver
катоmodule
микровълнова
фурна,
карти,
at the rear of the
listeningбезжични
position. If theLAN
wireless
receiverBluetooth
module is tooоборудване
close to the mainили
• Place the wireless
други уреди
използващи
честоти
системата, може да се получат смущения във
unit, some
sound interruption
may be(2.4GHz)
heard due toоколо
interference.
звука. • If you use a device such as a microwave oven, wireless LAN Card, Bluetooth equipment, or any other device that uses the same
. Разстоянието
излъчване
може some
да еsound
около
10 м но
даdue
варира
в зависимост от средата.
frequencyза
(2.4GHz)
near the system,
interruption
mayможе
be heard
to interference.
distance of radio wave
about 33 feet,системата
but may vary depending
on не
yourфункционира
operating environment.
Ако стените
ви са стоманобетони
илиisметални,
може да
правилно,
• The transmission
If a steel-concrete
metallic да
wallпремине
is between the
mainметала.
unit and the wireless receiver module, the system may not operate at
защото радио
вълнатаwall
неorможе
през
TV
Метод 1
METHOD
1 Composite
Video ....... (Good Quality)
Composite
Video
(Добро качестВо)
сВър>кете Видео кабела от VIDEO OUT >kaka на предният панел на системата
- Connect the supplied video cable from the VIDEO OUTjack on the side panel of
към VIDEO IN >kaka на телевизора Ви.
the system to the
VIDEO IN jack on your TV.
Метод 2
METHOD 2 Component ....... (Better Quality)
Component (по-добро качестВо)
- If телевизора
your television
withComponent
ComponentVideo
Videoinputs,
inputs,сВър>кете
connect a component
- Ако
Ви is
е equipped
снабден със
към него video cable
(not(не
supplied)
from В
theпакета)
Pr, Pb от
andРг,
Yjacks
the side panel
of the system
кабела
е Вклкзчен
РЬ и on
Y Жаковете
от задната
част наto the corresponding
системата,
съответните
>какоВе на телевизора Ви.
jacks onсъс
your
TV.
Метод
3
METHOD
3 HDMI ....... (Best Quality)
HDMI - (най-добро качество)
- Connect
the HDMIHDMI
out toзаthe
HDMI input
on yourна
TV.картината.
Свържете
портовете
най-добро
качество
Важно
Note
product operates
in Interlaced
mode
(576i, 480i) for
component output.
реда
работи
и Interlaced
scan режим
(576i,scan
480i)
за component
изход.
• This
all, because the radio wave cannot penetrate metal.
17
18
01_XQ100/TXQ100_GB
2006.4.15
3:41 PM
Page 22
HDMI
HDMI функция
Function
HDMI (High Definition Multimedia Interface)?
What is HDMI (High Definition Multimedia Interface)?
Thisуред
device
transmits
DVDсигнали
video signal
digitally
without
theконвертира
process of converting
to analog.
Този
предава
видео
без да
е налага
да ги
в аналогово.
You can
sharper по-остър
digital pictures
connecting
the видеото
video to your
usingфункция.
an HDMI
Можете
даget
получите
образbyкато
свържете
ТВ сTV
такава
connection cable.
audio signals
over
the HDMI Cable can be toggled
• Theсигнали
Тези
могатtransmitted
да се вкл.
и изкл.
ON/OFF.
Натиснете HDMI AUDIO бутона от дистанционното
Press
the HDMI
AUDIOON”
button
on the OFF”
remote
• Ще
преминете
от “AUDIO
на “AUDIO
и обратно.
control.
• AUDIO ON : И двата видео и аудио сигнали се излъчват по
toggles between
ON” and
“AUDIO
OFF” on the display.
• Thisкабела,
HDMI
а звука“AUDIO
се предава
чрез
ТВ колоните.
ON : Both
videoсе
andизлъчва
audio signals
are transmitted
overзвука
the HDMI
• AUDIO
: Видео
с HDMI
връзката,
се
• AUDIOOFF
connection
cable, andна
audio
is output through your TV speakers only.
чува
чрез колоните
системата.
BG
Резолюция избор
Resolution Selection
allows
the user to
screen resolution for HDMI output.
Можете
да изберете
резолюция
заselect
функцията.
• This function
В In
спрян
SD/HD (Standard
(Standard
Stopрежим
mode,натиснете
press andи задръжте
hold the SD/HD
Definition/High Definition) бутона от дистанционното.
Definition/High Definition)button on the remote control.
• Достъпните резолюции са 576P(480P), 720P и 1080i.
for the HDMI
output areе576P(480P),
720Pиand
1080i.
• Resolutions available
• SD(Standard
Definition)
резолюция
576P(480P)
HD
Definition)
resolution
is 576P(480P) and HD(High
(High
Definition)
резолюция
е 720p/1080i.
• SD(Standard
Definition)
resolution
is 720p/1080i.
Пример”
Ако
ТВ поддържа
резолюция до 576P(480P):
Натиснете SD/HD
Example: If the видео
TV supports
resolution
up to 576P(480P):
• 576P(480P)
сигнал
се излъчва
чрез HDMI изход.
• Ако ТВ не поддържа избраната резолюция, няма да
Press the SD/HD button.
виждате картината правилно.
CONNECTIONS
HDMI Audio
Audio вл./изкл.
HDMI
ON/OFF function
HDMI
HDMI функция
Function
• A 576P(480P) video signal is output through the HDMI output.
• If the TV does not support the configured resolution, you will not be able
to see the picture properly.
• AUDIO OFF : Video is transmitted over the HDMI connection cable only,
and audio is output through the home theater speakers only.
Важно
• Фабричната
настройка
е на HDMI AUDIO OFF – изкл.
Note • The default
setting value of this product is HDMI AUDIO OFF.
• HDMI AUDIO автоматично се преработва за 2ch за ТВ.
• HDMI AUDIO is automatically down-mixed to 2ch for TV speakers.
• Ако изкл. уреда и го включите пак когато HDMI AUDIO е
• If you turn the unit off and on, or switch functions when the HDMI
настроен на ON, HDMI AUDIO автоматично се настройва на
AUDIO is set to ON, the HDMI AUDIO is automatically set to OFF.
OFF.
Важно
Note
• Тъй
като• Since
този уред
има вградена
VideoVideo
Upscaler
функция
this product
has an embedded
Upscaler
function сwith
Faroudja DCDi
технология,
можеitда
DVD
Faroudja
DCDi technology,
canизползва
enhance a576i(480i)
576i(480i) DVD
to 576P(480P)/720p/1080i.
резолюцияresolution
за изходoutput
576P(480P)/720p/1080i.
• Не е необходимо
правите
настройки,
тъй като
• You do notда
have
to make допълнителни
separate adjustments,
since the Home
системата Theater
може автоматично
да се самоadjust
нагласи
на оптималните
and TV will be automatically
themselves
to the
настройкилoptimal resolution and aspect ratio if connected to HDMI. (If the TV
ако е свързано
HDMI.
ТВHDMI
е HDTV
има
HDMI
Input жак,
is an HDTV
and(Ако
has an
Input и
jack,
output
is automatically
1080i resolution
supported by the
изходният converted
формат to
автоматично
се(ifконвертира
на TV).)
1080i
резолюция
(ако
се поддържа
от ТВ.)
• For
component
video output,
only 576i(480i) is supported.
• За component video output, само 576i(480i) се поддържа.
• When both HDMI and COMPONENT jacks are connected,
• Когато HDMI и COMPONENT жаковете са свързани,
COMPONENT video is not displayed.
COMPONENT video не се показва.
• See your TV owner's
for more
information on how to select
• Вижте инструкцията
за ТВmanual
за повече
информация.
the TV's Video Input source.
19
20
01_XQ100/TXQ100_GB
2006.4.15
3:41 PM
Page 24
Свързване External
на външен
елемент
Connecting
Components
FM
антенаthe FM Antenna
Connecting
BG
Свързване на външен дигитален, аналогов, елемент
Connecting
an сигнали
External
Digital
/ Analog Component
Пример:
Дигитални
като
от Видео.
Example: Digital signal components such as a Set-Top Box or CD Recorder.
Analog signal components such as a VCR.
CONNECTIONS
FM Antenna (supplied)
Audio Cable
Optical Cable
(not supplied)
(not supplied)
If the external analog
component has only one
Audio Out, connect either left
or right.
1
Connect the Digital Input (OPTICAL) to the Digital Output on the external digital component.
2
Свъуржете AUX (Audio) In от уреда към Audio Out на външен аналогов компонент.
. Уверете
се че
цветовете
съвпадат.
Connect
AUX
(Audio)
In on the
Home Theater to Audio Out on the external analog component.
3
Натиснете AUX бутона от дистанционното за да изберете .AUX. вход.
. Можете да използвате FUNCTION от основният уред.
Press AUX on the remote control to select ‘DIGITAL IN / AUX’ input.
Режима се сменя п следният начин: DVD • D.IN • AUX • USB • FM
Свържете дигиталният вход (OPTICAL) към изхода на дигиталният компонент.
Свържете
FM 75Ω
COAXIAL
1 Connect
theFM
FMантената
antenna към
supplied
to the
FM 75Ωтерминала.
COAXIAL terminal.
Бавно преместете антената около вас за да намерите по-добър сигнал, после я фиксирайте.
move the antenna wire around until you find a location where reception is good, then
2 Slowly
fasten it to a wall or other rigid surface.
• Be sure to match connector colors.
• Each time the button is pressed, the selection changes as follows: D.IN
• You can also use the FUNCTION button on the main unit.
➝ AUX
The mode switches as follows: DVD ➝ D.IN ➝ AUX ➝ USB ➝ FM
Важно
can connect
the Video
Output
on your VCR
to към
the TV,
connect the
Audio
• You
. Вие
можете
да свържете
Video
Output
жакаjack
на вашето
видео
ТВand
и свържете
Audio
Output жака
Note
Output
jacks on the VCR to this product.
от видеото към
продукта.
21
Вентилатор
Cooling Fan
Вентилатора предоставя свеж въздух към уреда за да се избегне
прегряване.
The cooling fan supplies cool air to the unit to prevent overheating.
Моля, внимаайте за следните неща.
.Please
Уверете
се уреда
е добре проветрен.
е слаба,
observe
the following
cautions for Ако
yourвентилацията
safety.
температурата в уреда може да се повичши прекалено и да повреди уреда.
• Make sure the unit is well-ventilated. If the unit has poor ventilation, the temperature inside the unit could rise
. Не
пречете на вентилатора или вентилационните дупки. (Ако вентилатора
and may damage it.
или
отворите
покрити
с вестници
и парцали,
даholes
сеare
повиши
• Do not
obstruct the са
cooling
fan or ventilation
holes. (If the
cooling fan or може
ventilation
covered with a
температурата
и да
получи
или
newspaper or cloth, heat
mayсе
build
up inside повреда
the unit and fire
mayпожар.
result.)
Важно:
Notes • This unit does not receive AM broadcasts.
Уреда не приема AM честоти.
22
01_XQ100/TXQ100_GB
2006.4.15
3:41 PM
Page 26
Преди да използВате Вашата система за
домашен
театър
Before Using
Your Home Theater
BG
Your Home Theater is capable of playing DVD, CD, MP3/WMA and JPEG discs.Depending on the disc you are
Вашата
система може да възпрозиведе DVD, CD, MP3/WMA и JPEG
using, these instructions may vary slightly. Read the instructions carefully before using.
дискове. В зависимост от типа на диска, инструкциите може да варирата.
Да
DVD
c едно
дистанционно
To управлявате
Operate the TV
TV uand
DVD
Player
with a Single Remote Control
1
Включете
уреда
Plug the main
unit'sкъм
power
cord into the AC power
контакта.
4
Натиснете
TV/VIDEO
Press TV/VIDEO
button to
бутона
за
да
select VIDEO преминете
mode on
на
видео
your
TV. канала.
supply.
5
Натиснете
receiver
Press DVDDVD
RECEIVER
заbutton
да преминете
to switch toна
DVD
приемника.
RECEIVER mode.
3
Press the POWER
Натиснете
Powerbutton
за даto
turn on yourуреда.
Samsung TV
включите
6
Press FUNCTION
button
on
Натиснете
FUNCTION
бутона
от
за or
да DVD
активирате
theудереда
main unit
button
DVD/CD
възпрозивеждане.
on the remote
to enable
with this remote.
OPERATION
2
Натиснете
бутона
Press TV button
to setза
the
да
преминете
на ТВ
remote to TV mode.
режим.
DVD/CD playback.
VIDEO
23
Избор на видео формат
Selecting the Video Format
Натиснете и задръжте NT/PAL бутона от дистанционното за
Press and
NT/PAL
on the
remote controller for over 5 seconds
повече
от 5hold
сек,
когатоbutton
уреда
е изключен.
while the power is turned off.
• По подразбиране, видео системата е "PAL".
the "PAL"
video format
to "PAL".
• By default,
• "NTSC"
или
ще is
сеsetпояви
на екана. По това време,
"NTSC"
or
"PAL"
will
appear
in
the
display.
thisизберете
time, press the
NT/PAL иbutton
•
натиснете
NT/PAL бутона кратко
заAtда
"NTSC"
"PAL".
shortlyстрана
to select има
between
"NTSC"
and "PAL".
• Всяка
свой
видео
формат стандарт.
country has
a different video format standard.
• Each
• За
нормално
възпроизвеждане,
видео формата на диска
playback,
the video
format
of the формата
disc must be на
the same
трябва
да бъде
същият
като
видео
ТВ. as the video
• For normal
format of your TV.
Важно
Note за ТВ операции: POWER, CHANNEL, VOLUME, TV/VIDEO и цифрови
Бутони
бутони
0-9
Enabled for TV Operation: POWER, CHANNEL, VOLUME, TV/VIDEO, and Numeric (0-9) buttons.
• Buttons
Дистанционното
може
даis рабои
с with
ТВ Samsung
Самсунг.
control
set to work
TVs.
• By default, the remote
Вижте
стр 69
69forзаmore
повече
информация
относно
операциите.
See page
information
about remote control
operation
with other manufacturer's TVs.
24
01_XQ100/TXQ100_GB
2006.4.15
3:41 PM
Page 28
Преди да използВате Вашата система за
Before Using
Your Home Theater
домашен
театър
Диск
Disc възпрозивеждане
Playback
BG
Терминология
Disc terminology
Groups
and tracks
(DVD-AUDIO)
Групи
и песни
(DVD-AUDIO)
• DVD-audio
разделен
на няколко
големи
части
наречени
групи, и по-малки
into several
large sections
called
"groups"
and
• DVD-audio isе divided
smaller sections
"tracks".
Numbers are номера.
allotted to these
наречени
песни.called
На тях
са раздадени
Те сеsections.
казват група и песни
These numbers are called "group numbers" and "track numbers".
номера
GROUP 1
TRACK 1
TRACK 2
1
Load
a disc vertically into
the Disc
1.
Поставетедиска
вертикално
в
Insert
Hole.
уреда.
• Insert a disc so that the label side faces forward.
GROUP 2
TRACK 3
TRACK 1
TRACK 2
DVD
VCD
CD
• Playback starts automatically.
възпрозивеждането
започва автоматично.
Titles and
chapters (DVD-VIDEO)
Заглавия
и глави
into several
large sections
called "titles"
and smaller
• DVD-video
разделено
на няколко
по-големи
секции,
които се наричат
• DVD-video isе divided
sections called
"chapters".
Numbers are
allotted to these
sections.
"заглаВия"
и "глаВи".
Номерата
определят
секциите.
These
numbers
called "title
numbers" номера"
and "chapter
numbers". на глаВи".
Тези
номера
се are
наричат
"заглаВни
и "Номера
CHAPTER 2
TITLE 2
CHAPTER 3
CHAPTER 1
CHAPTER 2
Tracks(Video
(Video
music
Песни
и and
music
CDs)CDs)
Video
and
music
CDs
are
divided
into sections
called "tracks".
• Video
и
music
CDs
са
разделени
на секции
наречени песни. На тях са
•
Numbers are
allotted to
sections. и
These
numbers
are called
раздадени
номера.
Теthese
се казват
песни
номера
"track numbers".
TRACK 1
TRACK 2
TRACK 3
TRACK 4
TRACK 5
Файлове (DivX)
Files (DivX)
• DivX дисковете са разделени на секции наречени
• DivX is divided into sections called "files".
фаплоВе.
are allotted
to theseсекция
sections.
numbers are called
ТеNumbers
са номерирани
и Всяка
сиThese
има фаплоб
"file numbers".
номер.
FILE 1
OPERATION
TITLE 1
CHAPTER 1
2
За
да извадите
диска
To eject
the disc, press
the натиснете
EJECT
button
бутона EJECT
FILE 2
Важно:
В зависимост от съдържанието на диска, първоначалният екран
може
Depending on the content of the disc, the initial screen may appear different.
Noteда е• различен.
Но межете
да възпроизявждате
пиртски
копияOtherwise,
на уреда.
piracy could not be runnable
in the player.
it violates the CSS
• Any
recommendations.
Важно
Caution • Avoid getting fingerprints on the writing surface of a disc.
Избягвайте да
оставяте
пръстите си, това
It may
cause theотпечатъци
disc to not read от
properly.
може да повреди диска.
Ккаво е CSS (Content Scrambling System)?
What
is CSS
(Content
Scrambling System)?
CSS
е уред
който
предотвратява
копирането на DVD
The
CSS
is
a
copy
protection
that prevents
the content
of
съдържание на паметта на device
компютър,
за разлика
от други
a DVD from being copied into the HDD of the PC as it is, unlike
приложения се използва директно от компютър.
other media, executable directly from the PC. And it is also a data
Това
е и криптиране на информация, която криптира
decryption system that decrypts the key encryption with the
информация
отkey
DVD
заглавие
и декриптира
encrypted title
(of the
DVD title)
and the player за
keyDVD
(of the
плейъра.
DVD player).
Важно
Note
• In this manual, the instructions marked with "DVD ( DVD
25
)" are applicable
• В тази
инструкция,
описанията
маркирани
с "DVD ( )" са приложими
to DVD-VIDEO,
DVD-AUDIO,
and DVD-R/RW
discs.
за DVD-VIDEO,
DVD-AUDIO,
DVD-R/RWit дискове.
Where a particular
DVD type иis mentioned,
is indicated separately.
Когато
определен
DVDof тип
диск
е обозначен
отделно.
on the content
the disc,
the initial
screen may appear
different.
• Depending
• В зависимост от съдържанието на диска, екрана може да бъде
различен.
26
01_XQ100/TXQ100_GB
2006.4.15
3:41 PM
Page 30
Информация на екран за диска
MP3/WMA
Възпроизвеждане
MP3/WMA-CD
Playback
Displaying Disc Information
Data(CD-ROM,
CDs (CD-ROM,
CD-R,
CD-RW)
encoded
in MP3/WMA
format
can be
played.
CDs
CD-R,
CD-RW)
кодирани
като
MP3/WMA
формат
могат
да се възпроизведат.
1
Поставете диска
Load the MP3/WMA
вdisc.
уреда.
MP3/WMA
menuнаscreen
will appear
•I •The
менкзто
на МРЗ
се пояВи
на
and playback
will start.
екрана
и ще започне
The appearance of the menu depends on
•ВъзпроизВеЖдане.
I •the
менкзто
заВиси
MP3/WMA
disc.от типа диск.
WMA-DRMне
files
be played.
сеcannot
възпрозивежда
•WMA-DRM
2
YouмоЖе
can view
playback information
on за
theдиска
TV screen.
Вие
да disc
получаВате
информация
на екрана.
In Stop
mode,
use
При
спял
реЖим,
to
select
изберете албум, и
the album,ENTER
and then
натиснете
press
the
ENTER
бутона.
Натиснете INFO бутона.
INFOкогато
button.
• Press
Всеки път,
натиснете бутона, дисплея се променя както следба:
• Each time the button is pressed, the display changes as follows:
button.
DVD
to стрелките
select the track.
• Use
Използвайте
надолу/
нагоре за да изберте.
VCD
CD
MP3
3
4
•
4. Натиснете STOP
бутона
на
Pressза
theкрай
STOP
ВъзпроизВеЖдане.
button to stop
Информация екрана се маха
The information Display disappears from the screen
playback.
ENTER button.
Важно
Note
• В зависимост от диска,
информацията
theпояВяВа
disc, the disc
• Depending on се
различно.
information display may appear
• В зависимост от диска, се
different.
пояВяВат : DTS, DOLBY DIGITAL,
on the disc, you can
• Depending
или
PRO LOGIC.
also select DTS, DOLBY DIGITAL,
or PRO LOGIC.
select
anotherдруг
album
and track,
•заToда
изберете
албум
и запис,
repeat Steps
2 and23иabove.
повторете
стъпка
3
Важно:
Note • Depending on the recording mode, some MP3/WMA-CDs may not be played.
•В зависимост
от реЖима
на of
запис,
някоиvaries
МРЗ-CDs
могатonда
се Възпроизвеждат.
of contents
a MP3-CD
depending
theнеMP3/WMA
track
• Table
•прегледайте таблицата за типа MP3-CD дискове, които се Възпроизвеждат
format recorded on the disc.
нормално.
part of the menu.
music files
only, select the
Icon.
• Toзаplay
Само
музикални
файлове
image files only, select the
Icon.
Само
да снимки
• Toзаview
Само
Видео
файлове
movie
files only, select the
Icon.
• Toзаview
За Всички файлове
Icon.
• To select all files select the
27
JPEG
Информация от екрана.
The information Display disappears from the screen
този
симВол
се the
пояВи
екран докато натискате бутона тоВа
appears
on
TVнаscreen!
че функцията
е достъпна
за съответният
режим.
If thisозначаВа
symbol appears
on the TVне
screen
while buttons
are being operated,
that operation is not possible with the disc currently being played.
Какво
a Group?
• Whatеisгрупа?
A section
of tracksотcontained
in a DVD-AUDIO
disc.
Част
от песните
диск групирани
в група.
Какво
е
заглавие?
What
is
a
Title?
•
Филм
съдържащ
диска
A movie
contained се
in aвDVD-VIDEO
disc.
Какво е глава?
What
is
a
Chapter?
•
Всяка
глава от диска е разделена на няколко по-малки секции
Each title on a DVD disc is divided into several smaller sections called
наречени
"chapters".глави.
Какво е песен?
Track (File)?или друг диск.
• What isотaмузикален
секция
A section of video or a music file recorded on a DVD-AUDIO, CD, or MP3CD.
Екран
дисплей
Screen
Display
За
възпроизведете
като изберете иконата му.
To да
play
a file icon inфайл
the screen,
Press theбутоните В спрян
buttonреЖим
when за
it isдаin stop
Натиснете
status and
select aикона
desired icon from the top
изберете
Желаната
DivX
музикални
• Music File Icon
фаплоВе
• Image File Icon
снимки файлове
Icon
• Movie File
Видео
файлобе
За
File Icon фаплове
• AllВсички
DVD display
TITLE display
VCD display
GROUP display
CD display
CHAPTER display
DVD DVD-AUDIO display
AUDIO
TRACK (FILE) display
ELAPSED TIME display
STEREO (L/R) display
REPEAT PLAYBACK display
DOLBY DIGITAL display
AUDIO LANGUAGE display
ANGLE display
SUBTITLE display
28
OPERATION
Информация от екрана.
The information Display disappears from the screen
To да
change
the album,
За
промените
use
to
албума, изберете
select
another
album
друг албум, и
in Stop mode,
and
натиснете
ENTER
then press the
бутона.
BG
01_XQ100/TXQ100_GB
2006.4.15
3:41 PM
Page 32
Възпроизвеждане JPEG
диск
JPEG File Playback
JPEG
Images captured with a digital camera or camcorder, or JPEG files on a PC can be stored on a CD and then
Снимки
записани на диск от камера могат да се възпрозиведат на тази система.
played back with this Home Theater.
1
Поставете диска в уреда.
Press DIGEST
button during
playback.
2
• JPEG files will be shown in
Press Cursor , , , buttons
to select the desired image and
then press ENTER button.
• The selected image is played for 5 seconds before moving
9 windows.
to the next image.
Load the JPEG disc.
Натиснете SLIDE MODE бутона.
Press SLIDE MODE button.
Възпрозивеждането
започва автоматично.
• Playback starts automatically.
С• всяко
натискане
на isбутона
щеthe
сеimage
сменят
режимите
Each time
the button
pressed,
makes
the transition as follows:
To view the previous or next image with 9 windows, press
.
OPERATION
2
You can view 9 JPEG images on the TV screen.
1
Slide Mode
BG
Digest
функция
Digest Function
Rotate/Flip Function
From
top to
bottom
От
горе
надолу
От долу нагоре
From bottom to top
Press Cursor
,
,
,
buttons during playback.
Правоъгълно
в in
центъра
Rectangular shape
the center
Вертикален
ефект
Vertical blinds effect
button: Flip Vertically
Слайдовете ще се показват в разбъркан
Each time a new image is displayed, slide modes
ред
(1~11) will be applied randomly and automatically.
Отмяна на режим за слайдовете
button: Rotate 90°
Counterclockwise
Cancels the slide mode.
button: Rotate 90° Clockwise
Original Image
button: Flip Horizontally
Press
to skip to the next slide.
• Each time the button is pressed, the slide moves backward or forward.
29
Note
• The maximum resolutions supported by this product are 5120 x 3480 (or 19.0 MPixel) for
standard JPEG files and 2048 x 1536 (or 3.0 MPixel) for progressive image files.
30
01_XQ100/TXQ100_GB
2006.4.15
3:41 PM
Page 34
DivX
DivXВъзпроизвеждане
Playback
• The functions on this page apply to DIVX disc playback.
Press the SUBTITLE button.
Skip Forward/Back
During playback, press the
button.
• Goes to the next file whenever you press
•
BG
Subtitle Display
button, if there are over
2 files in the disk.
Goes to the previous file whenever you press
over 2 files in the disk.
button, if there are
• Each time you press the button, your selection will toggle between “SUBTITLE (1/1, 1/2 ...)” and “SUBTITLE OFF”.
• If the disc has only one subtitle file, it will be played automatically.
• See number 2 (Caption Function) below for more details concerning Subtitle usage with DIVX discs.
Audio Display
Press the AUDIO button.
• If there are multiple audio tracks on a disc, you can toggle between them.
• Each time you press the button, your selection will toggle between “AUDIO (1/1, 1/2 ...)” and
Fast playback
To play back the disc at a faster speed,
press
or
during playback.
follows:
2x ➞ 4x ➞ 8x ➞ 32x ➞ Normal.
•"
”.
" is displayed when there is one supported language in the disc.
DivX(Digital internet video eXpress)
DivX is a video file format developed by Microsoft and is based on MPEG4 compression technology
to provide audio and video data over the Internet in real-time.
MPEG4 is used for video encoding and MP3 for audio encoding so that the users can watch a movie
at near DVD-quality video and audio.
1. Supported Formats
• This product only supports the following media formats.If both video and audio formats are not
5 Minute Skip function
During playback, press the
,
supported, the user may experience problems such as broken images or no sound.
button.
• Playback skips 5 minutes forward whenever you press
• Playback skips 5 minutes back whenever you press
●
Format
Supported Versions
button.
button.
●
1
2
Press Cursor , ,
, buttons to
move to the area
you want to enlarge.
• Each time you press the button,
your selection will toggle between
“ZOOM X2” and “ZOOM OFF”.
Note
31
DIVX file can be zoomed only in ZOOM X2 mode.
•Важно:
файловете
могат
да се however,
уВеличаВат
само
X2.
DivX files
have .Avi file
extensions,
not all .Avi
filesZOOM
are DivX
•DIVX
Повечето
файлове
имат
and may not
be playable
in this.Avi
unit.разширение, обаче не всички и за това те може да не
могат да се възпроизведат.
AVI
DivX3.11 ~ 5.1
WMV
V1/V2/V3/V7
Supported Audio Formats
Format
Bit Rate
Sampling Frequency
Zoom Function
Press ZOOM
button.
Supported Video Formats
MP3
WMA
80~384kbps
56~128kbps
44.1khz
AC3
128~384kbps
44.1/48khz
• Aspect Ratio: Although default DivX resolution is 640*480 pixels (4:3), this product supports up to
720*480 pixels (16:9). TV screen resolutions higher than 800 will not be supported.
• When you play a disc whose sampling frequency is higher than 48khz or 320kbps, you may
experience shaking on the screen during playback.
2. Caption Function
• You must have some experience with video extraction and editing in order to use this feature properly.
• To use the caption function, save the caption file (*.smi) in the same file name as that of the DivX
•
media file (*.avi) within the same folder.
Example. Root
Samsung_007CD1.avi
Samsung_007CD1.smi
Up to 60 alphanumeric characters or 30 East Asian characters (2 byte characters such as Korean and
Chinese) for the file name.
32
OPERATION
• Each time you press either button, the playback speed will change as
Note
“
01_XQ100/TXQ100_GB
2006.4.15
3:41 PM
Page 36
ПроВерка
на оставащото
време
Checking the
Remaining Time
Бързо/бавно
Fast/Slow Playback
Възпроизвеждане
Fast Playback
DVD
VCD
CD
Slow Playback
MP3
Press the REMAIN button.
Press
• For checking the total and remaining time of a title or chapter
• Each time the button is pressed during playback,
being played.
BG
.
Press SLOW button.
• Each time the button is pressed during playback,
the playback speed changes as follows:
the playback speed changes as follows:
DVD
VCD
DivX
Each time the REMAIN button is pressed
DVDAUDIO
TITLE ELAPSED
GROUP ELAPSED
TITLE REMAIN
GROUP REMAIN
CHAPTER ELAPSED
TRACK ELAPSED
CHAPTER REMAIN
TRACK REMAIN
Notes
•
Note
• No sound is heard during slow play-
During fast playback of a CD or MP3-CD, sound is heard
only at 2x speed, and not at 4x, 8x, and 32x speeds.
• Reverse slow playback does not
back and step motion playback.
work with DivX.
Skipping Scenes/Songs
Прескачане
на сцени/записи
Press
VCD
CD
MP3
TRACK ELAPSED
TRACK REMAIN
TRACK REMAIN
TRACK ELAPSED
.
• Each time the button is pressed briefly during playback, the previous or next chapter, track,
or directory (file) will be played.
• You cannot skip chapters consecutively.
DVD
VCD
MP3
TITLE 01/05 CHAPTER 002/040
TOTAL ELAPSED
TOTAL REMAIN
TITLE 01/05 CHAPTER 004/040
• When watching a VCD with a track
33
longer than 15 minutes, each time
is pressed, playback
will skip back or forward 5 minutes.
34
OPERATION
DVDVIDEO
01_XQ100/TXQ100_GB
2006.4.15
3:41 PM
Page 38
Повторение
Възпроизвеждане
Repeat
Playback
Repeat playback
allows you to repeatedly
a chapter, title,
track (song), or
directory
(MP3 file).
Повторение
ВъзпроизВеЖдане
Виplay
позВоляВа
да повтаряте
глаВа,
запис,
заглаВие,
песен или директория.
DVD
VCD
CD
MP3
MP3
DVDAUDIO
JPEG
BG
You can
repeatedly
play b
a designated section
of a DVD.
Вие
моЖе
поВтаряте
иackопределен
участък
от диска.
JPEG
Натиснете REPEAT бутона.
PressпътREPEAT
button.
• Всеки
когато натискате
този бутона по Време на ВъзпроизВеЖдане праВите следните
• Each time the button is pressed during playback, the repeat playback mode changes as follows:
промени:
DVDVIDEO
А-В
A-BПобторение
Repeat Playback
VCD
Повтаряне
опцииOptions
Repeat Playback
CD
1
VCD
Press INFO button
twice.
2
Press Cursor button
to move to REPEAT
PLAYBACK ( ) display.
4
Press ENTER
button at the end
of the desired
segment.
• For a VCD, press INFO button
once.
3
Press Cursor , buttons
to select ‘A-’and then press
ENTER button at the beginning
of the desired segment.
• When ENTER button is pressed,
the selected position will be stored
in memory.
• The specified segment will be
played repeatedly.
A-
A-B
REPEAT : A—B
A -?
REPEAT : A—
To Select a Repeat Playback Mode in the Disc Information Screen
Важно
• Повторение
Note
ВъзпроизВеЖдане
е
операция при дискоВе
• Repeat
Версия
2.0 playback operation is
not possible
version 2.0
VCD ако
РВС еwith
Вклкзчен.
discs if PBC is turned on.
За да VCD
използвате
тази
To use Repeat Playback on a
функция
VCD with PBC, you should set
При VCD
c to РВС,
the PBC
OFF in Вие
the disc
(See page 44.)
трябваmenu.
да изклкзчите
РВС от менкзто
1
2
3
4
Press INFO button twice.
Press Cursor button to move
to REPEAT PLAYBACK ( )
display.
Press Cursor button to select
the desired Repeat Playback
mode.
Press ENTER button.
To return to normal playback, press Cursor
buttons to select
OFF.
DVD
VCD
CD
,
Важно:
Note
тази
функция няма да работи, ако диска е с
The
A-B Repeat
function does not operate with MP3 or JPEG discs.
•
МРЗ или
JPEG
MP3 and JPEG discs, you cannot select Repeat
* For
Play from the information display screen.
35
36
OPERATION
CHAPTER
Глава
Repeatedly
plays
the selectedглаба
chapter.
Побтаря
само
избраната
Заглавие
TITLE
Многократно
побтаря
избраното
Repeatedly plays
the selected
title.
заглавие
GROUP
GROUP
Repeatedly plays the
selected group.
Продължително
повтаряне
на
избрана
група.
RANDOM
RANDOM
Plays tracks in random order.
Възпроизвежда
записите
разбъркан
(A track that has already
been вplayed
may be
played again.)
ред.
Запис
TRACK
Многократно повтаря избрания запис
Repeatedly plays the selected track.
DIR
DIR
Многократно
повтаря избраната
Repeatedly plays all tracks in the selected folder.
директория
DISC
DISC
Многократно
повтаря
избрания
диск
Repeatedly plays
the entire
disc.
OFF
OFF
Отмяна
Cancels Repeat Playback.
DVD
01_XQ100/TXQ100_GB
2006.4.15
3:41 PM
Page 40
Step
Stepфункция
Function
DVD
Zoom
Zoom функция
(Screen Enlarge) Function
VCD
This function allows you to enlarge a particular area of the displayed image.
DVD
BG
VCD
Press STEP button.
• The picture moves forward one frame each time the button is pressed
1
during playback.
Note
• No sound is heard during slow playback and step motion
playback.
Press ZOOM
button.
2
Press Cursor , ,
, buttons to
move to the area
you want to enlarge.
3
Press ENTER
button.
• Each time the button is pressed,
the zoom level changes as follows:
SELECT ZOOM POSITION
Angle Function
DVD
This function allows you to view the same scene in different angles.
2
Press Cursor
button to move to
ANGLE ( ) display.
1/3
3
1/3
Press Cursor , or numeric buttons to
select the desired angle.
• Each time the button is pressed, the angle changes as follows:
1/3
Note
OPERATION
1
Press INFO button.
• When a DivX disc is being played, only the 2:1 zoom-in is available.
EZ
EZ VIEW
VIEWФункция
Function
DVD
Press EZ VIEW button.
• Each time the button is pressed, the zoom function will switch between On
and Off.
• When a movie is played in Widescreen format, black bars at the top and
bottom of the TV screen can be removed by pressing the EZ VIEW button.
2/3
3/3
EZ VIEW
EZ VIEW OFF
Note
Note
• The Angle function works only with discs on which multiple
angles have been recorded.
37
• This function will not work if the DVD is recorded with multi-camera angle format.
• Black bars may not disappear because some DVD discs have a built-in horizontal to vertical ratio.
• This feature is not supported for DivX discs.
38
01_XQ100/TXQ100_GB
2006.4.15
3:41 PM
Page 42
Бонус
страници
Bonusгрупа/Навигационни
Group / Navigating
Pages
Бонус
Bonusгрупа
Group
Избор
на Audio/Subtitle
ayguo/субтитри
език
Selecting
Language
Audio Language Selection Function
DVDAUDIO
Някой DVD-Audio
дискове
имат
0 бонус,
който
Some DVD-Audio
discs have
an допълнителни
extra ‘bonus’ groupпесни
that requires
a 4-digit
key можете да
чуете ако
въведете
4 See
цифрен
код.
Вижтеforопаковката
на диска
за повече инфо.
number
to access.
the disc
packaging
details and the-key
number.
Когато се възпроизвежда такав диск, на екрана
When you play a DVD-Audio disc that has a
ще се появи поле за да въведете номерата.
1
Press INFO button
twice.
2
BG
DVD
Press Cursor ,
buttons or numeric
buttons to select the
desired audio language.
• Depending on the number of languages on a
bonus group, the key number input screen
appears automatically.
DVD disc, a different audio language
(ENGLISH, SPANISH, FRENCH, etc.) is
selected each time the button is pressed.
SP 2/3
FR 3/3
BONUS GROUP
OPERATION
KEY NUMBER :
Subtitle Language Selection Function
Важно
Note
Ако извадите диска, изключите уреда от контакта ще трабва да
въведете
отново.
the disc, switch
the power off, or unplug the player, you will need to re-enter
• If you ejectномерата
1
Press INFO button
twice.
3
Press Cursor
button or numeric
buttons to select
the desired subtitle.
2
the key number.
Навигационни
страници
Navigating Pages
DVD
Press Cursor
button to move to
SUBTITLE ( )
display.
DVDAUDIO
По време на възпроизвеждане натиснете During
During playback,
press theот
TUNING/CH
button
playback,
press TUNING/CH
дистанционното.
on the remote control.
Можете
изберете
желаните
от диска.
select
the desired
image fromснимки
a DVD-Audio
disc containing still images.
• You canда
some
discs, you
may not
to select
• With
С
някой
дискове
може
да be
неable
можете
даimages.
ги изберете.
EN 1/3
EN 01/ 03
OFF
Note
• To operate this function, you can also
•
press the Select AUDIO or Select
SUBTITLE buttons on the remote control.
Depending on the disc, the Subtitle
and Audio Language functions may
not be available.
SP 02/ 03
FR 03/ 03
OFF / 03
39
40
01_XQ100/TXQ100_GB
2006.4.15
3:41 PM
Page 44
Възпроизвеждане на медия файлове
чрез
функцията
PlayingUSB
MediaHOST
Files using
the USB HOST feature
BG
Можете
даenjoy
се насладите
наasмедия
филми,
запазени
MP3 in
плейър,
You can
media files such
pictures,файлове
movies andкато
musicкартинки,
saved in an MP3
player,музика
USB memory
or digitalвcamera
high
USBquality
памет
или
дигитална
камера
с високо
с 5.1
канален
чрез
на външни
video
with
5.1 channel home
theater
sound by качество
connecting the
storage
device toзвук,
the USB
portсвързване
of the home theater.
уреди къмсистемата.
1
Свържете
USB
Connect the
USB
уреда към USB
device to the USB
порта на уреда.
port on the side of
the unit.
2
Compatible Devices
1. USB devices that support USB Mass Storage v1.0.
(USB devices that operate as a removable disk in Windows
(2000 or later) without additional driver installation.)
2. MP3 Player: HDD and flash type MP3 players.
3. Digital camera: Cameras that support USB Mass Storage v1.0.
• Cameras that operate as a removable disk in Windows (2000 or later) without additional driver installation.
4. USB HDD and USB Flash Drive: Devices that support USB2.0 or USB1.1.
• You may experience a difference in playback quality when you connect a USB1.1 device.
• For a USB HDD, make sure to connect an auxiliary power cord to the USB HDD for proper operation.
5. USB card Reader: One slot USB card reader and Multi slot USB card reader
• Depending on the manufacturer. the USB card reader may not be supported.
• If you install multiple memory devices into a multi card reader, you may experience problems.
6. If you use a USB extension cable, the USB device might not be recognized.
Натиснете
FUNCTION
Press the FUNCTION
бутона
USB
button или
on the
main
бутона
unit or на
the USB button
дистанционното
за да
on the remote control
изберете
режим.
to select USB
the USB
mode.
•USB
появява
onна
theекрана
displayиscreen
• “USB”сеappears
изчезва.
and then disappears.
• USB MENUscreen
се появява
on theнаТВ
TV
• USB MENU екранаappears
и файла се възороизвежда.
screen and the saved file is played.
Music
Безопастно
Safe USB изваждане
Removal на USB уреда.
За
да предпазите
повреда
уредите,
изключете
уредите
To prevent
damage to theот
memory
stored in
the USB device,
perform safe
removal
before disconnecting
the USB cable.
преди
да ги извадите
от USB порта.
(1)(1)Натиснете
два пъти
поред.
Press the Stop
Stop бутона
button twice
in a row.
Екрана
ще
покаже
• USB.➞ USB.
The
display
willREMOVE
show REMOVE
(2) Манете USB кабела.
Movie
•
•
File
extension
JPG
JPG .JPEG
MP3
.MP3
WMA
.WMA
56~128kbps
V8
–
44.1kHz
VCD
MPG.MPEG .DAT
1.5Mbps
VCD1.1,VCD2.0
320*480
44.1KHz
Bit rate
Sampling
Frequency
Version
Pixel
–
–
640*480
–
80~384kbps
–
–
44.1kHz
WMV
.WMV
4Mbps
V1,V2,V3,V7
720*480
44.1KHz~48KHz
DivX
.AVI,.ASF
4Mbps
DivX3.11~DivX5.1,Xvid
720*480
44.1KHz~48KHz
• Digital Cameras that use PTP protocol or require additional program installation
when connected to a PC are not supported.
• A device using NTFS file system is not supported.
(Only FAT 16/32 (File Allocation Table 16/32) file system is supported.)
Skip Forward/Back
When there is more than one file, when you press the
When there is more than one file, when you press the
File name
• CBI (Control/Bulk/Interrupt) is not supported.
(2) Remove the USB cable.
During playback, press the
Supported Formats
Still Picture
За
спрете
възпрозивеждането,
натиснете
STOP ( ) бутона.
Toда
stop
playback,
press the STOP
( ) button.
OPERATION
●
button.
button, the next file is selected.
button, the previous file is selected.
Fast playback
To play back the disc at a faster speed, press
• Some MP3 players, when connected to this product,may not operate depending
on the sector size of their file system.
• The USB HOST function is not supported if a product that transfers media files by
its manufacturer-specific program is connected.
• Does not operate with Janus enabled MTP(Media Transfer Protocol) devices.
or
• Each time you press either button, the playback speed will change as follows:
during playback.
• The USB host function of this product does not support all USB devices.
For information on the supported devices, see pages 75.
2x ➞ 4x ➞ 8x ➞ 32x ➞ Normal.
41
42
01_XQ100/TXQ100_GB
2006.4.15
3:41 PM
Page 46
Директен
достъпto
доaпесен/сцена
Moving Directly
Scene/Song
Използване
наMenu
меню
Using Disc
BG
DVD
You can use the menus for the audio language, subtitle language, profile, etc.
DVD menu contents differ from disc to disc.
DVD
1
CD
Moving to a Title/Track
2
Press INFO button.
01/05
001/040
0:00:37
1/1
Press Cursor , buttons
or numeric buttons to select
the desired title/track and then
press ENTER button.
03/05
001/002
0:00:01
Moving to a Chapter
Press Cursor ,
buttons to move to
Chapter ( ) display.
3
1
In Stop mode,
press MENU
button.
• When playing a VCD (version
2.0), this toggles between PBC
ON and OFF.
1/1
01/05
001/040
0:00:01
Press Cursor ,
buttons or numeric buttons
to select the desired
chapter and then press
ENTER button.
01/05
025/040
0:00:01
5
1/1
Press Cursor ,
buttons to move to
time display.
supported by the disc, the "This menu is not supported" message appears on the screen.
• Press ENTER button.
ENTER
MOVE
EXIT
ENTER
EXIT
Moving to a Specific Time
6
Press the numeric
buttons to select the
desired time and then
press ENTER button.
Note
• Disc menu display may be different depending on the disc.
PBC (Playback Control) Function
When playing a VCD (version 2.0), you can select and view various scenes according to the menu screen.
PBC ON: This VCD disc is version 2.0. The disc is played back according to the menu screen. Some functions
may be disabled. When some functions are disabled, select "PBC OFF" to enable them.
PBC OFF: This VCD disc is version 1.1. The disc is played back in the same way as with a music CD.
01/05
025/040
1:17:30
1/1
01/05
028/040
1:30:00
1/1
Използбане на меню-заглавие
Using the Title Menu
DVD
For DVDs containing multiple titles, you can view the title of each movie.
Depending on the disc, the availability of this feature may vary.
MP3
JPEG
Press the numeric
buttons.
• The selected file will be played.
• When playing an MP3 or JPEG disc, you
cannot use
,
to move to a folder.
To move a folder, press (Stop) and
then press
, .
Note
1
In Stop mode,
press MENU
button.
• You can press
•
on the
remote control to move directly to the
desired title, chapter, or track.
Depending on the disc, you may not
be able to move to the selected title
or time.
3
Press ENTER
button.
• The title menu appears.
MOVE
43
2
Press Cursor ,
button to move to
‘Title Menu’.
ENTER
EXIT
MOVE
ENTER
EXIT
Press MENU button to exit the setup screen.
Важно
Заглавното
меню може да е различно за всеки диск в зависимост от
Note • Title menu display may be different depending on the disc.
диска.
44
OPERATION
4
Moving to a Specific Time
• When you select Disc Menu and it is not
3
Press Cursor ,
, buttons to
select the desired
item.
1/1
MOVE
Moving to a Chapter
2
Press Cursor ,
buttons to move to
‘DISC MENU’ and then
press ENTER button.
02_XQ100/TXQ100_GB
2006.4.15
3:43 PM
Page 42
Настройка
език
Setting the на
Language
BG
OSD (On-Screen
Display)
is set to English
default.
Менюто
на екрана
поlanguage
подразбиране
е by
Английски.
1
In Stop mode,
press MENU
button.
2
Press Cursor
button to move to
‘Setup’ and then
press ENTER button.
3
Select ‘Language’
and then press
ENTER button
4
Press Cursor ,
button to select ‘OSD
Language’ and then
press ENTER button.
5
Press Cursor ,
button to select the
desired language and then
press ENTER button.
• Once the setup is complete, the OSD will be
English if English has been selected as language.
MOVE
ENTER
EXIT
MOVE
ENTER
EXIT
MOVE
ENTER
RETURN
EXIT
MOVE
ENTER
RETURN
EXIT
MOVE
SELECT
RETURN
EXIT
Press MENU button to exit the setup screen.
Note
• To select another language, select OTHER and enter the language code of your country.
(See page 74 for language codes)
AUDIO, SUB TITLE and DISC MENU language can be selected.
MOVE
ENTER
RETURN
Selecting the
OSD Language
MOVE
45
SELECT
RETURN
EXIT
EXIT
MOVE
ENTER
RETURN
EXIT
Selecting the
Audio Language
(recorded on the disc)
MOVE
ENTER
RETURN
EXIT
Selecting the
Subtitle Language
(recorded on the disc)
MOVE
ENTER
RETURN
EXIT
Selecting the Disc Menu
Language (recorded on the disc)
language you selected is
* Ifnottherecorded
on the disc, menu
language will not change even
if you set it to your desired
language.
46
SETUP
Press RETURN button to return to the previous level.
02_XQ100/TXQ100_GB
2006.4.15
3:43 PM
Page 44
Настройки
на екран
телевизор
Setting
TV Screen
type
BG
on your
type телевизор
(Wide Screen (широк
or conventional
you4:3
canTV),
selectвие
the TV's
aspect
ВDepending
зависимост
отTV
типа
екран4:3),
или
може
да ratio.
избирате типа.
1
In Stop mode,
press MENU
button.
2
Press Cursor
button to move to
‘Setup’ and then
press ENTER button.
Adjusting the TV Aspect Ratio (Screen Size)
The horizontal to vertical screen size ratio of conventional TVs is 4:3, while that of widescreen and high
definition TVs is 16:9. This ratio is called the aspect ratio. When playing DVDs recorded in different
screen sizes, you should adjust the aspect ratio to fit your TV or monitor.
• For a standard TV, select either "4:3LB" or "4:3PS" option according to personal preference.
Select "16:9" if you have a widescreen TV.
WIDE
MOVE
3
ENTER
MOVE
EXIT
Press Cursor
button to move to ‘TV
DISPLAY’ and then
press ENTER button.
4
•
ENTER
• You can enjoy the widescreen aspect.
EXIT
Press Cursor ,
button to select the
desired item and then
press ENTER button.
4:3LB
(4:3 Letterbox)
• Black bars will appear at the top and bottom of the screen.
4:3PS
(4:3 Pan&Scan)
ENTER
RETURN
EXIT
MOVE
SELECT
RETURN
EXIT
: Select this to play a 16:9 picture in the pan & scan
mode on a conventional TV.
• You can see the central portion of the screen only (with the
sides of the 16:9 picture cut off).
Note
MOVE
: Select this to play a 16:9 picture in the letter box
mode on a conventional TV.
SETUP
Once the setup is complete, you will
be taken to the previous screen.
: Select this to view a 16:9 picture in the full-screen
mode on your widescreen TV.
• If a DVD is in the 4:3 ratio, you cannot view it in widescreen.
• Since DVD discs are recorded in various image formats, they will look different depending on
the software, the type of TV, and the TV aspect ratio setting.
Press RETURN button to return to the previous level.
Press MENU button to exit the setup screen.
47
48
02_XQ100/TXQ100_GB
2006.4.15
3:43 PM
Page 46
Настройка родителски контрол
Setting Parental Controls (Rating Level)
Тази функция позВоляВа да напраВите забрана на дадени филми и сцени,които не се подходящи
this to restrict playback of adult or violent DVDs you do not want children to view.
за Use
деца.
1
In Stop mode,
press MENU
button.
2
Настройка
парола
Setting the на
Password
Youможе
can set
password парола
for the Parental
(rating
setting.
Вие
даthe
ВъВедете
на нивото
наlevel)
контрол
Press Cursor
button to move to
‘Setup’ and then
press ENTER button.
1
Press MENU button.
MOVE
MOVE
3
4
Press Cursor , button
to select the desired rating
level and then press
ENTER button.
• If you have selected Level 6, you
•
MOVE
EXIT
cannot view DVDs with Level 7 or
higher.
The higher the level, the closer the
content is to violent or adult material.
EXIT
ENTER
3
5
Enter the password
and then press
ENTER button.
Press Cursor button to
move to ‘PASSWORD’
and then press ENTER
button.
4
2
MOVE
EXIT
ENTER
Press ENTER
button.
Press Cursor
button to move to
‘Setup’ and then
press ENTER button.
5
ENTER
EXIT
Enter the password
and then press
ENTER button.
• Enter the old password, a new
password, and confirm new password.
• The setting is complete.
SETUP
Press Cursor
button to move to
‘PARENTAL’ and then
press ENTER button.
ENTER
BG
• The password is set to "7890" by default.
• Once the setup is complete, you will be
taken to the previous screen.
MOVE
ENTER
RETURN
EXIT
MOVE
SELECT
RETURN
EXIT
INPUT NUMBER
RETURN
EXIT
Важно:
Note • The password is set to "7890" by default.
фабричната
парола е "7890"
MOVE
ENTER
RETURN
EXIT
MOVE
SELECT
RETURN
EXIT
INPUT NUMBER
RETURN
Важни
Note • This function works only if a DVD disc contains the rating level information.
Функцията работи само с дискове с рейтинг.
Press RETURN button to return to the previous level.
49
Press MENU button to exit the setup screen.
EXIT
Ако заправите вашата парола на направете следните неща:
• докато тоВа съобщение стои на екрана "NO DISC", натиснете и задръжте ___ бутона
от предния панел 5сек. "INITIALIZE" се пояВяВа на дисплея и Всички фабрични
If you have
forgotten
the rating
level password, do the following:
настройки
ще се
Възстановят.
.
is in the noбутона.
disc mode, hold the main unit's
button for longer than 5 seconds. “INITIALIZE” appears
• натиснете
• While the playerPOWER
on the display and
settings willфункция
return to theще
default
values. Всички направени настройки. Не я
Използването
наallRESET
изтрие
button.
• Press the POWER
използвайте
осВен
ако не е необходимо.
Using the RESET function will erase all stored settings.
Do not use this unless necessary.
50
02_XQ100/TXQ100_GB
2006.4.15
3:43 PM
Page 48
Настройка
Setting theтапет
Wallpaper
JPEG
DVD
BG
VCD
While watching a DVD, VCD or JPEG CD, you can set the image you like as background wallpaper.
Когато гледате DVD, VCD или JPEG CD, Вие може да променяте фона
Setting the Wallpaper
1
During playback, press
PLAY/PAUSE button
when an image you
like appears.
To select one of the 3 wallpaper settings you've made
Press LOGO
button.
2
1
In Stop mode,
press MENU
button.
2
Press Cursor
button to move to
‘Setup’ and then
press ENTER button.
3
Press Cursor
button to move to
‘LOGO’ and then
press ENTER button.
• “COPY LOGO DATA” will be
displayed on the TV screen.
COPY LOGO DATA
PAUSE
MOVE
3
The power will
turn off and then
back on.
4
•
Press to select
the desired ‘USER’,
and then press
ENTER.
5
ENTER
EXIT
MOVE
ENTER
RETURN
EXIT
Press MENU
button to exit the
setup screen.
SETUP
• The selected wallpaper will be
MOVE
EXIT
ENTER
• This selects one of the 3
displayed.
You can select up to 3 wallpaper
settings.
wallpaper screens
MOVE
SELECT
RETURN
EXIT
Press RETURN button to return to the previous level.
MOVE
51
SELECT
RETURN
EXIT
Select this to set the
Samsung Logo image as
your wallpaper.
MOVE
SELECT
RETURN
EXIT
Press MENU button to exit the setup screen.
Select this to set the desired
image as your wallpaper.
52
02_XQ100/TXQ100_GB
2006.4.15
3:43 PM
Page 50
Настройка на режима на
Високоговорителите
Setting the Speaker Mode
DVD
режим
DVDвъзпрозивеждане
Playback Mode
SomeDVD-Audio
DVD-Audio дискве
discs contain
DVD-Video
as well as
DVD-Audio.
Някой
съдържат
DVD-Video
както
и DVD-Audio.
back the DVD-Video
portion of
the DVD-Audio
set the unit
to DVD-Video
mode. режим.
ЗаTo
даplay
възпроизведете
DVD-Video
частта
от диска,disc,
настройте
уреда
на DVD-Video
1
Натиснете EJECT
Press the EJECT
и после MENU.
2
button and then
press the MENU
button.
MOVE
press ENTER button.
MOVE
EXIT
ENTER
Натиснете курсора
Press Cursor
надолу за да
button to Setup’
move toи
изберете
‘Setup’ andENTER.
then
натиснете
Signal outputs
and frequency
responses
fromнаtheговорите
speakersавтоматично
will automatically
adjusted according
to your
Изходните
сигнали
и честоти
отговарят
наbe
настройката
според
speaker configuration
and whether certain
speakers
areдаused
or not.
конфигурацията
на говорителите
и дали
трябва
се използват
всички колони или не.
1
In Stop mode,
press MENU
button.
3
4
2
Натиснете
Press
Cursorкурсора
,
надолу за да
button to move to
изберете DVD
‘DVD
and then
VideoVIDEO’
и натиснете
press
ENTER button.
ENTER.
3
EXIT
ENTER
In the Speaker
Setup, press the
ENTER button again.
Set steps 1 ~ 4стъпки
again if you
• Повторете
1-4 want
за to
MOVE
4
RETURN
EXIT
MOVE
Важно
Note
• DVD режима е настроен на DVD Audio
фабрично.
Play mode is set to DVD Audio as
• DVD
• Акоfactory
изключите
уреда, той ще се върне
default setting.
на DVD Audio режима.
• Powering off the main unit will automatically
switch to the DVD Audio mode.
SELECT
RETURN
Press Cursor , ,
, buttons to move
to the desired
speaker and then
press ENTER button.
SETUP
•
ENTER
EXIT
ENTER
• For C, SL, and SR, each time the button
switch to DVDпроцедура.
AUDIO Play mode.
обратната
MOVE
Press Cursor
button to move to
‘Audio’ and then
press ENTER button.
EXIT
ENTER
MOVE
Press
Cursorкурсора
Натиснете
надолуtoза
да to
button
move
изберете
DVD
‘DVD
TYPE’
and
TYPEpress
и натиснете
then
ENTER
ENTER.
button.
BG
is pressed, the mode switches
alternately as follows: SMALL ➝ NONE.
For L and R, the mode is set to SMALL.
EXIT
При
избран
DVD Play
When
Selecting
DVDрежим:
Play Mode:
• DVD
VIDEO: set
: настройте
на
DVD VIDEO
to play the уреда
DVD video
•DVD
video, при
съдържание
contents
containedотonDVD
a
audio диск.
DVD audio disc.
• DVD AUDIO : фабрично настроен
: set to play the default
• DVD AUDIO
режим,
за DVD audio.
DVD audio.
MOVE
ENTER
RETURN
EXIT
MOVE
CHANGE
RETURN
EXIT
SMALL : Select this when using the speakers.
NONE : Select this when no speakers are connected.
DivX (R)
DivX
(R) registration
регистрация
53
Моля
регистрационният
use the Registration
code to register this
• Pleaseизползвайте
player
with theза
DivX
(R) (R)
videovideo
on demand
код
а уреда
DivX
on demand
format. ToЗа
learn
go to повече
www.divx.com/vod.
Формат.
даmore,
научите
отидете
на www.divx.com/vod.
MOVE
ENTER
RETURN
EXIT
Note
• Depending on PRO LOGIC and STEREO settings, the speaker mode may vary (see page 63).
54
02_XQ100/TXQ100_GB
2006.4.15
3:43 PM
Page 52
Настройка
забавяне
Setting the
Delay Възпроизвеждане
Time
BG
If theколоните
speakers cannot
be placed
distances
the listening
position, you
adjust the delay
time of
Ако
на могат
да at
сеequal
поставят
наfrom
еднакво
разстояние
отcan
позицията
на слушане,
the audio signals from the center and rear speakers.
вие
може да настроите тази опция, като надстроите определено време на закъснение
на сигнала преминаващ то едната колона на друга.
1
In Stop mode,
press MENU
button.
2
Press Cursor button
to move to ‘Audio’ and
then press ENTER
button.
3
Press Cursor button
to move to ‘DELAY
TIME’ and then press
ENTER button.
4
Press Cursor , ,
, buttons to move
to the desired speaker
and then press
ENTER button.
5
Press Cursor ,
to set the Delay
time.
• You can set the delay time for C
between 00 and 05mSEC and for
SL and SR between 00 and
15mSEC.
MOVE
ENTER
EXIT
MOVE
ENTER
EXIT
MOVE
ENTER
RETURN
EXIT
MOVE
SELECT
RETURN
EXIT
MOVE
CHANGE
RETURN
EXIT
SETUP
Setting up the Speaker Delay Time
When 5.1CH Surround Sound is played, you can enjoy the best sound if
the distance between you and each speaker is the same. Since the sounds
arrive at the listening position at different times depending on the
placement of speakers, you can adjust this difference by adding a delay
effect to the sound of the Center and Surround Speakers.
Note
(Dolby Pro Logic II), the delay time may be different for each mode.
• With
• With AC-3 and DTS, the delay time can be set between 00 and 15mSEC.
• The Center channel is only adjustable on 5.1 channel discs.
55
•Setting CENTER SPEAKER
If the distance of Dc is equal to or longer than the
distance of Df in the figure, set the mode as 0ms.
Otherwise, change the setting according to the table.
Distance between Df and Dc
0 inch
13.6 inches
27.2 inches
40.8 inches
4.5 feet
5.6 feet
Delay Time
0 ms
1 ms
2 ms
3 ms
4 ms
5 ms
•Setting REAR (SURROUND) SPEAKERS
If the distance of Df is equal to the distance of Ds
in the figure, set the mode as 0ms. Otherwise,
change the setting according to the table.
Distance between Df and Ds
0 inch
40.8 inches
6.7 feet
10.0 feet
13.4 feet
16.7 feet
Ideal CENTER
SPEAKER placement
Delay Time
0 ms
3 ms
6 ms
9 ms
12 ms
15 ms
Ideal
SURROUND
SPEAKER
placement
It is desirable to place all speakers within this circle.
Df: The distance from FRONT SPEAKER
Dc: The distance from CENTER SPEAKER
Ds: The distance from SURROUND SPEAKER
56
02_XQ100/TXQ100_GB
2006.4.15
3:43 PM
Page 54
Настройки на DRC (Dynamic Range
Setting the DRC (Dynamic Range Compression)
Compression)
Hacmpoйka
Setting
the тест
Test тон
Tone
Use the Test Tone feature to check the speaker connections.
BG
This
balances the
between
the насладите
loudest and quietest
sounds.
Чрезfeature
тази функция
Виеrange
моЖете
да се
на Dolby
Digital зВук докато гледате
You can use this function to enjoy Dolby Digital sound when watching movies at low volume at night.
филм при слаб, зВук Вечерно Време.
Тази функция балансира силните и тихите звуци.
1
In Stop or no
disc mode,
press MENU
button.
2
Press Cursor
button to move to
‘Audio’ and then
press ENTER button.
3
Press Cursor button
to move to ‘TEST
TONE’ and then press
ENTER button.
тон ще
изпратен
The test tone
will бъде
be sent
to L ➝ Cкъм
➝
•Тестовият
CR
-R➝- SR
последоват5елно.
SR -➝SL
SL- SW
➝ SW
in order.
Ако
бутона
ENTER
е натиснат
If the
ENTER
button
is pressedотново,
again
at this time,
tone
will stop.
тестовият
тонthe
щеtest
бъде
спрян.
MOVE
ENTER
EXIT
MOVE
ENTER
1
In Stop or no disc
mode, press
MENU button.
2
L-
Press Cursor
button to move to
‘Audio’ and then
press ENTER
button.
EXIT
MOVE
MOVE
ENTER
RETURN
Натиснете RETURN бутона за да се върнете в предишно
меню
Press RETURN button to return to the previous level.
Натиснете MENU бутона за изход от настройки.
3
STOP
ENTER
MOVE
EXIT
ENTER
EXIT
EXIT
EXIT
4
Press Cursor
, to adjust
the ‘DRC’.
• When the Cursor
button is pressed,
the effect is greater, and when the
Cursor button is pressed, the effect is
smaller.
Алтернативен метод: натиснете TEST TONE бутона от дистанционното упраВление.
Alternative method: press the TEST TONEbutton on the remote.
Press TESTTEST
TONE
button.
Натиснете
TONE
бутона.
•• тест
тона
щеproduced
се произбеде
Test tone
will be
as follows: както
следба:
When playing a DVD or CD, this will work only in Stop mode.
когато
DVD
илиis CD,
тази
function to check that each
speaker
correctly
• Use thisбъзпроизбеЖда
функция
работи
при спряла
connected ще
and that
there isсамо
no problem.
функция- използбайте тази функция
To проберите
end the test дали
tone, колоните работят
да
press
TEST
TONE
button again.
прабилно.
За край натиснете TEST TONE бутона
отнобо.
L: Front Speaker (L)
R: Front Speaker (R)
C: Center Speaker
SL: Rear Speaker (L)
SW: Subwoofer
SR: Rear Speaker (R)
Multi-Channel Pro Logic Mode
MOVE
Start
ENTER
RETURN
EXIT
CHANGE
RETURN
EXIT
Натиснете RETURN бутона за да се върнете в предишно меню
Натиснете MENU бутона за изход от настройки.
Press RETURN button to return to the previous level.
Press MENU button to exit the setup screen.
57
58
SETUP
Press MENU button to exit the setup screen.
Press Cursor
button to move to
‘DRC’ and then
press ENTER
button.
02_XQ100/TXQ100_GB
2006.4.15
3:43 PM
Page 56
Настройка
звука
Setting theна
Audio
BG
You can adjustна
theбаланса
balance and
level for
Настройване
и нивото
наeach
вскаspeaker.
колона.
Method 1
1
In Stop mode,
press MENU
button.
MOVE
3
When adjusting the audio quality using the setup screen
ENTER
RETURN
EXIT
4
ENTER
CHANGE
RETURN
Adjusting Center Speaker Level
Press SOUND
EDIT button and
then press Cursor
, .
Press SOUND
EDIT button and
then press Cursor
, .
2
3
Adjusting Rear Speaker Level
4
Press SOUND
EDIT button and
then press Cursor
, .
Adjusting Subwoofer Speaker Level
5
Press SOUND
EDIT button and
then press Cursor
, .
EXIT
Press RETURN button to return to the previous level.
Press MENU button to exit the setup screen.
59
1
Press SOUND
EDIT button and
then press Cursor
, .
Adjusting Rear Speaker Balance
EXIT
Press Cursor ,
buttons to select and
adjust the desired item.
Press the , buttons
to adjust the settings.
MOVE
Adjusting Front Speaker Balance
SETUP
ENTER
MOVE
EXIT
Press Cursor button
to move to ‘SOUND
EDIT’ and then press
ENTER button.
MOVE
2
Press Cursor
button to move to
‘Audio’ and then press
ENTER button.
Метод 2
Method 2 When manually adjusting with the SOUND EDIT button
Ръчно настройване
чрез SOUND EDIT бутони
Важно
• Note
настройките се изписват на дисплея на уреда, не на екрана на
Adjusting Front/Rear Speaker Balance
телевизора
between 00
–06 and OFF.
• You can selectбаланс
Настройка
наand
предни
и задни колони
volume
decreases
as you move closer
to –6. и OFF.
•• The
Вие
трябВа
да изберете
между-06
Adjusting
Center/Rear/Subwoofer
Speaker
Level
• ниВото на зВука е до -6.
can централни,
be adjusted in steps
from +6dB
to –6dB.субуфер
• The volume level
Настройки
ниво
задни,
предни,
sound gets
louder
youнастропВа
move closer to на
+6dBетапи
and quieter
as you get
closer to -6dB.
•• The
ниВото
може
даasсе
от +6dB
go6dB.
• зВука се уВеличаВа когато стигнете близо go+6dB.
60
02_XQ100/TXQ100_GB
2006.4.15
3:43 PM
Page 58
Звуково
поле(DSP)/EQ
(DSP)/EQFunction
функция
Sound Field
AV SYNC
AV
SYNC настройки
Setup
Videoкартината
may look slower
audio if itno-баВна
is connected
to a digital
Видео
моЖеthan
да the
изглеЖда
от зВука,
акоTV.
уреда е сВързан съ
If this occurs,
adjust theАко
audio
delay
to to
match the Времето
video.
дигитален
телеВизор.
тоВа
сеtime
случи
настроите
за забаВяне на
зВука за да съВпадне с картината.
1
Press the MENU button.
2
Press Cursor , buttons
to move to ‘Audio’ and then
press ENTER button.
3
ENTER
DSP(Digital
Processor)
DSP
режимите
са designed
проектирани
за даdifferent
симолират
различни
акустични
DSP(DigitalSignal
Signal Processor)
DSP
modes
have been
to simulate
acoustic
environments.
условия.
EQ: You can select ROCK, POP, or CLASSIC to optimize the sound for the genre of music you are playing
EQ: Можете да изберете ROCK, POP, или CLASSIC за да оптимизирате звука за жанра за музиката която
възпрозивеждате.
Натиснете DSP/EQ бутона
Press DSP/EQ button.
. "DSP"
показва
панела
onна
theдисплей
display panel.
• "DSP"сеappears
. с• всяко
натискане
наisбутона,
се сменя
както
Each time
the button
pressed,избора
the selection
changes
asследва:
follows:
• Setup menu appears.
MOVE
MOVE
EXIT
4
ENTER
EXIT
Press Cursor
, buttons
to select the AV-SYNC Delay
Time and then press the
ENTER button.
SETUP
Press Cursor ,
buttons
to move to ‘AV-SYNC’ and
then press ENTER button.
• You can set the audio delay time between 0 ms
and 300 ms. Set it to the optimal status.
MOVE
ENTER
RETURN
EXIT
MOVE
SELECT
RETURN
EXIT
Press RETURN button to return to the previous level.
Press MENU button to exit the setup screen.
61
BG
Важно
Note • DSP/EQ function is only available in STEREO mode.
. DSP/EQ функцията
е достъпна само в STEREO режим.
PLза
II mode
show STEREO
on the display.
Натиснете PL II Press
modethe
бутона
да сеbutton
появиtoSTEREO
на екрана.
This feature
works
with CDs, MP3-CDs,
channel
DVD-Audio,
. Тази функция• работи
с CDs,
MP3-CDs,
2 channel2DivX
и Dolby
Digital
DivX and Dolby Digital discs.
дискове.
When
playing
a
DVD
disc
encoded
with
two
or
more
channels,
•
. При възпрозивеждане на DVD диск с две или повече канала, multi-channel
multi-channel
mode will be иselected
automatically
and DSP/EQ
режима ще бъде
избран автоматично
DSP/EQ
фнкцята няма
да работи.
function does not work.
POP,
JAZZ,
ROCK:
в зависимост
от жанра
музиката,
да
POP, JAZZ,
ROCK:
Depending
on the genre of music,
you canна
select
POP, JAZZ,можете
and ROCK.
изберете
POP,a sense
JAZZ,
и ROCK.
STUDIO : Provides
of presence
as if in a studio.
STUDIO
: Дава
усещането
чес
студио.
CLUB : Simulates
the ви
sound
of a dance club
withеa намирате
throbbing bassвbeat.
HALL : Provides
a clear vocal
as от
if listening
a concert
hall.
CLUB
: Симулира
звук
клуб inчрез
нагласяне
на баса.
MOVIE: :Provides
the feelingви
of aясен
movie theater.
HALL
Предоставя
глас, като във зала например.
CHURCH: Gives the feel of being in a grand church.
MOVIE: Дава ви усещането че сте в кино салон.
PASS: Select this for normal listening.
CHURCH: Дава ви усещането че сте в църква.
PASS: Изберете тази опция за нормално слушане.
62
02_XQ100/TXQ100_GB
2006.4.15
3:43 PM
Page 60
Dolby Pro Logic II режим
Dolby Pro Logic II Mode
Youможе
can select
the desired
DolbyPro
ProLogic
Logic IIII зВукоВ
audio mode.
Вие
да избирате
Dolby
режим.
Натиснете PL II MODE бутона.
Pressнатискане
PL II MODE
button.ще се сменя по
С всяко
на бутона
Each time the button is pressed, the mode changes as follows.
•
следният начин:
PRO
PRO LOGIC
LOGIC IIII
MUSIC: When
listeningслушате
to music, you can
experience
sound effects
if you are listening
. •MUSIC:
Когато
музика,
можете
даasизпитате
to the actual
performance.
звуков ефект
като
чели слушате живо изпълнение.
CINEMA: Adds
realism to theреализъм
movie soundtrack.
. •CINEMA:
Придава
на звука.
PRO LOGIC: You will experience a realistic multi-channel effect, as if using five
. •PRO
LOGIC: Ще изпитате реалистичен мулти-канален
speakers, while using just the front left and right speakers.
ефект, като че ли имате пет колони и леви и десни
• MATRIX: You will hear 5.1 channel surround sound.
колони.
STEREO: Select this to listen to sound from the front left and right speakers and the
. subwoofer
MATRIX:
Ще чуете 5.1 канален съроунд звук.
only.
STEREO: Изберете това за да изберете звук предните
леви и десни и субуфер.
Dolby
DolbyPro
ProLogic
LogicII IIефект
Effect
This function works only in Dolby Pro Logic MUSIC mode.
Тази функция работи при Dolby Pro Logic реЖим музика.
1
Press
PL II MODE
button to select ‘MUSIC’
mode.
include the surround speakers for an exciting
"wraparound" effect with side wall imaging.
3
Press
PL II EFFECT button
to select C-Width, then press
Cursor , buttons to select
the desired effect setting.
63
4
Press
PL II EFFECT button
to select Dimension, then press
the Cursor , buttons to
select the desired setting.
• You can select between 0 and 6.
• Incrementally adjusts the sound field (DSP)from
the front or rear.
SETUP
The higher the setting, the less sound comes from
the center speaker.
the inputs (L or R), you cannot listen to surround sound.
2
Press
PL II EFFECT button
to select Panorama, then press
Cursor , buttons to select
the desired effect setting.
• You can select either 0 or 1.
• This mode extends the front stereo image to
• You can select between 0 and 7.
• This sets the width of the center image.
Важно
• когато
Pro Logic II режим, сВържете Вашия уред към AUDIO
Note изберете
Pro Logic II mode, connect your external device to the
• When selecting
INPUT жакоВе (L and R) на плейъра. Ако сВържете само към единия
AUDIO INPUT jacks (L and R) on the player. If you connect to only one of
Вход, Вие не може да слушате 5.1 канален зВук.
BG
Важно
Note
When playing a DVD disc encoded with two or more channels, multi-channel mode will be
• когато •Възпроизвеждате DVD записани с поВече детайли, мулти-каналните мога
selected automatically and
(Dolby Pro Logic II) button does not work.
да се избират автоматично и (Dolby Pro Logic II) бутона не работи.
64
02_XQ100/TXQ100_GB
2006.4.15
3:43 PM
Page 62
Слушане на
Listening
to paguo
Radio
Remote Control Unit
Press the TUNER
button and select
the FM band.
1
Запаметябане
на станци
Presetting
Stations
BG
Example: Presetting FM 89.1 in the memory
2
Tune in to the
desired station.
Automatic Tuning 1
Automatic Tuning 2
Manual Tuning
1
Press the TUNER
button and select the
FM band.
When
is pressed, a
preset broadcast station is
selected.
Press and hold TUNING/CH to
automatically search for active
broadcasting stations.
2
Press TUNING/CH
to select "89.10".
3
• Refer to Step 2 on page 65 to
Press the TUNER
MEMORY button.
• “1” flashes in the display.
automatically or manually tune in
to a station.
Briefly press TUNING/CH to
increase or decrease the
frequency incrementally.
Main Unit
1
Press the
FUNCTION button to
select the FM band.
2
Select a broadcast
station.
Press the STOP ( )
button to select
PRESET and then press
button to select the preset station.
Automatic Tuning 1
4
Press
to select preset
number.
• You can select between 1 and
5
Press the TUNER
MEMORY button
again.
6
To preset another
station, repeat
steps 2 to 5.
• Press the TUNER MEMORY button before
‘number’ disappears from the display.
15 presets.
• ‘number’ disappears from the display and
the station is stored in memory.
RADIO OPERATION
Press the STOP ( )
button to select "MANUAL"
and then press and hold
button to automatically search the band.
Automatic Tuning 2
Press STOP ( ) to select
MANUAL and then briefly
press
to tune in to a lower or
higher frequency.
Manual Tuning
Press MO/ST button to listen in Mono/Stereo.
(This applies only when listening to an FM station.)
65
• Each time the button is pressed, the sound switches between "STEREO" and "MONO".
• In a poor reception area, select MONO for a clear, interference-free broadcast.
Note
• This unit does not receive
AM broadcasts.
To tune in to a preset station, press
remote control to select a channel.
on the
66
02_XQ100/TXQ100_GB
2006.4.15
3:43 PM
Page 64
Допълнителни
функции
Convenient Functions
Sleep Timer функция
Sleep
Timer Function
You can
the time that
the Home
Theater
shutще
itself
Можете
даset
настройте
времето
след
коетоwill
уреда
сеoff.
изключи.
Натиснете
Sleepbutton.
Press SLEEP
SLEEP"
сеthe
поябяба
дисплея.
Всеки
катоasнатиснете
button is на
pressed,
the preset
timeпът
changes
follows:
• Each time
10 ➝ 20 ➝ 30
➝ 60 ➝
90 ➝ 12010
➝ 150
➝ OFF.
променяте
както
следба:
'20
'30 '60 '90 '120 '150
OFF.
BG
Mute Function
This is useful when answering a doorbell or telephone call.
Press MUTE button.
appears in the display.
•
• To restore the sound, press the button again.
За да потвърдите настройките, натиснете SLEEP бутона.
• на екрана ще се появи оставащото време, до изклкючване на
To confirm the sleep timer setting, press SLEEP button.
плепъра
time before
theвърнете
Home Theater
shut itself off isкоито
displayed.
• The remaining
•ако натиснете
отново
ща се
към will
настройките,
сте на
the button again changes the sleep time from what you have set earlier.
• Pressing
правили
по-рано.
За отмяна на тази функция, натиснете SLEEP бутона докато на
екрана
се появиthe
OFFsleep timer, press SLEEP button until
To cancel
OFF appears on the display.
Използване на слушалки
Using Headphones
Можете
да използвате
слушалки
(не
са предоставени)
за да слушате само вие.
Use headphones
(not supplied)
for private
listening
pleasure.
Включете
към HEADPHONE жака
Connect the headphones to the HEADPHONE jack for private listening.
Adjusting Display Brightness
You can adjust the brightness of the display on the main unit so it won't interfere
with your movie viewing.
Press DIMMER button.
DARK ➞ BRIGHT.
Важно
За
да избегнете повреда на слуха, не усилвайте звука
Caution
прекалено много.
MISCELLANEOUS
• Each time the button is pressed, the brightness changes as follows:
• To prevent hearing damage, do not increase the
volume excessively when using headphones.
67
68
02_XQ100/TXQ100_GB
2006.4.15
3:43 PM
Page 66
Управление на телеВизора с
Operating
a TV with управление
the Remote Control
дистанционното
BG
Списък
с телевизионните
TV Brand
Code List честоти
When operating a TV with the remote control
1
2
3
4
5
Press TV button to select TV mode.
Press POWER button to turn on the TV.
Point the remote control toward the TV.
While holding down POWER, enter the code
corresponding to your brand of TV.
Brand
Code
No.
Brand
1
Admiral (M.Wards)
56, 57, 58
44
MTC
18
2
A Mark
01, 15
45
NEC
18, 19, 20, 40, 59, 60
3
Anam
01, 02, 03, 04, 05, 06, 07, 08, 09, 10, 11, 12,
46
Nikei
03
13, 14
47
Onking
03
Code
4
AOC
01, 18, 40, 48
48
Onwa
03
5
Bell & Howell (M.Wards)
57, 58, 81
49
Panasonic
06, 07, 08, 09, 54, 66, 67, 73, 74
6
Brocsonic
59, 60
50
Penney
18
7
Candle
18
51
Philco
03, 15, 17, 18, 48, 54, 59, 62, 69, 90
8
Cetronic
03
52
Philips
15, 17, 18, 40, 48, 54, 62, 72
9
Citizen
03, 18, 25
53
Pioneer
63, 66, 80, 91
10
Cinema
97
54
Portland
15, 18, 59
11
Classic
03
55
Proton
40
12
Concerto
18
56
Quasar
06, 66, 67
13
Contec
46
57
Radio Shack
17, 48, 56, 60, 61, 75
14
Coronado
15
58
RCA/Proscan
18, 59, 67, 76, 77, 78, 92, 93, 94
15
Craig
03, 05, 61, 82, 83, 84
59
Realistic
03, 19
16
Croslex
62
60
Sampo
40
17
Crown
03
61
Samsung
00, 15, 16, 17, 40, 43, 46, 47, 48, 49, 59, 60,
18
Curtis Mates
59, 61, 63
19
CXC
03
62
Sanyo
19, 61, 65
20
Daewoo
02, 03, 04, 15, 16, 17, 18, 19, 20, 21, 22, 23, 24,
63
Scott
03, 40, 60, 61
25, 26, 27, 28, 29, 30, 32, 34, 35, 36, 48, 59, 90
64
Sears
15, 18, 19
15, 57, 64
98
21
Daytron
40
65
Sharp
22
Dynasty
03
66
Signature 2000 (M.Wards)
57, 58
23
Emerson
03, 15, 40, 46, 59, 61, 64, 82, 83, 84, 85
67
Sony
50, 51, 52, 53, 55
• If the code matches the TV's code, the TV will be turned off.
• If there is more than one code listed for your TV in the table,
24
Fisher
19, 65
68
Soundesign
03, 40
25
Funai
03
69
Spectricon
01
enter one at a time to determine which code works.
Example: For a Samsung TV
While holding down POWER, use the number buttons to enter 00,
15, 16, 17 and 40.
26
Futuretech
03
70
SSS
18
27
General Electric (GE)
06, 40, 56, 59, 66, 67, 68
71
Sylvania
18, 40, 48, 54, 59, 60, 62
28
Hall Mark
40
72
Symphonic
61, 95, 96
29
Hitachi
15, 18, 50, 59, 69
73
Tatung
06
30
Inkel
45
74
Techwood
18
31
JC Penny
56, 59, 67, 86
75
Teknika
03, 15, 18, 25
32
JVC
70
76
TMK
18, 40
33
KTV
59, 61, 87, 88
77
Toshiba
19, 57, 63, 71
34
KEC
03, 15, 40
78
Vidtech
18
35
KMC
15
79
Videch
59, 60, 69
36
LG (Goldstar)
01, 15, 16, 17, 37, 38, 39, 40, 41, 42, 43, 44
80
Wards
15, 17, 18, 40, 48, 54, 60, 64
• You can use the TV POWER, VOLUME, CHANNEL, and Numeric
37
38
Luxman
18
81
Yamaha
18
LXI (Sears)
19, 54, 56, 59, 60, 62, 63, 65, 71
82
York
40
39
Magnavox
15, 17, 18, 48, 54, 59, 60, 62, 72, 89
83
Yupiteru
03
40
Marantz
40, 54
84
Zenith
58, 79
41
Matsui
54
85
Zonda
01
42
MGA
18, 40
86
Dongyang
03, 54
43
Mitsubishi/MGA
18, 40, 59, 60, 75
Note
• The remote control may not work on some brands of TVs. Also, some operations may not be
possible depending on your brand of TV.
• If you do not set the remote control with the code for your brand of TV, the remote control will
work on a Samsung TV by default.
MISCELLANEOUS
Point the remote control toward the TV and
press POWER. If the TV turns off or on,
the setting is complete.
buttons (0~9).
69
No.
70
02_XQ100/TXQ100_GB
2006.4.15
3:43 PM
Page 68
Преди
се обадите
в сервиза
Beforeда
Calling
for Service
BG
Refer
to the chart
below ще
whenмоЖете
this unit does
properly. If сtheновата
problem you
are experiencing
is not listed
below or
За
съвсем
кратко
даnotсеfunction
запознаете
система.
Ако имате
някакВи
if the instruction below does not help, turn off the unit, disconnect the power cord, and contact the nearest authorized dealer
проблеми,
които са посочени В долния списък, опитайте да прилоЖите дадените
or Samsung Electronics Service Center.
решения. Те могат да Ви спестят Време и неудобството от ненуЖно обаЖдане за
серВизно обслуЖВане.
СимптомSymptom
Диска не се отваря
I cannot eject the disc.
Възпроизвеждането не се
пуска
Playback does not start.
Решение
Check/Remedy
• Кабела за захранването пъхнат ли е праВилно?
• Is the power cord plugged securely into the outlet?
• Изклкючите захранването u го Вклкючете отново.
• Turn off the power and then turn it back on.
• •Проверете
регионалният
на диска.
Check the region
number ofномер
the DVD.
• CD-ROMs
и DVD-ROM
могат
да бъдат
DVD discs
purchasedне
from
abroad
may Възпроизведени
not be playable. на
DVD
уреда. and DVD-ROMs cannot be played on this Home
• CD-ROMs
• Проверете
Theater. дали рейтинга е правилен.
• Make sure that the rating level is correct.
Възпроизвеждането не
• Използвате ли деформиран диск или надраскан диск?
Playback does not start
• Are you using a deformed disc or a disc with scratches on
стартира веднага като
• Изчистете диска.
the surface?
immediately
when
the
натиснете бутона Play/
• Wipe the disc clean.
Play/Pause button is pressed.
Pause.
Sound
is not
produced.
Не
се чува
звук
• Не се чува звук по Време на Възпроизвеждане, баВно
playback,
• No sound is heardи during
Възпроизвеждане
кадърfast
след
кадър. slow playback, and step
motion playback.
• ПраВилно
ли са сВързани кулоните? Настроени ли са
• Are the speakers connected properly? Is the speaker setup
праВилно?
correctly customized?
• Диска поВреден ли е?
•
Sound can be heard only
Звук моЖе да се чуе само
a fewкулони.
speakers and
отfrom
няколко
not all six.
Dolby Digital 5.1 CH
Dolby Digital 5.1
Surround Sound is not
СНСъраунд не се работи
produced.
• •Докато
слушате
или
се издава
звук
When listening
toCD
a CD
or радио,
radio, sound
is output
toот
theпредните
front
кулони
(Л/Д)(L/R)
само.
Изберете
"PROLOGIC
LOGICII"II"byкато
натиснете
speakers
only.
Select "PRO
pressing
(Dolby
Pro
Logic
II)
от
дистанционното
за
да
използвате
(Dolby Pro Logic II) on the remote control to use all six speakers.
Всичките
6 кулони.
Make sure
that the DVD disc is 5.1-CH compatible.
•• Уверете
е 5.1-СН съвместим.
If you setсе
C,че
SL,DVD
and диска
SR to NONE
in the speaker mode in the
•
• Ако настроите SL, и SR на NONE, кулоните В аудио
audio setup of the setup screen, no sound is heard from the
настройките няма да се Възпроизведе никакъв зВук от
center speaker and the front left and right speakers. Set C, SL,
централната и предните ляВа и дясна кулона. Настроите С, SL,
and SR to SMALL.
u SR на SMALL.
Is thereмаркиран
"Dolby Digital
CH" mark
on 5.1
the CH"?
disc? Dolby
• •Диска
ли е 5.1
с "Dolby
Digital
Dolby Digital
Digital5.1
5.1
Surround
is produced само
only ifкогато
the disc
is recorded
with на
CHCH
съраунд
се Sound
ВъзпроизВеЖда
диска
е записан
channel
sound.
5.15.1
channel
зВук.
• •Аудио
праВилноcorrectly
ли е настроен
на DOLBY
DIGITAL
Is the езика
audio language
set to DOLBY
DIGITAL
5.1-CH5.1in
CH?
the information display?
• Disc is rotating but no
picture is produced.
• Picture quality is poor and
picture is shaking.
Check/Remedy
• Is the TV power on?
• Are the video cables connected properly?
• Is the disc dirty or damaged?
• A poorly manufactured disc may not be playable.
• Is the remote control being operated within its operation range of
and distance?
The remote control does not angle
• Are the batteries exhausted?
work.
• Have you selected the mode(TV/DVD) functions of the remote
control (TV or DVD) correctly?
Audio language and
subtitles do not work.
• Audio language and subtitles will not work for DVDs not containing
Menu screen does not appear even
when the menu function is selected.
• Are you using a disc that does not contain menus?
Aspect ratio cannot be
changed.
•The main unit is not
working. (Example: The power
them. And depending on the disc, they may work differently.
• You can play 16:9 DVDs in 16:9 WIDE mode, 4:3 LETTER BOX
mode, or 4:3 PAN SCAN mode, but 4:3 DVDs can be seen in 4:3
ratio only. Refer to the DVD disc jacket and then select the
appropriate function.
• Turn off the power and hold the
button on the main unit for
longer than 5 seconds.
goes out or strange noise is heard.)
• The Home Theater is
not working normally.
Using the RESET function will erase all stored settings.
Do not use this unless necessary.
• While “NO DISC” message appears on the display of main unit, hold
The password for rating
level has been forgotten.
the main unit's
button for longer than 5 seconds. “INITIALIZE”
appears on the display and all settings will return to the default values.
• Press the POWER button.
Using the RESET function will erase all stored settings.
Do not use this unless necessary.
Can't receive radio
broadcast.
• Is the antenna connected properly?
• If the antenna's input signal is weak, install an external FM
antenna in an area with good reception.
72
MISCELLANEOUS
71
Is the disc severely damaged?
Symptom
02_XQ100/TXQ100_GB
2006.4.15
3:43 PM
Page 70
Съхранение
на guckoвeme
Cautions
on Handling
and Storing Discs
Small scratches
on the
may могат
reduceда
sound
and picture
quality or cause
skipping.
Малки
драскотини
наdisc
диска
променят
качеството
му. ЗатоВа
трябВа да се
Be especially Внимателно.
careful not to scratch discs when handling them.
съхраняВат
Handling discs
Do not touch the playback side of the disc. Hold
the disc by the edges so that fingerprints will not
get on the surface.
Do not stick paper or tape on the disc.
Disc Storage
Keep in a cool
ventilated area
Do not keep in
direct sunlight
Caution
Keep in a clean
Protection jacket.
Store vertically.
• Do not allow the discs to become contaminated with dirt.
• Do not load cracked or scratched discs.
Handling and Storing Discs
ЕзикоВи
kogoвe
за отделните
страни
Language
Code
List
Enter the appropriate code number for the initial settings “Disc Audio”, “Disc Subtitle”
Въведете
подходящите кодове за съответните езици.
and/or “Disc Menu” (See page 45).
Code
Language
Code
Language
Code
Language
Code
Language
1027
Afar
1181
Frisian
1334
Latvian, Lettish
1506
Slovenian
1028
Abkhazian
1183
Irish
1345
Malagasy
1507
Samoan
1032
Afrikaans
1186
Scots Gaelic
1347
Maori
1508
Shona
1039
Amharic
1194
Galician
1349
Macedonian
1509
Somali
1044
Arabic
1196
Guarani
1350
Malayalam
1511
Albanian
1045
Assamese
1203
Gujarati
1352
Mongolian
1512
Serbian
1051
Aymara
1209
Hausa
1353
Moldavian
1513
Siswati
1052
Azerbaijani
1217
Hindi
1356
Marathi
1514
Sesotho
1053
Bashkir
1226
Croatian
1357
Malay
1515
Sundanese
1057
Byelorussian
1229
Hungarian
1358
Maltese
1516
Swedish
1059
Bulgarian
1233
Armenian
1363
Burmese
1517
Swahili
1060
Bihari
1235
Interlingua
1365
Nauru
1521
Tamil
1069
Bislama
1239
Interlingue
1369
Nepali
1525
Tegulu
1066
Bengali; Bangla
1245
Inupiak
1376
Dutch
1527
Tajik
1067
Tibetan
1248
Indonesian
1379
Norwegian
1528
Thai
1070
Breton
1253
Icelandic
1393
Occitan
1529
Tigrinya
Turkmen
1079
Catalan
1254
Italian
1403
(Afan) Oromo
1531
1093
Corsican
1257
Hebrew
1408
Oriya
1532
Tagalog
1097
Czech
1261
Japanese
1417
Punjabi
1534
Setswana
1103
Welsh
1269
Yiddish
1428
Polish
1535
Tonga
1105
Danish
1283
Javanese
1435
Pashto, Pushto
1538
Turkish
1109
German
1287
Georgian
1436
Portuguese
1539
Tsonga
1130
Bhutani
1297
Kazakh
1463
Quechua
1540
Tatar
1142
Greek
1298
Greenlandic
1481
Rhaeto-Romance
1543
Twi
1144
English
1299
Cambodian
1482
Kirundi
1557
Ukrainian
Esperanto
1300
Kannada
1483
Romanian
1564
Urdu
1149
Spanish
1301
Korean
1489
Russian
1572
Uzbek
1150
Estonian
1305
Kashmiri
1491
Kinyarwanda
1581
Vietnamese
1151
Basque
1307
Kurdish
1495
Sanskrit
1587
Volapuk
• When cleaning, wipe gently from the inside to the outside of the disc.
1157
Persian
1311
Kirghiz
1498
Sindhi
1613
Wolof
1165
Finnish
1313
Latin
1501
Sangro
1632
Xhosa
• Condensation may form if warm air comes into contact with cold parts
1166
Fiji
1326
Lingala
1502
Serbo-Croatian
1665
Yoruba
1171
Faeroese
1327
Laothian
1503
Singhalese
1684
Chinese
1174
French
1332
Lithuanian
1505
Slovak
1697
Zulu
inside the player. When condensation forms inside the player, the player
may not operate correctly. If this occurs, remove the disc and let the
player stand for 1 or 2 hours with the power on.
73
74
MISCELLANEOUS
1145
When you get fingerprints or dirt on the disc, clean it
with a mild detergent diluted in water and wipe with a
soft cloth.
Note
BG
02_XQ100/TXQ100_GB
2006.4.15
3:43 PM
Page 72
USBHost
HostFeature
FeatureSupported
поддържащи
уреди
USB
Products
Digital Camera
Product
Finepix-A340
Finepix-F810
Finepix-F610
Finepix-f450
Finepix S7000
Finepix A310
KD-310Z
Finecam SL300R
Finecam SL400R
Finecam S5R
Finecam Xt
Dimage-Z1
Dimage Z1
Dimage X21
Coolpix4200
Coolpix4300
Coolpix 2200
Coolpix 3500
Coolpix 3700
Coolpix 4100
Coolpix 5200
Stylus 410 digital
300-digital
U300
X-350
C-760
C-5060
X1
U-mini
Lumix-FZ20
DMC-FX7GD
Lumix LC33
LUMIX DMC-F1
Optio-S40
Optio-S50
Optio 33LF
Optio MX
Digimax-420
Digimax-400
Sora PDR-T30
Coolpix 5900
Coolpix S1
Coolpix 7600
DMC-FX7
Dimage Xt
AZ-1
Технически характеристики
Specifications
BG
USB Flash Disk
Company
Type
Fuji
Fuji
Fuji
Fuji
Fuji
Fuji
Konica
Kyocera
Kyocera
Kyocera
Kyocera
Minolta
Minolta
Minolta
Nikon
Nikon
Nikon
Nikon
Nikon
Nikon
Nikon
Olympus
Olympus
Olympus
Olympus
Olympus
Olympus
Olympus
Olympus
Panasonic
Panasonic
Panasonic
Panasonic
Pentax
Pentax
Pentax
Pentax
Samsung
Samsung
Toshiba
Nikon
Nikon
Nikon
Panasonic
Minolta
Olympus
Digital Camera
Digital Camera
Digital Camera
Digital Camera
Digital Camera
Digital Camera
Digital Camera
Digital Camera
Digital Camera
Digital Camera
Digital Camera
Digital Camera
Digital Camera
Digital Camera
Digital Camera
Digital Camera
Digital Camera
Digital Camera
Digital Camera
Digital Camera
Digital Camera
Digital Camera
Digital Camera
Digital Camera
Digital Camera
Digital Camera
Digital Camera
Digital Camera
Digital Camera
Digital Camera
Digital Camera
Digital Camera
Digital Camera
Digital Camera
Digital Camera
Digital Camera
Digital Camera
Digital Camera
Digital Camera
Digital Camera
Digital Camera
Digital Camera
Digital Camera
Digital Camera
Digital Camera
Digital Camera
Product
Cruzer Micro
Cruzer Mini
Cruzer Mini
SONY Micro Vault
FLEX DRIVE
AnyDrive
XTICK
Micro Mini
iFlash
LG
RiDATA
Company
Type
Sandisk
Sandisk
Sandisk
Sony
Serotech
A.L tech
LG
Iomega
Imation
XTICK(M)
EZDrive
USB 2.0 USB Flash Drive 128M
USB 2.0 128M
USB 2.0 256M
USB 2.0 64MB
USB 2.0 32MB
USB 2.0 128MB
USB 2.0 128M
USB 2.0 128M
USB 2.0 64M
USB 2.0 64M
USB 2.0 64M
MP3 Player
Product
Company
Type
Creative MuVo NX128M
Iriver H320
YH-920
YP-T7
YP-MT6
YP-T6
YP-53
YP-ST5
YP-T5
YP-60
YP-780
YP-35
YP-55
iAUDIO U2
iAUDIO G3
iAudio M3
SI-M500L
H10
YP-T5 VB
YP-53
Creative
Iriver
Samsung
Samsung
Samsung
Samsung
Samsung
Samsung
Samsung
Samsung
Samsung
Samsung
Samsung
Cowon
Cowon
Cowon
Sharp
Iriver
Samsung
Samsung
128 MB MP3 Player
20G HDD MP3 Player
20G HDD MP3 Player
MP3 Player
MP3 Player
MP3 Player
MP3 Player
MP3 Player
MP3 Player
MP3 Player
MP3 Player
MP3 Player
MP3 Player
MP3 Player
MP3 Player
HDD MP3 Player
256MB MP3 Player
MP3 Player
MP3 Player
256MB MP3 Player
G
E
N
E
R
A
L
T
F U
N
M E
R
V
I
D
E
O
O
U
T
P
U
T
A
M
P
L
I
F
I
E
R
Power Consumption
Weight
Dimensions (W x H x D)
Operating Temperature Range
Operating Humidity Range
Usable Sensitivity
S/N Ratio
Distortion
Composite Video
Component Video
HDMI
Front speaker output
Center speaker output
Rear speaker output
Subwoofer speaker output
Frequency range
S/N Ratio
Channel separation
Input sensitivity
90W
5 kg
521 x 320 x 178 mm
41°F ~ 95°F
10% ~ 75%
10dB
60dB
0.5%
1.0Vp-p(75Ω load)
Y:1.0Vp-p(75Ω load)
Pr:0.70Vp-p(75Ω load)
Pb:0.70Vp-p(75Ω load)
Impedance: 85~115
80W x 2(3Ω)
80W
80W x 2(3Ω)
100W(3Ω)
20Hz~20KHz
70dB
60dB
(AUX)400mV
Multi Card Reader
Product
UNICORN
USB 2.0 Card Reader
Company
Type
Unicorn
USB 2.0 7 IN 1 CARD READER UC-601R
Billionton(Taiwan) USB 2.0 Card Reader for SD/MMC/RS-MMC(3-in-1)
MISCELLANEOUS
USB External HDD
Product
CUTIE
MOMOBAY UX-2
75
Company
Type
Serotech
Dvico
POCKET HARD DISK DRIVE
USB 2.0
76
02_XQ100/TXQ100_GB
2006.4.15
3:43 PM
Page 74
Технически
характеристики
Specifications
Бележки
Memo
HT - XQ100/HT - XQ100W
Speaker system
S
P
E
A
K
E
R
Impedance
Frequency range
Output sound pressure level
Rated input
Maximum input
Dimensions (W x H x D)
Weights
5.1ch speaker system
Subwoofer speaker
Front/Center/Rear speaker
3Ω
3Ω
40Hz~200Hz
150Hz~20kHz
85dB/W/M
82dB/W/M
100W
80W
200W
160W
Front
Center
Front
Center
98 x 482 x 76 mm
443 x 98 x 76 mm
3.3 kg
1 kg
98 x 206 x 80 mm
180 x 364 x 378 mm
Rear
1.1 kg
Subwoofer 7.1 kg
Rear
Subwoofer
HT - TXQ100
Speaker system
S
P
E
A
K
E
R
Impedance
Frequency range
Output sound pressure level
Rated input
Maximum input
Dimensions (W x H x D)
Weights
77
5.1ch speaker system
Subwoofer speaker
Front/Center/Rear speaker
3Ω (DCR 3.4Ω)
3Ω (DCR 3.4Ω)
40Hz~200Hz
150Hz~20kHz
85dB/W/M
82dB/W/M
100W
80W
200W
160W
Front/Rear
Center
Front
Center
98 x 1157 x 76 mm Subwoofer
180 x 364 x 378 mm
443 x 98 x 76 mm
6.4 kg
Subwoofer 7.1 kg
1 kg