1
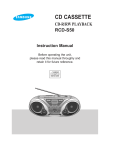
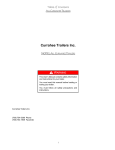
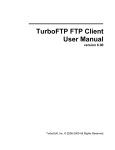
MAINTAINING THE SOUND QUALITY
OPERATING
INSTRUCTIONS
To obtain the best possible results from your cassette player, you must clean
it regularly (heads, roller and drive capstan).
RC-29
Open the deck by pressing the ST/EJ (
) button.
Use a cotton bud and a special cassette cleaning agent to clean the:
◊ Heads ( 1 )
◊ Roller ( 2 )
◊ Drive capstan ( 3 )
To guarantee hours of enjoyable listening with your cassettes:
◊ Check that the tape in the cassette is always sufficiently taut
◊ Store your cassettes in a clean place, out of direct sunlight, where
they will not be exposed to high temperatures
◊ Avoid using 120-minute cassettes as they are extremely fragile.
Before operating the unit,
please read this manual throughly and
retain it for future reference.
ELECTRONICS
AH68-10352B
—7—
SPECIFICATIONS
MEMO
SAFETY WARNINGS
RADIO
LW(OPTION)
Frequency range ..................................................................150 KHz ~ 290 kHz
Use of controls, adjustments or performance of
procedures other than those specified herein may
result in hazardous radiation exposure.
CAUTION
RISK OF ELECTRIC SHOCK.
DO NOT OPEN.
SW(OPTION)
Frequency range ......................................................................6 MHz ~ 18 MHz
This symbol indicates that dangerous
voltage which can cause electric shock
is present insede this unit.
CAUTION:
TO REDUCE THE RISK OF ELECTRIC
SHOCK, DO NOT REMOVE REAR COVER,
NO USER SERVICEABLE PARTS INSIDE,
REFER SERVICING TO QUALIFIED SERVICE PERSONNEL.
AM(MW)
Frequency range................................................................530 KHz ~ 1605 kHz
FM
Frequency range..................................................................88 MHz ~ 108 MHz
This symbol alerts you to important
operating and maintenance instructions
accompanying unit.
WARNING: To reduce the risk of fire or electric
shock, do not expose this appliance to
rain or moisture.
CAUTION: To prevent electric shock, match wide
blade of plug to wide slot, fully insert.
TAPE DECK
Frequency response................................................................125 Hz ~ 6.3 kHz
Wiring the Mains Power Supply Plug(UK Only)
GENERAL
IMPORTANT NOTICE
Output power ........................................................................................0.8 Watts
Dimensions ..........................................................264(W) x 145(H) x 135(D) mm
The mains lead on this equipment is supplied with a moulded plug incorporating a fuse. The value of the fuse is indicated on the pin face of the plug and if it requires replacing, a fuse approved to BS1362 of the same rating must be
used.
Never use the plug with the fuse cover omitted. If the cover is detachable and a replacement is required, it must be of
the same colour as the fuse fitted in the plug. Replacement covers are available from your dealer. If the fitted plug is
not suitable for the power points in your house or the cable is not long enough to reach a power point, you should
obtain a suitable safety approved extension lead or consult your dealer for assistance.
However, if there is no alternative to cutting off the plug, remove the fuse and then safely dispose of the plug. Do not
connect the plug to a mains socket as there is a risk of shock hazard from the bared flexible cord.
Never attampt to insert bare wires directly into a mains socket. A plug and fuse must be used at all times.
IMPORTANT
The wires in the mains lead are coloured in accordance with the following code:–
BLUE = NEUTRAL
BROWN = LIVE
As these colours may not correspond to the coloured markings identifying the terminals in your plug, proceed as follows:–
The wire coloured BLUE must be connected to the terminal marked with the letter N or coloured BLUE or BLACK.
The wire coloured BROWN must be connected to the terminal marked with the letter L or coloured BROWN or RED.
WARNING: DO NOT CONNECT EITHER WIRE TO THE EARTH TERMINAL WHICH IS MARKED WITH
THE LETTER E OR BY THE EARTH SYMBOL
, OR COLOURED GREEN OR
GREEN AND YELLOW.
—8—
—9—
— 10 —
FRONT PANEL
POWER SOURCES
LISTENING TO THE RADIO
HOUSE CURRENT
The mains lead must be plugged into an appropriate socket.
Before plugging your system into a mains socket, you must chek the voltage setting, if the
voltage of the socket does not correspond to the setting on the bottom of the unit, you
may seriously damage your system.
1
Select the desired band.
3
Turn VOLUME.
2
Turn TUNING.
* The nameplate indicating operating voltage, power consumption, Etc.
is located at the bottom.
BATTERIES
To turn off the radio.
To improve broadcast reception.
Reorient the antenna for FM or SW (option). Reorient the player itself for AM or
LW(option).
For FM or SW
(option)
For AM or LW (option)
6V ; C SIZE
Note: The unit will not operate from the internal batteries while the AC power
cord is connected to the unit.
—1—
—2—
RECORDING FROM RADIO
1
3
Turn TUNING.
5
Press REC button.
—3—
LISTENING TO THE CASSETTE
2
Select the desired band.
4
Turn VOLUME.
BUILT-IN MICROPHONE RECORDING
1
Place FUNCTION switch in
TAPE position.
2
Insert a cassette to DECK.
1
Place FUNCTION switch in
TAPE position.
2
Insert a cassette to DECK.
3
Press PLAY button.
4
Turn VOLUME.
3
Press REC button.
4
To stop recording,
press ST/EJ button.
Recorded side
Tab
To stop play,
Press ST/EJ button.
To pause
Press
To release pause
Press
To advance the tape
Press
To rewind the tape
Press
NOTE
To re-use
To prevent accidental erasure.
Break off the tab corresponding to the side which has been recorded on.
Recording on that side will be protected.
—4—
—5—
again.
Since this unit is built in the microphone with high sensitivity.
(This recording can be available 3 to 5 meters apart from the unit.)
—6—