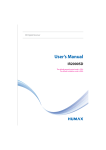
1
Digital Set-Top Box
DIGI+IV
User’s Manual
The default password is 0000.
Notice
Thank you for purchasing a HUMAX product. Please read this user’s manual carefully to be able
to safely install, use and maintain the product at maximum performance. Keep this user’s manual
next to your product for future reference. The information in this user’s manual is subject to
change without notice.
Copyright (Copyright © 2008 HUMAX Corporation)
Not to be copied, used or translated in part or whole without HUMAX’s prior consent in writing
except approval of ownership of copyright and copyright law.
Warranty
The warranty does not cover parts which may become defective due to misuse of the information
contained in this manual.
Trademarks
Nagravision is a registered trademark of KUDELSKI S.A.
Warnings, Cautions and Notes
Throughout the whole manual, pay special attention to the following marks that indicate
hazardous situations.
•
Warning
Indicates a hazardous situation which could result in serious injury.
•
Caution
Indicates a situation which could damage the equipment or other apparatus.
•
Note
Indicates additional information to make the user aware of possible problems and
information of any importance to help understand, use and maintain the installation.
GB1
Notice
Meaning of Symbols
To reduce the risk of electric shock, do not remove cover (or back). No user
serviceable parts inside. Refer servicing to qualified service personnel.
This symbol indicates dangerous voltage inside the product that presents a
risk of electric shock or personal injury.
This symbol indicates important instructions accompanying the product.
Instruction about the ‘WEEE’ Symbol
This product should not be disposed with other household wastes at the end
of its working life. Please separate this from other types of wastes and recycle it
responsibly to promote the sustainable reuse of material resources. This will prevent
possible harm to the environment or human health from uncontrolled waste
disposal.
•
Domestic users:
Please contact either the retailer where you purchased this product or their local government
office for details of where and how they can take this item for environmentally safe recycling.
•
Business users:
Contact your supplier and check the terms and conditions of the purchase contract. This
product should not be mixed with other commercial wastes for disposal.
GB2
Safety Warning
This product has been manufactured to comply with international safety standards. Please read
the following safety precautions carefully.
Safety Instructions and Precautions
1. MAINS SUPPLY
90-250V a.c., 50/60Hz
•
•
Operate this product only from the type of power supply indicated on the marking
label. If you are not sure of the type of power supplied to your home, consult your
local power company.
Disconnect the product from the mains before you start any maintenance or
installation procedures.
2. OVERLOADING
•
Do not overload a wall outlet, extension cord or adapter as this may result in electric
fire or shock.
3. LIQUID
•
The product should not be exposed to liquid of any kind. In addition, no objects
filled with liquid should be placed on the apparatus.
4. CLEANING
•
•
Disconnect the product from the wall outlet before cleaning.
Use a light damp cloth (no solvents) to dust the product.
5. VENTILATION
•
•
•
The slots on top of the product must be left uncovered to allow proper airflow into
the unit.
Do not stand the product on soft furnishings or carpets.
Do not stack electronic equipments on top of the product.
6. ATTACHMENTS
•
Do not use any unsupported attachments as these may be hazardous or cause
damage to the product.
7. CONNECTION TO THE SATELLITE DISH LNB
•
Disconnect the product from the mains before connecting or disconnecting the
cable from the satellite dish. Failure to do so can damage the LNB.
8. CONNECTION TO THE TV
•
Disconnect the product from the mains before connecting or disconnecting the
cable from the TV. Failure to do so can damage the TV.
9. EARTHING
•
The LNB cable must be earthed to the system earth for the satellite dish.
GB3
Safety Warning
10. LOCATION
•
•
•
•
•
•
•
Place the product indoors to avoid exposing it to lightning, rain or sun.
Do not place it near a radiator or heat register.
Make sure it has more than 10 cm clearance from any appliances susceptible to
electromagnetic influences, such as a TV or a VCR.
Do not block the openings with any object, and do not place the product on a bed,
sofa, rug, or other similar surface.
If you place the product on a rack or a bookcase, ensure that there is adequate
ventilation and that you have followed the manufacturer’s instructions for
mounting.
Do not place the product on an unstable cart, stand, tripod, bracket, or table where
it can fall.
A falling product can cause serious injury to a child or adult, and serious damage to
the appliance.
11. LIGHTNING, STORM OR NOT IN USE
•
Unplug the product from the wall outlet and disconnect the antenna during a
thunderstorm or when left unattended and unused for long periods of time. This will
prevent damage to the unit due to lightning and power-surges.
12. EXTRANEOUS OBJECTS
•
Do not insert anything through the openings in the unit, where they can touch
dangerous voltage points or damage parts.
13. REPLACEMENT OF PARTS
•
GB4
When replacement of parts is required, be sure the service technician uses
replacement parts specified by the manufacturer or those that have the same
characteristics as the original part. Unauthorized substitution may result in
additional damage to the unit.
Safety Warning
Warning
1. To avoid damage of the power cord or plug;
•
•
•
•
Do not modify or process the power cord or plug arbitrarily.
Do not bend or twist the power cord.
Make sure to disconnect the power cord holding the plug.
Keep heating appliances as far as possible from the power cord in order to prevent
the cover vinyl from melting.
•
The mains plug, as a disconnection device, shall remain readily accessible by the user.
2. To avoid electrical shock;
•
•
•
•
Do not open the main body.
Do not insert metal or inflammable objects inside the product.
Do not touch the power plug with wet hands.
Disconnect the power cord in case of lightning.
3. To avoid damage of product;
•
•
Do not use the product when it is out of order. If you continue to use the product
when defective, serious damage can be caused to it. Make sure to contact your local
product distributor if the product is out of order.
Do not insert metal or alien substance into the slots for the modules or Smartcards.
It may cause damage to the product and reduce its life span.
GB5
Contents
1. Before Using the Product.
1.1 Package Contents . . .
1.2 Front Panel . . . . . . .
1.3 Conditional Access . .
1.4 Rear Panel . . . . . . . .
1.5 Remote Control . . . .
.
.
.
.
.
.
.
.
.
.
.
.
.
.
.
.
.
.
. . . . . . . . . . . . .
. . . . . . . . . . . . . .
. . . . . . . . . . . . . .
. . . . . . . . . . . . . .
. . . . . . . . . . . . . .
. . . . . . . . . . . . . .
.
.
.
.
.
.
.
.
.
.
.
.
.
.
.
.
.
.
.
.
.
.
.
.
.
.
.
.
.
.
.
.
.
.
.
.
. . . . . . . . . . . . . .
. . . . . . . . . . . . . . .
. . . . . . . . . . . . . . .
. . . . . . . . . . . . . . .
. . . . . . . . . . . . . . .
. . . . . . . . . . . . . . .
.
.
.
.
.
.
.
.
.
.
.
.
. GB7
. . GB7
. . GB8
. . GB9
. GB10
. GB11
2. Setup . . . . . . . . . . . . . . . . . . . . . . . . . . . . .
2.1 Connecting the Antenna. . . . . . . . . . . . . . . .
2.2 Connecting the TV. . . . . . . . . . . . . . . . . . . .
2.3 Connecting the TV and VCR . . . . . . . . . . . . . .
2.4 Connecting Audio System. . . . . . . . . . . . . . .
2.5 Connecting the Master and Slave Set-Top Box . .
2.6 Powering On . . . . . . . . . . . . . . . . . . . . . . .
.
.
.
.
.
.
.
.
.
.
.
.
.
.
.
.
.
.
.
.
.
.
.
.
.
.
.
.
.
.
.
.
.
.
.
.
.
.
.
.
.
.
. . . . . . . . . . . . .
. . . . . . . . . . . . . .
. . . . . . . . . . . . . .
. . . . . . . . . . . . . .
. . . . . . . . . . . . . .
. . . . . . . . . . . . . .
. . . . . . . . . . . . . .
.
.
.
.
.
.
.
.
.
.
.
.
.
.
.GB14
. GB14
. GB15
. GB18
. GB19
. GB20
. GB22
.
.
.
.
.
.
.
3. Installation Wizard . . . . . . . . . . . . . . . . . . . . . . . . . . . . . . . . . . . . . . . . . . . .GB23
4. Basic Operation . . . . . . . . . . . . . . . . . . . . . . . . . . . . . . . . . . . . . . . . . . . . . .GB24
5. Channel List . . . . . . . . . . . . . . . . . . . . . . . . . . . . . . . . . . . . . . . . . . . . . . . .GB26
6. Programme Guide . . . . . . . . . . . . . . . . . . . . . . . . . . . . . . . . . . . . . . . . . . . .GB27
7. Menu . . . . . . . . . . . .
7.1 Preferences . . . . . .
7.2 Edit Channels . . . . .
7.3 Installation . . . . . .
7.4 System & Games . . .
7.5 Pay Per View Service
.
.
.
.
.
.
.
.
.
.
.
.
.
.
.
.
.
.
.
.
.
.
.
.
. . . . . . . . . . . . .
. . . . . . . . . . . . . .
. . . . . . . . . . . . . .
. . . . . . . . . . . . . .
. . . . . . . . . . . . . .
. . . . . . . . . . . . . .
.
.
.
.
.
.
.
.
.
.
.
.
.
.
.
.
.
.
.
.
.
.
.
.
.
.
.
.
.
.
.
.
.
.
.
.
. . . . . . . . . . . . . .
. . . . . . . . . . . . . . .
. . . . . . . . . . . . . . .
. . . . . . . . . . . . . . .
. . . . . . . . . . . . . . .
. . . . . . . . . . . . . . .
.
.
.
.
.
.
.
.
.
.
.
.
.GB28
. GB28
. GB28
. GB29
. GB30
. GB30
8. Software Update . . . . . . . . . . . . . . . . . . . . . . . . . . . . . . . . . . . . . . . . . . . . .GB31
8.1 OTA (Over the Air) . . . . . . . . . . . . . . . . . . . . . . . . . . . . . . . . . . . . . . . . . . . . GB31
8.2 Software Update from PC . . . . . . . . . . . . . . . . . . . . . . . . . . . . . . . . . . . . . . . GB31
9. Service and Support . . . . . . . . . . . . . . . . . . . . . . . . . . . . . . . . . . . . . . . . . . .GB32
GB6
1. Before Using the Product
This chapter describes detailed instructions on the product and its accessories.
1.1 Package Contents
Please check all package contents before using your product.
Remote Control
SCART Cable
User’s Manual
User’s Manual
Batteries
Note:
• Faults may occur if the remote control is left without battery for a long time.
Always keep the battery inserted in the remote control.
• The front and rear of the product are subject to change without notice.
• Package contents may vary according to area.
GB7
1. Before Using the Product
1.2 Front Panel
1
2
3
4
5
6
1. STANDBY BUTTON
Switches between operation and standby modes.
2. TV/RADIO BUTTON
Switches between TV and radio modes.
3. CH-/CH+ BUTTON
Moves the TV/radio channel up or down.
4. STANDBY LED
Red light is emitted when the product is in standby mode.
5. TV LED
Green light is emitted when the product is in TV mode.
6. RADIO LED
Amber light is emitted when the product is in radio mode.
7. SMARTCARD SLOT
A slot for a Smartcard
GB8
7
1. Before Using the Product
1.3 Conditional Access
Although some TV and radio channels are free to air, most TV and radio/music channels are
available on a subscription basis and can only be enjoyed via a Conditional Access component.
The Conditional Access component is a removable Smartcard.
1. Inserting the Smartcard
The Smartcard looks similar to a credit card and is inserted into the slot. A valid Smartcard entitles
you to view and listen to all the channels you choose to subscribe to.
The Smartcard slot on the product can be used for Nagravision Smartcard only.
1.
2.
Hold the Smartcard horizontally with the electronic chip (small square-shaped, gold in colour)
facing downwards.
Insert the Smartcard into the slot.
Notice
Smartcard
GB9
1. Before Using the Product
1.4 Rear Panel
1
2
3
4
5
6
1. LNB IN
Connects a satellite antenna cable.
2. LNB OUT
Connects another digital set-top box.
3. TV SCART
Connects to the TV using a TV SCART cable.
4. AUDIO L/R
Connects to the TV or VCR using a RCA cable.
5. VIDEO
Connects to the TV or VCR using a RCA cable.
6. S/PDIF
Connects to the audio system using an S/PDIF cable. (digital audio)
7. DUAL ROOM PORT
Connects to the master or slave STB using a LAN cross cable.
8. RF OUT
Connects to the RF IN of the TV using an RF cable.
9. RF IN
Connects to the general aerial antenna or cable.
GB10
7
8
9
1. Before Using the Product
1.5 Remote Control
1
1. SOURCE
Controls the input of TV.
2. TV/RADIO
Switches between TV and radio modes.
2
3
4
5
6
7
8
9
10
11
3. NUMERIC(0-9) BUTTONS
Enters a TV/radio channel number or
menu option number.
4. LIST (SUB-PAGE)
Displays the channel list.
5. BACK
Returns to the previous channel or menu
option.
6. ARROW BUTTONS
Changes the channel or moves the cursor
up, down, left or right.
7. V-/V+
Adjusts the audio volume.
8. OPT+(OPTION)
Displays the channel attributes while
watching a programme.
9. AUDIO
Displays the audio list.
10. MENU
Displays the main menu.
11. WIDE
Changes the display format.
GB11
1. Before Using the Product
12. MUTE
Mutes or unmutes the audio temporarily.
12
13
13. POWER
Switches between operation and standby
modes.
14. GUIDE (HOLD)
Displays the programme guide.
15. EXIT
Exits all On-Screen Display (OSD) screens.
14
15
16
17
18
19
20
GB12
16. OK
Selects a menu, or confirms the selected
operation. And displays the channel list
while watching a programme.
17. CH-/CH+ or PAGE-/PAGE+
Changes the channel or page.
18. FREEZE
Freezes the TV screen you are watching.
Does not cease audio.
19. SUBTITLE
Displays the subtitle language list.
20. i (INFORMATION)
Displays the channel and programme
information.
1. Before Using the Product
21. TELETEXT
a. SUB-PAGE
Searches the sub-page in
teletext mode.
b. TELETEXT ON/OFF
Switches between teletext and
TV modes.
c. DOUBLE
Displays the text size as double
size.
d. MIX
Adjusts transparency of the
teletext screen.
e. REVEAL
Displays the concealed
information.
21
a
b
c
d
e
f.
HOLD
Holds the current page not
updating it.
g. CANCEL
Hides the teletext leaving only
the page number.
f
g
GB13
2. Setup
This chapter describes how to connect the product to the TV with the particular equipments for
gaining optimum signal quality. The product provides various interfaces to connect to the TV, VCR
or other devices. Select the most appropriate procedure depending on the equipment you have.
Note:
If you encounter any problems setting up your product, please contact your local product
distributor.
2.1 Connecting the Antenna
Connect the antenna to the LNB.
GB14
2. Setup
2.2 Connecting the TV
1. Using SCART Cable
Connect the product and the TV using a SCART cable as follows.
SCART Cable
TV SCART
VIDEO
L
AUDIO
R
TV Antenna IN
TV Antenna OUT
S/PDIF
GB15
2. Setup
2. Using RCA Cable
Connect the product and the TV using a RCA cable as follows.
RCA Cable
TV SCART
GB16
VIDEO
L
AUDIO
R
TV Antenna IN
TV Antenna OUT
S/PDIF
2. Setup
3. Using RF Cable
Connect the product and the TV using an RF cable as follows.
Note:
• Connect your aerial or cable to the RF IN to watch analogue channels.
• Tune the TV to an UHF channel if the product is connected to the TV using an RF cable.
RF Cable
TV SCART
VIDEO
L
AUDIO
R
TV Antenna IN
TV Antenna OUT
S/PDIF
GB17
2. Setup
2.3 Connecting the TV and VCR
1. Using RF Cable
1.
2.
Connect the RF OUT of the product and the aerial input of the VCR using an RF cable.
Connect the aerial output of the VCR and the aerial input of the TV using an RF cable.
Note:
• Connect your aerial or cable to the RF IN to watch analogue channels.
• Tune the TV or VCR to an UHF channel if the product is connected to the TV or VCR using an
RF cable.
RF Cable
VCR SCART
VIDEO
L
AUDIO
R
VCR Antenna IN
VCR Antenna OUT
S/PDIF
RF Cable
TV SCART
GB18
VIDEO
L
AUDIO
R
TV Antenna IN
TV Antenna OUT
S/PDIF
2. Setup
2.4 Connecting Audio System
Select the most appropriate procedure for your convenience.
•
•
Connect the product and the audio system using an RCA cable.
Connect the product and the Dolby Digital decoder for higher quality sound using an S/PDIF
cable.
S/PDIF Cable
RCA Cable
L
AUDIO
R
S/PDIF
GB19
2. Setup
2.5 Connecting the Master and Slave Set-Top Box
1. Using LAN cross cable
Connect the master STB and slave STB using the LAN cross cable.
Note:
• Please use the RS-422 Converter Adapter. Refer to the 2.5.2 Using Converter Adapter.
• You can check your STB type in Menu>System & Games>Status.
• If the slave STB is not connected to the master STB, the AV is not displayed.
Master STB
LAN Cable
Slave STB
GB20
2. Setup
2. Using Converter Adapter
Connect the DIGI+II STB and DIGI+III master STB using the RS-422 Converter Adapter.
Note:
• You can check your STB type in Menu>System & Games>Status.
• If the slave STB is not connected to the master STB, the AV is not displayed.
DIGI+II/DIGI+III Master STB
RS-232C Cable
Adapter
LAN Cable
DIGI+IV Slave STB
GB21
2. Setup
2.6 Powering On
1.
2.
Connect the power cord of the product to a wall outlet.
Power on by pressing the POWER button on the remote control.
GB22
3. Installation Wizard
When powering on the product for the first time after purchasing, the installation wizard will
operate automatically.
1. Language: Select the appropriate language.
2. Area Setting: Select the appropriate area.
3. Antenna Setting: Set the antenna properties to watch the programme.
• Satellite: Select a satellite or enter the satellite name using User Define.
• LNB Frequency: Select the LNB frequency.
• 22kHz Tone: Select Enable when using the 22KHz tone switch.
• DiSEqC Input: Select DiSEqC input if you are using DiSEqC switch to connect
multiple antennas or LNBs.
4. Automatic Search: Search automatically for satellites according to the antenna setting.
5. Time Setting: Set the GMT offset for current time.
GB23
4. Basic Operation
This chapter describes functions such as switching channel, volume control and basic features for
watching programmes.
1. Switching Channel: Switch the current channel using the CH-/CH+, / or NUMERIC(0-9)
buttons.
2. Volume Control: Adjust the audio volume using the V-/V+ or / button.
3. Subtitle: Select the language for the subtitle using the SUBTITLE button.
4. Audio: Select the language you prefer using the AUDIO button.
5. Teletext: Enter the teletext mode using the TELETEXT ON/OFF button.
6. Programme Information (i-plate): You can view the programme information by pressing the
i button while watching a programme.
1
5
GB24
6
3
2
7
Channel number and channel name
Programme name
Icons
Current time
Detail programme information
Signal strength and signal quality
Satellite name or channel change mode
Programme broadcasting time and progress bar
Next programme information
4
8
9
4. Basic Operation
7. Option List: Press the OPT+ button to view the
option list.
• Favourite: Adds the current channels to
•
•
•
favourite group.
Lock/Unlock: Locks or Unlocks the current
channel.
Delete: Deletes the current channel.
Information: Displays the detailed
information about the current channel.
GB25
5. Channel List
1.
2.
You can display channel list using the LIST button
and switch to another channel on the channel list.
Press the button while the channel list is
displayed to view the group list.
Five types of channel lists are provided for easy and quick channel finding.
TV
The list of all TV channels with two subgroups
Radio
The list of all radio channels with two subgroups
Favourite
The list of favourite channels with five subgroups
Satellite
The lists of channels classified by satellites
Scramble
The lists of channels classified by CAS types
GB26
6. Programme Guide
The programme guide displays programme information about each channel, based on the date
and time. You can also schedule your watching using the information given.
1.
2.
Press the GUIDE button.
Select a programme and press the OK button. You
can watch the programme if it is on air or reserve it
if it is the future programme.
• Group: You can view programme
•
•
•
information of the selected channel list by
groups.
Time Bar: You can quickly search the time
zone you want using the time bar.
Schedule: You can add or edit reserved
programmes by viewing the reserved
programme list.
Find: You can sufficiently find the programme you want by programme name or
genre.
GB27
7. Menu
7.1 Preferences
1. Parental Control: Set censorship, watching time
and change password.
2. Language Setting: Set the language for menu,
audio and subtitle.
3. Time Setting: Specify the Power On/Off time.
4. Schedule: Reserve a programme and watch it
anytime you want.
5. A/V Control: Set the audio or video output control.
6. UHF Tuning: You can set the UHF tuning channel.
7. Miscellaneous Settings
7.2 Edit Channels
1. Edit Channel Lists: Edit all channels or each
channel by channel list group.
2. Edit Favourite Channels: Edit favourite channel or
favourite channel list.
3. Channel Change Mode: Change the channel
either in the group or in the entire groups while
watching a programme.
GB28
7. Menu
7.3 Installation
1. Antenna Setting
1.
2.
3.
4.
5.
Satellite: Select a satellite or enter the satellite name using User Define.
Satellite Alternative: Set to Enable.
LNB Frequency: Select the LNB frequency.
22kHz Tone: Select Enable when using the 22KHz tone switch.
DiSEqC Input: Select DiSEqC input if you are using DiSEqC switch to connect multiple
antennas or LNBs.
2. Automatic Search
If you select the satellite to search channel according to the antenna setting, you can
automatically search the satellite without entering any other information.
3. Manual Search
1. Satellite: Select a satellite or enter the satellite
name using User Define.
2. Transponder: Set transponder value for the
satellite.
3. Network Search: Determine whether or not to
search the channel for the other transponder.
4. Search Type: Determine whether or not to search
channel by FTA or CAS type.
5. Channel Type: Select the channel type.
GB29
7. Menu
4. Other Search
You can directly enter the packet ID value or search channel using SMATV.
5. Update
You can update the software.
6. Default Setting
Restores the product to the default settings.
7.4 System & Games
1. Status: You can view system information.
Note:
You can check your STB type (Master or Slave)
in the Status menu.
2. Signal Detection: You can view the signal strength
and signal quality.
3. Mail Box: You can view and delete the message.
4. Games: This product provides various games for
user’s entertainment.
7.5 Pay Per View Service
1. IPPV Smartcard Information
2. Purchasing History
3. PPV Service Description
GB30
8. Software Update
8.1 OTA (Over the Air)
OTA is a standard for the transmission of software for equipment through a broadcast system.
Software update will only occur under the following circumstances.
1.
2.
3.
4.
The equipment should have appropriate loader software.
The manufacturer decides to release the software via a designated antenna system.
The equipment must be tuned properly to the same antenna equivalent to that of the
manufacturer.
Update software when the signal strength quality is high.
Note:
The product will not activate during software update. It may take 5-10 minutes to
complete.
8.2 Software Update from PC
You can upgrade your software directly from the PC.
1.
2.
3.
4.
5.
Download the new software equivalent for the product from the website
(http://www.humaxdigital.com).
Download the download tool from the website and install it.
Connect the PC and the product using the LAN cross cable.
Execute the downloaded tool and follow the given instructions.
Power On/Off to start operating.
LAN Cable
LAN
PC
GB31
9. Service and Support
Germany
Tel:
01805-778870 (€0,12/min)
Opening Hours:
Mon-Sat 8:00-20:00
E-mail:
[email protected]
Website:
www.humax-digital.de
Language:
Deutsch/English/Turkish
UK
Tel:
0870 247 8800
Opening Hours:
Mon-Fri 8:30-21:00
E-mail:
[email protected]
Website:
www.humax-digital.co.uk
Language:
English
Middle East (Dubai, UAE)
Tel:
+971 (0)4 359 2323
Opening Hours:
Sat-Thurs 9:00-20:00 (Closed on Fri)
E-mail:
[email protected]
Website:
www.humaxarabia.com
Language:
Arabic/English
Australia
Tel:
1800 613 011
Opening Hours:
Mon-Fri 9:00-17:30
E-mail:
[email protected]
Website:
www.humaxdigital.com/australia
Language:
English
GB32
9. Service and Support
Italy
Tel:
899 100 080 (€1+ VAT/min)
Opening Hours:
Local time in Italy (GMT+1)
Mon-Fri 8:00-18:00
Language:
Italian
Sweden
Tel:
+46 (0)550 85527
Opening Hours:
Mon-Fri 8:00-16:30
Language:
Swedish/English
Finland
Tel:
09 56186366
Opening Hours:
Mon-Fri 8:00-16:00
Language:
Finnish/English
Austria
Tel:
0820 400675 (0,12 €/min)
Opening Hours:
Lun-Sâm 8:00-23:00
E-mail:
[email protected]
Website:
www.humax-digital.de
Language:
Deutsch/English/Turkish
Note:
For hardware repair, please visit our website.
GB33
www.humaxdigital.com
*20000-00042PT*
ROHS/C-MANUAL/DIGI+IV/100GBROHUCZSKHRSR
20000-00042PT