1
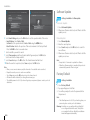
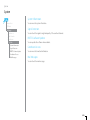
IRHD-1000S/XX The default password is 0000. Le mot de passe par défaut est 0000. For Your Safety For Your Safety Safety Instructions 1. POWER SUPPLY • Operate this product only from the type of power supply shown on the marking label. If you do not know the type of power supplied to your home, contact your local power company. • Disconnect the power supply before you start any maintenance or installation procedures. 2. OVERLOADING • Make sure that the wall outlet, extension cord and adapter have a sufficient power rating for the appliance. If not, this can cause an electric fire shock. 3. LIQUID • Do not expose this product to liquids. Do not put objects filled with liquid on the product. 4. CLEANING • Disconnect the product from the wall outlet before you clean it. • Use a moist cloth to clean the product. Do not use solvents. Wipe the surface gently with a soft cloth as it may get scratched. 5. VENTILATION • Make sure that the slots on top of the product are not blocked. It is necessary to have a sufficient airflow into the unit. • Do not put electronic equipment on the product. • Do not put objects on the product. This will block the ventilation or cause damage to the surface. 6. ATTACHMENTS • Do not use any unsupported attachments as these may be hazardous or cause damage to the product. 7. LIGHTNING, STORM OR NOT IN USE • Unplug the product from the wall outlet and disconnect the antenna during a thunderstorm or when left unattended and unused for long periods of time. This will prevent damage to the unit due to lightning and power-surges. 8. EXTRANEOUS OBJECTS • Do not insert anything through the openings in the unit, where they can touch dangerous voltage points or damage parts. 9. REPLACEMENT OF PARTS • When replacement of parts is required, be sure the service technician uses replacement parts specified by the manufacturer or those that have the same characteristics as the original part. Unauthorised substitution may result in additional damage to the unit. 10. CONNECTION TO THE SATELLITE DISH LNB/CABLE TV SIGNAL/AERIAL • Disconnect the power supply before you connect or disconnect the cable from the satellite dish/ cable TV signal/aerial. If not, this can cause damage to the LNB/cable TV line/aerial. 11. CONNECTION TO THE TV • Disconnect the power supply before you connect or disconnect the cable from the TV. If not, this can cause damage to the TV. 12. EARTHING (satellite only) • Earth the LNB cable to the system earth for the satellite dish. 13. LOCATION • Do not modify or process the power cord or plug arbitrarily. • Do not bend or twist the power cord. • Make sure to disconnect the power cord while you hold the plug. • Keep heating appliances as far as possible from the power cord to prevent the cover vinyl from melting. • The mains plug, as a disconnection device, shall remain readily accessible by the user. 2. To avoid electrical shock • Do not open the main body. • Do not insert metal or inflammable objects inside the product. • Do not touch the power plug with wet hands. • Disconnect the power cord in case of lightning. • Unplug the power cable before you install the antenna cable. 3. To avoid damage of product • Do not use the product when it is out of order. If you continue to use the product when defective, this may cause serious damage. Make sure to contact the customer service centre if the product is out of order. • Do not insert metal or alien substance into the slots for the modules or Smartcards. It may cause damage to the product and reduce its life span. • Place the product indoors to avoid exposure to lightning, rain or sun. Do not place it near a radiator or heat register. • Keep at least 10 cm clearance from any other appliances susceptible to electromagnetic influences such as a TV or a VCR. • If you place the product on a rack or a bookcase, make sure that there is adequate ventilation and that you have followed the manufacturer’s instructions for mounting. • Do not place the product on an unstable surface where it can fall. A falling product can GB1 Contents & Accessories Contents Accessories For Your Safety.................................................................1 System................................................................................19 Contents & Accessories...................................................2 Appendix...........................................................................20 Contents Accessories Quick Start Guide............................................................3 Front & Rear Remote Control Connections Wizard Trouble Shooting HUMAX Customer Support Error Messages Warranty Certificate or User’s Manual SUB OK User’s Manual SUB SUB OK Remote Control / Batteries Smartcard Managing Channels.......................................................8 Programme Information (i-Plate) Channel List Edit Channels or TV Guide............................................................................12 AC Adaptor HDMI Cable Preferences........................................................................14 Installation........................................................................15 Search Channels [Fixed Antenna] Search Channels [SCD Antenna] Search Channels [Motor Antenna] Software Update (OTA) Factory Default GB2 User’s Manual SUB OK User’s Manual Note: This accessories may vary according to area. OK Quick Start Guide Front & Rear Inserting the Smartcard 1. Hold the Smartcard horizontally with the electronic chip facing downwards. 2. Insert the Smartcard into the slot. Note: The image may differ from the actual product. STANDBY Switches between operation and standby modes Smartcard Slot STANDBY LED Red light is emitted when the product is in standby mode. 350 1.5A 1 2 3 4 5 1LNB 1 IN: Connect a satellite antenna cable. 2 VIDEO/AUDIO: Use an RCA cable to connect to the TV. 3HDMI: Use an HDMI cable to connect to the TV. 4 USB Port: Connect a USB storage device. 5 AC Adaptor: Use the AC adaptor to connect to the power supply. GB3 Quick Start Guide REC Remote Control STANDBY Switches between operation and standby modes TV/RADIO Switches between TV and radio modes 16:9 Sets the screen ratio to 16:9 4:3 WIDE YELLOW BLUE GREEN V-FORMAT RED 1 COLOUR Buttons For interactive applications LANG: Changes the subtitle/audio language : Displays the system information 2 NUMERIC (0-9) Sets the screen ratio to 4:3 i Displays the channel and programme infomration Sets the display format SLEEP Sets the sleep time Sets the resolution of video Jumps back 24 hours in the programme guide Jumps ahead 24 hours in the programme guide GB4 LIST Displays the channel list OPT+ Displays the channel attributes SCHED. Displays the schedule list FAV. Displays the favorite channel list GUIDE Displays the programme guide ARROW Buttons Moves the cursor up, down, left or right Important notice OK Selects a menu or confirms BACK Returns to the previous channel or the previous screen EXIT Exits all On-Screen Display (OSD) screens ◢ -/+ Changes the audio volume MUTE Mutes audio The batteries of your remote control are 2 x AAA type, 1.5V DC. Do not mix different types of batteries or new and old batteries. Do not use rechargeable batteries. In order to avoid any risk of explosion, observe polarities indicated inside the battery compartment. Replace only with the type of batteries specified above. Do not subject to excess heat such as SUN and Fire, do not recharge them. If you are not using the remote control for a long period of time, remove the batteries. Please respect the environment and prevalling regulations! Batteries must be collected separately from other refuse! Before you dispose of batteries, ask your dealer whether they are subject to special recycling and if he will accept them for disposal. beIN Displays the main menu P Changes the channel or page / SUB OK 2 SUB OK Battery 2 Insert the batteries matching the plus(+) and minus(-) at each end. Battery 1 Inserting Batteries Quick Start Guide Remote Control 1 1 1 i Displays the channel and programme infomration TV/RADIO Switches between TV and radio modes NUMERIC (0-9) FAV. Displays the favorite channel list GUIDE Displays the programme guide V +/- Changes the audio volume P + /- Changes the channel or page MUTE Mutes audio Displays the main menu 2 SUB Returns to the previous channel or the previous screen BACK OK 2 22 SUB SUB2 SUB OK 2 EXIT OK OK 2 Inserting Batteries Insert the batteries matching the plus(+) and minus(-) at each end. SUB OK 2 SUB OK 2 Exits all On-Screen Display (OSD) screens 2 the cursor up, down, left or ARROW Buttons Moves right OK Selects a menu or confirms COLOUR Buttons For interactive applications SUB: Changes the subtitle language : Displays the system information Battery 1 Switches between operation and standby modes Battery 1 STANDBY Important notice The batteries of your remote control are 2 x AAA type, 1.5V DC. Do not mix different types of batteries or new and old batteries. Do not use rechargeable batteries. In order to avoid any risk of explosion, observe polarities indicated inside the battery compartment. Replace only with the type of batteries specified above. Do not subject to excess heat such as SUN and Fire, do not recharge them. If you are not using the remote control for a long period of time, remove the batteries. Please respect the environment and prevalling regulations! Batteries must be collected separately from other refuse! Before you dispose of batteries, ask your dealer whether they are subject to special recycling and if he will accept them for disposal. GB5 Quick Start Guide Connections Connecting the Antenna This section describes how to connect your product to match your particular devices and to gain optimum signal quality. Connect the aerial to the LNB IN. Connecting the TV Warning: Connect all devices before you plug any power cords into the wall outlet. Always turn off the product, TV and other devices before you connect or disconnect any cables. 2-1 Using an HDMI cable Note: If you encounter any problems setting up your product, please contact your local retailer or HUMAX Customer Service. For the best picture quality, use an HDMI cable to connect to the TV. 2-2 Using an RCA cable For good picture quality, use an RCA cable to connect to the TV. Powering On Antenna 1. Connect the power cord of the product to a wall outlet. 2. Power on by pressing the STANDBY button on the remote control or the STANDBY button at the front panel. HDMI RCA Cable TV 1 2-2 2-1 350 1.5A GB6 Quick Start Guide Wizard The installation wizard operates automatically when you power on the product for the first time or do factory default in menu. 4. Search Channels 1. Language Select the appropriate language from the list. • beIN Sports: Search the beIN sports channels only. • Automatic Search: Search all channels of ES’HAIL(25.5E), NILESAT(7.0W), ARBSAT(BADR 26.0E) and HOTBIRD(13.0E) automatically. • Skip: If you have SCD or motor antenna, skip the search process and go to installation in Settings. 2. Display Set the video output to your TV. 5. Automatic Search Channel search will begin automatically. Save the found channels when the search is complete. 3. Time Zone Select your country to determine the time zone. 6. Result The result of the installation wizard will show. Select Finish to exit the wizard. GB7 REC Managing Channels Programme Information (i-Plate) REC Icons The i-plate is an information banner that is displayed for a few seconds whenever you change channels. Press the i button while you watch a programme to display the i-plate. Press the EXIT button to hide it. Channel number and name Current time Programme name and date 23:15 TUE 03.13.2012 AD Icons Group name Playing time AD Viewing detailed programme information Press the i button again while the i-plate is displayed. Viewing Programme information of other channels Press the p/q button while the i-plate is displayed. Press the OK button to change to the selected channel. GB8 Locked Programme Scrambled Programme AD Parental level AD AD HD Pregramme Resolution Subtitle Teletext Screen ratio Dolby Digital audio Dolby Digital Plus audio Managing Channels Channel List You can access the channel list in several ways. • Press the LIST button. • Press the beIN button and select Channel List. Note: • : Locked channel, : Scrambled channel (CAS icons) • Press the i button to view the detailed channel information. • Press the LIST or EXIT button to exit. AD • Press the TV/RADIO button to switch between TV and Radio groups. Changing Channels Editing Channels in Channel List Select the channel you want to watch and press the OK button. The channel will change. Select a channel you want to edit and press the YELLOW button. REC BEIN TV HDTV A-Z AD Radio Favourite1 Favourite Lock Delete Rename Sort Filter GREEN Locking Channels Select On or Off. Deleting Channels Press the OK button. Renaming Channels Press the OK button and enter the name in the keyboard. Edit Changing Group Press the button to display the list of the selected channel group. (BEIN, TV, HDTV, A-Z, Radio, Favourite 1~5, Recent) RED Setting Favourite Channels Select a favourite group you want to move the channel to and press the OK button. To remove a channel from a favourite group, select the group and press the OK button again. Note: • The default password is 0000. If you have forgotten your password, please contact your local distributor. • To edit multiple channels, go to beIN > Settings > Edit Channels. Sorting Channels Press the RED button to sort the channels in numerical or alphabetical order. Filtering Channels Press the GREEN button to filter the channels according to channel type in TV or Radio list. (Satellite, Pay Channel, All) GB9 E Managing Channels REC EditADChannels RED Editing Channel List > Settings > Edit Channels > Edit Channel List Edit Channel List will help you delete, move, lock or rename multiple channels. GREEN Marked/Total channels Group name YELLOW Settings Edit Channels Edit Channel List TV BLUE GREEN Moving Channels Select the channels using thep/q and OK button and press the GREEN button. Move the selected channels to the location you want using the p/q and OK button. Changing Group To list the channels of other groups, press the YELLOW button and select a group you want. Changing Background You can change the channel displayed in the background while editing. Select the channel you want to watch and press the BLUE button. Locking / Unlocking Channels Renaming Channels Selecting / Releasing All Channels RED Delete Move Group Preview Function Function buttons : Coloured or i button Note: • : Locked channel, : Scrambled channel (CAS icons) • Press the TV/RADIO button to switch between TV and Radio groups. • Press the beIN or EXIT button to exit. Press the BACK button to return to the AD previous screen. AD GB10 Deleting Channels Select the channels using the p/q and OK button and press the RED button. E AD Channels Managing Editing Favourite List > Settings > Edit Channels > Edit Favourite List Edit Favourite List will help you add or remove channels from the favourite groups. Group name Marked/Total channels RED p/q Favourite 1 GREEN YELLOW Group Favourite Preview Function BLUE GREEN Function buttons: Coloured or i button RED Note: • : Locked channel, : Scrambled channel (CAS icons) • Press the TV/RADIO button to switch between TV and Radio groups. • Press the beIN or EXIT button to exit. Press the BACK button to return to the AD previous screen. AD and OK button and then press the RED button. Changing Group To list the channels of other groups in the left column, press the GREEN button and select a group you want. (TV, Radio, HDTV) Settings Edit Channels Edit Favourite List Add Removing Favourite Channels Select the channels to remove from the right column using the REC Favourite group name TV Adding Favourite Channels Select the channels to add using the p/q and OK button in the left column and then press the RED button. The added channels will be listed in the right column. Moving Favourite Channels Select the channels using the p/q and OK button in the right column and then press the GREEN button. Changing Favourite Group To list the channels of other favourite groups, press the YELLOW button and select a group you want. Changing Background You can change the channel displayed in the background while editing. Select the channel you want to watch and the press the BLUE button. The background channel will change. Renaming Favourite Group Selecting / Releasing All Channels Import Channels from USB You can bring channel database from your hard disk drive. Export Channels to USB You can store channel database in your hard disk drive. GB11 AD TV Guide RED TV Guide Watching Programmes You can access the TV guide in several ways. • Press the GUIDE button. • Press the beIN button and select TV Guide. 1. Select a programme and press the OK button. The programme will display in the preview. 2. Press the OK button again to exit the TV guide and watch the programme. Preview Setting Reminders Information of the selected programme Current number & name, programme name, simple information, favourite group and icons TV Guide Current time and date 07:18 TUE 12 MAR 2012 1. Select a future programme and press the OK button. 2.Select Reminder and press the OK button. 3. Press the OK button again to cancel the reservation. The reserved programmes will be added automatically to Schedule. Note: • If the programme conflicts with another programme, adjust the reservation appropriately. Changing Group AD Guide To list the channels of other groups, press the BLUE button and select a group you want. Find Schedule Group Function buttons: Coloured button Note: AD • Press the i button to view the detailed programme information. • : Scheduled programme : Present time GB12 Time bar TV Guide Finding Programmes Scheduling Reminders Find will help you find the programmes more specifically according to the keyword or genre. Schedule shows you the list of reminders and helps you manage them. Schedule Find TUE TUE JUN ES’HAIL(25.5E) TV TUE TUE JUN ES’HAIL(25.5E) TV JUN JUN New Reminder 1 2 3 4 5 6 New Keyword TUE TUE WED THU FRI SAT Guide Guide Find Schedule Find Schedule Group Group By Keyword 1. Press the GREEN button. 2.Select Keyword and press the button. 3. Select a keyword and press the OK button. Note: To enter a new keyword, select New Keyword. By Genre 1. Press the GREEN button. 2.Select Genre and press the button. 3. Select a genre and press the OK button. 4. Select the specific genre and press the OK button. 1. Press the YELLOW button. 2. You can add, edit or delete your reminders. • To add, select New Reminder and press the OK button. • To edit, select a reservation and press the OK button. • To delete, select a reservation and press the BLUE button. 3. Reservation will pop up. You can change the options you want using the p/q//, NUMERIC(0~9) and OK buttons. 4.Select OK to save and exit. Note: • Press the i button to view the detailed programme information. • You can easily set reminders in TV Guide, Find or i-plate navigation mode. Note: • Press the i button to view the detailed programme information. • Press the OK button to watch a found programme. • You can set reminders for future programmes. GB13 Preferences AD Preferences Channel List TV Guide Settings Preferences Parental Control Language Time Video Audio Screen Display Edit Channels Installation System Parental Control Audio Setting • Maturity Rating: You can block the programme if the programme is above the age limit. • Change STB Password: Enter a new password. • Digital Audio Output: You can select the digital audio signal output. • Lip-Sync: You can adjust the sound difference between audio and video. Note: • The default password is 0000. If you have forgotten your password, please contact your local distributor. • Enter the password to view the blocked programmes. Language Setting You can set the system language, audio language or subtitle language. Setting Power On/Off Timer You can set the time the receiver powers on or powers off. Note: You can set the GMT Offset and daylight saving time. Video Setting • Screen Ratio: You can select the screen ratio of your TV. • Resolution: You can set the resolution of the screen. • Display Format: You can select the display format according to the screen ratio of your TV. • Letterbox & Pillarbox Colour: You can select the colour of the margin space in Letterbox or Pillarbox mode. GB14 Screen Display • Info Display Time: You can set the duration the i-plate is displayed whenever you change the channel. • Transparency: You can set the transparency of the On-Screen Display. • Subtitle Font: You can set the subtitle font. Installation Search Channels [Fixed Antenna] AD Installation allows you to configure your antenna and search the TV and radio channels. 1 Settings Installation (Fixed Antenna) Antenna Type Select your antenna type. > Settings > Installation 1 Fixed Antenna SCD Antenna Press the RED button and select Fixed Antenna. Select OK to save and exit. 2 Select Search Channels and press the OK button. Select Switch Type and select LNB Onlyor DiSEqC. 3 Select a satellite figure and press the OK button. • Satellite: Select the satellite. • LNB Frequency: Select the LNB frequency. • 22kHz Tone: Select the DiSEqC switch. • DiSEqC: Select the DiSEqC switch. • Test Transponder: Check the signal status of each transponder and select the one with the best quality. Select OK. Note: When Switch Type is set to DiSEqC , both 22kHz Tone and DiSEqC are activated. 4Select Transponder under the activated satellite figure and press the OK button. Select a value in the transponder list. 5Select Search and press the OK button. The found channels will be listed. 6When the search is completed, select Save and press the OK button. Motor Antenna Cancel OK Antenna Type 2 Settings Installation (Fixed Antenna) Search Channels Switch Type LNB Only ASTRA 1 Universal Transponder 10788 MHz (V) Search Search Option 3 Settings Installation (Fixed Antenna) Search Channels Satellite Setting Satellite ASTRA 1 (19.2E) LNB Frequency Test Transponder Note: • Select User Define to enter the options directly. • All channels will be deleted if you change the antenna type. • The default password is 0000. If you have forgotten your password, please contact your local distributor. Universal 10744, H, 22000, Auto Strength Quality 88% 67% OK Cancel Search Option 4 Settings Installation (Fixed Antenna) Search Channels All Switch Type None User Define 10755, V, 22000, 5/6 10818, V, 22000, 5/6 10832, H, 22000, 5/6 10847, V, 22000, 5/6 Search Search Option GB15 Installation Search Channels [SCD Antenna] Single Cable Distribution enables the delivery of broadcast programming over a single cable to multiple users AD eliminating the numerous cables required to support other electronics devices. If you are using more than one satellite receiver, set one receiver at a time and turn off the others while setting. Refer to the satellite antenna manual for details. 1 Settings Installation (SCD Antenna) Antenna Type Select your antenna type. Fixed Antenna SCD Antenna Motor Antenna > Settings > Installation 1 Press the RED button and select SCD Antenna. Select OK to save and exit. 2Select Search Channels and press the OK button. 3Select SCD Setting and press the OK button to set the channel(band) and frequency for this receiver. 2 • Tuner1: Select from Channel 1~8. • Frequency: The frequency is set based on the channel of tuner1. Select OK. Settings Installation (SCD Antenna) SCD Setting 5Select Transponder under the activated satellite figure and press the OK button. Search Channels Transponder - Search Search Option 3 Settings Installation (SCD Antenna) Search Channels SCD Setting Select a value in the transponder list. Tuner 1 Channel 1 6Repeat the two steps above to set more satellites. 7Select Search and press the OK button. The found channels will be listed. 8When the search is completed, select Save and press the OK button. Note: • Select User Define to enter the options directly. • Select Stop and press the OK button to stop the channel search. • All channels will be deleted if you change the antenna type. • The default password is 0000. If you have forgotten your password, please contact your local distributor. Channel 1/Channel 2 Position 1 Satellite - 4Select a satellite figure and press the OK button. • Satellite: Select the satellite. • LNB Frequency: Select the LNB frequency. • Test Transponder: Check the signal status of each transponder and select the one with the best quality. Select OK. Cancel OK Antenna Type Frequency Tuner 2 1210 Channel 2 Frequency 1400 Cancel OK Search Search Option 4 Settings Installation (SCD Antenna) Search Channels Satellite Setting Satellite Astra 1 (19.2E) LNB Frequency Test Transponder Universal 12722, H, 22000, 2/3 Strength Quality 75% 80% OK Search Option GB16 Cancel Installation Search Channels [Motor Antenna] AD You can set the position of the satellites when you use a motor antenna for efficient channel search. 1 Settings Installation (Motor Antenna) Antenna Type Select your antenna type. > Settings > Installation Fixed Antenna SCD Antenna 1Press the RED button and select Motor Antenna. Select OK to save and exit. 2Select Search Channels and press the OK button. 3Select Motor Setting and press the OK button to set the motor type and location. • Motor Type: DiSEqC1.2: General motor antenna using DiSEqC 1.2. USALS: Motor antenna using USALS. • My Longitude: Enter the longitude and direction. • My Latitude: Enter the latitude and direction. • LNB Frequency: Enter the LNB frequency. Motor Antenna 2 Settings Installation (Motor Antenna) Search Channels USALS Satellite Transponder - Note: When Motor Type is set to DiSEqC 1.2, both My Longitude and My Latitude are inactivated. Select satellites using the / and OK button. When selecting User Define, enter the Longitude and Direction. Press the BACK button to save and return. 5Select Position Setting and press the OK button to set the antenna position for the selected satellites. • Satellite: Select the satellite. • Transponder: Select the transponder. • Motor Driving: Continuous – Step - Time • Driving Size: When motor driving is set to Step or Time, select one from1~127. • Go to Stored Position: Make the antenna turn toward the position of the selected satellite. Fine-tune the position using the / button until the signal strength and quality reach the maximum level. • Store Current Position: Save the adjusted position. • Recalculate: Recalculates the positions of all satellites based on the position of current satellite. Motor Setting Edit Satellite Data Position Setting Limit Setting Select OK. 4Select Edit Satellite Data and press the OK button to select the satellites that the motor antenna is pointing to. Cancel OK Antenna Type Search Search Option 3 Settings Installation (Motor Antenna) Search Channels Motor Setting Motor Type My Longitude USALS 23.0E Direction East My Latitude 36.5N Direction North LNB Frequency Universal Cancel OK Search Search Option 4 .. Installation (Motor Antenna) Search Channels Edit Satellite Data Select Satellites for Motor Antenna Press the BACK button to save and return. Note: When Motor Type is set to USALS, Motor Driving, Store Current Position and Recalculate are inactivated. GB17 Installation 5 .. Installation (Motor Antenna) Search Channels Satellite Astra1 (19.2E) Transponder12722, H, 22000, 2/3 Motor Driving Continuous Driving Size 1 West Strength Quality Go to Stored position Store Current Position Recalculate Position Setting 6 AD Settings Installation (Motor Antenna) Limit Position Search Channels Limit Setting Software Update West > Settings > Installation > Software update Automatic Update East West Set Limits Reset Position East 75% 80% 6Select Limit Setting and press the OK button to set the operation limit of the motor. • Limit Position: Select East or West. • Set Limit: Set the operation limit to East or West using the / button. • Reset Position: Initialise the position of the motor antenna to the factory default. Press the BACK button to save and return. 7Select a satellite you want to search. 8Select Transponder under the activated satellite figure and press the OK button. Select a value in the transponder list. 9Select Search and press the OK button. The found channels will be listed. 10 When the search is completed, select Save and press the OK button. Note: • When you use a motor antenna, only the channels of one satellite can be searched. • Repeat the search process to search more satellites. • Select Stop and press the OK button to stop the channel search. • All channels will be deleted if you change the antenna type. • The default password is 0000. If you have forgotten your password, please contact your local distributor. 1.Select Automatic Update. 2. When new software is detected, select Yes to start the update process. Manual Update 1.Select Manual Update. 2. Enter the search options. 2.Select Search and press the OK button to search for new software. 2. When new software is detected, select Yes to start the update process now. Note: • It may take 5~10 minutes to update the software. • When the software update is completed, the product is automatically powered off and on again. AD Factory Default > Settings > Installation 1.Select Factory Default. 2. A popup will appear. Select Yes. 3. You will be prompted to enter the password. Enter the password. Note: • The default password is 0000. If you have forgotten your password, please contact your local distributor. Warning: Note that once you perform factory default, all user configured data will be reset. Shortly after you complete the factory default, the installation wizard will appear automatically. GB18 System A D System System Information Channel List TV Guide Settings You can view the system information. Signal Detection Preferences Edit Channels Installation You can check the signal strength and quality of the searched channels. System You can update the software when available. System Information Signal Detection IRDETO Software Update Conditional Access Mail Messages IRDETO Software Update Conditional Access You can view the Smartcard information. Mail Messages You can check the mail messages. GB19 Appendix Trouble Shooting Before contacting the customer service centre, make sure to read the tips below carefully. If the problem persists after you complete the following procedure, please contact HUMAX customer service for further instructions. 1. No message is displayed on the front display. (The product will not switch on.) • Check the main power cable and make sure it is plugged into a suitable power outlet. • Check that the mains supply is switched on. • Connect the power cable to a different power outlet. • Check that the power switch is on at the rear of the product. (where applicable) 2. No picture • Make sure that the product is powered on and in operation mode. (Press the STANDBY button) • Make sure that the AV cable is firmly connected to the TV. • Make sure that the antenna cable is properly connected to the product. • Be sure to activate channel search. • Check the brightness level of the TV. • Check if the channel is currently on air. • Make sure that STB or PVR is selected as input on the remote control. • Make sure that the antenna setting in the menu is correct. (satellite only) 3. Poor picture/sound quality • Make sure there is no mobile phone or microwave oven near the product. • Keep the power cable and the RF cable apart from each other. Note: If the antenna is covered with snow or the RF is weakened by heavy rain, the condition of the sound and picture may temporarily be poor. However, poor sound and picture quality due to weather conditions cannot be accepted as a malfunction of product. [Satellite] • Change the satellite dish for a larger one as this will increase the signal levels received. • Replace the LNB with a lower noise factor in cases where the noise factor is too high. • Replace the LNB with a lower noise factor in case the noise factor is too high. GB20 • Replace the LNB with a new one in case it is damaged or out of order. • Install the antenna in an obstacle-free place. • Check the signal levels and adjust your antenna if the level is too low. The signal level may be affected by weather conditions. 4. No or poor sound • Check that your AV cable is connected correctly. • Check the volume levels of your TV set and the product. • Check if the product or TV is on mute. • Check audio type or soundtrack option. (where applicable) 5. Remote control does not operate. • To control the product, the top end of the remote control should point directly towards the receiving part of the product. • Remove and reinsert the batteries in the remote control. • Replace the batteries in the remote control for a new set. • Set the remote control to STB or PVR mode, if you are using the universal remote control. (where applicable) 6. Cannot make reservations. • Check that no previous reservations are conflicting with the new reservation. 7. No password information is given. • The default password is 0000. 8. Channel search does not work. • [Satellite] Make sure that the antenna setting in the menu is correct. •[Cable] Make sure that your cable is connected correctly. • [Terrestrial] Use the appropriate antenna capable of receiving VHF or UHF channels for your area. 9. Cannot update new software. • If the product does not show a message requesting update, this means no software is available. 10.Cannot watch scrambled channels. • Check that you have the appropriate Smartcard or CI-Module. Reinsert the Smartcard or CI-Module and make sure it initialises correctly. • Check in the menu that the product is detecting the Smartcard or CI-Module. Appendix • Check in the menu that you have a valid subscription to the channels you want to view. • Make sure that the Smartcard or CI-Module is not damaged. 11.Cannot watch pay channels. • Check in the menu that you have a valid and working subscription to the channels you wish to view. 12.The product makes a humming noise. • The noise is from the fan; the hard disk is operating normally. 13.Cannot record progammes. (PVR only) • The hard disk is full. Delete unnecessary programmes and make space for new recording. • Check if the recording conflicts with another channel. Stop the current recording or wait until the recording is finished. • Check that the product is switched on when the recording starts. 14.Cannot operate Time Shifted Recording. (PVR only) • TSR may not be available during recording. Wait until the recording is finished. • Delete unnecessary programmes and make space for new recording. 15.Cannot playback. (PVR only) • To playback the recorded file of a scrambled channel, use the Smartcard. In case it has been a long time since you last recorded, this may not work. Contact the product distributor. • The signal during recording may be weak or the hard disk too full. 16.Cannot change channels while recording. (PVR only) • Certain channels may not be changed due to restriction of the tuner or connection type. telephone number is on the website. Middle East (Dubai. UAE) E-mail: [email protected] Website: http://www.humaxdigital.com/me/support Language: Arabic / English Note: For hardware repair, please visit our website. HUMAX Customer Support Information concerning troubleshooting, software upgrade and product support is provided in the following website. Should your product require warranty service, please contact the customer service center of which GB21 Appendix Error Messages Error messages No or bad signal [Satellite] No or bad signal [Cable] No or bad signal [Terrestrial] The channel is scrambled or not available. The audio is not available. GB22 Possible causes What to do The satellite dish is not pointing at the satellite. Adjust the dish alignment. Signal is too weak. Increase the LNB voltage or connect a signal amplifier. Satellite dish is too small. Change to a larger dish. Problem with LNB Change the LNB. Wrong antenna setting Set the antenna correctly. The cable is not connected. Make sure the cable is connected correctly. The cable may be damaged or defective. Replace the cable. The channel is not broadcasting. Replace the cable. The aerial is not pointing correctly. Adjust the aerial. Check the cable from the aerial. If you cannot resolve the problem, request a professional to test your aerial installation. The channel has a signal but no audio or video. Check if the channel is currently on air. The channel has been deleted by the broadcasting company. Check if the channel is currently on air. Error messages Possible causes No access No authorisation If the product has been in standby or power off for a long time, please wait for authorisation. It may take up to 60 minutes. Smartcard is not inserted. Insert the Smartcard. Wrong Smartcard is inserted. Insert the correct Smartcard. Smartcard is not inserted correctly. Remove the Smartcard and reinsert it. Smartcard is damaged. Contact your Smartcard retailer or channel broadcaster and ask for replacement. CI-Module not installed CI-Module is not inserted. Insert the CI-Module. CI-Module is not inserted correctly. Remove the CI-Module and reinsert it. CI-Module is not recognised. Insert another CI-Module to check if the current one is working. Wrong CI-Module Insert the correct CIModule. CI-Module is damaged. Replace the CI-Module. LNB cable is short. Replace the LNB cable. LNB is internally short. Replace the LNB. Alien substance is inserted into the LNB IN port. The port may be damaged. Remove the alien substance and contact the service centre if the port is damaged. No access No card inserted Incorrect card CI-Module not installed The channel is for data broadcasting. Remove the channel from the channel list and check for new transponder details. Invalid CI-Module The channel has a video signal but no audio. Press the audio button to confirm that the channel has audio options. The antenna cable is short-circuited. [Satellite] What to do Make sure you have a subscription to the channel. < CONDITIONS 1. 2. Warranty Certificate IMPORTANT: Keep this Certificate together with the Original invoice or receipt in a safe place and show them to the retailer or place of purchase whenever a warranty repair is necessary. 3. 4. 5. 6. • Model No.: 7. • Serial No.: • Date of Purchase: • Dealer’s Signature: • Customer’s Signature: HUMAX thanks you for your recent HUMAX product purchase. For your benefit, we recommend that you record your serial number, found on the product, and other purchase information on this card and keep it with your personal records, along with proof of purchase. This information will allow us to better serve your needs. < WARRANTY CONDITIONS Keep this Certificate together with the original invoice or receipt in a safe place and show them to the retailer or place of purchase whenever a warranty repair is necessary. < HUMAX CONSUMER WARRANTY HUMAX warrants this product to be free of defects in materials and workmanship, subject to the conditions set forth overleaf. 8. 9. The HUMAX Warranty is valid for a period of one year from the date of first purchase. In the event that this product fails to function properly during the warranty period, the retailer or distributor will make this product capable of operating for the purpose of which it was designed, without charging for labour and parts. This warranty will be honoured only if the Warranty Certificate has been duly completed by the purchaser and is presented to the retailer with the original invoice or receipt. This warranty does not cover shipping or transportation charges from you to us. The obligations of the distributor are limited to the repair of defect parts. Costs and risks of transport to the retailer as well as removal and installation of the product, and any other costs directly or indirectly related to its repair, are not covered by the warranty. All warranty repairs performed by non-authorized repair shops will not be reimbursed and if such repairs damage this product such damage will not be covered by this warranty. This warranty is not applicable in cases other than defects in materials or workmanship and, in particular, does not cover: a. periodic check-ups, adjustments, maintenance or conversions as well as replacement of parts due to normal wear and tear; b. damage caused by accidents, negligence, modifications, use of non-HUMAX parts, improper use, installation or package; c. damage caused by lightning, water, fire, acts of war, public disturbances, incorrect mains voltages, incorrect ventilation or any other cause beyond the control of the distributor; d. products where the label bearing the serial number has been removed, defaced or is illegible. This warranty is offered to any person who has legally obtained possession of this product within the warranty period. HUMAX’s maximum liability shall not exceed the actual purchase price paid by you for the product. In no event shall HUMAX be liable for special, incidental, consequential or indirect damages. Middle East (Dubai. UAE) E-mail: Website: Language: [email protected] http://www.humaxdigital.com/me/support Arabic/English achat et de la conserver avec vos données personnelles, conjointement avec votre preuve d'achat. Ces informations nous permettront de mieux répondre à vos attentes. Certificat de garantie IMPORTANT ! Conservez le certificat conjointement avec la facture ou le reçu original dans un endroit sûr. Présentez-les à votre revendeur ou à votre lieu d’achat dès que votre produit nécessite une réparation sous garantie. < CONDITIONS DE GARANTIE < GARANTIE CLIENT HUMAX 2. • N° de série : 3. • Date d’achat : 4. • Signature du revendeur : • Signature du client : HUMAX vous remercie pour l'achat récent d'un de nos produits. Pour en tirer pleinement profit, nous vous recommandons de consigner sur cette carte le numéro de série figurant sur le produit ainsi que d'autres informations concernant votre 5. 6. 7. Moyen-Orient (Dubaï, EAU) E-mail : Website: Language: [email protected] http://www.humaxdigital.com/me/support Arabe/anglais HUMAX garantit que ce produit ne présente aucun défaut au niveau des matériaux et de la fabrication, conformément aux conditions mentionnées au verso. < CONDITIONS 1. • N° de modèle : Conservez le certificat conjointement avec la facture ou le reçu original dans un endroit sûr. Présentez-les à votre revendeur ou à votre lieu d'achat dès que votre produit nécessite une réparation sous garantie. 8. 9. La garantie HUMAX est valide pour une période d'un an, à compter de la date de l'achat initial. Dans l'éventualité où ce produit ne fonctionnerait pas correctement au cours de la période de garantie, le revendeur ou le fournisseur local s'engage à le faire fonctionner conformément à la finalité pour laquelle il a été conçu, sans facturer de frais supplémentaires pour la main-d'œuvre et les pièces. La présente garantie ne s'applique que si le certificat de garantie a été dûment complété par l'acheteur et que ce certificat est présenté au revendeur conjointement avec la facture ou le reçu original. La présente garantie ne couvre pas les frais d'expédition ou de transport entre l'acheteur et HUMAX. Les obligations du revendeur se limitent à la réparation des pièces défectueuses. La présente garantie ne couvre pas les coûts et les risques liés au transport à destination du revendeur, ceux associés à l'installation et à l'enlèvement du produit ainsi que tout autre coût directement ou indirectement lié à sa réparation. Les coûts liés aux réparations sous garantie effectuées par un atelier de réparation non autorisé ne seront pas remboursés. En outre, si le produit est endommagé lors de telles réparations, les dégâts causés ne seront pas couverts par la présente garantie. La présente garantie ne s'applique pas aux cas autres que les défauts de matériaux ou de main-d'œuvre et ne couvre pas, en particulier : a. les vérifications périodiques, les réglages, la maintenance ou les transformations ainsi que le remplacement de pièces en raison de l'usure normale ; b. les dégâts causés par des accidents, par négligence, par l'apport de modifications, par l'utilisation de pièces non HUMAX, par une utilisation incorrecte ou lors de l'installation ou l'emballage ; c. les dégâts causés par la foudre, l'eau, le feu, les faits de guerre, les troubles publics, des tensions de secteur incorrectes, une mauvaise ventilation ou toute autre cause indépendante de la volonté du revendeur ; d. les produits dont l'étiquette portant le numéro de série est illisible, a été enlevée ou abîmée. La présente garantie est offerte à toute personne qui est entrée en possession de ce produit légalement au cours de la période de garantie. La responsabilité maximale d'HUMAX ne peut pas dépasser le prix d'achat que vous avez payé pour acquérir le produit. En aucun cas HUMAX ne peut être tenu pour responsable des dommages-intérêts particuliers, accessoires, secondaires ou indirects.