1
PRO-700
User Guide
Table of Contents
1. The Basics . . . . . . . . . . . . . . . . . . . . . . . . . . . . . . . . . . .1
Your Phone . . . . . . . . . . . . . . . . . . . . . . . . . . . . . . . . . . .1
Viewing the Display Screen . . . . . . . . . . . . . . . . . . . . . . .5
Turning Your Phone On and Off . . . . . . . . . . . . . . . . . . . . .8
Using the Battery . . . . . . . . . . . . . . . . . . . . . . . . . . . . . . .9
Using the Holster . . . . . . . . . . . . . . . . . . . . . . . . . . . . . .11
Navigating Through the Menus . . . . . . . . . . . . . . . . . . . .13
Displaying Your Phone Number . . . . . . . . . . . . . . . . . . .14
Making and Answering Calls . . . . . . . . . . . . . . . . . . . . .14
Entering Text . . . . . . . . . . . . . . . . . . . . . . . . . . . . . . . . .24
2. Your Phone’s Settings . . . . . . . . . . . . . . . . . . . . . . . . .29
Sound Settings . . . . . . . . . . . . . . . . . . . . . . . . . . . . . . .29
Display Settings . . . . . . . . . . . . . . . . . . . . . . . . . . . . . . .35
Location Settings . . . . . . . . . . . . . . . . . . . . . . . . . . . . . .40
Messaging Settings . . . . . . . . . . . . . . . . . . . . . . . . . . . .41
Airplane Mode . . . . . . . . . . . . . . . . . . . . . . . . . . . . . . . .44
TTY Use . . . . . . . . . . . . . . . . . . . . . . . . . . . . . . . . . . . .45
Phone Setup Options . . . . . . . . . . . . . . . . . . . . . . . . . . .46
Browser Settings . . . . . . . . . . . . . . . . . . . . . . . . . . . . . .51
Phone Information Management . . . . . . . . . . . . . . . . . .52
3. Security . . . . . . . . . . . . . . . . . . . . . . . . . . . . . . . . . . . .53
Accessing the Security Menu . . . . . . . . . . . . . . . . . . . . .53
Using Your Phone’s Lock Feature . . . . . . . . . . . . . . . . . .53
Restricting Calls . . . . . . . . . . . . . . . . . . . . . . . . . . . . . . .55
Using Special Numbers . . . . . . . . . . . . . . . . . . . . . . . . .55
Deleting Phone Content . . . . . . . . . . . . . . . . . . . . . . . . .56
Resetting the Browser . . . . . . . . . . . . . . . . . . . . . . . . . .57
Resetting Favourites . . . . . . . . . . . . . . . . . . . . . . . . . . .57
Resetting All Settings . . . . . . . . . . . . . . . . . . . . . . . . . . .57
Resetting Your Phone . . . . . . . . . . . . . . . . . . . . . . . . . .58
4. Roaming . . . . . . . . . . . . . . . . . . . . . . . . . . . . . . . . . . .59
Understanding Roaming . . . . . . . . . . . . . . . . . . . . . . . .59
Setting Your Phone’s Roam Mode . . . . . . . . . . . . . . . . .59
5. Menu Navigation . . . . . . . . . . . . . . . . . . . . . . . . . . . . .60
Viewing the Menus . . . . . . . . . . . . . . . . . . . . . . . . . . . . .60
6. History . . . . . . . . . . . . . . . . . . . . . . . . . . . . . . . . . . . . .62
Viewing History . . . . . . . . . . . . . . . . . . . . . . . . . . . . . . .62
History Thread . . . . . . . . . . . . . . . . . . . . . . . . . . . . . . . .63
History Details . . . . . . . . . . . . . . . . . . . . . . . . . . . . . . . .63
Making a Call from History . . . . . . . . . . . . . . . . . . . . . . .63
History Menu Options . . . . . . . . . . . . . . . . . . . . . . . . . .64
Saving a Phone Number from History . . . . . . . . . . . . . . .65
Making a New Group Entry from History . . . . . . . . . . . . .66
Prepending a Phone Number from History . . . . . . . . . . .67
Deleting History . . . . . . . . . . . . . . . . . . . . . . . . . . . . . . .67
7. Contacts . . . . . . . . . . . . . . . . . . . . . . . . . . . . . . . . . . .68
About Contacts . . . . . . . . . . . . . . . . . . . . . . . . . . . . . . .68
Displaying the Contacts List . . . . . . . . . . . . . . . . . . . . . .68
Viewing History from Contacts . . . . . . . . . . . . . . . . . . . .68
Creating a New Contacts Entry . . . . . . . . . . . . . . . . . . . .69
Finding Contacts Entries . . . . . . . . . . . . . . . . . . . . . . . .70
Displaying the Details Screen . . . . . . . . . . . . . . . . . . . . .71
Editing a Contacts Entry . . . . . . . . . . . . . . . . . . . . . . . . .72
Contacts Menu Descriptions . . . . . . . . . . . . . . . . . . . . .76
Secret Contacts Entries . . . . . . . . . . . . . . . . . . . . . . . . .78
Dialing Services . . . . . . . . . . . . . . . . . . . . . . . . . . . . . . .79
8. Personal Organizer . . . . . . . . . . . . . . . . . . . . . . . . . . .80
Using Your Phone’s Calendar . . . . . . . . . . . . . . . . . . . . .80
Using Your Phone’s Tools . . . . . . . . . . . . . . . . . . . . . . . .87
9. Voice Services . . . . . . . . . . . . . . . . . . . . . . . . . . . . . . .91
Using Automatic Speech Recognition (ASR) . . . . . . . . . .91
Managing Voice/Call Memos . . . . . . . . . . . . . . . . . . . . .95
Setting Up Screen Call . . . . . . . . . . . . . . . . . . . . . . . . . .98
10. Messaging . . . . . . . . . . . . . . . . . . . . . . . . . . . . . . .101
New Messages . . . . . . . . . . . . . . . . . . . . . . . . . . . . . .101
Displaying Messages . . . . . . . . . . . . . . . . . . . . . . . . . .102
Sending a Text Message . . . . . . . . . . . . . . . . . . . . . . .103
Creating Folders for Messages . . . . . . . . . . . . . . . . . . .104
Changing All Messages to Read . . . . . . . . . . . . . . . . . .105
Deleting Text Messages . . . . . . . . . . . . . . . . . . . . . . . .106
®
11. Bluetooth . . . . . . . . . . . . . . . . . . . . . . . . . . . . . . . .107
Accessing the Bluetooth Settings Menu . . . . . . . . . . . .107
Turning Bluetooth On and Off . . . . . . . . . . . . . . . . . . . .107
Using the Bluetooth Settings Menu . . . . . . . . . . . . . . .108
Bluetooth Profiles . . . . . . . . . . . . . . . . . . . . . . . . . . . .109
Pairing Bluetooth Devices . . . . . . . . . . . . . . . . . . . . . .110
Using the Trusted Devices Options . . . . . . . . . . . . . . . .111
Sending Data via Bluetooth . . . . . . . . . . . . . . . . . . . . .112
Printing Data via Bluetooth . . . . . . . . . . . . . . . . . . . . . .112
12. Service Features . . . . . . . . . . . . . . . . . . . . . . . . . . .114
Using Voicemail . . . . . . . . . . . . . . . . . . . . . . . . . . . . . .114
Responding to Call Waiting . . . . . . . . . . . . . . . . . . . . .115
Making a Three-Way Call . . . . . . . . . . . . . . . . . . . . . . .116
Web . . . . . . . . . . . . . . . . . . . . . . . . . . . . . . . . . . . . . .117
Downloading through the Wireless Web . . . . . . . . . . . .120
13. Safety Guidelines . . . . . . . . . . . . . . . . . . . . . . . . . .121
Maintaining Your Phone’s Peak Performance . . . . . . . .121
Using Your Phone While Driving . . . . . . . . . . . . . . . . . .121
Following Safety Guidelines . . . . . . . . . . . . . . . . . . . . .122
Using Your Phone Near Other Electronic Devices . . . . .122
Turning Off Your Phone Before Flying . . . . . . . . . . . . . .122
Turning Off Your Phone in Dangerous Areas . . . . . . . . .123
Restricting Children’s Access to Your Phone . . . . . . . . .124
Protecting Your Battery . . . . . . . . . . . . . . . . . . . . . . . .124
Disposal of Lithium Ion (Li-Ion) Batteries . . . . . . . . . . . .125
Industry Canada Notice . . . . . . . . . . . . . . . . . . . . . . . .125
Cautions . . . . . . . . . . . . . . . . . . . . . . . . . . . . . . . . . . .126
Index . . . . . . . . . . . . . . . . . . . . . . . . . . . . . . . . . . . . . . .128
1. The Basics
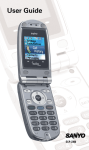
Your Phone
1. Earpiece
2. Main Screen
3. Softkeys
4. Navigation Key
5. MENU/OK Key
6. WEB Key
7. TALK Key
8. SPEAKER Key
16. TEXT Key
15. Headset Jack
14. Side Call Key
13. BACK Key
12. Side End Key
11. END/POWER Key
10. Keypad
9. Microphone
17. Speakerphone
Microphone
21. Volume Key
18. Outer Screen
22. Voice Memo Key
19. LED Indicator
23. Micro-USB
Connector
24. Internal Antenna
20. Speaker
1
Key Features
1. Earpiece lets you hear the caller and automated prompts.
2. Main Screen displays all the information needed to operate
your phone, such as the call status, the Contacts list, the
date and time, and the signal and battery strength.
3. Softkeys let you select softkey actions or menu items
corresponding to the bottom right/left line on the main
screen.
4. Navigation Key lets you navigate quickly and easily through
the menu options. These keys can also be reassigned to
create customized shortcuts. Default settings are:
Right: Contacts, Left: My Favourites, Up: Send Text, and
Down: My Downloads.
5. MENU/OK Key lets you access the phone’s menus and select
menu options.
6. WEB Key lets you launch the Web browser.
7. TALK Key lets you place or receive calls, answer Call Waiting,
use Three-Way Calling, or activate ASR (see page 91).
8. SPEAKER Key lets you place or receive calls in speakerphone
mode, turn the speakerphone on and off during a call, or
activate ASR (see page 91).
9. Microphone allows other callers to hear you clearly when you
are speaking to them.
10. Keypad lets you enter numbers, letters, and characters, and
navigate within menus. Press and hold keys 2-9 for speed
dialing.
11. END/POWER Key lets you turn the phone on or off, end a call,
or return to standby mode. While in the main menu, it
returns the phone to standby mode and cancels your input.
2
12. Side End Key ends a call while the phone is closed. This key
can also be used to display the recent call history.
13. BACK Key lets you display the previous page or clear
characters from the screen.
14. Side Call Key lets you place calls without opening the phone.
Press and hold this key to activate ASR.
15. Headset Jack allows you to plug in an optional headset for
convenient, hands-free conversations. CAUTION! Inserting
an accessory into the incorrect jack may damage the
phone.
16. TEXT Key gives you quick access to the Send Text screen for
sending messages.
17. Speakerphone Microphone receives your voice input while in
speakerphone mode.
18. Outer Screen lets you monitor the phone’s status and see
who’s calling without opening the phone.
19. LED Indicator shows your phone’s connection status at a
glance.
20. Speaker lets you hear different ringers and sounds. You can
mute the ringer when receiving incoming calls by pressing
or any of the side keys. The speaker also lets you hear
the caller’s voice in speakerphone mode.
21. Volume Key allows you to adjust the ringer volume in standby
mode or adjust the voice volume during a call. The volume
key can also be used to scroll up or down to navigate
through the different menu options.
3
22. Voice Memo Key lets you record voice or call memos without
opening the phone. Press and hold this key to start the
recording.
23. Micro-USB Connector allows you to connect a phone charger
or other accessories to your phone. CAUTION! Inserting an
accessory into the incorrect connector may damage the
phone.
24. Internal Antenna facilitates reception and transmission. To
maximize call performance, do not obstruct the internal
antenna area (see page 14).
4
Viewing the Display Screen
This list identifies the symbols you’ll see on your display
screen.
indicates your current signal strength. The more lines
you have, the stronger your signal.
indicates your phone cannot find a signal.
indicates the call is on hold.
indicates a call is in progress.
indicates 1X Data access is active.
indicates 1X Data access is dormant. (Voice calls can
still be made or received.)
indicates 1X Data access is disabled.
indicates 1X Service is available.
indicates EVDO service is active.
indicates EVDO service is dormant.
indicates EVDO service is available.
indicates you are off the home network.
indicates you have missed voice calls.
indicates you have scheduled events or call alarms.
indicates you have alarm clock or countdown
notifications.
indicates you have new text messages or Web Alerts
waiting.
indicates you have new voicemail messages waiting.
(Voicemail service is optional.)
indicates you have alert messages from Java
applications activated in the background.
indicates you have urgent messages waiting.
5
indicates you have two or more different types of
missed alerts (missed voice calls and other missed
alarm clocks, call alarms, or scheduled events).
indicates the Bluetooth feature is enabled (blue icon).
indicates your phone is connected to a Bluetooth
device (green icon).
indicates your phone is discoverable by another
Bluetooth device.
indicates your phone is communicating with a
Bluetooth device.
indicates your access to a secure site.
indicates the level of your battery charge (icon shown is
full). The more black you see, the more power you have
left. (The icon is animated while the battery is charging.)
indicates your battery is charging in “Power Off” state.
indicates all the sound settings (except for
applications) are off and the vibrate feature is set.
indicates volume level 1 to 8 and vibrate feature are set.
indicates a beep sounds once when you receive a
phone call or message, etc.
indicates a beep sounds once when you receive a
phone call or message, etc. and vibrate feature is set.
indicates all ringer settings are off.
indicates all ringer settings are off and the vibrate
feature is set.
indicates all the sound settings are off.
indicates the Location feature of your phone is enabled.
indicates the Location feature of your phone is disabled.
indicates you have a new voice message when Screen
Call is activated.
indicates the Screen Call Auto setting is enabled.
indicates the alarm clock or countdown is set to on.
6
indicates your phone is in TTY mode.
indicates the speakerphone mode is set to on.
indicates a call is in progress using the Bluetooth
device.
indicates a call is in progress using the car kit device.
indicates a call is in progress using the wired headset
device.
7
Turning Your Phone On and Off
Turning Your Phone On
©
Press
.
Once your phone is on, it displays “Looking for service...”
which indicates that your phone is searching for a signal.
When your phone finds a signal, it automatically enters
standby mode. At this point, you are ready to begin making
and receiving calls.
If your phone is unable to find a signal after 15 minutes of
searching, a Power Save feature is automatically activated.
When a signal is found, your phone automatically returns to
standby mode.
In Power Save mode, your phone searches for a signal
periodically without your intervention. You can also initiate a
search for service by pressing any key (when your phone is
turned on).
Tip: The Power Save feature helps to conserve your battery power when you
are in an area where there is no signal.
Turning Your Phone Off
©
Press and hold
for two seconds until you see the
powering down animation on the display screen.
Your screen remains blank while your phone is off (unless the
battery is charging).
8
Using the Battery
Installing the Battery
1. Insert the battery into the opening on the back of the phone,
making sure the connectors align. Gently press down to
secure the battery.
2. Replace the battery cover into position (see below), and
slide it upward until you hear a click.
3. Lock the battery cover by sliding the latch into its locked
position.
1
2
Removing the Battery
Warning! Do not handle a damaged or leaking Li-Ion battery as you can be
burned.
1. Make sure the power is off so that you do not lose any
stored numbers or messages.
2. Slide the battery cover latch into its unlock position, and
slide the battery cover downward to remove it.
3. Lift up the battery and remove it from the phone.
9
Charging Your Battery
Your phone comes with a rechargeable battery. You should
charge the battery as soon as possible so you can begin using
your phone.
Keeping track of your battery’s charge is important. If your
battery level becomes too low, your phone automatically turns
off and you will lose all the information you were just working
on. For a quick check of your phone’s battery level, glance at
the battery charge indicator located in the upper-right corner
of your phone’s display screen. If the battery charge is getting
too low, the battery icon
appears and the phone displays a
warning message.
Always use a manufacturer-approved charger to charge your
battery.
Warning! Using the wrong battery charger could cause damage to your phone
and void the warranty.
Note: Long backlight settings, searching for service, vibrate mode, and browser
use affect the battery’s talk and standby times.
Using the Phone Charger
1. Plug the phone charger into a wall outlet.
2. Open the micro USB connector cover located on the lower
left side of your phone.
3. Plug the other end of the phone charger into the micro USB
connector (with the battery installed).
n
n
10
A red indicator light means the battery is charging.
A green indicator light means the battery charging is
completed.
Using the Holster
Attaching the phone to the holster
1. With the front of the phone facing the holster, insert the
bottom of the phone into the holster.
2. Press the phone down into the holster until it snaps into
place.
11
Removing the phone from the holster
1. With your forefinger, push against the holster’s top plate
while gripping the phone at the sides.
2. The phone can now be easily removed from the holster.
12
Navigating Through the Menus
The navigation key on your phone allows you to scroll through
menus quickly and easily.
To navigate through a menu, simply press the navigation key
up or down. If you are in a first-level menu such as Settings,
you may also navigate to the next or previous first-level menu
by pressing the navigation key right or left.
For a diagram of your phone’s menu, please see “Menu
Navigation” on page 60.
Selecting Menu Items
As you navigate through the menu, menu options are
highlighted. In list view, select any numbered option by simply
pressing the corresponding number on the phone’s keypad.
You may also select any item by highlighting it and
pressing .
For example, if you want to display your volume settings:
1. Press
to access the main menu.
Note: You can select List View or Grid View for your phone’s menu style. (See
“Changing the Phone’s Menu Style” on page 35.)
2. Select Settings by pressing
highlighting it and pressing
(in List view) or by
.
3. Select Ringers by pressing
pressing .
or by highlighting it and
4. Select Volume by pressing
pressing .
or by highlighting it and
5. Select Ringer by pressing
pressing .
or by highlighting it and
Note: For the purposes of this guide, the above steps condense into “Select
> Settings > Ringers > Volume > Ringer.”
13
Displaying Your Phone Number
©
Select
> Settings > Phone Info > My Phone#. (Your phone
number and other information about your phone will be
displayed.)
Tip: You can also display your phone number through the Contacts menu.
Select
> Settings > More... > Contacts > My Name Card. To send your
contact information using Bluetooth, press Options (right softkey) > Send Card.
Making and Answering Calls
Holding Your Phone
To maximize performance, do not obstruct the internal
antenna area. Also make sure you do not cover the
microphone with your hand while talking.
Correct
Incorrect
Internal Antenna
Making Calls
To place a call using your keypad:
1. Make sure your phone is on.
2. Enter a phone number from standby mode. (If you make a
mistake while entering, press
to delete one digit at a
time. Press and hold
to delete the entire number.)
3. Press
or
.
4. When you are finished, press
14
.
Tip: You can also place calls from your phone by using speed dialing (page 22),
your History listings (page 63), and by using Automatic Speech Recognition
(ASR, page 92).
To redial your most recent call, press
twice.
To place a call with the phone closed:
1. Make sure your phone is on and the Side Key Guard feature
is disabled. (See “Setting Side Key Guard” on page 50.)
2. Press and hold the side call key (
phone.
) on the right side of the
3. Follow the system prompts. (See “Using Automatic Speech
Recognition (ASR)” on page 91.)
To redial with the phone closed:
1. Press the side end key (
the outer screen.
2. Use the side volume key (
you would like to redial.
3. Press
). Recent call history appears on
) to highlight a recent call entry
.
Dialing Options
Dialing options are displayed when you press Options (right
softkey) after entering numbers in standby mode.
v
v
v
v
v
Abbrev. Dial to use the Abbreviated Dialing feature.
(See “Setting Abbreviated Dialing” on page 48 and “Using
Abbreviated Dialing” on page 23.)
Call:Speaker On to dial the phone number in speakerphone
mode.
Save to save the phone number in your Contacts.
(See “Saving a Phone Number” on page 20.)
P Hard Pause to insert a hard pause. (See “Dialing and
Saving Phone Numbers with Pauses” on page 21.)
T 2-Sec. Pause to insert a 2-second pause. (See “Dialing
and Saving Phone Numbers with Pauses” on page 21.)
15
Answering Calls
To answer an incoming call with the phone open:
1. Make sure your phone is on. (If your phone is off, incoming
calls go to voicemail [optional service].)
2. Press
or
to answer an incoming call. (Depending on
your settings, you may also answer incoming calls by pressing
any number key. See “Call Answer Mode” on page 48.)
To answer an incoming call with the phone closed:
1. Make sure your phone is on. (If your phone is off, incoming
calls go to voicemail [optional service].)
2. When your phone rings or vibrates, press
on the right
side of the phone. (The call will be answered in
speakerphone mode.)
– or –
Open the phone to use the earpiece.
Your phone notifies you of incoming calls in the following ways:
v
The phone rings and/or vibrates.
v
The LED flashes.
v
The backlight illuminates.
v
The screen displays an incoming call message.
v
If the incoming call is from a number stored in your
Contacts, the entry’s name is displayed. The caller’s phone
number may also be displayed, if available.
The following options are also displayed by pressing Options
(right softkey).
v Answer to answer the call.
v Answer:Speaker to answer the call in speakerphone mode.
v Select Audio to switch the call to your desired device
(if available).
v Answer on Hold to put the call on hold. (See “Setting Answer
on Hold” on page 17.)
v Screen Call to answer the call by using pre-recorded
announcement. (See “Setting Up Screen Call” on page 98.)
16
v
v
Quiet Ringer to mute the ringer. (This feature appears unless
the ringer is set to 1 Beep, Ringer Off, or Silence All.)
Ignore with Text to ignore the call and send a text message to
the caller (if available).
Tip: Your phone offers additional ways to answer calls. (See page 48 for “Call
Answer Mode” and 47 for “Auto Answer Mode”.)
Setting Answer on Hold
This feature allows you to hold an incoming call when you
cannot answer immediately.
To set Answer on Hold:
©
When you receive an incoming call, press Options (right
softkey) > Answer on Hold.
(The caller hears a message while waiting for you to answer.
will be displayed on the screen while the call is on hold.)
To resume the call:
©
Press Answer (left softkey) or
.
Ending a Call
©
Press
. When the phone is closed, press
.
17
Missed Call Notification
When an incoming call is not answered, the missed call log is
displayed on your screen.
To display the missed call entry from the notification screen:
©
Select the entry and press
. (Select an option to continue.)
Tip: If you have two or more notifications, the Missed Alerts list will appear.
To display the Missed Alerts list from standby mode:
1. Select
> Missed Alerts.
2. Select the entry you wish to view and press
.
Calling Emergency Numbers
You can place calls to 911 (press
), even if your
phone is locked or your account is restricted. Once the
connection is established, press Options (right softkey) to
display 911 options:
v
v
v
Speaker On to activate speakerphone mode. (If you are in
speakerphone mode, the option will appear as Speaker Off
to deactivate.)
Unlock My Phone to unlock your phone (appears only if the
phone is locked).
Close Menu to close the pop-up menu (appears only if the
phone is unlocked).
Tip: Press My Phone (left softkey) to display your phone number during an
emergency call.
18
Emergency mode options:
If you end the emergency call by pressing , your phone
enters the Emergency mode. Press Options (right softkey) to
display the Emergency mode options:
v
Call 911 to call 911 again.
v
Call 911:Speaker to call 911 in speakerphone mode.
v
Exit Emergency to exit Emergency mode.
Note: Emergency mode automatically times out after 5 minutes.
In-Call Options
During a call, your phone displays menu options by pressing
Options (right softkey).
v
Three-Way Call to call a third party.
v
Main Menu to display the phone’s main menu.
v
Save to save the currently used phone number in your
Contacts.
n
Contact Details appears if the number is already in your
Contacts.
v
Contacts to display your Contacts list.
v
Call Memo Rec. to record the conversation during a call.
v
Phone Info to access the Phone Info menu.
v
Transfer Audio to switch the call to an external device (if
applicable).
Warning! Due to higher volume levels, do not place the phone near your ear during
speakerphone use.
During a call, use the volume key or press the navigation key
up or down to adjust the receiver volume.
19
End-of-Call Options
Once you have finished your call, the phone will display the
Recent History. From the Recent History, you can view the
date and time of the call, the phone number (if available), the
entry name (if the number is already in your Contacts), and the
duration of the call.
©
©
Press Options (right softkey) to display the Recent History
options. (See “History Menu Options” on page 64 for details.)
Press Send Text (left softkey) to send a text message to the
entry in the Recent History.
Note: Some options may not be displayed for calls identified as No Caller ID,
Restricted ID (Private), or Unavailable ID.
Saving a Phone Number
Your phone can store up to 600 Contacts entries with up to
4200 total numbers. Each entry’s name can contain 64
characters. Your phone automatically sorts the Contacts
entries alphabetically. (For more information, see “Contacts”
on page 68.)
1. Enter a phone number and press Options (right softkey) >
Save.
2. Select New Entry or Existing Entry.
n
New Entry to create a new Contacts entry for the
number.
Existing Entry to save the number to an existing entry.
(This step is not necessary on the very first entry in your
Contacts.)
n
3. If New Entry was selected, select a phone type, and then use
the keypad to enter the new entry name and press .
– or –
If Existing Entry was selected, select an existing entry to
which you want to save the number, and then select a
phone type and press .
4. Press Done (left softkey).
20
Finding a Phone Number
You can search Contacts entries for phone numbers that
contain a specific string of numbers.
1. Enter the last three or more digits of the number in standby
mode. (The more numbers you enter, the more specific the
search becomes.)
2. All Contacts entries matching the entered numbers will be
displayed. Highlight the entry and press
to dial the
number.
Dialing and Saving Phone Numbers with Pauses
You can dial or save phone numbers with pauses for use with
automated systems, such as voicemail (optional) or credit
card billing numbers.
There are two types of pauses available on your phone:
v Hard Pause to send the next set of numbers when you
press .
v 2-Sec. Pause to automatically send the next set of numbers
after two seconds.
Note: You can have multiple pauses in a phone number and combine 2-second
and hard pauses.
1. Enter the phone number and press Options (right softkey).
2. Select either Hard Pause or 2-Sec. Pause.
3. Enter additional numbers.
4. To dial the number, press
or
. (When dialing a number
with a hard pause, press
to send the next set of numbers.)
– or –
To save the number in your Contacts, press Options (right
softkey) > Save.
21
Plus (+) Code Dialing
When placing international calls, use Plus Code Dialing to
automatically enter the international access code for your
location (for example, 011 for international calls made from
Canada).
1. Press and hold
screen.
until a “+” is displayed on your phone
2. Dial the country code and phone number you are calling,
and press . (The access code for international dialing will
automatically be dialed, followed by the country code and
phone number.)
Note: This feature is subject to network availability, therefore the “+” sign may
not appear on your phone’s display when pressed.
Dialing from the Contacts List
1. Press Contacts (right softkey).
– or –
> Contacts.
Select
2. Select the entry you want to call and press
.
3. Highlight the number you want to call and press
or
.
Note: The icon next to each entry represents the labels (for example, Mobile,
Home, Work, etc.) of the entry’s default phone number. Triangles appears on the
list if there are other phone numbers for the entry. Press the navigation key
right or left to select other number.
Using Speed Dialing
You can store up to 98 numbers in your phone’s speed dial
memory to make contacting friends and family as easy as
pressing a key or two.
With this feature, you can dial your favourite entries using one
key press for locations 2-9 or two key presses for locations
10–99. (See “Assigning Speed Dial Numbers” on page 73.)
To use speed dial:
©
22
From standby mode, press and hold the appropriate key for
approximately two seconds.
The display confirms that the number has been dialed when it
shows “Connecting...”. To use Two-Touch Dialing (10–99),
press the first digit, then press and hold the second digit.
Using Abbreviated Dialing
Abbreviated Dialing is similar to speed dialing. You can use
either of the following abbreviated dialing features.
v
v
Contacts Match to retrieve any desired number saved in your
Contacts by entering only the last three to six digits of the
number. (See “To activate Contacts Match feature” on
page 48.)
Prepend to prepend the first five- or six-digit prefix you want
to use for abbreviated dialing, so that you can dial a number
by entering only the last four or five digits of the number.
Above features become available when you enable
Abbreviated Dialing feature. (See “To set your prepend
number” on page 48.)
To place a call using abbreviated dialing:
1. Enter the last 3-6 digits of a Contacts entry’s phone number
saved in your Contacts.
– or –
Enter the last four or five digits of your desired number to
use the prepend feature.
2. Press
or
.
Note: If the Abbrev. Dial list is displayed, select the name or the number you
want to call from the list, and then press
to place a call.
23
Entering Text
Selecting a Character Input Mode
Your phone provides convenient ways to enter words, letters,
punctuation, and numbers whenever you are prompted to
enter text (for example, when adding a Contacts entry or when
sending text messages).
1. When you display a screen where you can enter text, press
Mode (right softkey) to change the character input mode.
2. Select one of the following options and press
.
Note: The menus displayed vary according to the entry field. If you see triangles
on the right of the menu, you can press the right and left navigation keys to
switch between related menus.
n
n
T9 Word to enter characters using T9 Text Input (see
page 25).
n
SYMBOL to enter symbols.
n
SMILEYS to enter smiley pictures.
n
Emoticons to enter emotion icons.
n
n
n
n
n
n
24
Alphabet to enter characters by using the keypad (see
page 26).
Web Shortcuts to enter web shortcuts (for example,
www., http://, or .com).
Canned Messages to enter canned messages (see page
42 and 104).
Recent Messages to enter messages used recently
(if applicable).
Paste List to paste copied or cut text (if applicable).
Fr. Schedule List to extract the schedule items you have
added to your Calendar (see page 81).
From To Do List to extract the To Do items you have
added to your Calendar (see page 83).
n
NUMBER to enter numbers.
n
Signature to enter your signature (see page 43).
n
n
n
n
n
Select Language to select the language (English or
French).
Delete All to delete all text (if applicable).
Select Text to select text for copying or cutting
(if applicable).
Add Word to store words that you use frequently.
Text Options to display the Text Entry settings menu
(see page 47).
Tip: When entering text, press
to change letter capitalization style
: Abc > ABC > abc (Alphabet Mode)
: T9w > T9W > t9w (T9 Text Input Mode).
Entering Characters Using T9 Text Input
T9 Text Input lets you enter text in your phone with just one
keypress per letter. (To select the T9 Word mode when entering
text, see “Selecting a Character Input Mode” on page 24.)
T9 Text Input analyses the letters you enter using an intuitive
word database and creates a suitable word. (The word may
change as you type.) To accept a word and insert a space,
press
or .
Tip: In order to insert a space by pressing
page 47).
, Auto-Space must be on (see
If you make a mistake, press
to delete a single character.
Press and hold
to delete an entire entry.
Adding a Word to the T9 Database
If a word you want to enter does not display as an option when
you are using T9 Text Input, you can add it to the database.
To add a word to the T9 Text Input database:
1. Press Mode (right softkey) > Add Word.
2. Enter the word using Alphabet Mode and press Save (left
softkey).
25
To edit or delete the words you have added:
1. Press Mode (right softkey) > Text Options > My Words.
2. Highlight your desired word and press Options (right softkey).
3. Select an option and press .
n Edit to edit a word in My Words.
n Delete to delete a word in My Words.
Note: You can add, edit, or delete a word from standby mode. Select
Settings > Text Entry > My Words.
>
Customizing the T9 Settings
1. Press Mode (right softkey) > Text Options > T9 Settings.
– or –
From standby mode, select
> Settings > Text Entry >
T9 Settings.
2. Select an option and press .
n Next WordPrediction to automatically display the word
that may follow the current text input.
n Word Completion to show the completed words that
match the keys you have entered without entering the
whole word.
n Word Scan to allow T9 text input to recognize words by
searching Contacts and messages.
n Word Choice List to display word choice list.
n Show after enter to select digits number (1-3 digits) to
display the words choice list. The word choice list will
be displayed based on the number of digits you
selected.
n Show after wait to select how many seconds the phone
should wait to display the word choice list.
For more information about T9 Text Input, visit the Nuance
Web site at www.nuance.com/t9/textinput/.
Entering Characters Using Alphabet Mode
To enter characters using Alphabet mode, select the Alphabet
mode (see “Selecting a Character Input Mode” on page 24).
Press the corresponding key until the desired character
26
appears. By default, the first letter of a word is capitalized and
following letters are lowercased.
Characters scroll in the following order:
Key
English Sequence
Lower Case
Upper Case
.,@1?! #/
abc2
ABC2
def3
DEF3
ghi4
GHI4
jkl5
JKL5
mno6
MNO6
pqrs7
PQRS7
tuv8
TUV8
wxyz9
WXYZ9
0
Space
One-character-shifted Caps Lock Unshifted
*
In French mode, characters scroll in the following order:
Key
French Sequence
Lower Case
Upper Case
.,@1?! #/
ABCÀÂÇ2
abcàâç2
DEFÉÈÊË3
deféèêë3
GHIÎÏ4
ghiîï4
JKL5
jkl5
MNOÔ6
mnoô6
PQRS7
pqrs7
TUVÙÛÜ8
tuvùûü8
WXYZ9
wxyz9
0
Space
One-character-shifted Caps Lock Unshifted
*
See pages 25, 47 for changing French entry mode.
After a character is entered, the cursor automatically
advances to the next space after two seconds or when you
enter a character not on the same key.
27
Setting the Default Input Mode
1. Select
> Settings > Text Entry > Default Input.
2. Select an option and press .
n T9 Word to select the T9 word mode for the initial entry
mode.
n Alphabet to select the Alphabet mode for the initial entry
mode.
n Retain Mode to set the retain mode on to retain the
previous entry mode.
28
2. Your Phone’s Settings
Sound Settings
Ringer Types
Selecting Ringer Types for Incoming Calls
Select a ringer type for incoming calls so that you can
recognize when a certain type of call is coming in:
1. Select
> Settings > Ringers > Ringer Type > Incoming Calls.
2. Select With Caller ID or Without Caller ID, and press
.
3. Select Downloads or Other Ringers. (The list of available
ringers is displayed.)
4. Use your navigation key to scroll through the available
ringers.
5. Press
to assign a ringer.
Selecting Ringer Types for Messages
1. Select
> Settings > Ringers > Ringer Type > Messaging.
2. Select Text Message, Voicemail, or Web Alerts.
3. Select Downloads or Other Ringers. (The list of available
ringers is displayed.)
4. Use your navigation key to scroll through the available
ringers.
5. Press
to assign a ringer.
29
Selecting Ringer Types for Alarms or Scheduled Events
1. Select
> Settings > Ringers > Ringer Type.
2. Select Alarm or Schedule and press
.
3. Select Downloads or Other Ringers. (The list of available
ringers is displayed.)
4. Use your navigation key to scroll through the available
ringers.
5. Press
to assign a ringer.
Selecting Ringer Types for Power On or Power Off Tone
1. Select
> Settings > Ringers > Ringer Type.
2. Select Power On or Power Off and press
.
3. Select Downloads, Tones, or Off. (The list of available ringers is
displayed.)
4. Use your navigation key to scroll through the available
ringers.
5. Press
30
to assign a ringer.
Adjusting the Phone’s Volume Settings
1. Select
> Settings > Ringers > Volume.
2. Select Ringer, Earpiece, Headset, Speakerphone, Applications,
or Start-up/Pw-off.
3. Use your navigation key to choose a volume level and press
Done (left softkey).
Tip: You can adjust the ringer volume in standby mode (or the earpiece volume
during a call) by using the volume key.
Adjusting the Alert Volume
You can set the alert volume separately from the ringer volume
setting.
1. Select
> Settings > Ringers > Volume > Advanced....
2. Select Alarms, Text Message, Voicemail, or Web Alerts.
3. Using the navigation key, select Separate Vol..
4. Press the navigation key right or left to choose a volume
level, and press Done (left softkey).
Tip: You can make the ringer vibrate at any volume level by checking the box
next to Always Vibrate.
31
Selecting Vibrate Types
With this feature, you can select vibrate types for incoming
calls, messages, alarms, and scheduled events.
1. Select
> Settings > Ringers > Vibrate Type.
2. Select Incoming Calls, Messaging, Alarm, or Schedule.
The following items require an additional step:
n Incoming Calls: select With Caller ID or Without Caller ID.
n Messaging: select Text Message, Voicemail, or Web Alerts.
3. Select a vibrate type and press
.
Selecting a Key Tone
Your phone offers a number of options for selecting the
audible tones accompanying a keypress.
1. Select
> Settings > Ringers > Keytones.
2. Select an option and press
n
n
.
Tone Length to select a key tone length. (Longer tone
lengths may be better for tone recognition when dialing
voicemail [optional] or other automated systems.)
Tone Volume to select a keypress volume level.
Setting Up Voice Guide
Voice Guide activates both voice prompt and keypress echo
functions. This feature allows you to hear voice prompts and
spoken numbers as you press the keypad.
1. Select
> Settings > Ringers > Voice Guide.
2. Select On or Off.
Note: The default setting is Off.
When the ringer volume is set to Silence All or Vibrate All, Voice Guide
does not work.
32
Alert Notification
Your phone comes with several different options to keep you
aware of what is going on by sounding the alert or ringer.
To set the alerts:
1. Select
> Settings > Ringers > Alerts.
2. Select an option and press
n
n
n
n
n
.
Beep Each Minute to set a minute reminder that beeps
ten seconds before the end of each minute during a
call.
Out of Service to set alert on or off for network services
parameter changes.
Connect to set an alert to notify you when your call has
been connected.
Signal Fade/Call Drop to set alert to notify you when your
phone loses a signal during a call.
Messaging to set an alert to notify you of text, voicemail,
or Web Alert. Select Ringer Length to set the ringer
length of Messaging notification.
3. Select a setting and press
.
33
Silence All
The Silence All option allows you to mute all sounds without
turning your phone off.
©
Press the volume key down repeatedly in standby mode
with the phone open. (The screen will display “Silence All.”)
n
To deactivate, press the volume key up repeatedly with
the phone open to select a volume level.
Tip: When the ringer volume is set to Silence All, you are not able to change
the settings of Applications, Start-up/Pw-off, Advanced..., Tone Volume,
or Voice Guide. See “Adjusting the Phone’s Volume Settings” on page 31
and see “Selecting Vibrate Types” and “Selecting a Key Tone” on page 32.
You can also select Vibrate All to set your phone to vibrate only.
34
Display Settings
Changing the Phone’s Menu Style
Your phone allows you to choose how the main menu appears
on your display screen.
1. Select
> Options (right softkey) > Change View.
2. Select Grid View or List View.
n
n
Grid View to view each main menu item as an animated
single-screen icon. You can select a menu by pressing
a number key. Allocation of menu options corresponds
to that of number keys on the keypad.
List View to view main menu as a list. Menu option is
numbered and you can select it by pressing the
corresponding number key on the key pad.
Changing the Backlight Time Length
To change the backlight setting:
1. Select
> Settings > Display > Main Screen > Backlight.
2. Select Always On, Dim Only, or a preset length of time.
To change the keypad backlight setting:
1. Select
> Settings > Display > Keypad Light.
2. Select Always Off or a preset length of time.
Note: Long backlight settings affect the phone’s talk and standby times.
Power Save Mode
This feature helps conserve your battery power.
1. Select
> Settings > Display > Power Save Mode.
2. A message appears. Press OK (left softkey) to continue.
3. Select On. (Select Off to deactivate this feature.)
35
Changing the Greeting
To display or change your custom greeting:
1. Select
> Settings > Display > Main Screen > Foreground >
Greeting > Custom.
2. Enter a custom greeting using your keypad and press
(See “Entering Text” on page 24.)
.
To select the default greeting:
©
Select
> Settings > Display > Main Screen > Foreground >
Greeting > Default.
Changing the Font Size
To change the input font size:
1. Select
– or –
Select
> Settings > Display > Main Screen > Input Font.
> Settings > More... > Accessibility > Input Font.
2. Select Phone#s, Messaging, or Others.
3. Select an input font size and press
.
To change the display font size:
1. Select
– or –
Select
> Settings > Display > Font Size.
> Settings > More... > Accessibility > Font Size.
2. Select an option and press
n
n
.
Main Screen to select Messaging or Browser.
Outer Screen to select Names.
3. Select a font size and press
.
Tip: You can see the preview of the display by pressing Preview (right softkey).
(For Font Size menu only.)
From the preview display, you can select a font size by pressing the
navigation key right or left and press
.
36
Changing the Background
1. Select
> Settings > Display > Main Screen > Background.
2. Select background option and press
.
Changing the Contrast
You can adjust your screen’s contrast (brightness) to suit your
surroundings.
To adjust the display’s contrast:
1. Select
> Settings > Display > Contrast.
2. Select an option and press
.
Changing the Display Screen Animation
Your new phone offers animation for what you see on the
display screen during various phone functions.
1. Select
> Settings > Display > Main Screen > Animation.
2. Select Outgoing Calls or Service Search.
3. Select an option and press
.
4. Select an animation display and press
.
Changing the Screen Saver
Your new phone offers you the option of displaying a screen
saver while in standby mode.
To change the screen saver:
1. Select
> Settings > Display > Main Screen > Screensaver.
2. Select an option and press
.
3. Select a screen saver and press
twice.
37
Changing the Standby Mode Display
Select from among a variety of items to be displayed in
standby mode.
To set the clock/calendar display for standby mode:
1. Select
> Settings > Display > Main Screen or Outer Screen.
2. Select Foreground > Clock/Calendar.
3. Select a display option and press
.
4. Press OK (left softkey) to apply the display setting.
Setting Return to Idle Mode
1. Select
> Settings > Display > Return to Idle.
2. A message appears. Press OK (left softkey) to continue.
3. Select Automatically or End Key.
n
n
Automatically to return to Idle mode (which indicates
standby mode or signal search mode) automatically
when no key is pressed in 30 seconds.
End Key to return to Idle mode by pressing
Note: End Key setting affects the phone’s talk and standby times.
38
.
Sleep Mode
This feature helps conserve your battery power by restricting
the display.
1. Select
> Settings > Display.
2. Select Main Screen or Outer Screen > Sleep Mode.
3. Select a time interval before the phone goes into sleep
mode and press . (Select Off to deactivate this feature.)
39
Location Settings
The settings allow you to turn the Assisted GPS chipset in the
cell phone to “On” or “Off.” Setting location to On lets the
network detect the cell phone’s geographic location using
Assisted GPS, making some features easier to use. Setting
location to Off disables Assisted GPS, but some features may
still detect the cell phone’s whereabouts using cell tower
technology. Assisted GPS is automatically set to On when an
emergency call is placed, then set back to Off when the call is
completed. Except for basic cellular and 911 services, your
location will only be used with your consent.
To set the Location Menu to On or Off:
1. Select
> Settings > More... > Location > On/Off.
2. Read the disclaimer and press OK (left softkey).
3. Select On or Off.
Tip: When the Location feature is on, your phone’s standby screen will display
the
icon. When Location is turned off, the
icon will be displayed.
You can send the log received from the GPS applications to
other devices via Bluetooth or a USB cable.
To send the GPS log to other devices:
1. Select
> Settings > More... > Location > NMEA Output.
2. Select Bluetooth, USB, or Off.
Note: This is an optional service. For more details, please check with your
service provider on availability.
40
Messaging Settings
Setting Message Notification Display
You can set your phone to display an icon and message
notification or just display an icon notification when you
receive a text message, voicemail (optional), or Web Alert.
1. Select
> Settings > Messaging > Notification.
2. Select Msgs and Icon or Icon Only.
Note: Receiving messages will not interrupt current operations. If you receive
messages during operations, only an icon is displayed even if you select
Msgs and Icon.
Tip: To access Messaging settings menu, you can also select
Messaging > Settings.
>
Setting Push Options
Turning this feature on allows you to connect to a Web Alerts
page automatically (if possible) when you receive a Web Alert.
See page 102 for Web Alerts.
1. Select
> Settings > Messaging > Push Options.
2. Select Yes or No.
Setting Message Reminders
When new messages arrive, you can choose to have your
phone notify you by playing an audible alert.
1. Select
> Settings > Messaging > Message Reminder.
2. Select Text Message, Voicemail, or Web Alerts.
3. Select Repeat or Ringer Length.
4. Select a setting and press
.
41
Editing Canned Messages
Your phone can store canned messages for use with text
messaging. You can edit your phone’s default canned
messages through the Settings menu.
To edit a canned message:
1. Select
> Settings > Messaging > Canned Messages. (The list
of canned messages will be displayed.)
2. Select the message you want to edit and press Options
(right softkey) > Edit.
3. Use your keypad to edit the message and press
your changes.
to save
Note: To reset all messages, press Options (right softkey) > Reset All Msgs >
Yes (left softkey) after step 1 above.
To delete a canned message:
1. Select
> Settings > Messaging > Canned Messages.
2. Select the message you want to delete and select Options
(right softkey).
3. Select Delete > Yes (left softkey).
To change the language of the canned messages:
1. Select
> Settings > Messaging > Canned Messages.
2. Press Options (right softkey) > Select Language.
3. Select English or French.
Note: For information on editing text, see “Entering Text” on page 24.
42
Setting Your Callback Number
With this feature, you can send a callback number with your
text message.
1. Select
press
> Settings > Messaging > Callback Number, and then
again.
2. Select an option and press
.
n
None to send no callback number.
n
My Phone# to send your phone number.
n
Other to send a defined number. To set a number, enter
a phone number in the Enter Callback# field, and then
press
> Done (left softkey).
Setting Your Signature
This feature allows you to send a text message with your
signature.
1. Select
> Settings > Messaging > Signature.
2. Select On in the Signature field. (If you do not wish to attach
a signature to your outgoing messages, select Off.)
3. Enter your signature in the Text field.
4. Press
> Save (left softkey).
Note: You can insert your signature even when your signature setting is off.
Press Mode (right softkey) and select Signature while composing your
message.
Setting Drafts Alert
Drafts Alert sends you a reminder when you have unsent
messages waiting in the drafts folder.
1. Select
> Settings > Messaging > Drafts Alert.
2. Select On or Off.
43
Airplane Mode
When your phone is in Airplane mode, it cannot send or
receive any calls (except for 911 dialing) or access online
information. You may still use the phone’s other features, such as
voice memo, calculator, calendar, etc., while you are in
Airplane mode.
1. Select
> Settings > More... > Airplane Mode.
2. Read the disclaimer and press OK (left softkey).
3. Select On or Off.
Note: While in Airplane mode, your phone’s screen will display “Phone Off.”
44
TTY Use
A TTY (also known as a TDD or Text Telephone) is a
telecommunications device that allows people who are deaf,
hard of hearing, or who have speech or language disabilities,
to communicate via a telephone.
Your phone is compatible with select TTY devices. Please
check with the manufacturer of your TTY device to ensure that
it supports digital wireless transmission. Your phone and TTY
device will connect via a special cable that plugs into your
phone’s headset jack. If this cable was not provided with your
TTY device, contact your TTY device manufacturer to
purchase the connector cable.
1. Select
> Settings > More... > Accessibility > TTY.
(An informational message will be displayed.)
2. Press
or OK (left softkey) to continue.
3. Select On or Off.
Note: When you connect TTY devices, your phone will display
in TTY mode.
If TTY mode is enabled, the audio quality of non-TTY devices connected
to the headset jack may be impaired.
IMPORTANT NOTICE: 911 Emergency Calling
It is recommended that TTY users make emergency calls by other means
including cellular and landline communications.
45
Phone Setup Options
My Favourites
Your phone offers you the option of assigning a shortcut to a
favourite or often-used function. Pressing the navigation key
left (by default) will launch your user-defined shortcut.
1. Press the navigation key left.
2. Select <Add Favourite>.
3. Select an item to be assigned to My Favourites list and
press .
n
n
Contact to display stored Contacts entries.
My Downloads to display downloaded items stored in
your phone.
n
Web Bookmark to display your bookmarked sites.
n
Menu Item to assign an often-used menu item.
4. Using the navigation key or your keypad, select an item to
be assigned to the My Favourites list.
5. Press Assign (left softkey) to save if you select options other
than Contact.
Tip: While My Favourites list is displayed, press Options (right softkey) to
customize the list according to your needs.
46
Setting the Text Entry Options
1. Select
> Settings >Text Entry.
2. Select an option and press
n
n
n
n
n
n
n
n
n
.
Auto-Capital to set the auto-capital on or off.
Auto-Space to set the auto-space on or off after T9
words you enter.
Input Language to select the language (English or
French).
My Words to add a word to or edit a word in the T9
database (see page 26).
T9 Settings to customize the T9 settings (see page 26).
Default Input to select T9 word, Alphabet, or Retain Mode
for the initial entry mode. Set Retain Mode to retain the
previous entry mode (see page 28).
Add Word to store words that you use frequently
(see page 25).
Auto-Complete to automatically display words that may
follow the current text input.
Help to see the T9 instructions page.
Auto Answer Mode
This feature sets the phone to automatically pick up incoming
calls in speakerphone mode or hands-free mode (when
connected).
1. Select
> Settings > More... > Call Setup > Auto-Answer.
2. Select Hands-free or Speakerphone.
3. Select 5 Seconds, 10 Seconds, or Off.
47
Call Answer Mode
This feature allows you to select how to answer incoming calls
on your phone: whether you want to be required to press ,
to press any number key, or simply to open the phone.
1. Select
> Settings > More... > Call Setup > Call Answer.
2. Select Talk Key, Any Key, or Flip Open.
Setting Abbreviated Dialing
To activate Contacts Match feature:
1. Select
> Settings > More... > Call Setup.
2. Select Contacts Match > On.
n
To deactivate this feature, select Off.
Note: Contacts Match does not apply when entering 411 or 911.
To set your prepend number:
1. Follow step 1 above.
2. Select Abbrev. Dial > Prepend > On.
n
To deactivate this feature, select Off.
3. Enter the first five- or six- digit prefix in the Prepend# field,
(for example, an area code and prefix) and press OK (left
softkey).
Tip: To make an Abbreviated Dial call, see “Using Abbreviated Dialing” on
page 23.
48
Headset Mode
This feature allows you hands-free phone use. Press the Turbo
Button (the operation button) on the headset to activate useful
functions.
Note: Set TTY to Off to change Headset Mode settings.
To connect the headset:
©
Simply plug the headset into your phone’s headset jack.
To set headset mode:
1. Select
> Settings > More... > Headset Mode.
2. Select Headset Button.
3. Select an option and press
n
n
:
Voice Calls to use the Turbo Button for voice calls. In
standby mode, press twice to redial the last call, and
press and hold to activate ASR.
Off to disable a Turbo Button.
To set the ringer sound:
1. Select
> Settings > More... > Headset Mode.
2. Select Ringer Sound > Normal or Headset Only.
49
Setting Navigation Key Shortcuts
You can use the navigation keys as shortcuts to access
specific menu items directly from standby mode. With this
feature, you can reassign the default shortcuts to the menu
items you choose.
To set the navigation key shortcut:
1. Select
> Settings > More... > Navigation Keys.
2. Select the navigation key you want to reassign and press
3. Using the navigation key or your keypad, select a function.
4. Press Assign (left softkey) to save. (If there are additional
levels available, press
before selecting your shortcut.)
Changing the Menu Language
1. Select
> Settings > Display > Language.
2. Select English or Français.
Setting Side Key Guard
This feature enables you to lock the external keys while the
phone is closed in order to prevent accidental key presses.
1. Select
> Settings > More... > Side Key Guard.
2. Select On or Off.
Note: This feature does not apply when the phone is open.
Tip: You can deactivate this feature temporarily by pressing and holding
while the phone is closed.
50
.
Browser Settings
Customize your phone’s Web browser settings.
Editing Bookmarks
Edit, sort, and delete Web browser bookmarks.
1. Select
> Settings > More... > Browser > Bookmarks.
2. Scroll to highlight a bookmark and press Options (right
softkey).
3. Select an option and press
n
.
Show Page displays the Web page of the selected
bookmark.
n
Edit to edit the title or address of a selected bookmark.
n
Delete to delete a selected bookmark.
n
Delete All to delete all bookmarks saved in the phone.
n
Reorder to change the order of the bookmarks.
Deleting Browser Cache Files
With this feature, you can delete the browser cache
(temporary files) saved in the phone.
1. Select
> Settings > More... > Browser.
2. Select Delete Web Cache.
3. If you are certain you would like to delete, press OK (left
softkey) > Yes (left softkey).
51
Phone Information Management
Displaying Phone Information
©
Select
> Settings > Phone Info > My Phone#.
Finding Icon Definition
1. Select
> Settings > Phone Info > Icon Glossary.
2. Select the item for which you want to see the explanation
and press .
Displaying the Version Information
©
Select
> Settings > Phone Info > Version.
Displaying Advanced Information
©
52
Select
> Settings > Phone Info > Advanced.
3. Security
Accessing the Security Menu
You must enter your lock code to view the Security menu.
1. Select
> Settings > More...> Security.
2. Enter your lock code to display the Security menu.
Tip: If you never changed the lock code number and you can not recall your
lock code, try using the last four digits of your phone number.
Using Your Phone’s Lock Feature
Locking Phone
Locking phone automatically locks the keys. If you select
Lock My Phone, you must enter the lock code beforehand to
make a call. In this way you can prevent other people from
using your phone.
1. From the Security Menu (see “Accessing the Security
Menu” above), select Lock My Phone.
2. Select Lock Now or On Power-up.
n
n
Lock Now to lock your phone now.
On Power-up to lock your phone the next time it is
turned on.
3. Select either Full Lock or Exp. IncomingCalls.
n
n
Full Lock to restrict both outgoing and incoming calls.
Exp. IncomingCalls to restrict outgoing calls while
allowing incoming calls.
53
Unlocking Your Phone
1. From standby mode, press Unlock (left softkey).
2. Enter your lock code.
Changing the Lock Code
1. From the Security Menu (see “Accessing the Security
Menu” on page 53), select Change LockCode.
2. Enter and re-enter a new lock code.
Calling in Lock Mode
Even when your phone is locked, you can make calls to 911,
Customer Service, and to special numbers without entering
the lock code. (For information on special numbers, see
“Using Special Numbers” on page 55.)
Note: You can call only emergency numbers while Voice is set to Locked in
Restrict and Lock (see “Locking Voice Calls and Internet” shown below).
Locking Voice Calls and Internet
With this feature, you can block access to the Internet or
incoming and outgoing voice calls (except 911).
1. Select
> Settings > More... > Restrict and Lock.
2. Select Voice or Internet.
n
Voice: Enter your lock code, and then select Lock.
n
Internet: Enter your lock code.
3. Select Locked. (Select Unlocked to deactivate this feature.)
Tip: To avoid accidental Internet connections, you can use the Net Guard
feature (see page 117).
54
Restricting Calls
You can restrict phone numbers your phone dials or receives.
(This setting does not apply to 911 or Customer Service.)
1. Select
> Settings > More... > Restrict and Lock.
2. Select Voice, and then enter your lock code.
3. Select Restrict > Incoming Calls or Outgoing Calls.
4. Select an option and press
n
n
n
.
Allow All to make or receive all calls.
Contacts Only to make or receive calls to or from
Contacts entries, voicemail (optional), or special
numbers only.
Special #s Only to make or receive calls to or from three
special numbers only. (You must register the numbers
beforehand. See “Using Special Numbers” below.)
Note: Restricted incoming calls are forwarded to voicemail. (Voicemail service is
optional and may require subscription fee.)
Using Special Numbers
You can save three special numbers on your phone in addition
to your Contacts entries (the same number may be in both
directories). You can make or receive calls to or from special
numbers even when your phone is locked.
To add or edit a special number:
1. From the Security Menu (see “Accessing the Security
Menu” on page 53), select Special Numbers.
2. Select a field to enter or edit the number and press
3. Enter or edit the number and press
.
.
Note: There are no speed dial options associated with special numbers.
You cannot make calls to or receive calls from special numbers if Voice
is set to Locked in Restrict and Lock.
55
Deleting Phone Content
1. From the Security Menu (see “Accessing the Security
Menu” on page 53), select Delete/Reset.
2. Select an option and press
n
n
n
n
n
n
n
.
Delete Web History to delete all Web history saved in the
phone.
Delete Web Cache to delete all Web cache memory
saved in the phone.
Delete Contacts to delete all of your Contacts entries.
Delete My Downloads to delete all items you have
downloaded to your phone.
Delete Voice Data to delete all voice data and call memos
you have saved in the phone.
Delete Message to delete all messages (including locked
ones) in the Inbox, Sent Mail, Pending, Drafts folders,
your defined folders, and Recent List, and reset all
user-created canned messages.
Delete Cal. Events to delete all scheduled events
(including secret ones).
3. Press OK (left softkey) to continue.
4. If you are certain you would like to delete, press Yes (left
softkey).
56
Resetting the Browser
This option resets your Web browser’s history, bookmarks,
cookies, auto-complete text, and URLs.
1. From the Security Menu (see “Accessing the Security
Menu” on page 53), select Delete/Reset > Reset Browser.
2. Press OK (left softkey) to continue.
3. If you are certain you would like to reset, press Yes (left
softkey).
Resetting Favourites
1. From the Security Menu (see “Accessing the Security
Menu” on page 53), select Delete/Reset > Reset Favourites.
2. Press OK (left softkey) to continue.
3. If you are certain you would like to reset, press Yes (left
softkey).
Resetting All Settings
Reset All Settings restores all the factory defaults, including the
ringer types and display settings. The Contacts, Call History,
Calendar, and Messaging are not affected.
1. From the Security Menu (see “Accessing the Security
Menu” on page 53), select Delete/Reset > Reset All Settings.
2. Press OK (left softkey) to continue.
3. If you are certain you would like to restore all the factory
settings, press Yes (left softkey).
57
Resetting Your Phone
Resetting the phone resets all settings and delete all data on
your phone.
1. From the Security Menu (see “Accessing the Security
Menu” on page 53), select Delete/Reset > Reset Phone.
(A disclaimer is displayed.)
2. Press OK (left softkey) to continue.
3. If you are certain you would like to reset your phone, press
Yes (left softkey).
58
4. Roaming
Understanding Roaming
Recognizing Icons on the Display Screen
Your phone’s display screen always lets you know when you
are off the home network. Any time you are roaming, the
phone displays the roaming icon (
).
Roaming on Other Networks
When you are roaming, your call quality and security will be
similar to the quality you receive when making calls on the
home network. You may not be able to access certain features.
Note: If you are on a call when you leave the home network and enter an area
where roaming is available, your call is dropped. If your call is dropped in an
area where you think service is available, turn your phone off and on again to
reconnect to the home network.
Setting Your Phone’s Roam Mode
Your phone allows you to control your ability to roam. By using
the Roaming menu option, you can determine which signals
your phone accepts.
1. Select
> Settings > More... > Roaming.
2. Select an option and press .
n Automatic to seek Service. When service is unavailable,
the phone searches for an alternate system.
n Home Only to access the home network only and
prevent roaming on other networks.
n 1X Only to prevent EVDO service and access 1X service
only.
59
5. Menu Navigation
Viewing the Menus
Menu Diagram
Menus let you check or change your phone settings.
The following outline shows your phone’s menu structure.
1. Missed Alerts
2. History
3. Contacts
4. Messaging
1. Send Text
2. Text
3. Web Alerts
4. Voicemail
5. Settings
5. My Downloads
Application Mgr.
Games
Ringers
Screen Savers
Applications
Dynamic (If applicable)
Others (If applicable)
6. Web
7. Calendar
60
8. Tools
1. Voice Memo
2. Bluetooth
3. Alarm Clock
4. Stopwatch
5. Countdown
6. World Clock
7. Calculator
9. Settings
1. Display
2. Ringers
3. Bluetooth
4. Messaging
5. Text Entry
6. Phone Info
7. More...
IN USE MENU
Press Options (right softkey) to display the following options:
1. Three-Way Call
2. Main Menu
3. Save (or Contact Details)
4. Contacts
5. Call Memo Rec.
6. Phone Info
61
6. History
Viewing History
History shows up to the 60 most recent phone calls you have
placed, received, or missed. Each history entry contains the
phone number (if available) and Contacts entry name (if the
phone number is in your Contacts). Duplicate calls (same
number and type of call) may only appear once on the list.
To display History details:
©
From standby mode, press
– or –
> History.
Select
or
.
The current day’s history appears under Today, and the
previous day’s history appears under Yesterday. Other history
includes date information.
Note: History records only calls that occur while the phone is turned on. If a call
is received while your phone is turned off, it will not be included in the
phone’s History.
You can access your Contacts list by selecting Go to Contacts.
History Icon Indication
You can determine the type of phone call that was placed,
accepted, or missed from the icons shown below.
v
– Incoming Call
v
– Outgoing Call
v
– Missed Call
62
History Thread
The History thread screen shows all history of a selected
history entry.
To display a History thread:
©
From the History list display, select an entry and press
.
Tip: Text messages are included in the History thread.
History Details
To display History details:
From a History thread display, select an entry and press .
The History details screen shows the call type, phone number,
and date and time of the call. An onscreen menu is also
displayed according to the type of call. See “History Menu
Options” on page 64. To make a call from History details
screen, press
or
.
©
Making a Call from History
To place a call from History:
1. Press
or
to display your recent call history log, and
then highlight a listing.
2. Press
or
.
Note: You cannot make calls from History to entries identified as No Caller ID,
Restricted ID (Private), or Unavailable ID.
Tip: You can also send a message when the left softkey displays the Send Text
option.
63
History Menu Options
You may see several menu items on the onscreen menu or by
pressing Options (right softkey).
v Call:Speaker On to dial the phone number in speakerphone
mode.
v Send Text to send a text message. See page 103 for details.
v New Group to access a group entry menu to create a new
group entry. See “Making a New Group Entry from History”
on page 66.
v Save Contact to save a phone number. See “Saving a Phone
Number from History” on page 65.
n Contact Details is displayed when the name and number
are already in your Contacts.
v Delete to delete the entry.
v Delete All to delete all entries in the History. See “Deleting
History” on page 67.
v Rename to change an entry’s current name to Caller ID name.
v Prepend to add numbers to the beginning of the phone
number. See “Prepending a Phone Number from History”
on page 67.
64
Saving a Phone Number from History
Your phone can store up to 600 Contacts entries. Contacts
can store up to a total of 4200 phone numbers.
1. From the History list display, highlight the entry you want to
save and press Options (right softkey) > Save Contact.
2. Select New Entry or Existing Entry.
n
New Entry to create a new Contacts entry for the number.
Existing Entry to save the number to an existing entry.
(This step is not necessary on the very first entry in your
Contacts.)
n
3. If New Entry was selected, select a phone type, and then use
the keypad to enter the new entry name and press .
– or–
If Existing Entry was selected, select an existing entry to
which you want to save the number, and then select a
phone type and press .
4. Press Done (left softkey).
Note: You cannot save phone numbers from calls identified as No Caller ID,
Restricted ID (Private), or Unavailable ID.
65
Making a New Group Entry from History
1. From the History list display, press Options (right softkey) >
New Group.
2. Read the message and press Start (left softkey).
3. Scroll through the list and press
after each selection.
(A check mark will appear in the box next to the selected
entry.)
Tip: Press Options (right softkey) > Enter New Address or Contacts to enter
a new address or to select an entry from your Contacts.
4. When you have marked all the entries you want to add,
press Continue (left softkey).
5. Enter a name for the new group and press
.
6. Press Save (left softkey) to save the group entry.
66
Prepending a Phone Number from History
If you need to make a call from History and you happen to be
outside your local area code, you can add the appropriate
prepending by following these steps:
1. From the History list display, highlight your desired entry and
press Options (right softkey) > Prepend.
2. Enter the prefix you want to add to the number.
3. Press
or
to place a call.
Deleting History
1. From the History list display, highlight an entry you wish to
delete and press Options (right softkey) > Delete.
n Select Delete All if you wish to delete all entries in your
History.
2. If you are certain you would like to delete the History, press
Delete (left softkey).
– or –
Press Cancel (right softkey) to return to the previous menu.
67
7. Contacts
About Contacts
Your phone can store up to 600 Contacts entries.
You can create two types of Contacts entries:
v
v
Personal Contacts Entries (for individual contacts) – An entry
for an individual. Each entry can contain up to seven phone
numbers, three email addresses, and one Web address.
Group Entries – Your phone can store up to 25 group entries.
Each entry can contain up to 40 members.
Displaying the Contacts List
©
Press Contacts (right softkey).
– or –
> Contacts.
Select
If you highlight a name, the main (default) phone number is
displayed. If a group entry is highlighted, a group icon and
number of group members will also be displayed.
Viewing History from Contacts
You can view the history of the selected Contacts entry from
the Contacts list.
©
68
Highlight the entry and press Options (right softkey) >
Contact History.
Creating a New Contacts Entry
Creating a Personal Contacts Entry
Shortcut: Enter the phone number in standby mode and press
with steps 2-4 in “Saving a Phone Number” on page 20.
. Proceed
1. From the Contacts list display, select Add New > New Contact.
2. Enter a name for the new entry and press the navigation key
down.
3. Enter the phone number for the entry and press
.
4. Select a phone type for the entry (Mobile, Home, Work, Pager,
Fax, or Other) and press .
5. Press Done (left softkey).
After you have saved the number, the new Contacts entry is
displayed.
Creating a Group Entry
You can create a group entry by giving it a name and assigning
members to it.
1. From the Contacts list display, select Add New > New Group.
2. Read the message and press Start (left softkey).
3. Scroll through the list and press
after each selection.
(A check mark will appear in the box next to the selected
entry.)
Tip: Press Options (right softkey) > Enter New Address or Recent History to
enter a new address or to select an entry from your Recent History.
4. When you have marked all the entries you want to add,
press Continue (left softkey).
5. Enter a name for the new group and press
.
6. Press Save (left softkey) to save the group entry.
69
Finding Contacts Entries
There are several ways to display your Contacts entries:
by name, by Automatic Speech Recognition (ASR), by speed
dial number, and by group. Follow the steps outlined in the
sections below to display entries from the Contacts menu.
Finding Names
To find Contacts entries by name:
1. From the Contacts list display, scroll through all the entries
using your navigation key.
– or –
From the Contacts list display, enter the first letter or the first
few letters of the name. (The more letters you enter, the
more your search narrows.)
2. To display an entry, highlight your desired entry and
press .
3. To make the call, highlight an entry, and select a phone
number using the navigation key right or left (if there are
multiple saved phone numbers), and then press
or
.
To find Contacts entries by Automatic Speech Recognition
(ASR):
1. Press and hold
or
.
2. Say “Call” and then the name you would like to find. If the
software finds multiple matches, a list of the most likely
names is displayed. You will hear the voice prompt “Did you
say…” followed by the matched name.
3. Say “Yes” to confirm the name, or “No” to change the
selection.
Note: Your phone will automatically place a call if the name is completely
recognized.
70
Finding Speed Dial Numbers
1. Select
> Settings > More… > Contacts > Speed Dial #’s.
– or –
Press Contacts (right softkey) > Options (right softkey) >
Settings > Speed Numbers.
n See “Using Speed Dialing” on page 22 for how to use
speed dialing.
2. Scroll through speed dial entries. Speed dial numbers are
displayed in numeric order.
3. To dial the phone number assigned to a speed dial number,
press
or
.
Finding Group Entries
To find entries designated as part of a group:
1. Press Contacts (right softkey).
– or –
> Contacts.
Select
2. Scroll through the group entries using your navigation key.
To display Contacts entries belonging to a group, highlight
the group and press .
3. To dial the entry’s default phone number, select the entry and
press
or
.
Displaying the Details Screen
To display the details screen:
1. From the Contacts list display, select a Contacts entry for
which you would like to see the details and press .
2. Highlight any information and press . You will see
onscreen menu options for the information displayed.
Note: If you select a group entry on step 1, entries belonging to the group entry
are displayed. Highlight an entry and press Options (right softkey) to display
the menu options.
For details of each menu, see “Contacts Menu Descriptions”
on page 76.
71
Editing a Contacts Entry
Adding a Phone Number to a Personal Contacts Entry
1. From the Contacts list display, highlight the Contacts entry
to which you want to add a phone number and press Options
(right softkey) > Edit Contact.
2. Scroll down to highlight <Add Number> and enter the new
phone number and press .
3. Select a phone type for the number and press
.
4. Press Done (left softkey).
Adding Group Members to the Group Entry
You can add group members to an existing group entry. Each
group can include up to 40 members. You can enter a group
member directly or select the member from your Contacts.
1. From the Contacts list display, scroll to the group you want
to add members to, and press .
2. Press Options (right softkey) > Edit Group > Add More.
3. Read the message and press Start (left softkey).
4. Highlight each member you want to add and press
after
each selection. (A check mark will appear in the box next to
the selected member.)
5. Press Continue (left softkey) > Save (left softkey).
72
Assigning Speed Dial Numbers
Your phone can store up to 98 phone numbers in speed dial
locations. (For details on how to make calls using speed dial
numbers, see “Using Speed Dialing” on page 22.)
To assign a speed dial number:
1. From the Contacts list display, select a Contacts entry that
has a phone number to which you would like to assign a
speed dial and press .
2. Highlight the number and press Options (right softkey) >
Set Speed Dial.
3. Select an available speed dial location and press
.
– or –
1. Select
> Settings > More... > Contacts > Speed Dial #’s.
2. Select an available speed dial location and press
.
3. Select an entry from the list and press .
The entry’s default phone number is assigned.
n To select another phone number in the entry, press the
navigation key right or left.
Note: If you attempt to assign a new number to an already used location, you
will be asked whether to overwrite it. Select Replace option to overwrite.
73
Editing a Contacts Entry’s Information
1. From the Contacts list display, highlight the entry you want
to edit.
2. Press Options (right softkey) > Edit Contact.
3. Select the field you want to edit, and then add or edit the
information and press .
4. Press Done (left softkey).
To edit a group entry:
You can change the group name, the assigned image, or add
new members to the group.
1. From the Contacts list display, highlight the group you want
to edit.
2. Press Options (right softkey) > Edit Group.
3. Change the group name or the image.
n See “Adding Group Members to the Group Entry” on
page 72 to add a member.
4. Press Save (left softkey) to save your changes.
Assigning an Image to a Contacts Entry
You can assign an image to a Contacts entry. The image is
displayed when the entry calls you.
To assign an image for an entry:
1. From the Contacts list display, select the entry to which you
want to assign an image and press .
2. Press the navigation key up to highlight the
press .
icon and
3. Select Select Photo.
4. Select an option and press
.
5. If you select Downloads, select an image and press
then press OK (left softkey) to assign.
74
, and
Deleting a Contacts Entry
To delete a personal Contacts or a group entry:
1. From the Contacts list display, highlight an entry you want to
delete.
2. Press Options (right softkey) > Delete Contact > Delete (left
softkey).
– or –
Press Options (right softkey) > Delete Group > Yes (left softkey).
To remove a group member from a group entry:
1. From the Contacts list display, scroll to the group from
which you want to delete a member, and press .
2. Press Options (right softkey) > Edit Group.
3. Highlight the member you want to delete and press Options
(right softkey) > Remove from Group > Yes (left softkey).
4. Press Save (left softkey).
Selecting a Ringer Type for a Personal Contacts Entry
You can assign a ringer type to a Contacts entry so you can
identify the caller by the ringer type. (See “Ringer Types” on
page 29.)
1. From the Contacts list display, select a Contacts entry to
which you would like to assign a ringer and press .
2. Select the current ringer type and press
Ringer menu.
to display the
3. Select Change.
4. Select an option and press
5. Select a ringer and press
.
.
75
Contacts Menu Descriptions
You may see several menu items on the onscreen menu or by
pressing Options (right softkey).
In the Contacts List:
v
v
v
v
v
v
v
v
New Contact to create a new Contacts entry. See “Creating a
Personal Contacts Entry” on page 69.
New Group to create a new group entry. See “Creating a
Group Entry” on page 69.
Edit Contact to edit the selected Contacts entry. Edit Group
appears if a group entry is selected. See “Editing a Contacts
Entry” on page 72.
Delete Contact to delete the selected Contacts entry.
Delete Group appears if a group entry is selected. See “To
delete a personal Contacts or a group entry” on page 75.
Send Text to send a text message to the selected Contacts
entry.
Contact History to display the selected Contacts entry’s
history. See “Viewing History from Contacts” on page 68.
Send Contact to send the selected Contacts entry via
Bluetooth.
Set as Secret to make the selected entry secret. See “Secret
Contacts Entries” on page 78.
v
Settings to display the Settings menu.
v
Print to print the selected Contacts entry’s information.
On the Details screen:
v
v
Prepend to alter a phone number by adding numbers to the
beginning of the entry. See “Prepending a Phone Number
from History” on page 67.
v
Delete # to delete the selected phone number.
v
Call Alarm to set a Call Alarm for the selected phone number.
v
76
Edit to edit the selected Contacts information.
Set Speed Dial to assign a Speed Dial number to the selected
phone number.
v
Set as Main # to set the selected number as the main (default)
number for the Contacts entry.
On the Group Details screen only:
v
Contact Details appears if the entry is already saved in your
Contacts.
Onscreen menu only:
v
Call to call the selected phone number.
v
Set # Type to select a number type (mobile, home, etc.)
v
Launch to connect to a selected URL.
v
Set as Favourite to set a selected URL as My Favourites.
v
Edit to edit the selected information.
v
Clear to delete a current memo or address.
77
Secret Contacts Entries
You can hide an entry by making it secret. The entry is not
displayed in your Contacts. In History, a telephone number is
displayed but the Contacts entry’s name is not.
To make an entry secret:
1. From the Contacts list display, select the Contacts entry you
want to tag as secret and press Options (right softkey).
2. Select Set as Secret.
3. Select On. (Select Off if you do not want to tag as secret.)
4. From the Contacts list, press Options (right softkey) >
Settings > Hide Secret.
5. Enter your four-digit lock code.
To make an entry public:
1. From the Contacts list, press Options (right softkey) >
Settings > Show Secret.
2. Enter your four-digit lock code.
Note: If you make an entry secret, calls cannot be made to or received from
that entry if Contacts Only is selected in Settings > More... >
Restrict and Lock > Voice > Restrict > Incoming Calls or Outgoing Calls
(see page 55).
Tip: If you never changed the lock code number and you can not recall your
lock code, try using the last four digits of your phone number.
78
Dialing Services
Your Contacts is pre-programmed with contact numbers for
various services.
1. Select
> Settings > More... > Contacts > Services.
2. Select Customer Service or Dir Assistance.
3. Press
or
.
79
8. Personal Organizer
Using Your Phone’s Calendar
Use the Calendar to remind you of events or important calls
you need to make. You can schedule up to 200 events, 15 Call
Alarms and 40 To Do Items.
Displaying Your Calendar
©
Select
> Calendar.
Tip: The current day is framed by a rectangle.
To change the calendar display views, press the left softkey (Monthly or
Weekly). In the weekly view, you can easily add or edit your own schedule.
Changing the Calendar Settings
This setting allows you to change the default settings for your
phone’s calendar. You can customize the calendar display
according to your needs.
To change the calendar settings:
1. From the calendar display, press Options (right softkey) >
Settings.
2. Select one of the following options and press
n
n
n
Display to change the display settings of the calendar
(Calendar View, Monthly View, or Time Starts at).
Alarm to change the alarm settings of the calendar
(Ringer Length, Snooze Interval, or Snooze Times).
3. Change the settings and press
80
:
Holiday to add or reset a holiday on the calendar
(Set Date, Set Weekly, Reset Date, Reset Weekly, or
Reset All).
.
Adding a Schedule to the Calendar
1. From the Calendar display, highlight the day to which you
want to add a schedule.
2. Press Options (right softkey) > Add Schedule.
3. Enter the description and press
.
Tip: You can retrieve a description from the To Do List or the Schedule List by
pressing Mode (right softkey) > From To Do List or Fr. Schedule List once
you have stored them on the list.
4. Enter other fields if necessary:
n
n
Description to change the description for the schedule.
Category to select a category (Appointment, Business,
Meeting, Personal, Vacation, Travel, or Miscellaneous).
n
Priority to select a priority (None, High, or Low).
n
Start to set a start time for the schedule.
n
End to set an end time for the schedule.
n
n
n
n
Location to edit the location of your schedule (up to 64
characters).
Alarm to select the ringer for the alarm.
Alarm Time to edit the alarm time (number of hours or
minutes before the event starts). Default alarm time is
10 minutes.
Repeat to set the schedule’s repeating status.
5. Press Save (left softkey) to save the event.
Tip: Press the navigation key up or down to scroll by week through the
calendar, and the volume key to scroll by month.
In the monthly view, days with events scheduled are indicated by a small
© just to the left of the date. In the weekly view, times for which you have
scheduled events are displayed as colored blocks.
81
Adding a Call Alarm to the Calendar
1. From the Calendar display, highlight the day to which you
want to add a call alarm and press Options (right softkey).
2. Press the navigation key left or right to select Add Call Alarm.
3. Enter the phone number directly or press Options (right
softkey) for the following options:
n
n
From Contacts to select a number from your Contacts.
Voicemail to select a number for voicemail access.
(Voicemail service is optional.)
4. Select the following items you want to edit and press
n
.
Category to select a category for the call alarm
(Appointment, Business, Meeting, Personal, Vacation,
Travel, or Miscellaneous).
n
Time/Date to edit the start time/date.
n
Alarm to select the ringer alarm.
n
Repeat to set the Call Alarm’s repeating status.
5. Press Save (left softkey).
Tip: You can also add a call alarm from the Contacts menu. (See “Contacts
Menu Descriptions” on page 76.)
You can set up to 15 call alarms.
To respond to a call alarm:
©
Press any key to stop the alarm. (The alarm will stop and
then sound again after the selected snooze interval.)
n
Press and hold
n
to cancel snoozing.
Press Dismiss (right softkey) to dismiss the event.
Tip: To change the alarm settings, from the calendar view, press Options (right
softkey) > Settings > Alarm to set the ringer length and snooze options.
To call the phone number at the time of a call alarm
notification:
©
82
Press
or
to dial the phone number (if applicable).
Adding To Do Items
Your phone can store and manage 40 To Do List items.
1. From the Calendar display, press Options (right softkey).
2. Press the navigation key left or right to select Add To Do.
3. Enter a description and press
.
Tip: You can retrieve a description from the To Do List or the Schedule List by
pressing Mode (right softkey) > From To Do List or Fr. Schedule List once
you have stored them on the list.
4. Select an option you want to edit and press
n
.
Category to select an event category (Appointment,
Business, Meeting, Personal, Vacation, Travel, or
Miscellaneous).
n
Priority to select an event priority (None, High, or Low).
n
Due Time/Date to schedule a due time and date.
n
Status to select a status for the To Do items
(Needs Action or Completed).
5. Press Save (left softkey).
Adding a To Do List Item to the Schedule
1. From the Calendar display, press Options (right softkey).
2. Highlight Schedule List and press the navigation key left or
right and select To Do List.
3. Select the item you want to add to the schedule, and press
Options (right softkey) > Add to Schedule.
4. Modify the description field (if desired), and set the other
fields using your keypad and press . (See “Adding a
Schedule to the Calendar” on page 81.)
Tip: You can retrieve a description from the To Do List or the Schedule List by
pressing Mode (right softkey) > From To Do List or Fr. Schedule List once
you have stored them on the list.
5. Press Save (left softkey).
83
Event Alerts
When your phone is turned on and you have an event alarm
scheduled, your phone alerts you and displays the event
summary. There are several ways your phone alerts you to
scheduled events.
v
v
v
©
©
©
By playing the alert tone (depending on the ringer type and
ringer volume setting).
By blinking the LED.
By lighting the LCD backlight (depending on the backlight
setting).
Press any key to stop the alert. (The alert will stop and then
sound again after the selected snooze interval.)
Press and hold
to cancel snoozing.
Press Dismiss (right softkey) to dismiss the event.
Note: To change the alert settings, from the calendar view, press Options (right
softkey) > Settings > Alarm to set the ringer length and snooze options.
84
Viewing Day’s Events
1. From the Calendar display, highlight the day for which you
would like to view events and press . (If you have events
scheduled for the selected day, they will be listed in
chronological order.)
2. To display the details of an event listed in the schedule,
highlight the event and press .
Event List Options
While you are displaying the day’s events list, press Options
(right softkey) to display the following options:
v
Add Schedule to add a schedule to the calendar.
v
Add Call Alarm to add a call alarm to the calendar.
v
Add To Do to add a To Do item to the calendar.
v
Schedule List to display the Schedule List on the calendar.
v
Call Alarm List to display the Call Alarm List on the calendar.
v
To Do List to display the To Do List on the calendar.
v
Edit to edit the event.
v
Set Cal. Secret to make an event secret.
v
Send Event to send the event via Bluetooth.
v
Delete to delete the event.
v
Go to Date to jump to another date on the calendar.
v
v
v
View Memory to view the memory status for events saved in
the phone.
Delete Memory to delete memory for events saved in the
phone.
Print to print the calendar events.
85
Deleting Events
To delete a day’s scheduled events:
1. From the calendar display, select the day for which you
would like to delete events and press .
2. Highlight one of the events and press Options (right softkey) >
Delete.
3. Select an option and press
n
n
n
.
This to delete a single event.
Select to delete events selected with check marks at
one time. Press Delete (left softkey) to continue.
All on This List to delete all events on the list.
4. Press Yes (left softkey) to delete the event(s).
To delete old scheduled events:
©
From the calendar display, press Options (right softkey) >
Delete Memory > Delete Old > Yes (left softkey).
To delete all scheduled events:
1. From the calendar display, press Options (right softkey) >
Delete Memory > Delete All > Yes (left softkey). (An alert will be
displayed asking you to confirm the deletion.)
2. Press Yes (left softkey) to delete all events.
Note: All events are deleted including Call Alarms (see page 82) and To Do List
items (see page 83).
Going to a Given Date
1. From the Calendar display, press Options (right softkey) >
Go to Date.
2. Enter a date by using the navigation key and/or the keypad
and press .
86
Using Your Phone’s Tools
Using the Alarm Clock
To set the alarm clock:
1. Select
> Tools > Alarm Clock.
2. Select an alarm number and press
.
3. Select the items you want to edit and press
n
n
.
Description to enter a description of the alarm.
Time to enter the alarm time. Enter the desired alarm
time and press .
n
Repeat to select the alarm frequency.
n
Alarm to set the alarm on or off.
4. Press Save (left softkey) to save the alarm settings.
Tip: Press the left softkey (On or Off) to toggle the alarm on and off.
To change the alarm settings, select Settings (right softkey) to set the
ringer length and snooze options.
To stop the alarm:
©
Press any key to stop the alarm. (The alarm will stop and
then sound again after the selected snooze interval.)
©
Press and hold
©
Press Dismiss (right softkey) to dismiss the alarm.
to cancel snoozing.
87
Using the Countdown Timer
This feature allows you to use the countdown timer with alarm
capabilities. You can set up to five timers.
1. Select
>Tools > Countdown.
2. Select a countdown timer number and press
3. Select items to edit and press
.
.
n
Description to enter a description of the countdown.
n
Time to enter the countdown time.
n
Alarm to set the countdown alarm on or off.
4. Press Save (left softkey) to save the countdown settings.
To stop the alarm:
©
Press any key. (The alarm will stop and then sound again
after the selected snooze interval.)
©
Press and hold
©
Press Dismiss (right softkey) to dismiss the timer.
to cancel snoozing.
Tip: Press the left softkey (On or Off) to toggle the countdown alarm on and off.
To change the alert settings, press Settings (right softkey) to set the
ringer length and snooze options.
88
Using the Stopwatch
To start the stopwatch:
©
Select
> Tools > Stopwatch.
n
Press Start (left softkey) to start the stopwatch.
n
Press Stop (left softkey) to stop the stopwatch.
n
Press Resume (left softkey) to start the stopwatch again.
To record a lap time while the stopwatch is running:
n
n
Press Lap (right softkey) to record time of the first lap.
Press Lap (right softkey) again to record the next lap.
(Up to 5 lap times can be saved. If you continue
recording, lap times will be deleted from the oldest.)
To display the stopwatch options:
1. From the stopwatch display, press Options (right softkey).
2. Select an option and press
n
n
n
.
Go to Lap List to display a saved Lap List. Press Detail
(left softkey) to display the lap list details.
Save to Lap List to save the recorded lap times.
(Available when you stop the lap in stopwatch
operation.)
Reset to reset the time to zero and clear any recorded
lap times.
89
Using the World Clock
1. Select
> Tools > World Clock.
2. Press the navigation key right or left to scroll through
different time zones.
Tip: Press Summer (left softkey) or Standard (right softkey) for changing
between summer and standard time, if applicable. The
icon is shown while
summer time is displayed.
Using the Calculator
1. Select
> Tools > Calculator.
2. Enter numbers using your keypad. Press the left softkey to
insert a decimal point.
3. Press the appropriate navigation key for an arithmetic
option. (Up for addition, Down for subtraction, Left for
multiplication, Right for division.)
4. Enter numbers and press
n
90
for the result.
To clear the numbers, press CLR (right softkey).
9. Voice Services
Using Automatic Speech Recognition (ASR)
Your phone is equipped with an Automatic Speech
Recognition (ASR) that allows you to make calls or launch
phone functions using your voice. All you have to do is to talk
into the phone, and ASR will recognize your voice and
complete tasks by itself.
Activating ASR
With the phone open:
©
From standby mode, press and hold
,
or
.
With the phone closed:
©
Press and hold
.
– or –
When Headset Button is set to Voice Calls in headset mode
(see page 49), press and hold the Turbo Button (the
operation button) on your optional headset.
The phone displays “Say a command” screen and prompts
you to say the name of the command you want to use. To
complete your task, simply follow the voice prompts.
Available ASR commands are:
v
v
v
Call <Name or #> to call an entry in your Contacts list or to
the phone number you say. (See page 92 for details.)
Go To <Menu> to jump directly to the menu items or
applications. (See page 92 for details.)
Check <Item> to check your phone’s status. (See page 93
for details.)
Note: Use ASR in a quiet environment so it can accurately identify your voice.
Tip: During ASR operation, press Help (left softkey) to get instructions for using
the software.
91
Making a Voice Call Using ASR
With ASR, you can make a voice call by reciting a name or
phone number.
1. Press and hold
,
or
.
2. If you hear “Say a command,” say “Call.”
3. If you hear “Say the name or number,” say a name or a
phone number.
4. If you hear “Which Location?,” say a phone type (for
example, “Mobile”).
Shortcut: To execute several commands at a time, you can say several
commands in sequence (for example, “Call, John Jones, Mobile”).
Note: If ASR does not recognize the name or number, it will find the most likely
matches and display a list of up to three names or numbers. You will hear “Did
you say…” followed by the name or number. You can confirm by saying “Yes.”
Say “No” to change the selection.
Opening Menus Using ASR
You can jump directly to 15 menu items or applications by
saying “Go to” followed by a menu option.
1. Press and hold
,
or
.
2. If you hear “Say a command,” say “Go to.”
3. If you hear “Which shortcut?,” say a menu option name (for
example, “Messaging”). (To display additional menu options,
say “More options.”)
Shortcut: To execute several commands at a time, you can say several
commands in sequence (for example, “Go to Messaging”).
92
Checking Phone Status Using ASR
You can use ASR to obtain information about your phone:
v
My Phone Number
v
Network
v
Signal Strength
v
Battery
v
Status (all of the above except phone number)
1. Press and hold
,
or
.
2. If you hear “Say a command,” say “Check.”
3. If you hear “Which status item?,” say a command.
ASR Options
To change ASR confirmation:
1. Press and hold
,
or
.
2. Press Settings (right softkey) > Confirmation and select an
option.
n Automatic to display the list and ask for your
confirmation if the system is not sure what you said.
n Always Confirm to always display the list and ask for your
confirmation.
n Never Confirm to never display the list and ask for your
confirmation.
To adapt the system to your voice:
1. Press and hold
,
or
.
2. Press Settings (right softkey) > Adaptation > Adapt Voice.
3. Press Start (left softkey) and repeat each word, phrase, or
telephone number you hear.
To reset the adaptation:
1. Press and hold
,
or
.
2. Press Settings (right softkey) > Adaptation > Reset Voice.
3. Read the message and press Yes (left softkey) if you are
certain you would like to reset.
93
To change ASR mode:
1. Press and hold
,
or
.
2. Press Settings (right softkey) > Modes and select an option.
n
Expert Mode to sound a beep only.
n
Prompt Mode to prompt for required information.
n
Readout Mode to prompt for required information and to
read aloud the content displayed on the main screen.
To change ASR dialing region:
1. Press and hold
,
or
.
2. Press Settings (right softkey) > Dialing region and select an
option.
n
n
North America to recognize only numbers valid in North
America.
Other to recognize any number regardless of location.
To display ASR software version:
1. Press and hold
,
or
.
2. Press Settings (right softkey) > About.
94
Managing Voice/Call Memos
You can use your phone’s voice recording to record brief
memos to remind you of important events, phone numbers, or
grocery list items.
Recording Voice Memos
1. Select
> Tools > Voice Memo > Record.
– or –
Press Memo (left softkey) > Record.
2. Start recording after the beep.
3. To finish recording, press
,
, or
.
Note: The total recording time depends on the available memory space on your
phone.
Recording Call Memos
1. During a call, press Options (right softkey) > Call Memo Rec.
2. Start recording after the beep.
3. To finish recording, press
or .
n Recording also stops when the call is disconnected.
Note: Only the other party’s voice is recorded during this process.
Voice and Call Memo Options
1. Select
> Tools > Voice Memo > List.
– or –
Press Memo (left softkey) > List.
2. Highlight a voice memo and press Options (right softkey).
3. Select an option and press .
n Play to play selected voice memos or all voice memos.
n This to play the selected memo.
n Multiple to play selected memos.
n All to play all memos.
Note: Press Speed (left softkey) to adjust the playing speed among three
speeds (1x, 2x, and 3x) which will be displayed on the lower part of the screen.
95
n
n
n
n
n
n
n
Speaker On or Speaker Off to activate or deactivate the
speakerphone mode.
Edit Title to edit the title of a voice memo.
Properties to display information about a voice memo.
Type Filter to display only voice memos or only call
memos.
Sort by to sort voice memos by time recorded, name, or
file size.
Go to Time to set the starting point of the playing.
Delete to delete either selected memos or all memos.
Deleting Voice and Call Memo
To delete an individual memo:
1. Select
> Tools > Voice Memo > List.
– or –
Press Memo (left softkey) > List.
2. Highlight the memo you want to delete and press Options
(right softkey) > Delete > This > Yes (left softkey).
To delete all memos:
1. Select
> Tools > Voice Memo > List.
– or –
Press Memo (left softkey) > List.
2. Press Options (right softkey) > Delete > All > Yes (left softkey).
To delete multiple selected recordings:
1. Select
> Tools > Voice Memo > List.
– or –
Press Memo (left softkey) > List.
2. Press Options (right softkey) > Delete > Multiple.
3. Select the memos you want to delete and press Delete (left
softkey) > Yes (left softkey).
96
Setting the Recording Guard
With this feature, you can record voice memos without
interruption from incoming calls.
1. Press
> Tools > Voice Memo.
– or –
Press Memo (left softkey).
2. Press Settings (right softkey) > Recording Guard.
3. Select On or Off.
Setting the Recording Mode
This feature allows you to match the sensitivity of the
microphone to the type of recording you are making.
1. Select
> Tools > Voice Memo.
– or –
Press Memo (left softkey).
2. Press Settings (right softkey) > Recording Mode.
3. Select an option and press :
n Dictation to record a single voice.
n Conference to record multiple voices.
Setting the Audio Quality
This feature enables you to set the quality of your recording.
1. Select
> Tools > Voice Memo.
– or –
Press Memo (left softkey).
2. Press Settings (right softkey) > Audio Quality.
3. Select High or Low and press
.
97
Setting Up Screen Call
You can screen incoming calls by using a recorded
announcement, either a pre-recorded one or one that you
record. You can also record the caller’s message.
Activating Screen Call
To start Screen Call when you have incoming calls:
©
When the phone rings or vibrates, press Options (right
softkey) > Screen Call.
To set Auto Screen Call:
1. Select
> Tools > Voice Memo > Screen Call > Auto > On.
– or –
Press Memo (left softkey) > Screen Call > Auto > On.
2. Set the answer delay by using numeric keys or by pressing
the navigation key up or down.
3. Press
or OK (left softkey). The
screen.
icon is displayed on the
Tip: While the caller’s message is being recorded, press
or press
to stop recording and disconnect the call.
to answer the call,
Selecting an Announcement for Screen Call
1. Select
>Tools > Voice Memo > Screen Call > Announcement.
– or –
Press Memo (left softkey) > Screen Call > Announcement.
2. Depending on your preference, select Pre-Recorded or
Custom.
98
Recording Name for a Pre-Recorded Announcement
1. Select
> Tools > Voice Memo > Screen Call > Announcement.
– or –
Press Memo (left softkey) > Screen Call > Announcement.
2. Highlight Pre-Recorded and press Edit (right softkey) >
Record Name.
n
If your name has already been recorded, select Yes or
No for overwriting.
3. Press
to start the 1st recording. (The maximum
recording time is 12 seconds.)
4. Press
to stop recording.
5. After the 1st recording, press
recording.
6. Press
again to start the 2nd
to stop recording.
Recording a Customized Announcement
1. Select
>Tools > Voice Memo > Screen Call > Announcement.
– or –
Press Memo (left softkey) > Screen Call > Announcement.
2. Highlight Custom and press Edit (right softkey) > Record.
n
If your announcement has already been recorded,
select Yes or No for overwriting.
3. Press
to start the 1st recording. (The maximum recording
time is 12 seconds.)
4. Press
to stop recording.
5. After the 1st recording, press
recording.
6. Press
again to start the 2nd
to stop recording.
99
Reviewing an Announcement
1. Select
> Tools > Voice Memo > Screen Call > Announcement.
– or –
Press Memo (left softkey) > Screen Call > Announcement.
2. Highlight Pre-Recorded or Custom and press Edit (right
softkey) > Play or Play:Speaker.
Deleting an Announcement
1. Select
> Tools > Voice Memo > Screen Call > Announcement.
– or –
Press Memo (left softkey) > Screen Call > Announcement.
2. Highlight Pre-Recorded or Custom and press Edit (right
softkey).
3. Select Delete Name or Delete. (A confirmation will be
displayed.)
4. Press Yes (left softkey).
100
10. Messaging
New Messages
You can set your phone to display an icon and message
notification or just display an icon notification when you
receive a new text message or Web Alert. See “Setting
Message Notification Display” on page 41.
To view a new message with an icon and message
notification:
©
A text message or a Web Alert will automatically appear on
your phone’s screen with
icon.
To view a new message with an icon notification or during
other operations:
©
icon will appear on your phone’s screen. To view
messages, see “Displaying Messages” on page 102.
Note: When there are two or more notifications, a Missed Alerts list displayed in
standby mode. Highlight a text message in the list and press View (left softkey)
to display the message details.
v
Press Call (left softkey) to dial the callback number.
v
Press Reply (left softkey) to reply to the sender.
v
Press Go (left softkey) to go to the Web site.
v
v
Press Forward (left softkey) to forward the message
(appears only if there is no sender’s phone number, email
address, or callback number).
Press Options (right softkey) to display options.
101
Displaying Messages
To display a text message from the main menu:
1. Select
> Messaging.
2. Select Text > Inbox, Sent Mail, Pending, Drafts, or your defined
folder and press .
3. Select the message you want to see and press .
(To display the message options, press Options [right
softkey].)
Note: When you have duplicated messages,
messages,
icon will be displayed.
icon appears. After opening the
To display Web Alerts:
1. Select
> Messaging > Web Alerts.
2. Select the header of the message you want to see and press
. (To display the Web Alerts options, press Options [right
softkey].)
3. Press Go (left softkey) to go to the Web site to view the
message.
To read other messages:
©
Press the navigation key right or left to read the next or
previous message.
Note: Web Alerts include URLs etc. When you buy a ringer or image through
your computer for your phone, your phone will receive Web Alerts. Press
Go (left softkey) to go to the website and follow steps to download it to
your phone.
If a Web Alert does not include a URL address, the left softkey displays the
OK option. You can press it to leave the message read.
102
Sending a Text Message
1. Select
> Messaging > Send Text.
2. Select an entry method you prefer:
n
n
n
Go to Contacts to select a recipient from your Contacts
(qualifying Contacts entries must contain a wireless
phone number or an email address).
Phone# to use the keypad to enter a wireless phone
number directly.
Email to enter the recipient’s email address.
Tip: You can also press Others (right softkey) to select recipients from your
Recent List.
3. Press Next (left softkey) when you have finished entering
recipients (up to 50 recipients per message).
4. Compose a message. When you have finished composing,
press OK (left softkey).
n
To enter a message, use your keypad to type your
message. Press Mode (right softkey) to select a
character input mode. (See “Selecting a Character
Input Mode” on page 24.)
5. Scroll down to select the message priority and set the
callback number and the signature.
6. Review your message and press Send (left softkey).
(To change the recipients or save the message to the Draft
folder, press Options [right softkey].)
Tip: You can also send a text message when the left softkey displays the
Send Text option.
You can simply press the TEXT key to access the Send Text screen.
103
Sending Canned Messages
Canned messages make sending text messages to your
friends, family, and coworkers easier than ever.
1. Select
> Settings > Messaging > Canned Messages.
2. Highlight a message you want to send and press Options
(right softkey) > Send Text.
3. Follow steps 2-6 in “Sending a Text Message” on page 103.
Creating Folders for Messages
You can create up to ten folders to store your Messages.
When 10 of your defined folders exist, the “Create Folder”
option will not appear.
To create a new folder:
1. Select
> Messaging >Text.
2. Press Options (right softkey) > Create Folder.
3. Enter a folder name and press
.
4. Press Save (left softkey).
To set an optional feature for the added folder:
1. During step 3 above, scroll down to select other menu
options.
n
Auto Filing to file messages into the folder automatically.
The following options appear when this feature is set to
on.
n
n
n
Keyword to set a keyword for Auto Filing. Enter a
keyword and press .
Notify to set the notification display to on or off when
you have an unread message matching the defined
folder.
Envelope Icon to set the envelope icon display to on or
off when you have unread message matching the
defined folder.
2. Press Save (left softkey).
104
Changing All Messages to Read
1. Select
> Messaging >Text.
2. Press Options (right softkey) > Change All to Read.
3. Press Yes (left softkey).
Tip: This option may not be displayed if you do not have any unread message in
those folders.
105
Deleting Text Messages
To delete an individual message or all messages:
1. Select
> Messaging >Text.
2. Select Inbox, Sent Mail, Pending, Drafts, or your defined folder
and press .
3. Highlight a message you want to delete and press Options
(right softkey) > Delete.
4. Select This.
Tip: This option may not be displayed if you save only one message in a folder.
To delete all messages, select All.
5. If you are certain you would like to delete, press Yes (left
softkey).
To delete multiple messages:
1. Open any message folder. (By following steps 1-2 above.)
2. Press Options (right softkey) > Delete > Multiple.
3. Press
to select messages to be deleted.
4. Press Delete (left softkey).
To delete read messages:
1. Select
> Messaging >Text > Inbox or your defined folder
and press .
2. Press Options (right softkey) > Delete > Read.
3. Press Yes (left softkey).
106
®
11. Bluetooth
Bluetooth is a short-range communications technology that
allows you to connect wirelessly to a number of Bluetooth
devices, such as headsets, hands-free car kits, and Bluetooth
enabled handhelds, computers, printers, and wireless
phones. The Bluetooth communication range is usually up to
approximately 10 meters (30 feet).
Accessing the Bluetooth Settings Menu
©
Select
> Settings > Bluetooth.
Turning Bluetooth On and Off
By default, your phone’s Bluetooth feature is turned off.
Turning Bluetooth on makes your phone “available” to other
in-range Bluetooth devices. To make your phone visible to
other devices, you must also set your phone’s visibility is not
set to Hidden. (See page 108.)
1. From the Bluetooth Settings menu display, select On/Off.
2. Select On to enable Bluetooth. Select Off to disable
Bluetooth.
Note: Enabling the Bluetooth settings affect the phone’s talk and standby times.
Bluetooth Status Indicators
The following icons show your Bluetooth connection status at
a glance:
v
v
v
v
– Bluetooth feature is active (blue icon).
– Your phone is connected to a Bluetooth device (green
icon).
– Your phone is discoverable by another Bluetooth
device.
– Your phone is communicating with a Bluetooth
device.
107
Using the Bluetooth Settings Menu
The Bluetooth Settings menu allows you to set up many of the
characteristics of your phone’s Bluetooth service, including:
v
v
v
v
Setting your phone’s visibility (or “discoverability”) for other
Bluetooth devices.
Choosing a device for your Bluetooth calls.
Entering or changing the name your phone uses for
Bluetooth communication.
Displaying your phone’s Bluetooth device information.
1. Select
> Settings > Bluetooth.
2. Select an option and press
n
n
n
n
n
n
108
.
On/Off to enable or disable Bluetooth.
Visibility > Always Visible, Visible for 3 min., or Hidden to set
your Bluetooth visibility.
Device Name to set a Bluetooth name for your phone.
Device Info to display your phone’s Bluetooth name,
address, class and available services.
Trusted Devices to display a list of trusted Bluetooth
devices.
Voice Priority to choose the default device you want to
use for incoming and outgoing calls.
Bluetooth Profiles
All the Bluetooth settings you configure are stored in your
phone’s Bluetooth user profile. Different profiles can be used
for specific Bluetooth functions.
v HSP: Headset Profile – This profile functions as a wireless ear
jack. When an incoming call is received, the ringer can be
heard through the headset instead of through the phone.
The call can then be received by pushing a button. While
using your phone, you can use the headset instead of the
phone by pushing a button on the headset, which has the
same effect as inserting a jack into the phone. Increase or
decrease the volume by using the volume key on the left
side of the phone.
Note: To cycle among the phone’s earpiece, speakerphone and a Bluetooth
headset during a call, press
.
v
v
v
v
v
HFP: Hands-Free Profile – This profile functions as a wireless
car kit. Incoming calls ring to the hands-free headset or
device. Calls can be received by pressing a button on the
headset or device. For dialing, four functions are supported:
recent call dial, voice dial, speed dial, and number dial.
Increase or decrease the volume by using the volume key
on the left side of the phone.
DUN: Dial-Up Network Profile – This profile functions as a
wireless data cable, connecting a computer or PDA to a
network through your phone.
OPP: Object Push Profile – This profile uses the Generic Object
Exchange profile services to send data objects between
devices and can be used to exchange business cards
(vCard), Contacts (vCard), and calendar (vCal).
BPP: Basic Printing Profile – This profile enables simpler
printing from your phone to a Bluetooth-enabled printer.
PBAP: Phone Book Access Profile – This profile enables
exchange of Contacts information between devices. It is
typically used between a car kit and a mobile phone to allow
the car kit to display the name of the incoming caller.
109
Pairing Bluetooth Devices
Paired Devices
The Bluetooth pairing process allows you to establish a
trusted connection between your phone and another
Bluetooth device. When devices are paired, a passcode (PIN
Code) is shared between devices, allowing for fast, secure
connections while bypassing the discovery and
authentication process.
To pair your phone with another Bluetooth device:
1. Select
> Tools > Bluetooth > Add New > Search.
(Your phone will display a list of discovered in-range
Bluetooth devices.)
2. Select a device and press
.
3. Select Add to Trusted.
4. Enter the PIN and press . (When the owner of the other
device enters the same PIN, the pairing is complete.)
Note: Due to different specifications and features of other Bluetooth-compatible
devices, display and operations may be different, and functions such as transfer
or exchange may not be possible.
Waiting for Request
If you are going to be using a Dial-Up Networking (DUN) profile
to pair with a computer or PDA, you will need to allow the
other device to initiate pairing with your phone.
To allow your phone to be paired with another Bluetooth
device:
1. Select
> Tools > Bluetooth > Add New > Wait for Request.
2. Follow the onscreen prompts to enter your PIN and
press .
110
Using the Trusted Devices Options
Once you have created paired devices, several options are
available from the trusted devices list.
1. From the Trusted List, highlight a device.
2. Press Options (right softkey) to display the following options:
n
n
n
n
n
Connect or Disconnect to connect to or disconnect from
the Bluetooth device (if applicable).
Send Item to send an item saved in your phone to
another Bluetooth device (if applicable).
Print to print the data using Basic Printing Profile or
Object Push Profile (if applicable).
Edit Name to edit the name of the trusted device.
Auto-Accept to configure your phone’s accessibility to
other Bluetooth devices. (See “Setting Automatic
Paring” shown below.)
n
Device Info to display the trusted device’s information.
n
Sort by to sort the trusted devices.
n
Delete to delete the selected device from the list.
n
Delete All to delete all devices from the list.
n
Settings to display the Bluetooth settings menu (see
page 108).
Setting Automatic Paring
You can configure your phone’s accessibility to other
Bluetooth devices.
1. From the trusted devices list, highlight a device and press
Options (right softkey) > Auto-Accept.
2. Select a setting and press
n
n
.
On to allow the Bluetooth device to initiate a connection
to the handset without any confirmation except pairing
request.
Off to display a confirmation screen from which you can
accept or deny a connection.
111
Sending Data via Bluetooth
You can send data saved in your phone to another Bluetooth
device.
1. Select
> Tools > Bluetooth.
2. From the trusted devices list, highlight a device and then
press Options (right softkey) > Send Item.
3. Select an item (Business Card, Contacts, or Calendar Event) and
press .
4. Follow the onscreen instructions to select the item(s) to
send.
5. Make sure the other device is ready to receive data, and
then press Send (left softkey).
6. If necessary, enter the PIN and press
.
Printing Data via Bluetooth
You can print out your Contacts entries, business cards,
calendar events, and messages stored on the phone. (Some
Bluetooth wireless technology enabled printers may not
support this feature.)
To print data via Bluetooth:
1. Select
> Tools > Bluetooth.
2. Select a device from the trusted devices list and then press
Options (right softkey) > Print.
3. Select a category (Business Card, Contacts, Calendar Event, or
Message) and press .
4. Follow the onscreen instructions to select the item(s) to
print.
5. Select Handset Default or Printer Default and press
n
n
112
.
Handset Default to print items by creating a print job via
the Basic Printing Profile.
Printer Default to print items using the default printer
settings via the Object Push Profile.
6. Make sure the printer is ready to print data, and then select
Print (left softkey).
7. If necessary, enter the PIN and press
.
Note: Before using the Bluetooth feature, make sure your phone’s battery is
fully charged.
113
12. Service Features
Using Voicemail
If your phone is subscribed to the voicemail service, all
unanswered calls to your phone are automatically transferred
to voicemail, even if your phone is in use or turned off.
Note: Voicemail service is optional and may require subscription fee.
New Voicemail Message Alerts
You can set your phone to display an icon and notification or
just display an icon when you receive a new Voicemail
message. See “Setting Message Notification Display” on
page 41.
To view a new Voicemail details with an icon and notification:
©
A voicemail notification automatically appears on your
phone’s screen. Press
to listen to the message.
To view a new Voicemail details with an icon notification or
during other operations:
©
icon will appear on your phone’s screen. To view
> Messaging > Voicemail and press
messages, select
.
Displaying Voicemail Details
©
Select
> Messaging > Voicemail > Details.
Retrieving Your Voicemail Messages
©
Press and hold
. (Your phone will dial your voicemail box.)
– or –
Select
> Messaging > Voicemail > Call Voicemail.
Note: You may be charged for airtime minutes when you are accessing your
voicemail from your phone.
114
Clearing the Voicemail Icon
©
Select
> Messaging > Voicemail > Reset Indicator >
Yes (left softkey).
Editing Your Voicemail Number
You may need to change the number to retrieve your
voicemail.
To change the number:
1. Select
> Messaging > Voicemail > Edit Voicemail#.
2. Edit your voicemail number and press
.
To reset your voicemail number:
1. Select
> Messaging > Voicemail > Edit Voicemail#.
2. Press Options (right softkey) > Reset Voicemail# > Yes (left
softkey).
Responding to Call Waiting
When you are on a call, Call Waiting alerts you to incoming
calls by sounding beeps. Your phone’s screen informs you
that another call is coming in and displays the caller’s phone
number (if available).
To respond to an incoming call while you are on a call:
©
Press . This puts the first caller on hold and answers the
second call.
To switch back to the first caller:
©
Press
again.
Note: Call Waiting may not be available while roaming off the home network.
115
Making a Three-Way Call
With Three-Way Calling, you can talk to two people at the
same time. When using this feature, the normal airtime rates
will be charged for each of the two calls.
1. Enter a number you wish to call and press
or
.
2. Once you have established the connection, press
the first caller on hold.
to put
3. Select Contacts, Recent History, or Enter Phone#.
4. Choose a number from your Contacts or Recent History, or
enter it directly, and press .
5. When you are connected to the second party, press
Join (right softkey) again to begin your three-way call.
or
If one of the people you called hangs up during your call, you
and the remaining caller stay connected. If you initiated the call
and are the first to hang up, all three callers are disconnected.
116
Web
With Web access on your phone, you will be able to browse
full-color graphic versions – not just text versions – of your
favourite website, making it easier than ever to stay informed
while on the go. Check sports scores, trade stocks and shop,
all on your phone, anywhere on the home network.
Launching the Web
©
Press
.
– or –
Select
> Web.
Net Guard
With the Net Guard feature enabled, your phone will ask for
confirmation before connecting to the Internet. This feature
helps you avoid accidental connections. You can disable the
Net Guard in the future by selecting Always Auto-Connect when
the Net Guard is displayed.
©
Select
> Settings > More... > Internet > Net Guard.
n On to enable the Net Guard.
n Off to disable the Net Guard.
Tip: You can also block the Internet connection by selecting
> Settings >
More... > Restrict and Lock > Internet (enter your lock code) > Locked
(see page 54).
Browsing the Web
Creating a Bookmark
Bookmarks allow you to store the address of your favourite
websites for easy access at a later time.
1. Launch the Web page you want to mark.
2. Press the right softkey to go to the browser menu.
3. Select Mark this page > Save (left softkey).
Note: Bookmarking a page does not store the page contents, just its address.
Some pages cannot be bookmarked. Whether a particular Web page may
be marked is controlled by its creator.
117
Accessing a Bookmark
1. Launch the Web and press the right softkey to access the
browser menu.
2. Select View Bookmarks.
3. Highlight the bookmark you wish to access and press
(or press the number corresponding to the bookmark you
wish to access).
Editing a Bookmark
1. Access View Bookmarks menu. (See “Accessing a
Bookmark” above.)
2. Highlight the bookmark you wish to edit and press the right
softkey.
3. Select Edit.
4. Press
to edit the address or title.
5. Press OK (left softkey) > Save (left softkey).
Deleting a Bookmark
1. Access View Bookmarks menu. (See “Accessing a
Bookmark” shown above.)
2. Highlight the bookmark you wish to delete and press the
right softkey.
3. Select Delete. (A confirmation screen will be displayed.)
4. Press Yes (right softkey) to remove the bookmark.
Going to a Specific Website
1. Launch the Web and press the right softkey to display the
browser menu.
2. Select Go to URL... > Input Address.
3. Enter the URL of the website you wish to go to, and
press .
Note: Not all websites are viewable on your phone.
118
Reloading a Web Page
1. Launch the Web and press the right softkey to display the
browser menu.
2. Select Refresh this page. (The browser will reload the current
Web page.)
Restarting the Web Browser
If the Web browser seems to be malfunctioning or stops
responding, you can usually fix the problem by simply
restarting the browser.
1. Launch the Web and press the right softkey to display the
browser menu.
2. Select More... > Restart Browser.
Sending a Web Page
This feature allows you to send a URL (Web site address) you
are viewing through text messaging.
1. Launch the Web and press the right softkey to display the
browser menu.
2. Select Send page.
3. To complete and send a Web Page, follow steps 2-6 in
“Sending a Text Message” on page 103.
Adjusting the Browser Sound Volume
1. Launch the Web and press the right softkey to display the
browser menu.
2. Select More... > Preferences > Sound Volume.
3. Select your desired volume level by pressing the navigation
key and press .
119
Downloading through the Wireless Web
Your phone allows you to download images (screen savers),
ringers, games, etc., from a website.
1. Select
> My Downloads.
2. Select your desired data folder (for example, Games, Ringers,
Screen Savers, or Applications).
3. Select Get New to start up the browser.
4. Select an item, and follow the system prompts.
Using Application Manager
The application manager lets you run applications in the
background while accessing other items in your phone’s
menu.
1. Select
> My Downloads > Application Mgr.
Shortcut: You can also press App. Mgr. (left softkey) in standby mode while
the application is running in the background.
2. Select an application or an alert and press Options (right
softkey) to display the following options:
n
View Alert to display an alert screen.
n
Ignore Alert to ignore the alert.
n
120
Bring to Front to display the application screen in the
foreground.
n
Exit Application to close the application.
n
Launch New App to launch a new application.
13. Safety Guidelines
Maintaining Your Phone’s Peak Performance
v
v
v
v
v
v
To maximize performance, do not touch the lower back
portion of your phone where the internal antenna is located
while using the phone.
Speak directly into the mouthpiece.
Avoid exposing your phone and accessories to rain or liquid
spills. If your phone does get wet, immediately turn the
power off and remove the battery.
Do not expose your phone to direct sunlight for extended
periods of time (such as on the dashboard of a car).
Although your phone is quite sturdy, it is a complex piece of
equipment and can be broken. Avoid dropping, hitting,
bending, or sitting on it.
Any changes or modifications to your phone not expressly
approved in this document could void your warranty for this
equipment and void your authority to operate this
equipment.
Using Your Phone While Driving
Talking on your phone while driving (or operating the phone
without a hands-free device) is prohibited in some
jurisdictions. Laws vary as to specific restrictions.
v
v
Let the person you are speaking to know you are driving; if
necessary, suspend the call in heavy traffic or hazardous
weather conditions.
Do not take notes or look up phone numbers while driving.
121
Following Safety Guidelines
To operate your phone safely and efficiently, always follow any
special regulations in a given area. Turn your phone off in areas
where use is forbidden or when it may cause interference or
danger.
Using Your Phone Near Other Electronic Devices
Most modern electronic equipment is shielded from radio
frequency (RF) signals. However, RF signals from wireless
phones may affect inadequately shielded electronic
equipment.
RF signals may affect improperly installed or inadequately
shielded electronic operating systems and/or entertainment
systems in motor vehicles. Check with the manufacturer or
their representative to determine if these systems are
adequately shielded from external RF signals. Also check with
the manufacturer regarding any equipment that has been
added to your vehicle.
Consult the manufacturer of any personal medical devices,
such as pacemakers and hearing aids, to determine if they are
adequately shielded from external RF signals.
Note: Always turn off the phone in health care facilities and request permission
before using the phone near medical equipment.
Turning Off Your Phone Before Flying
Turn off your phone or set your phone to Airplane mode before
boarding any aircraft. To prevent possible interference with
aircraft systems, Transport Canada regulations require you to
have permission from a crew member to use your phone while
the plane is on the ground.
122
Turning Off Your Phone in Dangerous Areas
To avoid interfering with blasting operations, turn your phone
off when in a blasting area or in other areas with signs
indicating two-way radios should be turned off. Construction
crews often use remote-control RF devices to set off
explosives.
Turn your phone off when you are in any area that has a
potentially explosive atmosphere. Although it is rare, your
phone and accessories could generate sparks. Sparks can
cause an explosion or fire, resulting in bodily injury or even
death. These areas are often, but not always, clearly marked.
They include:
v
Fuelling areas such as gas stations.
v
Below deck on boats.
v
Fuel or chemical transfer or storage facilities.
v
v
Areas where the air contains chemicals or particles such as
grain, dust, or metal powders.
Any other area where you would normally be advised to turn
off your vehicle’s engine.
Note: Never transport or store flammable gas, liquid or explosives in the
compartment of your vehicle that contains your phone or accessories.
123
Restricting Children’s Access to Your Phone
Your phone is not a toy. Do not allow children to play with it as
they could hurt themselves and others, damage the phone or
make calls that increase your telephone bill.
Protecting Your Battery
The guidelines listed below help you get the most out of your
battery’s performance.
v
v
v
v
Use only approved batteries and chargers. These chargers
are designed to maximize battery life. Using other batteries
or chargers voids your warranty and may cause damage.
In order to avoid damage, charge the battery only in
temperatures that range from 0º C to 45º C (32º F to 113º F).
Do not store the battery in a high humidity environment.
Do not use the battery charger in direct sunlight or in high
humidity areas, such as the bathroom.
v
Never dispose of the battery by incineration.
v
Keep the metal contacts on top of the battery clean.
v
Do not attempt to disassemble or short-circuit the battery.
v
Do not store the battery in high temperature areas for long
periods of time. It is best to follow these storage rules:
Less than one month:
-20º C to 60º C (-4º F to 140º F)
More than one month:
-20º C to 45º C (-4º F to 113º F)
124
Disposal of Lithium Ion (Li-Ion) Batteries
For safe disposal options of your Li-Ion batteries, please
ensure that disposal of this in accordance with law and
regulation.
v
v
Do not dispose of the battery in fire; the cell may explode.
Do not open or puncture the battery; the released
electrolyte is corrosive and may cause damage to the eyes
and skin.
Special Note: Be sure to dispose of your battery properly. In
some areas, the disposal of batteries in household or business
trash may be prohibited.
Note: For safety, do not handle a damaged or leaking Li-Ion battery.
Industry Canada Notice
Operation is subject to the following two conditions: (1) this
device may not cause interference, and (2) this device must
accept any interference, including interference that may cause
undesired operation of the device.
The term “IC” before the radio certification number only
signifies that the Industry Canada technical specifications
were met.
This Class B digital apparatus complies with Canadian ICES-003.
125
Cautions
Any changes or modifications to your phone not expressly
approved in this document could void your warranty for this
equipment and void your authority to operate this equipment.
Only use approved batteries, antennas and chargers. The use
of any unauthorized accessories may be dangerous and void
the phone warranty if said accessories cause damage or a
defect to the phone.
Although your phone is quite sturdy, it is a complex piece of
equipment and can be broken. Avoid dropping, hitting,
bending or sitting on it.
126
This product contains NetFront Browser of ACCESS CO., LTD. ACCESS and NetFront are
trademarks or registered trademarks of ACCESS CO., LTD. in Japan and other countries.
This software is based in part on the work of the Independent JPEG Group.
The Bluetooth word mark and logos are owned by the Bluetooth SIG, Inc. and any use of such
marks by Kyocera Corporation is under license. Other trademarks and trade names are those of
their respective owners.
Java & all Java-based trademarks and logos are trademarks or registered trademarks of
Sun Microsystems Inc. in the U.S. and other countries.
“SANYO” is a registered trademark of SANYO Electric Co., Ltd. and is used under license.
Kyocera manufactures and markets the SANYO wireless line of products.
127
Index
A
Abbreviated Dialing 23, 48
Airplane Mode 44
Alarm Clock 87
Alert Notification 33
Animation 37
Answering Calls 16
Audio Quality 97
Auto-Answer 47
Automatic Speech
Recognition (ASR) 91
B
Background 37
Backlight 35
Battery
Charging 10
Installing 9
Removing 9
Bluetooth 107
Bookmarks 51, 117
C
Calculator 90
Calendar 38, 80
Call Alarm 82
Call Answer 48
Call Memo 95
Call Waiting 115
Callback Number 43
Canned Messages 42, 104
Contacts 68
Contrast 37
Countdown Timer 88
D
Dialing Options 15
Display Screen Icons 5, 52
Display Settings 35
128
E
Emergency Numbers 18
Entering Text 24
F
Font Size 36
H
Headset Mode 49
History
Deleting 67
Making a Call from 63
Making a Group from 66
Menu Options 64
Prepending a Phone
Number from 67
Saving a Phone Number
from 65
Thread 63
Viewing 62
Holster 11
I
Icon Definition 5, 52
In-Call Options 19
K
Key Tone 32
L
Language 25, 42, 47, 50
Location Settings 40
Lock Code 53
Lock Mode 54
Locking Internet 54
Locking Phone 53
Locking Voice Calls 54
M
Making Calls 14
Menu Diagram 60
Menu Style 35
Message Notification
Display 41
Messaging 41, 101
Missed Call Notification 18
My Downloads
Accessing Menus 120
Deleting 56
My Favourites 46
N
Navigation Key 50
Net Guard 117
P
Phone (illus.) 1
Phone Number
Dialing with Pauses 21
Displaying 14, 52
Finding 21
Saving 20, 21
Plus (+) Code Dialing 22
Power On/Power Off Tone
30
Power Save Mode 35
R
Recording Guard 97
Recording Mode 97
Resetting Your Phone 58
Restricting Calls 55
Ringer Types 29, 75
Roaming 59
Silence All 34
Sleep Mode 39
Sound Settings 29
Special Numbers 55
Speed Dialing 22, 73
Stopwatch 89
T
T9 Text Input 25
Text Greeting 36
Text Message 101
Three-Way Call 116
To Do List 83
Tone Length 32
Tone Volume 32
TTY 45
Turning Your Phone On and
Off 8
U
Unlocking Your Phone 54
V
Voice Guide 32
Vibrate Type 32
Voice Memo 95
Voicemail
Clearing Voicemail Icon
115
Editing Number 115
Message Alerts 114
Retrieving 114
Volume Settings 31
W
Web 117
World Clock 90
S
Safety 121
Screen Call 16, 98
Screen Saver 37, 120
Security Menu 53
Side Key Guard 50
129