1
User Guide
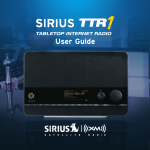
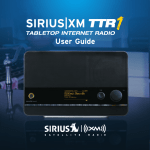
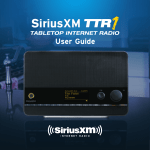
TTR1C Tabletop Internet Radio
Table of Contents
Introduction . . . . . . . . . . . . . . . . . . . 5 Appendix: Manual Network
Configuration . . . . . . . . . . . . . . . . 65
Features . . . . . . . . . . . . . . . . . . . . . . . . . . . . 6
Safety and Care Information . . . . . . . . . . 7
What’s in the Box? . . . . . . . . . . . . . . . . . . . 9
SIRIUS TTR1C Internet Radio
Functions . . . . . . . . . . . . . . . . . . . . . . . . 10
Remote Control . . . . . . . . . . . . . . . . . . . . 12
Display Screen . . . . . . . . . . . . . . . . . . . . . 13
Troubleshooting . . . . . . . . . . . . . . . 75
Product Specifications . . . . . . . . . 81
Patent Information . . . . . . . . . . . . . . . . . 83
Environmental Information . . . . . . . . . . 83
Installation . . . . . . . . . . . . . . . . . . . 15
Introduction . . . . . . . . . . . . . . . . . . . . . . . 16
Step 1: Connect to a Network . . . . . . . . . . 17
Step 2: Enter Your SIRIUS Account
Information . . . . . . . . . . . . . . . . . . . . . . 23
Using Your SIRIUS TTR1C Radio . . 25
Navigation Basics . . . . . . . . . . . . . . . . . . . 26
Direct Tune . . . . . . . . . . . . . . . . . . . . . . . . 30
Favourite Channels . . . . . . . . . . . . . . . . . . 31
Alarm Clock . . . . . . . . . . . . . . . . . . . . . . . . 32
Snooze . . . . . . . . . . . . . . . . . . . . . . . . . . . . 34
Sleep Timer . . . . . . . . . . . . . . . . . . . . . . . . 35
Parental Control . . . . . . . . . . . . . . . . . . . . 36
Audio Settings . . . . . . . . . . . . . . . . . . . . . 42
Configuring Your SIRIUS TTR1C
Radio . . . . . . . . . . . . . . . . . . . . . . 45
SIRIUS setup . . . . . . . . . . . . . . . . . . . . . . . 46
System Setup . . . . . . . . . . . . . . . . . . . . . . 50
3
4
Introduction
5
Introduction
Features
Congratulations, on your purchase of the SIRIUS TTR1C Internet Radio!
Your new SIRIUS TTR1C Internet Radio comes with everything you need to enjoy
SIRIUS Internet Radio in your home.
Use this manual to familiarize yourself with all of your SIRIUS TTR1C Internet
Radio features and capabilities. For the latest information about your SIRIUS
TTR1C Internet Radio and other SIRIUS products and accessories, visit http://www.
sirius.ca.
Please read the entire User Guide before using your SIRIUS TTR1C
Internet Radio!
6
Safety and Care Information
IMPORTANT! Always read and understand all the instructions to avoid
injury to yourself and/or damage to your device. Sirius Canada Inc.
disclaims all responsibility for damage from data loss due to breakdown,
repair, or other causes.
• Do not expose to extreme temperatures (above 140ºF or below -4ºF, or
above 60ºC or below -20ºC).
• Do not expose to moisture. Do not use device near or in water.
• Do not let any foreign matter spill into device.
• Do not store in dusty areas.
• Do not expose to chemicals such as benzene and thinners. Do not use
liquid or aerosol cleaners. Clean with a soft damp cloth only.
• Do not expose to direct sunlight for a prolonged period of time, and do
not expose to fire, flame, or other heat sources.
• Do not try to disassemble and/or repair device yourself.
• Do not drop your device or subject it to severe impact.
• Do not place heavy objects on device.
• Do not subject device to excessive pressure.
• If the screen is damaged, do not touch the liquid crystal fluid.
WARNING!
• Opening the case may result in electric shock.
• Make sure that you insert the plug all the way into the outlet.
• Do not touch the device with wet hands.
• Do not install near any heat sources such as radiators, heat registers,
7
Introduction
stoves, or other apparatus (including amplifiers) that produce heat.
• Do not defeat the safety
purpose of the polarized
or grounding type plug.
A polarized plug has two
blades with one wider than
the other. A grounding
type plug has two blades
and a third grounding
prong. The wide blade or
the third prong is provided
for your safety. When the
provided plug does not fit
into your outlet, consult an
electrician for replacement
of the obsolete outlet.
• Protect the power cord
from being walked on
or pinched particularly
at plugs, convenience
receptacles, and the point
where they exit from the
apparatus.
8
What’s in the Box?
TUNE
1
2
3
4
5
6
7
8
9
0
BACK
VOL
MENU
ALARM 1
ALARM 2
SIRIUS TTR1C Internet Radio
BACK
OK
MUTE
MENU
1
2
3
5
6
7
4
8
9
0
ALARM
1
ALARM
2
Remote Control
9
Introduction
SIRIUS TTR1C Internet Radio Functions
TUNE Knob (Multifunction) (page 26)
Turning the knob at the default display screen displays the
category tune screen; pressing the knob at the default display
screen displays the direct tune screen; turning the knob in a menu
or user input screen scrolls through menus and choices; pressing
the knob in a menu or user input screen selects a highlighted item;
pressing and holding displays the Parental control menu.
Power Button (page 26)
Turn radio On and Off.
VOL (Volume) Knob (page 26)
Increases or decreases
volume; also mutes the audio.
TUNE
1
2
3
4
5
6
0-9 Number Buttons
(page 26) Set and select
channel presets or
directly enter channel
numbers.
10
7
8
9
0
BACK
VOL
MENU
ALARM 1
BACK Button (page 27)
Press to return to the
previous display
screen.
ALARM 2
ALARM 1 / ALARM 2 Buttons
(page 27) Turns the alarm
clocks On or Off; pressing and
holding displays the alarm
settings.
MENU Button (page 27)
Press to access or exit
category and channel
tuning, advanced features,
and configuration options.
Snooze/Sleep Timer Button (page 27)
Mutes the alarm, or sets the
sleep timer, for 5, 10, 15, 30, 45,
or 60 minutes.
Wireless Antenna
Headphone Connector
Aux In Connector
Rear Compartment
Wired Ethernet Connector
Line Out Connector
11
Introduction
Remote Control
Power Button
Turn radio On and Off.
Arrow Buttons
Press to scroll through lists;
also highlight menu options.
OK Button
Press to select channel
list and menu items.
BACK
BACK Button
Press to return back to
the previous display
screen.
MENU Button
Press to access or exit
advanced features and
configuration options.
0-9 Number Buttons
Set and select channel
presets or directly enter
channel numbers.
12
OK
MUTE
+/— Buttons
Press to increase or
decrease the audio volume.
MUTE
Press to silence the audio.
MENU
1
2
3
4
5
6
7
8
9
0
ALARM
1
ALARM
2
ALARM 1 / ALARM 2
Press to turn the respective
alarm clock On or Off;
pressing and holding
displays the alarm settings.
Display Screen
When using the SIRIUS TTR1C Internet Radio, information about songs and
artists, and radio functions are displayed.
Category or Channel
List Screen
Menu Options Screen
Main Display Screen
Channel Name
Song Title or
Talk Show Schedule
Alarm 1/2 On Indicator
5:23PM
SIRIUS 017
Jam_ON
Phish
First Tube
1
2
P1
Alarm Audio is Preset
Snooze
Muted Number
Countdown
(Favorites)
Current Time
Channel Number
Artist Name or
Talk Show Host
Network Connection
Type (wireless)
Signal Strength
(wireless)
Network Connection
Type (wired)
13
14
Installation
15
Installation
Introduction
The SIRIUS TTR1C Internet Radio allows you to listen to all of the channels on
your Premium SIRIUS Internet Radio subscription package using either a wireless
Internet connection (Wi-Fi), or using a wired Ethernet connection.
You must be subscribed to the SIRIUS Satellite Radio service to use the SIRIUS
TTR1C Internet Radio. Go to www.sirius.ca or call 1-888-539-7474 to subscribe and
get your user name and password.
The SIRIUS TTR1C Internet Radio supports a wireless Internet connection through
any standard 802.11b/g access point. This includes wireless networks which
are WEP/WPA/WPA2 protected and require a password, and wireless networks
where the network name (SSID) is hidden. Once you have connected to a wireless
network, the radio will remember your network settings so you will not have to
enter the information again, unless you perform a reset of the radio to the factory
defaults.
16
Step 1: Connect to a Network
The Network Wizard feature is the easiest way to connect to a wireless
network. It searches for available wireless networks and displays a list of
wireless networks found for you to select. However, if your wireless network
name (SSID) is hidden, or if your network is DHCP disabled, you’ll have to
manually enter the network settings rather than using the Network Wizard.
Decide whether you will be using a wireless network connection, or a wired
network connection, and whether you can use the Network Wizard or if you’ll
need to manually configure your network settings. Complete the instructions
in the appropriate section:
Connect to a WIRELESS network using the NETWORK WIZARD (page 17)
Connect to a WIRED network using the NETWORK WIZARD (page 21)
Connect to a WIRELESS network using MANUAL settings (page 66)
Connect to a WIRED network using MANUAL settings (page 71)
17
Installation
To connect to a wireless network using the Network Wizard
If the wireless network is secured, you’ll need to enter the key (password) for
the wireless network during the connection procedure. If you don’t know the
password, contact your network administrator of the person who setup the
wireless network.
a. If you have just turned your SIRIUS TTR1C Internet Radio on for the first
time, the SSID screen will already be displayed. Skip ahead to step e.
b. Press MENU and turn the TUNE knob to highlight System Setup.
Press the TUNE Knob.
c. Turn the TUNE knob to highlight Network. Press the TUNE Knob.
d. Press the TUNE Knob to select Network Wizard.
e. The radio will scan for wireless networks
SSID
and return with a list of wireless networks
which were found. (A sample screen is
shown here. Your actual wireless network
name will appear in the list, if found.) Turn
the TUNE knob to highlight your wireless
network and press the TUNE knob. If you
don’t know the network name, contact
your network administrator of the person
who set up the wireless network.
f. If you choose an unsecured network, and
the radio is able to connect to the wireless
network, the Connected screen will be
18
Your_Network_Name
Other_Network_Name
[Rescan]
[Wired]
[Manual config]
Connected
Connected
displayed and the radio will connect to the wireless network. Skip
to step h.
Key:
If you choose a network that is
secured, you will be prompted to
0123456789., ab BKSP
enter the key (password). If you
cdefghijklmnopq
OK
don’t know the password, contact
rstuvwxyzABCDEF
your network administrator of the
GHIJKLMNOPQRSTU CANCEL
person who setup the wireless
network. Remember that the key is
case sensitive. Turn the TUNE knob to scroll through the list of
characters and highlight each character. Press the TUNE knob to
select the highlighted character and move to the next character.
If you make a mistake, press BACK, or
turn the TUNE knob to highlight BKSP
and press the TUNE knob to erase the
Incorrect
character.
key
g. When the key has been entered, turn
the TUNE knob to scroll to highlight
OK and press the TUNE knob. If you
have entered the correct key, and the radio is able to connect to
your wireless network, the Connected screen will be displayed.
If you have entered the wrong key, the Incorrect key screen is
displayed, and you will be prompted to enter the key again.
h. If you are installing your SIRIUS TTR1C Internet Radio for the
first time, continue with “Step 2: Enter Your SIRIUS Account
Information” on page 23.
19
Installation
If you have previously entered your SIRIUS user name and key into the
radio, and had tuned to a channel, the screen will show Connecting.
When successfully connected, the Buffering... screen will be displayed
as the channel information is streamed to the radio. When complete,
you are returned to the main display screen and you should hear the
audio playing. Otherwise, the Category Tune screen is displayed.
SIRIUS
SIRIUS Hits 1
3:13PM
Connecting.
SIRIUS Hits 1
3:14PM
Buffering...
/
20
SIRIUS 001
/
To connect to a wired network using the Network Wizard:
a. At the rear of the radio, remove the compartment cover and
connect an Ethernet cable to the Ethernet connector on the inside
left of the compartment. Refer to “Wired Ethernet Connector”
on page 11 for the location of the Ethernet connector. Replace the
compartment cover.
b. Connect the other end of the Ethernet cable to your home’s wired
network.
c. If you have turned your SIRIUS TTR1C Internet Radio on for the first
time, the SSID screen will already be displayed. Skip ahead to step g.
d. Press MENU and turn the TUNE knob to highlight System Setup.
Press the TUNE Knob.
e. Turn the TUNE knob to highlight
Network. Press the TUNE Knob.
f. Press the TUNE Knob to select
Network Wizard.
g. The radio will scan for networks.
When the scan is complete, turn the
TUNE knob to highlight [Wired] and
press the TUNE knob.
h. If the radio is able to connect to your
network, the Connected screen will
be displayed. If Waiting for Ethernet
SSID
Some_Network_Name
Other_Network_Name
[Rescan]
[Wired]
[Manual config]
Connected
Connected
21
Installation
is displayed, check the Ethernet cable
connections.
Network settings
i. If you are installing your SIRIUS TTR1C
Internet Radio for the first time, continue
with “Step 2: Enter Your SIRIUS Account
Information” on page 23.
If you have previously entered your SIRIUS user name and key into the
radio, and had tuned to a channel, the screen will show Connecting.
When successfully connected, the Buffering... screen will be displayed
as the channel information is streamed to the radio. When complete,
you are returned to the main display screen and you should hear the
audio playing. Otherwise, the Category Tune screen is displayed.
SIRIUS
SIRIUS Hits 1
3:13PM
Connecting.
SIRIUS 001
SIRIUS Hits 1
3:14PM
Buffering...
/
22
Waiting for
Ethernet
/
Step 2: Enter Your SIRIUS Account Information
The SIRIUS TTR1C Internet Radio needs your account user name and password
to connect to SIRIUS Internet Radio service. If are not yet subscribed to the
SIRIUS Satellite Radio service, go to www.sirius.ca or call 1-888-539-7474 to
subscribe, and get your user name and password. If you are a current SIRIUS
subscriber but do not have an online user name or password, please contact,
Customer Care at 1-888-539-SIRIUS (7474).
To enter your account information:
a. Turn on the radio by pressing the Power button.
b. Press MENU and turn the TUNE knob
SIRIUS
Category Tune
SIRIUS Setup
c. Turn the TUNE knob to highlight User Audio Settings
name. Press the TUNE knob.
Parental control
System Setup
to highlight SIRIUS Setup. Press the
TUNE knob.
d. Turn the TUNE knob to scroll through
the list of characters and highlight
each character for your user name.
Press the TUNE knob to select the
highlighted character and move to the
next character. If you make a mistake,
press BACK, or turn the TUNE knob
to highlight BKSP and press the
TUNE knob to erase the character.
>
>
>
User name
0123456789 abcd BKSP
efghijklmnopqrs
OK
tuvwxyzABCDEFGH
IJKLMNOPQRSTUVW CANCEL
23
Installation
e. When you have entered your user name, turn the TUNE knob to
scroll to highlight OK and press the TUNE knob.
f. You will then be prompted to enter your password. Enter your
password in the same way as you entered your user name and
then select OK. Note that the password is case sensitive.
g. The radio will attempt to connect to the
SIRIUS
SIRIUS Internet Radio service. If the
user name and password you entered
is incorrect, the Login failed screen will
be displayed. You’ll have to re-enter the
correct user name and password.
Go to SIRIUS setup
If you have previously connected to a network, and had tuned to
a channel, the screen will show Connecting. When successfully
connected, the Buffering... screen will be displayed as the channel
information is streamed to the radio. When complete, you are
returned to the main display screen and you should hear the audio
playing. Otherwise, the Category Tune screen is displayed.
SIRIUS
SIRIUS Hits 1
3:13PM
Connecting.
SIRIUS 001
SIRIUS Hits 1
3:14PM
Buffering...
/
24
Login failed
/
Using Your SIRIUS TTR1C Radio
25
Using Your SIRIUS TTR1C Radio
Navigation Basics
Power Button
The Power button turns the SIRIUS TTR1C Internet Radio On or Off.
Tune Knob
TUNE
The TUNE knob is multifunction— you can turn it clockwise or counterclockwise, and press it.
• Turn: Turning the TUNE knob when at the main display screen displays the
Category tune screen. When in menus or user input screens, turning the
TUNE knob scrolls up or down through menus and user choices.
• Press and Release: Pressing the TUNE knob at the default display screen
displays the Direct tune screen. When in menus or user input screens,
pressing the TUNE knob selects a highlighted item.
• Press and Hold: pressing and holding the TUNE knob displays the Parental
control menu options.
VOL
VOL Knob
Turning the VOL knob clockwise or counter-clockwise increases or
decreases the volume of the audio. When turned counter-clockwise it will mute the
audio when zero is reached.
Number Buttons 0-9
1
...
0
The number buttons are used to store favourite channels in a button location so
you can tune a channel just by pressing the button. They can also be used to enter
the channel number when at the Direct tune screen.
26
BACK
BACK Button
The BACK button returns back to the previously displayed screen.
MENU Button
MENU
Pressing the MENU button from the main display screen accesses the
advanced features and configuration options menu, where you can browse
the channel categories and channels, and change the radio settings. Pressing
it when in the configuration options menu returns the radio to the main
display screen.
ALARM 1 / ALARM 2 Buttons
ALARM 1
ALARM 2
Pressing the ALARM button turns the respective alarm clock function On or
Off. Pressing and holding the ALARM button displays the respective alarm
setup screen where you can configure the options for each alarm.
Snooze / Sleep Button
When the alarm clock is sounding, pressing the Snooze/Sleep button will silence
the alarm for 5 minutes. Each additional immediate press of the Snooze/
Sleep button increases the snooze time for 10, 15, 30, 45 or 60 minutes. While
snoozing, the snooze countdown time is displayed on the display screen.
While the radio is playing, pressing the Snooze/Sleep button enters the sleep
mode. The first press displays Sleep OFF, and each immediate additional
press sets the sleep time for 5, 10, 15, 30, 45 or 60 minutes.
While in snooze or sleep mode, the countdown time is displayed on the display
screen. You can also check and change the remaining snooze/sleep time by
pressing the Snooze/Sleep button. To increase the sleep or snooze time,
repeatedly press the Snooze/Sleep button until the desired sleep/snooze time
is displayed.
27
Using Your SIRIUS TTR1C Radio
Listening to SIRIUS Internet Radio
Tune a Channel:
1. Press MENU.
2. Press the TUNE knob to select Category
Tune.
3. Press the TUNE knob to select All
All channels
001-SIRIUS Hits
002-The Blend
003-SIRIUS Love
004-40s on 4
005-50s on 5
Channels to browse through all the
channels, or turn the TUNE knob to highlight a category. Press the
TUNE knob to select the category.
4. Turn the TUNE knob browse through the channels, and highlight a
channel to tune. Press the TUNE knob to tune the channel. The radio
will momentarily tune the channel.
TIP! Go to www.sirius.ca to view our complete channel lineup.
View a Category:
Channels are organized into categories to make it
easier for you to find the ones that suit your taste.
1. To view the categories press MENU.
28
Category Tune
All Channels
Pop
Rock
Electronic/Dance
Hip-Hop/R&B
>
>
>
>
>
2. Press the TUNE knob to select Category Tune.
Pop
001-SIRIUS Hits 1
002-The Blend
4. Press the TUNE knob to select the
003-SIRIUS Love
category and view the channels in the 004-40s on 4
category.
005-50s on 5
3. Turn the TUNE knob to browse
through and highlight a category.
Returning to Main Display Screen
When in the advanced features and configuration options menu, pressing
MENU will return you to the main display screen.
29
Using Your SIRIUS TTR1C Radio
Direct Tune
A channel can be tuned directly by entering the channel number.
1. From the main display screen, press the
TUNE button.
2. Use the 0-9 number buttons on the radio
or Remote Control to enter the channel
number. If you make a mistake, press
BACK, or turn the TUNE knob to highlight
BKSP and press the TUNE knob erase the
character.
Direct Tune
BKSP
OK
CANCEL
3. When the channel number is entered, turn the TUNE knob to highlight
OK. Press the TUNE knob to tune the channel.
30
Favourite Channels
You can assign up to 10 of your favourite channels to a number button (0-9)
so you can easily tune them.
To assign a favourite channel to a number button:
1. Tune to the channel you want as a
favourite.
2. Press and hold a number button (0-9) for
one second to assign the channel as a
favourite (preset) to that button.
Preset stored
IMPORTANT! If the button you choose already has a favourite channel
assigned to it, it will be replaced with the new favourite channel.
To tune a favourite channel:
1. Press the number button 0-9 that is assigned to the favourite
channel. The channel will momentarily be tuned.
31
Using Your SIRIUS TTR1C Radio
Alarm Clock
Your SIRIUS TTR1C Internet Radio has two alarm
clocks which can be configured according to your
liking. When the radio is off, and the alarm(s) are on,
the times of each alarm are displayed on the screen.
4:54
1
AM
2
Before you configure the alarm clock, refer to “Clock
Setup” on page 53 and ensure that the Time Zone and
Daylight Savings Time are set correctly.
To turn the alarm clocks On or Off:
1. Press the ALARM 1 or ALARM 2 button
SIRIUS 003
SIRIUS Love
6:49PM
to toggle the alarms On or Off. If the
alarm(s) are On, the alarm icon(s) 1 2 will Michael Bolton
That’s What Love Is All A
be displayed in the lower left of the main
display screen.
1
2
To configure an alarm clock:
1. Press MENU. You can also press and hold the alarm button that you
want to configure to go directly to the
alarm configuration (go to step 4).
2. Turn the TUNE knob to scroll to and
highlight System Setup. Press the TUNE
knob.
3. Turn the TUNE knob to scroll to and
highlight Alarms. Press the TUNE knob.
32
Alarms
Alarm 1: On [6:30AM]
Alarm 2: Off [8:00AM]
4. The Alarms screen summarizes each alarm clock setting. To
configure an alarm, turn the TUNE knob to scroll to and highlight
Alarm 1 or Alarm 2. Press the TUNE knob.
5. Each alarm has 5 configuration options which are summarized in
the following table at the beginning of this section. To change an
option, turn the TUNE knob to scroll to and highlight the option.
Press the TUNE knob to configure the option.
Alarm 1
Enable: Daily
Time: 6:30AM
Wake to: SIRIUS
Preset: Last Listened
Volume: 5
Enable
Time
Wake to
Preset
Volume
Off
Daily
Once
Weekends
Weekdays
12:00 AM - 11:59 PM
SIRIUS
Buzzer
Last listened (last channel tuned)
Any favourite channel (1 - 10)
1 - 20
6. Turn the TUNE knob to scroll to and highlight a setting for each
option. Press the TUNE knob to select the setting. Continue until
you have configured all the options
for the alarm.
7. When you are done, press Alarm 1 or
Alarm 2, or any button, to save the
alarm setting.
Alarm
Saved
33
Using Your SIRIUS TTR1C Radio
Snooze
When the alarm sounds, pressing the Sleep/Snooze button will silence the alarm
for a period of time. After the snooze time elapses, the alarm will sound again.
To snooze:
1. Press the Snooze/Sleep button on the top
of the radio. The radio will display a snooze
time of 05 minutes.
Set snooze time
05 minutes
2. Each immediate subsequent press of the
Snooze/Sleep button increases the snooze
time to 10, 15, 30, 45, or 60 minutes.
3. For the snoozing alarm, a countdown timer
is displayed showing how many minutes
are remaining before the alarm sounds
again. The alarm icon will also blink for the
snoozing alarm.
5:30
1
AM
2
4. You can also check and change the
remaining snooze time by pressing the
Snooze/Sleep button. To increase the snooze time, repeatedly press
the Snooze/Sleep button until the desired snooze time is displayed.
34
Sleep Timer
The sleep timer turns the radio off after a period of time as you fall asleep.
The time can be set to turn the radio off after 5, 10, 15, 30, 45, or 60 minutes.
To turn the sleep timer On:
Set sleep time
1. Press the Snooze/Sleep button on the
top of the radio. The radio will display
a sleep time of 05 minutes.
05 minutes
2. Each subsequent press of the
Snooze/Sleep button increases the
sleep time to 10, 15, 30, 45, or 60
minutes.
3. A countdown timer is displayed at the
bottom of the screen showing how
many minutes are remaining before
the radio turns off.
SIRIUS 016
Deep Tracks
3:21PM
Eric Clapton & B.B. King
Key to the Highway
4. You can also check and change the remaining sleep time by
pressing the Snooze/Sleep button. To increase the sleep time,
repeatedly press the Snooze/Sleep button until the desired sleep
time is displayed.
Set sleep time
To turn the sleep timer Off:
1. Repeatedly press the Snooze/Sleep
button on the top of the radio until Off
is displayed.
Sleep OFF
35
Using Your SIRIUS TTR1C Radio
Parental Control
Your SIRIUS TTR1C Internet Radio has a parental control feature which will allow
you to lock access to channels. A 4-digit code controls access to the locked
channel or locked category.
When you browse a category, the locked channel will
have an L displayed to the right of the channel name.
Lock channels
L
100-Howard 100
L
101-Howard 101
102-SIRIUS Stars
103-Blue Collar Radio
104-Raw Dog Comedy
L
If you attempt to tune to a locked channel, either by
using direct tune or through the category list, you’ll be
prompted to enter your 4-digit code. When the correct
code is entered, you’ll be able to tune to the channel.
All locked channels become unlocked and will remain unlocked until you turn the
radio Off, and back On.
If the radio is turned off while listening to a locked
SIRIUS 101
channel, the next time you turn the radio on, you will
be prompted to enter your lock code. If you cancel, and
Parental locked
do not enter your lock code, the channel will display
Parental locked.
Howard 101
To change the parental lock code:
11:14AM
1
The SIRIUS TTR1C Internet Radio has a default lock code of 1111. The first time you
change the lock code, you’ll need to enter this code during the procedure.
1. Press MENU. You can also press and hold the TUNE knob to go directly
to parental control (go to step 3).
2. Turn the TUNE knob to scroll to and highlight Parental control. Press
the TUNE knob.
36
3. Turn the TUNE knob to highlight Change lock code. Press the
TUNE knob.
4. You will be prompted to enter the original lock code. If this is the
first time you are changing the lock code, enter 1111, otherwise
enter your existing lock code. Use the 0-9 number buttons on the
radio or Remote Control to enter the
Enter orginal code
lock code. If you make a mistake, turn
the TUNE knob to highlight BKSP and
BKSP
press the TUNE knob to erase the
character. When you have selected all
OK
4 digits of your code, turn the TUNE
CANCEL
knob to highlight OK and press the
TUNE knob.
5. You will be prompted to enter the new code. Enter the new code
you desire in the same way. When you have selected all 4 digits
of your code, turn the TUNE knob to highlight OK and press the
TUNE knob.
6. You will be prompted to enter the new code again. Enter the new
code again in the same way. When you have selected all 4 digits
of your code, turn the TUNE knob
Category Tune
to highlight OK and press the TUNE
knob.
7. If you have entered your new code
correctly, New Code Saved will be
displayed.
New code saved
37
Using Your SIRIUS TTR1C Radio
8. Press MENU to exit.
To turn Parental control Off:
1. Press and hold the TUNE knob.
2. Lock/Unlock will be highlighted. Press the TUNE knob.
3. You will be prompted to enter your 4-digit lock code. Use the 0-9
number buttons on the radio or Remote
Control to enter the lock code. If you
make a mistake, turn the TUNE knob to
highlight BKSP and press the TUNE knob
to erase the character. When you have
selected all 4 digits of your code, turn the
TUNE knob to highlight OK and press the
TUNE knob.
Enter lock code
BKSP
OK
CANCEL
4. If you have entered the correct code, the parental lock is turned off. If
you entered an incorrect code, Parental lock code mismatch message
will be displayed, and the channels will remain locked.
Category Tune
Parental lock is off
38
SIRIUS
Parental lock code
mismatch
To lock or unlock channels:
1. Press and hold the TUNE knob.
2. Turn the TUNE knob to scroll through the list and highlight Lock
channels. Press the TUNE knob.
3. If parental control is On (locked), you will be prompted to enter
your 4-digit code, otherwise skip to step 4. Use the 0-9 number
buttons on the radio or Remote
Enter lock code
Control to enter the lock code. If you
make a mistake, turn the TUNE knob
BKSP
to highlight BKSP and press the
OK
TUNE knob to erase the character.
When you have selected all 4 digits of
CANCEL
your code, turn the TUNE knob to
highlight OK and press the TUNE knob.
4. When you have successfully unlocked parental control, a list of all
the channels will be displayed. Turn
the TUNE knob to scroll through the
list and highlight a channel that you
wish to lock. Press the TUNE knob
to lock the channel. An L will be
displayed to the right of the channel
name indicating that the channel is
locked.
Lock channels
L
100-Howard 100
L
101-Howard 101
102-SIRIUS Stars
103-Blue Collar Radio
104-Raw Dog Comedy
L
39
Using Your SIRIUS TTR1C Radio
To unlock a channel, highlight a locked channel and press the TUNE
knob. The L lock indicator will be removed
Parental lock
indicating that the channel is unlocked.
5. Continue to lock or unlock channels until
you are done. When complete, press MENU.
You will be prompted to save the parental
lock list. Turn the TUNE knob to highlight
YES and press the TUNE knob.
6. A confirmation screen will be displayed.
Press MENU to exit.
Save parental
lock list?
YES
No*
Category Tune
Locked channels
saved
To listen to a locked channel:
When you tune to a locked channel, the channel will display Parental locked and no
audio will play until you have unlocked the channel.
1. Select the locked channel which will display Parental locked.
2. Press the TUNE knob.
3. Use the 0-9 number buttons on the radio
or Remote Control to enter the lock code.
If you make a mistake, turn the TUNE knob
to highlight BKSP and press the TUNE
40
Enter lock code
BKSP
OK
CANCEL
knob to erase the character. When you have selected all 4 digits of
your code, turn the TUNE knob to highlight OK and press the
TUNE knob.
4. If you have entered the correct lock
code, the channel will begin playing.
Once you have unlocked one channel, all locked
channels become unlocked and will remain
unlocked until you turn the radio Off. The next
time you turn the radio On, all channels will be
locked.
Category Tune
Parental lock is off
41
Using Your SIRIUS TTR1C Radio
Audio Settings
In the Audio Settings menu option, you can adjust the equalization profile of the
radio (EQ) to adjust for room acoustics and your listening pleasure. The profiles for
equalization are Flat, Loudness, Bass Boost, Bright,
Audio Settings
and Vocal Boost.
Another audio settings adjustment option is
spatialization. Spatialization makes the radio sound
like it is in a three-dimensional environment. By
default, spatialization is on, but can be turned off.
EQ Profiles
Spatialization
>
To change the equalization profile:
1. Press MENU.
2. Turn the TUNE knob to scroll to and highlight Audio Settings. Press
the TUNE knob.
3. Press the TUNE knob to select EQ Profiles.
4. The currently selected profile will be
denoted with an asterisk. Turn the
TUNE knob to scroll to and highlight the
equalization profile desired, and press the
TUNE knob. The radio will change to the
new equalization profile.
5. Press MENU to exit.
42
Audio Settings
Flat
Loudness
Bass Boost
Bright
Vocal Boost
*
To turn spatialization on or off:
1. Press MENU.
2. Turn the TUNE knob to scroll to and
highlight Audio Settings. Press the
TUNE knob.
Spatialization
Spatialization
3. Turn the TUNE knob to scroll to and
highlight Spatialization. Press the
TUNE knob.
ON*
OFF
4. Turn the TUNE knob to highlight ON or OFF and press the TUNE
knob.
5. Press MENU to exit.
43
44
Configuring Your SIRIUS TTR1C Radio
45
Configuring Your SIRIUS TTR1C Radio
SIRIUS setup
The SIRIUS setup menu option allows you to configure your user name and
password for the SIRIUS Internet Radio service. You
SIRIUS setup
can also check the status of your connection.
If are not yet subscribed to the SIRIUS Satellite
Radio service, go to www.sirius.ca or call 1-888539-7474 to subscribe, and get your user name and
password.
User name
Password
Status
To test whether you are subscribed to the service, go to www.sirius.ca, click on
the LISTEN ONLINE link, and then click the LAUNCH PLAYER link. Enter your
username and password. Select a channel to listen to. Close the browser window
to exit the player before continuing.
User name and Password
This option allows you to enter your user name and password for the SIRIUS
Internet Radio service. If for any reason your user name or password should
change after you had entered the information into the radio, use these procedures
to re-enter your user name and password.
To enter your user name:
1. Press MENU.
46
2. Turn the TUNE knob to scroll to and highlight SIRIUS setup.
Press the TUNE knob.
3. User name will be highlighted. Press the TUNE knob.
4. Turn the TUNE knob to scroll through
the list of characters and highlight
each character for your user name.
Press the TUNE knob to select the
highlighted character and move
to the next character. If you make
a mistake, turn the TUNE knob to
highlight BKSP and press the TUNE
knob erase the character.
User name
0123456789 abcd BKSP
efghijklmnopqrs
OK
tuvwxyzABCDEFGH
IJKLMNOPQRSTUVW CANCEL
5. When you have entered your user name, turn the TUNE knob to
scroll to highlight OK and press the TUNE knob.
6. You’ll now be prompted to enter your password. Continue with
the step 4 in next section, and enter your password.
To enter your password:
1. Press MENU.
2. Turn the TUNE knob to scroll to and highlight SIRIUS setup.
Press the TUNE knob.
3. Turn the TUNE knob to scroll to and highlight Password. Press
the TUNE knob.
47
Configuring Your SIRIUS TTR1C Radio
4. Turn the TUNE knob to scroll through the list of characters and
highlight each character for your
password. The password is case sensitive.
Press the TUNE knob to select the
highlighted character and move to the
next character. If you make a mistake, turn
the TUNE knob to highlight BKSP and
press the TUNE knob erase the character.
Password
0123456789 abcd BKSP
efghijklmnopqrs
OK
tuvwxyzABCDEFGH
IJKLMNOPQRSTUVW CANCEL
5. When you have entered your user name, turn the TUNE knob to scroll
to highlight OK and press the TUNE knob.
6. The Saved screen will be displayed. If you have correctly entered the
information, the radio will display the Connecting... and then the
Buffering... screens. If your user name or password is incorrect, the
Login failed screen will be displayed.
SIRIUS 001
SIRIUS Hits 1
3:14PM
Login failed
Buffering...
/
48
SIRIUS
Go to SIRIUS setup
Status
The Status screen shows the current status of your Premium SIRIUS
Internet Radio service, the user name you are using, and the bit rate of your
connection.
To display the status:
1. Press MENU.
2. Turn the TUNE knob to scroll to and
highlight SIRIUS setup. Press the
TUNE knob.
3. Turn the TUNE knob to scroll to and
highlight Status. Press the TUNE
knob.
Status
Active
User name:
your_user_name
Bit rate:
HIGH
4. The Status screen will be displayed. Press MENU to exit.
49
Configuring Your SIRIUS TTR1C Radio
System Setup
The System Setup menu option offers the following menu items:
SIRIUS
AUX in
Alarms
Alarm 1:
Alarm 2:
Brightness
Clock Setup
Set Time/Date
Auto Update
Time Zone
Daylight savings
Network
Network wizard
View Settings
Manual Settings
Network profile
Factory reset
Software update
Auto-check setting
Check now
Info
page 51
page 51
page 52
page 52
page 52
page 52
page 53
page 53
page 54
page 54
page 55
page 56
page 56
page 57
page 58
page 58
page 60
page 61
page 61
page 62
page 64
System Setup
SIRIUS
AUX in
Alarms
Brightness
Clock Setup
Refer to the sections following for each menu option.
50
>
SIRIUS and AUX in
These two menu options select what the radio will play— SIRIUS selects the
SIRIUS Internet Radio service to be played, and AUX in selects the auxiliary
input to be played. You can connect a CD or MP3 player to the AUX In
connector, and listen to it.
To select auxiliary in to be played:
1. Press MENU.
2. Turn the TUNE knob to scroll to and highlight System Setup.
Press the TUNE knob.
3. Turn the TUNE knob to scroll to and highlight AUX in. Press the
TUNE knob.
4. The Auxiliary input screen will be
displayed, and the radio will play the
input from the AUX In connector.
Auxiliary input
Audio In
7:14PM
To switch from AUX in to SIRIUS:
1. Press MENU.
2. Turn the TUNE knob to scroll to and highlight System Setup.
Press the TUNE knob.
3. SIRIUS will be highlighted. Press the
TUNE knob.
4. The radio will switch back to SIRIUS
AUX in
EQ
System Setup
>
and connect to the SIRIUS Internet
Radio service.
51
Configuring Your SIRIUS TTR1C Radio
Alarms
Before setting any alarms, refer to “Clock Setup” on page 53 and ensure that
the clock is set correctly, i.e., the Time Zone and Daylight Savings Time are set
correctly for your location. Then refer to “Alarm Clock” on page 32 for information
about the alarm clocks. Refer to “Snooze” on page 34 for more information about
the snooze function.
Brightness
Brightness has four settings to set the brightness of the display screen,
Automatic, High, Medium, and Low. The Automatic setting adjusts the brightness
of the display screen according to the background light in the room, automatically
dimming the display screen the darker the room.
To change the display screen brightness:
1. Press MENU.
2. Turn the TUNE knob to scroll to and
highlight System Setup. Press the TUNE
knob.
Brightness
Automatic
3. Turn the TUNE knob to scroll to and
highlight Brightness. Press the TUNE
knob.
4. Turn the TUNE knob to display your desired setting, Automatic, High,
Medium, or Low. Press the TUNE knob to select your setting.
5. Press MENU to exit.
52
Clock Setup
Clock Setup allows you to change the clock settings:
Clock Setup
• Set Time/Date - Change the time and/
or date.
Set Time/Date
Auto Update
• Auto Update - Synchronize the clock via
Time Zone
the Internet Yes or No. Yes is the default
Daylight savings
and preferred setting. The radio will
automatically update the time, keeping it
accurate.
• Time Zone - Select the time zone you are in.
• Daylight savings - Turn daylight savings time On or Off.
>
To set the time and date:
1. Press MENU.
2. Turn the TUNE knob to scroll to and highlight System Setup.
Press the TUNE knob.
3. Turn the TUNE knob to scroll to and
highlight Clock Setup. Press the
TUNE knob.
4. Set Time/Date will be highlighted.
Press the TUNE knob.
Set Time/Date
07-20-2009
11:39 AM
5. Turn the TUNE knob to select the desired hour, and press the
TUNE knob to advance to the next field. Continue doing this until
you have finished.
53
Configuring Your SIRIUS TTR1C Radio
To set Auto Update:
1. Press MENU.
2. Turn the TUNE knob to scroll to and highlight System Setup. Press the
TUNE knob.
3. Turn the TUNE knob to scroll to and highlight Clock Setup. Press the
TUNE knob.
4. Turn the TUNE knob to scroll to and
highlight Auto Update. Press the TUNE
knob.
5. Turn the TUNE knob to select either YES
or NO, and press the TUNE knob.
Auto Update
Sync. Time
Via Internet?
YES*
NO
6. Press MENU to exit.
To set your time zone:
1. Press MENU.
2. Turn the TUNE knob to scroll to and highlight System Setup. Press the
TUNE knob.
3. Turn the TUNE knob to scroll to and highlight Clock Setup. Press the
TUNE knob.
4. Turn the TUNE knob to scroll to and highlight Time Zone. Press the
TUNE knob.
54
5. Turn the TUNE knob to scroll to and highlight the time zone you
are in. Press the TUNE knob.
6. Press MENU to exit.
Time Zone
Eastern
Central
Mountain
Pacific
Alaska
>
To set daylight savings time:
1. Press MENU.
2. Turn the TUNE knob to scroll to and highlight System Setup.
Press the TUNE knob.
3. Turn the TUNE knob to scroll to and highlight Clock Setup. Press
the TUNE knob.
4. Turn the TUNE knob to scroll to and
highlight Daylight savings. Press the
TUNE knob.
Daylight savings
Daylight savings
5. Turn the TUNE knob to select either
ON or OFF, and press the TUNE knob.
ON
OFF*
6. Press MENU to exit.
55
Configuring Your SIRIUS TTR1C Radio
Network
Network allows you to view and change the network settings:
• Network wizard - Helps you to easily connect
to a network
• View settings - Displays information about
your network connection
• Manual Settings - Allows you to manually
setup your connection to a network
Network settings
Network wizard
View settings
Manual Settings
Network profile
>
• Network profile - Displays the wireless network connections saved in the
radio
Each Network menu option is discussed in the sections which follow.
Network Wizard:
IMPORTANT! To connect to a wireless network which restricts access by MAC
address, the MAC address of the SIRIUS TTR1C Internet Radio must be added to
the allowed list of MAC addresses in the access point before connecting. You can
find the MAC address of your radio by pressing MENU, then turning and pressing
the TUNE knob to highlight and select: System Setup   Network   View
settings. The MAC address of the SIRIUS TTR1C Internet Radio will be displayed.
Refer to one the following sections for detailed instructions on using the Network
Wizard to connect to a network:
56
• For connecting to a wireless network, refer to “To connect to a
wireless network using the Network Wizard” on page 18.
• For connecting to a wired network, refer to “To connect to a wired
network using the Network Wizard:” on page 21.
View settings:
View Settings displays information about your network connection, including
the type of connection, the status, the radio’s MAC address, and other
network connection details such as IP addresses.
To view the network settings:
1. Press MENU.
2. Turn the TUNE knob to scroll to and
highlight System Setup. Press the
TUNE knob.
3. Turn the TUNE knob to scroll to and
highlight Network. Press the TUNE
knob.
View settings
Active connection:
WLAN is active
MAC address:
00:00:00:00:00:00
Wlan region:
4. Turn the TUNE knob to scroll to and highlight View settings.
Press the TUNE knob.
5. Turn the TUNE knob to scroll through the network settings.
6. Press MENU to exit.
57
Configuring Your SIRIUS TTR1C Radio
Manual Settings:
Refer to one the following sections for detailed instructions on using the Manual
Settings to connect to a network:
• For connecting to a wireless network, refer to “Connect to a Wireless
Network Using Manual Settings” on page 66.
• For connecting to a wired network, refer to “Connect to a Wired Network
Using Manual Settings” on page 71.
Network profile:
Network profile displays the wireless network
connections which are stored in the radio when you
connect to a wireless network. The currently active
profile is denoted with a “*“. You can delete the
profiles if desired.
Network profile
Your_Network_Name
Some_Other_Network
*
To view and delete the network profiles:
Note that you cannot delete the active wireless network profile.
1. Press MENU.
2. Turn the TUNE knob to scroll to and highlight System Setup. Press the
TUNE knob.
58
3. Turn the TUNE knob to scroll to and highlight Network. Press the
TUNE knob.
4. Turn the TUNE knob to scroll to and highlight Network profile.
Press the TUNE knob.
5. The saved wireless network names will be displayed. If you wish
to delete a profile, turn the TUNE
knob to scroll to and highlight a
profile name. Press the TUNE knob.
6. Confirm that you really want to delete
the profile. Turn the TUNE knob to
highlight YES or NO and press the
TUNE knob.
Confirm delete
Confirm delete
YES
NO*
7. Press MENU to exit.
59
Configuring Your SIRIUS TTR1C Radio
Factory reset
Factory reset restores the SIRIUS TTR1C Internet Radio to the factory settings.
It will erase all the stored network settings, account user name and password,
favourite channels, alarm clock settings, lock code, and set all other options back
to the factory settings.
To restore the radio to the factory settings:
1. Press MENU.
2. Turn the TUNE knob to scroll to and highlight System Setup. Press the
TUNE knob.
3. Turn the TUNE knob to scroll to and highlight Factory reset. Press the
TUNE knob.
4. Confirm that you really want to proceed
Factory reset
with the factory reset. Turn the TUNE
knob to highlight YES or NO and press the
TUNE knob.
5. The screen will display Restarting and the
radio turn off.
60
Proceed?
YES
NO*
Software update
Software update allows you to set the radio to automatically check for any
available software updates, and also to manually
Software update
force the radio to check if an update is available.
Auto-check setting
SIRIUS occasionally updates the software for
Check now
their radios. Check www.sirius.ca for any updated
documentation associated with a software
update.
By default, the SIRIUS TTR1C Internet Radio is set to automatically check for
updates. If it finds a software update, you’ll be prompted that a new software
is available. You can change this setting so the radio will not automatically
check for updates.
To change automatic software updates:
1. Press MENU.
2. Turn the TUNE knob to scroll to and highlight System Setup.
Press the TUNE knob.
3. Turn the TUNE knob to scroll to and highlight Software Update.
Press the TUNE knob.
4. Turn the TUNE knob to scroll to and
highlight Auto-check setting. Press
the TUNE knob.
5. Select whether you periodically
Software update
Check periodically for
new versions?
YES*
NO
61
Configuring Your SIRIUS TTR1C Radio
want the radio to check for software updates. Turn the TUNE knob to
highlight YES or NO and press the TUNE knob.
6. Press MENU to exit.
To force the radio to check for a software update:
1. Press MENU.
2. Turn the TUNE knob to scroll to and highlight System Setup. Press the
TUNE knob.
3. Turn the TUNE knob to scroll to and
highlight Software Update. Press the
TUNE knob.
Software update
Checking for
new versions.../
4. Turn the TUNE knob to scroll to and
highlight Check now. Press the TUNE
knob.
5. The radio will check for a software update.
If an update is available, the radio will
download and install the update. If no
update is available, Software up to date
will be displayed. If a software update is
available, Software update is displayed.
6. Press MENU to exit.
62
Software update
Software up to
date
Updating the software:
If you manually force the radio to check for a
software update, or the radio automatically finds
a software update, and you want to update the
software, follow these steps.
1. The Software update screen is
displayed. Turn the TUNE knob to
highlight YES and press the TUNE
knob.
Software update
New version available.
Update Software?
YES
NO*
Software update
1.5.6.21635-1A17
Downloading
2. The radio will download the software
/
update. Allow the download to finish.
3. When the download is complete, you
will be prompted to proceed with the
installation of the software. The
default answer is YES. Press the
TUNE knob to proceed.
4. You will be warned not to power
off the radio, and the radio will be
updated with the new software.
5. When the update is complete, you’ll
be prompted to Press OK/Tune to
start. Press the TUNE knob.
Software update
Proceed?
YES*
NO*
Software update
1.5.6.21635-1A17
Updating...
/
63
Configuring Your SIRIUS TTR1C Radio
6. The radio will start with the new software.
Software update
Update
Completed
Press OK/Select
Info
Info displays the software version number, and the Radio ID number.
To display the information:
1. Press MENU.
2. Turn the TUNE knob to scroll to and highlight System Setup. Press the
TUNE knob.
3. Turn the TUNE knob to scroll to and
highlight Info. Press the TUNE knob.
4. The software version number, and the
Radio ID number will be displayed.
5. Press MENU to exit.
64
Info
SW version:
v1.5.6.21635-1B2
Radio ID:
0013E09BD61E
Appendix: Manual Network Configuration
65
Appendix: Manual Network Configuration
Connecting to a network using the Manual settings requires some knowledge of
your network. You’ll need to manually configure your network connection using the
Manual Settings or [Manual config] option if your wireless network name (SSID) is
hidden, or if your network is DHCP disabled.
Decide whether you will be using a wireless network connection (page 66), or a
wired Ethernet connection (page 71). Then follow the instructions in the appropriate
following section.
Connect to a Wireless Network Using Manual Settings
In order to connect to a wireless network, you will need to have the following
information to enter during the procedure:
Is DHCP enabled or disabled?
If disabled, the IP address to use for the radio?
If disabled, the Subnet Mask?
If disabled, the Gateway IP address?
If disabled, the Primary DNS IP address?
If disabled, the Secondary IP address?
The name of your wireless network (SSID)?
Is the wireless network password protected?
If so, the type of authentication?
If Pre-Shared Key, whether WEP is enabled?
If WPA or WPA2, whether it’s TKIP or AES?
The wireless network key (password)?
66
a. If you have just turned your SIRIUS TTR1C Internet Radio on for the
first time, the SSID screen will already be displayed. Skip ahead to
step d.
b. Press MENU and turn the TUNE knob to highlight System Setup.
Press the TUNE Knob.
c. Turn the TUNE knob to highlight Network. Press the TUNE Knob.
d. Turn the TUNE Knob to highlight Manual Settings or [Manual
config]. Press the TUNE Knob.
e. Turn the TUNE Knob to highlight
Wireless. Press the TUNE Knob.
Connection type
Wired
Wireless
1/9
>
>
f. Will you be using DHCP? Turn the
TUNE Knob to highlight DHCP enable
or DHCP disable and press the TUNE
Knob.
g. If you have selected DHCP disable, enter the following
information. Otherwise, continue with step h.
For each entry, Turn the TUNE knob to select the numbers, and
press the TUNE knob to confirm and move to the next number.
Press BACK if you entered an incorrect number.
TIP! You can use the Remote Control to increment the numbers (
move forward or backward through the number fields ( + and —).
), and
i. Enter the IP address to use for the radio.
ii.Enter the Subnet Mask for the network.
67
Appendix: Manual Network Configuration
iii.Enter the Gateway IP address for the
network.
iv.Enter the Primary DNS IP address for
the network.
v. Enter the Secondary DNS IP address
for the network, or leave blank if there
is none.
h. Enter your wireless network name (SSID).
IP settings
IP address
0 . 0 . 0 . 0
Subnet mask
255 . 255 . 255 . 0
Key:
3/9
9/9
Note that the SSID is case sensitive. Turn
0123456789., ab
the TUNE knob to scroll through the list of cdefghijklmnopq BKSP
OK
characters and highlight each character.
rstuvwxyzABCDEF
Press the TUNE knob to select the
GHIJKLMNOPQRSTU CANCEL
highlighted character and move to the next
character. If you make a mistake, turn the
TUNE knob to highlight BKSP and press the TUNE knob to erase the
character. When done, turn the TUNE knob
Authentication
7/9
to highlight OK and press the TUNE knob.
Open
Pre-Shared Key
WPA
key (password)), Pre-Shared key, WPA, or
WPA2. Turn the TUNE Knob to highlight your WPA2
i. Select the authentication type, Open (no
>
selection and press the TUNE knob. If you
have selected Open, skip ahead to step k.
j. Depending upon your selection, complete these additional steps:
•Pre-Shared Key:
i. Select whether the Pre-Shared Key has WEP encryption disabled or
68
disabled. Turn the TUNE Knob to highlight your selection and
press the TUNE knob.
ii. Enter your key (password). Turn the TUNE knob to scroll through
the list of characters and highlight each character. Press the
TUNE knob to select the highlighted character and move to the
next character. If you make a mistake, turn the TUNE knob to
highlight BKSP and press the TUNE knob erase the character.
•WPA or WPA2:
i. Select whether WPA or WPA2 has TKIP or AES encryption.
Turn the TUNE Knob to highlight your selection and press the
TUNE knob.
ii.Enter your key (password). Remember that the key is case
sensitive. Turn the TUNE knob
Connected
to scroll through the list of
characters and highlight each
Connected
character. Press the TUNE knob
to select the highlighted character
and move to the next character.
If you make a mistake, turn the
TUNE knob to highlight BKSP and
press the TUNE knob to erase the
character. When done, turn the
Failed
TUNE knob to highlight OK and
to connect
press the TUNE knob.
k. If you have entered the correct
information, and the radio is able
69
Appendix: Manual Network Configuration
to connect to your wireless network, the Connected screen will be
displayed. If not, the Failed to connect screen is displayed. This means
that one or more of the settings you entered is incorrect.
l. If you are installing your SIRIUS TTR1C Internet Radio for the first time,
continue with “Step 2: Enter Your SIRIUS Account Information” on page
23.
If you have previously entered your SIRIUS user name and key into the
radio, and had tuned to a channel, the screen will show Connecting.
When successfully connected, the Buffering... screen will be displayed
as the channel information is streamed to the radio. When complete,
you are returned to the main display screen and you should hear the
audio playing. Otherwise, the Category Tune screen is displayed.
SIRIUS
SIRIUS Hits 1
3:13PM
Connecting.
3:14PM
Buffering...
/
70
SIRIUS 001
SIRIUS Hits 1
/
Connect to a Wired Network Using Manual Settings
In order to connect to a wired network, you will need to have the following
information to enter during the procedure:
Is DHCP enabled or disabled?
If disabled, the IP address to use for the radio?
If disabled, the Subnet Mask IP address?
If disabled, the Gateway IP address?
If disabled, the Primary DNS IP address?
If disabled, the Secondary DNS IP address?
a. At the rear of the radio, remove the compartment cover and
connect an Ethernet cable to the Ethernet connector on the inside
left of the compartment. Refer to “Wired Ethernet Connector”
on page 11 for the location of the Ethernet connector. Replace the
compartment cover.
b. Connect the other end of the Ethernet cable to your home’s wired
network.
c. If you have just turned your SIRIUS TTR1C Internet Radio on for the
first time, the SSID screen will already be displayed. Skip ahead to
step f.
d. Press MENU and turn the TUNE knob to highlight System Setup.
Press the TUNE Knob.
e. Turn the TUNE knob to highlight Network. Press the TUNE Knob.
f. Turn the TUNE Knob to highlight Manual Settings [Manual
config]. Press the TUNE Knob.
71
Appendix: Manual Network Configuration
g. Turn the TUNE Knob to highlight Wired.
Press the TUNE Knob.
h. Will you be using DHCP? Turn the TUNE
Connection type
Wired
Wireless
1/9
>
>
Knob to highlight DHCP enable or DHCP
disable and press the TUNE Knob.
i. If you have selected DHCP disable, enter
the following information. Otherwise, continue with step j.
For each entry, Turn the TUNE knob to select the numbers, and press
the TUNE knob to confirm and move to the next number. Press BACK if
you entered an incorrect number.
TIP! You can use the Remote Control to increment the numbers (
forward or backward through the number fields ( + and —).
), and move
i. Enter the IP address to use for the radio.
ii.Enter the Subnet Mask IP address for the network.
iii.Enter the Gateway IP address for the
network.
iv.Enter the Primary DNS IP address for
the network.
v. Enter the Secondary DNS IP address
for the network, or leave blank if there
is none.
IP settings
IP address
0 . 0 . 0 . 0
Subnet mask
255 . 255 . 255 . 0
3/9
j. If you have entered the correct information, and the radio is able to
connect to your network, the Connected screen will be displayed. If
not, the Failed to connect screen is displayed. This means that one or
72
more of the settings you entered is
incorrect. If Waiting for Ethernet is
displayed, check the Ethernet cable
connections.
Connected
k. If you are installing your SIRIUS TTR1C
Internet Radio for the first time,
continue with “Step 2: Enter Your
SIRIUS Account Information” on page 23.
If you have previously entered your
SIRIUS user name and key into the
radio, and had tuned to a channel,
the screen will show Connecting.
When successfully connected, the
Buffering... screen will be displayed as
the channel information is streamed
to the radio. When complete, you are
returned to the main display screen
and you should hear the audio playing.
Otherwise, the Category Tune screen
is displayed.
SIRIUS
SIRIUS Hits 1
3:13PM
Connecting.
Connected
Network settings
Waiting for
Ethernet
SIRIUS 001
Failed
to connect
SIRIUS Hits 1
3:14PM
Buffering...
/
/
73
74
Troubleshooting
75
Troubleshooting
Your SIRIUS TTR1C Internet Radio has been designed and built to be trouble-free
but if you experience a problem, here’s some troubleshooting hints.
You can also call SIRIUS Customer Care at 1-888-539-7474.
If you see this on the screen:
Try this:
Connecting
•The radio is attempting to connect to the SIRIUS
Internet Radio service. If this message is displayed
more than one minute, make sure your network is
connected to the Internet.
To verify that you have an Internet connection,
refer to “To force the radio to check for a software
update:” on page 62 and follow the procedure. If
you get the message Software up to date, or New
version available, then the radio is connected to the
Internet. If you get the message, Login failed, then
you don’t have an Internet connection. Check with
your network administrator for Internet connectivity
on your network.
•Turn your radio Off and On again.
Buffering
•The radio is loading the channel information. If this
message is displayed for more than one minute,
make sure your connection to the Internet has
not been interrupted. See Connecting (previous
troubleshooting item) and verify your Internet
connection.
•Turn your radio Off and On again.
Updating
•Your radio is installing a software update. Do not turn
the radio off. Allow the software update complete.
76
If you see this on the screen:
Try this:
Waiting for Ethernet
•The radio is expecting a wired Ethernet
connection. Plug an Ethernet wire into your
home network, then plug the other end into the
Ethernet connection inside the compartment
at the rear of the radio. (Refer to page 11 for the
location of the connector.)
•Change to a wireless network connection if a
wired Ethernet connection is not available.
Login failed
•Your SIRIUS user name and/or password is
incorrect, you don’t have a subscription to
the SIRIUS Satellite Radio service, or your
subscription is no longer valid. To verify that you
are subscribed to service, go to www.sirius.ca,
click on the LISTEN ONLINE link, and then click
the LAUNCH PLAYER link. Enter your username
and password. Select a channel to listen to. If
you can listen, then you are subscribed. Close
the browser window to exit the player before
continuing.
If you don’t have a SIRIUS Satellite Radio
subscription, go to www.sirius.ca or call 888539-7474 to subscribe and get your user name
and password.
77
Troubleshooting
78
If you see this on the screen:
Try this:
Failed to connect
•The network information you entered is
incorrect. Verify and re-enter the information.
(Refer to page 17 for a wireless network, or page 21
for a wired network.)
•You have entered an incorrect password for a
secure wireless network. Verify and re-enter the
information. (Refer to page 23.)
•If you have manually configured a network
connection, you have entered one or more
incorrect settings. Verify and re-enter the
information. (Refer to page 66 for a wireless
network, or page 71 for a wired network.)
Stream Closed
•Your account username and password has
been used at another location to connect to
the Premium SIRIUS Internet Radio service,
and your radio has been disconnected from the
service. Turn your radio Off and On again.
•The radio may have timed out due to lack of
activity. Turn your radio Off and On again. To
prevent a time-out, periodically adjust the
volume, change the channel, or enter a menu, etc.
If this happens:
Try this:
You do not receive the same
SIRIUS channels you receive on
your Satellite Radio
•The SIRIUS Internet Radio service does not have
all of the same channels as the SIRIUS satellite
service.
Check www.sirius.ca and click the View Channel
Lineup link for the latest channel lineup.
If this happens:
Try this:
The Network Wizard fails before
the radio connects to your
network
•Your network has DHCP disabled. You’ll have to
manually configure your network connection.
(Refer to page 66 for a wireless network, or page 71
for a wired network.)
The Network Wizard does not find
your wireless network
•Your wireless network has a hidden name (SSID).
If so, you will have to manually configure your
wireless network connection (page 66), or use a
wired network connection (page 21 or page 71).
•The wireless signal from your access point is too
low. Try moving the radio closer to your access
point and see if the Network Wizard finds your
wireless network.
79
80
Product Specifications
81
Product Specifications
Dimensions
SIRIUS TTR1C Internet Radio 283 mm (W) x 185 mm (H) x 95 mm (D)
11 in (W) X 7.25 in (H) X 3.75 in (D)
Remote
52 mm (W) x 85 mm (H) x 5 mm (D)
2 in (W) x 3.3 in (H) x .25 in (D)
Weight
SIRIUS TTR1C Internet Radio
2.85 kg (6.3 lbs)
Audio Outputs
Headphone
Line Out
3.5 mm diameter mini stereo jack
3.5 mm diameter mini stereo jack
Audio Input
82
Aux In
3.5 mm diameter mini stereo jack
Patent and Environmental Information
Patent Information
It is prohibited to, and you agree that you will not, copy, decompile,
disassemble, reverse engineer, hack, manipulate, or otherwise access and/
or make available any technology incorporated in this product. Furthermore,
the AMBE® voice compression software included in this product is protected
by intellectual property rights including patent rights, copyrights, and trade
secrets of Digital Voice Systems, Inc. The software is licensed solely for use
within this product. The music, talk, news, entertainment, data, and other
content on the Services are protected by copyright and other intellectual
property laws and all ownership rights remain with the respective content and
data service providers. You are prohibited from any export of the content and/
or data (or derivative thereof ) except in compliance with applicable export
laws, rules and regulations. The user of this or any other software contained
in a SIRIUS radio is explicitly prohibited from attempting to copy, decompile,
reverse engineer, hack, manipulate or disassemble the object code, or in any
other way convert the object code into human-readable form.
Environmental Information
Follow local guidelines for waste disposal when discarding packaging and
electronic appliances.
Your radio is packaged with cardboard, polyethylene, etc., and does not
contain any unnecessary materials.
83
FCC Statement
The user is cautioned that changes or modifications not expressly approved by Sirius Canada
Inc. can void the user’s authority to operate this device.
This device complies with Part 15 of the FCC Rules:
1. This device may not cause harmful interference.
2.This device must accept any interference received, including interference that may
cause undesired operation.
NOTE: This equipment has been tested and found to comply with the limits for a Class B digital
device, pursuant to Part 15 of the FCC Rules. These limits are designed to provide reasonable
protection against harmful interference in a residential installation. This equipment generates,
uses and can radiate radio frequency energy and, if not installed and used in accordance with
the instructions, may cause harmful interference to radio communications. However, there
is no guarantee that interference will not occur in a particular installation. If this equipment
does cause harmful interference to radio or television reception, which can be determined by
turning the equipment off and on, the user is encouraged to try to correct the interference by
one or more of the following measures:
• To comply with FCC RF exposure compliance requirements, a separation distance of at
least 20 cm must be maintained between the antenna of this device and all persons.
• This device must not be co-located or operating in conjunction with any other antenna
or transmitter.
Canadian Compliance
This Class B digital apparatus complies with Canadian ICES-003.
84
Operation is subject to the following two conditions: (1) this device may not cause
interference, and (2) this device must accept any interference, including interference
that may cause undesired operation of the device.
To reduce potential radio interference to other users, the antenna type and its gain
should be so chosen that the equivalent isotropically radiated power (EIRP) is not more
than that required for successful communication
This device has been designed to operate with an antenna having a maximum gain of
2 dBi. Antenna having a higher gain is strictly prohibited per regulations of Industry
Canada. The required antenna impedance is 50 ohms.
To reduce potential radio interference to other users, the antenna type and its gain
should be so chosen that the equivalent isotropically radiated power (e.i.r.p.) is not more
than that permitted for successful communication.
IC Radiation Exposure Statement:
This equipment complies with IC RSS-102 radiation exposure limits set forth for an
uncontrolled environment. This equipment should be installed and operated with
minimum distance 20cm between the radiator & your body.
The Country Code Selection feature is disabled for products marketed in the US/Canada.
This device and its antenna(s) must not be co-located or operating in conjunction with
any other antenna or transmitter.
This Class [B] digital apparatus complies with Canadian ICES-003.
85
Copyrights and Trademarks
©2010 SIRIUS Canada Inc. “SIRIUS”, “SIRIUS Satellite Radio” and the SIRIUS dog logo are
trademarks of SIRIUS XM Radio Inc. and are used under licence. All other marks and logos
are the property of their respective owners. All rights reserved. Hardware, subscription
and activation fee required. Other fees and taxes will apply. Month-to-month subscriptions
must be activated via telephone. Hardware and subscription sold separately. Subscription
governed by SIRIUS Terms & Conditions available at sirius.ca.
86
sirius.ca
Sirius Canada Inc.
135 Liberty St. - 4th floor
Toronto, Ontario, M6K 1A7
1-888-539-SIRIUS (7474)
© 2010 Sirius Canada Inc.
SIRIUS TTR1C 071310a