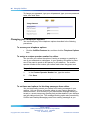
1
Nortel CallPilot
Desktop Messaging User Guide
for My CallPilot
ATTENTION
Clicking on a PDF hyperlink takes you to the appropriate page. If necessary,
scroll up or down the page to see the beginning of the referenced section.
NN44200-109
.
Document status: Standard
Document version: 01.01
Document date: 26 February 2007
Copyright © 2007, Nortel Networks
All Rights Reserved.
Sourced in Canada
Information is subject to change without notice. Nortel Networks reserves the right to make changes in design or
components as progress in engineering and manufacturing may warrant.
The process of transmitting data and call messaging between CallPilot and its servers, switches or system is
proprietary to Nortel Networks. Any other use of the data and the transmission process is a violation of the user
license unless specifically authorized in writing by Nortel Networks prior to such use. Violations of the license by
alternative usage of any portion of this process or the related hardware constitutes grounds for an immediate
termination of the license and Nortel Networks reserves the right to seek all allowable remedies for such breach.
Nortel Networks and third-party trademarks appear on the following pages:
*Nortel, the Nortel logo, the Globemark, and Unified Networks, BNR, CallPilot, DMS, DMS-100, DMS-250,
DMS-MTX, DMS-SCP, DPN, Dualmode, Helmsman, IVR, MAP, Meridian, Meridian 1, Meridian Link, Meridian Mail,
Norstar, SL-1, SL-100, Succession, Supernode, Symposium, Telesis, and Unity are trademarks of Nortel Networks.
3COM is a trademark of 3Com Corporation.
ACCENT is a trademark of Accent Software International Ltd.
ADOBE is a trademark of Adobe Systems Incorporated.
AMDEK is a trademark of Amdek Corporation.
AT&T is a trademark of American Telephone and Telegraph Corporation.
ATLAS is a trademark of Quantum Corporation.
ATRIA is a trademark of Pure Atria Corporation.
BLACKBERRY is a trademark of Research in Motion Limited.
CASEWARE is a trademark of Caseware International, Inc.
CONTINUUS is a trademark of Continuus Software Corporation.
CRYSTAL REPORTS is a trademark of Seagate Software Inc.
DEFINITY is a trademark of Avaya Inc.
DIALOGIC, INTEL and VOICEBRIDGE are trademarks of Intel Corporation.
DIVX is a trademark of DivXNetworks, Inc.
EUDORA and QUALCOMM are trademarks of Qualcomm, Inc.
eTrust and InoculateIT are trademarks of Computer Associates Think Inc.
DIRECTX, EXCHANGE.NET, FRONTPAGE, INTERNET EXPLORER, LINKEXCHANGE, MICROSOFT,
MICROSOFT EXCHANGE SERVER, MS-DOS, NETMEETING, OUTLOOK, POWERPOINT, VISUAL STUDIO,
WINDOWS, WINDOWS MEDIA, and WINDOWS NT are trademarks of Microsoft Corporation.
GROUPWISE and NOVELL are trademarks of Novell Inc.
HITACHI is a trademark of Hitachi Limited.
LOGITECH is a trademark of Logitech, Inc.
LUCENT is a trademark of Lucent Technologies, Inc.
MATRA is a trademark of Matra Hachette.
MCAFFEE and NETSHIELD are trademarks of McAfee Associates, Inc.
MYLEX is a trademark of Mylex Corporation.
NET2PHONE is a trademark of Net2Phone, Inc.
NETOPIA is a trademark of Netopia, Inc.
NETSCAPE COMMUNICATOR is a trademark of Netscape Communications Corporation.
NOTES is a trademark of Lotus Development Corporation.
NORTON ANTIVIRUS and PCANYWHERE are trademarks of Symantec Corporation.
POWERQUEST is a trademark of PowerQuest Corporation.
PROMARK and RHOBOT are trademarks of DMI Promark, Inc.
QUICKTIME is a trademark of Apple Computer, In.
RADISYS is a trademark of Radisys Corporation.
ROLM is a trademark of Siemens ROLM Communications Inc.
SLR4, SLR5, and TANDBERG are trademarks of Tandberg Data ASA.
SONY is a trademark of Sony Corporation.
SYBASE is a trademark of Sybase, Inc.
TEAC is a trademark of TEAC Corporation.
UNIX is a trademark of X/Open Company Limited.
US ROBOTICS, the US ROBOTICS logo, and SPORTSTER are trademarks of US Robotics.
WINAMP is a trademark of Nullsoft, Inc.
WINRUNNER is a trademark of Mercury Interactive Corporation.
WINZIP is a trademark of Nico Mark Computing, Inc.
5
Contents
How to get help
7
Using My CallPilot
9
Getting started 10
Logging on 12
Accessing your CallPilot messages 16
Playing voice messages 17
Viewing fax messages 19
Composing voice messages 20
Composing fax and text messages 23
Calling the sender of a message 25
Forwarding and replying to messages 26
Adding attachments to messages 27
Setting message options 28
Addressing messages 29
Using the Message Waiting Indicator 32
CallPilot Features tab 34
Working with greetings 34
Setting up message notification 37
Setting up message forwarding 39
Managing personal distribution lists 42
Changing your CallPilot password 43
Changing your telephone options 44
Setting up telephone access to e-mail 46
Changing fax printing options 47
Setting up links to your e-mail accounts 48
Setting messaging preferences 53
Choosing a home page for My CallPilot 54
Useful Information tab 54
Transcribing voice forms 55
Protecting the security of your mailbox 56
Appendix A Remote Text Notification for Microsoft Outlook and
BlackBerry Devices
57
Nortel CallPilot
Desktop Messaging User Guide for My CallPilot
NN44200-109 01.01 Standard
5.0 26 February 2007
Copyright © 2007, Nortel Networks
.
Nortel Networks Confidential
6 Contents
Nortel CallPilot
Desktop Messaging User Guide for My CallPilot
NN44200-109 01.01 Standard
5.0 26 February 2007
Copyright © 2007, Nortel Networks
.
Nortel Networks Confidential
7
How to get help
This section explains how to get help for Nortel products and services.
Getting help from the Nortel Web site
The best way to get technical support for Nortel products is from the Nortel
Technical Support Web site:
http://www.nortel.com/support
This site provides quick access to software, documentation, bulletins, and
tools to address issues with Nortel products. More specifically, you can
use the site to:
•
download software, documentation, and product bulletins
•
search the Technical Support Web site and the Nortel Knowledge Base
for answers to technical issues
•
sign up for automatic notification of new software and documentation
for Nortel equipment
•
open and manage technical support cases
Getting help over the phone from a Nortel Solutions Center
If you don’t find the information you require on the Nortel Technical Support
Web site, and have a Nortel support contract, you can also get help over the
phone from a Nortel Solutions Center.
In North America, call 1-800-4NORTEL (1-800-466-7835).
Outside North America, go to the following Web site to obtain the phone
number for your region:
http://www.nortel.com/callus
Getting help from a specialist by using an Express Routing Code
To access some Nortel Technical Solutions Centers, you can use an Express
Routing Code (ERC) to quickly route your call to a specialist in your Nortel
product or service. To locate the ERC for your product or service, go to:
Nortel CallPilot
Desktop Messaging User Guide for My CallPilot
NN44200-109 01.01 Standard
5.0 26 February 2007
Copyright © 2007, Nortel Networks
.
Nortel Networks Confidential
8 How to get help
http://www.nortel.com/erc
Getting help through a Nortel distributor or reseller
If you purchased a service contract for your Nortel product from a distributor
or authorized reseller, contact the technical support staff for that distributor
or reseller.
Nortel CallPilot
Desktop Messaging User Guide for My CallPilot
NN44200-109 01.01 Standard
5.0 26 February 2007
Copyright © 2007, Nortel Networks
.
Nortel Networks Confidential
9
Using My CallPilot
My CallPilot* from Nortel is a Web-based messaging system that offers
exceptional flexibility for managing your messaging needs.
You can work with My CallPilot from any computer that has network access
and a Web browser configured for My CallPilot. Here are some of the many
ways you can use My CallPilot:
•
Record, edit, and delete greetings that callers hear when they reach
your mailbox.
•
Receive, forward, reply to, and send voice messages, faxes, and e-mails.
•
Address messages to CallPilot users on local and remote servers, as
well as to non-CallPilot users.
•
Set up message forwarding to another CallPilot mailbox or to an external
e-mail address.
•
Configure e-mail-by-phone.
•
Set up links to your e-mail.
•
Change your CallPilot mailbox password.
•
Create personal distribution lists.
•
Set up remote notification to a telephone or pager.
•
Set up text message notification for a wireless e-mail device. See
Appendix A for details.
•
Transcribe voice forms, if your site uses voice forms to collect
information.
Some features mentioned in this guide are optional. For details, refer to the
Feature availability topic in the CallPilot Player online Help, or ask your
administrator.
Note: The screen images of dialog boxes shown in this guide
are those displayed when operating My CallPilot in the Windows
environment, unless otherwise specified. Users of the Macintosh or
Nortel CallPilot
Desktop Messaging User Guide for My CallPilot
NN44200-109 01.01 Standard
5.0 26 February 2007
Copyright © 2007, Nortel Networks
.
Nortel Networks Confidential
10 Using My CallPilot
Linux environments might see altered versions of these dialog boxes,
depending on specific feature and functionality support.
Getting started
About this guide
This user guide describes how to use the Web-based resources of My
CallPilot. The instructions and screen images shown in this guide provide
general information for using My CallPilot through a Web client. Specific
details can vary, depending on your computer operating system and the
features available for your CallPilot mailbox.
Hardware and software requirements
You can access My CallPilot from any computer with network access and
a Web browser configured for My CallPilot. Before you start to use My
CallPilot, ensure that the computer you are using is set up according to
the following requirements.
Note: Support for additional hardware and software may be added in
the future as it becomes available (for example, new browser releases).
For more information, contact your CallPilot administrator.
Windows-based hardware and software
•
Operating systems: Windows 2000 Professional, Windows XP
Professional, or Windows Vista
•
Browsers: Internet Explorer 6.0 and 7.0, Firefox 2.0 for Windows
•
TCP/IP network connection of at least 56 Kbit/s
•
Sound card and speakers for playing voice messages on your computer
•
A microphone connected to your computer, or a telephone situated near
your computer, for recording voice messages
Macintosh-based hardware and software
•
PowerPC G3 processor or newer (PowerPC G4 preferred)
•
Operating system: Mac OS X v10.3
•
Browser: Safari 1.3.2
•
TCP/IP network connection of at least 56 Kbit/s
•
Speakers for playing voice messages on your computer
•
A microphone connected to your computer, or a telephone situated near
your computer, for recording voice messages
Nortel CallPilot
Desktop Messaging User Guide for My CallPilot
NN44200-109 01.01 Standard
5.0 26 February 2007
Copyright © 2007, Nortel Networks
.
Nortel Networks Confidential
Getting started
11
Note: The type of microphone to use depends on the type of Macintosh
you have; a microphone designed for a Windows-based PC does not
always work.
Linux-based software
•
Red Hat Linux 9
•
Browsers: Mozilla 1.7.x, Firefox 2.0
•
TCP/IP network connection of at least 56 Kbit/s
•
A microphone connected to your computer, or a telephone situated near
your computer, for recording voice messages
Peripheral hardware and software (including audio player)
•
Video display and monitor with 8-bit (256-color) 800 x 600 capability
(1024 x 768 16-bit color preferred)
•
A network connection to the My CallPilot server, and to the CallPilot
server where applicable, for accessing CallPilot messages
•
To create faxes:
— For Windows systems, the Nortel Fax Driver and CallPilot desktop
messaging.
— For Macintosh and Linux systems, you must provide your own
software for creating faxes.
•
To play and record voice messages: CallPilot Player, or another audio
player that can play WAV files.
— For Windows systems: If you are using Internet Explorer, you can
use the CallPilot Player that is conveniently embedded inside the
browser to play and record voice messages. Otherwise, you can use
the CallPilot Player as a browser helper application (stand-alone
version of the CallPilot Player). If you choose not to use the CallPilot
Player, you can use the Microsoft Windows Media Player, or another
WAV-compatible media player. These players do not function in
exactly the same way as the CallPilot Player described in this guide.
— For Macintosh and Linux systems, you must provide your own audio
player to play and record voice messages.
Requirements for the embedded CallPilot Player
For Windows systems, My CallPilot includes an embedded audio player that
conveniently appears on the page you use to compose and listen to voice
messages, as shown here:
Nortel CallPilot
Desktop Messaging User Guide for My CallPilot
NN44200-109 01.01 Standard
5.0 26 February 2007
Copyright © 2007, Nortel Networks
.
Nortel Networks Confidential
12 Using My CallPilot
For the embedded player to automatically appear in My CallPilot, your
workstation and My CallPilot must meet the following requirements:
•
your browser must be Internet Explorer
•
the CallPilot Player must be installed (for instructions, see "To download
audio players" (page 15))
•
you must have VBK set as your audio type in your My CallPilot
preferences (for instructions, see "Setting messaging preferences"
(page 53))
Logging on
Your administrator provides you with the URL for My CallPilot. Bookmark
this address in your Web browser for easy access.
To log on to My CallPilot
Step
Action
1
In your Web browser, navigate to the My CallPilot address.
Example:
http://serverABC/mycallpilot
2
On the Welcome page, in the Mailbox box, type your mailbox
number. This number is usually your office telephone extension
number.
Nortel CallPilot
Desktop Messaging User Guide for My CallPilot
NN44200-109 01.01 Standard
5.0 26 February 2007
Copyright © 2007, Nortel Networks
.
Nortel Networks Confidential
Logging on 13
3
In the Password box, type the password for this mailbox.
4
Click Login.
—End—
Logging on to environments with multiple CallPilot servers
If your site has more than one CallPilot server to which you can connect, a
Location list containing multiple CallPilot servers appears in the Welcome
page.
Nortel CallPilot
Desktop Messaging User Guide for My CallPilot
NN44200-109 01.01 Standard
5.0 26 February 2007
Copyright © 2007, Nortel Networks
.
Nortel Networks Confidential
14 Using My CallPilot
Selecting a server from this list lets you select (and log on to) your CallPilot
server without needing to know any of your server-specific settings beyond
your mailbox and password.
To configure or update the settings to connect to My CallPilot
Under normal circumstances, your CallPilot administrator configures the
settings that allow you to log on to My CallPilot. If this is not the case, you
might need to add or update the settings so that you can log on successfully.
Step
Action
1
In your Web browser, navigate to the My CallPilot address.
2
On the Welcome page, click Configure.
The Configure dialog box appears. The information shown in the
following illustration is an example only.
3
Type or update the configuration information. If you do not have this
information, contact your CallPilot administrator.
4
Click OK.
The system attempts to connect you using the information you
entered.
5
If the connection is successful, click OK on the confirmation
messages, and then try logging on again. If the connection is not
successful, contact your CallPilot administrator for assistance.
—End—
Nortel CallPilot
Desktop Messaging User Guide for My CallPilot
NN44200-109 01.01 Standard
5.0 26 February 2007
Copyright © 2007, Nortel Networks
.
Nortel Networks Confidential
Logging on 15
To change to another server
If you have a mailbox on another CallPilot server, you can log on to that
server from My CallPilot. Click Configure, type the server details, then click
OK until you return to the Welcome page. When you log on again from the
same computer, CallPilot accesses the new server. To change back to your
default server, click Configure, then click Restore Defaults.
To change to another language
If language buttons are available on your My CallPilot log on page, you can
click one to change from your default language to another language.
To log on using secure login
If the Enable Secure Login link is available on your login page, click it to
enable SSL encryption. The Login Securely button appears. Bookmark
the link for future use.
To log on remotely
You can log on to My CallPilot from any computer that has Internet access
and supported browser configuration. You can use the pre-installed audio
player for voice messages, or you can download the CallPilot Player for
full feature capability.
To log out
To log out from My CallPilot, click Logout on any My CallPilot page.
To download audio players
You need an audio player to play and record voice messages. If you do
not have the CallPilot Player installed, the first time you log on to My
CallPilot, you are prompted to download it. Follow the instructions to start
the download and installation process. If you choose to use a different audio
player, arrange to install it if it is not already installed.
If you choose not to download the player when you first log on, you can do
so later on using the following procedure.
Step
Action
1
Log on to My CallPilot.
2
Click the CallPilot Features tab, and then click the Downloads item.
3
Select CallPilot Player & MWI icon or another audio player from
the list.
4
Follow the instructions to download and install the audio player.
The stand-alone version of the CallPilot Player is shown here:
Nortel CallPilot
Desktop Messaging User Guide for My CallPilot
NN44200-109 01.01 Standard
5.0 26 February 2007
Copyright © 2007, Nortel Networks
.
Nortel Networks Confidential
16 Using My CallPilot
—End—
Note: The CallPilot Player software is bundled with software for a
Message Waiting Indicator (MWI). When installed, the Message Waiting
Indicator appears as an icon in the Windows taskbar, and it notifies you
when you have new CallPilot messages. For more information, see
"Using the Message Waiting Indicator" (page 32).
Accessing your CallPilot messages
You can access your CallPilot messages from the CallPilot Messages tab.
You can play voice messages and view faxes, delete, forward, and reply to
messages, and compose new messages.
Your message list
To check for new messages
To see new messages, click Refresh. New messages appear in bold.
To sort your messages, click on a column heading, for example, Subject
or Received.
Nortel CallPilot
Desktop Messaging User Guide for My CallPilot
NN44200-109 01.01 Standard
5.0 26 February 2007
Copyright © 2007, Nortel Networks
.
Nortel Networks Confidential
Playing voice messages 17
Note: Only the messages currently displayed are sorted, which might
not be the entire message list.
To open a message
To open a CallPilot message, click the voice, fax, or text icon in the
attachments column beside the message, or click any underlined part of
the message line. See "Playing voice messages" (page 17), and "Viewing
fax messages" (page 19).
To select a message
To select a CallPilot message, check the box at the far left of the message
line. When a message is selected, you can delete, forward, or reply to it.
To delete a message
To delete a CallPilot message, select the message and click Delete or
Delete Now. If you click Delete, the message temporarily moves to your
Deletable Items folder, and then it is permanently deleted when you log out.
If you click Delete Now, all selected messages, and items in your Deletable
Items folder, are permanently deleted immediately.
If you want to keep items in your Deletable Items folder after you log out,
you can change this setting on the My CallPilot Preferences page. See "To
change environment settings" (page 54).
Note: To view items in your Deletable Items folder, from the CallPilot
Messages tab, select Deletable Items from the Folder list.
To select your telephone or computer to play and record voice messages
You can choose to play and record voice messages through your telephone
or your computer. Click the telephone or computer icon in the embedded or
downloaded CallPilot Player. If you have any problems using your telephone
for this purpose, contact your CallPilot administrator.
See "Setting messaging preferences" (page 53), to change the audio setting
and the number that CallPilot dials for playing and recording messages.
Playing voice messages
Before playing voice messages, see "To select your telephone or computer
to play and record voice messages" (page 17).
To play a voice message the quick way (Windows only)
Use the embedded CallPilot Player, if available, to play your voice messages
quickly. If you cannot see the embedded player in your message list, see
"Requirements for the embedded CallPilot Player" (page 11).
Nortel CallPilot
Desktop Messaging User Guide for My CallPilot
NN44200-109 01.01 Standard
5.0 26 February 2007
Copyright © 2007, Nortel Networks
.
Nortel Networks Confidential
18 Using My CallPilot
Step
Action
1
In your message list, click the voice icon in the attachments column
beside the message you want to play (see the following illustration).
Note that this icon appears as a telephone instead of a black arrow if
your audio format is set to WAV in your My CallPilot preferences.
2
If you are not using the embedded player, follow the prompts to open
the audio file. When the audio player appears, press the play button.
The controls on the embedded CallPilot player are shown here:
If you select the computer for playback, the audio player plays your
message from your computer speakers. If you select the telephone
for playback, your telephone rings and plays the message when
you answer.
3
Use the player buttons to stop or replay the message, or to call
the sender. You can use the slider control on the player to skip to
another part of the message.
4
If you are using the telephone, when finished, click the disconnect
icon or hang up the telephone.
5
To return to your messages, click Message List.
—End—
To play a voice message in a mixed voice, fax, or text message
CallPilot messages can have more than one type of attachment. In your
message list, each attachment appears as a different icon beside the
message in the attachment column.
Nortel CallPilot
Desktop Messaging User Guide for My CallPilot
NN44200-109 01.01 Standard
5.0 26 February 2007
Copyright © 2007, Nortel Networks
.
Nortel Networks Confidential
Viewing fax messages 19
Step
Action
1
In your message list, click any underlined part of the message to
open it.
The mixed message appears with each attachment shown on the
left.
2
To play the voice message, click the Voice icon. For more details on
playing a voice message, see the preceding procedure.
—End—
Viewing fax messages
To view faxes on your computer you must have appropriate software.
•
For Windows systems, you can use the viewer included with the
Windows operating system, or install your own software.
•
For Macintosh systems, QuickTime Viewer can display faxes.
•
For Linux systems, Eye of GNOME or kfax software can display faxes.
To view a fax message
Step
Action
1
In your message list, click the fax icon in the attachments column
beside the fax message you want to view, or click any underlined
part of the message.
If the Open/Save dialog box appears, select Open to display the
image.
2
Use the controls supplied with the fax viewing software to work with
the fax.
Nortel CallPilot
Desktop Messaging User Guide for My CallPilot
NN44200-109 01.01 Standard
5.0 26 February 2007
Copyright © 2007, Nortel Networks
.
Nortel Networks Confidential
20 Using My CallPilot
3
When you finish, close the fax image to return to your messages.
—End—
Composing voice messages
If you use Internet Explorer for Windows, you can compose a voice message
using one of two methods:
•
You can use the embedded CallPilot Player to record the voice message
(VBK format only) and automatically attach it to the message. If you
cannot see the embedded player when you compose a message, see
"Requirements for the embedded CallPilot Player" (page 11).
•
You can use the stand-alone CallPilot Player to record your message
and then save it as a stand-alone file. You can then attach it to one or
more messages and send it.
These procedures are described in the following sections.
If you are using a different browser or player, or if you are using a Macintosh
or Linux system, you must first record the message in your audio player and
then attach it to the CallPilot message before sending it. For information
about adding an attachment to a message, see "Adding attachments to
messages" (page 27).
Note: You cannot add additional audio to audio files that exist in your
inbox.
To record and send a new voice message using the embedded CallPilot
Player
Step
Action
1
In your message list, click Compose. A new message page appears.
2
Address the message. For more information, see "Addressing
messages" (page 29).
3
In the Subject box, type a subject for the message.
4
Choose how you want to record the voice message: in the
embedded Windows CallPilot Player, select either the telephone or
the computer icon.
Nortel CallPilot
Desktop Messaging User Guide for My CallPilot
NN44200-109 01.01 Standard
5.0 26 February 2007
Copyright © 2007, Nortel Networks
.
Nortel Networks Confidential
Composing voice messages 21
Note: If you select the telephone to record the message, ensure
you have your telephone number configured in My CallPilot. To
check, click the My CallPilot Features tab, and then click the
My CallPilot Preferences item. In the Environment Settings,
ensure your telephone number is entered in the Number to call
for telset playback (ie. your phone) box.
5
To begin recording your message, click the record button.
6
Do one of the following:
7
8
•
If you are recording from a computer, speak into the microphone.
•
If you are recording from a telephone, answer when the telephone
rings. At the tone, record your message into the handset.
When you finish speaking:
•
To end the recording, click the stop button.
•
To review the recording, click the play button.
•
To add to the recording, click the record button, speak again,
and then click the stop button.
If you are using the telephone, when finished, click the disconnect
icon or hang up the telephone.
Nortel CallPilot
Desktop Messaging User Guide for My CallPilot
NN44200-109 01.01 Standard
5.0 26 February 2007
Copyright © 2007, Nortel Networks
.
Nortel Networks Confidential
22 Using My CallPilot
9
When you are satisfied with the message, click Save Audio. This
automatically adds the recording as an attachment to the message.
10
Click Send.
—End—
To record and save a message using the stand-alone CallPilot Player
To save a copy of your voice recording as a stand-alone file you must use
the stand-alone CallPilot Player, not the embedded CallPilot Player.
Step
Action
1
Open the stand-alone CallPilot Player (from the Windows Start
menu, choose Programs > Nortel > CallPilot Desktop Messaging
> Audio Player).
2
Choose how you want to record the voice message: in CallPilot
Player, select either the telephone or the computer icon.
Note: If you select the telephone to record the message, ensure
you have your telephone number configured in My CallPilot. To
check, click the My CallPilot Features tab, and then click the
My CallPilot Preferences item. In the Environment Settings,
ensure your telephone number is entered in the Number to call
for telset playback (ie. your phone) box.
3
To begin recording your message, click the record button.
4
Do one of the following:
5
•
If you are recording from a computer, speak into the microphone.
•
If you are recording from a telephone, answer when the telephone
rings. At the tone, record your message into the handset.
When you finish speaking:
Nortel CallPilot
Desktop Messaging User Guide for My CallPilot
NN44200-109 01.01 Standard
5.0 26 February 2007
Copyright © 2007, Nortel Networks
.
Nortel Networks Confidential
Composing fax and text messages 23
•
To end the recording, click the stop button.
•
To review the recording, click the play button.
•
To add to the recording, click the record button, speak again,
and then click the stop button.
6
If you are using the telephone, when finished, click the disconnect
icon or hang up the telephone.
7
On the CallPilot Player File menu, click Save or Save As.
8
In the File name box, type a name for the file, select a folder to keep
the file in, and then click Save. Save voice files as VBK files.
Note: My CallPilot automatically converts VBK files to WAV files
when sending to non-CallPilot users.
9
Add the saved recording as an attachment to one or more CallPilot
messages. For instructions, see "Adding attachments to messages"
(page 27).
—End—
Composing fax and text messages
To create a fax file, your CallPilot mailbox must have fax capability, and your
computer must have desktop messaging installed. After you save the fax
file, you can add the fax to a message as an attachment. Your CallPilot
recipients must have fax capability to view your fax on their computer. If your
recipients access their messages from their telephone, they can view the
fax only by printing it. You can also send your fax to a fax machine.
For Macintosh and Linux systems, Nortel does not supply software for
creating faxes. You must supply your own software to do this, and then
attach the fax message to a CallPilot message before sending it. The fax
file must be TIF-F format. For information about adding an attachment to a
message, see "Adding attachments to messages" (page 27).
To create and save a fax file
Step
Action
1
Start the application you want to use to compose the fax, for
example, Microsoft Word. The document you open or create must be
8.5 in. (21.5 cm) wide or less. Multiple page documents are allowed.
2
When the document is ready, from the File menu, click Print or
whichever option opens the dialog box to allow you to select a printer.
Nortel CallPilot
Desktop Messaging User Guide for My CallPilot
NN44200-109 01.01 Standard
5.0 26 February 2007
Copyright © 2007, Nortel Networks
.
Nortel Networks Confidential
24 Using My CallPilot
3
From the list of printers, select Nortel Fax.
4
Click OK or Print, or whichever option sends the file to the printer
you selected. The Compose Fax dialog box appears.
5
Click Save As.
6
Type a name for the file.
Note: If you chose to include a subject line, the information in
that text box is displayed in the e-mail portion of the fax. The
subject line is not displayed on a hard copy of the fax.
7
Browse to select a folder to save the file in.
8
Ensure the selected file format is TIFF-F (*.tif).
9
To save the file to the folder you specified, click OK.
10
Click Exit.
—End—
To compose and send a fax or text message
Step
Action
1
In your message list, click Compose. A new message page appears.
2
Address the message. For more information, see "Addressing
messages" (page 29).
3
Add a fax file as an attachment as follows:
Nortel CallPilot
Desktop Messaging User Guide for My CallPilot
NN44200-109 01.01 Standard
5.0 26 February 2007
Copyright © 2007, Nortel Networks
.
Nortel Networks Confidential
Calling the sender of a message
25
a. Click Attach Files.
b. In the File to attach box, click Browse, navigate to and select the
file that you want to attach, and then click Open. Alternatively,
you can type the path and file name in the File to attach box.
c. To attach additional files, repeat the previous step.
d. Click OK. An icon representing each attached file appears
beside the Attach Files button on the message.
4
If you want to include a message with the fax attachments, type
the message.
5
Click Send.
—End—
Calling the sender of a message
You can respond to a message with a telephone call instead of a recorded
message. My CallPilot includes a Call Sender button that appears in both
the message list and when you are in an open message. Clicking the
Call Sender button calls the sender of the currently selected message,
regardless of whether or not the message contains an audio attachment.
To use the Call Sender feature, ensure you have your telephone number
configured in My CallPilot. To check, click the My CallPilot Features tab,
and then click the My CallPilot Preferences item. In the Environment
Settings, ensure your telephone number is entered in the Number to call
for telset playback (ie. your phone) box.
Nortel CallPilot
Desktop Messaging User Guide for My CallPilot
NN44200-109 01.01 Standard
5.0 26 February 2007
Copyright © 2007, Nortel Networks
.
Nortel Networks Confidential
26 Using My CallPilot
If the Call Sender button does not appear, it could be due to the following:
•
You are not viewing a message on the CallPilot server (for example, you
are viewing a message on the e-mail tab that is linked to your e-mail
inbox).
•
The system administrator has not enabled this feature for your mailbox
class.
To call the sender of a message
Step
Action
1
Open the message, or from the message list select the check box to
the left of the message.
2
Click Call Sender.
One of the following dialog boxes appears, depending on whether
or not you are using Internet Explorer and have the CallPilot Player
installed.
3
Click either Call or Call Sender.
4
When your telephone rings, answer it and the sender’s number is
automatically called.
—End—
Forwarding and replying to messages
You can forward a message, and compose an introduction to send with it.
You can also compose a reply to the sender of a message, or to the sender
and all recipients of a message.
Nortel CallPilot
Desktop Messaging User Guide for My CallPilot
NN44200-109 01.01 Standard
5.0 26 February 2007
Copyright © 2007, Nortel Networks
.
Nortel Networks Confidential
Adding attachments to messages 27
To forward or reply to a message
Step
Action
1
In an open message, click Reply, Reply All, or Forward.
2
On the new message page, compose a voice, fax, or text message.
3
Address forwarded messages the same way as a new message.
Replies are addressed automatically.
4
Add attachments, set options, and change the subject line if required.
5
Click Send.
—End—
Adding attachments to messages
Before sending a message, you can attach one or more voice, fax, or
text files to it. Voice files can be either VBK or WAV format. My CallPilot
automatically converts VBK files to WAV files when sending to systems
that do not support VBK. Fax files must be TIF format. Text files must be
TXT format.
To attach a file to a message
Step
Action
1
On a new message page, click Attach Files.
2
In the File to attach box, click Browse, navigate to and select the
file that you want to attach, and then click Open. Alternatively, you
can type the path and file name in the File to attach box.
Nortel CallPilot
Desktop Messaging User Guide for My CallPilot
NN44200-109 01.01 Standard
5.0 26 February 2007
Copyright © 2007, Nortel Networks
.
Nortel Networks Confidential
28 Using My CallPilot
3
To attach additional files, repeat the previous step.
4
Click OK. An icon representing each attached file appears beside
the Attach Files button on the new message.
5
Continue to compose, address, and send the message as usual.
—End—
Setting message options
Before sending a message, you can set options for handling and delivery.
To set message options
Step
Action
1
On a new message page, select Priority, Sensitivity, and read
receipt options, as required.
•
For Priority, select Low, High, or leave the setting as Normal.
•
For Sensitivity, select Private, or leave the setting as Public.
You cannot forward messages that are marked Private to other
CallPilot addresses. However, be aware that when you send
a message marked Private, your recipient can still forward
the message to someone else, if the recipient does not have
Nortel CallPilot
Desktop Messaging User Guide for My CallPilot
NN44200-109 01.01 Standard
5.0 26 February 2007
Copyright © 2007, Nortel Networks
.
Nortel Networks Confidential
Addressing messages 29
a CallPilot address. Also, recipients in non-CallPilot systems
are not informed of Private settings. In your message, tell the
recipient that the message is private.
•
2
For Notify me when message is read, select the check box
to request acknowledgment that your recipient opened the
message.
Continue to compose, address, and send the message as usual.
—End—
Addressing messages
You can address a CallPilot message in two ways:
•
You can select a name from the CallPilot Address Book that is
maintained by your organization on the server. The CallPilot Address
Book contains the addresses of the CallPilot users and shared
distribution lists that you can use.
•
You can manually enter addresses using the Enter a Special Address
dialog box.
Accessing CallPilot addresses from other networked CallPilot servers
If your site has more than one CallPilot server, your CallPilot administrator
can provide you access to additional CallPilot Address Books on networked
servers. In this case, you can choose which CallPilot Address Book you
want to search when addressing a message (see the Available Address
Books list in the following illustration).
Alternatively, your CallPilot administrator can create a central directory
of addresses drawn from multiple CallPilot servers. In this case, you do
not have to choose the address book to search, but you automatically
have access to an expanded list of CallPilot addresses to search when
addressing a message.
If you do not need access to CallPilot addresses on other networked
servers, you can configure your CallPilot Address Book to include only
addresses from your local server using a check box on the My CallPilot
Preferences page. For more information, see "To change environment
settings" (page 54).
Nortel CallPilot
Desktop Messaging User Guide for My CallPilot
NN44200-109 01.01 Standard
5.0 26 February 2007
Copyright © 2007, Nortel Networks
.
Nortel Networks Confidential
30 Using My CallPilot
To address a message from the CallPilot Address Book
Step
Action
1
In a new CallPilot message, click To (or Address Book).
The Select recipients from the Address Book dialog box appears.
2
If the Available Address Books list appears, you must choose
which CallPilot server’s Address Book or directory you want
to search to address the message. The system administrator
determines what you see in this list.
3
In the Enter Last Name (or *) box, do one of the following:
•
To look up a single address, type the recipient’s last name (or
just the first letter or first few letters), and then click Find.
•
To get a list of all entries in the Address Book, type an asterisk
(*), and then click Find.
4
In the list of names, select the name of the recipient or distribution
list, and then click To.
5
You can look up additional names as required. To add more names,
select the name, and then click either To, Cc, or Bcc. (Bcc stands
for blind carbon copy; the recipient gets a copy of the message, but
the recipient’s name is not visible to other recipients of the message.
Nortel CallPilot
Desktop Messaging User Guide for My CallPilot
NN44200-109 01.01 Standard
5.0 26 February 2007
Copyright © 2007, Nortel Networks
.
Nortel Networks Confidential
Addressing messages 31
6
To return to the new CallPilot message, click OK.
—End—
To address a message in Special Addresses
Step
Action
1
In a new CallPilot message, click Special Addresses.
The Enter a Special Address dialog box appears.
2
Select an address format from the drop-down list (for example:
Network mailbox or Personal Distribution List). Note that
Personal Distribution List entries appear alphabetically sorted when
doing an Address Book search.
3
Type the number and any other information required. Refer to the
online Help for the correct addressing formats.
4
Click either To, Cc, or Bcc.
—End—
Nortel CallPilot
Desktop Messaging User Guide for My CallPilot
NN44200-109 01.01 Standard
5.0 26 February 2007
Copyright © 2007, Nortel Networks
.
Nortel Networks Confidential
32 Using My CallPilot
Using the Message Waiting Indicator
My CallPilot includes a Message Waiting Indicator (MWI) that appears as
a telephone handset icon in the lower-right corner of your screen, in the
Windows taskbar or system tray. The Message Waiting Indicator notifies you
if you have new messages and provides you with quick access to your inbox.
A red telephone handset icon indicates that you have new messages:
The appearance of the Message Waiting Indicator icon changes to give you
additional information about your connection to the server as follows:
To download and install the Message Waiting Indicator
If you have desktop messaging installed on your workstation, or if you have
already downloaded the stand-alone CallPilot Player, you should already
see the Message Waiting Indicator in your taskbar. If you do not, you can
download and install it as follows:
Step
Action
1
In My CallPilot, click the CallPilot Features tab.
2
Click the Downloads item.
3
Click CallPilot Player & MWI icon, and then follow the instructions
to save and install the player and Message Waiting Indicator.
—End—
To configure the Message Waiting Indicator
Use the CallPilot MWI Configuration dialog box to
•
show or hide the Message Waiting Indicator
•
enable and disable its pop-up balloon text
•
control how long the balloon text stays on the screen
Nortel CallPilot
Desktop Messaging User Guide for My CallPilot
NN44200-109 01.01 Standard
5.0 26 February 2007
Copyright © 2007, Nortel Networks
.
Nortel Networks Confidential
Using the Message Waiting Indicator 33
Step
Action
1
In the Windows taskbar, right-click the Message Waiting Indicator
icon.
2
Click CallPilot MWI Configuration.
3
If you want to be able to open My CallPilot by double-clicking the
icon, ensure that the My CallPilot URL box contains the correct
URL.
Ask your CallPilot administrator for the correct URL. Typically, the
URL appears in one of these formats:
http://prefix.hostname.com/mycallpilot/
http://IP address/mycallpilot/
4
To show or hide the icon, select or clear the Show MWI Icon on
taskbar check box.
Note: If you hide the icon and then decide you want to show it
again, from the Windows Start menu, choose Programs > Nortel
> CallPilot MWI Icon. It reappears in the taskbar.
5
To enable or disable the balloon text, select or clear the Display
pop-up balloon for x seconds check box. You can also change
the number of seconds.
6
To save your changes, click OK.
—End—
To use the Message Waiting Indicator
Here are some helpful tips for using the Message Waiting Indicator.
•
To open your latest CallPilot message, double-click the Message Waiting
Indicator icon.
Note: If this does not work, ensure that the My CallPilot URL box
contains the correct URL in the CallPilot MWI Configuration dialog
box. To open it, right-click the Message Waiting Indicator icon, and
then click CallPilot MWI Configuration.
•
To display your mailbox number, the address of the server, and the
number of messages waiting in your inbox, move your pointer over the
icon.
•
Right-click the icon to display a shortcut menu with options to:
Nortel CallPilot
Desktop Messaging User Guide for My CallPilot
NN44200-109 01.01 Standard
5.0 26 February 2007
Copyright © 2007, Nortel Networks
.
Nortel Networks Confidential
34 Using My CallPilot
— open My CallPilot (if a URL for My CallPilot is defined in the
configuration settings for the Message Waiting Indicator)
— configure the Message Waiting Indicator
— log on to or off from your CallPilot mailbox
— exit from the Message Waiting Indicator so it no longer appears
CallPilot Features tab
Click the CallPilot Features tab to change the settings for your CallPilot
features and telephone options, and to set preferences for Web-based
access.
The main CallPilot Features page displays only the features that are
available for you to use. Click any item to open its settings page.
Working with greetings
Using My CallPilot, you can record and manage your voice greetings and
personal verification.
If you use Internet Explorer on a Windows system, you can use the CallPilot
Player to record and play greetings or personal verification from My CallPilot.
Alternatively, you can import WAV files recorded on other audio devices for
greetings and personal verification messages.
Nortel CallPilot
Desktop Messaging User Guide for My CallPilot
NN44200-109 01.01 Standard
5.0 26 February 2007
Copyright © 2007, Nortel Networks
.
Nortel Networks Confidential
Working with greetings
35
You can record external, internal, and temporary greetings. Callers from
outside your organization hear your external greeting, and callers within
your organization hear your internal greeting. If you do not record an
internal greeting, all callers hear your external greeting. If you record a
temporary greeting, it is played to all callers in place of your external and
internal greetings until it expires or you delete it.
To access greetings
•
Click the CallPilot Features tab, and then click the Greetings item.
The Greetings page appears.
To record or change a greeting using your telephone
Ensure you have your telephone number configured in My CallPilot.
•
To check, click the My CallPilot Features tab, and then click the My
CallPilot Preferences item. In the Environment Settings, ensure your
telephone number is entered in the Number to call for telset playback
(ie. your phone) box.
Note: If you want to record greetings using the stand-alone CallPilot
Player or another audio device instead of the telephone, see "Importing
a greeting recorded with a standalone audio device" (page 36)
Nortel CallPilot
Desktop Messaging User Guide for My CallPilot
NN44200-109 01.01 Standard
5.0 26 February 2007
Copyright © 2007, Nortel Networks
.
Nortel Networks Confidential
36 Using My CallPilot
Step
Action
1
Click the CallPilot Features tab, and then click the Greetings item.
2
To start recording, click the Edit icon beside the greeting type.
3
When your telephone rings, answer it. At the tone, record your
message into the handset.
4
When you finish speaking:
•
To end the recording, click the stop button.
•
To review the recording, click the play button.
5
When you are satisfied with the greeting, click Save Greeting.
6
When you are finished, click the disconnect icon or hang up the
telephone.
7
If you recorded a temporary greeting and you want to revert back to
your regular greeting by a certain date and time, under Expiry date,
click the date option, and then select a date and time.
—End—
Importing a greeting recorded with a stand-alone audio device
You can record and then import a new or changed greeting using the
stand-alone CallPilot Player or any other audio device that supports WAV
format.
Step
Action
1
Open your audio device and record a voice greeting or personal
verification.
To open the stand-alone CallPilot Player, from the Windows Start
menu, choose Programs > Nortel > CallPilot Desktop Messaging
> Audio Player.
2
Save the recording. For the CallPilot Player, save in VBK format. For
other audio devices, save in WAV format.
3
Click the CallPilot Features tab, and then click the Greetings item.
4
Click the Import icon beside the greeting type.
5
Click Browse, select the audio file, and then click Open.
6
Click Save.
Nortel CallPilot
Desktop Messaging User Guide for My CallPilot
NN44200-109 01.01 Standard
5.0 26 February 2007
Copyright © 2007, Nortel Networks
.
Nortel Networks Confidential
Setting up message notification
37
7
If you recorded a temporary greeting and you want to revert back to
your regular greeting by a certain date and time, under Expiry date,
click the date option, and then select a date and time.
8
Click OK.
—End—
To delete greetings
Step
Action
1
Click the CallPilot Features tab, and then click the Greetings item.
2
Click the Delete icon beside the greeting.
3
Click OK.
—End—
Setting up message notification
CallPilot can notify you of new messages when you are away from the
office. Your administrator defines whether these devices and services are
available to you:
•
Remote Text Notification to a wireless e-mail device. See Appendix
"Remote Text Notification for Microsoft Outlook and BlackBerry Devices"
(page 57).
•
Remote Notification to a telephone or pager. This type of remote
notification can be set up and turned on or off from your telephone
as well. You can set up two time periods for notification, and choose
whether you want to be notified of all messages or urgent messages
only.
You can have the two types of notification turned on simultaneously.
To access message notification options
•
Click the CallPilot Features tab, and then click the Message
Notification item. The Message Notification page appears.
Nortel CallPilot
Desktop Messaging User Guide for My CallPilot
NN44200-109 01.01 Standard
5.0 26 February 2007
Copyright © 2007, Nortel Networks
.
Nortel Networks Confidential
38 Using My CallPilot
Nortel CallPilot
Desktop Messaging User Guide for My CallPilot
NN44200-109 01.01 Standard
5.0 26 February 2007
Copyright © 2007, Nortel Networks
.
Nortel Networks Confidential
Setting up message forwarding 39
Setting up message forwarding
You can forward your CallPilot messages to a CallPilot mailbox or to an
external e-mail address. To do this you must create a message forwarding
rule, which is a set of criteria defining which messages to forward and
where to forward them.
When you enable a message forwarding rule, you can then access all
incoming messages that meet the criteria from another location, such as an
Internet mailbox or a Personal Digital Assistant (PDA). You can enable and
disable message forwarding as required. Voice messages can be forwarded
in the format in which they are received or converted to WAV.
In My CallPilot, you can set up your own message forwarding rule using the
following procedures, or you can have the CallPilot administrator set it up for
you. For security reasons, you must enable it yourself.
Nortel CallPilot
Desktop Messaging User Guide for My CallPilot
NN44200-109 01.01 Standard
5.0 26 February 2007
Copyright © 2007, Nortel Networks
.
Nortel Networks Confidential
40 Using My CallPilot
To set up message forwarding
Step
Action
1
Click the CallPilot Features tab, and then click the Message
Forwarding Rule item.
2
Click Configure Rule.
The Configure New Message Forwarding Rule page appears.
3
From the Messages to forward list, select the type of messages
you want to forward.
4
From the Forward to options, select either E-mail address or
CallPilot address. Note that each rule can include only one
address.
5
Do one of the following:
•
If you chose E-mail address, type the address in the adjacent
box.
Example: [email protected]
Note: You can also type an e-mail distribution list.
•
If you chose CallPilot address, you can either:
— Click the CallPilot link to open the Select Recipient dialog
box, and then select or type a CallPilot address or an Open
VPIM address. Then click OK.
Nortel CallPilot
Desktop Messaging User Guide for My CallPilot
NN44200-109 01.01 Standard
5.0 26 February 2007
Copyright © 2007, Nortel Networks
.
Nortel Networks Confidential
Setting up message forwarding 41
— Manually type a CallPilot mailbox or Open VPIM address.
Note that CallPilot distribution lists, telephone numbers, and
fax addresses are not accepted. Use the following address
formats:
Local mailbox:
<local VPIM prefix><mailbox>@<local FQDN>
Remote mailbox:
<remote location VPIM prefix><mailbox>@<local FQDN>
Open VPIM:
VPIM=<VPIM shortcut><mailbox>/<remote FQDN>@<local
FQDN>
6
If you want the original CallPilot message to appear as read (for
example, not bold) in your mailbox under certain circumstances (see
the next step), select the Mark original message as read check box.
7
If you checked the Mark original message as read check box,
select one of the following options:
•
Forwarded by this service: As soon as a message is
automatically forwarded, it appears as read in your CallPilot
inbox.
•
Opened by the recipient: The message appears as read
in your CallPilot inbox only after it is opened in the location
to which it is forwarded. This option works only if the e-mail
server to which the message is forwarded supports read receipt
capability. This option is not supported if you forward messages
to a CallPilot address.
For this option, you can also select Then automatically delete
original message. This way, only the forwarded copy of the
message is kept and you have only one copy to keep track
of. Note that this option is not available if Forwarded by this
service is selected, because there is no guarantee the message
will ever be received by the remote e-mail server.
8
If you want to convert outgoing voice messages to WAV format,
select the WAV option. You might want to do this if the CallPilot
Player is not available to play VBK messages at the forwarding
address.
9
To create this rule, click Save. Note that the rule is automatically
enabled. To disable it until you are ready to use it, clear the Enable
check box.
Nortel CallPilot
Desktop Messaging User Guide for My CallPilot
NN44200-109 01.01 Standard
5.0 26 February 2007
Copyright © 2007, Nortel Networks
.
Nortel Networks Confidential
42 Using My CallPilot
10
Click OK.
—End—
To enable or disable message forwarding
Step
Action
1
Click the CallPilot Features tab, and then click the Message
Forwarding Rule item. The Message Forwarding Rule page
appears.
2
In the Enable column, select or clear the check box.
3
Click OK.
—End—
Managing personal distribution lists
A distribution list saves you time when you send messages to the same
group of addresses. You can create up to 99 personal distribution lists, and
enter a number and name to identify each list. Each personal distribution
list can contain up to 200 entries.
A personal distribution list can contain any addresses to which you can
send a message, except other personal distribution lists. An entry can be
a mailbox number, shared distribution list number, network mailbox, open
network mailbox, or telephone number.
Nortel CallPilot
Desktop Messaging User Guide for My CallPilot
NN44200-109 01.01 Standard
5.0 26 February 2007
Copyright © 2007, Nortel Networks
.
Nortel Networks Confidential
Changing your CallPilot password 43
You can create personal distribution lists in My CallPilot or on your
telephone. These lists are stored for you in the CallPilot Address Book on
the CallPilot server. You can access these lists from My CallPilot, Desktop
Messaging, and your telephone.
To edit, delete, or create personal distribution lists
To edit or delete an existing list, select the list and click Edit or Delete. Make
the changes, then click Save.
To create a personal distribution list, click Add New List. Type a number
and name for the list. Add entries by selecting an address format from the
drop-down list, then enter the information required. Refer to the online Help
for the correct addressing formats, if required. Click Save.
Changing your CallPilot password
Your CallPilot password is the same password that you use to log on to
CallPilot from the telephone. CallPilot requires that you change your
password on a regular schedule set by your administrator.
CallPilot prevents you from using some passwords if they are too short or
too simple, or if you have used the same one recently. Keep your mailbox
secure by choosing passwords that are not easily discovered.
Nortel CallPilot
Desktop Messaging User Guide for My CallPilot
NN44200-109 01.01 Standard
5.0 26 February 2007
Copyright © 2007, Nortel Networks
.
Nortel Networks Confidential
44 Using My CallPilot
To change your password, type your old password, type your new password
twice, then click Save.
Changing your telephone options
You can modify any of the telephone options described in the following
procedures.
To access your telephone options
•
Click the CallPilot Features tab, and then click the Telephone Options
item.
To assign a custom operator number for callers
You can offer your callers the option of leaving a message or speaking to
one of your assistants or colleagues. In your greeting, tell callers to press
zero if they want to speak to this person in your absence. The custom
operator number is the number your callers reach when they press zero.
Step
Action
1
In the Custom Operator Number box, type the number .
2
Click Save.
—End—
To set times and options for blocking messages from callers
You can temporarily prevent your callers from leaving messages in your
mailbox. You can choose to transfer callers to your custom operator or
disconnect them. As a courtesy to your callers while message blocking is
turned on, record a temporary greeting that provides details of your absence
and tells callers what to do. The message blocking option also prevents My
CallPilot and Desktop Messaging users from sending messages to you.
Nortel CallPilot
Desktop Messaging User Guide for My CallPilot
NN44200-109 01.01 Standard
5.0 26 February 2007
Copyright © 2007, Nortel Networks
.
Nortel Networks Confidential
Changing your telephone options
45
Step
Action
1
In the Block callers from leaving messages list, specify when to
block message reception:
2
3
•
Never: Allow callers to leave messages.
•
Always: Do not allow callers to leave messages.
•
Only when temporary greeting recorded: Do not allow callers
to leave messages when the temporary greeting is recorded.
For Blocked callers will be played the greeting, then, choose one
of the following options:
•
Transferred to custom operator: When message reception is
blocked, play the mailbox greeting and then transfer the caller to
the number specified in the Customer Operator Number box.
•
Disconnected: When message reception is blocked, play the
mailbox greeting and then disconnect the call.
Click Save.
—End—
To turn Auto Login on or off
When Auto Login is turned on, you do not have to enter your mailbox and
password when you log on from a defined number. Your administrator
defines secure numbers for Auto Login, such as your office or home
telephone. When Auto Login is turned on, you access your mailbox by
dialing the CallPilot access number or pressing the message key at one of
your defined Auto Login numbers.
Step
Action
1
To enable Auto Login, select the Turn on Auto Login for allowed
numbers check box.
2
Click Save.
3
Use your telephone to complete activation of Auto Logon. Log on
to your mailbox from the telephone, and then enable Auto Logon by
pressing 804.
—End—
Nortel CallPilot
Desktop Messaging User Guide for My CallPilot
NN44200-109 01.01 Standard
5.0 26 February 2007
Copyright © 2007, Nortel Networks
.
Nortel Networks Confidential
46 Using My CallPilot
To hide your name and number in CallPilot Address Books
You can keep your personal information from being listed in any CallPilot
Address Book or the address book of any desktop client, and ensure that
your mailbox is not name dialable or name addressable from the telephone.
Even with this setting turned on, your name and address
•
still appears in any messages you send
•
still appears in any messages you receive and is therefore viewable by
others on the distribution list for that message
Step
Action
1
Select the Hide my name and number in all CallPilot address
books, including Name Dial check box.
2
Click Save.
—End—
To select which directory numbers are associated to your Message
Waiting Indicator
Message Waiting Indicator Directory Numbers (MWI DN) are assigned by
the administrator. You cannot change the numbers; however, you can
see these MWI DNs in your telephone options and identify which ones to
associate to your Message Waiting Indicator.
Step
Action
1
In the Message Waiting Indicator at telephone section, select
the check box beside each DN that you want associated with your
Message Waiting Indicator.
2
Click Save.
—End—
Setting up telephone access to e-mail
If you have a linked e-mail account set up, you can configure it for telephone
access. You can check for new e-mail messages while logged in to CallPilot
from your telephone. You can have the text content of any new e-mail
messages read to you over the telephone. If you have not yet set up access
to your e-mail accounts from CallPilot, see "Setting up links to your e-mail
accounts" (page 48).
Nortel CallPilot
Desktop Messaging User Guide for My CallPilot
NN44200-109 01.01 Standard
5.0 26 February 2007
Copyright © 2007, Nortel Networks
.
Nortel Networks Confidential
Changing fax printing options
47
To set up an e-mail account for telephone access
Step
Action
1
Click the CallPilot Features tab, and then click the E-mail By
Phone item. The E-mail By Phone page appears, listing any mailbox
links you currently have set up.
Note: If you need to set up or edit a mailbox link first, click
Configure New Mailbox Link. See To set up an e-mail link.
2
From the Use voice of list, select a female or male voice to read
your e-mail.
3
In the Enable column, select one e-mail account for access by
telephone.
4
Click OK.
You can now access your e-mail by logging on to your CallPilot
messages using the telephone and then switching to your e-mail
message list by pressing 8-9.
—End—
Changing fax printing options
If your CallPilot mailbox has fax messaging capability, you can receive a fax
message in your mailbox and print the fax at a selected fax number. Set
options for default fax number, Auto printing, and print cover page on the
Fax Printing page.
Nortel CallPilot
Desktop Messaging User Guide for My CallPilot
NN44200-109 01.01 Standard
5.0 26 February 2007
Copyright © 2007, Nortel Networks
.
Nortel Networks Confidential
48 Using My CallPilot
To access fax printing options
•
Click the CallPilot Features tab, and then click the Fax Printing item.
To change the default printer
You must set a default fax number. If you are not using Auto printing, a
default fax number is the simplest way to print. The default number can
be any fax number that CallPilot can dial, including any normally required
prefixes.
To turn Auto printing on or off
When Auto printing is turned on, any faxes that arrive at your mailbox are
automatically printed at a specified default fax number. A message that
has been auto printed remains in your mailbox so that you can reprint
the message or forward the message. Your printed faxes can be deleted
automatically from your mailbox on a schedule set by your administrator.
Auto printing is the most convenient way to handle fax messages while you
are in one location. If you are away from your office, you can turn Auto
printing off and print your faxes at another fax number.
To turn fax separator page printing on or off
You can select whether to print a fax separator page when you print a fax
message. A separator page identifies you and gives details of the print job,
such as the number of pages. Separator pages are useful if you receive
faxes without cover pages. If the sender of the fax includes a header page
with the fax, the header page also prints.
Setting up links to your e-mail accounts
You can set up links in My CallPilot so that you can check your e-mail for
new messages. You can also forward and reply to messages, and send
new e-mails.
You can define up to five e-mail accounts. One of these accounts can be
set up for access from your telephone. See "Setting up telephone access
to e-mail" (page 46).
Nortel CallPilot
Desktop Messaging User Guide for My CallPilot
NN44200-109 01.01 Standard
5.0 26 February 2007
Copyright © 2007, Nortel Networks
.
Nortel Networks Confidential
Setting up links to your e-mail accounts 49
To set up a link to your e-mail account
My CallPilot supports various settings when configuring an external e-mail
server. Some of these settings are configured in CallPilot Manager, while
others are specified in My CallPilot. This way, My CallPilot can work
correctly in situations where your corporate IMAP, SMTP and LDAP servers
are on different hosts.
Consult your administrator if you are required to enter or change these
settings and are uncertain of the appropriate entries.
Note: In the following procedure, the check boxes for This server
requires a secure connection will appear automatically selected
and dimmed if the CallPilot administrator has specified that only SSL
connections can be used.
Step
Action
1
Click the CallPilot Features tab, and then click the Mailbox Links
item.
2
Click Configure New Mailbox Link. The Configure New Mailbox
Link page appears.
Nortel CallPilot
Desktop Messaging User Guide for My CallPilot
NN44200-109 01.01 Standard
5.0 26 February 2007
Copyright © 2007, Nortel Networks
.
Nortel Networks Confidential
50 Using My CallPilot
3
Select your e-mail server from the Mailbox server drop-down list.
Your CallPilot administrator creates this list.
4
Type a name for this account to display on the tab.
5
Type the name of the folder to access for your e-mail messages,
such as INBOX.
6
Type your e-mail address.
7
Type your mailbox user name (the user ID of your e-mail account).
8
Type the password for this e-mail account.
9
Retype the password for this e-mail account to verify it.
10
If the mail server for this e-mail account requires a secure
connection, click This server requires a secure connection.
11
In the Outgoing mail server (SMTP) settings, complete the
following steps if the SMTP server requires authentication:
a. Select the This server requires a user name and password
check box.
b. Type your mailbox user name (the User ID of your e-mail
account).
c. Type the password for this e-mail account.
d. Retype the password for this e-mail account to verify it.
12
In the Directory service (LDAP) section, complete the following
steps if the LDAP server requires authentication:
a. Select the This server requires a user name and password
check box.
b. Type your mailbox user name (the User ID of your e-mail
account).
c. Type the password for this e-mail account.
d. Type the password again to verify it.
13
Click Save.
14
On the Mailbox Links page, click OK. A new tab appears in My
CallPilot with a link to the e-mail account you just configured.
—End—
Nortel CallPilot
Desktop Messaging User Guide for My CallPilot
NN44200-109 01.01 Standard
5.0 26 February 2007
Copyright © 2007, Nortel Networks
.
Nortel Networks Confidential
Setting up links to your e-mail accounts 51
These settings allow My CallPilot to be configured easily to work in nearly
any corporate e-mail environment.
Note: To log on anonymously, clear This server requires a user name
and password, for both SMTP and IMAP. Note that some servers
require authentication and do not allow logging on anonymously.
Searching external e-mail address books (LDAP databases)
You might have access to an external address book if there is one defined
for your e-mail server and it is configured by your administrator in CallPilot
Manager. In the preceding procedure, completing the fields in the Directory
Service (LDAP) section allows you to search external LDAP databases
if the LDAP server requires authentication. This means you can search
the external address book when composing a new external e-mail server
message, just as you do when composing a CallPilot message. Note that
you do not have the ability to specify the port numbers; these are defined by
the administrator in CallPilot Manager.
Note: The administrator must enter the correct search base, host/IP
and port number for the external LDAP server in CallPilot Manager when
the external e-mail server is defined.
The following shows an example of an external e-mail server address book
in My CallPilot:
Nortel CallPilot
Desktop Messaging User Guide for My CallPilot
NN44200-109 01.01 Standard
5.0 26 February 2007
Copyright © 2007, Nortel Networks
.
Nortel Networks Confidential
52 Using My CallPilot
When you address a message, the address book that appears depends
on the inbox you are working from. For example, when you compose a
new CallPilot message, the address book displays addresses only from
the CallPilot server. When you compose a new Exchange message, the
address book displays addresses only from the Exchange server, and so on.
Distribution lists may appear in the results.
Using your linked e-mail accounts
When you have completed configuring your linked e-mail accounts, you can
check your e-mail messages. You can also forward and reply to messages,
and send new e-mails.
You can also set up access to a second CallPilot mailbox, which can be on
another server. For setup details, refer to the online Help.
For each linked e-mail account, a tab appears in your My CallPilot session.
Your linked e-mail accounts look similar to your message list on the CallPilot
Messages tab, and they work in a similar way. Here is an example:
To open a message
To open an e-mail message in My CallPilot, click the icon in the Attachments
column beside the message, or click any underlined part of the message
line.
To delete a message
To mark an e-mail message for deletion, select the message and click
Delete. To ensure that deleted messages are permanently deleted, open
the My CallPilot Preferences page, and in Environment Settings, check the
Remove Deletable items on logout check box.
To compose and send a new message
To compose a new e-mail message, click Compose, type the message, and
send the message the same way as a CallPilot message. The Address
Book is not available.
Nortel CallPilot
Desktop Messaging User Guide for My CallPilot
NN44200-109 01.01 Standard
5.0 26 February 2007
Copyright © 2007, Nortel Networks
.
Nortel Networks Confidential
Setting messaging preferences 53
To forward and reply to messages
You can forward and reply to e-mails in the same way as CallPilot messages.
You might have access to an external address book if there is one defined
for your e-mail server and it is configured by your administrator in CallPilot
Manager.
Setting messaging preferences
You can set preferences for your message list displays and behavior, options
for message editing, and your default audio format for voice messaging.
To access messaging preferences
•
Click the CallPilot Features tab, and then click the My CallPilot
Preferences item.
To change message list columns
You can change the columns in your message list. The Attachments
option must be in the Displayed Columns list to see the embedded player
(Windows only) in your message list.
To add a signature
Type or paste your signature and other information, and then select the
check box if you want this signature added automatically to outgoing text
messages.
Nortel CallPilot
Desktop Messaging User Guide for My CallPilot
NN44200-109 01.01 Standard
5.0 26 February 2007
Copyright © 2007, Nortel Networks
.
Nortel Networks Confidential
54 Using My CallPilot
To change environment settings
Change any of these My CallPilot settings to your preferences.
Note: The Remove Deletable items on logout check box applies to
both CallPilot and regular e-mail messages, as well as messages you
access when using E-mail-by-Phone.
Choosing a home page for My CallPilot
Choose the page that you want to display automatically when you log on
to My CallPilot.
Useful Information tab
Click the Useful Information tab to:
•
View status and details about your mailbox.
Nortel CallPilot
Desktop Messaging User Guide for My CallPilot
NN44200-109 01.01 Standard
5.0 26 February 2007
Copyright © 2007, Nortel Networks
.
Nortel Networks Confidential
Transcribing voice forms 55
•
View online user guides.
•
Print online user guide files on your laser printer.
Transcribing voice forms
You can use My CallPilot to transcribe voice forms, if your system
administrator has granted you this capability. If so, your My CallPilot session
includes a tab called Voice Forms Transcription.
A voice form is an electronic equivalent of a paper form or questionnaire.
Voice forms can be used for services such as credit card applications,
registration forms, and customer complaints. Using My CallPilot, you can
retrieve and play back the responses left by callers to a voice form.
For detailed procedures for using My CallPilot to transcribe voice forms, see
Voice Forms Transcriber User Guide (NN44200-110), or refer to the My
CallPilot online Help.
Nortel CallPilot
Desktop Messaging User Guide for My CallPilot
NN44200-109 01.01 Standard
5.0 26 February 2007
Copyright © 2007, Nortel Networks
.
Nortel Networks Confidential
56 Using My CallPilot
Protecting the security of your mailbox
Because My CallPilot is a Web-based product, it is important to take
precautions to protect the security of your mailbox.
•
If your administrator has enabled SSL encryption, you can use the
Secure Login feature for greater security. See "To log in using secure
login" (page 15).
•
When you finish using My CallPilot, make sure that you log out. If you
go to a Web site outside of My CallPilot without logging out, you remain
logged in until your My CallPilot session times out. This can make your
CallPilot information vulnerable to hackers. If you want to visit a Web
site without exiting My CallPilot, use a separate browser window to
view the other site.
•
You can set CallPilot to log out automatically after a short time, such as
5 or 10 minutes. See "Setting messaging preferences" (page 53).
•
If you use a public or shared workstation, avoid using the Remember
Password option when you log on to My CallPilot. If this option is
selected, others can access your CallPilot mailbox.
•
If you use a public or shared workstation, empty the browser cache
after a CallPilot session. For information about your browser cache, see
your browser online Help.
Nortel CallPilot
Desktop Messaging User Guide for My CallPilot
NN44200-109 01.01 Standard
5.0 26 February 2007
Copyright © 2007, Nortel Networks
.
Nortel Networks Confidential
57
Appendix A
Remote Text Notification for Microsoft
Outlook and BlackBerry Devices
Remote text notification can be configured to send a message to your
SMTP e-mail account when a new voice, fax, or text message arrives in
your CallPilot mailbox. You can set up notification to any e-mail server that
supports SMTP. These include most e-mail accounts, wireless handheld
organizers, mobile phones, or PDAs like the Research In Motion BlackBerry.
To set up My CallPilot for remote telephone or pager notification, see
"Setting up message notification" (page 37). If you want to forward the
actual messages to a PDA that supports e-mail, you or your administrator
can configure a message forwarding rule to do this. See "Setting up
message forwarding" (page 39).
This section describes how to set up remote text notification for Microsoft
Outlook and BlackBerry devices. Any device or portal with a service
provider that supports SMTP can receive e-mail notification messages. If
you plan to use another type of device to receive remote text notification,
ask your CallPilot administrator about any additional setup that is required
for your device.
To receive notification messages on a Research In Motion (RIM) BlackBerry
Internet Edition device, you must configure Microsoft Outlook and
BlackBerry Desktop Manager (version 2 or later) to forward CallPilot
notification messages to your BlackBerry device.
If you use a BlackBerry Enterprise Edition device, your administrator can set
up notification message forwarding for you on the e-mail server or configure
BlackBerry Desktop Manager to redirect CallPilot notification messages.
Note: If you set up My CallPilot to send CallPilot notification to your
Outlook Inbox, and set up BlackBerry Desktop Manager to send all
incoming messages to your BlackBerry device, your CallPilot notification
Nortel CallPilot
Desktop Messaging User Guide for My CallPilot
NN44200-109 01.01 Standard
5.0 26 February 2007
Copyright © 2007, Nortel Networks
.
Nortel Networks Confidential
58 Appendix A Remote Text Notification for Microsoft Outlook and BlackBerry Devices
messages appear in your list of e-mails on your BlackBerry device with
no additional configuration required.
Notification message format
An e-mail notification message can show the:
•
type of message
•
name of the person who left the message, if available
•
telephone number, if available
For example, John Smith calls from extension 1234 and leaves a voice
message for Andrew Jones. An e-mail message is sent to Andrew Jones
with the following text:
You have a voice message from John Smith [1234]
Microsoft Outlook forwards this e-mail message to Andrew’s BlackBerry
device. The message appears with the subject CallPilot Notification. When
Andrew receives the message, he can decide whether to retrieve the
message from CallPilot or to call John immediately, using a telephone.
Getting started with remote text notification
Requirements
•
You need a BlackBerry device. Ensure that e-mail service on your
BlackBerry device is working.
•
Microsoft Outlook must be installed. Currently, BlackBerry Desktop
Manager works only with Microsoft Outlook. Consult your BlackBerry
documentation for information about other e-mail clients.
•
BlackBerry Desktop Manager 2 or later must be installed and running on
your computer.
•
Remote text notification capability must be enabled and set up for your
mailbox by your CallPilot administrator.
•
Remote text notification must be configured and enabled in My CallPilot.
For more information, see "Setting up message notification" (page 37).
Nortel CallPilot
Desktop Messaging User Guide for My CallPilot
NN44200-109 01.01 Standard
5.0 26 February 2007
Copyright © 2007, Nortel Networks
.
Nortel Networks Confidential
Creating a notification holding folder 59
Configuration steps
Complete the following steps to effectively manage e-mail notification
messages.
Step
Reference
Create a holding folder for your e-mail
notification messages so that they are stored
separately from your other messages.
"Creating a notification
holding folder" (page 59)
If you want to forward all messages in your
Outlook inbox to your BlackBerry device, you
can skip this step.
Configure BlackBerry Desktop Manager to
forward messages to your BlackBerry device.
"Configuring BlackBerry
Desktop Manager" (page 62)
If desired, configure Outlook to delete old
CallPilot notification messages automatically
from the holding folder.
"Automatically removing
notification messages" (page
63)
Alternatively, you can manually delete
notification messages from the holding folder.
Creating a notification holding folder
You can create a holding folder for your CallPilot e-mail notification
messages so that they are stored separately from your other messages. To
store messages in the folder, follow these steps:
Step
Action
1
Create an Outlook folder for the notification messages.
2
Configure Outlook to route CallPilot notification e-mail messages to
the folder using the Rules Wizard.
—End—
To create a notification folder
Step
Action
1
Start Outlook.
2
In the Folder List, select Outlook Today.
3
From the File menu, choose New > Folder. The Create New Folder
dialog box appears.
Nortel CallPilot
Desktop Messaging User Guide for My CallPilot
NN44200-109 01.01 Standard
5.0 26 February 2007
Copyright © 2007, Nortel Networks
.
Nortel Networks Confidential
60 Appendix A Remote Text Notification for Microsoft Outlook and BlackBerry Devices
4
In the Name box, type CallPilot Notification, and then click OK. The
CallPilot Notification folder appears in the Folder List.
—End—
To route notification messages to the holding folder
Step
Action
1
Choose Tools > Rules Wizard. The Rules Wizard dialog box
appears.
2
Click New. The first panel of the Rules Wizard appears.
3
In the list of rule types, select Check messages when they arrive,
and then click Next.
4
In the list of rule conditions, check With Specific words in the
subject box.
5
In the Rule description box, click Specific Words. The Search Text
dialog box appears.
6
In the Add new box, type CallPilot Notification.
Nortel CallPilot
Desktop Messaging User Guide for My CallPilot
NN44200-109 01.01 Standard
5.0 26 February 2007
Copyright © 2007, Nortel Networks
.
Nortel Networks Confidential
Creating a notification holding folder 61
7
Click Add. The text "CallPilot Notification" is added to the Search
list box.
8
Click OK. The search text "CallPilot Notification" appears in the rule
description.
9
Click Next.
10
In the list of actions, check the move it to the specified folder box.
11
In the Rule description box, click Specified. A list of Outlook folders
appears.
12
In the folder list, choose CallPilot Notification, and then click OK.
The folder name appears in the rule description.
13
Click Finish. The finished rule is shown in the following illustration:
14
Click OK to close the Rules Wizard.
—End—
Nortel CallPilot
Desktop Messaging User Guide for My CallPilot
NN44200-109 01.01 Standard
5.0 26 February 2007
Copyright © 2007, Nortel Networks
.
Nortel Networks Confidential
62 Appendix A Remote Text Notification for Microsoft Outlook and BlackBerry Devices
Configuring BlackBerry Desktop Manager
This section explains how to configure BlackBerry Desktop Manager to
redirect your e-mail notification messages.
If you did not create a holding folder for notification messages, and if you
already configured BlackBerry Desktop Manager to forward messages in
your Outlook inbox, you can skip this section.
To configure e-mail redirection
Step
Action
1
From the Windows Start menu, choose Programs > BlackBerry >
Desktop Manager. BlackBerry Desktop Manager appears.
2
In the application list, double-click Redirector Settings. The
Redirector Settings dialog box appears.
3
Click the Advanced tab.
4
In the Folder redirection section, choose Selected folders.
5
Click Choose Folders... .The Choose Folders dialog box appears.
6
Select the folders where you receive messages that you want to
redirect to your BlackBerry device.
•
To redirect messages in your holding folder, select the CallPilot
Notification folder.
•
To redirect all messages in your Outlook inbox, select the Inbox
folder.
Nortel CallPilot
Desktop Messaging User Guide for My CallPilot
NN44200-109 01.01 Standard
5.0 26 February 2007
Copyright © 2007, Nortel Networks
.
Nortel Networks Confidential
Automatically removing notification messages 63
7
Click Save to save your folder selection.
8
Click OK to save your redirection options.
9
Exit BlackBerry Desktop Manager.
—End—
Automatically removing notification messages
This section explains how to configure Outlook to remove messages
automatically from the CallPilot Notifications holding folder using the
AutoArchive feature. If you do not want Outlook to delete notification
messages automatically, you can manually delete them from the folder.
ATTENTION
If you currently do not use AutoArchive, ensure that you become familiar with this
feature before you activate it. You can have existing folders with AutoArchive
settings that have never been activated. If you activate AutoArchive to delete
messages automatically from the CallPilot Notifications folder, you might find that
messages in other folders are being archived as well.
If you are unsure about what to do, check with your local Microsoft Outlook
support group.
Step
Action
You must perform two steps to configure automatic deletion of notification
messages:
1
Set up AutoArchive to delete messages from the CallPilot
Notifications folder.
2
Activate the AutoArchive feature.
—End—
To set up deletion of notification messages
Step
Action
1
In the Outlook Folder List, right-click the CallPilot Notifications
folder, and then choose Properties. The CallPilot Notification
Properties dialog box appears.
2
Click the AutoArchive tab.
Nortel CallPilot
Desktop Messaging User Guide for My CallPilot
NN44200-109 01.01 Standard
5.0 26 February 2007
Copyright © 2007, Nortel Networks
.
Nortel Networks Confidential
64 Appendix A Remote Text Notification for Microsoft Outlook and BlackBerry Devices
3
Select the Clean out items older than check box.
4
Set the time to 1 day.
5
Select Permanently delete old items.
6
Click OK.
—End—
To activate AutoArchive
Step
Action
1
In Outlook, choose Tools > Options.
2
Click the Other tab.
3
Click AutoArchive. The AutoArchive dialog box appears.
4
Check the AutoArchive every... box and set the frequency to 1 day.
5
Click OK to close the dialog box.
Nortel CallPilot
Desktop Messaging User Guide for My CallPilot
NN44200-109 01.01 Standard
5.0 26 February 2007
Copyright © 2007, Nortel Networks
.
Nortel Networks Confidential
Automatically removing notification messages 65
6
Click OK to close the Options dialog box.
—End—
Nortel CallPilot
Desktop Messaging User Guide for My CallPilot
NN44200-109 01.01 Standard
5.0 26 February 2007
Copyright © 2007, Nortel Networks
.
Nortel Networks Confidential
66 Appendix A Remote Text Notification for Microsoft Outlook and BlackBerry Devices
Nortel CallPilot
Desktop Messaging User Guide for My CallPilot
NN44200-109 01.01 Standard
5.0 26 February 2007
Copyright © 2007, Nortel Networks
.
Nortel Networks Confidential
Nortel CallPilot
Desktop Messaging User Guide for My CallPilot
Copyright © 2007, Nortel Networks
All Rights Reserved.
Publication: NN44200-109
Document status: Standard
Document version: 01.01
Document date: 26 February 2007
To provide feedback or to report a problem in this document, go to http://www.nortel.com/documentfeedback
Sourced in Canada
The information in this document is subject to change without notice. The statements, configurations, technical data, and
recommendations in this document are believed to be accurate and reliable, but are presented without express or implied
warranty. Users must take full responsibility for their applications of any products specified in this document. The information in
this document is proprietary to Nortel Networks.
Nortel, the Nortel logo, and the Globemark are trademarks of Nortel Networks.