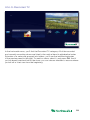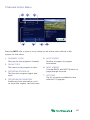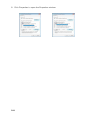
1
User Guide
Contents
Welcome
Management������������������������������������35
Media Player Orientation��������������������7
Options��������������������������������������������37
The Main Menu Layout�����������������������9
Sort Options�������������������������������������37
Horizontal Categories���������������������� 10
Canceled and Deleted����������������������37
Vertical Lists�������������������������������������11
Scheduled to Record�����������������������37
Action Menus�����������������������������������12
Options������������������������������������������� 38
Mini TV���������������������������������������������13
Series Options��������������������������������� 38
Recording Defaults�������������������������� 38
Remote Control
Recording Space�����������������������������39
Using Your Remote��������������������������15
External Hard Drive������������������������� 40
Using Your Pulse TV Advanced
Remote������������������������������������������� 20
TV Channels
Pairing the Remote ��������������������������22
TV Channels - Layout�����������������������42
Pairing the Remote���������������������������22
TV Channels - Focus������������������������43
To pair the remote:����������������������������22
Recording Icons�������������������������������44
Full Screen TV
Channels Action Menu���������������������47
Flip Bar���������������������������������������������24
What’s On Next������������������������������� 26
See All Times���������������������������������� 26
Flip Bar Options�������������������������������27
Controlling Live TV��������������������������� 28
Controlling Live TV����������������������������29
Player Bar��������������������������������������� 30
Automatic Conflict Detection������������31
Screen Saver������������������������������������31
Recorded TV
Intro to Recorded TV������������������������33
Recorded TV - Layout����������������������34
Preview Panel�����������������������������������45
Action Menu Options����������������������� 48
Recording a Show��������������������������� 50
Recording Options���������������������������51
Currently Recording��������������������������52
Conflict Management�����������������������53
Space Management�������������������������53
Change Time Slot�����������������������������54
Grid Guide����������������������������������������55
Grid Guide Genres��������������������������� 56
Change Time Slot�����������������������������57
Grid Guide��������������������������������������� 58
Grid Guide Genres����������������������������59
3
Search
Intro to Search����������������������������������61
Find By Title�������������������������������������62
Find By Keyword������������������������������63
Find By Category�����������������������������64
Search Options��������������������������������65
1. Show/Hide Channel In Guide Icon
������������������������������������������������������� 86
2. Favorites Icon ����������������������������� 86
3. Now Button �������������������������������� 86
4. Network (Channel) logos ������������ 86
5. Program listings ������������������������� 86
6. Media Player Selection ����������������87
On Demand
7. Filter Icons ����������������������������������87
Intro to Pulse TV On Demand�����������67
8. Activity Icon ��������������������������������87
VOD Library������������������������������������� 68
9. Handle Icon �������������������������������87
VOD Options����������������������������������� 68
10. Select Date ������������������������������87
PIN Entry����������������������������������������� 68
Scheduling Recordings�������������������� 88
My Rentals���������������������������������������69
Search Screen����������������������������������89
Recorded TV Screen����������������������� 90
Home Network
Remote Screen��������������������������������91
Setup�����������������������������������������������71
Settings Screen��������������������������������92
Getting Started���������������������������������72
Playing Media�����������������������������������73
SuperTicker
Supported Files��������������������������������73
SuperTicker��������������������������������������95
Adding to Favourites�������������������������74
Player Controls���������������������������������75
Pay Per View
Finding Pay Per View Programming�� 77
Finding Pay Per View Programming� 78
Purchasing Pay Per Vew Programming
��������������������������������������������������������79
Using a Purchase PIN���������������������� 80
Playing Games
Games������������������������������������������ 100
Screen saver and Game Display�����101
Settings
Parental Controls����������������������������103
Parental Controls����������������������������104
Working with your PIN��������������������105
VOD/PPV PIN���������������������������������105
Mobile Apps
Locking and Unlocking Programs�� 106
The Mobile Apps�������������������������������82
Menu Customization����������������������107
Downloading a Mobile App���������������83
Configure Main Menu���������������������107
Intro to the Arris App������������������������84
Sort Options for TV Channels���������107
Guide Screen�����������������������������������85
Skip����������������������������������������������� 108
4
Local Network Status�������������������� 108
Recording Space���������������������������109
Remote Control of your Media Player
������������������������������������������������������109
SuperTicker����������������������������������� 110
Closed Caption����������������������������� 110
TV Setup����������������������������������������111
Sound Effects���������������������������������111
Front Panel�������������������������������������111
Aspect Ratio�����������������������������������112
Recording Defaults�������������������������113
External Hard Drive������������������������113
Audio Output����������������������������������113
Grid Guide��������������������������������������114
Channel List�����������������������������������114
Media Gateway
Hardware
External Hard Drive �����������������������127
Reset Button��������������������������������� 128
LED Display����������������������������������� 128
Wireless Network Configuration������129
Connecting Devices to Your Network
������������������������������������������������������129
Configuring Your Ethernet Connection
����������������������������������������������������� 130
TCP/IP Configuration for Windows
2000����������������������������������������������131
TCP/IP Configuration for Windows XP
������������������������������������������������������132
TCP/IP Configuration for Windows
Vista�����������������������������������������������135
Tips������������������������������������������������114
TCP/IP Configuration for Windows 7
and 8�������������������������������������������� 138
Messages
TCP/IP Configuration for MacOS X�142
Receiving Messages���������������������� 116
New Message������������������������������� 116
Media Player Hardware
Resolution Reset����������������������������145
Filters
Front Panel Brightness�������������������145
Intro to TV Filters��������������������������� 118
Front Panel Buttons������������������������145
Favourites
Internet Account Access
Online Scheduling��������������������������123
Online Management�����������������������124
Other Features�������������������������������125
5
Welcome
Congratulations on choosing Pulse TV.
Let’s get started with all your system can do.
6
Media Player Orientation
The Media Player experience starts with pressing the MENU button on the remote.
You’ll then see the top level of the main menu, a horizontal band that runs across
the middle of the screen and gives access to all of the main menu options.
Channels
A vertical menu that lists
all available channels.
Recorded TV
A list of all of
the programs
you’ve recorded.
Search
Options to search
for programs by title,
keyword, or by category.
On Demand
Contains the VOD library
of all available titles.
Home Network
An easy way to enjoy
media stored on your
computer from the
comfort of your TV.
SuperTicker
A customizable t
icker that lets you
view the latest news,
sports scores, and
stocks without
missing your show.
Games
A variety of classic
games like Blackjack and
Slotmachine.
Settings
A category that allows
you to customize your
Media Player.
Messages
A place to receive
messages about
Pulse TV services and
updates.
7
TV Music
A collection of TV music
channels to match your
taste and mood.
News
A filter that displays all
of the 24 hour news
channels and current
news programming.
Kids
Access all children’s
programming in one
consolidated list.
Sports
A filter that displays all
available sports content.
Movies
A filter that displays
all available movies,
including live and
recorded TV as well
as VOD.
HDTV
A filter that displays
all of the highdefinition content.
Favourites
A filter that lets you add
your favorite TV, video,
photo and music content
to one convenient place.
8
The Main Menu Layout
1
7
5
2
4
1. TIME
With the current time, you’ll know
when your show begins.
2. CURRENT CHANNEL
Displays the channel that is
playing in Mini TV. If the program is
recorded, an icon will display the
current status - i.e., play or pause.
3. M
INI TV
Lets you keep watching your
program while you browse.
4. F
OCUS
The current selection is in the focus
area of the menu. When cards are
in focus, they appear raised and
highlighted.
3
6
6. INFO PANEL
Depending on the item in focus,
this area either provides more
information about that item or a
selection of choices for that item.
7. CARD
Items in vertical lists are called cards.
8. CATEGORY
Items in the horizontal band are
called categories. When a category
is in focus, the name of the category
appears in the top of the focus area.
5. VERTICAL LIST
Contains all of the items in the
current horizontal category.
9
Horizontal Categories
8
Once you’ve pressed the MENU button to bring up the main menu, the top level
of choices will appear in a horizontal band; use the left and right arrow buttons to
browse through your choices. There are a couple of features to be aware of with
the horizontal categories:
1. Auto Expand
When you bring a horizontal card into focus, all of the choices in that category
will open up in a vertical list.
2. N
avigation Fade Back
When a vertical list appears, the horizontal navigation fades. Simply pressing the
left or right arrow buttons will bring the horizontal menu right back.
10
Vertical Lists
End of List Marker
A thin, colored line that defines the beginning and end of a vertical list.
Option Card
Some categories contain cards that allow you to take action on the entire vertical
list. Pressing OK on these option cards will reveal all of the actions available. Option
cards will differ in appearance from the rest of the cards in the list. In some areas of
the main menu, such as Find by Category, the option card will allow you to access
a deeper level of the menu.
Turbo Scroll
If you hold down an arrow button, you can increase your browsing speed. The
icons will help you quickly recognize media as it scrolls by.
11
Action Menus
When you press INFO with an item in focus, you’ll get a list of options for that item
in an action menu.
Use the up and down arrow buttons to scroll through your action menu options.
Action menus have a focus, just like the main menu. To select an option, bring it
into focus and press OK.
To close the action menu, either select close or press the left arrow button.
12
Mini TV
MINI TV
The Mini TV lets you keep an eye on what you’re watching while you’re browsing
the menu. The Mini TV will show you what’s currently playing, whether it’s a photos
slideshow, TV program or Jukebox album.
• To enjoy the media in the Mini TV full-screen, press ZOOM on your remote control.
• To watch Live TV regardless of what’s playing in the Mini TV, press LIVE TV.
13
Remote Control
The Remote Control makes using your Media Player
easy to use while giving advanced users full control.
14
Using Your Remote
Your remote will automatically allow you to control the menu.
C
ticker
B
A
info
live
D
TV
zoom
OK
back
next
menu
replay
skip
play
pause
rew
rec
vol
fwd
stop
mute
ch
last
abc
def
ghi
jkl
mno
pqrs
tuv
wxyz
clear
0
enter
9
7
pqrs
4
ghi
8
6
enter
9
8
wxyz
tuv
6
5
jkl
mno
7
5
3
0
4
2
clear
1
15
Shortcut Buttons
1
A
2
3
B
C
1. D
VR
Goes to the Recorded TV category.
2. VOD
Goes to the Pulse TV Video On
Demand category.
16
4
D
3. G
RID
Activates the traditional Grid Guide
view of TV programming.
4. LIVE TV
Goes to full-screen, live TV,
regardless of what’s currently
in focus.
Menu Navigation
5
6
1
info
zoom
2
OK
back
next
3
abc
def
ghi
jkl
mno
pqrs
tuv
wxyz
clear
0
enter
1
4
7
2
5
8
3
6
9
7
4
1. ARROWS
Moves the horizontal or vertical
bands one card backward or
forward. Holding them down
activates Turbo Mode and increases
your browsing speed.
2. OK
Begins playing the item in focus
or executes an option in an
action menu.
3. B
ACK
Takes a vertical list displaying TV
programming back to the previous
half hour. Also pages back through
an info note and backs out of a
second-level menu.
4. N
EXT
Takes a vertical list displaying TV
programming forward to the next
half hour. Also pages forward
through an info note.
5. INFO
Brings up an action menu of options
related to the item in focus
6. ZOOM
Alternates between full screen and
the main menu. Also turns the
SuperTicker on and off.
7. NUMBER KEYS
Entering numbers will take you
directly to the corresponding
channel.
17
Player Controls
1
4
2
menu
replay
3
skip
play
5
pause
rew
rec
7
6
fwd
stop
9
8
Control your recorded or live program with the following buttons:
1. MENU
From wherever you are,
MENU returns you one step
at a time toward the top level
of the main menu.
2. PLAY
Begins playing the TV show or
media file in focus. Also allows you
to view the show at the point of fastforwarding or rewinding.
3. SKIP
Skips forward the number of
seconds that you predefine in
settings. Also takes a vertical list of
TV programming forward in time
24 hours.
4. REPLAY
Rewinds seven seconds. Also takes
a vertical list of TV programming
back in time 24 hours.
18
5. REWIND
Press up to three times (for three
speeds) to rewind the show.
6. FAST-FORWARD
Press up to three times (for three
speeds) to fast-forward.
7. RECORD
Press RECORD while watching
a show or with a show in focus
to record.
8. STOP
Exits out of a recorded show
or stops a recording in progress if
you’re watching that show
full screen.
9. PAUSE
Pauses the show you are watching.
Infrared Receiver
Infrared Receiver
Video
L
R
Digital Audio Optical
Video
L
Digital Audio Optical
R
OK
OK
MENU
MENU
Pr
Pb
Cable
Y
Pr
Pb
Y
Digital Audio Optical
Digital Audio Optical
USB
Ethernet 10/100
Input
Input
IR
USB
Blaster
Ethernet
Reset 10/100
IR
Blaster
Reset
When a button on the remote is pressed, the infrared signal is sent to an IR receiver.
The receiver then sends commands to electronic components. For the remote to
send its signals to the system’s IR receiver, it must have a clear view of the front
panel (see the figure above).
Subchannel Separator
Many networks broadcast multiple digital subchannels. For example, some
networks broadcast four standard definition subchannels identified using a decimal
point (such as 09, 09.1, 09.2, and 09.3). When using the arrow buttons to navigate
the electronic program guide, these channels appear in order in the channels listing.
To access these subchannels directly using the remote buttons, use the “LAST”
button (which also has a dot) on the number pad to represent the decimal point.
For example, to go directly to channel 09.2, on the remote control number pad
press 0, 9, LAST, and then 2.
19
Using Your Pulse TV Advanced Remote
Your remote will automatically allow you to control the menu.
on
off
input
setup
exit to liveTV
B
A
C
D
info
OK
back
next
menu
last
vol
ch
replay
skip
VOD
1
2
3
4
5
6
7
8
9
delete
0
enter
enter
0
delete
clear
clear
8
7
5
4
9
6
20
Pulse TV Advanced Remote
1
3
2
VOD
The Pulse TV Advanced Remote is a wireless keyboard remote with a mouse
feature. RF technology lets you use the remote with the Media Player hidden from
view. To order a Pulse TV Advanced Remote, call your cable provider.
The front of the Pulse TV Advanced Remote has the same functionality as the
regular remote with the following additions:
1. APPS
The apps button takes you directly
to the App Market
2. SEARCH
The search button takes you directly
to the search by title feature
3. VOD
The VOD button goes directly to
the Video On Demand category in
the menu.
On the back of the Pulse TV Advanced Remote, you’ll find a keyboard block that
makes it easy to enter text.
21
Pairing the Remote
Once you have your Pulse TV Advanced Remote, you’ll need to pair it with a Media
Player for full functionality.
Pairing the Remote
Before you pair the Pulse TV Advanced Remote, it will function in IR mode, which
means that not all of the buttons will work, and you will need an unobstructed path
to the Media Player when you press buttons.
To pair the remote:
1. If your remote came with a USB dongle, insert it into either a front or back USB
port of the Media Player. Wait until you see a message confirming that the
dongle has been detected. This takes approximately 30 seconds.
2. Point the remote at the Media Player and press and hold the Up and SETUP
keys until the remote Power button blinks rapidly.
3. After a few seconds, you should see two slow remote Power button blinks,
indicating that the remote has successfully paired.
22
Full Screen TV
With the mini guides available in full screen TV,
the Media Player makes channel surfing fun.
23
Flip Bar
On Now
Coming Up
When you’re watching full-screen TV, the Flip Bar is your mini menu. Pressing an
arrow or the OK button or changing the channel will bring up the Flip Bar, giving
you program information about what you’re watching, what’s on next, and what’s
on other channels.
The main panel of the Flip Bar gives you the program name, air time, and channel.
Use the up and down arrows to change the channel displayed in the Flip Bar
without leaving the program you’re watching.
On the right, you’ll see what’s coming up next for the channel displayed in the
Flip Bar. You can see further into the future by pressing the right arrow button
to highlight that panel and then using the up and down arrow buttons to scroll
through programming.
The Flip Bar will automatically disappear after five seconds, but you can make it go
away by pressing CLEAR.
24
Flip Bar - Layout
1
3
2
4
5
6
7
If you press the INFO button with the Flip Bar visible, you’ll get more information
about the show displayed as well as options for that show.
1. GENRE
The type of show selected.
2. INFO PAGES
Press NEXT or BACK on your
remote to page through the show
information.
3. C
LOCK
The current time.
4. L
OGO AND CHANNEL NUMBER
The logo and channel number of the
selected show.
5. P
ROGRAM SCHEDULE
The time the program begins and
ends.
6. COMING UP
Displays the next three shows
coming up on the selected channel.
7. A
CTION MENU
The list of options available for the
selected show.
25
What’s On Next
The Flip Bar also has the capability to display up to two weeks of upcoming
programs for each channel.
Press the right arrow to highlight the Coming Up Panel, and then the up and down
arrows will let you browse through programming.
See All Times
One of the options you’ll see in a show’s action menu is See All Times. Select it
to see a list of all of the times that the selected show airs. Select the Back card to
return to your original show listing.
PROGRAM INFO NOTES
Just like in the main menu, you can press the INFO button with the Flip Bar
displayed to bring up an action menu, which will give you more detailed information
on the selected show.
26
Flip Bar Options
Pressing the INFO button with the Flip Bar up will bring up an action menu for the
Flip Bar’s show.
The options available are the same options available in the Channels Menu with
the addition of closed captioning controls, which makes it easy to toggle closed
captions on and off.
27
Controlling Live TV
back
next
replay
skip
play
pause
rew
rec
fwd
stop
• Press PAUSE to alternate between pausing and resuming the show you’re
watching.
• Press REWIND up to three times (for three speeds) to rewind the show.
• P
ress FORWARD up to three times (for three speeds) to fast-forward the show
up to the point of broadcast.
• Press PLAY to stop fast-forwarding or rewinding or resume from a pause.
• Press LIVE TV to view the point of broadcast for the last channel you watched.
• Press REPLAY to view the previous 7 seconds of the show.
• P
ress SKIP to skip forward in the show up to the moment of broadcast. You can
decide how many seconds to skip with this button in the Settings menu.
• Press PAUSE and then FORWARD once to activate slow motion.
• P
ressing RECORD to record the entire contents of the temporary memory or buffer for the show you are watching.
• Press PAUSE and then SKIP to advance forward one frame.
28
Controlling Live TV
THE BUFFER
When you start watching a show, your Media Player will start storing it in temporary
memory, called a buffer. The amount of temporary memory varies, but it is never
less than 30 minutes for standard definition or 10 minutes for HDTV.
TV Roaming
With TV Roaming, you can pause a show in one room and resume it in another.
Once you press pause, if you switch to another room and choose to watch the
same show, it automatically plays at the point you left off.
29
Player Bar
1
3
4
2
5
6
Whenever you press one of the player control buttons, you’ll see the Player Bar,
which gives you status information about the program you’re currently watching.
You’ll see a version of the player bar no matter what type of media you’re enjoying,
whether it’s recorded or live TV, photos, or music.
1. CURRENT TIME
The current time or point in the
current program.
2. P
ROGRAM
The current live or recorded program
being played back.
3. S
HOW START TIME
The start time of the recorded or
Live TV program.
4. STORED IN MEMORY
While watching live TV, this area (the
buffer) displays the part of the show
recorded in temporary memory.
While watching recorded TV, it
shows the entire contents of the
show available for viewing.
30
5. P
LAYER BAR STATE
The current state of the program
controls, such as play, pause,
rewind, and fast-forward.
6. S
HOW END TIME
Displays the end time of the Live
TV program or the duration of a
recorded TV program.
Automatic Conflict Detection
You may see a conflict detection note while you’re watching full screen TV, which
indicates that you have more programs set to record than available tuners.
The conflict detection note will allow you to decide which programs you would like
to cancel and which you would like to continue recording.
Screen Saver
If there has been no activity for more than 30 minutes while browsing the main
menu, the Media Player will change to full screen TV with the last-watched channel
playing to help extend the life of your TV screen.
If live TV has been playing on the same channel for five hours without any input
from the remote, the Pulse TV screen saver will be displayed.
To return to the main menu, press the MENU button.
31
Recorded TV
Your Media Player makes it easy to watch and
manage your recordings from one place in the
main menu: Recorded TV.
32
Intro to Recorded TV
In the horizontal menu, you’ll find the Recorded TV category. All of the recorded
and currently-recording shows are listed in the vertical band in alphabetical order.
Episodes of a series are grouped into folders; you’ll see the individual episodes
in the preview panel to the right. To watch a show, select it, and press OK. And if
you’ve already watched half of the show, you can choose whether to resume where
you left off or start over from the beginning.
33
Recorded TV - Layout
1
2
3
4
1. CHANNEL LOGO
Displays the channel of the
recorded show.
2. R
ECORDED SHOW ICONS
Let you know if the show is in
danger of deletion or protected
against deletion.
3. FOCUS
Displays the channel number, logo
and an indication of whether a
show is part of a series. Folders that
contain multiple episodes in a series
also display the number of episodes.
4. SERIES FOLDER
Episodes of a series are held
within a folder listing the number of
recorded episodes.
34
5
6
7
5. E
PISODES OR DURATION
If the item in focus is a folder
containing episodes in a series,
focus lists the number of episodes.
If it’s an individual show, it lists the
show’s duration.
6. I NFORMATION
With a folder containing episodes
in a series in focus, this area shows
the current recording options for
the series. With a single recorded
program in focus, this area shows a
summary of the show information.
7. SERIES
Individual episodes in a series are
shown in the preview panel. Press
the right arrow button and select
an episode to see that episode’s
action menu.
Management
When you press INFO with a recorded program in focus, you’ll get the following list
of options in the action menu:
• Play/Start Over - Launches the program full screen from the beginning.
• Resume - This option only appears if you’ve watched a portion of the program.
Launches the program full screen from the point you left off.
• See all times - Displays all of the times that particular show airs.
• Delete - Removes the program from Recorded TV.
• Recording options - Lets you access the recording options menu.
• Keep Until - Your Media Player will automatically delete the oldest shows in your
Recorded TV folder as you need the room for new recordings. Keep Until lets you
set the program to be deleted at the point of your choosing.
• Lock - Prevents someone from watching the recorded program without a PIN.
• Record Series - you’ll get this option if you only have a single episode recorded.
35
Folder Options
If you bring a folder of episodes into focus and press OK, you’ll see the
following options:
• See all times
• Recording options
• Delete all
36
Options
The Options card appears in the Recorded TV category and lets you set your
personal recording preferences. Select the Options card, and you’ll get access to:
Sort Options
The recorded TV sort options allows you to choose whether recordings appear in
ascending or descending order as well as whether they are sorted alphabetically or
by date.
Canceled and Deleted
When you chose to record one show over another due to a conflict, (or someone
in your household does) sometimes it’s hard to remember why that canceled show
isn’t showing up in Recorded TV. Your Media Player keeps a list of shows that
you have scheduled that will not record as well as shows that did not record. The
shows above focus have not aired yet, while the shows below focus have already
aired.
Scheduled to Record
You can confirm that a show is set to record using the Scheduled to Record
category. In Scheduled to Record, you can also cancel a recording and access
your recording options for each show. Just pick the show you want to manage and
press INFO.
37
Options
Series Options
For details on the Series Options menu, see the “Channels” chapter.
Recording Defaults
In Recording Defaults, you can determine your preferences for the following
settings, that will then be applied each time you record a show:
• Keep - Decide how long shows will be stored.
• Episode Limit - Determine how many episodes of a series request to keep at once.
• Accept - Decide whether you’ll record first-run or repeats for a series request.
• Close
• Start - Start programs early or late.
• Stop - Stop programs early or late.
38
Recording Space
The storage meter lets you know how much space you have left for more
recorded programs. It’s located in two places in the main menu: the Settings
category and the Recorded TV category. Press OK with the Storage Info card in
focus to view details.
39
External Hard Drive
o expand the space you have for recorded programs, you can connect one
T
external hard drive at a time to the rear eSATA port on the Media Gateway.
When selecting an external drive, keep in mind that your Media Gateway only
supports eSATA storage devices marketed or certified for DVR use.
For instructions on how to set up and disconnect an external drive, see the
“Media Gateway Hardware” chapter.
40
TV Channels
With all of the channels available these days, it’s tough to
know what all of your options are. The TV Channels category
makes it easy to find what you want to watch.
41
TV Channels - Layout
1
2
4
5
1. TIME
With the current time, you’ll know
when your show begins.
2. CURRENT CHANNEL
Displays the channel that is
playing in Mini TV. If the program is
recorded, an icon will display the
current status - i.e., play or pause.
3. MINI TV
Even when channel surfing, Mini TV
always keeps you in the action.
4. FOCUS PROGRAM
Pressing INFO on this item brings up
an action menu.
42
3
6
7
8
5. A
VAILABLE TV PROGRAMS
Displays all of the programs available
in your TV lineup that are currently
airing.
6. RECORDING ICON
Displays an icon if the show is
recording or scheduled to record.
7. INFORMATION PANEL
Displays program information about
the show in focus.
8. PROGRAM INFORMATION
Displays the next three upcoming
shows that will air on the channel in
focus.
TV Channels - Focus
1
7
6
2
5
3
4
Different areas of the card provide more information about the TV program in focus.
1. CATEGORY
The name of the category moved
into focus.
5. PROGRAM SCHEDULE
Displays the selected program’s air
time.
2. S
HOW TITLE
The name of the program in focus.
6. C
HANNEL NUMBER
The selected program’s channel
number.
3. S
HOW LENGTH
The selected program’s duration.
4. RECORDING ICON
Displays an icon here if the selected
program is currently recording or
scheduled to record.
7. CHANNEL LOGO
Displays the channel logo for the
selected program.
43
Recording Icons
Recording
Scheduled
to Record
Your Media Player includes the following recording icons for DVR status at a glance.
The following icons appear on focus cards and vertical cards throughout the main
menu:
The show is recording right now.
The show is scheduled to be recorded.
The show is recorded and may be deleted when space is needed for
newer shows.
The show will not delete and can only be deleted manually.
44
Preview Panel
Arrow right ➡ to view the Preview Panel
TV Channels, like all horizontal categories that contain TV programming, has a
preview panel that displays upcoming programs for the channel in focus. Press the
right arrow button to select the panel, and then use the up and down arrows to
browse through up to two weeks of programming for that channel.
For a shortcut back to the present time, press the MENU button.
If you see a show you would like to record, press the RECORD or the INFO button.
45
Preview Panel - Layout
1
2
4
1. C
HANNEL LOGO
The current channel.
2. P
ROGRAM LENGTH
The time the program begins and
ends.
3. TIMESLOT
Indicates the day and time that the
preview panel is currently displaying.
4. PROGRAM INFORMATION
Detailed show information, such
as title, rating, whether it’s a repeat,
cast and crew.
46
3
5
6
5. TIME
Displays the time corresponding to
each show.
6. S
ELECTED SHOW
The currently-selected show.
Pressing info on the selected show
brings up an action menu with
options.
Channels Action Menu
1
2
4
3
5
6
7
Pressing INFO with a show in focus brings up an action menu with all of the
options for that show.
1. CHANNEL LOGO
The logo for the program’s channel.
2. S
HOW TITLE
The name of the program or item.
3. P
ROGRAM SCHEDULE
The time the program begins and
ends.
4. P
ROGRAM INFORMATION
Additional show information, such
as show title, repeat, cast and crew.
5. NOTE PAGES
Number of pages of program
information.
6. N
EXT & BACK
Use the BACK and NEXT buttons to
page through the note.
7. O
PTIONS
The list of options available for the
selected TV program.
47
Action Menu Options
If the show you’re watching is currently airing, you’ll see the following options
in the action menu:
• Record once - Records only the currently-airing episode of the program, including
the portion in the live TV buffer.
• Watch - Plays the program in full-screen TV.
• Add to Favourites - Adds the channel to your Favourites category.
• Lock - Activates Parental Controls for the selected channel.
• See all times - Presents a list of all of that program’s air dates/times.
• Record series - Sets the entire series of that program to record. You’ll only see
this option if the show is part of a series.
48
Action Menu Options
If the show will air in the future, you’ll see:
• Record once
• Add to Favourites
• Lock
• See all times
• Set reminder - Allows you to set a reminder that will appear before the show airs
• Record series
If the show is currently recording, you’ll see:
• Stop recording - Stops recording the current show, but does not delete the
portion already recorded.
• Watch
• Add to Favourites
• See all times
• Recording options - Gives you a list of elements to alter about the way the
program will record.
If the show is scheduled to record, you’ll see:
• Recording options
• Cancel recording - Removes the program from the recording lineup.
• Add to Favourites
• Lock
• See all times
49
Recording a Show
The easiest way to record an individual show is to press the record button with that
show in center focus.
If you want to record a series, just press the info button and select record series
from the action menu.
50
Recording Options
If you have record once or record series selected, you’ll see an arrow to the right
that allows you to access recording options. You can also access recording options
from the action menu of a show that’s currently recording or scheduled to record.
Scheduled to Record
Recording options for a single episode scheduled to record:
• Keep - Lets you decide when the show will be deleted.
• Get Series - Sets the entire series to record.
• Stop - Allows you to set the recording to stop early or late.
• Start - Allows you to set the recording to start early or late.
Recording options for a series scheduled to record:
• Keep
• Series Options - Allows you to set recording preferences for the entire series.
• Stop
• Start
51
Currently Recording
Recording options for a single episode currently recording:
• Keep
• Get series
• Stop
Recording options for a series currently recording:
• Keep
• Series options
• Stop
Series Options
• Keep
• Episode limit - Determines how many episodes will be stored automatically.
• Accept - Determines whether you’ll accept first-run only or repeat episodes.
• Timeslots - Lets you record only epsiodes airing at a certain timeslot.
• Priority - Sets the priority order of your series recordings.
• Cancel series - Cancels the scheduled recordings.
• Start
• Stop
52
Conflict Management
Your Media Gateway comes with six tuners, which means that you can record up
to six shows at once, unless someone is watching live TV at the same time. In the
event that there is a tuner conflict, such as when you have six recordings scheduled
and are watching another live show, your DVR will bring up an action menu that
outlines your options and lets you make a choice.
Space Management
Shows are automatically kept until more room is needed. You can protect shows
from deletion from the Recorded TV category; see the following chapter for details.
When you schedule a new show to record, your Media Player will check to make
sure that your Media Gateway hard drive has enough room.
If your hard drive does not have enough room for the new recording, you’ll receive a
message informing you that, when the new show airs, some recordings may need
to be deleted in order to make room for the new show.
If all of your current recordings are protected against deletion, you’ll get a message
that your show may not be recorded.
53
Change Time Slot
If you want to compare what’s on in the future across multiple channels, start from
TV Channels, press the NEXT button, and the entire vertical list will show the next
half hour’s programming. Shows that have not started airing yet will appear gray,
while currently-airing shows will be black.
You can use the NEXT button to view up to two weeks of upcoming shows. The
BACK button will take you one half hour earlier. The SKIP button advances the
category forward 24 hours, and the REPLAY button goes back 24 hours. If you
browse to another TV category, like a filter or TV Favourites, the time slot will be
maintained. To return to the current time, just press the MENU button.
You can also use the Change Time Slot card to move the category to a future time
slot. With that card selected, press the right arrow. Use the up and down arrows
to select a time slot, and press OK. The vertical band will now display the time slot
you selected.
54
Grid Guide
The Media Player offers an optional Grid Guide view for people who prefer to find
programming in that layout. You’ll see the Grid Guide card below focus when you
first enter TV Channels. Bring it into focus, and press OK.
The Grid Guide works similarly to the rest of the main menu:
• Arrow buttons navigate the guide
• INFO brings up a list of options
• SKIP will cycle forward 24 hours; REPLAY will cycle back 24 hours
• BACK and NEXT will move through the guide in 30 minute increments
• ZOOM will alternate between the guide and full screen TV
• If you are looking at the present time in the guide, MENU will return you to
the main menu
• Black shows indicate currently-airing programs; gray shows will air in
the future
• OK tunes to the show if it’s currently airing, brings up an action menu if it’s
on in the future.
55
Grid Guide Genres
The Grid Guide has four different types of programming that are easy to spot by
color:
• Movies - Red
• Sports - Green
• Children’s - Purple
• News - Grey
56
Change Time Slot
If you want to compare what’s on in the future across multiple channels, start from
TV Channels, press the NEXT button, and the entire vertical list will show the next
half hour’s programming. Shows that have not started airing yet will appear gray,
while currently-airing shows will be black.
You can use the NEXT button to view up to two weeks of upcoming shows. The
BACK button will take you one half hour earlier. The SKIP button advances the
category forward 24 hours, and the REPLAY button goes back 24 hours. If you
browse to another TV category, like a filter or TV Favourites, the time slot will be
maintained. To return to the current time, just press the MENU button.
You can also use the Change Time Slot card to move the category to a future time
slot. With that card selected, press the right arrow. Use the up and down arrows
to select a time slot, and press OK. The vertical band will now display the time slot
you selected.
57
Grid Guide
The Media Player offers an optional Grid Guide view for people who prefer to find
programming in that layout. You’ll see the Grid Guide card below focus when you
first enter TV Channels. Bring it into focus, and press OK.
The Grid Guide works similarly to the rest of the main menu:
• Arrow buttons navigate the guide
• INFO brings up a list of options
• SKIP will cycle forward 24 hours; REPLAY will cycle back 24 hours
• BACK and NEXT will move through the guide in 30 minute increments
• ZOOM will alternate between the guide and full screen TV
• If you are looking at the present time in the guide, MENU will return you to
the main menu
• Black shows indicate currently-airing programs; gray shows will air in
the future
• OK tunes to the show if it’s currently airing, brings up an action menu if it’s
on in the future.
58
Grid Guide Genres
The Grid Guide has four different types of programming that are easy to spot
by color:
• Movies - Rred
• Sports - Green
• Children’s - Purple
• News - Grey
59
Search
Sometimes you know the title. Sometimes you just
know what night it’s on. Sometimes you’re in the mood
for a certain type of show. The Media Player has you
covered to help you find what you’re looking for.
60
Intro to Search
The Search category in the main menu contains three different ways to search for
programming: By Title, By Keyword, and By Category.
When you use any of these three options to search for a show, the results will
return shows that are currently airing, airing sometime in the future, Pulse TV On
Demand programming, and shows that you have recorded.
You’ll be able to tell what type of show you’re looking at by the color of the card:
• Current shows are black.
• Future shows are gray.
• Video On Demand, Recorded , and Pay Per View programs are yellow.
61
Find By Title
1
2
4
5
3
6
7
8
When you select Find By Title, a screen will open that allows you to enter your
title and browse through results. Use the arrow buttons to navigate the onscreen
keyboard; to enter a letter, press OK with that letter highlighted. To browse the list,
press the left arrow until that panel is in focus.
1. SEARCH TYPE
This bar describes the type of
search you’re doing.
2. S
EARCH RESULTS
As you enter characters on the right,
the list on the left will filter down to
only display shows that match your
entry.
3. S
EARCH BOX
As you select characters, the
characters are entered in the search
box.
4. F
OCUS
The details for the channel and show
are displayed in the focus card.
62
5. V
ERTICAL LIST
The vertical list fills with shows that
match your criteria. Pressing the up
or down arrows brings these shows
into focus.
6. SPACE
Use a space to separate words in
your search entry.
7. SELECTOR
To enter a letter, move the selector
to it, and press OK; each character
is entered into the search box. You
can use texting-style letter entry as
a shortcut.
8. BACKSPACE
Removes a character from the
search box.
Find By Keyword
A Keyword search lets you search for any word contained in a show’s program
information. For example, if you know the actor in a show, but can’t remember the
title, you can search on the actor’s name, and all programs featuring that actor will
appear in the list.
To search by keyword, enter each letter by selecting it and pressing OK. You’ll see
results on the left filter down with each letter you enter. Press the left arrow and use
the up and down arrows to scroll through them.
SEARCHING TIP
Did you know that you can use your remote control keypad like a mobile
phone keypad?
For example, by pressing 222 on your remote control you will enter the letter C. By
pressing 33, you will enter the letter E.
• CLEAR - Clears the entire entry.
• 0 - Enters a space.
• 1 - Enters a backspace.
63
Find By Category
4
5
3
1
2
If you’re in the mood for a certain type of show, Find by Category gives you a way
to browse what you’re looking for. When you press OK with Find by Category
selected, you’ll see a list of categories along the vertical band, and a list will display
the shows in each category. An Option card in each category will take you one level
deeper in the menu and allow you to browse subcategories.
1. CATEGORY
Category describes the type of
search you’re currently doing.
2. SHOW CATEGORY
The different types of shows run
along the horizontal band.
3. SHOW LIST
Each show airing over the
next 24 hours that falls into
the selected category.
64
4. S
UB CATEGORY OPTION CARD
Each category will contain a card
labeled “Press OK to see more...”
Selecting this card will take you to
another screen with subcategories
along the horizontal band.
5. B
ACK CARD
Select this card and press OK to go
back up one level in the menu.
Search Options
The Search Options card allows you to choose which type of content is displayed in
both Search results and in the TV Filters.
To customize the type of content that appears in both areas, select Options and
press OK to clear the check box for the type of content you would like to remove.
You can remove:
• TV Recordings - Programs you’ve recorded with your DVR.
• TV Shows - Live TV shows from Pulse TV’s lineup.
• VOD - Programs from Pulse TV’s Video On Demand library.
65
65
On Demand
Pulse TV’s Video On Demand selection gives you a vast
library of great programming to choose from and an easy
way to search through it all.
66
Intro to Pulse TV On Demand
When you bring the Pulse TV VOD card into focus, you’ll see a list of On Demand
video folders in the vertical band, as well as a My Rentals folder. When you bring
each folder into focus, the available movies in each will appear in the preview panel.
Pressing OK with any of these folders in focus will take you to that particular folder
in the VOD library. To browse the entire library, press OK with the Movies card in focus.
67
VOD Library
When you enter the Pulse TV VOD library, you’ll see a list of movie folders
by category.
VOD Options
When you see a program you like, press OK, and you’ll get the following list of
options:
• Preview - Plays the trailer for the selected movie.
• Lock - Uses Parental Controls to block access to that channel.
• Buy - Purchases the movie so that you can watch it immediately.
PIN Entry
The first time you try to purchase a VOD program (or purchase a PPV program or
set Parental Controls), you’ll be prompted to create a PIN that you will then enter
before you make additional purchases.
You can turn the PIN prompt off from the Parental Controls section of the Settings
category. See the “Settings” chapter for details.
68
My Rentals
When you select the My Rentals card, you’ll see a list of all of the movies you’ve
currently rented along with a My Adult Rental card. Selecting the adult rental card
will take you to a list of any adult movies you may have rented.
Movies will continue to appear in this list until the rental has expired. You can begin
watching a movie by pressing OK.
If you begin watching a movie on one Media Player, you can watch
that movie in another room in the exact place you left off by pressing INFO
and choosing resume. If the Media Player in the new room has that
selection locked with Parental Controls, you’ll need to enter the PIN to
resume watching.
69
Home Network
With your Media Player, you can access your
computer’s music, video, and photos from the comfort
of your living room.
70
Setup
Home Network allows you to stream media from any server in your home, such as
your computer, to your Media Player. Because Home Network is DLNA ®-based, it
is completely plug and play; if your computer is connected to your home network
and has a DLNA server, you should automatically see that computer listed in the
Home Network category of the main menu.
To make sure that Home Network will function properly, make sure that:
• Your computer is set up to share content according to your server’s instructions.
• Your server software is not blocked by a Firewall.
DLNA Servers
Although any DLNA server will work with Home Network, the following DLNA
servers have been fully tested with your Media Player:
• Windows Media Player
• TVersity Media Server
• Windows Media Connect
• Twonky Media Manager
• Media Mall PlayOn
71
Getting Started
When you first bring the Home Network card into focus, you’ll see all of your
connected devices. If one isn’t showing up, select Search for Media Servers and
choose Search. If connected properly, any new devices will then appear.
72
Playing Media
• To access your content, choose the device that interests you, and press OK.
• To open a folder of content, press OK.
• If you have an individual file selected that you would like to play, press OK.
• If you have a folder selected, and you would like to view a list of options for the
content of that folder, press INFO.
Supported Files
• Photo: JPEG, GIF*, BMP* and PNG* files
• Music: MP3, WMA, and AAC (unprotected files), and LPCM files
• Video: MPEG-1, MPEG-2, MPEG-4, H.264, and WMV files
*These file types are available through DLNA® servers that support transcoding
Content that is protected by Digital Rights Management (DRM) will not be accessible.
73
Adding to Favourites
For easy access, you can add content to the Favourites category in the main
menu. Press INFO with a folder or item selected, with the exception of individual
songs, and choose add item to Favourites. The content will then appear in the
Favourites category.
74
Player Controls
back
next
replay
skip
play
pause
rew
rec
fwd
stop
Once you are enjoying a piece of media, the following player controls can be used:
Video
• PLAY
Slideshow
• PAUSE
Music
• PAUSE
• PLAY
• PLAY
• PAUSE
• BACK
• STOP
• STOP
• NEXT
• BACK
• SKIP
• NEXT
• REPLAY
• STOP
NOTE – Northwestel supports media sharing from Windows devices to
Pulse TV. It does not support DLNA based sharing of personal media
from Apple products to Pulse TV.
75
Pay Per View
Watch premium programming
with easy access to Pay Per View
76
Finding Pay Per View Programming
You’ll find PPV programming the same way you look for regular programming: by
browsing the Channels and Filter categories or doing a search.
Throughout the user interface, you’ll e able to spot PPV programming easily
because its cards are a different color and it’s labeled with the OnDemand logo.
There is also a purchase price listed for each program.
77
Finding Pay Per View Programming
There are two ways to find PPV programming:
1. By browsing the Channels and Filter categories or doing a search, the same
way you look for regular programming.
2. By briniging the PPV category in to center focus; you’ll then see a list of all
current PPV programming in the vertical list.
Throughout the user interface, you’ll be able to spot PPV programming easily
because its cards are a different color and it’s labeled with the OnDemand logo.
There is also a purchase price listed for each program.
78
Purchasing Pay Per Vew Programming
When you see a PPV program that interest you, just press OK. You will then see an
action menu with your purchase options. You’’ll also be able to lock an content with
a Parental Control option.
79
Using a Purchase PIN
The first time you try to purchase a PPV or VOD program (or set Parental
Controls) you’ll be prompted to create a PIN that you will then enter before
making additional purchases.
You can turn the purchase PIN prompt off from the Parental Controls section of the
Settings category. See the “Settings” chapter for details.
80
Mobile Apps
A group of mobile apps brings control
of your Media Player to your tablet and smartphone.
81
The Mobile Apps
The Mobile Apps let you:
• Use your tablet or smartphone as a remote control for your Media Player.
• Browse programming in an easy-to-filter grid guide.
• Search programming by a variety of criteria.
• Schedule and manage recordings.
82
Downloading a Mobile App
You can find the Pulse TV Mobile Apps in Google Play and the iTunes store. Once you’ve downloaded a mobile app, you’ll need to pair it with your Media Player.
You can do that in three easy steps:
1. Go to the Mobile App card in the Settings area of your Media Player.
Choose add.
2. Open the mobile app on your device.
3. Enter the code displayed on the screen of your Media Player into the
mobile app.
The rest happens automatically. When you see the success message, you’re ready
to use your mobile app.
83
Intro to the Arris App
The Arris App allows you to use your smartphone or tablet as a remote
control and lets you manage your DVR and search for content with ease.
You can use the app to control any of the Media Players in your home. To
get the Arris App simply access the App Store and search for Arris App.
Select the Arris App from the list and install it on your device. Once you
have installed the app on your device it will look like this:
84
Guide Screen
The Guide screen allows you to scroll through your channel listings for up
to two weeks. You may set recordings from here or even tune to a channel
with just the touch of a button. The features that are available on this
screen are as follows:
85
1. Show/Hide Channel In Guide Icon
The Show/Hide Channel In Guide Icon lets you select what channels
you want to show up in the program guide that you see on your TV. If
the Guide Icon is showing, the channel next to it will appear in the line
up. If the Guide Icon is not showing, then the channel next to it will be
hidden from the guide on your TV screen. By default this icon and the
favorite icon (2), are not in the normal view. In order to expose these icons
it is necessary to slide the handle shown (9) to the right. When making
changes to the Show/Hide channel or Favorite channel icons, the changes
will only be sent to the Media Player if you go to the Sync area of Settings.
Once there, select Replace Settings in Media Player and then select Sync
at the bottom of the screen. More information about sync is provided in
the Settings section of this guide.
2. Favorites Icon
The Favorites Icon lets you select channels that you want to have listed in
your favorites channel lineup on your Ultra TV. If the is showing then the
channel will be included in the favorites channel lineup. See information
above in Show channel in guide Icon (1) on how to access the Favorites
icons.
3. Now Button
The Now button can be tapped at anytime to return the guide to the
current day and time.
4. Network (Channel) logos
The Network logo can be tapped to bring up all the listings available for
that channel. To return to the full guide simply tap the Guide button at the
navigation bar on the bottom on the screen.
5. Program listings
Tapping the box around the name of a program will bring up information
on the program including rating, genre, description, and cast when
available. If the program is currently airing, you can select to watch it on
TV and the Media Player will tune to that channel. If it is going to air later
then you have the option to record the show or the entire series.
86
6. Media Player Selection
Tap on the arrow next to the Media Player listed to control a different Media
Player. Note: To prevent the app from being able to control the Media Player
as a remote control, go to the Settings menu on the Media Player and
select Remote Control of Media Player and toggle the setting to off. This will
prevent the app from working as a remote control but will allow the app to
manage the DVR and use of the guide.
7. Filter Icons
Tapping the HD icon – will only show HD channels. Tapping the filter icon
next to HD will allow you to filter guide listing by genre, star rating, TV rating,
or movie rating.
8. Activity Icon
When this icon is spinning, the app is loading content or connecting. When it
stops moving all content has been loaded.
9. Handle Icon
This handle allows you to expose or hide the Favorites and Show/Hide
Channel In Guide Icons.
10. Select Date
By selecting the dropdown arrow you can select the date and time that you
would like the guide to display.
87
Scheduling Recordings
When selecting a program from the channel guide, a new window will
pop up with options for that program listing. The new window will give a
description of the show, the rating of the show, and the cast information
when available. If the listing is currently available to watch then the option to
tune to the channel and watch that show will be presented. There will also
be an option to record the program and if it is part of a series there will be
an option to record the series as well.
88
Search Screen
The Search screen allows you to search by:
• Title
• Actor/Actress Name
• Director
• Genre
• Keyword
• Description
The search screen will search the entire guide as well as any recorded
content that on the DVR. The results can be filtered by:
• All
• TV Shows
• Movies
• Recorded TV
There are also filter icons at the top right of the Search screen that allows
you to filter by HD, genre, star rating, TV ratings, and movie ratings.
89
Recorded TV Screen
In the Recorded TV screen you can manage your DVR, and control
settings for Priorities, Recorded TV, Scheduled TV, and Series. Selecting
a show within any of these screens will bring up the setting options for
that show. The options may include Play, Series Recording, Record Series,
Options, and Delete. Selecting any of these options prompts you for further
actions. Shows in the Recorded TV screen will have a banner indicating
the status of the recording as shown above.
90
Remote Screen
NOTE – The remote screen can only be used while your device is
connected to the wireless network from your Media Gateway.
The Remote screen allows you to use your device as a remote control for
your Pulse TV Media Players.
• Media Player Selection - You can select the Media Player you want to
control from the top right corner of the app. To make it easier to manage you may want to go into the Settings screen and select Account
and then rename your Media Players to something like Living Room,
Family Room, or Bedroom.
• Quick Select Keys - The Quick Select keys allow you to instantly jump
to select category cards on the Pulse TV smart menu. You can select
the Channels view, the Recorded TV screen or the HDTV screen listings.
• Shortcut Keys - The Shortcut Keys allow you to quickly bring up
Recorded TV (DVR), Video On Demand (VOD), the Grid Guide (Grid)
and Live TV.
• Menu Keys - The Menu Keys provide the ability to replay, skip, pause,
play, stop, record, last channel, fast forward, and rewind.
• Navigation Keys - The Navigation Keys can be used to navigate up,
down, right, left, back, next, and channel up and down in the
onscreen guide.
• Number Keys - Use to select the channel you want to watch.
The Trackpad screen allows you to use gestures on your device screen
to perform many of the functions that can be done with the remote.
The gesture options are shown on the screen.
91
Settings Screen
The Settings screen allows you to modify the settings for many of the
screens in the app.
Guide setting allows you to:
• Choose if you want the channels sorted numerically or alphabetically
• Determine if your filter matches are displayed, highlighted or stacked
DVR setting allows you to:
• Choose how to resolve space conflicts, select from automatically or ask
• Determine if you want to use default options or prompt for options when
scheduling new recordings
• Select DVR default settings – start, stop, episode limit, keep and accept
• Turn Confirm, Cancel, and Delete on or off
Account setting allows you to:
• Log out of the app
• Manage Media Player names
• View terms of use
92
Sync setting allows you to:
• Merge settings from the Media Player and the app
• Copy settings from the Media Player to the app
• Copy the settings from the app to the Media Player (Replace Settings
on Media Player)
Important – The Media Player must not be in the settings or favorites menu
when synching with the app.
93
SuperTicker
Now you can view the latest news headlines, sports scores,
financial news, entertainment news, and weather on your TV.
94
SuperTicker
Pressing OK with the SuperTicker category in focus will launch full screen TV with
the SuperTicker displayed along the bottom of the screen.
The SuperTicker displays information on the latest news headlines, sports scores,
financial news, entertainment news, and weather. These are called Topics. An
individual story in each topic is called an Item.
Sports scores and stock market index numbers in the SuperTicker update every 3
minutes. All other SuperTicker information updates every 15-20 minutes.
Navigation
The SuperTicker will automatically scroll through each topic, subtopic, and news
item. If you’re interested in a particular topic, you can use the left and right arrow
buttons to browse through topics and the up and down arrows to scroll through
items in each topic.
95
Lock a Topic or Item
The SuperTicker lets you lock on a topic or item in case you want to keep an eye
on the DOW or a baseball score.
Press OK when the topic or item you’re interested in appears. If you choose lock
item, the SuperTicker will stop automatic navigation, but continue to update that
item. If you select lock topic, the SuperTicker will scroll through the items in that
topic.
The Asterisk button on the remote will rotate the following options: locking a
topic, locking an item, and unlocking everything. You’ll know that a topic is locked
because the horizontal arrows turn red. When an item is locked, the vertical arrows
turn red.
96
SuperTicker Displaying Weather
1
2
1. P
ROGRAM
The current piece of media being
enjoyed.
2. ACTION MENU
Pressing OK on an item in the
SuperTicker brings up an action
menu with that item’s options.
4
3
3. N
AVIGATION
You can navigate SuperTicker topics
by using the left and right arrows.
You can navigate topics by using the
up and down buttons.
4. SUPERTICKER ITEMS
The SuperTicker menu items are
shown on one line.
97
View the Whole Story
If you see a headline that interests you, you can read the whole story by pressing
OK and choosing more info. You can also press the INFO button. An info note will
open up that displays the story.
Use the BACK and NEXT buttons to scroll through pages of the story.
98
Playing Games
The Media Player comes with a collection of games
to help you pass the time between shows.
99
Games
From the Games category on the horizontal band, you’ll have access to:
• Tomato
• Blast It
• Mahjong
• Bowling
• Ping
• Code Breaker
• Video Poker
• Blockbreaker
• Solitaire HD
• Blackjack
• Bubble Blast HD
• Slot Machine
• Invasion Wave
• 21 Frenzy
100
Screen saver and Game Display
After 30 minutes with no button-press activity, games exit and live TV appears in
full screen. However, some games include a Mini TV and some do not. The screen
saver behavior is slightly different for the two types:
Games that include a Mini TV
After 30 minutes with no button-press activity, the media playing in the Mini TV
zooms to full screen. You can also press the ZOOM button on the remote control
to move between the game and full screen of what is playing in the Mini TV.
Full-screen games that do not include a Mini TV
After 30 minutes with no button-press activity, the game suspends, and a screen
saver appears. Press any button to continue; the game will reappear and resume.
101
Settings
Settings allows you to customize your
Media Player to your preferences.
102
Parental Controls
Settings provides robust Parental Controls, including the ability to lock shows by:
• TV Rating
• Movie Rating
• Channel
In addition, you can lock out individual shows, including recorded programs, from
action menus for each show in the main menu. The system records scheduled
shows that are blocked by parental controls, but you must enter the PIN before you
can watch them..
Parental Controls also allows you to turn on the option to have a PIN prompt before
any VOD or PPV purchase.
103
Parental Controls
1
2
3
4
1. R
ATING
You can lock individual ratings by
pressing OK on the focus. Locking a
rating locks all higher ratings above
it.
2. M
INI TV
Your current program, if unlocked,
will continue to play in the Mini TV.
3. L
OCK ICON
The Lock icon displays if the item is
locked.
104
5
4. CATEGORY TITLES
Category titles display the parental
control category.
5. HELP
Help explains details about the
currently-selected rating.
Working with your PIN
Creating a PIN
1. The first time you use Parental Controls (or purchase a PPV or VOD program),
the system asks you to create a PIN.
2. In the Settings category, scroll to the Parental Controls card, and press OK.
3. Press the numbers on the remote to enter a four digit PIN and then enter the
PIN again to confirm it.
4. Choose close.
Changing a PIN
1. In the Settings category, scroll to the Parental Controls card, and press OK.
2. Choose settings, use the left arrow to scroll left to the Change PIN card, and
then press OK.
3. Enter the old PIN, enter the new PIN, and then enter the new PIN again to
confirm it.
If You Forget Your PIN, please call the Northwestel Customer Care Centre
1 888 423-2333.
VOD/PPV PIN
You can choose to turn off the PIN prompt before a VOD or PPV purchase from the
Parental Control section. Select the On Demand/Pay Per View card and press OK
to turn the PIN prompt on or off.
105
Locking and Unlocking Programs
Locking by Channels or by Rating
1. In the Settings category, scroll to the Parental Controls card, and press OK.
2. C
hoose settings. You’ll be taken to the Parental Controls menu. Use the right
arrow to choose either TV Ratings, Movie Ratings or Lock By Channel.
3. E
ach card contains a list of the rating systems or a list of channels. Scroll to the
format or channel you want to control.
Lock the rating or channel by choosing it, and then pressing OK on the remote.
When you lock a rating, all ratings for more restrictive content are also locked. For
example, if you lock the TVPG rating, then the TV14 and TVMA ratings are also
locked automatically, because these ratings are for more mature audiences than
TVPG. When unlocking, the reverse is also true.
If the V-Chip in your TV is enabled, you may see a black screen after tuning to a
channel with blocked content. No Pulse TV menu, flip bar, sound effects, or any
other audio or video are shown or heard. To correct this, change to an unblocked
channel, or disable all V-Chip functions and use the parental control features
provided by the Pulse TV system to regulate viewing.
Turning Off Parental Controls
To unlock or change all parental control settings, go to the Settings category, scroll
to the Parental Controls card, and then press OK. Follow these instructions to
unlock selected items:
1. Press OK with any locked program in focus.
2. E
nter your PIN to unlock all programming temporarily or choose more options to
only unlock the current channel.
Unlock for a Specified Amount of Time:
1. In the Settings category, scroll to the Parental Controls card, and then press OK.
2. Choose settings (within Parental Controls), scroll to the Set Relock Timer card,
and then press OK.
3. Enter your PIN, if prompted.
4. Choose the unlock duration between one and six hours.
5. Once set, the Parental Controls category card displays the selected relock time.
106
Menu Customization
The Menu Customization feature in Settings allows you to configure your main
menu and choose how TV Channels display.
Configure Main Menu
The main menu configuration section allows you to toggle each category on or off
for menu display. There are some categories, like Settings, that cannot be turned
off.
Sort Options for TV Channels
This feature allows you to choose whether the TV channels sort in ascending menu
up the vertical list or descending menu down the list.
107
Skip
Pressing the SKIP button on the remote moves you forward in recorded or stored
programs in set increments. In Settings, navigate to the Skip card and press OK.
Select the increment you want to apply to the SKIP button on your remote.
Local Network Status
Local Network Status will provide information on your network connection and
allow you to reconnect or refresh that connection.
108
Recording Space
The Recording Space card displays the amount of Recorded TV storage space
used by recorded shows. In Settings, navigate to the Recording Space card and
press OK. For details, see the Gateway hardware chapter.
EXTERNAL HARD DRIVE
You may connect one external hard drive at a time to the rear eSATA port on the
Gateway system.
the Mobile App
the Mobile App allows you to use your iPad as a remote control for your Media
Player. You can also use the Mobile App to schedule and manage recordings.
The the Mobile App card in Settings helps you set up the application once you’ve
downloaded it.
Remote Control of your Media Player
This setting allows you to turn off your Media Player’s ability to be controlled by an
alternate device, like your iPad.
109
SuperTicker
When you select the SuperTicker settings card, you’ll be able to determine which
categories appear in your SuperTicker screen display. To remove a category, simply
press OK to clear it.
Closed Caption
Most viewers use these settings to turn closed captioning on or off; however, you
can select one of the following closed caption cards to set other preferences:
• D
isplay Preferences - Choose a font type, window background and color, and
other similar closed caption display settings.
• D
igital Services - Scroll through the additional digital stream service cards provided, and press OK to make a selection. Select one option at a time.
• Basic Services - Scroll through the various basic service cards provided, and
press OK to make a selection. Select one option at a time.
110
TV Setup
If you have connected the Media Player unit to your TV with an HDMI™ cable, your
TV Setup should automatically select the correct resolution.
If you are using alternate cables, including an HDMI to DVI cable, you should
select the highest video resolution supported by your TV. The Pulse TV system
automatically adjusts the video output to match the broadcast format and the
selections set in the TV Setup card. The video resolution options are 480i (nonHDTV), 480p, 720p (default), 1080i, and 1080p.
If your TV is standard-definition (SD), make sure 480i is the only box checked. All
other video resolutions will be output at 480i. You can still watch HD channels and
they may look considerably better than their SD counterparts.
Sound Effects
Allows you to set the volume level of the Media Player sound effects, including
turning them off completely.
Front Panel
For Media Player that have a front panel, this setting allows you to set the
brightness level.
111
Aspect Ratio
Use the Aspect Ratio card in Settings to control how programming content appears
on your TV. For standard-definition (SD) TVs, choose Standard (4:3) only. You’ll
then be asked to choose how you want HD content to display on your TV, either by
letterboxing (putting black pillars on the top and bottom of the content) or cropping
the content to fit.
For Widescreen TVs, determine how standard content displays on your TV by first
choosing Widescreen (16:9) and then selecting maintain (displays standard content
as-is), or stretch (stretches the standard content to fill the TV screen).
112
Recording Defaults
Recording Defaults provides access to the same settings that are available in
Recorded TV. See the “Recorded TV” chapter for details.
External Hard Drive
When you plug in an external hard drive, this setting will help you initialize setup, as
well as provide options for disconnection.
Audio Output
Use the Audio Output card in Settings to identify the type of connection to audio
equipment. Choose from the options that the Media Player system can output:
Dolby Digital®, stereo, or mono. Depending on the broadcast content and your
audio receiver’s capabilities, sound effects may not be heard when selecting Dolby
Digital as the audio output mode.”
113
Grid Guide
The Grid Guide setting allows you to enable or disable the Grid Guide application.
Channel List
You can remove channels from displaying in the Pulse TV Main Menu by scrolling
to the desired channel and pressing OK to select or de-select the channel. If a
channel appears in your Channel List that you do not subscribe to, you can remove
it here.
Tips
his category provides information on using your Media Player features. To read a
T
tip, scroll to one that interests you and press OK.
114
Messages
You’ll receive a new message whenever there is information
from Pulse TV, like the availability of a new feature.
115
Receiving Messages
The Messages category is located in the main menu. Bring the Messages category
into focus, and your messages will appear in the vertical band. Press OK to view
each message.
Use the NEXT and BACK buttons to page through the message.
nce you have read the message, you can choose to close the message, mark it
O
as unread, or delete it.
New Message
When you receive a new message, a mail icon appears at the bottom left of your
main menu.
As soon as you have read all your messages, the icon will disappear.
116
Filters
The Media Player comes with several filter categories for
viewers who know what they like to watch and want an easy
way to find it.
117
Intro to TV Filters
Channels
Channels List Filtered
The main menu contains a group of filter cards:that only show you the types of
programs for that category. Filters include TV Music, News, Kids, Sports, Movies,
and HD. Each filter will display live TV as well as recorded, VOD, and PPV programs
that fit that category.
Like the Channels category, the TV filters have a Change Time Slot card that allows
you to browse up to two weeks into the future to see what’s on. You can also use
the BACK and NEXT buttons to move through time.
TV Filters also have a preview panel to the right that displays upcoming shows
for live TV channels in focus and additional information for other types of
programs. For live TV channels, you can navigate this panel the same way as
the Channels category.
118
Movies on TV
In addition to currently-airing and recorded movies, The Movies on TV category also
has a Pulse TV VOD card for quick access to all of the movies available for you to
watch right away. When you bring the VOD card into focus, a list of top releases
will appear in the preview panel. You can select the VOD card to access the VOD
category, or you can press the right arrow to browse the top releases.
119
Favourites
The Favourites category is a convenient way to access your
favorite TV channels, videos, photos, and music.
120
Favourites
The Favourites category provides easy access to the media you like the most. You
can build your Favourites list from any channel that appears in the TV channels
category or TV filters, excluding any channels blocked by parental controls. You can
also add a folder or file from your computer.
To add an item, press INFO with that item selected, and choose add item to
Favourites.
You can delete a single item by selecting it and choosing remove from Favourites
from the action menu. You can also press CLEAR on the remote control.
Clear the entire Favourites list by selecting the Options card (you might need to
scroll down to see it) and then choosing clear all from the action menu.
121
Internet Account Access
Your Media Player comes with Internet access to your
account, which allows you to record shows and manage your
DVR while you’re away from the TV.
122
Online Scheduling
From your Pulse TV account, you can schedule a program to record on your DVR
from any computer with Internet access.
Online scheduling uses real-time conflict resolution, so you’ll know immediately if
there are any problems recording your program.
123
Online Management
You can use your online Pulse TV account to check the list of shows you have
scheduled to record. From this list, you can manage your recordings.
124
Other Features
You can also use your online account to add Flickr users so that their photos
display in the Photos category of the main menu. Checking Interestingness will add
that popular Flickr® feature for display as well.
If you want to add Web sites for display on your TV, you add them to your online
account by typing the url.
125
Media Gateway
Hardware
There are a number of features of the Media Gateway device
that you might need to use.
126
External Hard Drive
You can expand the amount of hard drive storage on your Media Gateway by
connecting a DVR-certified eSATA external hard drive.
When you first insert the external drive into the Media Gateway, you’ll see a dialog
on all connected Media Players indicating that the drive needs to be formatted. You
can choose to respond on any Media Player; formatting can take up to 30 minutes,
and you will lose any existing content on the drive. You will receive notification when
the formatting is complete.
Before you physically disconnect an external hard drive, you must eject it using
software. Although the external hard drive is connected only to the Media Gateway,
you can eject an external hard drive using any Media Player. To disconnect an external
hard drive, from any Media Player, go to the Settings category on the main menu and
choose External Hard Drive. Choose disconnect and wait for notification that you may
now disconnect the drive.
Setting Up Your External Hard Drive:
1. Plug the eSATA connector into the eSATA port on the rear of the
Media Gateway.
2. Wait for the confirmation on all of your Media Players that the Media Gateway
recognizes the external hard drive. You will receive this confirmation on all
Media Players and can respond on any
that’s convenient.
3. If this is the first time this hard drive has been connected to this system, or if the
hard drive is not properly formatted for any reason, the system will ask if you
want to reformat the external hard drive. (Reformatting deletes all data on the
hard drive). Select yes to confirm the reformatting of the external hard drive.
4. O
nce the external hard drive is recognized and properly formatted, the
scheduler will include the additional space in scheduling decisions.
Disconnecting Your External Hard Drive:
Disconnecting an external hard drive while it is in use (playing a recording or
recording a show), can result in corrupting stored data.
1. M
anually stop all recordings in progress by selecting the program card in the
main menu, and then choosing stop recording.
2. In the Settings category, select the External Hard Drive card.
3. Select disconnect, and then press OK. 4. You may be presented with a message that the drive is still busy. If this happens,
please repeat the disconnect process at a later time.
127
Reset Button
There are two modes to the reset button located on the back of your
Media Gateway:
1. To reset all the Media Gateway functionality, excluding Wi-Fi, press and release
the reset button.
2. To reset the router and Wi-Fi to the factory defaults, press and hold the reset
button for ten seconds or more. You will know that you’ve held the button long
enough when the Record light flashes.
LED Display
The following LED displays are visible on the Media Gateway:
Power LED - Appears when the Media Gateway is currently powered on.
Link LED - Appears when a computer is connected directly via Ethernet to the
Media Gateway
Battery LED - Appears when the battery is present and charged.
MOCA LED - Appears when the Media Gateway is currently connected to an
Media Player.
Wi-Fi LED - Appears when the Wi-Fi is on and connected.
Recording - Glows red when the Media Gateway is currently recording.
128
Wireless Network Configuration
When your installer leaves your home after setting up your Media Gateway, your
network will be configured and functional.
There are a few settings that you may want to alter at some point in the future that
are accessible from the Gateway’s eRouter website at http://192.168.0.1
The default user name to log in to the website is Admin. Your installer should leave
you with information about the login password.
You may, at some point, want to change the following settings:
SSID: The default SSID (Wireless Network Name) is PULSE-ABCD (where ABCD
are the last 4 characters of the MAC ID of the Pulse Gateway. You have the option
to change the SSID to a more friendly, recognizable name.
Passphrase: The default passphrase is NORTHWESTELABCD (where ABCD are
last 4 characters of the MAC id of the Pulse Gateway). You may want to change
this passphrase initially to something more secure. In addition, you may want to
change it periodically to maintain security levels.
RF Channel: If you’re experiencing interference from a neighbor’s wireless network,
for example, try changing the RF channel frequency.
At any point if you forget the SSID and passphrase you can reset it to default
factory setting and the details of these are as follows:
SSID: The factory default SSID for your router is taken from the Media Gateway
serial number on the bottom of the Gateway. You have the option to change the
SSID to a more friendly, recognizable name.
Passphrase: The factory default passphrase for your wireless network is printed
on the label on the bottom of your Media Gateway. You may want to change this
passphrase to something more secure. In addition, you may want to change it
periodically to maintain security levels.
Connecting Devices to Your Network
If you are using a wireless network, you will need to enter the SSID and passphrase
to connect additional devices. Each device that you connect should have
instructions on where to enter this information.
If you are using a wired network, you may need to configure the TCP/IP settings on
the computers you are connecting after you attach the Ethernet cable.
129
Configuring Your Ethernet Connection
If your computer is equipped with a LAN card providing an Ethernet connection,
you may have to configure your computer’s TCP/IP settings. The steps that follow
will guide you through setting your computer’s TCP/IP settings to work with the
Telephony Gateway.
Requirements
Make sure you have the following before attempting to configure your Ethernet
connection:
• Computer with:
— One of: Windows 2000, Windows XP, Windows Vista, Windows 7, MacOS X
— Ethernet interface
• Ethernet cable (supplied)
• IP address, subnet, gateway, and DNS information for installations not using
DHCP
How to use this chapter
The following list shows the procedures for modifying the TCP/IP settings on the
computer. The procedure is slightly different depending on the operating system
that you are using. Please ensure you are using the correct steps for the operating
system on your computer. Follow the links below for instructions to configure your
Ethernet connection on your operating system.
• TCP/IP Configuration for Windows 2000
• TCP/IP Configuration for Windows XP
• TCP/IP Configuration for Windows Vista
• TCP/IP Configuration for Windows 7
• TCP/IP Configuration for MacOS X
130
TCP/IP Configuration for Windows 2000
Follow these steps to configure the Ethernet interface on a Windows 2000
operating system.
Note: Dialog boxes shown on your computer may differ slightly from those
shown in this procedure.
1. From the computer, select Start > Settings > Network and Dial-up Connections
> Local Area Connection.
2. In the Local Area Connections Properties window, highlight TCP/IP by clicking on
it one time, then click on Properties.
Note: If your computer has more than one Ethernet card, you may have to select
the appropriate Ethernet card in the Connect using: area of the Local Area
Connection Properties window.
3. Click Obtain an IP address automatically and Obtain DNS server address
automatically, then click OK.
4. Click OK to accept the new settings, and OK again to close the Configuration
window.
5. You may have to restart your computer.
131
TCP/IP Configuration for Windows XP
Follow these steps to configure the Ethernet interface on a Windows XP operating
system.
Note: Dialog boxes shown on your computer may differ slightly from those
shown in this procedure.
1. From the computer, select Start > Settings > Control Panel and doubleclick
Network Connections in the Control Panel.
The Network Connection window displays a list of LAN connections and associated
network adapters.
132
2. Double-click the local area connection to be used for your device’s network
connection. The Local Area Connection Status widow appears.
3. Click Properties.
4. Select TCP/IP by clicking it one time. Then click Properties.
133
5. Click the General tab. Then click Obtain an IP address automatically and click OK.
6. Click OK to accept the new settings, and OK again to close the Properties window.
7. You may have to restart your computer in order for your computer to obtain a new
IP address from the network.
134
TCP/IP Configuration for Windows Vista
Follow these steps to configure the Ethernet interface on a Windows Vista
operating system
1. Open the Vista Control Panel.
2. Double-click Network and Sharing Center to display the Network and Sharing
Center window.
135
3. Click Manage network connections. If prompted for a connection, choose Local
Area Connection. The Network Connections window appears.
4 Double-click the Local Area Connection to open the Properties window:
Note: If Windows requests permission to continue, click Continue.
TCP/IPv4 Selected
136
5. Double-click Internet Protocol Version 4 (TCP/IPv4) to configure TCP/IPv4.
The TCP/IP properties window for the version you selected appears.
6. For TCP/IPv4 select Obtain an IP address automatically and Obtain DNS server
address automatically, unless instructed otherwise by your cable provider.
7. Click OK to accept the new settings and close the Properties window.
137
TCP/IP Configuration for Windows 7 and 8
Follow these steps to configure the Ethernet interface on a Windows 7 and 8
operating system.
1. Open the Windows 7 Control Panel.
2. Click Network and Internet.
138
3. Click Network and Sharing Center.
4. Click Local Area Connection to open the Status window.
139
5. Click Properties to open the Properties window.
140
6. Select Internet Protocol Version 4 (TCP/IPv4) and click Properties to configure
TCP/IPv4.
The TCP/IP properties window for the version you selected appears
7. For TCP/IPv4, select Obtain an IP address v Obtain DNS server address
automatically, unless instructed otherwise by your cable provider.
8. Click OK to accept the new settings and close the Properties window. Then
click Close to back out of the remaining setup screens.
141
TCP/IP Configuration for MacOS X
Follow these steps to configure the Ethernet interface on a MacOS X
operating system.
1. Open System Preferences, either by choosing System Preferences from theApple
menu or by clicking the System Preferences icon in the dock.
2. Click the Network icon.
142
3. Choose Automatic from the Location drop-down menu, and Built-in Ethernetfrom
the Show menu.
4. Choose the TCP/IP tab, if necessary.
If you are using TCP/IPv4, go to step 5. If your cable provider requires TCP/IPv6,
go to step 8.
5. Choose Using DHCP from the Configure IPv4 menu.
6. If necessary, click the Renew DHCP Lease button.
7. Close the System Properties application. TCP/IPv4 configuration is completed.
143
Media Player Hardware
Your Media Player provides some control buttons
and indicators.
144
Resolution Reset
Media Players with front panels provide the ability reset the screen resolution in the
event that you’ve selected an unsupported resolution.
To reset the resolution, press the menu and up arrow buttons at the same time for
four seconds.
The Media Player will then start cycling through available resolutions, starting with
480i and cycling through 480p, 720p, and 1080i.
If the current resolution is supported, you’ll see a dialog asking you if you see a
picture. Selecting Yes will select that resolution. If you do not see this dialog right
away, your Media Player is scrolling through an unsupported resolution. If you wait
approximately 30 seconds, the Media Player will try a new resolution.
Front Panel Brightness
For Media Players with a front panel, you can modify its brightness by going to
Settings and selecting Front Panel. You’ll then be able to choose between high,
medium, low, or off.
Front Panel Buttons
Media Players with a front panel come with four arrow buttons and an OK button.
These front panel buttons function identically to the corresponding buttons on the
remote control.
145