1
Analog Radiosonde
RS92-KL, RS92-K
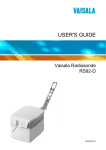
USER'S GUIDE
M210299en-A
June 2003
PUBLISHED BY
Vaisala Oyj
P.O. Box 26
FIN-00421 Helsinki
Finland
Phone (int.): +358 9 8949 1
Fax:
+358 9 8949 2227
Visit our Internet pages at http://www.vaisala.com/
© Vaisala 2003
No part of this manual may be reproduced in any form or by any means,
electronic or mechanical (including photocopying), nor may its contents be
communicated to a third party without prior written permission of the copyright
holder.
The contents are subject to change without prior notice.
Please observe that this manual does not create any legally binding obligations for
Vaisala towards the customer or end user. All legally binding commitments and
agreements are included exclusively in the applicable supply contract or
Conditions of Sale.
_________________________________________________________________________________
Table of Contents
CHAPTER 1
GENERAL INFORMATION............................................................................ 3
About This Manual ................................................................... 3
Contents of This Manual ....................................................... 3
Version Information ............................................................... 4
Related Manuals ................................................................... 4
Safety......................................................................................... 4
General Safety Considerations ............................................. 4
Product Related Safety Precautions ..................................... 5
Warranty .................................................................................... 5
CHAPTER 2
PRODUCT OVERVIEW.................................................................................. 7
Introduction to RS92 Analog Radiosonde ............................. 7
CHAPTER 3
OPERATION................................................................................................... 9
General Sounding Instructions............................................... 9
Prepare the Balloon ................................................................. 9
Unpacking the Radiosonde ................................................... 13
Analog Sonde Tuning.......................................................... 13
Sounding with DigiCORA III MW21....................................... 14
Sounding Preparations........................................................ 14
Sounding with DigiCORA II MW15........................................ 15
Sounding Preparations........................................................ 15
Activate the Battery................................................................ 16
Launch the Radiosonde......................................................... 17
Ground Equipment................................................................. 17
CHAPTER 4
MAINTENANCE ........................................................................................... 19
Storage .................................................................................... 19
Handling .................................................................................. 19
CHAPTER 5
VAISALA HELPDESK.................................................................................. 21
Getting Help ............................................................................ 21
Return Instructions ................................................................ 21
Radiosonde Failure Report ................................................... 23
VAISALA_________________________________________________________________________ 1
User's Guide _______________________________________________________________________
APPENDIX A
SAFETY INSTRUCTIONS FOR BALLOON OPERATORS.........................25
List of Figures
Figure 1
Figure 2
Figure 3
RS92 Analog Radiosonde ..........................................................7
Attaching the Balloon................................................................10
Rigging Options with RS92-KL and RS92-K ............................12
List of Tables
Table 1
Table 2
Manual Revisions .......................................................................4
Related Manuals.........................................................................4
2 _____________________________________________________________________M210299en-A
Chapter 1 _________________________________________________________ General Information
CHAPTER 1
GENERAL INFORMATION
About This Manual
This manual provides information for installing, operating, and
maintaining the RS92 Radiosonde.
Contents of This Manual
This manual consists of the following chapters:
- Chapter 1, General Information, provides important safety, revision
history, and warranty information for the product.
- Chapter 2, Product Overview, introduces the RS92 Radiosonde
features, advantages, and the product nomenclature.
- Chapter 3, Operation, contains information that is needed to
operate this product.
- Chapter 4, Maintenance, provides information on the basic
maintenance of the product.
- Chapter 5, Vaisala Helpdesk, and Return Instructions.
- Appendix A, Safety Instructions for Balloon Operators.
VAISALA_________________________________________________________________________ 3
User's Guide _______________________________________________________________________
Version Information
Table 1
Manual Code
M210299en
Manual Revisions
Description
This manual
Related Manuals
Table 2
Manual Code
M210295en
M210329en
Related Manuals
Manual Name
RS92 Digital Radiosonde User's Guide
GC25 Ground Check Set User's Guide
Safety
General Safety Considerations
Throughout the manual, important safety considerations are
highlighted as follows:
WARNING
Warning alerts you to a serious hazard. If you do not read and follow
instructions very carefully at this point, there is a risk of injury or
even death.
CAUTION
Caution warns you of a potential hazard. If you do not read and
follow instructions carefully at this point, the product could be
damaged or important data could be lost.
NOTE
Note highlights important information on using the product.
4 _____________________________________________________________________M210299en-A
Chapter 1 _________________________________________________________ General Information
Product Related Safety Precautions
The RS92 Radiosonde delivered to you has been tested for safety and
approved as shipped from the factory. Note the following precautions:
WARNING
Conduct soundings in a safe environment and in accordance with all
applicable restrictions and regulations.
WARNING
Do not use the radiosonde in an area with power lines or other
obstructions overhead. Make sure that you check the area for such
obstructions before using.
WARNING
Do not use the radiosonde without consultation and cooperation with
local and other applicable aviation authorities.
WARNING
Do not modify the unit in any way, except as instructed in the
manual.
WARNING
Do not use the radiosonde for any purpose other than for soundings.
Warranty
For certain products Vaisala normally gives a limited one year
warranty. Please observe that any such warranty may not be valid in
case of damage due to normal wear and tear, exceptional operating
conditions, negligent handling or installation, or unauthorized
modifications. Please see the applicable supply contract or conditions
of sale for details of the warranty for each product.
VAISALA_________________________________________________________________________ 5
User's Guide _______________________________________________________________________
This page intentionally left blank.
6 _____________________________________________________________________M210299en-A
Chapter 2 ___________________________________________________________ Product Overview
CHAPTER 2
PRODUCT OVERVIEW
This chapter introduces the RS92 Radiosonde features, advantages,
and the product nomenclature.
Introduction to RS92 Analog Radiosonde
The RS92 Analog Radiosonde offers improved accuracy of humidity,
pressure, temperature measurement. This new radiosonde type
features a silicon pressure sensor and heated twin Humicap sensor.
The RS92 Analog Radiosonde has a small and fast temperature sensor
and features easy 'add sensor' capability. The RS92 radiosonde is
available in digital and analog versions. The synthesizer based
transmitter is stable and uses narrow bandwidth.
0212-250
Figure 1
RS92 Analog Radiosonde
VAISALA_________________________________________________________________________ 7
User's Guide _______________________________________________________________________
The following numbers refer toFigure 1 on page 7:
1
2
3
4
5
6
7
8
=
=
=
=
=
=
=
=
Battery housing
RS92-KL Analog Radiosonde
Antenna
Temperature sensor
Humidity sensor
Sensor boom
GC25 interface
Special sensor interface
The RS92 Analog Radiosonde can be used with the new DigiCORA
III (MW21) as well as the DigiCORA II systems (MW11, 12, 15, 21)
using the UPP210 radio card with MWG card software update.
For up-to-date and detailed technical datasheet on the RS92-K and
RS92-KL Analog Radiosondes, visit the Vaisala website at
www.vaisala.com.
8 _____________________________________________________________________M210299en-A
Chapter 3 _________________________________________________________________ Operation
CHAPTER 3
OPERATION
This chapter contains information that is needed to operate this
product.
General Sounding Instructions
For a successful sounding, it is essential to carry out the pre-launch
steps as instructed and always in the same way.
Before preparing the radiosonde, prepare the balloon and (if
necessary) parachute or cardboard sheet and rigging. Details for
proper and safe balloon preparation are provided in the following
section.
Prepare the Balloon
The balloon and rigging (when necessary) must be prepared before the
radiosonde. This is necessary, as the radiosonde must be launched
within 15 minutes of battery activation.
WARNING
It is essential that you read the safety instructions in Appendix A on
page 25 before proceeeding. Carefully study the instructions for use
of the hydrogen generator and for the correct method of inflation.
1.
Attach the balloon to the gas nozzle by securing the balloon with
string or clamp.
VAISALA_________________________________________________________________________ 9
User's Guide _______________________________________________________________________
WARNING
2.
Inflate the balloon in strict accordance to balloon manufacturer's
correct inflation instructions. Do not leave the balloon filling
shed while inflating.
3.
Close the gas valve.
Take extreme caution when handling the inflated balloon!
4.
Tightly secure the neck of the balloon with a string before
removing the balloon from the gas nozzle.
5.
Fold the neck over double and secure firmly. Tie the string
higher up to ensure the unwinder can easily fit. Note that the
unwinder hook must come out the other side, as shown in Figure
2 below.
0212-246
Figure 2
NOTE
Attaching the Balloon
Be careful to attach the balloon correctly. This is the only correct
method to attach the balloon to unwinder.
The purpose of the unwinder is to unwind the suspension string gently
and slowly. For this to be possible, the unwinder must be attached
firmly to prevent its movement relative to the balloon. If the unwinder
were allowed to move about freely, the suspension string would
unwind too quickly and the radiosonde might hit the ground upon
launch.
10 ____________________________________________________________________M210299en-A
Chapter 3 _________________________________________________________________ Operation
If you cannot attach the radiosonde with the unwinder to the balloon
as instructed – for instance when using a radar reflector – attach the
unwinder with string to a distance of about 10 cm from the reflector
and the reflector to a distance of approximately 50 cm from the
balloon, see Figure 3 on page 12 for further information.
VAISALA________________________________________________________________________ 11
User's Guide _______________________________________________________________________
Balloon
Unwinder
60 m string
RS92
OPTION 1
OPTION 2
12 ____________________________________________________________________M210299en-A
Chapter 3 _________________________________________________________________ Operation
NOTE
The RS92 Analog Radiosonde can be disturbed by strong highfrequency transmitters of various kinds, such as aerial surveillance
radars and mobile phones. For example, mobile phones should not be
taken closer than 10 meters to the radiosonde.
NOTE
The RS92 Analog Radiosonde should not be closer than at a distance
of 3 m to another radiosonde. This requirement should be kept in
mind especially when performing dual soundings.
Unpacking the Radiosonde
CAUTION
1.
Tear open the foil bag as indicated.
2.
Remove the rubber-band and lift the cardboard flap protecting
the sensor boom. Be careful to avoid touching or hitting the
sensors on the sensor boom from here on.
3.
Remove the radiosonde from the package, free the antenna, and
take the unwinder out of the package with the radiosonde.
Do not touch or hit the sensors on the sensor boom. Also be careful
not to bend the GPS antenna. By carefully handling the radiosonde
and the sensor boom, as well as the GPS antenna, you will ensure
proper functioning of the radiosonde during sounding.
Analog Sonde Tuning
The analog Radiosondes RS92-KL and RS92-K are tuned at the
factory to the frequency of 403 MHz. Should the frequency have
changed for any reason, adjust it with the tuning potentiometer at the
bottom of the radiosonde (see Figure 1).
Turn the screw with a screwdriver clockwise to lower the frequency
and counterclockwise to increase the frequency. In case the frequency
has changed, it is preferable to lower the frequency, i.e. turn the screw
clockwise.
VAISALA________________________________________________________________________ 13
User's Guide _______________________________________________________________________
CAUTION
Adjust the frequency of the transmitter carefully, staying within the
400 to 406 MHz telemetry band. If tuned too far, the tuning screw
can drop inside the radiosonde.
Adjust the frequency only when the ground equipment is in the Track
mode (display shows: 40x.xx Hz Trck....) and you can see the
frequency changing while turning the screw. Do not exceed 405.5
MHz if the frequency does not change when you carefully turn the
screw. If the screw drops inside the radiosonde and the frequency is
outside the applicable range, the radiosonde is damaged beyond repair
and has to be discarded.
NOTE
Be sure to follow the local regulations for radio communications and
telecommunications.
Sounding with DigiCORA III MW21
When using RS92 Analog Radiosonde with DigiCORA III, no tape
reader is necessary. The GC25 unit will communicate directly with
DigiCORA III. For example, the radiosondes coefficients are
automatically given to DigiCORA III via telemetry.
Sounding Preparations
For details on using the GC25 Ground Check Set, refer to the GC25
Ground Check Set User's Guide. See Related Manuals on page 4 for
details.
For details on using the GC25 Ground Check Set, refer to the GC25
Ground Check Set User's Guide. See Related Manuals on page 4 for
details.
1.
Switch on the PC and start a new sounding with the DigiCORA
III software. For details refer to the DigiCORA III User's Guide.
2.
Make sure the GC25 is switched on.
14 ____________________________________________________________________M210299en-A
Chapter 3 _________________________________________________________________ Operation
CAUTION
3.
Set the radiosonde into the GC25 as explained in the GC25
User's GUide. For detailed instructions on conducting a ground
check see section Operation in the GC25 Ground Check Unit
User's Guide, refer to Related Manuals on page 4.
4.
Find the radiosonde frequency using DigiCORA III. For further
information, refer to the DigiCORA III User's Guide, refer to
see the appropriate ground equipment manual.
5.
Remove the radiosonde from the GC25 as instructed. Be careful
not to touch or hit the sensor boom.
6.
Using your index fingers, pull the clips apart and bend the
sensor boom forward into flight position with your thumb.
When handling the sensor boom, be careful not to touch or hit the
sensors. When pressing the sensor boom into flight position, only
touch the bottom of the boom so as to not contaminate the surface.
The sonde is now ready for battery activation, refer to section Activate
the Battery on page 16.
Sounding with DigiCORA II MW15
When using RS92 Analog Radiosonde with DigiCORA III, no tape
reader is necessary. The GC25 unit will communicate directly with
DigiCORA III. For example, the radiosondes coefficients are
automatically given to DigiCORA III via telemetry.
Sounding Preparations
For details on using the GC25 Ground Check Set, refer to the GC25
Ground Check Set User's Guide. See Related Manuals on page 4 for
details.
1.
Switch on MW15 (MW11 or MW12) and start a new SOND
program with the DigiCORA I - II software. For details refer to
appropriate User's Guide.
2.
Make sure the GC25 is switched on.
3.
Set the radiosonde into the GC25. For detailed instructions, refer
to the GC25 Ground Check Unit User's Guide.
VAISALA________________________________________________________________________ 15
User's Guide _______________________________________________________________________
CAUTION
4.
Find the radiosonde frequency using DigiCORA I - II. For
further information, refer to the appropriate DigiCORA User's
Guide.
5.
When the proper frequency has been found, the coefficients will
be read automatically via telemetry. Wait until the coefficients
transfer is completed. For detailed instructions on conducting a
ground check see section Operation in the GC25 Ground Check
Unit User's Guide, refer to Related Manuals on page 4.
6.
Remove the radiosonde from the GC25.
7.
Using your index fingers, pull the clips apart and bend the
sensor boom forward into flight position with your thumb.
When handling the sensor boom, be careful not to touch or hit the
sensors. When pressing the sensor boom into flight position, only
touch the bottom of the boom so as to not contaminate the surface.
The radiosonde is now ready for battery activation, refer to section
Activate the Battery below.
Activate the Battery
CAUTION
1.
Open the battery wrapping with scissors.
2.
Dip the battery in water for four minutes. Use fresh tap water,
with a temperature of 15 to 25 °C.
3.
The battery will be ready for use after 4 minutes of immersion.
Do not press water out of the battery.
4.
Connect the battery connector. Make sure the red wire is
connected to the side marked with the text "RED".
Make sure to observe the correct polarity when connecting the battery
to the radiosonde power cord. Reversing the polarity can render the
radiosonde inoperable.
5.
NOTE
Re-insert the battery into its receptacle with the wax end down.
Close the battery cover.
One end of the battery is waxed to prevent leakage. Therefore, the
battery should be inserted with the waxed end down.
16 ____________________________________________________________________M210299en-A
Chapter 3 _________________________________________________________________ Operation
NOTE
You now have 15 minutes for handling the radiosonde before launch.
The sonde is now prepared for launch. The radiosonde is now
prepared for launch. Attach the radiosonde unwinder to the balloon as
explained in section Prepare the Balloon on page 9.
Launch the Radiosonde
When launching the radiosonde, proceed as follows:
1.
NOTE
To launch the RS92 Analog Radiosonde, hold the unwinder so
that the string cannot begin to run out before release.
When releasing the sonde, keep the string length between the
radiosonde and the unwinder as short as possible.
2.
Immediately after the launch, check the reception of the
radiosonde frequency on the receiver. Correct the tuning if
necessary.
3.
The radiosonde should be launched within 15 minutes from the
battery activation. A setup with a radar reflector between the
balloon and the unwinder should be prepared as far as possible
before activating the battery.
4.
The preparation and setup procedures for ozone soundings with
RS92 Analog Radiosonde can be found in the appropriate
manuals.
Ground Equipment
At this stage the ground equipment will ask you for surface
observation information. Please refer to your sounding equipment
manuals for further details on monitoring the sounding and
receiving/viewing sounding data.
VAISALA________________________________________________________________________ 17
User's Guide _______________________________________________________________________
This page intentionally left blank.
18 ____________________________________________________________________M210299en-A
Chapter 4 _______________________________________________________________ Maintenance
CHAPTER 4
MAINTENANCE
This chapter provides information on the basic maintenance of the
product.
Storage
The radiosondes must be stored and used properly in accordance with
applicable instructions, the User’s Manual, and specifications issued
by Vaisala.
Proper storage conditions must fulfill the following requirements:
Radiosondes are to be kept in their original packaging (unopened
vacuum envelopes) in a dry, ventilated indoor storage space, and
within the following key environmental limits (ref. IEC 721-3-3 class
3K3):
- Constant temperature, within the range of +5 to +40 °C
- Constant humidity below 85 % RH
Handling
Vaisala radiosondes must be transported in their original shipping
packings. These packings are designed and built to survive and protect
their contents in the environmental conditions described herein with
the terminology and definitions per standard: IEC 60721-3-2,
Transportation of radiosondes requires climatic conditions 2K2 and
mechanical conditions class 2M1 of this standard:
- Transportation in weather protected conditions.
VAISALA________________________________________________________________________ 19
User's Guide _______________________________________________________________________
- Using conventional means (car, truck, and/or aircraft), with free fall
not exceeding 0.25 m in any circumstance.
- Additional markings on packing must be followed.
20 ____________________________________________________________________M210299en-A
Chapter 5 ___________________________________________________________ Vaisala Helpdesk
CHAPTER 5
VAISALA HELPDESK
Getting Help
For technical questions or assistance, contact Vaisala technical
support:
E-mail
[email protected]
Telephone
+358 9 8949 2789
Fax
+358 9 8949 2790
Return Instructions
If the product needs repair, please follow the instructions below to
speed up the process and avoid extra costs.
1.
Read the warranty information.
2.
Write a Problem Report with the name and contact information
of a technically competent person who can provide further
information on the problem.
3.
On the Problem Report, please explain:
- What failed (what worked / did not work)?
- Where did it fail (location and environment)?
- When did it fail (date, immediately / after a while /
periodically / randomly)?
- How many failed (only one defect / other same or similar
defects / several failures in one unit)?
- What was connected to the product and to which connectors?
VAISALA________________________________________________________________________ 21
User's Guide _______________________________________________________________________
- Input power source type, voltage and list of other items
(lighting, heaters, motors etc.) that were connected to the
same power output.
- What was done when the failure was noticed?
4.
Include a detailed return address with your preferred shipping
method on the Problem Report.
5.
Pack the faulty product using an ESD protection bag of good
quality with proper cushioning material in a strong box of
adequate size. Please include the Problem Report in the same
box.
6.
Send the box to:
Vaisala Oyj
Contact person / Division
Vanha Nurmijärventie 21
FIN-01670 Vantaa
Finland
22 ____________________________________________________________________M210299en-A
Chapter 5 ___________________________________________________________ Vaisala Helpdesk
Radiosonde Failure Report
To be sent to Vaisala HelpDesk, contact information below.
Filled by
Station
Date
Sounding Equipment
Ground Equipment
Wind Processor
Antenna
Receiver
PTU Processor
Sounding Program Revision Number (from printout):
Status Report printout attached
Raw Data disks included
METGRAPH/EDT data included
Config List printout attached
Additional printouts/material
Sonde returned
pages
pcs
pcs
pages
pages
Weather at Launch
Present Weather
ww =
Clouds
Temperature
group =
°C
No precipitation
Fog
Drizzle
Rain
Heavy Rain
Snow
Freezing
Thunder
Clear sky
Low clouds
High clouds
%
Wind Speed
m/s
Relative Humidity
Sounding
Radiosonde
Ground check
Sounding preparations
Balloon
Type
Serial Number
Parachute
Radar Reflector
P Correction
hPa;
T Correction
U Correction
% RH
°C
Approximative time from battery activation to balloon launch
min
Type
Size
g
Nozzle lift
g
Failure Description
Reason
Material
Sounding data at failure Time from start
Ground equipment display error code
Loudspeaker sound
Silence
Field strength
1 (weak)
GC failure
min;
Failure during sounding
Other reason (describe below)
P
hPa;
T
U
% RH
°C;
Noise
2
Noisy signal
3
Clear signal
4
5 (strong)
Detailed Failure Description
Continues on additional paper
Customer Contact Information
Customer
Contact Person
Postal Address
Phone
Fax
E-mail
I want to be informed about the case progress by:
Complaint Sent to Vaisala HelpDesk By
E-mail
Telefax
Post
[email protected]
+358-9-8949 2790
Vaisala Oyj HelpDesk, P.O. Box 26, FIN-00421 Helsinki, Finland
Date
Vaisala Contact Person
Filled in By Vaisala HelpDesk
Received by
Related HelpDesk Case Number
Date
Notes
VAISALA________________________________________________________________________ 23
User's Guide _______________________________________________________________________
This page intentionally left blank.
24 ____________________________________________________________________M210299en-A
Appendix A _______________________________________ Safety Instructions for Balloon Operators
APPENDIX A
SAFETY INSTRUCTIONS FOR
BALLOON OPERATORS
The safety instructions for radiosonde operators are provided on the
following page for your convenience. Photocopy the instructions and
place the list into clear view in the balloon filling shed and in the
sounding compartment.
VAISALA________________________________________________________________________ 25
User's Guide _______________________________________________________________________
To be placed into view in the balloon filling shed and in the
sounding compartment.
WARNING
1.
No smoking or naked flame is allowed.
2.
If possible, avoid wearing clothing of nylon or other synthetic
fabric to avoid buildup of static charges. Do not use shoes with
rubber soles.
3.
Wear protective glasses.
4.
Regularly check the gas tube for secure fit to the gas cylinder or
generator nozzle and to the balloon inflation nozzle.
5.
Prevent gas leakage in the shed when interrupting inflation to
replace gas cylinder.
6.
Never use a mended balloon.
7.
Should a leak develop in the balloon during inflation, do not let
off gas from the balloon in the shed. Instead, release the
defective balloon without load. It is not advisable to deflate the
balloon even outside near the shed.
8.
Do not touch the balloon with bare hands except when holding it
by the neck. Use gloves of soft cotton.
9.
Ensure that there are no pointed objects in the shed. Nails,
hooks, hinges, padlocks, etc., are dangerous as they might
scratch the inflated balloon. The balloon film is only 0.05-0.1
mm thick upon launch; the slightest scratch could cause
premature or even immediate burst in the shed.
10.
Keep the doors of the shed shut while inflating the balloon on a
windy day. However, ensure that the shed is properly ventilated.
11.
No outside person shall be allowed admittance to the shed while
the hydrogen generator is in operation or balloon inflation is
going on.
12.
Ensure that all tools and other implements not essential for
balloon inflation have been removed from the shed.
New operator! Carefully study the instructions for use of the
hydrogen generator and for the correct method of inflation.
26 ____________________________________________________________________M210299en-A