1
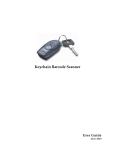
Keychain Barcode Scanner User Guide June 2008 © 2008 TABLE OF CONTENTS Quick Start..................................................................................................................................................... 4 Congratulations......................................................................................................................................... 4 Scanner Features ..................................................................................................................................... 4 What’s Included with Your Scanner.......................................................................................................... 5 What You Need to Get Started ................................................................................................................. 6 Summary of Adding Products to Your Order or Order Form .................................................................... 7 Using the Scanner with the Web Site ........................................................................................................... 8 Setting up the Scanner ............................................................................................................................. 8 Enabling the Scanner ............................................................................................................................... 8 Printing Item Barcodes ........................................................................................................................... 10 Printing Item Barcode Quantities........................................................................................................ 10 Printing Item Barcode Labels from Items Purchased......................................................................... 11 Printing Barcodes from a Shopping List............................................................................................. 12 Scanning Item Codes and Ordering Products ........................................................................................ 13 Setting Keychain Barcode Scanner Ordering Preferences .................................................................... 15 Using the Scanner with ArubA eZ............................................................................................................... 16 Setting up the Scanner ........................................................................................................................... 16 Enabling Your Scanner........................................................................................................................... 16 Printing Item Barcodes ........................................................................................................................... 17 Printing Item Barcode Quantities........................................................................................................ 17 Printing Item Barcode Labels from Order History ............................................................................. 17 Printing Item Barcode Labels from Shopping Lists ............................................................................ 17 Scanning Item Codes and Ordering Products ........................................................................................ 18 Deleting Barcodes....................................................................................................................................... 19 Deleting Barcodes with Web Site ........................................................................................................... 19 Deleting Barcodes with ARUBA EZ........................................................................................................... 19 Keychain Barcode Scanner User Guide Page 3 QUICK START Congratulations Thank you for purchasing the Keychain Barcode Scanner. The scanner is a Portable pocketsized device that offers you an alternative method to order items on the Web Site or using ARUBA EZ. This quick and simple solution enables you to scan product codes and/or ordering quantities directly from a product list or shelf label and then upload the scanned items to your order on the Web Site and/or to the Order Form on ARUBA EZ simply by connecting the scanner to your computer using a USB or Serial cable. NOTE: If you have not already done so already, please review the Setup Instructions enclosed with your scanner before using it on the Web Site or ARUBA eZ. Scanner Features Small and lightweight — Fits onto a keychain and easily carried in pocket or purse Allows scanning of item codes and quantities Previously scanned item codes and quantities can be deleted Can store up to 300 item codes without scanning quantities Can store up to 150 item codes if a quantity value of 1 for each product Can perform up to 5,000 scans with a new set of batteries Real-time clock — Each bar code is time/date stamped Non-volatile Memory — Retains scanned item codes even when batteries are removed Battery Operated — Uses 4 Silver Oxide Watch Batteries Serial Connector or USB Connector Compatible Compatible with Windows 98 (Serial Connector Only), Windows 2000, Windows Me (Serial Connector Only) and Windows XP Page 4 Keychain Barcode Scanner User Guide What’s Included with Your Scanner Depending upon the configuration purchased, the Barcode Keychain Scanner is packaged with a serial communication cable or a USB communication cable set, the USB Driver Installation CD, a Read Me First, an Owner’s Guide, and Setup Instructions. Keychain Barcode Scanner Serial Cable USB-to-Serial Converter Cable USB Driver Installation CD Read Me First Keychain Barcode Scanner User Guide Page 5 Owner’s Guide Setup Instructions What You Need to Get Started To scan item codes with the Keychain Barcode Scanner, you need: Keychain Barcode Scanner USB Driver Installation CD needed to install USB Driver (if necessary) USB or Serial Cable (Serial Connection recommended for faster upload) IBM or IBM-compatible Computer with a mouse Pentium II (or better) processor with a memory of at least 32MB CD-ROM to install the Scanner USB Driver Windows 98 or Me (Serial Connection only) Windows 2000, Windows XP, or newer (Serial and USB Connection) Hard Disk with at least 75MB of free space Internet Connection for Web Site Access (Dial-up, DSL, or Broadband) Internet Explorer 4.0 or higher for Web Site Access Adobe Acrobat 6.0 or higher (for Printing Barcode Reports) Page 6 Keychain Barcode Scanner User Guide Summary of Adding Products to Your Order or Order Form To add products to your Order or Order Form: 1. Print a list of Barcode Labels if necessary. 2. Simply point and click to scan the desired item codes and quantities. Aim the scanner at the desired barcode from a product list or shelf label. Press and hold the large button on the scanner until you hear the tone and the blinking indicator turns solid green. NOTE: Make sure the scanner beam covers the entire barcode and extends as far out as indicated by the endpoints of the barcode. The scanner should be held approximately 2.5 inches from the barcode and at a slight angle. 3. Connect the scanner to the computer using a USB or Serial cable. If using the USB Connector, you must install the USB driver from the enclosed CD. See the Setup Instructions enclosed with your scanner. 4. Go to the Web Site or open ArubA eZ. 5. If using the Web Site (see Using the Scanner with Web Site): a. Login by entering your User ID and Password. b. Go to the My Account Page. c. Click the link “Keychain Barcode Scanner” in the My Account Menu. d. Click the link “Enable Scanner.” e. Click the link “Upload Scannned Items” at the bottom of the page. f. The scanned items are automatically added to your order page. 6. If using ARUBA eZ (see Using the Scanner with ARUBA eZ): a. Login by entering your User Name and Password. b. From the Tools Menu, click System Setup. c. Click the Enable Barcode Device button. d. Click the Upload Scanned Items to Order button on the Order Form. e. The scanned items are automatically added to the Order Form. 7. Review and submit your order. Keychain Barcode Scanner User Guide Page 7 USING THE SCANNER WITH THE WEB SITE To use the scanner with the Web Site: 1. Setup the Scanner 2. Enable the Scanner 3. Print Barcodes 4. Scan Item Codes and Order Products Setting up the Scanner Before using the Keychain Barcode Scanner, you must setup the scanner according to the type of connection used. To setup your scanner, see the Setup Instructions enclosed with the scanner. Enabling the Scanner Before using the Keychain Barcode Scanner to add products to your order, you must first enable the scanner. Once enabled, you can disable it if necessary. To enable your scanner for the Web Site: 1. Go to the Web Site. 2. Login: a. Enter your User ID and Password. b. Go to the My Account Page. 3. Click the Yes button. Page 8 Keychain Barcode Scanner User Guide 4. Click the link “Keychain Barcode Scanner” in the My Account Menu. 5. Click the link “Enable Scanner” on the Keychain Barcode Scanner Page. 6. You will be prompted to install the Scanner ActiveX Control. Depending on your operating system, you may be presented with one of the following messages: Keychain Barcode Scanner User Guide Page 9 NOTE: Internet Security Settings for Download Unsigned ActiveX Controls must be enabled to download Scanner Software. 7. Click Yes button and continue with the installation. NOTE: This installation may take a few seconds and is required in order for your scanner to be fully operational. 8. Once the installation is completed, you may begin using your device. The following confirmation message may be displayed. 9. Click the OK button. Printing Item Barcodes If necessary, you can print: Item Barcode Quantities Item Barcode Labels from Purchase History Item Barcode Labels from a Shopping List Printing Item Barcode Quantities To print item barcode quantities: 1. Go the Keychain Barcode Scanner Page and click the link “Print a list of Item Quantity Barcodes” at the bottom of the page. Page 10 Keychain Barcode Scanner User Guide 2. Click the Print button. 3. Close the pop-up window. Printing Item Barcode Labels from Items Purchased To print a list of barcode labels: 1. Go the Keychain Barcode Scanner Page and click the link “Print Barcodes from your items purchased.” 2. Click the link . 3. If you want to print a list of item quantity barcodes, click the link Item Quantity Barcodes and then click the Print button. 4. If you want to print barcode labels for products, click the link Barcode Labels and then click the Print button. 5. If you want to print a barcode report, click the link Barcode List and then click the Print button. Keychain Barcode Scanner User Guide Page 11 6. Close all pop-up windows. Printing Barcodes from a Shopping List To print item quantity barcodes from a shopping list: 1. Go the Keychain Barcode Scanner Page and click the link “Print Barcodes from a Shopping List.” 2. Click the link . 3. Click the link Print Barcodes. Page 12 Keychain Barcode Scanner User Guide 4. If you want to print a list of item quantity barcodes, click the link Item Quantity Barcodes and then click the Print button. 5. If you want to print barcode labels for products, click the link Barcode Labels and then click the Print button. 6. If you want to print a barcode report, click the link Barcode List and then click the Print button. 7. Close all pop-up windows. Scanning Item Codes and Ordering Products To scan item codes and add them to your Current Order: 1. Connect the scanner to the computer using a USB or Serial cable. If using the USB Connector, you must install the USB driver from the enclosed CD. See the Setup Instructions enclosed with your scanner. 2. Go to the Web Site. 3. Login: a. Enter your User ID and Password. b. Go to the My Account Page. Keychain Barcode Scanner User Guide Page 13 4. Click the Yes button. 5. Click the link “Keychain Barcode Scanner” in the My Account Menu. 6. Click the link “Enable Scanner.” Page 14 Keychain Barcode Scanner User Guide 7. Click the link “Upload Scannned Items” at the bottom of the page. 8. The scanned items are automatically added to Your Order Page. NOTE: If an Internet connection is not detected once the scanner is connected, a message "the items will be stored offline temporarily" is displayed. Once the Internet connection is detected, an option to "Load Offline Orders" is displayed. When selected, all items previously stored are uploaded to the Current Order. 9. If the scanner is connected, all the products stored are automatically transferred to your order. A “processing…please wait” message is displayed while the data is transferred to your order. Once the transfer is completed, your order page is refreshed and displays the newly added items from the scanner. The last item scanned is displayed at the top of your order page. If the scanner is not connected, a message “Device is not detected. Please connect the scanner to the computer” is displayed. Once the scanner is connected, the items stored in the scanner are automatically transferred to your order. However, if there are no products stored in the scanner, a message “No items are present on scanner. Please scan your items and re-upload” is displayed. NOTE: All items are automatically removed from the scanner device once they have successfully been transferred to your order, and are displayed at the top. Items scanned that are not recognized in the Web Site Catalog are displayed in red. 10. Review the order and click check out to submit the order. Setting Keychain Barcode Scanner Ordering Preferences To set the scanner default ordering quantity: 1. Click the link “Keychain Barcode Scanner” in the My Account Menu. 2. Select the default ordering preference: Last quantity ordered (a value of 1 if the item has never been ordered) Set Quantity to 1. NOTE: All quantity values scanned will override the default settings in the this page. Keychain Barcode Scanner User Guide Page 15 USING THE SCANNER WITH ARUBA EZ To use the scanner with ARUBA EZ: 1. Setup the Scanner 2. Enable the Scanner 3. Print Barcodes Setting up the Scanner Before using the Keychain Barcode Scanner, you must setup the scanner according to the type of connection used. To setup your scanner, see the Setup Instructions enclosed with the Scanner or open ARUBA EZ and click ARUBA EZ Help from the Help Menu. Enabling Your Scanner Before using the scanner to add products to your Order Form, you must enable the scanner. To enable your scanner: 1. Open ARUBA EZ by double-clicking the ARUBA EZ Shortcut Icon on your PC Desktop. NOTE: If you do not see the ARUBA EZ Shortcut Icon on your desktop, please verify with E-Commerce Support that ARUBA EZ has been installed on your PC. 2. Login to ARUBA EZ: a. Enter your assigned User Name and Password. b. Click the OK button. NOTE: The default username is “ADMIN.” The “ADMIN” is the highest-level user, has access to all customer features, and can create or modify other users. If you forget your assigned password, please call E-Commerce Support at 1-800-711-6032. 3. From the Tools Menu, click System Setup. Page 16 Keychain Barcode Scanner User Guide 4. Click the Enable Barcode Device button. Printing Item Barcodes If necessary, you can print: Item Barcode Quantities Item Barcode Labels from Purchase History Item Barcode Labels from a Shopping List Printing Item Barcode Quantities To print item barcode quantities: 1. Select Print Barcodes from the File Menu, and then select Quantities. 2. Click the Print button from the pop-up window. 3. Close the pop-up window. 4. Click the Close button. Printing Item Barcode Labels from Order History To print a list of barcode labels: 1. Select Print Barcodes from the File Menu, and then select Labels or Tags. 2. Click the Print button on the pop-up window. 3. Close the pop-up window. 4. Click the Close button. Printing Item Barcode Labels from Shopping Lists To print a list of barcode labels: 1. From the Order Menu, click Shopping List to display the Shopping List pop-up window. Alternatively, you can click the Shopping List button on the Tool Bar, or use the keyboard shortcut Ctrl+L. 2. Select a Shopping List from the drop-down list. 3. To print labels, click the Labels button. 4. To print tags, click the Tags button. 5. To print a report, click the Report button 6. Click the Print button on the pop-up window. 7. Click the Close button. Keychain Barcode Scanner User Guide Page 17 Scanning Item Codes and Ordering Products To scan item codes and add them to your Order Form: 1. Connect the scanner to the computer using the USB or Serial Connector. If you connect the scanner using the USB Connector, you must install the USB Driver from the enclosed CD. See the Setup Instructions enclosed with your scanner. 2. Open ARUBA EZ by double-clicking the ARUBA EZ Shortcut Icon on your PC Desktop. NOTE: If you do not see the ARUBA eZ Shortcut Icon on your desktop, please verify with E-Commerce Support that ARUBA eZ has been installed on your PC. 3. Login to ARUBA EZ: a. Enter your assigned User Name and Password. b. Click the OK button. NOTE: The default username is “ADMIN.” The “ADMIN” is the highest-level user, has access to all customer features, and can create or modify other users. If you forget your assigned password, please call E-Commerce Support at 1-800-711-6032. 4. Click the Upload Scanned Products Button on the Order Form. 5. If the scanner is connected, all the products stored are automatically transferred to the Order Form. A “Adding Products to Order . . .” message is displayed while the data is transferred to the Order Form. Once the transfer is completed, the Order Form is refreshed and displays the newly added items from the scanner. The last item scanned is displayed at the top of the Order Form. If the scanner is not connected, a message “Device is not detected. Please connect the scanner to the computer” is displayed. Once the scanner is connected, the items stored in the scanner are automatically transferred to the Order Form. However, if there are no products stored in the scanner, a message “No items are present on scanner. Please scan your items and re-upload” is displayed. NOTE: All items are automatically removed from the scanner device once they have successfully been transferred to your order and are displayed at the top. Items scanned that are not recognized in the catalog are displayed in yellow. Page 18 Keychain Barcode Scanner User Guide 6. Review the order and click Connect to submit the order. DELETING BARCODES Deleting Barcodes with Web Site To delete previously scanned products: 1. Go the Keychain Barcode Scanner Page and click the link “Print a list of Item Quantity Barcodes.” 2. Click the Print button. 3. Close the pop-up window. 4. Scan the item code to be deleted from the Barcode Labels. 5. Scan the Delete Barcode from the Item Quantity Barcodes. 6. Repeat steps 1 to 6, if necessary. Deleting Barcodes with ARUBA EZ To delete previously scanned products: 1. Print Quantities by selecting Print Barcodes from the File Menu, then select Quantities. 2. Click the Print button from the pop-up window. 3. Close the pop-up window. 4. Scan the item code to be deleted from the Barcode Labels. 5. Scan the Delete Barcode from the Item Quantity Barcodes. 6. Repeat steps 1 to 5, if necessary. NOTE: Please be aware that pressing the Delete Button for 6 seconds or more before connecting and uploading the products to the Web Site or ARUBA EZ, clears any previously scanned barcodes from the scanner memory. If this occurs, simply rescan the desired products, connect, and upload them to the Web Site or ARUBA EZ. Keychain Barcode Scanner User Guide Page 19