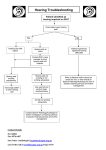
Download Basic Across-the-Counter Induction Loop Troubleshooting
Transcript
Basic Across-the-Counter Induction Loop
Troubleshooting
1) -The most basic point of using an Induction Loop system is that the client must
have a Hearing aid or Cochlear Implant that has a T-coil (or Telecoil) and that the
T-coil is active.
-Ask the client if their hearing aid has a T-coil mode (or Telephone mode) and if
they know how to switch into that mode. The hearing instrument needs to be
SWITCHED into that mode. It will NOT happen automatically.
If YES: Have them switch into T-mode. (Continue to step 2).
If No: Have them contact their Audiologist or Hearing Aid Practitioner to
program their T-coil (if they have one).
2) -At this point, if the loop is working, the client should be able to hear what is
coming through the loop (If they cannot, continue to step 3).
3) If they say that they cannot hear what is coming through the loop, get the onsite
“Loop Listener”, put on the supplied headphones, turn on the Loop Listener and
set the volume at ‘2’ initially. Ensure that the power light on the Loop Listener is
lit. If it is not, replace the batteries and repeat step 3. (Continue to step 4). ** If
there is no onsite Loop Listener, continue to step 5.
4) Hold the listener about one foot above the middle of the counter (with the Loop
Listener in the upright position). Speak into the microphone mounted on the
computer monitor. You should clearly hear yourself through the headphones. If
you do, the loop is working. The client may not be in T-mode, their T-coil may
not be activated, or they may not have a T-coil. Refer them to their Audiologist or
Hearing Aid Practitioner. If you do not hear yourself, increase the volume level
on the Loop Listener. If you still do not hear yourself at maximum volume, the
loop may not be functioning properly. (Continue to step 5)
5) Look underneath the counter and locate the Induction Loop Amplifier. The entire
system looks like this:
Ensure that the RED power indicator light is lit. If yes, continue to step 6. If not, make
sure the power supply is plugged into an active power outlet and that the power supply is
plugged into the amplifier. If the RED power indicator light is still not lit, Contact
Advanced Listening Systems at 1-250-580-2180.
6) Ensure that the GREEN input indicator light flickers when you tap on the
microphone attached to the computer monitor. If yes, continue to step 7. If not,
ensure that the microphone cable is plugged into ‘Mic 1’ input on the amplifier
(see picture above). If no, plug it in. Repeat step 6
7) Ensure that both the RED and BLUE ‘Antenna’ Wires are plugged into the
amplifier. If no, contact Advanced Listening Systems at 1-250-580-2180 for
directions on reattaching the Antenna wires. If yes, contact Advanced Listening
Systems at 1-250-580-2180.


