1
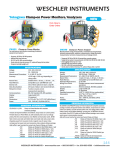
Operating Instructions
Extensometer Model 200XR
and Biaxial Extensometer Model 200XR
H.-D. Rudolph GmbH
Extensometer Model 200XR
February 2010
Page 1 of 11
Contents
Page
General ...........................................................................3
Description .....................................................................3
Preparations....................................................................4
Measurement ..................................................................8
Maintenance ...................................................................9
Technical Data..............................................................10
List of Standard Lens Units ..........................................11
Note: Model 200XR is electromagnetically compatible according to the European
standards for industrial environment.
Appendix
Wiring Diagram of Model 200XR
Calibration Certificate(s)
Drawing with Dimensions of Model 200XR
Drawing with Dimensions of Gauge Length Adapter 200XR/1-25
Drawing with Dimensions of Gauge Length Adapter 200XR/25-125
Drawing(s) of the Lens Unit(s)
H.-D. Rudolph GmbH
Extensometer Model 200XR
February 2010
Page 2 of 11
General
A system 200XR ready for measuring strain consists of:
Extensometer 200XR or Biaxial Extensometer 200XR
Lens Unit 200XR-... (measuring range in mm, see list of standard lens units)*
Power Supply 201R
Illuminator for the targets
External low-pass filter 50 kHz
Optional items to be delivered:
Gauge Length Adapter 200XR/1-25
Gauge Length Adapter 200XR/25-125
Three-Axis Table 105
Tripod, heavy version
Illuminators with power supply
Aluminum transportation case
* Special lens units with another measuring range and working distance can be offered as well.
Description
The electro-optical Extensometer 200XR serves for measuring the motion of two black-andwhite edges (targets) on a sample. The analog output signal is proportional to the strain within
the frequency range of 0 – 250 kHz. Viewer and integrated display simplify the performance of
the adjustments required for the setup of the instrument; the viewer also allows observing the
targets on the sample while their motion is measured. Lens units with different measuring
ranges from 1 mm to 500 mm can be mounted to the camera Model 200XR by means of a
flange. The calibration of the lens units results in an output voltage ∆l of ±10V for the range of
strain.
The two measuring axes of the Extensometer 200XR are rectangular to the base plate. The
measuring distance l0 is 75 mm.
There is the option of delivering Model 200XR with a switch to toggle between the two
measuring axes; this allows using the instrument also as Biaxial Extensometer 200XR in order
to measure strain in either vertical or horizontal direction; this means that the two measuring
axes can be either in right angles (y) or parallel (x) to the base plate. The measuring distance l0
is 75 mm. For the Biaxial Extensometer 200XR the lens units have to be calibrated in both
measuring directions, that is to say in x and y.
With standard lens units the measuring length l0 is 75 mm. A continuously adjustable gauge
length of 1 mm up to 125 mm can be established by means of gauge length adapters mounted to
the lens units. With special versions also gauge lengths of more than 125 mm can be measured.
H.-D. Rudolph GmbH
Extensometer Model 200XR
February 2010
Page 3 of 11
Preparations
1) Choose suitable lens unit regarding the measuring range and the measuring distance. Lens
unit and Model 200XR must have the same serial number. The motion to be measured on
the sample should be at least 40 % of the measuring range. Motions exceeding the
measuring range result in wrong measuring values, but won’t damage the instrument.
2) Mount lens unit to Model 200XR. Please make sure that the three cylindrical pins of the
extensometer correspond to the boreholes in the flange of the lens unit. The four mounting
screws M5 x 16 have to be tightened; the contact pins serve for connecting the components
for calibration of the lens unit to the extensometer; they have to be clean and must be
resilient over a length of about 5 mm.
3) Connect Power Supply 201XR with Model 200XR by means of the 9-pin Sub-D plug.
4) Connect Power Supply 201XR to the mains.
5) Mount the extensometer stably and free from vibrations for example to the base of a tensile
tester. By means of the four tapped holes in the base plate (M6, 10 mm deep) the
extensometer can be mounted e.g. on a three-axis table. In addition there is a borehole of
3/8” for mounting it onto a heavy tripod. The bubble level serves for horizontal alignment
of the extensometer whose position for operation is arbitrary. The relative motions between
the extensometer with lens unit and the sample should be as small as possible, because e.g.
in case of lateral motions of the extensometer the targets might get out of the visible range.
Also targets that are not exactly rectangular to the direction of measurement and parallel
might influence the measuring results. Align the camera to the targets by means of the
integrated viewer. The direction of measurement is rectangular to the base plate of the
camera. Make sure to keep strictly to the Measuring Distance A as indicated on the lens
unit. The Measuring Distance A is the distance between the front edge of the lens unit and
the targets. While looking through the viewer high-contrast reproduction of the target
within the cross spider must be visible; therefore the operator can achieve individual
adjustment by turning the knurled ring.
6) Illuminate both measuring ranges sufficiently. For the illumination we recommend our LED
illuminators e.g. our Standard LED Illuminators 60 mm. By means of the two LCD’s on
top of the instrument the illumination can be observed in mode LIGHT. The minimum size
of each target should be 10% of its measuring range. With standard lens units l0 is 75 mm;
in case of another l0 adjustable gauge length adapters such as Model 203XR/25-125 and
Model 203XR/1-25 are to be used. Make sure to observe the instructions on the drawings
of the gauge length adapters and the system drawings.
H.-D. Rudolph GmbH
Extensometer Model 200XR
February 2010
Page 4 of 11
There are two possibilities of illumination:
Arrangement A: ILLUMINATION FROM THE REAR
With diffusers attached the illuminators are arranged behind the targets. This arrangement
allows using jutted out edges as targets on the sample instead of black-and-white edges.
L
LENGTH OF LENS
A
WORKING DISTANCE
2 JUTTED OUT
EDGES AS
TARGETS
RUDOLPH GmbH
MODEL 200XR
SN 201
UNIFORMLY WHITE
ILLUMINATED AREA
approx. 100x 20 mm
Plastic diffuser
FW 102
OPTICAL AXIS
RUDOLPH GmbH
MODEL 200XR
FW 102
EXTENSOMETER
MODEL 200XR
RUDOLPH GmbH
LED ILLUMINATOR
110 mm
APERTURE
SN 201
TOP VIEW
Arrangement B: ILLUMINATION FROM THE FRONT
The targets on the sample are illuminated from the front without using a diffuser. There
must be two black-and-white edges as measuring targets on the surface, with a measuring
distance of l0. Do only use dull colors for marking lines on the surface of a sample. The
division between black and white must be straight and rectangular to the direction of
measurement.
L
LENGTH .OF LENS
A
WORKING .DISTANCE
APERTURE
RUDOLPH GmbH
MODEL 200XR
SN 201
F W 102
OPTICAL AXIS
RUDOLPH GmbH
MODEL 200XR
SN 201
2 PAINTED BLACK
AND WHITE TARGETS
ON SAMPLE
F W 102
EXTENSOMETER
MODEL 200XR
RUDOLPH GmbH
H.-D. Rudolph GmbH
Extensometer Model 200XR
. 90
OX
PR
AP
mm
LED ILLUMINATOR 110 mm
TOP VIEW
February 2010
Page 5 of 11
Note: Polished metal surfaces can change their reflecting qualities during a measurement and
therefore may not be suitable when used without targets painted on.
5%
5%
MINIMUM SIZE OF TARGET
OBSERVED THROUGH THE VIEWER
CHANNEL A , B
10%
7)
Now switch on Power Supply 201XR and observe both LCD’s on the camera. The
extensometer scans the measuring ranges five times per second and displays the distribution
of light within the measuring ranges (Channel A and Channel B) via the LCD’s. If the
measuring ranges are too bright OVEREXPOSURE is displayed. In this case either the
intensity of illumination must be reduced or the diaphragms on the lens unit have to be
closed step by step until appropriate illumination is achieved. There is appropriate
illumination when the whole line on each display, which represents the distribution of light
within the measuring range concerned, is to be seen above the two red spots on the LCD.
Mode LIGHT
Channel B:
Measuring range is overexposed.
Mode LIGHT
Channel A:
Measuring range is not illuminated
sufficiently.
H.-D. Rudolph GmbH
Extensometer Model 200XR
February 2010
Page 6 of 11
If neither of the two methods of illumination mentioned above leads to proper illumination
there will be also the possibility of increasing the light sensitivity of the camera by means of the
knob SENSITIVITY.
Mode LIGHT
Channel B:
The illumination of the measuring
range is even and sufficient and can be
used for measurement.
Mode LIGHT
Channel A:
The illumination of the measuring
range is uneven und cannot be used for
measurement.
Mode LIGHT
Channel B:
Black-and-white edge within the
measuring range with sufficient contrast
Mode LIGHT
Channel A:
Black-and-white edge within the
measuring range without sufficient
contrast
Strain Measurement on Specimens in a Test Chamber
If the temperature of the specimen in the test chamber is between -200°C and +250°C strain
measurement can take place by front light. The 200XR measures into the strain through a glass
window. The two targets can be illuminated by flexible light guides.
If the temperature of the specimen exceeds 250°C strain measurement has to take place by
transmitted light; then the specimen itself must have - or must have been provided with - small
edges jutting out. There must be a second glass window in the rear of the test chamber. In case
the temperature of the specimen is very hot, that is to say up to 3000°C, a UV light source has
to be used for illumination. Optical filters will help achieving the contrast between light and
dark needed for the measurement.
H.-D. Rudolph GmbH
Extensometer Model 200XR
February 2010
Page 7 of 11
Measurement
Now move the black-and-white edges of the object of measurement into the measuring ranges.
When pushing the red button MEASURE the extensometer begins to search these targets and
follows their motion. The sequence of black/white or white/black for Channel A and
Channel B is to be chosen by means of the switch TARGET.
If the light path between the lens unit and the targets is interrupted, the extensometer no longer
will see the targets and SEARCH will be displayed. The analog output of the channel
concerned now shows rapid analog voltage alterations. As soon as the extensometer can see the
target again, the electronics immediately adapt themselves to it again and display the correct
measuring value.
Mode MEASURE
Channel B:
Target is within the
measuring range.
Mode MEASURE
Channel A:
While measuring takes
place the light path has
become interrupted;
Channel A is searching
for a target.
With LOW PASS – separately for Channel A and Channel B - the bandwidth of the amplifier
for the analog output can be adjusted in six steps. It is a first order lag low-pass filter; with the
frequency indicated it attenuates a sinusoidal measuring signal by -3dB.
Digital oscilloscopes or fast pen recorders can be used for recording the measuring values. In
case of slow motions of the targets the Low-Pass Filter 50 kHz (-3dB) delivered with the
instrument can be connected with the input of an oscilloscope in order to minimize the high
frequency noise level.
At the analog output ∆l the differential signals for Channel A and Channel B are available as
strain measuring signals. The initial values are to be read on the digital displays; before the
strain test begins they can be set for example at 0V by means of the potentiometers and the
switches OFFSET.
Note: Never do apply external voltage to the analog output A, the analog output B, and ∆l.
H.-D. Rudolph GmbH
Extensometer Model 200XR
February 2010
Page 8 of 11
Maintenance
1) Carefully clean: the surface of the lenses, the optical opening of Channel A and the one of
Channel B, the contacts and contact surfaces of the printed circuit boards of the lens unit(s)
and on front of the 200XR.
2) Check the operating voltage of the Power Supply 201XR by means of the wiring diagram
of the extensometer; the nominal voltage is ±12V,DC.
Attention: The instrument may only be opened by trained specialists and with the
permission of the H.-D. Rudolph GmbH.
3) Check the operating voltage of the photomultiplier; it must be about -830V,DC when the
potentiometer LIGHT SENSITIVITY is in position end stop at the left. By turning the
potentiometer LIGHT SENSITIVITY clockwise it may increase until about -1100V,DC.
4) For calibration please send the extensometer together with the lens unit(s) to the
manufacturer.
H.-D. Rudolph GmbH
Extensometer Model 200XR
February 2010
Page 9 of 11
Technical Data
Measuring Range of Channel A and Channel B
Working Distance A
Resolution
Max. Measuring Velocity
Low-Pass Filter
Channel A and Channel B
Target Search Time of Channel A and Channel B
Error of Channel A and Channel B
Brightness of Target
Measuring Width on the Target
Arrangement of the Targets
Light Sensitivity
Display for the adjustment of Channel A and Channel
B
Spectral Responsivity
Analog Output
(BNC)
Output Impedance
Output Load
Operating Voltage of Power Supply Model 201XR
Operating Temperature
Max. Relative Humidity
Maximum Impact Stress
Weight
Dimensions of Camera 200XR
Dimensions of Power Supply 201XR
from 1 mm up to 500 mm depending on lens unit
from 40 mm up to 10 m depending on lens unit
0.01% of the measuring range measured with a bandwidth of 100Hz
vmax = (measuring range of lens in mm) x 83.5 m/s
first order lag
adjustable in steps
Bandwidth (-3dB) Noise (mV ptp)*
250 KHz
25
50 KHz
15
10 KHz
8
2.5 KHz
3**
500 Hz
1.5**
100 Hz
1**
< 20µs to the first suitable target within the measuring range
± 0.2% of the measuring range
> 500 lux
approx. 5% of the measuring range
black above white or white above black, adjustable by a switch
adjustment by means of a 10-gear potentiometer
two dot matrix displays with 120 x 32 pixels ea., illuminated
400 – 700 nm
± 5.000 for the measuring range of Channel A and Channel B
± 10,000 V für úl
50 ohms
< 10 mA, short circuit protected against ground
85 – 264 V
47 – 63 Hz
approx. 30VA
10 – 50° C
90%, non-condensing
< 10g in 3 axes
6 kg without lens unit
without lens: (L/H/W) 305 mm x 177 mm x 156 mm
(L/H/W) 260 mm x 51 mm x 76 mm
* measured with lens unit 200XR-10 (measuring range 10 mm), typical value
** measured with external 50 KHz low-pass filter
H.-D. Rudolph GmbH
Extensometer Model 200XR
February 2010
Page 10 of 11
List of Standard Lens Units
Model
200XR1
2
5
10
20
50
100
200
500
Measuring Range in mm
for Channel A and Channel B
1
2
5
10
20
50
100
200
500
Working Distance
A = approx. mm
120
130
190
250
390
800
1400
2900
6000
Length of Lens Unit
approx. mm
550
610
350
210
170
140
120
110
100
Standard lens units have a gauge length l0 of 75 mm.
Special lens units with another measuring range and working distance can be offered as well.
H.-D. Rudolph GmbH
Extensometer Model 200XR
February 2010
Page 11 of 11