1
Complete Solutions in Emergency Lighting STANILITE
INSTALLATION INSTRUCTIONS
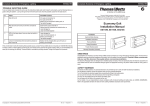
To install the Spitfire/Whitefire, follow these steps:
1.
2.
Complete Solutions in Emergency Lighting STANILITE
10 x 1.2V Sub-C Cell for SF07FP
Remove the Spitfire/Whitefire from the packing box and inspect it for damage or imperfections. If any damage is found, do not
install the Spitfire/Whitefire, replace it carefully into the packing box and notify the Thomas & Betts Product Support Hotline in
Australia on 1300 666 595.
If all looks okay proceed with the installation, use a pencil to mark the position of the mounting screw holes for the control pack
and battery pack.
280
Sealed Lead Acid Battery
6V 7Ah
for EWF10FP
5 x 1.2V D Cell for SF10FP
198
181
Height: 107.5
157
3.
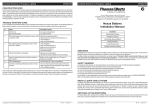
After mounting control and battery pack to their position, connect the lamp head plug assembly to the control pack.
Fit the LED and test switch to the lamp head as shown in Figure 1.
Fit the quartz halogen QI lamp.
Connect the battery plug from control pack (red & black wire) to the battery pack.
Note: The battery pack can also be attached to the control pack with the cable tie supplied.
Dia 130mm
Dia 70mm
Standard
Head
Ceiling Cut Out Size
Large
Head
Test
Switch
66
LED
Ceiling Cut Out Size
Figure 2: Battery Pack:
10 Sub-C Cell Ni-cad pack for SF07FP
5 D Cell Ni-cad pack for SF10FP
6V 7Ah Sealed Lead Acid Battery for EWF10FP
TO REMOVE INSTALLED UNIT
Before removing the installed Spitfire/Whitefire, switch off the mains supply to the unit. Unplug the power cord from the mains socket/
GPO. Disconnect the battery and lamp head plug and then unscrew the mounting screws of the control pack. When the Spitfire/Whitefire
is reconnected to the supply, it will need time to recharge its battery before it will be capable of a full length discharge again.
Mains
Cable
Note: When sending Spitfire/Whitefire for repairs, please ensure that LED, test switch and battery pack are included.
L: 225mm
H: 44mm
W: 56mm
TESTING PRECAUTIONS
To Battery
225
Figure 1: Spitfire/Whitefire Control Pack and Lamp Head Connection Diagram
4.
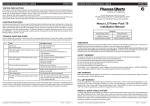
Once mains power is connected, the emergency lamp should not be on as this a non-maintained fitting. The emergency lamp
should only operate when the unswitched active power supply fails or when the manual test button located on the lamp head is
operated. The normal status of the Spitfire/Whitefire charge indicator LED is steady red under power on condition. This indicates
that the power is connected, the battery is charging and the lamp filament is not open.
5.
Check the operation of the fitting to ensure that the installation was successful. When powered up, allow a few minutes to give the
battery a small charge, then press the manual test button located at the lamp head. Press and hold the test button for a few seconds
and observe that the lamp lights up and stays on until the test switch is released. If the lamp works only momentarily, this ensures
that the connections are correct and the battery requires at least 16 hours to fully charge. If the lamp doesn’t work at all, check the
supply, the connections, and the trouble shooting guide at the end of this document.
© Copyright 2013. Thomas & Betts Australasia ABN: 062 074 810 898.
Rev: 5.0
15 April 2013
2
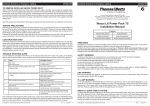
If the Spitfire/Whitefire is to be left permanently connected to the mains supply from now on, you will need to allow 24 hours to charge its
battery and then you will have to conduct a manual discharge test as per the requirements of AS/NZS2293.2. Presently (at the time of
writing), the standard requires that the new fittings operate in emergency mode for at least 2 hours for their first test. Subsequent tests
are required every 6 months; fittings are then required to operate for not less than 90 minutes. You will need to keep records of the initial
test into the building emergency service logbook.
If the fitting isn’t permanently connected to mains supply at this time, you are responsible for giving it the initial 2 hour test when you do
connect it permanently to the mains supply.
CONSTRUCTION SITES
Continuously switching on and off the mains supply to the fittings during the installation process (due to building works or for some other
reason), could cause the fittings to discharge and charge their batteries many times over a short period which may shorten the life of the
battery. Thomas & Betts does not recommend such practices and may not honour any warranty on the life of the batteries or the lamp
when subjected to such harsh operating conditions. The fittings are designed to be regularly discharge tested once every 6 months as
per AS/NZS2293.2. In order to prevent damage to the battery, leave the unswitched active circuit turned off at the circuit breaker, until the
emergency lighting is required on the site.
© Copyright 2013. Thomas & Betts Australasia ABN: 062 074 810 898.
Rev: 5.0
15 April 2013
3