1
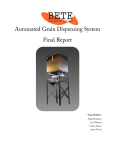
Automated Grain Dispensing System
User Manual
Team Members
Mike Hofmann
Joe Willmott
Colton Davies
James Wood
Table of Contents
Introduction ............................................................................................................................................... 3
Tools, Materials or Equipment.............................................................................................................. 3
Step by Step Instructions ...................................................................................................................... 4
Filling the Hopper ................................................................................................................................... 4
Bag Filling ................................................................................................................................................ 4
Shutdown ................................................................................................................................................. 5
Periodic Cleaning ................................................................................................................................... 5
Troubleshooting ....................................................................................................................................... 6
Conclusion ................................................................................................................................................. 7
Warranty ..................................................................................................................................................... 7
Graphics ..................................................................................................................................................... 8
2
Introduction
Camosun College commissioned Team BETE to design and construct an automated grain
bagging system for Saanichton Farm. Currently, owner of Saanichton Farm employs their
grandmother to label the bags and their mother to bag the grains. The bagging operation takes
about 1 minute to fill a 2.5 lbs bag. In 2012, Saanichton Farm produced approximately 6000 lbs
of lentils (about 2400-2.5 lbs bags). During the week of 16 August 2013, Saanichton Farm
harvested over 18000 pounds of lentils and with the current bagging procedure, we estimate
that bagging all the lentils into 2.5 lbs bags will take approximately 7500 minutes or 15 days to
bag (at 8 hours a day). With the automated lentil bagger, the procedure should take about 4
days.
The grain bagger uses microcontrollers and a user actuated system to bag the grain. This
manual is designed to assist the user of our grain bagger in use and for troubleshooting
purposes.
Tools, Materials or Equipment
Equipment
Part
Material
Vacuum Cleaner
Stanley Wet/Dry Vacuum
Hopper
¾” Fir Plywood, Plexiglass
Frame
Slotted Angle Iron
Hopper Chute
5052 Aluminum 14 Gage, UHMW, HDPE
Shaker Tray
5052 Aluminum 14 Gage
Weigh Bucket
5052 Aluminum 14 Gage, Plexiglass
Bottom Chute
5052 Aluminum 14 Gage
3
Step by Step Instructions
Filling the Hopper
1.
2.
3.
4.
5.
6.
7.
8.
9.
10.
11.
12.
13.
14.
15.
Place a large sack of grains next to the automated grain weighing machine.
Hook up the vacuum hose from the vacuum cleaner into the top of the hopper and
ensure a proper seal (Figure 1).
i.
Ensure that you have put the hose into the vacuum’s intake and not the exhaust
Ensure that the chute valve under the hopper is in the closed position (Figure 2).
i.
The rod will be pulled all the way out.
Plug in the power for the vacuum.
Carefully plug in the suction hose into the pipe on the left side of the hopper (Figure 3).
Unhook the suction hose from the mount on the left side of the hopper.
Turn on the vacuum cleaner (Figure 5).
Take the end of the suction hose and place the end inside the large sack of grains
about 1/4 inch from the top of the grains (Figure 4).
Do not ‘jam’ the hose into the grain- ensure suction is occurring at all times.
Vacuum out the grains at a steady pace.
Suck all the grains out of the large sack into the hopper by moving the hose about
inside the bag.
Look through the plexiglass window to see the fullness of the hopper (Figure 6).
When the hopper is full or when the sack is empty, turn off the vacuum cleaner and
remove the hose from the large bag of grains.
i.
The hopper can hold about 200 lbs of grains. Do not overfill or the lid will not fit.
Shake out any leftover grains out of the hose.
Place hose in the hose mount located on the side of the hopper.
Bag Filling
1.
2.
3.
4.
5.
6.
Plug in the a power cord from the hopper into the wall socket.
Turn on the unit by flipping the switch up on the far right side (Power switch) located on
the control panel. The red LED light above the switch will turn on to indicate power
(Figure 7).
Select the weight mode.
a. If 2.5 lbs is needed skip to step 11.
b. If another weight is needed flip the switch marked 'weight' and select the weight
using the dial (Figure 8).
The screen will display the selected weight (Figure 9).
Flip the ‘weight’ switch into the down position once weight is selected.
Ensure that there are no obstructions in any of the chutes and that the weigh bucket is
empty.
a. If there are grains in the weigh bucket, place a bag under the bottom chute and flip
the 'purge' switch up until all the contents are expelled (Figure 10).
4
7.
8.
9.
10.
11.
12.
13.
14.
15.
16.
17.
Push the chute valve located under the hopper until it comes to a rest in the open
position (Figure 11). At this point lentils will flow down onto the shaker tray.
Wait until lentils have stopped flowing onto the tray.
Flip the 'run' switch to the upwards position to begin bagging operation (Figure 12).
Watch the shaker tray shake and weigh bucket fill.
When the “READY” light is illuminated you can proceed with filling the bag (Figure 13).
Take a tin tie paper bag and place it under the bottom chute and slip the chute into the
bag (Figure 14).
a.
It is best to hold the bag on the side and on the bottom as the force of the
dropping lentils will jolt the bag downwards
Push the switch located behind and under the chute.
Hold bag steady until weigh bucket is empty.
Remove the bag from under the chute and place another bag under the bottom chute
once the bag is full.
Repeat the procedure from steps 10-17.
Refill the hopper when all the lentils have been bagged, (see Filling the Hopper
section).
Shutdown
1.
2.
3.
4.
Pull out the rod out to close the chute valve.
Flip the purge switch on the control panel up (Figure 10).
Wait until all grains are off the shaker tray.
Flip the power switch and the purge switch down.
Periodic Cleaning
It is recommended that the system be cleaned periodically to prevent stale grain dust from
accumulating and making its way into new product. The frequency of this cleaning will depend
on the nature of the grain being used and the discretion of the operator.
Tools required: air compressor, air nozzle, stepstool. A compressed air can will also suffice.
1.
2.
3.
4.
5.
Remove lid from hopper.
Ensure hopper is 100% empty. If it is not empty, run the purge function.
Ensure valve slide is in full-open position.
Aim air nozzle inside hopper and blow compressed air at all the seams, forcing any
excess grit or dust down through the chute and onto the shaker tray.
When the hopper is sufficiently clean, close the slide valve and blow off the shaker tray,
weigh bucket, and lower chute.
5
Troubleshooting
Filling the hopper
If there is no suction, ensure that the slide valve under the hopper is closed.
If you hear wheezing as you are vacuuming up the lentils
• Ensure that the slide valve is close properly;
• Check the hose fittings (to the hopper and to the vacuum)
If suction has decreased or no lentils are being sucked up into the hopper:
• Ensure that the intake hose is not clogged with lentils.
o If clogged, then turn off vacuum, and unplug the hose from the hopper and shake
out the lentils back into the bag
o Plug the hose back into the hopper and restart the process.
• Check that the foam gasket around the lid is intact and uncompromised.
o If the foam is damaged or compromised, peel the remainder off and replace with
any 3/8 inch thick closed cell foam.
Adjusting Grain Flow
If there is inadequate or excess flow of grain through the chute and shaker tray system, the
height and angle of the shaker tray can be adjusted.
•
To change the height of the shaker tray relative to the chute, slide the shaker tray up or
down along the mounting rod after loosening the clamping nuts to achieve the desired
gap between the chute and shaker tray.
•
To change the angle of the shaker tray, loosen or tighten elastic straps on either side,
being mindful in keeping the shaker tray balanced side-to-side.
•
To change the motor speed or weigh bucket extension, contact Team BETE.
Changing System Parameters (advanced users only)
•
•
•
•
Load the provided program on your computer.
Plug in the Arduino programming cord that is anchored at the bottom of the hopper.
Proceed to change any system parameters deemed necessary.
Note that this voids the warranty.
6
Conclusion
We hope you enjoy using the Automated Grain Dispensing System, and that it enhances the
efficiency of your home business or industrial packaging application.
Warranty
Full One Year Warranty
What is Covered
This warranty covers any defects in materials or workmanship, including installation.
How Long Coverage Lasts
This warranty runs for one year from the date your grain bagging system is installed.
What Team BETE Will Do
Team BETE will repair anything that proves to be defective in materials or workmanship with the
grain bagging system.
How To Get Service
For problems with electronics and automation system, contact Joe Willmott at
[email protected] and for other issues, contact Mike Hofmann at [email protected].
Questions
If you have any questions regarding other automated systems that you require, feel free to
contact us for a quote.
7
Graphics
Figure 1. Hook up of vacuum hose from the vacuum cleaner to the hopper.
Figure 2. Location of Chute Valve.
8
Figure 3. Side of Hopper Depicting Location of Hose.
Figure 4. Hose in Bulk Lentils.
9
Figure 5. Location of On/Off switch on Stanley Wet/Dry Vacuum.
Figure 6. Look through the Plexiglass Window to Amount of Lentils.
10
↓
Figure 7. Control Panel showing the Location of On/Off switch.
↓
Figure 8. Location of the 'Weight' Switch.
11
→
Figure 9. LCD Screen with weight selection.
↓
Figure 10. Location of the 'Purge' Switch on the Control Panel.
12
Figure 11. Chute Valve in Open Position.
↓
Figure 12. Location of 'Run' Switch
13
↓
Figure 13. Control Panel showing location of the blue 'Ready' LED light
Figure 14. Paper Bag with Tin Tie under the Chute.
14