1
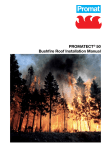
The ideal insulation and mantelpiece for your fireplace
Installers Manual
We are pleased ...
with your interest in the PROMAFOUR® casing system by Promat,
the reference worldwide in passive fire protection and high performance insulation materials.
This manual is meant as a useful guide, which will help you to case,
insulate and finish your fireplace or stove quickly and easily in only
a few steps.
As a division of Promat Group, Promat HPI (High Performance
Insulation) is specialised in the design and manufacturing of innovative products and solutions, as well as integrated systems for
thermal insulation applications in several industrial branches.
In order to build a secure and aesthetic PROMAFOUR® encasement, we advise you to observe the instructions described below
and to apply the PROMAFOUR® product range, which has been
developed especially for fires and stoves.
PROMAFOUR® is the result of our many years’ experience and
know-how in fire protection and insulation.
PROMAFOUR®, the mantelpiece and insulation that make the difference
Safe and reliable
PROMAFOUR® construction boards are incombustible and
resistant to very high temperatures up to 1000°C during
prolonged exposure. They don’t contain any bonding agent,
which could emit an irritating odour or affect the cohesion of
the board in a negative way.
Aesthetics and convenience
PROMAFOUR® construction boards have a very smooth
surface, which can perfectly be painted without additional
plastering. Thanks to a minimal extension under the influence
of heating and a minimal shrinkage after cooling off, the risk
of cracks, microscopic fissures or deforming is reduced to an
absolute minimum.
By insulating your floor and rear wall with a PROMASIL®-1000L
board, the loss of heat is reduced to the bare minimum.
Thanks to the high thermal storage capacity of
PROMAFOUR® construction boards, the emitted heat is
distributed evenly in your living room. Your fireplace will
continue to emit heat, even after it has been put out.
Mechanical strength and solidity
PROMAFOUR® construction boards are composed of
calcium silicate and cement. This results in very strong
walls, even with minimal thicknesses of 12 mm, 15 mm or
18 mm. Also heavier objects, such as frames, paintings and
flat screens can be attached to the wall without additional
consolidation.
Quick and easy installation
PROMAFOUR® construction boards can easily be cut
with traditional woodworking equipment and installed by
means of standard screws, staples and refractory
PROMAFOUR® - GLUE 1000.
General safety measures
Before you begin to install your PROMAFOUR® encasement, it
is important to carefully read the following safety measures and
instructions:
1. Always observe the safety instructions of the fire and stove
manufacturer.
2. Always ensure safe working conditions and a safe working
environment.
3. Take the necessary precautionary measures to prevent
possible injuries to the hands, eyes, feet, back and other
members.
2
4.
5.
6.
7.
Call in additional help if a particular part of the
PROMAFOUR® system is too heavy to lift alone.
Always use the proper equipment, as described in the
present installation manual.
Only use equipment, which meets the European safety
requirements (CE-label).
Always observe the maximum concentration values for
occupational dust exposure while cutting PROMAFOUR®
construction boards and PROMASIL®-1000L insulation
boards. We can cut your boards to size in our workshop
on request.
Products composing the PROMAFOUR® system
1. PROMASIL®-1000L insulation boards
PROMASIL®- 1000L insulation boards are lightweight, large sized, refractory calcium silicate boards with excellent insulation
properties, which resist to temperatures up to 1000°C. Their
homogeneous, stable, calcium silicate structure guarantees
exceptional thermal and mechanical properties.
PROMASIL®- 1000L boards are available in 1200 x 2500 mm
and thicknesses of 25, 30, 40 and 50 mm.
In order to prevent overheating and/or ignition of the rear
wall due to prolonged and frequent heating and to minimise
possible heat loss outwards or towards the rooms behind, we
advise you to insulate the rear wall or to protect it against the
heat emitted by your stove at all times.
2. PROMAFOUR® construction boards
PROMAFOUR® construction boards are incombustible, high
temperature resistant, calcium silicate and cement based
boards which resist to temperatures up to 1000°C.
PROMAFOUR® construction boards are solid large sized
boards with a very high mechanical strength. Their large
dimensions, 1250 mm (W) x 2500/3000 mm (L), enable a
quick and simple installation. They are available in thicknesses of 12 mm, 15 mm en 18 mm.
3. PROMAFOUR®-HTI 1100 insulation blankets
PROMAFOUR®-HTI 1100 insulation blankets are flexible, high
temperature resistant insulation blankets, based on alkaline
earth fibres (high temperature glass fibres), which are bonded
mechanically by needle felting, without the addition any bonding agents.
They are incombustible and resist to temperatures up to
1000°C.
Thanks to their high flexibility, these insulation blankets can
easily be used to “wrap up” smoke evacuation ducts.
PROMAFOUR®-HTI 1100 insulation blankets are manufactured
in 610 x 7320 x 25,4 mm and 610 x 14640 x 12,7 mm rolls with
a density of 96 kg/m³ or 128 kg/m³.
4.PROMAFOUR®-GLUE 1000
PROMAFOUR®-GLUE 1000 is a refractory silicate based glue, which resists to temperatures up to 1000°C.
PROMAFOUR®-GLUE 1000 adheres very well to all materials and can be used to glue PROMAFOUR®-construction boards and PROMASIL®-1000L insulation boards, as well as
PROMAFOUR®-HTI 1100 insulation blankets.
5.PROMAFOUR®-HT JOINTFILLER
PROMAFOUR®-HT JOINTFILLER is a high temperature
resistant filler, which is based on a mixture of clay and an
inorganic bonding agent. It resists to temperatures up to
1000 °C. PROMAFOUR®-HT JOINTFILLER has been
developed especially to fill up and equalise the joints, screw
and staple holes and unevennesses of the PROMAFOUR®
mantelpiece. PROMAFOUR®-HT JOINTFILLER is available in
500 gr cartridges and 1,5 kg and 10 kg buckets.
6.PROMAFOUR®-STUDS
PROMAFOUR®-STUDS are incombustible, cut-to-size profiles,
which are made of the same material as PROMAFOUR®
construction boards.
PROMAFOUR®-STUDS are available in two standard sizes:
48 x 3000 x 18 mm and 69 x 3000 x 18 mm. Studs in other
dimensions are available on request.
7.PROMAFOUR®-PRIMER
PROMAFOUR®-PRIMER is an incombustible and vapour
passable primer, based on liquid calcium silicates and a
confined number of organic additives.
PROMAFOUR®-PRIMER is available in 3 l containers.
Step 1: Insulation of the rear wall, floor and stove
4
1.1. Installation of the PROMASIL -1000L insulation boards
4
1.2. Insulation of the smoke evacuation ducts
6
Step 2:
Installation of the metal profiles and PROMAFOUR -STUDS
8
Step 3:
Installation of the PROMAFOUR® construction boards
10
Step 4: Finishing of the PROMAFOUR® encasement
12
®
®
4.1. Finishing of the joints12
4.2. Finishing of the angles13
4.3. Paint and/or wallpaper14
Tables
Fixing mediums / Construction recommendations 15
3
1. Insulation of the rear wall, floor and stove
1.1. Installation of the PROMASIL®-1000L insulation boards
Required material/equipment*
■■ PROMASIL®-1000L
■■ PROMAFOUR®-GLUE 1000
■■ Standard mechanical screwdriver
■■ Standard screws depending on the rear wall material
■■ Jigsaw with woodworking saw blade
■■ 3 mm coarse-toothed glue spatula
Preparation
−− Cover your floor and furniture with a blanket or other
protective material to avoid possible damage.
−− Make sure that the floor and rear wall are in good condition. They have to be free of moisture and mould and
combustible and loose parts.
−− Equalise, straighten and level the floor and rear wall.
−− Create sufficient secure and free workspace around
your fire.
Safety recommendations
Only use safe equipment, wear safety gloves, goggles and
shoes and a dust mask.
Important recommendations
A. In case of a timber wall, an air cavity has to be provided
by applying a 50 mm thick PROMASIL®-1000L board
directly to the PROMAFOUR® construction boards at
a minimum distance of 5 cm from the rear wall. Use
PROMAFOUR®-GLUE 1000 and self-tapping plasterboard-screws on the outside of the PROMAFOUR®
construction boards. Apply a sufficiently thick layer of
PROMAFOUR®-GLUE 1000 on the edges of the board
before you fix the PROMASIL®-1000L board by means
of screws on the outside to the PROMAFOUR®-construction boards. The upper and lower side of the insulating
wall have to be fixed on metal profiles, which are fixed
to the floor and ceiling in advance. Provide sufficient
ventilation in this cavity.
B. Protect and insulate the floor by providing a small air
cavity between the wall and the board, as described in
point A.
* For more product information, go to page 3.
4
C. Even in case of a freestanding stove, the floor and rear
wall have to be protected and insulated as described in
points A and B.
D. In case of a timber wall, use boards with a minimum
thickness of 50 mm. In case of a brick wall, boards with
a thickness of 30 mm are sufficient.
E. Observe the installation and security instructions of the
stove manufacturer.
Tip
−− You can obtain a very fine saw-cut without burs by using
a DIA saw blade. This saw blade, which has been developed especially to cut fibre-cement and calcium silicate
boards, is equipped with moulded teeth and diamond
plating. This type of saw blade also has a better durability than ordinary saw blades. Contact Promat for more
detailed information.
−− Cutting different materials with the same saw blade reduces its life span. We therefore advise you to use a fibre
cement saw blade only to cut fibre cement materials.
−− It is advisable to insulate the rear wall behind a freestanding stove also. PROMASIL®-1000L boards are the best
solution for this application. Installation
1. Remove any trace of dirt and dust and ensure that the surface is equal, dry and clean.
6. Then fix the board in each corner by means of screws
and an installation ring.
2. Cut the PROMASIL®-1000L boards to the right size.
Remove the sawdust and provide an opening in the
board for the smoke evacuation duct if necessary.
7. Install your stove following the instructions of the
manufacturer.
3.
Apply a layer of PROMAFOUR®-GLUE 1000 on the entire surface of the boards and the edges by means of a coarse-toothed glue spatula (3 mm). Depending
on the kind of surface, the quantity of glue needed amounts to 1,5 to 3 kg/m2.
4. Protect the floor and rear wall by providing an air
cavity. Also read point A and B under the section
‘Important recommendations’ for a detailed description.
5. After a drying time of approximately 3 minutes, press
the PROMASIL®-1000L board firmly to the floor/rear
wall. Don’t forget to carefully press the sides of the
board also.
5
1.Insulation of the rear wall, floor and stove
1.2. Insulation of the smoke evacuation ducts
Required material/equipment*
■■ PROMAFOUR®-HTI 1100 insulation blanket
■■ PROMAFOUR®-GLUE 1000
■■ Standard stainless steel wire
■■ Standard metal spring clips
F. In rooms with free access, single wall smoke extraction
ducts have to be insulated. We recommend
PROMAFOUR®-HTI 1100 insulation blankets fort his
application.
G. Never use fire resistant foams, silicones or sealants
containing organic bonding agents to seal penetrations.
■■ Standard cutting tools and measuring rod
Preparation
−− Cover your floor and furniture with a blanket or other
protective material to avoid possible damage.
−− Create sufficient secure and free workspace around
your fire.
−− Create sufficient space to unroll the insulation blanket.
Put a cardboard or other sufficiently plane material to
protect the floor when cutting.
Safety recommendations
Only use safe equipment, wear safety gloves, goggles and
shoes and a dust mask.
Important recommendations
A. Use smoke extraction and chimney ducts prescribed
by the stove manufacturer, which meet specific quality
standards, such as CE-standards.
B. Smoke extraction ducts and penetrations have to be
installed and insulated according to the national fire
protection and insulation standards and prescriptions.
C. Both single and double wall smoke extraction ducts,
which penetrate a timber construction, such as a timber
floor, wall or roof, have to receive additional fire resistant
insulation. Try to avoid contact with surrounding timber
constructions where possible.
D. For the insulation of smoke extraction duct penetrations
through a timber construction, we can recommend our
PROMAFOUR® smoke extraction duct penetration system. Contact Promat for more detailed information.
E. Insulated double wall smoke extraction ducts don’t have
to be insulated additionally against energy loss.
* For more product information, go to page 3.
6
Tip
−− You have to cut the PROMAFOUR®-HTI 1100 insulation
blanket larger than the girth of the smoke extraction duct,
in order to provide a sufficient overlap.
−− PROMAFOUR®-HTI 1100 insulation blankets may also
be used to ‘wrap up’ or insulate your stove or as mending wool. Always consult the stove manufacturer in
this regard, because certain types of stoves may not be
insulated because of the risk of overheating.
−− A PROMAFOUR®-HTI 1100 insulation blanket with a
density of 128 kg/m³ has better insulating and mechanical
properties than an insulation blanket with a density of
96 kg/m³.
−− PROMAFOUR®-HTI 1100 insulation blankets don’t
contain any organic bonding agents, which burn at high
temperatures. Therefore the insulation is safer, has a
longer life span and won’t cause irritating odours when
you turn on the stove for the first time.
−− PROMAGLAF®-HTI 1100 insulation blankets are composed of high temperature resistant, bio-soluble glass
fibers and therefore not subject to any health risk classification.
Installation
1. Unroll the PROMAFOUR®-HTI 1100 insulation
blanket on a cardboard or any other plane surface.
2. Cut the PROMAFOUR®-HTI 1100 insulation blanket
to the right size.
3. Wrap the PROMAFOUR®-HTI 1100 insulation
blanket around the smoke extraction duct.
4. Attach the insulation blanket with stainless steel
wire. It is advisable to provide an additional
fixation by means of metal spring clips and
PROMAFOUR®-GLUE 1000.
7
2. Installation of the metal profiles and PROMAFOUR®-STUDS
Required material/equipment*
Important recommendations
■■ At least two vertical PROMAFOUR®-STUDS of 18 mm A. Use fuse pins to fix U-profiles in a stone floor and screws
thick and 69 mm broad
for a timber floor.
■■ Two horizontal PROMAFOUR -STUDS of 18 mm thick ®
and 69 mm broad
■■ Two PROMAFOUR® L-profiles (assembled STUDS)
■■ PROMAFOUR®-GLUE 1000 + standard cartridge clip
■■ Standard mechanical screwdriver
B. Watch carefully not to damage pipes, which run through
the floor, when fixing the metal U-profiles.
C. As an insulation specialist, we advise you to carefully
follow the instructions mentioned below during the
installation of PROMAFOUR®-STUDS and L-profiles
■■ 25 mm long, self-tapping, stainless steel screws
■■ Standard mechanical stapler
■■ 20 mm long staples
■■ 70 mm U-profiles in stainless or galvanised steel
■■ Consult the construction table on p. 15 for quantities and dimensions of the required material
Preparation
−− Cover your floor and furniture with a blanket or other
protective material to avoid possible damage.
−− Create sufficient secure and free workspace around
your fire.
−− Take the measurements of the spots, where the U-profiles
and STUDS will be installed and mark these measurements on the floor and ceiling.
−− Cut the metal U-profiles and PROMAFOUR®-STUDS to
the right size.
−− Assemble the PROMAFOUR® L-profiles by fixing two
PROMAFOUR®-STUDS lengthwise and with a right angle
to each other by means of PROMAFOUR®-GLUE 1000
and stainless steel screws or staples.
Safety recommendations
Only use safe equipment, wear safety gloves, goggles and
shoes and a dust mask.
* For more product information, go to page 3.
8
Tip
−− Standard U-profiles are available at your local building
materials store.
−− You can use the same standard U-profiles as those, which
are used to build a drywall.
−− PROMAFOUR®-STUDS can also be used to enlarge the
inner peripheral frame, which has to be completely integrated in the encasement.
Installation
1. Cut the PROMAFOUR®-STUDS and L-profiles to the right length.
2. Fix the metal U-profiles to the floor and the ceiling.
3. Place both PROMAFOUR® L-profiles in the first angles of the metal U-profiles.
4. Place the vertical PROMAFOUR®-STUDS in the metal U-profiles, which are fixed to the left and right side of
your stove, to the rear wall and in the middle above your stove.
5. Place two horizontal PROMAFOUR®-STUDS between the vertical PROMAFOUR®-STUDS that have been
placed next to your stove at the same level of the upper and lower side of the stove’s glass pane.
Provide a 3 mm wide gap between the STUDS and the stove, in order to allow it to expand when heated
without damaging the entire system.
9
3. Installation of the PROMAFOUR® construction boards
Required material/equipment*
Tip
■■ PROMAFOUR® construction boards
−− PROMAFOUR® construction boards can be cut to size
and installed very easily be means of traditional equipment. They can also be combined with other building
materials. They can be cut to size on request, even with
chamfered edges or mitered angles.
■■ PROMAFOUR -GLUE 1000
®
■■ Sharp-pointed stainless steel screws of 25 mm with self-milling head
■■ Standard mechanical stapler
■■ Staples 20 mm
■■ Consult the construction table on p. 15 for quantities and dimensions of the required material
Preparation
−− Cover your floor and furniture with a blanket or other
protective material to avoid possible damage.
−− Create sufficient secure and free workspace around
your fire.
−− Determine the required dimensions and number of
PROMAFOUR® construction boards.
−− Cut the PROMAFOUR® construction boards to the right
size.
Safety recommendations
Only use safe equipment, wear safety gloves, goggles and
shoes and a dust mask.
Important recommendations
A. Depending on the type of stove (wood- or gas-fired) and
its dimensions, we recommend you to build the
PROMAFOUR® encasement as described in the table
below and following the installation instructions.
B. When casing a large fire, if you want to attach heavier objects, such as a flat screen or a mirror to the encasement
or if you want to tile it, we recommend a PROMAFOUR®
construction board with a thickness of 18 mm.
C. Provide a 3 mm wide gap between the peripheral edge of
the stove and the PROMAFOUR® construction board, in
order to allow it to expand when heated without damaging the entire system.
D. See recommendations on p. 13 for the finishing of the
angles.
* For more product information, go to page 3.
10
−− We recommend to always use PROMAFOUR®-GLUE 1000,
not only to guarantee stronger joints, but also to obtain a
better sealing in the joints. Furthermore it enables a better
positioning of the boards prior to their fixation by means
of screws and staples.
−− It is also easy to rough-drill the holes before fixing the
screws (8 mm from the outer edge for 15 mm boards). We
recommend to use a drill with a smaller diameter than the
diameter of the screw. Then place the screw upright in the
hole and screw it down.
−− To obtain a better finishing of the drilling holes, you can
also pre-mill them. This enables you to screw down the
screws completely into the board and finish the heads
with PROMAFOUR®-HT JOINTFILLER.
−− Provide reinforcement at the backside of each joint.
−− PROMAFOUR® waste may be disposed of with ordinary
building material waste (observe the local and national
legislation).
Installation
1. Prepare the boards, which will be used to make up the angles of the encasement
by chamfering the edges of two boards (demi- V-shape) or by mitering one board
(45° angle).
2. Fix the PROMAFOUR® construction boards (12 mm, 15 mm or 18 mm) to the
PROMAFOUR®-STUDS by means of PROMAFOUR®-GLUE 1000
3. Then fix them by means of stainless steel screws of 25 mm and self-milling head
or staples of 20 mm.
A
B
C
D
E
F
11
4. Finishing of the PROMAFOUR® encasement
4.1. Finishing of the joints
Joints and drilling holes can be finished by means of PROMAFOUR®-HT JOINTFILLER and PROMAFOUR®-GLUE 1000.
Required material/equipment*
Important recommendations
■■ PROMAFOUR -HT JOINTFILLER
A. Smooth and plane surfaces can be obtained easily by
®
■■ PROMAFOUR -GLUE 1000
®
using a spatula.
■■ Glass paper or sanding machine with fine grit
B. Thinner layers (up to 1 mm) need to dry 2 to 3 hours.
■■ Spatula or trowel
C. Thicker layers (2 up to 3 mm) need to dry 6 to 8 hours.
Preparation
−− Cover your floor and furniture with a blanket or other protective material to avoid possible damage.
−− Create sufficient secure and free workspace around
your fire.
−− Remove all dust and dirt and make sure that all surfaces
are clean and dry.
Safety recommendations
D. The finished surface can be painted with a silicate
coating.
Tip
−− To obtain a better finishing of the drilling holes, you can
also pre-mill them. This enables you to screw down the
screws completely into the board and finish the heads
with PROMAFOUR®-HT JOINTFILLER.
−− We recommend to always use PROMAFOUR®-GLUE 1000,
not only to guarantee stronger joints, but also to obtain a
better sealing in the joints.
Only use safe equipment, wear safety gloves, goggles and
shoes and a dust mask.
* For more product information, go to page 3.
Installation
A. Boards with square edges
1. Apply a layer of PROMAFOUR®-GLUE 1000 between
the tangent planes of the PROMAFOUR® construction
boards and press them together firmly.
2. Sand down possible irregularities with fine glass paper.
B. Boards with chamfered edges
(demi- V-shape)
1. Apply a layer of PROMAFOUR®-GLUE 1000 between
the tangent planes of the PROMAFOUR® construction
boards and press them together firmly.
2. Fill up the V-shape with PROMAFOUR®-HT JOINTFILLER.
3. Smooth down the surface of the boards with another
layer of PROMAFOUR®-HT JOINTFILLER.
4. Sand down possible irregularities with fine glass paper.
5. Repeat steps 2, 3 and 4 until you obtain the right result.
12
4.2. Finishing of the angles
Required material/equipment*
Safety recommendations
■■ PROMAFOUR®-GLUE 1000
Only use safe equipment, wear safety goggles.
■■ PROMAFOUR -HT JOINTFILLER
®
■■ Glass paper or sanding machine with fine grit
■■ Mitre box saw
Preparation
−− Cover your floor and furniture with a blanket or other
protective material to avoid possible damage.
Tip
−− Contrary to gypsum boards, you don’t need to
use metal angle profiles to finish PROMAFOUR®
construction boards.
* For more product information, go to page 3.
Installation
A. Boards with square edges
1. Apply a layer of PROMAFOUR®-GLUE 1000 between
the tangent planes of the PROMAFOUR® construction
boards and press them together firmly.
2. Smooth down the surface of the boards with another
layer of PROMAFOUR®-HT JOINTFILLER.
3. Sand down possible irregularities with fine glass paper.
B. Boards with chamfered edges (demi- V-shape)
1. Chamfer the corners (demi- V-shape) of the
PROMAFOUR® construction boards.
2. Apply a layer of PROMAFOUR®-GLUE 1000 between
the tangent planes of the PROMAFOUR® construction
boards and press them together firmly.
3. Fill up the V-shape with PROMAFOUR®-HT JOINTFILLER.
4. Smooth down the surface of the boards and repeat.
5. Sand down possible irregularities with fine glass paper.
C. Mitered angles (45° angle)
1. Miter the edges of the board, which will shape the
angle (45° angle).
2. Apply a layer of PROMAFOUR®-GLUE 1000 between
the tangent planes of the PROMAFOUR® construction
boards and press them together firmly.
3. Sand down possible irregularities with fine glass paper.
13
4.3. Paint and/or wallpaper
Required material/equipment*
Installation
■■ PROMAFOUR®-PRIMER
A. Painting
■■ Quality paint, such as silicate based paint or washable paint
■■ Glass fibre wallpaper
■■ Heat resistant wallpaper
■■ Paint roller and paintbrush
Preparation
1. In order to obtain an optimum result and to avoid
possible cracks in the paint, we recommend a silicate
based paint, which can be bought at specialist stores. Contact Promat International for more detailed
information. Before painting the encasement with
silicate paint, first apply a double layer of
PROMAFOUR®-PRIMER.
−− Cover your floor and furniture with a blanket or other
protective material to avoid possible damage.
−− Remove all dust and dirt and make sure that all surfaces
are clean and dry.
Safety recommendations
Only use safe equipment, wear safety gloves, goggles
and shoes and a dust mask.
Tip
−− Glass fibre gives a very nice and smooth result.
−− Your PROMAFOUR® encasement can also be tiled
with ceramic tiles or boards. The tiles or boards
can simply be fixed to the encasement by means
of PROMAFOUR®-GLUE 1000.
* For more product information, go to page 3.
14
B. Wallpaper
1. Your PROMAFOUR® encasement can also be finished
with glass fibre or heat resistant wallpaper.
Tables
Fixing mediums
Fix the PROMAFOUR® construction boards to the vertical PROMAFOUR®-STUDS with staples or screws, depending
on the design and the structure of the encasement and the installer’s equipment. The cutting, drilling, sanding etc. can be
executed with traditional tools. If you prefer using stainless steel screws, you have to pick sharp-pointed screws with a
self-milling head.
L = length of screw or staple
r = distance to the side of the board
A
d
=
=
hart to hart distance
thickness of the board
R =
width of the staples
r
15 mm
Fixation to metal profiles, thickness < 2 mm
Hardened steel phosphate drywall screws with Hi-Lo threat and milling ribs.
L = d + 25 mm
A
=
250 mm
=
Fixation into the edge of the board and on PROMAFOUR®-STUDS
Staples
R = 10 mm for d ≥ 8 mm
L = 2 to 3 x d (min. 40 mm)
A = 250 mm
A = 100 mm stapled alternating at an angle to the edge
r = 8 mm ( PROMAFOUR®-STUDS )
For functional reasons, the boards which are fixed with staples, have to have a minimal thickness of 12 mm.
Hardened steel phosphate drywall screws with Hi-Lo threat and milling ribs.
L = d + 25 mm
A
=
250 mm
For functional reasons, boards which are fixed with screws, have to have a minimal thickness of 15 mm.
Construction recommendations
Depending on the type of stove (wood- or gas-fired) and its dimensions, we recommend you to build the PROMAFOUR®
encasement as described in the table below and following the installation instructions. When casing a large fire, if you want
to attach heavier objects, such as a flat screen or a mirror to the encasement or if you want to tile it, we recommend a
PROMAFOUR® construction board with a thickness of 18 mm.
Type of fire
Width of
the fire
Thickness of
the board
Use of PROMAFOUR® - STUDS and
U-profiles
Fixation
Wood-burning
stoves
≤ 1,25 m
PROMAFOUR®
boards 12 mm
PROMAFOUR®-STUDS 68 x18 mm on corners.
Metal U-profiles 70 mm on floor and ceiling.
PROMAFOUR®-GLUE 1000
and staples or screws.
Gas fires
≤ 1,25 m
PROMAFOUR®
boards 12 mm
Metal profiles or PROMAFOUR®-STUDS
68 x18 mm on corners.
Metal U-profiles 70 mm on floor and ceiling.
PROMAFOUR®-GLUE 1000
and staples or screws.
Wood-burning
stoves or
gas fires
≤ 1,25 m
PROMAFOUR®
boards 15 mm
or 18 mm
No PROMAFOUR®-STUDS required.
Metal U-profiles 70 mm on floor and ceiling.
PROMAFOUR®-GLUE 1000
and staples or screws.
Wood-burning
stoves or
gas fires
> 1,25 m
PROMAFOUR®
boards 12 mm
or 15 mm
PROMAFOUR®-STUDS 68 x18 mm on corners
and every 625 mm.
Metal U-profiles 70 mm on floor and ceiling.
PROMAFOUR® GLUE 1000
and staples or screws.
Wood-burning
stoves
> 1,25 m
PROMAFOUR®
boards 18 mm
PROMAFOUR®-STUDS 68 x18 mm on corners
and every 830 mm.
Metal U-profiles 70 mm on floor and ceiling.
PROMAFOUR®-GLUE 1000
and staples or screws.
15
Promat Iberica S.A.
C/Velázquez, 47, 6 Izquierda
28001 Madrid
Tel.: +34 91 781 15 50
Fax: +34 91 575 15 97
E-mail: [email protected]
URL: www.promat.es
Promat GmbH
Scheifenkamp 16
40878 Ratingen
Germany
Tel.: +49-2102 493 0
Fax: +49-2102 493 115
E-mail: [email protected]
URL: www.promat.de
Promat UK Ltd.
The Sterling Centre
Eastern Road, Bracknell
RG12 2TD Bershire
UK
Tel.: +44-1344 381 300
Fax: +44-1344 381 301
E-mail: [email protected]
URL: www.promat.co.uk
Promat s.r.o.
Čkalova 22/784
16000 Praha 6 - Bubenec
Czech Republic
Tel.: +420-2 2439 0811
Fax: +420-2 3333 3576
E-mail: [email protected]
URL: www.promatpraha.cz
Promat TOP Sp. z.o.o.
ul.Przecławska 8
03-879 Warszawa
Poland
Tel.: +48-22 212 2280
Fax: +48-22 212 2290
E-mail: [email protected]
URL: www.promattop.pl
PROMAT S.p.A.
Divisione HPI
Via Idiomi 1/9
I-20090 ASSAGO (M)
Italy
Tel.: +39-02 4571711
Fax: +39-02 45706187
E-mail: [email protected]
URL: www.promat.it
Promat S.A.S.
BP 66 - Rue de l’Amandier
F - 78540 Vernouillet
France
Tel.: +33 1 39 79 61 60
Fax: +33 1 39 71 16 60
E-mail: [email protected]
URL: www.promat.fr
Microtherm Inc.
1731 Fred Lawson Drive
Maryville, Tennessee 37801
U.S.A.
Tel.: (+1) (865) 681 0155
Fax: (+1) (865) 681 0016
E-mail: [email protected]
URL: www.microthermgroup.com
Promat Australia Pty. Ltd.
1 Scotland Road
SA 5031 Mile End South, Adelaide
Tel.: +61 (8) 8352 6759
Fax: +61 (8) 8352 1014
E-mail: [email protected]
URL: www.promat-ap.com
Promat International
(Asia Pacific) Ltd.
Unit 19-02-01, Level 2 PNB
Damansara No. 19 Lorong
Dungun Damansara Heights
50490 Kuala Lumpur
Tel.: +60-3 2095 5111
Fax: +60-3 2095 6111
E-mail: [email protected]
URL: www.promat-ap.com
Promat Middle East
Suite 1805, 18th Floor
Dubai Festival City Tower
PO Box 123945, Dubai
United Arab Emirates
Tel.: +971 4 232 9780
Fax: +971 4 232 9781
E-mail: [email protected]
URL: www.promatfp.ae
Promat India Ltd.
610-611, Ansal Imperial Tower
C-Block, Community Centre
Naraina Vihar, Naraina
110028 New Delhi
Tel.: +91 (11) 2577 8413
Fax: +91 (11) 2577 8414
E-mail: [email protected]
URL: www.promat-ap.com
Promat China Ltd.
Room 1507, Building 5
SOHO Xiandaicheng
No.88 Jianguo Road
Chaoyang District
100022 Beijing
P.R. CHINA
Tel.: +86 (10) 8589 1254
Fax: +86 (10) 8589 2904
E-mail: [email protected]
URL: www.promat.com.cn
Nippon Microtherm Co.,Ltd.
Pacifi c Marks Shinjuku Bldg, 4-15-7
Nishi-shinjuku, Shinjuku-ku
Tokyo 160-0023
Japan
Tel.: +81 333 772 821
Fax: +81 333 782 821
E-mail: [email protected]
URL: www.microthermgroup.com
ENG V1 12/2013
Promat International N.V.
Bormstraat 24
B-2830 Tisselt
Tel.: +32 (0)15 71 21 86
Fax: +32 (0)15 71 26 90
E-mail: [email protected]
URL: www.promat.be
16