1
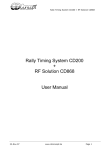
Rally Timing System CD200 - User Manual
Rally Timing System CD200
User Manual
14-Aug-02
www.cdconcept.be
Page 1
Rally Timing System CD200 - User Manual
Summary
1.
INTRODUCTION. ..................................................................................................................................... 3
2.
THE RALLY TIMER. ................................................................................................................................. 4
2.1 DESCRIPTION. .............................................................................................................................................. 4
2.2 RALLY TIMER MENU. .................................................................................................................................... 4
2.2.1 Configuration Menu. ...................................................................................................................... 4
2.2.2 F1: Set the Mode............................................................................................................................ 5
2.2.3 F2: Set the Position number. ..................................................................................................... 5
2.2.4 F3: Set the time. ............................................................................................................................ 5
2.2.5 F4: In-System Programming (ISP). ........................................................................................ 6
2.3 RALLY TIMER MODES ................................................................................................................................... 6
2.3.1 Start Mode......................................................................................................................................... 6
2.3.2 Time Control Mode ......................................................................................................................... 8
2.3.3 Flying Finish mode. ........................................................................................................................ 8
2.4 CHECK THE MODE, SOFTWARE VERSION AND SERIAL NUMBER. ............................................................. 9
2.5 LOW BATTERY WARNING............................................................................................................................ 10
3.
THE RALLY MANAGER. ....................................................................................................................... 11
3.1 DESCRIPTION. ............................................................................................................................................ 11
3.2 RALLY MANAGER MENU. ............................................................................................................................ 11
3.2.1 Configuration menu..................................................................................................................... 11
3.2.2 F1: Set Position number............................................................................................................ 12
3.2.3 F2: Set the time. .......................................................................................................................... 12
3.2.4 F3: Set the date. .......................................................................................................................... 12
3.2.5 F4: Data transfer.......................................................................................................................... 13
3.2.6 F5 Data Erase. ............................................................................................................................... 14
3.2.7 F6: Competitor number. ............................................................................................................ 14
3.2.8 F7: Set Synchro ibutton time. ................................................................................................. 14
3.2.9 F8: Customize ticket header.................................................................................................... 15
3.2.10
F9: In-System Programming (ISP). .................................................................................. 16
3.3 CHECK THE SOFTWARE VERSION AND SERIAL NUMBER. ........................................................................ 16
3.4 LOW BATTERY WARNING............................................................................................................................ 16
4.
4.1
4.2
4.3
4.4
IMPORTANT THINGS TO KNOW................................................................................................... 17
HOW TO PRESENT THE IBUTTON ON THE READER. .................................................................................. 17
THE RALLY MANAGER MEMORY LIMIT....................................................................................................... 17
CONTROL NUMBER ATTRIBUTION.............................................................................................................. 17
BATTERY REPLACEMENT............................................................................................................................. 17
14-Aug-02
www.cdconcept.be
Page 2
Rally Timing System CD200 - User Manual
1. Introduction.
Originally developed to meet the needs of Regularity Rallies, the Rally Timing System CD200 is
suitable for any rally-type event.
It is very easy to use, entirely based on electronic and eliminates the need of any hand-written
data or manual data insertion into the results computer.
The system consists of:
- Rally Timers: one per control.
- One Rally Manager & printer: at the finish line.
- ibuttons: stainless steel memory chip
fitted on every competitor’s time card.
Principle:
At every control, the Rally Timer records the time into the
competitor's chip which is carried up to the finish line.
Benefits:
-
Get all the data into the results computer automatically.
No operator nor data copying error.
No cheating possible.
No reason for the competitor to argue.
Instant results publishing.
Smaller results team.
Key features:
-
Very easy to use.
Unfailing reliability.
Compatible with any results software.
Resolution of 1/100th of a second.
Visual and audible signals.
Automatic Time synchronisation.
Timers software upgradeable via the internet.
Optional timing input.
14-Aug-02
www.cdconcept.be
Page 3
Rally Timing System CD200 - User Manual
2.
The Rally Timer.
2.1
Description.
The Rally Timer is a microcomputer mounted inside a
stopwatch body which is fitted with an ibutton interface.
One Rally Timer is needed at every control to record the
times into the competitors’ ibutton (memory chip).
It can work in the three following modes:
•
•
•
Start Mode (4 submodes)
Time Control
Flying Finish
The position number appears on the top right of the display.
2.2
Rally Timer menu.
2.2.1
Configuration Menu.
To enter the configuration menu, hold both 'ESC' and
'ENT' buttons for minimum 5 seconds.
After this delay, the first function in the menu will
appear which is the function 'Mode' (F1) in this case.
(see figure on the left).
Four functions are available in the Rally Timer menu:
- F1: Mode, set the mode.
- F2: P-n°, set the Position number.
- F3: time, set the time.
- F4: ISP, In-System Programming mode.
Use:
- ‘STOP/SELECT’ button, to select the function.
- ‘RESET’ button to go back to function 1 (F1).
- ‘ENT’ button to execute/enter the function.
- ‘ESC’ button to quit the menu.
14-Aug-02
www.cdconcept.be
Page 4
Rally Timing System CD200 - User Manual
2.2.2
F1: Set the Mode.
Enter the configuration menu, select 'Mode' function and
press the 'ENT' button.
Use the 'STOP/SELECT' button to select the mode.
Press the 'ENT' button to validate the change or the 'ESC'
button to go back to the menu leaving the mode
unchanged.
2.2.3
F2: Set the Position number.
Enter the configuration menu, select 'P n°' function
and press the 'ENT' button.
Use the 'STOP/SELECT' button to set the units.
Use the 'RESET' button to set the tens.
Press the 'ENT' button to validate the change or the
'ESC' button to go back to the menu leaving the Pnumber unchanged.
2.2.4
F3: Set the time.
Enter the configuration menu, select 'time' function and press
the 'ENT' button.
Use the 'RESET' button to select the seconds, minutes or hours
(blinking).
Use the 'STOP/SELECT' button to set the value.
Press the 'ENT' button to validate the change or the 'ESC'
button to go back to the menu leaving the time unchanged.
14-Aug-02
www.cdconcept.be
Page 5
Rally Timing System CD200 - User Manual
2.2.5
F4: In-System Programming (ISP).
Connect the Rally Timer to a free serial port of your
computer using the CD200-ISP cable and follow the
instructions on the CD200-ISP web form(see the upgrade
page of the CD200).
Enter the configuration menu, select 'ISP' function and
press the 'ENT' button.
2.3
Rally Timer modes
Hold the ‘ESC’ button to check the Rally Timer Mode.
The following modes are available:
2.3.1
Ref
Description
St00
St30
St0:30
St0:20:40
tC
F
Start Mode at xx:xx:00
Start Mode at xx:xx:30
Start Mode at xx:xx:00 or xx:xx:30
Start mode at xx:xx:00, xx:xx:20 or, xx:xx:40
Time Control
Flying Finish
Start Mode
In Start Mode, the Rally Timer records the Start Time into the ibutton.
The Rally Timer can be configured to allow a start every minutes at xx:xx:00 , every minute at
xx:xx:30, every 30 seconds and every 20 seconds.
14-Aug-02
www.cdconcept.be
Page 6
Rally Timing System CD200 - User Manual
The Start Mode is identified by the symbol on the
top left of the display (man running).
Hold the ‘ESC’ button to check which start mode is
set.
The position number appears on the top right of the
display.
When the competitor arrives to the start line, the
control worker presents the ibutton to the Rally
Timer.
In a fraction of a second, the Start time is
recorded into the ibutton and appears on the
display for 3 seconds.
The Start Time is the time the control worker is
allowed to leave the competitor to go.
Five seconds before start time, the Rally
Timer begins a countdown.
The red led switches ON and the Rally
Timer emits an audible signal every
second.
At the end of the countdown, the red led turns green
and the control worker can leave the competitor to
go.
If for any reason, the competitor was unable to go,
the ibutton can be presented to the Rally Timer again
and the previous data will be overwritten.
14-Aug-02
www.cdconcept.be
Page 7
Rally Timing System CD200 - User Manual
2.3.2
Time Control Mode
In Time Control Mode, the Rally Timer records the present time into the ibutton.
The Time Control Mode is identified by the 'TIME' symbol
on the top of the display.
The control worker presents the ibutton to the Rally Timer.
In a fraction of a second, the time is recorded into the ibutton
and appears on the display for 3 second
2.3.3
Flying Finish mode.
The Flying Finish Mode is identified by the
'MEMORY' symbol on the top of the display.
When the control worker presses the 'Stop' button, the Rally
Timer records the time in its embedded memory.
Up to ten successive times can be recorded into a queue.
The last time recorded appears on the display as long as the
control worker holds the 'Stop' button.
14-Aug-02
www.cdconcept.be
Page 8
Rally Timing System CD200 - User Manual
When the control worker releases the 'Stop' button,
the first time into the queue appears on the display
as well as the number of times recorded.
If a time has been taken by mistake, it can be erased
pressing the 'Reset' button. The time erased is the
time displayed which is the first time into the queue
When the control worker presents, the ibutton to the
Rally Timer, the first time into the queue is recorded
into the ibutton and erased in the Rally Timer's
embedded memory.
2.4
Check the Mode, Software version and Serial number.
Hold the ’ESC’ button and press the ‘STOP/SELECT’ button to
select the Mode, Software version or the Serial number.
i.e. Software version: CD200 rt10 V1.00
i.e. Serial number: Sn 010507
14-Aug-02
www.cdconcept.be
Page 9
Rally Timing System CD200 - User Manual
2.5
Low battery warning.
When battery is low, an ‘LO’ figure is blinking alternatively with the position number.
NB: The battery can be replaced without losing the time inserting the new battery within 15
seconds.
14-Aug-02
www.cdconcept.be
Page 10
Rally Timing System CD200 - User Manual
3.
The Rally Manager.
3.1
Description.
The Rally Manager is a microcomputer mounted inside a
stopwatch body which is fitted with an ibutton interface,
a serial port and an embedded EEPROM memory.
At the finish line, the content of the memory chip is read
by the Rally Manager which prints a ticket to be given to
the competitor and records all the data for further upload
to the result computer through the serial port.
3.2
Rally Manager menu.
3.2.1
Configuration menu.
To enter the configuration menu, press both the 'ESC' and
'ENT' button.
The first function in the menu will appear which is the
function 'P n°’ (F1) in this case. (See figure on the left).
Eight functions are available in the Rally Timer menu:
- F1: P n°, set the Position number.
- F2: time, set the time.
- F3: date, set the date.
- F4: dat:tr, data transfer(to computer).
- F5: dat:Er, data erase.
- F6: COMP n°, program competitor n° into ibuttons.
- F7: Synch, program synchronization ibutton.
- F8: Header, customize ticket header (i.e. Rally name).
- F8: ISP, In-System Programming mode.
Use:
- ‘STOP/SELECT’ button, to select the function.
- ‘RESET’ button to go back to function 1 (F1).
- ‘ENT’ button to execute the function.
- ‘ESC’ button to quit the menu.
14-Aug-02
www.cdconcept.be
Page 11
Rally Timing System CD200 - User Manual
3.2.2
F1: Set Position number.
Enter the configuration menu, select 'P n°' function
and press the 'ENT' button.
Use the 'STOP/SELECT' button to set the units.
Use the 'RESET' button to set the tens.
Press the 'ENT' button to validate the change or the
'ESC' button to go back to the menu leaving the Pnumber unchanged.
Important note !! :
The Position number of the Rally Manager has to be
higher than the position number of any Rally Timer.
In fact, the Rally Manager read the data from the
ibutton from position n°1 up to its own position.
3.2.3
F2: Set the time.
Enter the configuration menu, select 'time' function and press
the 'ENT' button.
Use the 'RESET' button to select the seconds, minutes or hours
(blinking).
Use the ' STOP/SELECT ' button to set the value.
Press the 'ENT' button to validate the change or the 'ESC' button
to go back to the menu leaving the time unchanged.
3.2.4
F3: Set the date.
Enter the configuration menu, select 'date' function and press
the 'ENT' button.
Use the 'RESET' button to select the year, months or days
(blinking).
Use the 'STOP/SELECT' button to set the value.
Press the 'ENT' button to validate the change or the 'ESC' button
to go back to the menu leaving the time unchanged.
14-Aug-02
www.cdconcept.be
Page 12
Rally Timing System CD200 - User Manual
3.2.5
F4: Data transfer.
Enter the configuration menu, select 'dat;tr' function and
press the 'ENT' button.
The Rally Manager will send all the data in memory through
its serial port to the result computer.
As the transmission goes along, the successive record
numbers of transmitted data is displayed (r:xxx).
The results computer can import those data using any
terminal software such as the ‘HyperTerminal’ software
supplied with Microsoft Windows operating system.
Communication parameters:
Bauds:9600
Data bits:8
Parity: none
Stop bits:1
Flow control: None
The data is sent to the results computer in a text file (.txt) which can be imported into any results
software.
The format is the following (<TAB> separated columns):
-
One line per competitor
First column: the date the competitor crossed the finish line.
Second column: unique ibutton serial number ending by the family code
(04=1kb ibutton, 06= 4kb ibutton).
Third column: empty (future use).
Fourth column: Competitor number (4 digits).
Following columns (up to 99): Control data string “Ppp:Ss-hh:mm:ss:hh”
pp = position number, s = security code, hh = hours, mm = minutes, ss = seconds, hh =
1/100th of a second.
See the example below:
Date
ibutton serial n°
22/06/2002
22/06/2002
22/06/2002
22/06/2002
22/06/2002
22/06/2002
22/06/2002
22/06/2002
7D0000000514A0-04
4500000004F262-04
4000000004F7BC-04
4000000004EEE4-04
48000000050897-04
C2000000051550-04
5400000005029F-04
4500000004EE47-04
14-Aug-02
free
Comp n° Positon 1
Position 2
Position 3...
0093
0146
0129
0119
0123
0103
0068
0092
P02C6-09:35:01.26
P02C6-10:01:06.83
P02C6-09:53:01.01
P02C6-09:48:02.24
P02C6-09:49:23.05
P02C6-09:39:12.00
P02C6-09:14:21.66
P02C6-09:34:28.26
P03S6-09:36:30.00
P03S3-10:03:00.00
P03S3-09:54:00.00
P03S6-09:48:30.00
P03S3-09:51:00.00
P03S6-09:40:30.00
P03S6-09:14:30.00
P03S3-09:36:00.00
P01S6-08:57:00.00
P01S6-09:23:00.00
P01S6-09:15:00.00
P01S6-09:10:00.00
P01S6-09:11:30.00
P01S6-09:01:00.00
P01S6-08:36:30.00
P01S6-08:56:30.00
www.cdconcept.be
Page 13
Rally Timing System CD200 - User Manual
3.2.6
F5 Data Erase.
Enter the configuration menu, select 'dat;Er' function and
press the 'ENT' button.
The Rally Manager will display the number of records
present in memory (r:xxx).
Press the ‘RESET’ button to reset the record number value.
Press the 'ENT' button to validate the change or the 'ESC'
button to go back to the menu without resetting the record
number.
Note: One record represents the data from one competitor.
3.2.7
F6: Competitor number.
Enter the configuration menu, select 'COMP n°' function and press
the 'ENT' button.
Press the ‘RESET’ button to increment the two higher digits.
Press the ‘STOP/SELECT’ button to increment the two lower digits.
When the desired competitor number is set, present the ibutton on
the reader.
Press 'ESC' button to go back to the menu.
3.2.8
F7: Set Synchro ibutton time.
Enter the configuration menu, select 'SynCH' function and
press the 'ENT' button.
Press the ‘STOP/SELECT’ button to select a security code
(from 1 to 7). The security code will be transmitted to the
Rally Timers when synchronizing their times. It allows the
detection of the use of a Rally Timer by a competitor.
Present the synchro ibutton on the reader to set its time.
The time into the synchro is valid for 4 minutes only.
Meanwhile, present the synchro ibutton to any Rally Timer
to synchronize its time.
Press 'ESC' button to go back to the menu.
14-Aug-02
www.cdconcept.be
Page 14
Rally Timing System CD200 - User Manual
3.2.9
F8: Customize ticket header.
Connect the Rally Manager to the printer or to the serial port of your
computer ready to receive data at 9600 bauds.
Enter the configuration menu, select 'Header' function and press the
'ENT' button.
The Rally Manager will print the present header and a table of the
available characters and their codes:
*** RALLY NAME HERE ***
012345678901234567890123
‘Custom Header’
‘Column number (0 to 23)’
Character codes:
' '=00'!'=01'"'=02'#'=03
'$'=04'%'=05'&'=06'''=07
'('=08')'=09'*'=10'+'=11
','=12'-'=13'.'=14'/'=15
'0'=16'1'=17'2'=18'3'=19
'4'=20'5'=21'6'=22'7'=23
'8'=24'9'=25':'=26';'=27
'<'=28'='=29'>'=30'?'=31
'@'=32'A'=33'B'=34'C'=35
'D'=36'E'=37'F'=38'G'=39
'H'=40'I'=41'J'=42'K'=43
'L'=44'M'=45'N'=46'O'=47
'P'=48'Q'=49'R'=50'S'=51
'T'=52'U'=53'V'=54'W'=55
'X'=56'Y'=57'Z'=58'['=59
'\'=60']'=61'^'=62'_'=63
'`'=64'a'=65'b'=66'c'=67
'd'=68'e'=69'f'=70'g'=71
'h'=72'i'=73'j'=74'k'=75
'l'=76'm'=77'n'=78'o'=79
'p'=80'q'=81'r'=82's'=83
't'=84'u'=85'v'=86'w'=87
'x'=88'y'=89'z'=90
The Rally Manager will display the Column number (from 0 up
to 23) followed by the character code.
Press the ‘STOP/SELECT’ button to select the character code.
Press the ‘RESET’ button to save the change and go to the next
column.
Press 'ESC' button to print the new ticket header and go back to the
menu.
14-Aug-02
www.cdconcept.be
Page 15
Rally Timing System CD200 - User Manual
3.2.10
F9: In-System Programming (ISP).
Connect the Rally Manager to a free serial port of your
computer and follow the instructions on the CD200-ISP web
form(see the upgrade page of the CD200).
Enter the configuration menu, select 'ISP' function and
press the 'ENT' button.
3.3
Check the Software version and Serial number.
Hold the ’ESC’ button and press the ‘STOP/SELECT’ button to
select the Software version or the Serial number.
i.e. Software version: CD200 rM10 V1.00
i.e. Serial number: Sn 020205
3.4
Low battery warning.
When battery is low, an ‘LO’ figure is blinking alternatively with the position number.
NB: The battery can be replaced without losing the time if you insert the new battery within 15
seconds.
14-Aug-02
www.cdconcept.be
Page 16
Rally Timing System CD200 - User Manual
4.
Important things to know.
4.1
How to present the ibutton on the reader.
In the most cases, programming the ibutton is so fast that it looks instantaneous.
However, in the three following cases, the data transmission can take a few tenths of a second and
requires some precautions.
- The Rally Timer with the Position number set to 01 will clean the whole ibutton memory (up to
position n°30 for the DS1992 ibutton, up to 99 for the DS1993).
- The Rally Manager will read all ibutton data up to the selected position (up to 99).
- The Rally Timer/Manager during time synchronization which can take up to 1 second.
In those three cases, the Rally Timer/Manager will display ‘Hold’
until the transmission is successful.
The best way to present the ibutton is to insert it in the reader
and exert a slight pressure to make a good contact with the
external ring and STAY STILL (don’t move) until the transmission
is completed.
4.2
The Rally Manager memory limit.
The Rally Manager’s embedded memory can save the data for up to 255 competitors (30 times for
each using the DS1992, 99 times using the DS1993).
Once you’ve reach that limit, the manager won’t print and save any data anymore until it is
cleaned. If you present an ibutton, the rally manager will show ‘FULL’ and emit a ‘beep’.
4.3
Control number attribution.
You are free to attribute any control number to the timers. The only conditions to respect are the
followings.
- The first control has to be control number one because it is the one cleaning the ibutton from old
data.
- The Rally Manager has to be configured with the higher control number because the data in the
ibutton will be read, printed and saved from control number 01 to the number attributed to the
manager.
4.4
Battery replacement.
If the Low Battery warning appears (LO), the battery can be replaced without losing the time if you
insert the new battery within 15 seconds.
14-Aug-02
www.cdconcept.be
Page 17