1
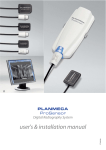
EN
user's manual
10029963_5
TABLE OF CONTENTS
1
INTRODUCTION ..............................................................................................1
2
SYMBOLS ON PRODUCT LABELS ................................................................2
3
ASSOCIATED DOCUMENTATION .................................................................3
4
SAFETY PRECAUTIONS ................................................................................4
4.1 Explanations for note, caution and warnings statements ............................................... 4
4.2 Notes, cautions and warnings ........................................................................................ 4
5
CHECKLIST - BEFORE USING THE UNIT .....................................................6
6 PLANMECA PROX INTRAORAL X-RAY UNIT
- MAIN PARTS 7
6.1 General view of the X-ray unit ........................................................................................ 7
6.2 Control panel .................................................................................................................. 7
6.3 Mobile base .................................................................................................................... 8
7
PREPARATIONS FOR THE EXPOSURE ......................................................11
7.1 Switching the unit on .................................................................................................... 11
7.2 Selecting the cone ....................................................................................................... 12
8
CONTROL PANEL .........................................................................................15
8.1 Displays ....................................................................................................................... 15
8.2 Keys and indicator lights .............................................................................................. 17
9
MOLAR EXPOSURE ......................................................................................20
9.1 Selecting exposure parameters ................................................................................... 20
9.2 Patient positioning ........................................................................................................ 21
9.3 Taking an exposure ..................................................................................................... 22
10 PREMOLAR AND CANINE EXPOSURE .......................................................23
10.1 Selecting the exposure parameters ............................................................................. 23
10.2 Patient positioning ........................................................................................................ 24
10.3 Taking an exposure ..................................................................................................... 25
11 INCISOR EXPOSURE ....................................................................................26
11.1 Selecting the exposure parameters ............................................................................. 26
11.2 Patient positioning ........................................................................................................ 27
11.3 Taking an exposure ..................................................................................................... 28
12 OCCLUSAL EXPOSURE ...............................................................................29
12.1 Selecting the exposure parameters ............................................................................. 29
12.2 Patient positioning ........................................................................................................ 30
12.3 Taking an exposure ..................................................................................................... 31
13 ENDODONTIC EXPOSURE ...........................................................................32
14 BITE-WING EXPOSURE ................................................................................33
14.1 Selecting the exposure parameters ............................................................................. 33
14.2 Patient positioning ........................................................................................................ 34
14.3 Taking an exposure ..................................................................................................... 35
User’s Manual
Planmeca ProX i
TABLE OF CONTENTS
15 EXPOSURE VALUES ....................................................................................36
15.1 Default exposure values .............................................................................................. 36
15.2 Preprogrammed settings values .................................................................................. 36
16 PROGRAMMING EXPOSURE VALUES .......................................................38
16.1 Programming default exposure values ........................................................................ 38
16.2 Programming the density values .................................................................................. 39
16.3 Programming the preprogrammed settings ................................................................. 40
17 EXPOSURE VALUE TABLES .......................................................................42
17.1 Exposure values for Planmeca ProSensor and Planmeca Dixi2 V3 sensors .............. 42
17.2 Exposure values for Dixi2 V1 sensors (high sensitivity) .............................................. 44
17.3 Exposure values for speed F films ............................................................................... 46
18 ERROR CODES .............................................................................................48
19 CLEANING .....................................................................................................49
19.1 Surfaces ....................................................................................................................... 49
19.2 Film holder ................................................................................................................... 49
20 SERVICE ........................................................................................................49
21 DEVICE LABEL .............................................................................................49
22 DISPOSAL OF THE UNIT ..............................................................................50
23 TECHNICAL SPECIFICATIONS ....................................................................51
23.1
23.2
23.3
23.4
23.5
Technical data .............................................................................................................. 51
Dimensions (in mm) ..................................................................................................... 53
Planmeca ProX minimum dimensions ......................................................................... 54
Installation options ....................................................................................................... 56
User’s statement for Planmeca Prox ........................................................................... 57
The manufacturer, assembler and importer are responsible for the safety, reliability
and performance of the unit only if:
- installation, calibration, modification and repairs are carried out by qualified and
authorized personnel
- electrical installations are carried out according to the appropriate requirements
such as IEC 60364
- equipment is used according to the operating instructions.
Planmeca pursues a policy of continual product development. Although every
effort is made to produce up-to-date product documentation this publication
should not be regarded as an infallible guide to current specifications. We reserve
the right to make changes without prior notice.
COPYRIGHT PLANMECA
Publication number 10029963 Revision 5
Released 20 September 2013
ii Planmeca ProX
User’s Manual
INTRODUCTION
1
INTRODUCTION
The Planmeca ProX X-ray unit produces intraoral X-ray
images for the diagnosis of teeth and adjacent structures.
The unit is allowed to be used only under supervision of a
dental/health care professional.
This manual describes how to operate the Planmeca ProX
intraoral X-ray unit equipped with Planmeca Dixi or
Planmeca ProSensor digital X-ray system. Please read
these instructions carefully before using the unit.
Note that if you use the Planmeca Dixi or Planmeca
ProSensor digital X-ray system, you need a PC with a
Planmeca Romexis/Dimaxis imaging software to save,
view and modify the radiographs. The Planmeca Romexis/
Dimaxis software has a separate manual, which should be
used in conjunction with this manual.
CAUTION FOR US USERS:
Federal law restricts this device to sale by or
on the order of a health care professional.
NOTE This manual is valid for software revisions 4.00 or
later.
NOTE The Planmeca ProX intraoral X-ray unit is allowed to
be used only under supervision of a dental/health
care professional.
0598
The Planmeca ProX intraoral X-ray unit fulfils the
requirements of Directive 93/42/EEC.
All key illustrations indicate that the key should be pressed
or, where indicated, pressed and held down. Pressing a
key will either switch a function on or off, depending on the
original setting, or change the indicated value.
0.100
The display values shown in this guide are only examples
and should not be interpreted as recommended values
unless otherwise stated.
Make sure that you are fully acquainted with the
appropriate radiation protection measures and these
instructions before using the unit.
User’s Manual
Planmeca ProX 1
SYMBOLS ON PRODUCT LABELS
2
SYMBOLS ON PRODUCT LABELS
Type B equipment (Standard IEC 601-1).
Alternating current (Standard IEC-417).
Attention, consult accompanying documents
(Standard ISO7010-M002).
General warning (Standard ISO 7010).
Warning, electricity (Standard ISO 7010-W012).
Intermediate focal spot (Standard IEC-417).
Separate collection for electrical and electronic equipment
according to Directive 2002/96/EC (WEEE).
2
Planmeca ProX
User’s Manual
ASSOCIATED DOCUMENTATION
3
ASSOCIATED DOCUMENTATION
The Planmeca ProX X-ray unit is supplied with the
following manuals:
•
User’s Manual (10029963, Original English language
publication)
•
Installation Manual (10029964, Original English language
publication)
•
Technical Manual (10029965, Original English language
publication)
These manuals are intended to be used in conjunction with
the documentation for the Planmeca Romexis/Dimaxis
imaging software. The imaging software package contains
the following manuals:
User’s Manual
•
User’s Manual (10014593, Original English language
publication)
•
Installation Manual (10014600, Original English language
publication)
Planmeca ProX 3
SAFETY PRECAUTIONS
4
SAFETY PRECAUTIONS
4.1
Explanations for note, caution and warnings statements
NOTE Note messages are used to indicate information
which may be helpful or of special interest to the
reader.
CAUTION Caution statements alert the user to the
possibility of a problem with the unit
associated with its use or misuse. Such
problems include unit malfunction, unit
failure, damage to the unit or damage to
other property.
WARNING
Warning statements alert the user to
the possibility of personal injury to the
user or the patient, or other serious
damage associated with the use or
misuse of the unit.
4.2
Notes, cautions and warnings
WARNING
Failure to install the Planmeca ProX X-ray
unit in an approved location may be
dangerous to both patient and operator.
WARNING
No modification of this equipment is
allowed. Do not modify this equipment
without
authorization
of
the
manufacturer. If this equipment is
modified, appropriate inspection and
testing must be conducted to ensure
continued safe use of equipment.
WARNING
To avoid risk of electric shock, this
equipment must only be connected to a
supply mains with protective earth
4
Planmeca ProX
User’s Manual
SAFETY PRECAUTIONS
WARNING
IT IS VERY IMPORTANT THAT THE
PLACE WHERE THE UNIT IS TO BE USED
AND THE POSITION FROM WHICH THE
USER IS TO OPERATE THE UNIT ARE
CORRECTLY
SHIELDED.
SINCE
RADIATION SAFETY REQUIREMENTS
VARY FROM COUNTRY TO COUNTRY
AND STATE TO STATE IT IS THE
RESPONSIBILITY OF THE USER TO
ENSURE THAT ALL LOCAL SAFETY
REQUIREMENTS ARE MET.
WARNING
To protect the user from stray radiation
control of the X-ray unit must be from a
distance of not less than 2 metres from
the focal spot or X-ray beam.
WARNING
This X-ray unit may be dangerous to both
patient and operator unless safe
exposure values are used and correct
operating procedures are observed.
CAUTION The SIP/SOP shall not be used in Planmeca
ProX, but only for connection of Planmeca
Dixi or Planmeca ProSensor device.
CAUTION Do not connect a multiple portable socket
outlet (MPSO) or extension cord to the
system.
CAUTION Do not connect items which
specified as part of the system.
are
not
CAUTION Do not spill water on the X-ray unit.
NOTE Electromagnetic interference between the equipment
and other devices can occur in very extreme
conditions. Do not use the equipment in close
conjunction with sensitive devices, or devices
creating high electromagnetic disturbances.
User’s Manual
Planmeca ProX 5
CHECKLIST - BEFORE USING THE UNIT
5
6
CHECKLIST - BEFORE USING THE UNIT
Planmeca ProX
•
Make sure that you are fully acquainted with the
appropriate radiation protection measures and these
instructions before using the unit.
•
Make sure that the film processor is in working order and
is ready for use.
•
Make sure that you are using the correct film processing
chemicals for the film you are using.
•
Make sure that the processing chemicals you are using
are fresh and are at the correct processing temperatures
and concentrations.
•
Make sure that the film you are going to use is fresh. Do
not use old film. Store and handle the film according to the
manufacturer’s instructions.
User’s Manual
PLANMECA PROX INTRAORAL X-RAY UNIT - MAIN PARTS
6
PLANMECA PROX INTRAORAL X-RAY UNIT
- MAIN PARTS
6.1
General view of the X-ray unit
Support arm
Scale for cone angle
6.2
Prox_main.eps
nerator
x
Control panel
Tube head
Control panel
BW
Y
D
A
E T
R RE
P
kV
m
MO
A
DE
LE
s
SE
CT
One end of the control panel cable is connected to the
terminal at the underside of the generator box, and the
other end to the control panel.
CAUTION Do not connect any other equipment to the
control panel’s terminal.
User’s Manual
Planmeca ProX 7
PLANMECA PROX INTRAORAL X-RAY UNIT - MAIN PARTS
6.3
Mobile base
CAUTION The Planmeca ProX mobile X-ray unit has to
be in transport position when on surface
inclined 5° or more.
6.3.1
Transporting Planmeca ProX mobile x-ray unit
1. Secure the support arm to the transport position with strap.
CAUTION Never move the Planmeca ProX mobile x-ray
unit without first securing the support arm to
the transport position.
2. Disconnect the Planmeca ProX from the power supply and
loop the cable around the handle.
3. Transport the Planmeca ProX Mobile X-ray unit carefully
from the handle.
CAUTION The mobile Planmeca ProX X-ray unit is to
be moved only from the handle.
Mobile_ProX_2.eps
NOTE If you have to move the ProX Mobile X-ray unit over a
low obstacle, tilt the base slightly by pressing the
back of the wheel assembly with your foot.
8
Planmeca ProX
User’s Manual
PLANMECA PROX INTRAORAL X-RAY UNIT - MAIN PARTS
Mobile_ProX_1.eps
4. When the unit has been transported to the desired area to
prevent the unit from moving lock the wheels by pressing
the lever down.
CAUTION Always lock at least two of the four wheels
before taking your hand off the handle.
User’s Manual
Planmeca ProX 9
PLANMECA PROX INTRAORAL X-RAY UNIT - MAIN PARTS
6.3.2
Tray (optional)
CAUTION The maximum allowed weight
optional mobile tray is 3kg (7lbs).
the
Tray
Mobile_ProX_tray.eps
kg
on
10
Planmeca ProX
User’s Manual
PREPARATIONS FOR THE EXPOSURE
7
PREPARATIONS FOR THE EXPOSURE
7.1
Switching the unit on
The on/off switch is located under the generator box.
When the unit is switched on it will carry out an automatic
self-test during which the Display CPU software version is
shown on the kV display, and the Tube head CPU software
version on the time display.
BW
READY
PRET
kV
mA
s
SELECT
Prox_power.eps
MODE
On/off switch
0.125
63 6
After the self-test is completed the default exposure values
will appear on the displays.
The default exposure values can be reprogrammed by the
user, see section 16.1 “Programming default exposure
values” on page 38.
NOTE There are two sets of default exposure values: one for
the adult mode and one for the child mode. When
switched on the unit is always in the adult mode.
User’s Manual
Planmeca ProX 11
PREPARATIONS FOR THE EXPOSURE
7.2
Selecting the cone
Select the cone to be used in the exposure. It is
recommended to use the optional long cone in order to
keep the absorbed dose to the patient as low as possible.
7.2.1
Long 30 cm (12”) cone
The long cone is attached into its position by pushing it into
the short cone and rotating it so that the red point on the
short cone and the black point on the long cone are in line.
Attach/remove: red
points in line.
In position: red and
black points in line.
7.2.2
HAWE film holder
The rectangular collimator can be attached to the long
cone either before the film holder or after it. When the
collimator is attached before the film holder, the film holder
rotates when the collimator is rotated.
Rectangular collimator
Film holder
Film holder
Rectangular collimator
12
Planmeca ProX
User’s Manual
PREPARATIONS FOR THE EXPOSURE
When attaching the film to the holder make sure that the
film is in the same direction as the rectangular collimator.
Film and collimator sides
in the same direction
NOTE The exposure values must be selected according to
the cone used in the exposure, refer to the section 15
“EXPOSURE VALUES” on page 36.
7.2.3
RINN film holder
Attach the RINN compatible rectangular collimator to the
long cone. The film holder can be attached to the
collimator.
RINN compatible
rectangular collimator
RINN film holder
User’s Manual
Planmeca ProX 13
PREPARATIONS FOR THE EXPOSURE
7.2.4
Long rectangular cone
Prox_attaching_cone2.eps
Push the rectangular cone into the short cone so that the
red dots on the short cone and on the rectangular cone are
in line (1), and rotate the cone 180°, until the black dot on
the rectangular cone and the red dot on the short cone are
in line (2). The cone can be now rotated in its position ±90°.
1.
2.
180°
Red points
The rectangular cone can be removed when the red dots
on the short cone and on the rectangular cone are in line.
14
Planmeca ProX
User’s Manual
CONTROL PANEL
8
CONTROL PANEL
Preprogrammed setting keys
and indicator lights
Preprogrammed setting
keys and indicator
lights
Adult/child selection key
and indicator lights
Exposure warning
indicator light
Ready indicator light
Exposure key
66
kV display
66
6
mA display
0.25
0.250
Time display
MODE key
SELECT key
Parameter adjustment keys
8.1
Displays
8.1.1
kV display
The selected kV value is shown on the kV display. There
are eight different values that can be selected: 50, 52, 55,
57, 60, 63, 66 and 70 kV.
NOTE The kV range can be 50-70, 55-70, 60-70, 66-70, 70, 5068, 55-68, 60-68, 66-68 or 68 depending on the local
requirements.
8.1.2
mA display
6
The selected mA value is shown on the mA display. There
are seven different values that can be selected: 2 - 8 mA.
NOTE The minimum available mA value depends on the
local requirements.
User’s Manual
Planmeca ProX 15
CONTROL PANEL
8.1.3
Time display
The selected exposure time is shown on the time display.
After taking an exposure a waiting time starts to flash on
the time display which indicates the delay before the next
exposure can be taken.
Film mode
In the digital imaging mode the exposure time is shown
with the prefix “d.”
In the phosphoric mode the exposure time is shown with
the prefix “P.”.
Digital mode
After exposure the WAIT time appears on the display. The
wait time is 15 times the time of exposure, however always
at least 6 seconds.
Phosphoric mode
If the DAP display is activated (service mode parameter
24=1 or 3) the WAIT time display changes to DAP display
after a few seconds. In this case the beam limiting device
number (between 1 and 12) appears on the kV display.
The letter A is shown in the mA display and the DAP value
(0.1 - 9.9, 10 - 9999 mGy*cm2) appears on the s (time)
display.
The beam limiting devices can be selected using the arrow
keys.
Table 1: Beam limiting devices
kV display
mA display
Sensor type
1
A
-
No tube
-
2
A
-
Round tube without
supplementary limiting device
-
3
A
Round tube + B0 white, size 0
10009351
4
A
Round tube + B1 white, size 1
10009352
5
A
Round tube + B2 white, size 2
06001016
6
A
Round tube + B0 black, size 0
10009353
7
A
Round tube + B1 black, size 1
10009354
8
A
Round tube + B2 black, size 2
06001021
9
A
Round tube + S0 black, size 0
10021314
10
A
Round tube + S1 black, size 1
10021315
11
A
Round tube + S2 black, size 2
10021316
12
A
Rectangular tube without
supplementary limiting device
-
Film
Dixi
ProSensor
-
Explanation
Part number
See also the technical manual for DAP values of the 1, 2
and 12 beam limiting devices.
16
Planmeca ProX
User’s Manual
CONTROL PANEL
8.2
Keys and indicator lights
8.2.1
Preprogrammed settings keys and indicator lights
Incisors
Premolars
and
canines
The unit is preprogrammed with exposure parameters time, kV and mA values - which can be selected by
pressing these keys. There are ten sets of parameters for
Occlusal both the child mode and the adult mode: one for each
exposure exposure region and one for default exposure values,
which are in use when an exposure region is not selected.
Endodontic
Bite-wing
Adult/
child
mode
Molars
The selections that can be made are: molars, premolars &
canines, incisors, occlusal exposure, endodontic and bitewing.
Press the desired key once to select the projection of the
maxilla. The indicator light of the selected projection will
come on.
Press the key twice to select the projection of the
mandible. The indicator light of the selected projection will
come on.
Pressing the key a third time will recall the default
exposure values.
The preprogrammed settings can be changed by the user,
see section 16.1 “Programming default exposure values”
on page 38.
8.2.2
Adult/child mode selection key and indicator light
Press the adult/child mode selection key once to select the
child mode. The indicator light of the child mode will come
on.
Press the key again to return to the adult mode. The
indicator light of the adult mode will come on.
User’s Manual
Planmeca ProX 17
CONTROL PANEL
8.2.3
SELECT key
Press the SELECT key briefly to select the parameter - kV,
mA or exposure time - to be changed. When the parameter
value is flashing on the display, the parameter can be
changed. After adjusting the kV or mA value or exposure
time the unit will return automatically to the time
adjustment mode after 5 seconds time.
Press and hold down the SELECT key (about 4 seconds)
until you have heard two signal tones to enter the
programming mode. For more information about
programming refer to chapter 16.1 “Programming default
exposure values” on page 38.
Press the SELECT key to clear the error from the display.
8.2.4
MODE key
To select the exposure parameters for film, digital or
phosphor plate imaging press and hold down the MODE
key for 2 seconds.
Film-based
imaging mode
To enter the digital imaging mode from the film-based
imaging mode press and hold down the MODE key for 2
seconds. There is no prefix on the display in the film-based
imaging mode. The exposure time with prefix d. appears
on the time display in the digital imaging mode. All the keys
function as in the film-based imaging mode.
Digital
imaging mode
To enter the phosphoric mode from the digital imaging
mode press the MODE key and hold it down for 2 seconds.
The exposure time with prefix P. appears on the time
display in the phosphoric mode. All the keys function as in
the film-based imaging mode.
Phosphoric
imaging mode
All the exposure parameters remain selected after the
exposure until the user changes the parameters or until the
unit is switched off. The selected mode stays in the unit
memory even in case of power failure.
If the DAP display is activated (service mode parameter
24=2 or 3) by pressing the MODE key briefly the DAP
value mGy*cm2 appears on the time display, the beam
limiting device value between 1 and 12 appears on the kV
display and the letter A on the mA display. The beam
limiting device value can be changed using the arrow up/
down keys.
If the exposure count display is activated (service mode
parameter 23=2) by pressing briefly the MODE key the
exposure count value (00000 - 50000) appears on the mA
and time displays. The text EC appears on the kV display.
To return to the exposure value (kV, mA, sec) displays
press briefly the SELECT key.
18
Planmeca ProX
User’s Manual
CONTROL PANEL
8.2.5
Parameter adjustment keys
down
up
Press the SELECT key briefly to select the parameter - kV,
mA, exposure time or density - to be changed. When the
parameter value is flashing on the display, the parameter
can be changed with the parameter adjustment keys. The
up key increases the value and the down key decreases it.
After adjusting the kV or mA value or exposure time the
unit will return automatically to the time adjustment mode
after 5 seconds time.
8.2.6
Ready indicator light
The green ready indicator light will come on when the unit
is ready to take an exposure. The waiting time between
exposures is 12 times exposure time, but always at least 6
seconds.
In the programming mode the ready light will start to flash.
NOTE Planmeca Prox with Dixi3 or Planmeca ProSensor
system:
You can set the unit so that the Ready indicator light
will only come on when the Romexis / Dimaxis
program is ready for the exposure, i.e. the message
Waiting for exposure appears on the computer
screen. To change the settings of the unit contact
your Planmeca technical support.
8.2.7
Exposure key
When you take an exposure you must press and hold
down the exposure key for the entire duration of the
exposure.
8.2.8
Exposure warning indicator light
The yellow exposure warning light will come on when you
take an exposure. You will also hear an audible warning
sound during the exposure.
User’s Manual
Planmeca ProX 19
MOLAR EXPOSURE
9
MOLAR EXPOSURE
9.1
Selecting exposure parameters
The preprogrammed exposure values are shown in
section 15 “EXPOSURE VALUES” on page 36.
Check that you are in the desired mode: in the film-based
imaging mode, in the digital imaging mode or in the
phosphoric mode.
Film-based
imaging mode
Phosphoric
mode
Digital imaging
mode
The imaging mode can be changed by pressing the MODE
key for 2 seconds.
Select the adult or child mode. The indicator light of the
selected projection will come on.
Child
Adult
Select the molar exposure region with the preprogrammed
setting keys. Press the molar key once to select the
projection of the maxilla, and press the key twice to select
the projection of the mandible. The in-dicator light of the
selected projection will come on.
Molars
0.080
7
The preprogrammed time, kV and mA values appear on
the respective displays.
The preprogrammed time, kV and mA values can be
temporarily changed with the parameter adjustment keys.
This will not affect the preprogrammed values.
Select the parameter to be adjusted with the SELECT key.
When the parameter value is flashing on the kV display,
the anode voltage can be changed with the parameter
adjusting keys.
20
Planmeca ProX
User’s Manual
MOLAR EXPOSURE
When the parameter value is flashing on the mA display,
the anode current can be changed with the parameter
adjusting keys.
When the parameter value on the kV or mA display is not
flashing, the exposure time value can be changed with the
parameter adjusting keys.
NOTE After adjusting the kV or mA value the unit will return
automatically to the time adjustment mode after 5
seconds time.
9.2
Patient positioning
Ask the patient to sit down. Place a protective lead apron
over the patient’s chest.
9.2.1
Positioning the film/sensor
Paralleling technique (recommended)
The film or sensor is placed to a film holder which is used
to align the film parallel to the long axis of the tooth.
Use a long cone for the paralleling technique.
Long axis
of the tooth
Film or
sensor
Bisecting angle technique (optional)
The patient holds the film or sensor in place with his finger.
The X-ray beam is directed perpendicularly towards an
imaginary line which bisects the angle between the film
plane and the long axis of the tooth.
Long axis
of the tooth
Film or
sensor
User’s Manual
Planmeca ProX 21
MOLAR EXPOSURE
9.2.2
Positioning the cone
The angle of the cone is indicated on the scale located on
the vertical joint of the tube head.
Prox_cone_pos.eps
Scale for the cone angle
The optional long cone can be attached into the short
cone. Refer to chapter 7.2 “Selecting the cone” on page
12.
Select the cone angle from the table below.
TEETH
ANGLE OF
INCLINATION
Molars
Maxilla
+35°
Molars
Mandible
-5°
Position the cone according to the figures below.
Maxillary molar
9.3
Mandibular molar
Taking an exposure
Ask the patient to remain as still as possible. Move as far
away from the X-ray tube as the length of the cable from
the control panel permits. The distance must be at least 2
meters (6.6 ft) from the X-ray tube.
No one except the patient may remain in the radiation area
while the exposure is taken.
BW
READY
PRET
kV
mA
s
MODE
NOTE Maintain audio and visual contact with the patient and
unit during the exposure.
Check that the ready light is on.
SELECT
Press and hold the exposure key on the control panel for
the duration of the exposure.
The exposure warning light will come on. You will also hear
the radiation warning tone during the exposure.
22
Planmeca ProX
User’s Manual
PREMOLAR AND CANINE EXPOSURE
10 PREMOLAR AND CANINE EXPOSURE
10.1
Selecting the exposure parameters
The preprogrammed exposure values are shown in
section 15 “EXPOSURE VALUES” on page 36.
Check that you are in the desired mode: in the film-based
imaging mode, in the digital imaging mode or in the
phosphoric mode.
Film-based
imaging mode
Phosphoric
mode
Digital imaging
mode
The imaging mode can be changed by pressing the MODE
key for 2 seconds.
Select the adult or child mode. The indicator light of the
selected projection will come on.
Child
Adult
Select the premolar and canine exposure region with the
pre-programmed setting keys. Press the premolar and
canine key once to select the projection of the maxilla, and
press the key twice to select the projection of the mandible.
The indicator light of the selected projection will come on.
Premolars
and canines
0.08
7
The preprogrammed time, kV and mA values appear on
the respective displays.
The preprogrammed time, kV and mA values can be
temporarily changed with the parameter adjustment keys.
This will not affect the preprogrammed values.
Select the parameter to be adjusted with the SELECT key.
When the parameter value is flashing on the kV display,
the anode voltage can be changed with the parameter
adjusting keys.
User’s Manual
Planmeca ProX 23
PREMOLAR AND CANINE EXPOSURE
When the parameter value is flashing on the mA display,
the anode current can be changed with the parameter
adjusting keys.
When the parameter value on the kV or mA display is not
flashing, the exposure time value can be changed with the
parameter adjusting keys.
NOTE After adjusting the kV or mA value the unit will return
automatically to the time adjustment mode after 5
seconds time.
10.2
Patient positioning
Ask the patient to sit down. Place a protective lead apron
over the patient’s chest.
10.2.1 Positioning the film/sensor
Paralleling technique (recommended)
The film or sensor is placed to a film holder which is used
to align the film parallel to the long axis of the tooth.
Use a long cone for the paralleling technique.
Long axis
of the tooth
Film or
sensor
Bisecting angle technique (optional)
The patient holds the film or sensor in place with his finger.
The X-ray beam is directed perpendicularly towards an
imaginary line which bisects the angle between the film
plane and the long axis of the tooth.
Long axis
of the tooth
Film or
sensor
24
Planmeca ProX
User’s Manual
PREMOLAR AND CANINE EXPOSURE
10.2.2 Positioning the cone
The angle of the cone is indicated on the scale located on
the vertical joint of the tube head.
The optional long cone can be attached into the short
cone. Refer to chapter 7.2 “Selecting the cone” on page
12.
Scale for the cone angle
Prox_cone_pos.eps
Select the cone angle from the table below.
TEETH
ANGLE OF
INCLINATION
Premolars and
canine teeth
Maxilla
+45°
Premolars and
canine teeth
Mandible
-10°
Position the cone according to the figure below.
Maxillary premolar and canine
10.3
Mandibular premolar and canine
Taking an exposure
Ask the patient to remain as still as possible. Move as far
away from the X-ray tube as the length of the cable from
the control panel permits. The distance must be at least 2
meters (6.6 ft) from the X-ray tube.
No one except the patient may remain in the radiation area
while the exposure is taken.
BW
READY
PRET
mA
kV
s
MODE
NOTE Maintain audio and visual contact with the patient and
unit during the exposure.
Check that the ready light is on.
SELECT
Press and hold the exposure key on the control panel for
the duration of the exposure.
The exposure warning light will come on. You will also hear
the radiation warning tone during the exposure.
User’s Manual
Planmeca ProX 25
INCISOR EXPOSURE
11 INCISOR EXPOSURE
11.1
Selecting the exposure parameters
The preprogrammed exposure values are shown in
section 15 “EXPOSURE VALUES” on page 36.
Film-based
imaging mode
Check that you are in the desired mode: in the film-based
imaging mode, in the digital imaging mode or in the
phosphoric mode.
Phosphoric
mode
Digital imaging
mode
The imaging mode can be changed by pressing the MODE
key for 2 seconds.
Select the adult or child mode. The indicator light of the
selected projection will come on.
Child
Adult
Select the incisor exposure region with the
preprogrammed setting keys. Press the incisor key once to
select the projection of the maxilla, and press the key twice
to select the projection of the mandible. The indicator light
of the selected projection will come on.
Incisors
0.08
7
The preprogrammed time, kV and mA values appear on
the respective displays.
The preprogrammed time, kV and mA values can be
temporarily changed with the parameter adjustment keys.
This will not affect the preprogrammed values.
Select the parameter to be adjusted with the SELECT key.
26
Planmeca ProX
User’s Manual
INCISOR EXPOSURE
When the parameter value is flashing on the kV display,
the anode voltage can be changed with the parameter
adjusting keys.
When the parameter value is flashing on the mA display,
the anode current can be changed with the parameter
adjusting keys.
When the parameter value on the kV or mA display is not
flashing, the exposure time value can be changed with the
parameter adjusting keys.
NOTE After adjusting the kV or mA value the unit will return
automatically to the time adjustment mode after 5
seconds time.
11.2
Patient positioning
Ask the patient to sit down. Place a protective lead apron
over the patient’s chest.
11.2.1 Positioning the film/sensor
Paralleling technique (recommended)
The film or sensor is placed to a film holder which is used
to align the film parallel to the long axis of the tooth.
Use a long cone for the paralleling technique.
Long axis
of the tooth
Film or
sensor
Bisecting angle technique (optional)
The patient holds the film or sensor in place with his finger.
The X-ray beam is directed perpendicularly towards an
imaginary line which bisects the angle between the film
plane and the long axis of the tooth.
Long axis
of the tooth
Film or
sensor
User’s Manual
Planmeca ProX 27
INCISOR EXPOSURE
11.2.2 Positioning the cone
The angle of the cone is indicated on the scale located on
the vertical joint of the tube head.
Prox_cone_pos.eps
Scale for the cone angle
The optional long cone can be attached into the short
cone. Refer to chapter 7.2 “Selecting the cone” on page
12.
Select the cone angle from the table below.
TEETH
ANGLE OF
INCLINATION
Incisors
Maxilla
+55°
Incisors
Mandible
-20°
Position the cone according to the figures below.
Maxillary anterior
11.3
Mandibular anterior
Taking an exposure
Ask the patient to remain as still as possible. Move as far
away from the X-ray tube as the length of the cable from
the control panel permits. The distance must be at least 2
meters (6.6 ft) from the X-ray tube.
BW
No one, except the patient may remain in the radiation
area while the exposure is taken.
READY
PRET
kV
mA
s
MODE
SELECT
NOTE Maintain audio and visual contact with the patient and
unit during the exposure.
Check that the ready light is on.
Press and hold the exposure key on the control panel for
the duration of the exposure.
The exposure warning light will come on. You will also hear
the radiation warning tone during the exposure.
28
Planmeca ProX
User’s Manual
OCCLUSAL EXPOSURE
12 OCCLUSAL EXPOSURE
12.1
Selecting the exposure parameters
The preprogrammed exposure values are shown in
section 15 “EXPOSURE VALUES” on page 36.
Film-based
imaging mode
Phosphoric
mode
Check that you are in the desired mode: in the film-based
imaging mode, in the digital imaging mode or in the
phosphoric mode.
The imaging mode can be changed by pressing the MODE
key for 2 seconds.
Digital imaging
mode
Select the adult or child mode. The indicator light of the
selected projection will come on.
Adult
Child
Select the occlusal exposure region with the
preprogrammed setting keys. Press the occlusal exposure
key once to select the projection of the maxilla, and press
the key twice to select the projection of the mandible. The
indicator light of the selected projection will come on.
Occlusal
exposure
0.100
70
6
The preprogrammed time, kV and mA values appear on
the respective displays.
The preprogrammed time, kV and mA values can be
temporarily changed with the parameter adjustment keys.
This will not affect the preprogrammed values.
Select the parameter to be adjusted with the SELECT key.
When the parameter value is flashing on the kV display,
the anode voltage can be changed with the parameter
adjusting keys.
When the parameter value is flashing on the mA display,
the anode current can be changed with the parameter
adjusting keys.
When the parameter value on the kV or mA display is not
flashing, the exposure time value can be changed with the
parameter adjusting keys.
User’s Manual
Planmeca ProX 29
OCCLUSAL EXPOSURE
NOTE After adjusting the kV or mA value the unit will return
automatically to the time adjustment mode after 5
seconds time.
12.2
Patient positioning
Ask the patient to sit down. Place a protective lead apron
over the patient’s chest.
In the intraoral occlusal exposures the film or sensor is
positioned between patient’s upper and lower teeth.
12.2.1 Positioning the cone
The angle of the cone is indicated on the scale located on
the vertical joint of the tube head.
The optional long cone can be attached into the short
cone. Refer to chapter 7.2 “Selecting the cone” on page
12.
Scale for the cone angle
Prox_cone_pos.eps
Select the cone angle from the table below.
ANGLE OF
INCLINATION
TEETH
Occlusal
exposure
Maxilla
+75°
Occlusal
exposure
Mandible
-60°
Position the cone according to the figures below.
Film
Film
Maxillary occlusal
30
Planmeca ProX
Mandibular occlusal
User’s Manual
OCCLUSAL EXPOSURE
12.3
Taking an exposure
Ask the patient to remain as still as possible. Move as far
away from the X-ray tube as the length of the cable from
the control panel permits. The distance must be at least 2
meters (6.6 ft) from the X-ray tube.
No one except the patient may remain in the radiation area
while the exposure is taken.
NOTE Maintain audio and visual contact with the patient and
unit during the exposure.
Check that the ready light is on.
BW
Press and hold the exposure key on the control panel for
the duration of the exposure.
READY
PRET
kV
mA
s
MODE
SELECT
The exposure warning light will come on. You will also hear
the radiation warning tone during the exposure.
User’s Manual
Planmeca ProX 31
ENDODONTIC EXPOSURE
13 ENDODONTIC EXPOSURE
When you are taking an endodontic exposure use the
same exposure parameters and patient positioning
methods as with the molar, premolar & canine and incisor
exposures. See chapters 9 “MOLAR EXPOSURE” on
page 20, 10 “PREMOLAR AND CANINE EXPOSURE” on
page 23 and 11 “INCISOR EXPOSURE” on page 26 for
more information.
It is possible to program two sets of exposure parameters
with the endodontic exposure; adult and child.
32
Planmeca ProX
User’s Manual
BITE-WING EXPOSURE
14 BITE-WING EXPOSURE
14.1
Selecting the exposure parameters
The preprogrammed exposure values are shown in
section 15 “EXPOSURE VALUES” on page 36.
Film-based
imaging mode
Check that you are in the desired mode: in the film-based
imaging mode, in the digital imaging mode or in the
phosphoric mode.
Phosphoric
mode
Digital imaging
mode
The imaging mode can be changed by pressing the MODE
key for 2 seconds.
Select the adult or child mode. The indicator light of the
selected projection will come on.
Child
Adult
Select the bite-wing exposure region with the
preprogrammed setting keys. Press the bite-wing key once
to select the projection of the endo, and press the key
twice to select the projection of the bite-wing. The indicator light of the selected projection will come on.
Bite-wing
0.080
7
The preprogrammed time, kV and mA values appear on
the respective displays.
The preprogrammed time, kV and mA values can be
temporarily changed with the parameter adjustment keys.
This will not affect the preprogrammed values.
Select the parameter to be adjusted with the SELECT key.
User’s Manual
Planmeca ProX 33
BITE-WING EXPOSURE
When the parameter value is flashing on the kV display,
the anode voltage can be changed with the parameter
adjusting keys.
When the parameter value is flashing on the mA display,
the anode current can be changed with the parameter
adjusting keys.
When the parameter value on the kV or mA display is not
flashing, the exposure time value can be changed with the
parameter adjusting keys.
NOTE After adjusting the kV or mA value the unit will return
automatically to the time adjustment mode after 5
seconds time.
14.2
Patient positioning
Ask the patient to sit down. Place a protective lead apron
over the patient’s chest.
In the bite-wing exposures the patient closes the teeth
during the exposure on the film’s tab or on the film/sensor
holder.
14.2.1 Positioning the cone
The angle of the cone is indicated on the scale located on
the vertical joint of the tube head.
Prox_cone_pos.eps
Scale for the cone angle
The optional long cone can be attached into the short
cone. Refer to chapter 7.2 “Selecting the cone” on page
12.
Select the cone angle from the table below.
TEETH
Bite-wing exposure
ANGLE OF
INCLINATION
5°
Position the cone according to the figure below.
Bite-wing
34
Planmeca ProX
User’s Manual
BITE-WING EXPOSURE
14.3
Taking an exposure
Ask the patient to remain as still as possible. Move as far
away from the X-ray tube as the length of the cable from
the control panel permits. The distance must be at least 2
meters (6.6 ft) from the X-ray tube.
No one, except the patient may remain in the radiation
area while the exposure is taken.
NOTE Maintain audio and visual contact with the patient and
unit during the exposure.
Check that the ready light is on.
Press and hold down the exposure key on the control
panel for the duration of the exposure.
BW
READY
PRET
kV
mA
s
MODE
SELECT
The exposure warning light will come on. You will also hear
the radiation warning tone during the exposure.
User’s Manual
Planmeca ProX 35
EXPOSURE VALUES
15 EXPOSURE VALUES
15.1
Default exposure values
When the unit is switched on, the default exposure values
appear on the displays.
These values can be programmed by the user, see section
16.1 “Programming default exposure values” on page 38.
NOTE The exposure values are programmed corresponding
the density value 0 (factory preset value). The
exposure time values are automatically scaled
according to the density value.
NOTE These values are for digital sensor and speed F films
(Kodak Insight). For the speed E films (Kodak
Ektaspeed) select 1 step longer and for the speed D
films 4 steps longer exposure time.
PATIENT
kV
mA
time
Adult
63
6
0.125
Child
60
7
0.080
NOTE The preprogrammed default exposure values are for
the 20 cm (8”) cone. When using the 30 cm long cone,
use the exposure values given in the table below.
15.2
PATIENT
kV
mA
time
Adult
63
6
0.250
Child
60
7
0.200
Preprogrammed settings values
NOTE Two sets of exposure values (time/kV/mA) have been
programmed for each exposure region: one for adult
mode and one for child mode.
NOTE The exposure time values are programmed
corresponding the present density value.
The exposure time values are automatically scaled
according to the density value. If you select a density
value other than 0, the new values are shown both in
programming and exposure mode.
These values can be programmed by the user, see section
16.3 “Programming the preprogrammed settings” on page
40. The recommended exposure values are given in
section 17 “EXPOSURE VALUE TABLES” on page 42.
NOTE These values are for speed F films (Kodak Insight).
For the speed E films (Kodak Ektaspeed) select 1 step
longer and for the speed D films 4 steps longer
exposure time.
36
Planmeca ProX
User’s Manual
EXPOSURE VALUES
NOTE The values in the following tables correspond to the
density value 0.
PREMOLARS AND
CANINES
INCISORS
kV
Adult Maxilla
mA
time
kV
mA
time
MOLARS
kV
mA
time
60
7
0.100
63
6
0.1
63
6
0.125
Mandible 60
7
0.08
63
6
0.08
63
6
0.100
60
7
0.063
60
7
0.08
60
7
0.100
Mandible 60
7
0.05
60
7
0.064
60
7
0.080
Child Maxilla
OCCLUSAL
EXPOSURE
kV
Adult Maxilla
mA
time
70
6
0.100
Mandible 70
6
0.100
66
6
0.080
Mandible 66
6
0.080
Child Maxilla
ENDODONTIC
kV
mA
time
BITE-WING
kV
mA
time
60
7
0.100 60
7
0.100
60
7
0.080 60
7
0.080
When using the 30 cm long cone program the values
according to the table given in section 17 “EXPOSURE
VALUE TABLES” on page 42 or select three steps darker
density (longer exposure time).
PREMOLARS AND
CANINES
INCISORS
Adult Maxilla
Mandible
Child Maxilla
Mandible
kV
mA
time
kV
mA
time
kV
mA
time
60
7
0.200
63
6
0.200
63
6
0.250
60
7
0.160
63
6
0.160
63
6
0.200
60
7
0.125
60
7
0.160
60
7
0.200
60
7
0.100
60
7
0.125
60
7
0.160
OCCLUSAL
EXPOSURE
Adult Maxilla
Mandible
Child Maxilla
Mandible
User’s Manual
MOLARS
kV
mA
time
70
6
0.200
70
6
0.200
66
6
0.125
66
6
0.125
ENDODONTIC
BITE-WING
kV
mA
time
kV
mA
time
60
7
0.200
60
7
0.200
60
7
0.160
60
7
0.160
Planmeca ProX 37
PROGRAMMING EXPOSURE VALUES
16 PROGRAMMING EXPOSURE VALUES
16.1
Programming default exposure values
The default exposure values can be programmed for both
the adult and child mode. The indicator light of the selected
projection will come on. The current exposure values are
shown on the time, kV and mA displays.
NOTE Make sure that no exposure region is selected, i.e. no
preprogrammed setting indicator light is on.
NOTE The exposure parameters - time, kV and mA - are
programmed corresponding to the density value 0.
The time value will be automatically changed
according to the selected density value in the filmbased imaging mode, in the digital imaging mode and
in the phosphoric mode when you exit the
programming mode.
Press and hold down the SELECT key (about 4 seconds)
until you have heard a signal tone to enter the
programming mode.
The imaging mode can be changed by pressing the MODE
key briefly.
0.05
7
The kV range can be modified in Service mode. For more
information see Planmeca ProX Technicl manual.
The ready light will start to flash. The time display will start
to flash and the default exposure values will appear on the
displays.
The exposure time value is changed with the parameter
adjustment keys. The exposure times are shown in section
17 “EXPOSURE VALUE TABLES” on page 42.
Press the SELECT key briefly, the kV display will start to
flash and the exposure time value is stored in the memory.
The kV value can now be changed with the parameter
adjustment keys.
7
Press the SELECT key briefly, the mA display will start to
flash and the kV value is stored in the memory.
The mA value can now be changed with the parameter
adjustment keys.
38
Planmeca ProX
User’s Manual
PROGRAMMING EXPOSURE VALUES
16.2
Programming the density values
In the film-based imaging mode the type of the film
processor, processing chemicals and temperatures used
will affect the film density.
By changing the density value all the preprogrammed
values can be changed. This can be used for example
when a more sensitive or less sensitive film is being used
or when the cone is being changed.
Changing the density value will change the selected time
value as follows: one density step equals to one time step.
The negative density value shortens the selected time
value, whereas the positive value lengthens it.
When the SELECT key is pressed a third time briefly, the
current density value starts to flash on the time display and
the mA value is stored in the memory.
The imaging mode can be changed by pressing the MODE
key briefly.
The density value can now be changed with the parameter
adjustment keys. Note that the density value will affect the
time value both in adult and in child mode.
The density has 11 steps from -5 (light exposures) to +5
(dark exposures).
OR
Select the child/adult mode and program its settings as
described above or exit the programming mode by
pressing and holding down the SELECT key. The density
value is stored in the memory.
NOTE Both the child and adult mode have the same density
values.
NOTE If you interrupt programming for over 45 seconds, the
unit automatically exits the programming mode, and
the current values will be stored in the memory.
User’s Manual
Planmeca ProX 39
PROGRAMMING EXPOSURE VALUES
16.3
Programming the preprogrammed settings
NOTE Two sets of exposure values (time/kV/mA) can be
programmed for each exposure region: one for adult
mode and one for child mode. The indicator light of
the selected projection will come on.
NOTE The exposure parameters - time, kV and mA - are
programmed corresponding to the density value 0.
The time value will be automatically changed
according to the selected density value in the filmbased imaging mode, in the digital imaging mode and
in the phosphoric mode when you exit the
programming mode.
Incisors
Premolars
and
canines
Molars
Occlusal
exposure
Endodontic
Select the exposure region with the preprogrammed
setting keys. Press the desired key once to select the
Bite-wing projection of the maxilla, and press the key twice to select
the projection of the mandible. The indicator light of the
selected projection will come on.
Adult/
child
mode
selection
6
The current time, kV and mA values appear on the
respective displays.
Press and hold down the SELECT key (about 4 seconds)
until you have heard a signal tone to enter the
programming mode. The time display and the ready light
will start to flash.
The imaging mode can be changed by pressing the MODE
key briefly.
The exposure time value is changed with the parameter
adjustment keys.
Press the SELECT key briefly, the kV display will start to
flash and the exposure time value is stored in the memory.
The kV value can now be changed with the parameter
adjustment keys.
40
Planmeca ProX
User’s Manual
PROGRAMMING EXPOSURE VALUES
6
Press the SELECT key again briefly, the mA display will
start to flash and the kV value is stored in the memory.
The mA value can now be changed with the parameter
adjustment keys.
You can now select a new exposure region or exit the
programming mode by pressing and holding down the
SELECT key (about 4 seconds). You will hear a signal
tone.
NOTE If you interrupt programming for over 45 seconds, the
unit automatically exits the programming mode, and
the current values will be stored in the memory.
User’s Manual
Planmeca ProX 41
EXPOSURE VALUE TABLES
17 EXPOSURE VALUE TABLES
17.1
Exposure values for Planmeca ProSensor and Planmeca Dixi2 V3
sensors
Select the digital imaging mode of the unit or adjust the
exposure time according to the table.
NOTE In the digital imaging mode the highest time value
that can be selected is 0.80 seconds.
6 mA
70 kV/
child
6 mA
66 kV/
child
6 mA
63 kV/
child
7 mA
60 kV/
child
7 mA
57 kV/
child
7 mA
55 kV/
child
8 mA
52 kV/
child
8 mA
50 kV/
child
6 mA
70 kV/
adult
6mA
66 kV/
adult
6 mA
63 kV/
adult
7 mA
60 kV/
adult
7 mA
57 kV/
adult
7 mA
55 kV/
adult
8 mA
52 kV/
adult
8 mA
50 kV/
adult
I
P
M
I
P
I
M
P
M
I
P
I
P
M
I
P
P
M
I
P
0.800s
0.630s
0.500s
0.400s
0.320s
MANDIBLE
M MAXILLA
P
M
I
P
I
P
I
P
M
I
P
I
M
P
M
I
P
I
MANDIBLE
M MAXILLA
P
M
P
M
I
P
MANDIBLE
M MAXILLA
M
P
M
MANDIBLE
MAXILLA
M
MANDIBLE
MAXILLA
MANDIBLE
MAXILLA
MANDIBLE
M MAXILLA
P
M
I
P
I
MANDIBLE
M MAXILLA
P
M
I
P
I
I
MANDIBLE
M MAXILLA
P
M
I
P
I
P
I
Planmeca ProX
0.250s
MANDIBLE
M MAXILLA
I
I
0.200s
MANDIBLE
M MAXILLA
I
I
0.160s
MAXILLA
I
I
P
0.125s
0.100s
0.080s
0.064s
0.050s
0.040s
0.032s
0.025s
0.020s
I
P
I
I
P
M
42
0.016s
TIME
0.012s
mA
0.010s
Short cone exposure values
MANDIBLE
M MAXILLA
P
M
P
M
I
P
MANDIBLE
M MAXILLA
M
P
M
MANDIBLE
MAXILLA
M
MANDIBLE
MAXILLA
MANDIBLE
INCISORS
PREMOLARS AND CANINES
MOLARS
User’s Manual
EXPOSURE VALUE TABLES
6 mA
66 kV/
child
6 mA
63 kV/
child
7 mA
60 kV/
child
7 mA
57 kV/
child
7 mA
55 kV/
child
8 mA
52 kV/
child
8 mA
50 kV/
child
MAXILLA
MANDIBLE
6 mA
70 kV/
adult
I
P
6 mA
66 kV/
adult
6 mA
63 kV/
adult
7 mA
60 kV/
adult
7 mA
57 kV/
adult
7 mA
55 kV/
adult
8 mA
52 kV/
adult
8 mA
50 kV/
adult
P
M
I
P
M
M
P
M
I
P
0.800s
0.640s
0.500s
0.400s
0.320s
MAXILLA
MANDIBLE
M
M
P
M
I
P
M
MAXILLA
MANDIBLE
M
M
P
M
I
P
I
I
M
MAXILLA
MANDIBLE
M
M
P
M
I
P
I
P
M
MAXILLA
MANDIBLE
M
M
P
M
P
M
M
MAXILLA
MANDIBLE
M
MAXILLA
MANDIBLE
I
I
0.250s
M
I
I
0.200s
MAXILLA
MANDIBLE
I
P
M
I
P
I
I
M
M
MAXILLA
MANDIBLE
P
M
I
P
M
MAXILLA
MANDIBLE
P
M
I
P
M
MAXILLA
MANDIBLE
P
M
I
P
M
MAXILLA
MANDIBLE
P
M
I
P
I
P
M
MAXILLA
MANDIBLE
P
M
P
M
I
P
M
I
I
MAXILLA
MANDIBLE
MAXILLA
MANDIBLE
MAXILLA
MANDIBLE
I
P
M
User’s Manual
M
0.160s
0.125s
70 kV/
child
I
P
M
I
p
0.100s
0.080s
6 mA
I
I
P
0.064s
0.050s
0.040s
0.032s
0.025s
0.020s
0.016s
TIME
0.012s
mA
0.010s
Long cone exposure values
I
I
I
M
P
M
M
INCISORS
PREMOLARS AND CANINES
MOLARS
Planmeca ProX 43
EXPOSURE VALUE TABLES
17.2
Exposure values for Dixi2 V1 sensors (high sensitivity)
Select the digital imaging mode of the unit or adjust the
exposure time according to the table.
NOTE In the digital imaging mode the highest time value
that can be selected is 0.80 seconds.
2 mA
70 kV/
child
4 mA
66 kV/
child
6 mA
63 kV/
child
7 mA
60 kV/
child
7 mA
57 kV/
child
7 mA
55 kV/
child
8 mA
52 kV/
child
8 mA
50 kV/
child
6 mA
70 kV/
adult
6 mA
66 kV/
adult
6 mA
63 kV/
adult
7 mA
60 kV/
adult
7 mA
57 kV/
adult
7 mA
55 kV/
adult
8 mA
52 kV/
adult
8 mA
50 kV/
adult
I
I
I
I
P
I
P
M
P
M
P
M
I
P
I
M
P
M
I
P
I
I
I
I
P
M
I
P
I
M
P
M
I
P
I
M
MANDIBLE
MAXILLA
0.800s
0.640s
0.500s
0.400s
0.320s
0.250s
0.200s
0.160s
MAXILLA
MANDIBLE
MAXILLA
MANDIBLE
MAXILLA
M
P
M
I
P
I
P
MANDIBLE
MAXILLA
M
P
M
P
M
I
P
MANDIBLE
MAXILLA
M
M
P
M
MANDIBLE
MAXILLA
M
MANDIBLE
MAXILLA
MANDIBLE
MAXILLA
MANDIBLE
MAXILLA
M
P
M
I
P
I
MANDIBLE
MAXILLA
M
P
M
I
P
I
I
MANDIBLE
MAXILLA
M
P
M
I
P
I
P
I
Planmeca ProX
0.125s
0.100s
M
I
I
P
0.080s
0.064s
0.050s
0.040s
0.032s
0.025s
0.020s
I
P
I
P
I
P
M
44
0.016s
TIME
0.012s
mA
0.010s
Short cone exposure values
MANDIBLE
MAXILLA
M
P
M
P
M
I
P
MANDIBLE
MAXILLA
M
M
P
M
MANDIBLE
MAXILLA
M
MANDIBLE
MAXILLA
MANDIBLE
INCISORS
PREMOLARS AND CANINES
MOLARS
User’s Manual
EXPOSURE VALUE TABLES
4 mA
66 kV/
child
6 mA
63 kV/
child
7 mA
60 kV/
child
7 mA
57 kV/
child
7 mA
55 kV/
child
8 mA
52 kV/
child
8 mA
50 kV/
child
6 mA
70 kV/
adult
6 mA
66 kV/
adult
6 mA
63 kV/
adult
7 mA
60 kV/
adult
7 mA
57 kV/
adult
7 mA
55 kV/
adult
8 mA
52 kV/
adult
8 mA
50 kV/
adult
I
i
I
P
I
I
I
I
M
MANDIBLE
MAXILLA
I
I
0.800s
0.640s
0.500s
0.400s
0.320s
MANDIBLE
MAXILLA
MANDIBLE
MAXILLA
M
P
M
I
P
I
P
MANDIBLE
MAXILLA
M
P
M
P
M
I
P
MANDIBLE
MAXILLA
M
M
P
M
MANDIBLE
MAXILLA
M
MANDIBLE
MAXILLA
MANDIBLE
MAXILLA
M
P
M
I
P
0.250s
MAXILLA
I
P
M
I
P
0.200s
M
M
P
M
I
P
0.160s
0.125s
0.100s
0.050s
0.040s
0.032s
0.025s
0.020s
I
P
M
P
M
P
M
I
P
I
P
I
P
I
MANDIBLE
MAXILLA
M
P
M
I
P
I
MANDIBLE
MAXILLA
M
P
M
I
P
I
I
MANDIBLE
MAXILLA
M
P
M
I
P
I
P
MAXILLA
MANDIBLE
I
P
M
User’s Manual
0.080s
70 kV/
child
0.064s
2 mA
0.016s
TIME
0.012s
mA
0.010s
Long cone exposure values
I
MANDIBLE
MAXILLA
M
P
M
P
M
I
P
MANDIBLE
MAXILLA
M
M
MANDIBLE
MAXILLA
MANDIBLE
P
M
M
INCISORS
PREMOLARS AND CANINES
MOLARS
Planmeca ProX 45
EXPOSURE VALUE TABLES
17.3
Exposure values for speed F films
NOTE These values are for speed F films (Kodak Insight).
For the speed E films (Kodak Ektaspeed) select 1 step
longer and for the speed D films 4 steps longer
exposure time.
6
70 kV/
mA child
I
6
66 kV/
mA child
7
60 kV/
mA child
7
57 kV/
mA child
7
55 kV/
mA child
8
52 kV/
mA child
8
50 kV/
mA child
6
70 kV/
mA adult
6
66 kV/
mA adult
6
63 kV/
mA adult
7
60 kV/
mA adult
7
57 kV/
mA adult
7
55 kV/
mA adult
8
52 kV/
mA adult
8
50 kV/
mA adult
I
P
M
O
Planmeca ProX
2.000s
1.600s
1.250s
1.000s
0.800s
0.640s
0.500s
0.400s
0.320s
0.250s
0.200s
0.160s
0.125s
0.100s
0.080s
0.064s
0.050s
0.040s
0.032s
0.020s
0.025s
I
P
I
6
63 kV/
mA child
46
0.016s
0.012s
mA TIME
0.010s
Short cone exposure values
P M O MAXILLA
M
O MANDIBLE
I P M O MAXILLA
P M
O MANDIBLE
I P M O MAXILLA
I P M
O MANDIBLE
I P M O MAXILLA
I P M
O MANDIBLE
I P M O MAXILLA
I P M
O MANDIBLE
I P M O MAXILLA
I P M
O MANDIBLE
MAXILLA
I P M O
I P M
O
MANDIBLE
MAXILLA
I P M O
I P M
O
MANDIBLE
I P M O MAXILLA
I P M
O MANDIBLE
I P M O MAXILLA
I P M
O MANDIBLE
I P M O MAXILLA
I P M
O MANDIBLE
I P M O MAXILLA
I P M
O MANDIBLE
I P M O MAXILLA
I
P M
O MANDIBLE
I P M O MAXILLA
I P M
O MANDIBLE
MAXILLA
I P M O
I P M
O
MANDIBLE
MAXILLA
I P M O
MANDIBLE
I P M
O
INCISORS
PREMOLARS AND CANINES
MOLARS
OCCLUSAL EXPOSURE
User’s Manual
EXPOSURE VALUE TABLES
6
70 kV/
mA child
6
66 kV/
mA child
I
P
P P M
I
I
P
6
63 kV/
mA child
I
I
7
60 kV/
mA child
P
M
I
P
I
7
57 kV/
mA child
7
55 kV/
mA child
8
52 kV/
mA child
8
50 kV/
mA child
6
70 kV/
mA adult
6
66 kV/
mA adult
6
63 kV/
mA adult
7
60 kV/
mA adult
7
57 kV/
mA adult
7
55 kV/
mA adult
8
52 kV/
mA adult
8
50 kV/
mA adult
I
M
P
O
User’s Manual
I
I
P
I
2.000s
1.600s
1.250s
1.000s
0.800s
0.640s
0.500s
0.400s
0.320s
0.250s
0.200s
0.160s
0.125s
0.100s
0.080s
0.064s
0.050s
0.025s
0.032s
0.040s
0.020s
0.012s
0.016s
mA TIME
0.010s
Long cone exposure values
O MAXILLA
O MANDIBLE
M O MAXILLA
O MANDIBLE
P M O MAXILLA
M
O MANDIBLE
I P M O MAXILLA
P M
O MANDIBLE
I P M O MAXILLA
I P M
O MANDIBLE
I P M O MAXILLA
I P M
O MANDIBLE
MAXILLA
I P M O
I P M
O
MANDIBLE
MAXILLA
I P M O
I P M
O
MANDIBLE
P M O MAXILLA
M
O MANDIBLE
I P M O MAXILLA
P M
O MANDIBLE
I P M O MAXILLA
I P M
O MANDIBLE
I P M O MAXILLA
I P M
O MANDIBLE
I P M O MAXILLA
I P M
O MANDIBLE
I P M O MAXILLA
I P M
O MANDIBLE
MAXILLA
I P M O
I P M
O
MANDIBLE
MAXILLA
I P M O
MANDIBLE
I P M
O
INCISORS
MOLARS
PREMOLARS AND CANINES
OCCLUSAL EXPOSURE
Planmeca ProX 47
ERROR CODES
18 ERROR CODES
The error code is displayed on the time display.
Er. 11
Press the SELECT key to clear the error from the display.
ERROR CODE
48
ERROR MESSAGE EXPLANATION
E r. 0 0
E r. 1 0
E r. 1 1
E r. 1 2
E r. 1 3
E r. 2 9
Exposure key was released too early during the exposure.
E r. 3 0
kV value does not reach or it exceeds the given value (difference more than
5%).
E r. 3 1
E r. 3 3
X-ray tube Anode current (mA) missing, or not in specified limits.
E r. 3 4
E r. 3 6
E r. 3 7
E r. 3 8
E r. 5 0
E r. 5 1
E r. 5 2
E r. 5 7
E r. 6 0
E r. 6 1
E r. 7 1
E r. 8 1
E r. 8 3
X-ray tube Anode voltage (kV) missing, or below the specified limit.
Planmeca ProX
X-ray tube Anode voltage (kV) overshoot.
X-ray tube Anode voltage (kV) dropped suddenly.
X-ray tube cathode filament preheating voltages are not calibrated.
Filament preheating voltage calibration failed.
Membrane keyboard key short-circuited/pressed during the self test or
faulty display board.
X-ray tube Filament voltage (V) missing, or outside the range (too low or too
high).
Too long exposure.
kV feedback signal open circuit or short circuit.
mA feedback signal open circuit or short circuit.
Tube head temperature sensor short circuit.
Tube head temperature sensor open circuit.
Filament voltage feedback not in specified limits.
Exposure key pressed during self test.
± 15VDC voltage is out of limits.
Communication error between control panel and tube head CPU.
FLASH memory check-sum error (tube head CPU).
EEPROM memory defective (tube head CPU).
Config register error (tube head CPU).
User’s Manual
CLEANING
19 CLEANING
19.1
Surfaces
NOTE When cleaning the unit surfaces, always disconnect
the unit from mains.
The unit surfaces can be cleaned with a soft cloth damped
in a mild cleaning solution.
Stronger agents can be used for disinfecting the surfaces.
We recommend Dürr System-hygiene FD 322 or
respective disinfecting solution.
19.2
Film holder
The film holder can be autoclaved up to 145°C or cleaned
with alcohol-based solutions.
20 SERVICE
To guarantee user and patient safety and to ensure image
quality the unit must be checked and recalibrated by a
qualified PLANMECA service technician once a year or
after every 10 000 exposures if this is sooner. Please refer
to the Planmeca Prox Technical Manual for complete
servicing information.
21 DEVICE LABEL
User’s Manual
Planmeca ProX 49
DISPOSAL OF THE UNIT
22 DISPOSAL OF THE UNIT
In order to reduce the environmental load over the
product’s entire lifecycle, PLANMECA’s products are
designed to be as safe as possible to manufacture, use
and dispose of.
Parts which can be recycled should always be taken to the
appropriate processing centres, after hazardous waste
has been removed. Disposal of obsolete units is the
responsibility of the waste possessor.
All parts and components containing hazardous materials
must be disposed of in accordance with waste legislation
and instructions issued by the environmental authorities.
The risks involved and the necessary precautions must be
taken into account when handling waste products.
Part
Main materials for
disposal
Recyclable
material
Waste
disposal site
Hazardous
waste
(separate
collection)
Frame and covers
- metal
Aluminium,
X
galvanized steel,
X
X
lead
- plastic
PEI,
X
PC, ABS
X
ASA + PC
X
X
- rubber
Motors
(X)
Component
boards
(X)
Cables,
transformers
Copper,
X
steel,
X
transformer oil
X
X-ray tube
Packing
Other parts
50
Planmeca ProX
X
Wood,
X
cardboard,
X
paper,
X
polystyrene
X
X
User’s Manual
TECHNICAL SPECIFICATIONS
23 TECHNICAL SPECIFICATIONS
23.1
Technical data
Generator
Constant potential, microprocessor controlled,
operating frequency 66 kHz
X-ray tube
Toshiba D-041SB
Focal spot size
0.4 mm according to IEC 60336
Cone diameter
60 mm (2.36 in.)
Rectangular 36 x 45 mm (1.42 x 1.77 in.)
Max. symmetrical radiation field
ø 60 mm at SSD 200 mm
ø 60 mm at SSD 300 mm
according to IEC 806
Total filtration
min. 2.5 mm Al equivalent at 70 kV
according to IEC 60522
Inherent filtration
1 mm Al equivalent at 70 kV
according to IEC 60522
Anode voltage
7 mA: 60 kV, ±2 kV
2-6 mA: 60, 63, 66, 70 kV, ±2 kV
Anode current
7, 6, 5, 4, 3, 2 mA, ± ( 5 % + 0,2 mA)
Target material
Tungsten
Target angle
12.5°
Exposure times
0.01- 2 sec. ±(5% + 0.001 sec.), 24 steps
Reference current time product
6 mAs at 70 kV, 6 mA, 1 sec.
Lowest current time product
0.02 mAs at 2 mA, 0.01 sec.
Max. nominal anode voltage
70 kV
Power input
1000 VA (220-240 V)
890 VA (100-115V)
Max. electrical output
420 W at 70 kV, 6 mA
Electrical output at 0.1 sec.
420 W at 70 kV, 6 mA
Max. loading energy
700 mAs/h at 70 kV
SID (SID = source - image
receptor distance)
min. 200 mm (8 in.)
SSD (Source-Skin Distance)
Standard/Long
Long with rectangular collimator
200 mm (8 in.)/300 mm (12 in.)
306 mm (12.04 in.)
Mains voltage
100 V~/220-240 V~
Apparent resistance
0.3 ohms 100-115 V~ /
0.8 ohms 220-240 V~
Mains frequency
50/60 Hz
User’s Manual
Planmeca ProX 51
TECHNICAL SPECIFICATIONS
Fusing
units with 100V~ or 110-115V~ voltage
setting: 15AT, 250V, slow blow (6.3x32mm)
(special fuse, manufacturer Bussmann,
type MDA)
units with 220-240V~ voltage setting:
8AT, 250V, slow blow (6.3x32mm)
(special fuse, manufacturer Bussmann, type MDA)
Duty cycle
1:12, automatic control, at least 6 seconds
Electrical classification
Class I Type B
Mechanical data
Weight
total 33 kg (73 lbs)
tube head
4.2 kg (9.3 lbs) with standard cone
4.5 kg (10 lbs) with long cone
Color
RAL 9016
Environmental requirements
Ambient temperature
operating +5°C - +40°C
storage -10°C - +50°C
transport -10°C - +50°C
Humidity
25% - 75%
Atmospheric pressure range
700 hPa - 1060 hPa
External mains fuse recommendation
The recommendation for the external mains fuses are:
•
units with 100V~ or 115V~ voltage setting:
16A, time lag
•
units with 220-240V~ voltage setting:
10A, time lag
No other equipment should be connected to the same fused mains line as the x-ray unit. In some
countries an additional external fault current guard is also required.
Original manufacturer
PLANMECA Oy,
Asentajankatu 6,
FIN-00880, Helsinki,
FINLAND
Phone: +358-20-7795 500
52
Planmeca ProX
User’s Manual
TECHNICAL SPECIFICATIONS
Dimensions (in mm)
1180
(46.5")
590
(23.2")
365
(14.4")
Prox_dims_001.eps
590
(23.2")
1186
(46.7")
722
(28.4")
23.2
267
(10.5")
180°
290°
Prox_dims_002
550°
391
518
645
899
1200
(47.2")
Prox_dims_003.eps
305°
1524 (60")
1651 (65")
1778 (70")
2032 (80")
154
(6.1")
118
(4.6")
User’s Manual
Planmeca ProX 53
TECHNICAL SPECIFICATIONS
23.3
Planmeca ProX minimum dimensions
51 mm (2”)
1245 mm (49”)
Thin
203 mm (8”)
838 mm (33”)
965 mm (38”)
1092 mm (43”)
1346 mm (53”)
03.05.2012 MJ
54
Planmeca ProX
1
User’s Manual
TECHNICAL SPECIFICATIONS
51 mm (2”)
1245 mm (49”)
Narrow
279 mm (11”)
584 mm (23”)
711 mm (28”)
838 mm (33”)
1092 mm (43”)
03.05.2012 MJ
User’s Manual
2
Planmeca ProX 55
TECHNICAL SPECIFICATIONS
23.4
Installation options
Standard wall mount
Remote control
panel
Fixed control panel
with double exposure button
56
Planmeca ProX
User’s Manual
TECHNICAL SPECIFICATIONS
23.5
User’s statement for Planmeca Prox
Radiation leakage technique factors
The maximum rated peak tube potential is 70 kV and the maximum rated continuous tube current is
0.14 mA for the maximum rated peak tube potential.
Minimum filtration
The radiation port contains an added 1.5 mm aluminium filtration. The measured half-value is 0.50 0.55 at 70 kV. The measured value corresponds to an aluminium equivalent of 2.5 mm.
Rated line voltage
100, 110-117, 220-240 V~ ±10%. Line voltage regulation 10%.
Maximum line current
5A at 230V, 7,4A at 115V
Technique factors that constitute the maximum line current condition
70 kV, 6 mA
Generator rating and duty cycle
1.4 kW, duty cycle 1:30. The wait period is controlled automatically by calculating it according to the
formula tw = 30 x texp.
Maximum deviation of peak tube potential from indicated value
± 2.0 kV
Maximum deviation of tube current from indicated value
± (5% + 0.2 mA)
Maximum deviation of exposure time from indicated value
± (5% + 0.001 sec)
User’s Manual
Planmeca ProX 57
TECHNICAL SPECIFICATIONS
DEFINITION OF MEASUREMENT CRITERIA
Exposure time
The beginning and end points of the exposure time are defined at 70% of the peak radiation waveform
measured with a calibrated x-ray monitor.
Peak tube potential
Is defined as the high voltage mean value measured with a calibrated non-invasive kVp meter.
Tube current
Is defined using the voltage over the feedback resistor measured with a calibrated multimeter. The
mA value is calculated by dividing the voltage by the resistance value.
The nominal x-ray voltage together with the highest x-ray tube current obtainable
from the high-voltage generator when operated at it’s highest
x-ray tube voltage
70 kV, 6 mA
The nominal x-ray tube current when operated at the highest x-ray tube voltage
6 mA, 70 kV
The x-ray tube voltage and tube current which result in the highest electric output
power
70 kV, 6 mA
The nominal electric power for a load time of 0.1 sec and at the nominal x-ray tube
voltage
1.4 kW at 70 kV, 6 mA
58
Planmeca ProX
User’s Manual
TECHNICAL SPECIFICATIONS
Anode heating/cooling curve of the X-ray tube
4500
4300J
100W
4000
HEAT STORAGE [J]
3500
3000
50W
2500
2000
1500
COOLING
1000
500
HEATING
0
0
50
100
150
200
250
300
TIME [s]
X-ray tube assembly heating/cooling curve
120
100
13,5W
Heat Storage (kJ)
80
60
40
20
0
0
15
30
45
60
75
90
105
120
135
150
165
180
195
210
225
240
Tim e (m in)
User’s Manual
Planmeca ProX 59
TECHNICAL SPECIFICATIONS
Reference axis to which the target angle and the focal spot characteristics of the
tube head assembly refer
12,5°
Target angle with respect to the reference axis
12.5°
Dimensions of the tube head assembly
(WxHxD) 175mm x 105mm x 165mm
Weight of the tube head assembly
3.1 kg
Values of loading factors concerning leakage radiation
70 kV, 6 mA
Tolerances of the focal spot on the reference axis
X= ±0.5 mm (sideways)
Y= ±0.5 mm (in depth)
Z= ±0.5 mm (in height)
60
Planmeca ProX
User’s Manual
Planmeca Oy | Asentajankatu 6 | 00880 Helsinki | Finland
tel. +358 20 7795 500 | fax +358 20 7795 555 | [email protected] | www.planmeca.com