1
USER'S GUIDE
®
Vaisala HUMICAP
Humidity and Temperature Probe
HMP155
M210912EN-A
PUBLISHED BY
Vaisala Oyj
P.O. Box 26
FIN-00421 Helsinki
Finland
Phone (int.): +358 9 8949 1
Fax:
+358 9 8949 2227
Visit our Internet pages at http://www.vaisala.com/
© Vaisala 2008
No part of this manual may be reproduced in any form or by any means, electronic or
mechanical (including photocopying), nor may its contents be communicated to a third
party without prior written permission of the copyright holder.
The contents are subject to change without prior notice.
Please observe that this manual does not create any legally binding obligations for
Vaisala towards the customer or end user. All legally binding commitments and
agreements are included exclusively in the applicable supply contract or Conditions of
Sale.
________________________________________________________________________________
Table of Contents
CHAPTER 1
GENERAL INFORMATION............................................................................ 5
About This Manual ................................................................... 5
Contents of This Manual ....................................................... 5
Version Information ............................................................... 6
Related Manuals ................................................................... 6
General Safety Considerations ............................................. 6
Feedback............................................................................... 7
Product Related Safety Precautions ...................................... 7
Regulatory Compliances ......................................................... 7
Electromagnetic Compatibility............................................... 7
Recycling .................................................................................. 8
Trademarks ............................................................................... 8
License Agreement .................................................................. 8
Warranty.................................................................................... 9
CHAPTER 2
PRODUCT OVERVIEW................................................................................ 11
Introduction to HMP155 ......................................................... 11
Basic Features and Options................................................ 12
Structure of HMP155........................................................... 13
Additional Temperature Probe Option ................................ 14
Warmed Probe Option ........................................................ 15
CHAPTER 3
INSTALLATION............................................................................................ 17
Installation in Radiation Shields........................................... 17
Installation in DTR13........................................................... 18
Installation in DTR503A ...................................................... 19
Installation in DTR502B ...................................................... 20
Installation in Stevenson Screen......................................... 21
8-Pin Connector...................................................................... 22
Temporary RS-485 Connection Option............................... 23
CHAPTER 4
OPERATION................................................................................................. 25
Getting Started ....................................................................... 25
RS-485 Interface ..................................................................... 25
Serial Line Communication ................................................... 26
Installing the Driver for the USB Cable ............................... 27
Terminal Program Settings ................................................. 28
List of Serial Commands ..................................................... 31
Getting Measurement Message from Serial Line................ 33
VAISALA_____________________________________________________________________ 1
User's Guide ______________________________________________________________________
R .....................................................................................33
S .....................................................................................33
SEND [ADDR] ................................................................33
SDELAY .........................................................................34
Formatting Serial Line Message ...........................................34
Changing Quantities and Units............................................34
FORM .............................................................................34
UNIT [M/N] .....................................................................36
OVERICE [ON/OFF].......................................................36
Pressure Compensation Setting..........................................37
Time.....................................................................................38
TIME [HH MM SS]..........................................................38
Serial Settings .....................................................................38
SERI [BAUD][PARITY][DATA][STOP] ...........................38
SMODE ..........................................................................39
INTV ...............................................................................40
Data Filtering .......................................................................40
FILT [0.1…1] ..................................................................40
?......................................................................................41
HELP ..............................................................................42
ERRS..............................................................................43
VERS..............................................................................43
Resetting Transmitter Using Serial Line..............................43
RESET............................................................................43
Formatting Analog Output.....................................................44
Analog Output Settings .......................................................44
AMODE ..........................................................................44
ASEL [CH1 CH2]............................................................45
ATEST ............................................................................45
AERR..............................................................................46
ADDR .............................................................................47
OPEN .............................................................................47
CLOSE ...........................................................................47
Sensor Functions ...................................................................48
Chemical Purge (Optional) ..................................................48
Automatic Chemical Purge (Interval Purge)...................49
Manual Chemical Purge .................................................49
Chemical Purge in Power Up .........................................49
Starting and Configuring Chemical Purge...........................49
PUR ................................................................................49
Sensor Heating....................................................................50
Setting Humidity Sensor Heating ...................................51
XHEAT ......................................................................51
CHAPTER 5
MAINTENANCE............................................................................................53
Periodic Maintenance.............................................................53
Cleaning ..............................................................................53
Changing the Probe Filter ...................................................53
Changing the Sensor...........................................................54
Error States .............................................................................56
Technical Support ..................................................................57
Return Instructions ................................................................57
2 ________________________________________________________________ M210912EN-A
________________________________________________________________________________
Vaisala Service Centers......................................................... 58
CHAPTER 6
CALIBRATION AND ADJUSTMENT........................................................... 59
Push-Button Calibration ........................................................ 61
Two-Point Humidity and Temperature Adjustment ............. 61
One-Point Humidity and Temperature Adjustment ............. 63
Passive Output Version Push-Button Calibration ............... 64
Serial Line Calibration ........................................................... 65
Two-Point Humidity Adjustment.......................................... 65
Two-Point Temperature Adjustment ................................... 66
Relative Humidity Adjustment after Sensor Change........... 67
FCRH ............................................................................. 67
One-Point Humidity and Temperature Adjustment ............. 67
User Adjustment Commands................................................ 68
L .......................................................................................... 68
LI ......................................................................................... 68
Feeding Adjustment Information.......................................... 69
CTEXT................................................................................. 69
CDATE ................................................................................ 69
Analog Output Adjustment.................................................... 69
ACAL [0/1] ........................................................................... 70
MI70 Check and Adjustment ................................................. 70
CHAPTER 7
TECHNICAL DATA ...................................................................................... 73
Performance ........................................................................... 73
Relative Humidity ................................................................ 73
Temperature........................................................................ 74
Operating Environment ......................................................... 74
Calculated Variables .............................................................. 75
Accuracies of Calculated Variables ..................................... 75
Accuracy of Dewpoint Temperature °C............................... 75
Accuracy of Mixing Ratio g/kg (Ambient Pressure 1013
mbar) ................................................................................... 75
Accuracy of Wet Bulb Temperature °C ............................... 76
Accuracy of Dewpoint Measurement .................................. 76
Inputs and Outputs ................................................................ 77
Mechanics ............................................................................... 77
Options and Accessories ...................................................... 78
Dimensions in mm (inches) .................................................. 79
HMP155 Probe.................................................................... 79
Additional Temperature Probe ............................................ 79
APPENDIX A
CALCULATION FORMULAS ...................................................................... 81
VAISALA_____________________________________________________________________ 3
User's Guide ______________________________________________________________________
List of Figures
Figure 1
Figure 2
Figure 3
Figure 4
Figure 5
Figure 5
Figure 6
Figure 7
Figure 8
Figure 9
Figure 10
Figure 11
Figure 12
Figure 13
Figure 14
Figure 15
Figure 16
Figure 17
HMP155 Probe .........................................................................13
HMP155 with Additional T-probe..............................................14
HMP155 with T-probe Installed in DTR13................................18
HMP155 Installed in DTR503A.................................................19
T-probe Installed in DTR502B ..................................................20
HMP155 with T-Probe Installed in Stevenson Screen .............21
Wiring of HMP155 8-Pin Connector .........................................22
Pins Connected to Pt100 (passive output version) ..................23
Starting HyperTerminal Connection .........................................28
Connecting to HyperTerminal...................................................29
HyperTerminal Serial Port Settings ..........................................30
Decrease of Sensor Gain .........................................................48
Changing the Sensor................................................................55
HMP155 Adjustment Buttons ...................................................60
Accuracy over Temperature Range: Voltage and RS-485.......74
Accuracy of Dewpoint Measurement........................................76
Probe Dimensions ....................................................................79
Additional Temperature Probe Dimensions..............................79
List of Tables
Table 1
Table 2
Table 3
Table 4
Table 5
Table 6
Table 7
Table 8
Table 9
Table 10
Table 11
Table 12
Table 13
Table 14
Table 15
Table 16
Manual Revisions .......................................................................6
Related Manuals.........................................................................6
Quantities Measured by HMP155.............................................11
Calculated Quantities Measured by HMP155 ..........................12
Default Serial Communication Settings for the User Port ........27
Measurement Commands ........................................................31
Formatting Commands .............................................................31
Chemical Purge Commands (Optional)....................................31
Calibration and Adjustment Commands...................................31
Setting and Testing the Analog Outputs...................................32
Other Commands .....................................................................32
FORM Command Modifiers......................................................35
Selection of Output Modes .......................................................39
Error Messages ........................................................................56
Calculated Variables.................................................................75
Options and Accessories..........................................................78
4 ________________________________________________________________ M210912EN-A
Chapter 1 ________________________________________________________ General Information
CHAPTER 1
GENERAL INFORMATION
This chapter provides general notes for the manual and the product.
About This Manual
This manual provides information for installing, operating, and
maintaining Vaisala HUMICAP® Humidity and Temperature Probe
HMP155.
Contents of This Manual
This manual consists of the following chapters:
- Chapter 1, General Information, provides general notes for the
manual and the Humidity and Temperature Probe HMP155.
- Chapter 2, Product Overview, introduces the features, advantages,
and the product nomenclature of the Humidity and Temperature
Probe HMP155.
- Chapter 3, Installation, provides you with information that is
intended to help you install the Humidity and Temperature Probe
HMP155.
- Chapter 4, Operation, contains information that is needed to
operate the Humidity and Temperature Probe HMP155.
- Chapter 5, Maintenance, contains information that is needed in
basic maintenance of the Humidity and Temperature Probe
HMP155.
- Chapter 6, Calibration and Adjustment, provides information and
instructions concerning calibration and adjustment of the Humidity
and Temperature Probe HMP155.
VAISALA_____________________________________________________________________ 5
User's Guide ______________________________________________________________________
- Chapter 7, Technical Data, provides the technical data of the
Humidity and Temperature Probe HMP155.
- Appendix A, Calculation Formulas, presents the equations used in
the Humidity and Temperature Probe HMP155 to calculate values
of dewpoint, mixing ratio, absolute humidity and enthalpy in
normal pressure.
Version Information
Table 1
Manual Revisions
Manual Code
M210912EN-A
Description
June 2008 - First release.
Related Manuals
Table 2
Manual Code
M210913EN-A
Related Manuals
Manual Name
Vaisala HUMICAP® Humidity and
Temperature Probe HMP155 Quick
Reference Guide
General Safety Considerations
Throughout the manual, important safety considerations are
highlighted as follows:
WARNING
Warning alerts you to a serious hazard. If you do not read and follow
instructions very carefully at this point, there is a risk of injury or
even death.
CAUTION
Caution warns you of a potential hazard. If you do not read and
follow instructions carefully at this point, the product could be
damaged or important data could be lost.
NOTE
Note highlights important information on using the product.
6 ________________________________________________________________ M210912EN-A
Chapter 1 ________________________________________________________ General Information
Feedback
Vaisala Customer Documentation Team welcomes your comments
and suggestions on the quality and usefulness of this publication. If
you find errors or have other suggestions for improvement, please
indicate the chapter, section, and page number. You can send
comments to us by e-mail: [email protected]
Product Related Safety Precautions
Vaisala HUMICAP® Humidity and Temperature Probe HMP155
delivered to you has been tested for safety and approved as shipped
from the factory. Note the following precautions:
WARNING
Ground the product, and verify outdoor installation grounding
periodically to minimize shock hazard.
CAUTION
Do not modify the unit. Improper modification can damage the
product or lead to malfunction.
Regulatory Compliances
Vaisala HUMICAP® Humidity and Temperature Probe HMP155
complies with the following performance and environmental test
standards:
Electromagnetic Compatibility
Complies with EMC standard EN 61326-1, Electrical equipment for
measurement, control and laboratory use - EMC requirements for use
in industrial locations.
VAISALA_____________________________________________________________________ 7
User's Guide ______________________________________________________________________
Recycling
Recycle all applicable material.
Dispose of batteries and the unit according to statutory regulations.
Do not dispose of with regular household refuse.
Trademarks
HUMICAP® is a registered trademark of Vaisala. Microsoft®,
Windows®, Windows® NT, Windows® 2000, Windows® XP, and
Windows® Vista are registered trademarks of Microsoft Corporation
in the United States and/or other countries.
License Agreement
All rights to any software are held by Vaisala or third parties. The
customer is allowed to use the software only to the extent that is
provided by the applicable supply contract or Software License
Agreement.
8 ________________________________________________________________ M210912EN-A
Chapter 1 ________________________________________________________ General Information
Warranty
Vaisala hereby represents and warrants all Products
manufactured by Vaisala and sold hereunder to be
free from defects in workmanship or material
during a period of twelve (12) months from the date
of delivery save for products for which a special
warranty is given. If any Product proves however to
be defective in workmanship or material within the
period herein provided Vaisala undertakes to the
exclusion of any other remedy to repair or at its
own option replace the defective Product or part
thereof free of charge and otherwise on the same
conditions as for the original Product or part
without extension to original warranty time.
Defective parts replaced in accordance with this
clause shall be placed at the disposal of Vaisala.
Vaisala also warrants the quality of all repair and
service works performed by its employees to
products sold by it. In case the repair or service
works should appear inadequate or faulty and
should this cause malfunction or nonfunction of the
product to which the service was performed Vaisala
shall at its free option either repair or have repaired
or replace the product in question. The working
hours used by employees of Vaisala for such repair
or replacement shall be free of charge to the client.
This service warranty shall be valid for a period of
six (6) months from the date the service measures
were completed.
This warranty is however subject to following
conditions:
a) A substantiated written claim as to any alleged
defects shall have been received by Vaisala
within thirty (30) days after the defect or fault
became known or occurred, and
b) The allegedly defective Product or part shall,
should Vaisala so require, be sent to the works
of Vaisala or to such other place as Vaisala may
indicate in writing, freight and insurance
prepaid and properly packed and labelled,
unless Vaisala agrees to inspect and repair the
Product or replace it on site.
This warranty does not however apply when the
defect has been caused through
a) normal wear and tear or accident;
b) misuse or other unsuitable or unauthorized use
of the Product or negligence or error in storing,
maintaining or in handling the Product or any
equipment thereof;
c) wrong installation or assembly or failure to
service the Product or otherwise follow
Vaisala's service instructions including any
repairs or installation or assembly or service
made by unauthorized personnel not approved
by Vaisala or replacements with parts not
manufactured or supplied by Vaisala;
d) modifications or changes of the Product as well
as any adding to it without Vaisala's prior
authorization;
e) other factors depending on the Customer or a
third party.
Notwithstanding the aforesaid Vaisala's liability
under this clause shall not apply to any defects
arising out of materials, designs or instructions
provided by the Customer.
This warranty is expressly in lieu of and excludes
all other conditions, warranties and liabilities,
express or implied, whether under law, statute or
otherwise, including without limitation any implied
warranties of merchantability or fitness for a
particular purpose and all other obligations and
liabilities of Vaisala or its representatives with
respect to any defect or deficiency applicable to or
resulting directly or indirectly from the Products
supplied hereunder, which obligations and
liabilities are hereby expressly cancelled and
waived. Vaisala's liability shall under no
circumstances exceed the invoice price of any
Product for which a warranty claim is made, nor
shall Vaisala in any circumstances be liable for lost
profits or other consequential loss whether direct or
indirect or for special damages.
VAISALA_____________________________________________________________________ 9
User's Guide ______________________________________________________________________
This page intentionally left blank.
10 __________________________________________________________________ M210912EN-A
Chapter 2 __________________________________________________________ Product Overview
CHAPTER 2
PRODUCT OVERVIEW
This chapter introduces the features, advantages, and the product
nomenclature of the Vaisala HUMICAP® Humidity and Temperature
Probe HMP155.
Introduction to HMP155
The HMP155 probe provides reliable humidity and temperature
measurement in a wide range of applications. Humidity measurement
is based on the capacitive thin film polymer sensor HUMICAP®180R.
Temperature measurement is based on resistive platinum sensors
(Pt100). Both the humidity and temperature sensors are located at the
tip of the probe, protected by a sintered Teflon filter.
The HMP155 comes in active and passive output models where the
relative humidity voltage output is similar, but the temperature output
is either active or passive (resistive). Active output version has either
two analog outputs or an RS-485 digital output. Passive output version
has 4-wire temperature measurement and an analog voltage output for
relative humidity measurement.
The quantities measured and calculated by HMP155 are presented in
Table 3 below. The quantities available as an option are presented in
Table 4 on page 12.
Table 3
Quantities Measured by HMP155
Quantity
Relative humidity (RH)
Temperature (T)
Additional T-probe
temperature (Ta)
Abbreviati
on
RH
T
Ta
Metric Unit Non Metric
Unit
%RH
%RH
ºC
ºF
ºC
ºF
VAISALA _______________________________________________________________________ 11
User's Guide ______________________________________________________________________
Table 4
Calculated Quantities Measured by HMP155
Quantity
Abbreviation
TDF
Metric
Unit
ºC
Non Metric
Unit
ºF
Dewpoint / Frostpoint
Temperature (Td/f)
Dewpoint Temperature (Td)
Mixing ratio (x)
Wetbulb temperature (Tw)
TD
X
TW
ºC
g/kg
ºC
ºF
gr/lb
ºF
Basic Features and Options
- Can be used to replace HMP45A/D, also in radiation shields
- Improved performance with the HUMICAP®180R sensor and
alternatively the HUMICAP®180RC sensor. Also available with
the HUMICAP®180 sensor.
- Warmed humidity probe for improved performance in constant
high humidity (active output version)
- Different voltage ranges possible: 0...1 V, 0…5 V, 0…10 V (active
and passive output versions)
- Different T-output scales possible: -40…+60°C, -20…+40°C,
-80…+60°C (active output version)
- Chemical purge option for applications where interfering chemicals
in the measuring environment pose a risk (active output version)
- Additional temperature probe (T-probe) with fast response (active
output version)
- USB connectivity for service connections via the optional USBM12 cable (active and passive output versions)
- Installation kits for T-probe into DTR13 and DTR502B radiation
shields.
- Installation kit for Stevenson screen (active and passive output
version, both with and without additional T-probe)
- MI70 connectivity for field checking and calibration (active and
passive output versions)
12 __________________________________________________________________ M210912EN-A
Chapter 2 __________________________________________________________ Product Overview
Structure of HMP155
0801-070
Figure 1
HMP155 Probe
The numbers refer to Figure 1 above.
1
2
3
=
=
=
Filter
Protective cover
8-Pin connector (M12)
VAISALA _______________________________________________________________________ 13
User's Guide ______________________________________________________________________
0801-080
Figure 2
HMP155 with Additional T-probe
Additional Temperature Probe
Option
The active output version of HMP155 can be ordered with an
additional temperature probe option, see Figure 2 above. When the
additional T-probe is in use, the relative humidity value is calculated
based on the Td (dewpoint) value obtained from the humidity probe
and the Ta value obtained from the T-probe.
When installing HMP155 with T-probe, it is important to make sure
that the humidity probe and the T-probe are installed in the same
conditions in order to get accurate readings. Even a slight difference in
temperature conditions between the T-probe and the humidity probe
will result in false RH readings. The two probes need to be installed so
that the humidity probe does not heat the T-probe, but is close enough
for the probes to share the same environmental conditions. When the
RH reading is required, always install the T-probe in the place where
you need the reading from.
14 __________________________________________________________________ M210912EN-A
Chapter 2 __________________________________________________________ Product Overview
Warmed Probe Option
In changing temperature conditions with high humidity, the probe
temperature can lag behind the temperature of the surrounding air and
this can cause a risk of condensation on the sensor. A wet probe
cannot observe the actual humidity in the ambient air. If the
condensed water is contaminated, the life span of the probe may
shorten and the calibration may change.
The HMP155 warmed probe is heated continuously so that its
temperature is always higher than that of the environment. This
prevents condensation on the probe.
VAISALA _______________________________________________________________________ 15
User's Guide ______________________________________________________________________
This page intentionally left blank.
16 __________________________________________________________________ M210912EN-A
Chapter 3 _______________________________________________________________ Installation
CHAPTER 3
INSTALLATION
This chapter provides you with information that is intended to help
you install the product.
Installation in Radiation Shields
In order to reach the maximum performance level of the HMP155
probe, Vaisala recommends installing the HMP155 in a radiation
shield, for example in DTR503A, in DTR13 or in a Stevenson screen.
See Figure 3 on page 18, Figure 4 on page 19 and Figure 6 on page
21.
VAISALA _______________________________________________________________________ 17
User's Guide ______________________________________________________________________
Installation in DTR13
0801-071
Figure 3
HMP155 with T-probe Installed in DTR13
18 __________________________________________________________________ M210912EN-A
Chapter 3 _______________________________________________________________ Installation
Installation in DTR503A
0801-072
Figure 4
HMP155 Installed in DTR503A
VAISALA _______________________________________________________________________ 19
User's Guide ______________________________________________________________________
Installation in DTR502B
0809-006
Figure 5
T-probe Installed in DTR502B
In Figure 5 above, the HMP155 additional T-probe is installed in
DTR502B radiation shield using a Vaisala installation adapter
(Vaisala item code 221072).
20 __________________________________________________________________ M210912EN-A
Chapter 3 _______________________________________________________________ Installation
Installation in Stevenson Screen
0805-008
Figure 6
HMP155 with T-Probe Installed in Stevenson
Screen
VAISALA _______________________________________________________________________ 21
User's Guide ______________________________________________________________________
8-Pin Connector
Both the passive and active versions of HMP155 come with an 8-pin
connector on the bottom of the probe.
0507-044
Figure 7
Wiring of HMP155 8-Pin Connector
The pins of the connector for HMP155 passive output version in
Figure 7 are (open end wire colors in brackets):
1
2
3
4
5
6
7
8
-
=
=
=
=
=
=
=
=
=
PT100 (white)
RHOUT 0…1 V (brown)/RS-485-B
PT100 (green)
PT100 (yellow)
PT100 (grey)
AGND (pink)/RS-485-A
VCC (blue)
GND (red)
SHIELD (black)
The pins of the connector for HMP155 active output version in Figure
7 are (open end wire colors in brackets):
1
2
3
4
5
6
7
8
-
=
=
=
=
=
=
=
=
=
VOUT1 (white)
RS-485-B (brown)
AGND (green)
VOUT2 (yellow)
RS-485-A (pink)
VCC (blue)
GND (red)
SHIELD (black)
22 __________________________________________________________________ M210912EN-A
Chapter 3 _______________________________________________________________ Installation
The last entry in the list of pins, SHIELD, is not a pin but one of the
conductors in the connection cable.The SHIELD wire color is black.
4
1
3
5
0802-039
Figure 8
Pins Connected to Pt100 (passive output version)
Temporary RS-485 Connection
Option
It is possible to have a temporary RS-485 connection also in the
passive output version by resetting the probe, while simultaneously
holding down the ADJ button, see Figure 14 on page 60. After the
probe has restarted, pins 2 and 6 then have the RS-485 signal. For the
order of the pins, see Figure 7 on page 22. The default signals are
returned to the pins after the next reset.
VAISALA _______________________________________________________________________ 23
User's Guide ______________________________________________________________________
This page intentionally left blank.
24 __________________________________________________________________ M210912EN-A
Chapter 4 ________________________________________________________________ Operation
CHAPTER 4
OPERATION
This chapter contains information that is needed to operate this
product.
Getting Started
After the Vaisala HUMICAP® Humidity and Temperature Probe
HMP155 has been connected to a power supply, the serial line and the
analog outputs are operational.
RS-485 Interface
HMP155 supports a two-wire RS-485 communication. The RS-485
interface is non-isolated and offers a maximum communications rate
of 19200 bits/s. There is no internal termination for the RS-485 on the
HMP155. If any termination is needed, the bus should be terminated
at both ends. The recommended termination is R termination with 120
Ohm resistors.
Typically the termination resistors are only needed when the fastest
communications rate (19200 bit/s) is used for longer distances. If the
resistors are used, the possible increase in current consumption should
be taken into account.
VAISALA _______________________________________________________________________ 25
User's Guide ______________________________________________________________________
Serial Line Communication
Connect the probe to a PC, for example, by using a USB cable
(optional accessory item: 221040). Connect the USB cable to the 8pin connector on the bottom of the probe. Before you can use the USB
cable, you must install the provided USB driver on your PC, see
Installing the Driver for the USB Cable on page 27.
NOTE
When using the USB-cable, no separate power unit is needed. The
probe is powered through the USB port.
For permanent interfacing to host system, use the serial line. You can
change the serial settings and operate in RUN, STOP and POLL
modes.
HMP155 does not echo typed characters back to the terminal screen.
To see the commands you type, you need to enable the "local echo" setting in your terminal program.
A new command cannot be received while the instrument is sending
data out. Wait until the instrument has completed its response before
entering the next command.
NOTE
In the RUN mode, the instrument may send the measurement data
message right as you are typing the S command to stop the sending.
Therefore, you may need to repeat the S command. This must be
noted especially when designing computer programs to access the
HMP155. You can also use the Esc key on your keyboard to stop the
sending.
26 __________________________________________________________________ M210912EN-A
Chapter 4 ________________________________________________________________ Operation
Installing the Driver for the USB
Cable
Before taking the USB cable into use, you must install the provided
USB driver on your PC. When installing the driver, you must
acknowledge any security prompts that may appear. The driver is
compatible with Windows 2000, Windows XP, and Windows Vista.
1.
Check that the USB cable is not connected. Disconnect the cable
if you have already connected it.
2.
Insert the media that came with the cable, or download the
driver from www.vaisala.com.
3.
Execute the USB driver installation program (setup.exe), and
accept the installation defaults. The installation of the driver
may take several minutes.
4.
After the driver has been installed, connect the USB cable to a
USB port on your PC. Windows will detect the new device, and
use the driver automatically.
5.
The installation has reserved a COM port for the cable. Verify
the port number, and the status of the cable, using the Vaisala
USB Instrument Finder program that has been installed in the
Windows Start menu. The reserved ports are also visible in the
Ports section of the Windows Device Manager.
Remember to use the correct port in the settings of your terminal
program. Windows will recognize each individual cable as a different
device, and reserve a new COM port.
There is no reason to uninstall the driver for normal use. However, if
you wish to remove the driver files and all Vaisala USB cable devices,
you can do so by uninstalling the entry for Vaisala USB Instrument
Driver from the Add or Remove Programs (Programs and
Features in Windows Vista) in the Windows Control Panel.
Table 5
Parameter
Bauds
Parity
Data bits
Stop bits
Flow control
Default Serial Communication Settings for the User
Port
Value
4800
Even
7
1
None
VAISALA _______________________________________________________________________ 27
User's Guide ______________________________________________________________________
After power-up the transmitter (in STOP-mode) outputs the software
version and the command prompt.
HMP155 0.98
>
In RUN mode a measurement output starts immediately after powerup.
In POLL mode, the transmitter does not output anything after powerup, see section on page 39.
Terminal Program Settings
The following instructions show a connection example with
HyperTerminal program (included in the Microsoft Windows®).
Follow the instructions below to open a HyperTerminal program:
1.
Start HyperTerminal. To get help for starting HyperTerminal,
click Start, select Help to open Windows help, and search for
"HyperTerminal".
0801-073
Figure 9
2.
Starting HyperTerminal Connection
In New Connection window of the HyperTerminal, define a
name for HMP155 serial connection, for example "HMP155".
Click OK.
28 __________________________________________________________________ M210912EN-A
Chapter 4 ________________________________________________________________ Operation
3.
In Connect using pull down menu, select the PC
communications port where the serial cable is connected. (If
your computer has only one COM port, it is called "COM1").
Click OK.
0801-074
Figure 10
4.
Connecting to HyperTerminal
In the Properties window, set the port settings to match the
settings of your HMP155. For HMP155, Flow control must
always be set to None. Finally click OK to start using the serial
connection.
VAISALA _______________________________________________________________________ 29
User's Guide ______________________________________________________________________
0801-075
Figure 11
HyperTerminal Serial Port Settings
5. In the HyperTerminal main window, select File Æ Save to save
the serial port settings. To use the saved settings later, start
HyperTerminal and in the New Connection window, click Cancel
and select File Æ Open.
30 __________________________________________________________________ M210912EN-A
Chapter 4 ________________________________________________________________ Operation
List of Serial Commands
Most of the commands listed below can only be used in active output
version of HMP155. These commands are marked with an * in the
description column to make them easier to tell apart. The bold text in
the brackets is the default setting. To issue a command, type it on your
computer and press the Enter key.
Table 6
Measurement Commands
Command
R
S
INTV [0 ... 255 S/MIN/H]
SEND [0 ... 99]
SMODE
[STOP/RUN/POLL/SEND]
SDELAY[0 … 255]
SERI [baud p d s]
ADDR [0 ... 99]
OPEN [0 ... 99]
CLOSE
Table 7
OVERICE [ON/OFF]
TIME [HH MM SS]
UNIT
Command
PUR
Table 9
Command
ACAL [0/1]
CDATE
View or set user port (RS-485) answer
minimum delay *
User Port settings (Default: 4800 E 7 1)
baud: 300 ... 115200 *
Set the transmitter address (for POLL
mode) *
Open a temporary connection to a POLL
mode device *
Close the temporary connection (Back to
POLL mode) *
Formatting Commands
Command
FORM
Table 8
Description
Start the continuous outputting
Stop the continuous outputting
Set the continuous output interval (for RUN
mode)
Output the reading once *
Set the serial interface mode *
Description
Set the output format of SEND and R
commands *
Select the output for below freezing
temperatures *
Set or display the time *
Select the metric or non-metric output
units *
Chemical Purge Commands (Optional)
Description
Set the automatic chemical purge *
Calibration and Adjustment Commands
Description
Analog output calibration *
Set the calibration date
VAISALA _______________________________________________________________________ 31
User's Guide ______________________________________________________________________
Command
CRH
CT
CTA
FCRH
CTEXT
L
LI
Table 10
Command
AMODE
ASEL
AERR
ATEST
Table 11
Command
?
??
ERRS
FILT [0.1…1]
HELP
PRES [hPa]
RESET
VERS
XHEAT
XPRES [bar]
Description
Relative humidity calibration
Temperature calibration *
Additional temperature probe calibration *
Relative humidity calibration after sensor
change
Give the text to calibration information field
Displays user adjustment parameters
Displays new values for the user
adjustment parameters
Setting and Testing the Analog Outputs
Description
View the analog output modes*
Set or view analog output quantities and
scaling *
Change the analog error output values
Force the analog outputs to entered
values*
Other Commands
Description
Output information about the device
Output information about the device in
POLL mode *
List present transmitter errors
Set the result filtering
Lists the available commands
Set the value for pressure compensations
Resets the probe.
Display the software version information
Sensor heating *
Set the value for pressure compensations,
temporarily
32 __________________________________________________________________ M210912EN-A
Chapter 4 ________________________________________________________________ Operation
Getting Measurement Message
from Serial Line
R
Enter the R command to start the continuous output of measurements.
This command starts a temporary RUN mode. To change to
permanent RUN mode, use the SMODE command.
Example:
>r
RH= 33.0 %RH T= 22.1 'C
>
If a value is too long to fit to the allocated space in the output, or if
there is an error in outputting the quantity, the value is displayed with
stars ‘*’.
The output format can be adjusted with the FORM command and the
output interval can be changed with the INTV command.
S
Use the S command to end the RUN mode. After this command all
other commands can be used. You can also press the Esc key on your
keyboard or reset the transmitter to stop the outputting.
See SMODE command on page 39 to change the default (power up)
operation mode.
SEND [ADDR]
Use the SEND command, where ADDR is the address of the
transmitter, to output the reading once in STOP mode. The SEND
command can also be used without the address. The output format
depends on which parameters the transmitter can output.
Example without parameter:
>send
RH= 24.9 %RH T= 22.1 'C
>
VAISALA _______________________________________________________________________ 33
User's Guide ______________________________________________________________________
SDELAY
To view or set the minimun answer delay for the user port (RS-485),
use the SDELAY command. The value corresponds to milliseconds
delay and is set between 1 ... 255. By default the value is set to 10.
where
1 =
255 =
4-8 ms
1024 ms
Example:
>sdelay 15
Serial delay
>
:
15
Formatting Serial Line Message
Changing Quantities and Units
Use the FORM serial line command to change the format or select
certain quantities for the output commands SEND and R. Use the
UNIT serial line command to select metric or non-metric output units.
FORM
Use the serial line command FORM to change the format or select
certain quantities for the output commands SEND and R.
FORM [x]
where
x
=
Formatter string
Formatter string consists of quantities and modifiers.
When entering the command, use the abbreviations of the quantities.
For more information on quantities, see Table 3 and Table 4 on page
11.
The modifiers are presented in Table 12 on page 35.
34 __________________________________________________________________ M210912EN-A
Chapter 4 ________________________________________________________________ Operation
Table 12
Modifier
quantity
x.y
#t
#r
#n
“"
#xxx
U5
ADDR
ERR
STAT
SNUM
TIME
FORM Command Modifiers
Description
Quantity name (for example RH, T or TDF)
Length modifier (number of digits and decimal places)
Tabulator
Carriage-return
Line feed
String constant
Special character with decimal code "xxx"
Unit field and length
Transmitter address with two characters [00...99]
Error flags for P, T, Ta, RH [0000 ... 1111], 0 = no error
Transmitter status in 7 character field, for example:
N
no heating
h
probe heating active, power
H
purge heating active, temperature
S
purge cooling active, temperature
X
sensor heating active, temperature
Transmitter serial number
Time [hh:mm:ss]
Example:
>form "Temperature=" 5.2 t #r#n
OK
>send
Temperature=
24.23
>
>form "Twet=" 6.3 tw U3 #t "T=" t U3 #r#n
OK
>send
Twet=
11.290'C
T=
24.231'C
>
>form 5.1 rh #t t #t tdf #r#n
OK
>send
15.6
24.2
-3.1
>
FORM / command returns the default output format. The default
output format depends on the device configuration. FORM command
returns the current output format of the transmitter. You can only give
a maximum of 73 characters after the command on the command line.
>form /
OK
>send
RH= 23.8 %RH T= 19.4 'C
>
VAISALA _______________________________________________________________________ 35
User's Guide ______________________________________________________________________
UNIT [M/N]
Use the UNIT command to select metric or non-metric output units.
UNIT [M/N]
where
M =
N =
Metric units
Non-metric units
Example:
>unit n
Units
: non metric
>
OVERICE [ON/OFF]
Use the OVERICE command to select the probe dewpoint output in
below freezing temperatures. When overice is set to OFF and the
temperature is below freezing, the probe outputs dewpoint readings. If
overice is set to ON and the temperature is below freezing, the probe
outputs a frostpoint reading.
overice off
Overice
:
OFF
36 __________________________________________________________________ M210912EN-A
Chapter 4 ________________________________________________________________ Operation
Pressure Compensation Setting
Use the PRES serial line command to set ambient pressure value for
fixed pressure compensation. If the value is changed frequently, use
the XPRES serial line command. Its value is cleared to 0.0 at reset; if
it is set to other than 0, it overrides the setting given with the PRES
command.
NOTE
In normal pressure conditions, PRES command is not needed. But if
mixing ratio is used in high altitudes, the pressure changes will
increase the mixing ratio.
Use the serial line and do the following:
PRES [a.aaaa]
where
a.aaaa = Ambient pressure value (bar)
Example:
>pres
Pressure
>
: 1.013 bar ?
XPRES [a.aaaa]
where
a.aaaa =Ambient pressure value (bar)
Example:
>xpres
Pressure: 0.000 bar
>
?
VAISALA _______________________________________________________________________ 37
User's Guide ______________________________________________________________________
Time
To set or display the current time, use the TIME serial line command.
TIME [HH MM SS]
Example:
> time 12 00 00
Time
: 12:00:00
>
When you set the current time for the probe with the TIME
command, the time will be displayed as long as the probe is turned on.
The time setting will not be stored in any memory. At reset or when
the probe is turned off, the time will go back to 00:00:00.
Serial Settings
SERI [BAUD][PARITY][DATA][STOP]
To set the communication settings, use the SERI serial line command.
SERI [BAUD][PARITY][DATA][STOP]
where
baud =
parity =
data =
stop =
Bit rate (300, 600, 1200, 2400, 4800, 9600,19200)
Parity (n = none, e = even, o = odd)
Data bits (7 or 8)
Stop bits (1 or 2)
You need to reset the transmitter to activate the new communication
settings set with SERI command.
The settings can be changed one parameter at a time or all parameters
at once.
Example:
Changing all parameters
>seri 9600 e 7 1
Baud P D S
: 9600 E 7 1
>
38 __________________________________________________________________ M210912EN-A
Chapter 4 ________________________________________________________________ Operation
Example:
Changing baud only
>seri 4800
Baud P D S
>
: 4800 E 7 1
SMODE
Use the SMODE command to set the user port to permanent STOP,
RUN, POLL or SEND mode.
SMODE [xxxx]
where
xxxx = STOP, RUN, POLL or SEND
Example:
>smode
Serial mode
>
Table 13
Mode
STOP
RUN
POLL
: STOP ? POLL
Selection of Output Modes
Output
Only with the SEND command
Automatic output
Only with the SEND [addr]
command
Available Commands
All (default mode)
Only command S
Use with RS-485 buses
Selected output mode will be activated after power outages.
VAISALA _______________________________________________________________________ 39
User's Guide ______________________________________________________________________
INTV
Use the INTV command to set the outputting interval for the RUN
mode. The default value for this command is 2 seconds.
INTV [xxx yyy]
where
xxx =
yyy =
Output interval (0...255) where 0 is the fastest possible output
rate.
Unit (s, min or h)
Example:
>intv 1 min
Interval
>
: 1 min
Data Filtering
The commands introduced in this section are used for setting the
filtering level, checking the probe configuration, listing available
commands and possible error messages, and displaying the software
information of the probe.
FILT [0.1…1]
Use the FILT [xxx] serial line command to set the filtering level. The
default setting is 1. The output is calculated based on the following
formula: [( new result * filt) + ( old result * (1.0 - filt))].
FILT [xxx]
where
xxx =
0.1…1 where 1.0 = no filter and 0.1 = about 16 moving
average
Example:
>filt
Filter
>
: 0.800 ?
40 __________________________________________________________________ M210912EN-A
Chapter 4 ________________________________________________________________ Operation
?
Use the ? serial line command to check the current probe
configuration. ?? command is similar but can also be used if the probe
is in POLL mode.
Example:
>?
HMP155 1.00
Serial number :
Batch number
:
Module number :
Sensor number :
Sensor model
:
Cal. date
:
Cal. info
:
Time
:
Serial mode
:
Baud P D S
:
Output interval:
Serial delay
:
Address
:
Pressure
:
Filter
:
Ch0 output
:
Ch1 output
:
Ch0 error out :
Ch1 error out :
Ch0 RH
lo
:
Ch0 RH
hi
:
Ch1 T
lo
:
Ch1 T
hi
:
>
C1230001
B2350090
C4840248
B4250001
Humicap 180
YYYYMMDD
NONE
00:01:06
STOP
4800 E 7 1
2 S
0
0
1.013 bar
0.800
0 ... 1 V
0 ... 1 V
0.00 V
0.00 V
0.00 %RH
100.00 %RH
-40.00 'C
60.00 'C
VAISALA _______________________________________________________________________ 41
User's Guide ______________________________________________________________________
HELP
Use the HELP command to list the available commands.
Example:
>help
?
??
ACAL ch0/ch1
ADDR 0...99
AERR err1 err2
AMODE ch1 ch2
ASEL quantity1 quantity2 low1 high1 low2 high2
ATEST value1 value2
CDATE 'cal.date'
CLOSE
CRH
CT
CTA
CTEXT 'cal.info'
ERRS
FCRH
FILT value
FORM 'format string'
HELP
INTV 0...255 s/min/h
L
LI
OPEN addr
OVERICE on/off
PRES bar
PUR on/off
R
RESET
S
SDELAY 0...255
SEND addr
SERI baud p d s
SMODE stop/run/poll
TIME hh:mm:ss
UNIT m/n
VERS
XHEAT on/off
XPRES bar
>
42 __________________________________________________________________ M210912EN-A
Chapter 4 ________________________________________________________________ Operation
ERRS
Use the ERRS command to display probe error messages, see Table
14 on page 56.
Example:
>errs
No errors
>
VERS
Use the VERS command to display software version information.
Example:
>vers
HMP155 1.01
>
Resetting Transmitter Using Serial
Line
RESET
Use the RESET command to reset the device. The user port switches
to start-up output mode selected with SMODE command.
Example:
>reset
HMP155 1.00
>
VAISALA _______________________________________________________________________ 43
User's Guide ______________________________________________________________________
Formatting Analog Output
In this section, the commands for formatting the analog output settings
are introduced.
Analog Output Settings
The two analog outputs are set in the factory according to the order
form. In case you want to change the settings, follow these
instructions.
NOTE
The serial line commands AMODE, ASEL and ATEST cannot be
used with the passive output version of HMP155.
AMODE
Use the serial line to select and scale the analog output quantities.
Connect the probe to the PC and then open the terminal connection
between your PC and the probe.
The probe needs to be in ADJUST mode for the AMODE command
to work. To put the probe in ADJUST mode, hold down the
ADJ button until a green LED lights up.
Check the analog output modes with the AMODE command.
Analog output modes are:
3
4
5
=
=
=
0…1 V
0…5 V
0…10 V
Example:
>amode 3 3
Ch0 : 0 ... 1V
Ch1 : 0 ... 1V
>
NOTE
If you scale the analog output quantities with AMODE command,
you must continue by entering the ACAL command, see ACAL on
page 70.
44 __________________________________________________________________ M210912EN-A
Chapter 4 ________________________________________________________________ Operation
ASEL [CH1 CH2]
where
CH1 = Quantity of channel 1
CH2 = Quantity of channel 2
Select and scale the quantities for the analog outputs with the ASEL
command. Note that the optional quantities can be selected only if
they have been selected when ordering the device.
You can use ASEL command with parameters. There you enter all the
quantities for all the outputs at once. ASEL command can also be
used without parameters, like in the example below, in which case the
transmitter will ask for each parameter separately. Always enter all the
quantities for all outputs. For quantities and their abbreviations see
Table 3 on page 11 and Table 4 on page 12.
Use the command ASEL [CH1 CH2] as shown in the example below
when using a device with two analog outputs.
Example:
asel <cr>
Ch1 T lo : -40.00 'C ?
Ch1 T hi : 60.00 'C ?
Ch0 RH lo : 0.00 %RH ?
Ch0 RH hi : 100.00 %RH ?
ATEST
Use the serial line to test the operation of all the analog outputs. Use
the ATEST command to force the analog outputs to entered values.
The set values remain valid until you enter the ATEST command
without parameters or reset the probe. Entering the ATEST command
without parameters outputs the current value.
ATEST [V] [V]
where
V
V
= Output value for channel 1 (V)
= Output value for channel 2 (V)
VAISALA _______________________________________________________________________ 45
User's Guide ______________________________________________________________________
Example 1:
>
>
atest
2.412
1.943
6301
5090
Example 2:
>
>
atest 1.5 1.5
1.500
3948
1.500
3948
AERR
Use the AERR serial line command to set or view the error output
from analog outputs.
AERR [CH0ERR/CH1ERR]
where
CH0ERR = Analog output
CH1ERR = Analog output
Example:
>aerr
Ch0 error out
Ch1 error out
>
: 10.000V ? 0
: 1.000V ? 0
NOTE
The error output value must be within a valid range of the output
mode.
NOTE
The error output value is displayed only when there are minor
electrical faults such as humidity sensor damage. When there is a
severe device malfunction, the error output value is not necessarily
shown.
46 __________________________________________________________________ M210912EN-A
Chapter 4 ________________________________________________________________ Operation
ADDR
Addresses are required only for POLL mode (see serial line command
SMODE on page 39). Use the ADDR command to input the RS-485
transmitter address. Without parameters, ADDR command displays
current transmitter address. When a parameter is specified , it sets the
transmitter address to the given value.
ADDR [0…99]
where
0…99 = address (default = 0)
Example: the transmitter is configured to address 2.
>addr
Address
>
: 0 ? 2
OPEN
When all transmitters on the RS-485 bus are in POLL mode, the
OPEN command sets one transmitter temporarily to STOP mode so
that other commands can be entered.
OPEN [ADDR]
where
ADDR =address of the transmitter (0 ... 99)
CLOSE
The CLOSE command places the probe in temporary POLL mode.
After this only addressable commands can be used.
Example:
>close
line closed
VAISALA _______________________________________________________________________ 47
User's Guide ______________________________________________________________________
Sensor Functions
The active output version of HMP155 includes optional functions
such as chemical purge and sensor heating. These functions are
described in more detail in this section.
Chemical Purge (Optional)
In some specific applications the sensor gain may decrease gradually
due to an interference caused by a particular chemical present in the
measured gas, for example. The decrease of sensor gain due to an
interfering chemical and the effect of the chemical purge process are
illustrated below, see Figure 12 below. The sensor polymer absorbs
the interfering chemical; and this reduces the ability of the polymer to
absorb water molecules and consequently the sensor gain decreases. In
chemical purge, heating the humidity sensor to a temperature level of
approximately +180 °C for several minutes evaporates the interfering
chemical.
The purge function starts with heating stage, continues with settling
and when the temperature of the sensor is decreased, the probe returns
to normal mode. The whole cycle takes about 6 minutes.
NOTE
Chemical purge function locks the output values for about 6 minutes.
0508-035
Figure 12
Decrease of Sensor Gain
48 __________________________________________________________________ M210912EN-A
Chapter 4 ________________________________________________________________ Operation
Automatic Chemical Purge (Interval Purge)
When HMP155 leaves the factory the automatic chemical purge takes
place repeatedly with the time intervals set in the factory, if this option
is chosen. You can change the interval in which the purge takes place
by using serial commands. This can be necessary if the measuring
environment contains high concentrations of interfering chemicals.
The automatic chemical purge can also be turned off if necessary.
Manual Chemical Purge
The chemical purge must be performed always before RH calibration
(see section Calibration and Adjustment on page 59) or when there is
a reason to believe that a sensor has become exposed to an interfering
chemical. Manual chemical purge can be activated by turning the
power up purge on temporarily and resetting the probe. After the
operation, the power up purge can be turned off, see PUR command
on page 49. Make sure that the temperature of the sensor has come
down to normal temperature before starting a calibration.
Chemical Purge in Power Up
Chemical purge (start-up purge) can be set to start within 10 seconds
from the power-up of the device.
Starting and Configuring Chemical
Purge
In this section, the function and use of the chemical purge option is
explained.
PUR
With PUR command, you can enable or disable automatic and powerup chemical purge and set the interval for automatic purge. If the
sensor is exposed to chemicals it is recommended to have the
chemical purge done at least once in 720 min (=12 hours). In
applications where the chemical exposure is not likely, the interval
can be longer.
VAISALA _______________________________________________________________________ 49
User's Guide ______________________________________________________________________
Type PUR and press Enter to proceed. The maximum interval is
14400 minutes (=10 days).
Example:
>pur
Interval Purge
Interval
Power-up Purge
Duration
Settling
Temperature
>
:
:
:
:
:
:
OFF
720
OFF
240
240
180
?
min ?
?
s ?
s ?
'C ?
NOTE
To activate the new interval settings immediately, reset the probe.
NOTE
When chemical purge in power-up is enabled, wait about 6 min after
power-up before taking measurements. The output channels are
locked for the first operation minutes to the initial measured values.
Sensor Heating
This function is optionally available only in probes with
HUMICAP®180RC sensor. It should be used only with the heated
probe.
The sensor heating is recommended for the high humidity
environments where even small temperature differences can cause
water to condense on the sensor. The sensor heating speeds up the
recovery of the humidity sensor from condensation.
Sensor heating starts-up when the relative humidity of the measuring
environment reaches the RH-value set by a user (RH-limit). You can
define the RH-sensor heating temperature as well as the duration of
the heating.
After the heating cycle, the humidity conditions are checked and new
sensor heating is performed if the predefined conditions are reached
again.
NOTE
During the sensor heating, the outputs are locked to the values
measured before the heating cycle.
50 __________________________________________________________________ M210912EN-A
Chapter 4 ________________________________________________________________ Operation
Setting Humidity Sensor Heating
When the HMP155 leaves the factory, the sensor heating follows the
factory default values. You can enable or disable the function, change
the RH-limit and define the heating temperature and duration of this
function.
XHEAT
Enables or disables the sensor heating.
Example:
>xheat on
Extra heat
>xheat off
Extra heat
>
: ON
: OFF
To configure the sensor heating, use the XHEAT command without
parameters. Enter the values after the question mark. The available
ranges include the following:
Extra heat RH -limit (heating
function starts-up above the
setpoint)
Extra heating temperature
Extra heating time
0 ... 100 %RH (default: 95 %RH)
0 ... 200 ºC (default: 100 ºC)
0 ... 255 s (default: 30 s)
To see the current values, use the XHEAT * command.
Example:
>xheat *
Extra heat
RH limit
Temperature
Duration
>
NOTE
:
:
:
:
OFF
95 %RH
100 'C
30 s
After the defined XHEAT duration, there is an additional cooling
time of 10 seconds before outputs are updated.
VAISALA _______________________________________________________________________ 51
User's Guide ______________________________________________________________________
This page intentionally left blank.
52 __________________________________________________________________ M210912EN-A
Chapter 5 ______________________________________________________________ Maintenance
CHAPTER 5
MAINTENANCE
This chapter contains information that is needed in basic maintenance
of the product.
Periodic Maintenance
Cleaning
Clean the probe with a soft, lint-free cloth moistened with mild
detergent.
Changing the Probe Filter
1.
Remove the filter from the probe.
2.
After removing the filter, check the O-ring and change it if
necessary. See Figure 13 on page 55.
3.
Install a new filter on the probe.
New filters can be ordered from Vaisala, see section Options and
Accessories on page 78.
VAISALA _______________________________________________________________________ 53
User's Guide ______________________________________________________________________
Changing the Sensor
You can change the HUMICAP® sensor yourself and the probe does
not have to be sent in for service for a sensor change.
NOTE
Both HUMICAP®180 and HUMICAP®180R sensors can be changed,
but you must never replace a HUMICAP®180 sensor with a
HUMICAP®180R sensor or vice versa.
To change the sensor:
1.
Remove the filter from the probe. See the instructions in section
Changing the Probe Filter on page 53.
2.
After removing the filter, check the O-ring and change it if
necessary. See Figure 13 on page 55.
3.
Remove the damaged sensor and insert a new one. Handle the
new sensor by the plastic socket. DO NOT TOUCH THE
SENSOR PLATE.
4.
After sensor change the humidity calibration must be done
according to the instructions, see section Relative Humidity
Adjustment after Sensor Change on page 67.
5.
Attach a new filter on the probe.
54 __________________________________________________________________ M210912EN-A
Chapter 5 ______________________________________________________________ Maintenance
0802-159
Figure 13
Changing the Sensor
The following numbers refer to Figure 13 above:
1
2
3
4
=
=
=
Filter
O-ring
HUMICAP® sensor
Pt100 temperature sensor
VAISALA _______________________________________________________________________ 55
User's Guide ______________________________________________________________________
Error States
In an error state, the quantity is not measured and the output is shown
as follows:
- Analog channel outputs 0 V (you can use the AERR serial line
command to change this fault indication value, see section AERR
on page 46).
- The serial port outputs stars (***)
You can also check the error message via the serial interface by using
the ERRS command. In case of constant error, please contact Vaisala,
see Vaisala Service Centers on page 58.
Sometimes it is possible that the transmitter is not responding after
startup due to an error. If this happens, change the bauds to
19200 N 8 1 and then execute the ERRS command to see what error
caused the problem.
The possible error messages of HMP155 are listed in Table 14 below.
Table 14
Error Messages
Error Message
T MEAS error
T REF error
TA MEAS error
TA REF error
F MEAS error
F REF1 error
F REF3 error
Program flash
checksum error
Parameter flash
checksum error
INFOA checksum error
SCOEFS checksum
error
Description
Error in temperature
measurement
Error in temperature
measurement
Error in T-probe
measurement
Error in T-probe
measurement
Error in humidity
measurement
Error in humidity
measurement
Error in humidity
measurement
Internal error
Internal error
Internal error
Internal error
Action
Check the HUMICAP®
sensor.
Contact Vaisala Service
Center, see page 58.
Check the additional
temperature probe.
Contact Vaisala Service
Center, see page 58.
Check the HUMICAP®
sensor.
Contact Vaisala Service
Center, see page 58.
Contact Vaisala Service
Center, see page 58.
Contact Vaisala Service
Center, see page 58.
Contact Vaisala Service
Center, see page 58.
Contact Vaisala Service
Center, see page 58.
Contact Vaisala Service
Center, see page 58.
56 __________________________________________________________________ M210912EN-A
Chapter 5 ______________________________________________________________ Maintenance
Technical Support
For technical questions, contact the Vaisala technical support:
E-mail
[email protected]
Fax
+358 9 8949 2790
Return Instructions
If the product needs repair, please follow the instructions below to
speed up the process and to avoid extra costs to you.
1.
Read the section Warranty on page 9.
2.
Contact Vaisala Service Center or a local Vaisala representative.
The latest contact information and instructions are available
from www.vaisala.com. Addresses of the Service Centers are
provided in section Vaisala Service Centers on page 58.
Please have the following information on hand:
- serial number of the unit
- date and place of purchase or last calibration
- description of the fault
- circumstances in which the fault occurs/occurred
- name and contact information of a technically competent
person who can provide further information on the problem
3.
Pack the faulty product in a strong box of adequate size, with
proper cushioning material to avoid damage.
4.
Include the information specified in step 2 in the box with the
faulty product. Also include a detailed return address.
5.
Ship the box to the address specified by your Vaisala contact.
VAISALA _______________________________________________________________________ 57
User's Guide ______________________________________________________________________
Vaisala Service Centers
Vaisala Service Centers perform calibrations and adjustments as well
as repair and spare part services. See contact information below.
Vaisala Service Centers also offer accredited calibrations,
maintenance contracts, and a calibration reminder program. Do not
hesitate to contact them to get further information.
58 __________________________________________________________________ M210912EN-A
Chapter 6 ___________________________________________________Calibration and Adjustment
CHAPTER 6
CALIBRATION AND ADJUSTMENT
The Vaisala HUMICAP® Humidity and Temperature Probe HMP155
is fully calibrated and adjusted as shipped from factory.
Recommended calibration interval is one year. Depending on the
application, it is good to make more frequent checks. Calibration must
always be done when there is reason to believe that the device is not
within the accuracy specifications.
It is recommended that calibration and adjustment is carried out by
Vaisala. See section Vaisala Service Centers on page 58.
Calibration and adjustment can also be carried out either by using the
buttons on the probe or through the serial line connection.
NOTE
Vaisala recommends that RH adjustment is carried out as a two-point
adjustment. With one-point adjustment, the required accuracy can
only be achieved if the actual measurement environment (RH and T)
is the same as the one-point adjustment environment.
Before attempting calibration, the ADJ button has to be held down
until a green LED lights up. This turns off the heating and the
additional temperature probe in the case you are using an HMP155
with either of those options. After that HMP155 is ready to be
checked and calibrated. When the T-probe is turned off during
calibration, it does not need to be inserted into the same reference
conditions with the humidity probe.
If a chemical purge option is available, it should always be carried out
before calibration.
VAISALA _______________________________________________________________________ 59
User's Guide ______________________________________________________________________
NOTE
Button calibration is not available for the additional temperature
probe. In the passive output version of HMP155, the temperature
cannot be calibrated.
0801-076
Figure 14
HMP155 Adjustment Buttons
The following numbers refer to Figure 14 above:
1
2
3
4
5
=
=
=
=
=
Protective cover
Down button
ADJ button
Up button
Protective plug
There is a two-colour indicator LED located under the protective plug
and next to the Down button, see Figure 14 above. The LED is green
and red.
60 __________________________________________________________________ M210912EN-A
Chapter 6 ___________________________________________________Calibration and Adjustment
NOTE
If you are using a warmed probe (HMP155 active output version
option), probe heating will be interrupted when ADJ button is
pressed, see Figure 14 on page 60. Allow sufficient time for the probe
to reach ambient temperature before starting the adjustment
procedure.
NOTE
Fixed pressure compensation value of 1.01325 bar is used when in
adjustment mode.
Push-Button Calibration
Calibration and adjustment of the HMP155 can be done by using the
adjustment buttons found on the probe. The two-point humidity
adjustment is carried out by using two relative humidity references:
for example saturated salt points 11 % RH (LiCl) and 75 % RH
(NaCl). The difference between the two humidity reference points
must be at least 30 %RH. The difference between the two temperature
reference points must be at least 30 °C.
NOTE
In push-button calibration, the probe outputs are by default relative
humidity in the range 0…100 %RH in CH1 and temperature in the
range -40…+60°C in CH2.
Two-Point Humidity and
Temperature Adjustment
To make a humidity or temperature adjustment:
1.
Carry out the chemical purge (if available).
2.
Uncover the adjustment buttons on the probe by removing the
protective cover and removing the calibration seal.
3.
Open the protective plug and you can see three buttons marked , □ and +. There is also a two-coloured indicator LED. See
Figure 14 on page 60.
4.
Press the ADJ button and hold it down until the green indicator
LED lights up. This puts HMP155 in RH calibration mode.
VAISALA _______________________________________________________________________ 61
User's Guide ______________________________________________________________________
5.
NOTE
Do not touch the adjustment buttons before the conditions have
stabilized. This takes approximately 30 minutes.
6.
NOTE
Insert the probe into the high end reference chamber (for
example, NaCl: 75 % RH chamber in the humidity calibrator
HMK15) and do the high humidity gain adjustment by using the
- and + buttons to make sure the Aout voltage is correct. To finish
the RH calibration, press the ADJ button and the red indicator
LED lights up.
If you do not wish to perform the temperature adjustment at this time,
press ADJ -button two times and the indicator LED turns off. After
reset, HMP155 exits the calibration mode. Otherwise, continue
following the instructions from step 8 onwards.
8.
NOTE
Using the - and + buttons, make sure the Aout voltage is correct
and press the ADJ button. Green indicator LED turns off and
back on.
Do not touch the adjustment buttons before the conditions have
stabilized.
7.
NOTE
Remove the filter and insert the probe into a measurement hole
of the dry end reference chamber (for example, LiCl: 11 % RH)
to do the low humidity offset adjustment.
Insert the probe into a known reference temperature (if HMK15
Humidity Calibrator is not used) and let the temperature reading
stabilize.
Do not touch the adjustment buttons before the conditions have
stabilized.
9.
Using the - and + buttons, make the temperature offset
adjustment by making sure the Aout voltage is correct and press
the ADJ button. Red indicator LED turns off and back.
62 __________________________________________________________________ M210912EN-A
Chapter 6 ___________________________________________________Calibration and Adjustment
NOTE
If you do not wish to perform the two-point temperature adjustment at
this time, press the ADJ button one more time so that the red
indicator LED turns off. After reset, HMP155 exits the calibration
mode. Otherwise, continue following the instructions from step 10
onwards.
10.
NOTE
Insert the probe into another reference temperature.
Do not touch the adjustment buttons before the conditions have
stabilized.
11.
Using the - and + buttons, make the temperature gain adjustment
by making sure the Aout voltage is correct.
12.
Press the ADJ button and the red indicator LED turns off.
One-Point Humidity and
Temperature Adjustment
To make a one-point humidity or temperature adjustment:
NOTE
1.
Carry out the chemical purge (if available).
2.
Uncover the adjustment buttons on the probe by removing the
protective cover and removing the calibration seal.
3.
Open the protective plug and you can see three buttons marked , □ and +. There is also a two-coloured indicator LED. See
Figure 14 on page 60.
4.
Remove the filter and insert the probe into a measurement hole
of the salt chamber to do the humidity adjustment.
5.
Press the ADJ button and hold it down until the green indicator
LED lights up. This puts HMP155 in RH calibration mode.
Do not touch the adjustment buttons before the conditions have
stabilized.
6.
Using the - and + buttons, make sure the Aout voltage is correct
and press the ADJ button. Green indicator LED turns off and
back on.
VAISALA _______________________________________________________________________ 63
User's Guide ______________________________________________________________________
NOTE
7.
To move on to the temperature adjustment, press the
ADJ button once and the red indicator LED lights up.
8.
Insert the probe into the reference temperature.
Do not touch the adjustment buttons before the conditions have
stabilized.
9.
Using the - and + buttons, make the temperature offset
adjustment by making sure the Aout voltage is correct and press
the ADJ button. Red indicator LED turns off and back on.
10.
Press the ADJ button one more time so that the red LED turns
off to indicate the probe has quit the calibration mode.
Passive Output Version PushButton Calibration
If you are operating a passive output version HMP155, the humidity
calibration is carried out similarly to calibration of the active output
version. After finishing the humidity adjustment, press the
ADJ button twice until the LED turns off. Reset the probe to exit the
calibration mode.
64 __________________________________________________________________ M210912EN-A
Chapter 6 ___________________________________________________Calibration and Adjustment
Serial Line Calibration
Two-Point Humidity Adjustment
Note that the difference between the two humidity references must be
at least 30 %RH.
To make a humidity adjustment:
1.
Connect the HMP155 to a PC. See section Serial Line
Communication on page 26. Open a terminal program.
2.
Carry out the chemical purge (if available).
3.
Press the ADJ button and the green LED lights up.
4.
Remove the filter from the probe and insert the probe into a
measurement hole of the dry end reference chamber (for
example, LiCl: 11 % RH).
5.
Enter the CRH command and press ENTER.
6.
Wait at least 30 minutes for the sensor to stabilize.
7.
Press ENTER a few times to check if the reading has stabilized.
8.
When the reading has stabilized, give the reference humidity
after the question mark and press ENTER.
>crh
RH :
RH :
RH :
Press
RH :
16.6675 1. ref ?
16.4978 1. ref ?
16.3956 1. ref ? 11.25
any key when ready ...
11.25 Ref2 ?
9.
Now the device is waiting for the high end reference. Insert the
probe into the measurement hole of the high end reference
chamber (for example, NaCl: 75 % RH chamber in the humidity
calibrator HMK15). Press any key when ready.
10.
Let the probe stabilize for about 30 minutes. You can follow the
stabilization by pressing ENTER.
11.
When stabilized, type the high end reference value after the
question mark and press ENTER.
RH
RH
RH
RH
OK
:
:
:
:
75.45
75.57
75.55
75.59
Ref2
Ref2
Ref2
Ref2
?
?
?
? 75.5
VAISALA _______________________________________________________________________ 65
User's Guide ______________________________________________________________________
12.
OK indicates that the adjustment has succeeded and the new
calibration coefficients are calculated and stored. Enter the
adjustment information (date and text) to the memory of the
transmitter; see the commands CTEXT and CDATE.
13.
Reset the probe with the RESET command.
14.
Take the probe out of the reference conditions and replace the
filter.
Two-Point Temperature Adjustment
NOTE
In the passive output version of HMP155, the temperature cannot be
calibrated.
Note that the difference between the two temperature references must
be at least 30 ºC.
To make a temperature adjustment:
1.
Press the ADJ button to enable the adjustment mode. This lights
up the green LED on the probe. If using a warmed probe for
measuring, probe heating will be interrupted when ADJ button
is pressed.
2.
Wait some time for the probe to reach ambient temperature.
3.
Enter the CT command (or CTA for additional T-probe) and
press ENTER.
4.
Press ENTER a few times to check if the reading is stabilized.
Let the reading stabilize, give the reference temperature after the
question mark and press ENTER three times.
Example (2-point adjustment):
>ct
T
:
T
:
T
:
Press
T
:
OK
>
5.
18.6038
18.6068
18.6098
any key
49.5176
1. ref ?
1. ref ?
1. ref ? 19.0
when ready ...
2. ref ? 50.0
Move the probe into another reference temperature and let the
reading stabilize. Give the reference temperature after the
question mark and press ENTER, see example above.
66 __________________________________________________________________ M210912EN-A
Chapter 6 ___________________________________________________Calibration and Adjustment
6.
OK indicates that the calibration has succeeded. Enter the
calibration information (date and text) to the transmitter's
memory; see the serial commands CTEXT and CDATE.
7.
Reset the probe with RESET command.
Relative Humidity Adjustment after
Sensor Change
After sensor change, carry out the procedure as described in previous
sections. Just replace the CRH command with the FCRH command.
FCRH
Example:
>fcrh
RH :
25.19 Ref1 ? 11.3
Press any key when ready ...
RH :
70.02 Ref2 ? 75.5
OK
>
The OK indicates that the calibration has been succesful.
One-Point Humidity and
Temperature Adjustment
One-point humidity and temperature adjustment can be done by using
the following serial line commands:
- CRH and FCRH commands for humidity adjustment
- CT and CTA commands for temperature adjustment
To make an adjustment, just enter the command , press space bar and
then enter the reference value, as in the example below.
Example:
Crh 20.0
OK
VAISALA _______________________________________________________________________ 67
User's Guide ______________________________________________________________________
User Adjustment Commands
You can use the user adjustment commands to display and set
parameters. You can only use LI command in ADJUST mode.
L
With the L command you can display user adjustment parameters.
Example:
>l
Cp offset
Cp gain
T offset
T gain
Ta offset
Ta gain
P offset
P gain
>
:
:
:
:
:
:
:
:
0.00000000E+00
1.00000000E+00
0.00000000E+00
1.00000000E+00
0.00000000E+00
1.00000000E+00
0.00000000E+00
1.00000000E+00
LI
With the LI command you can display and ask for new values for the
user adjustment parameters.
Example:
>li
Cp offset
Cp gain
T offset
T gain
Ta offset
Ta gain
P offset
P gain
>
NOTE
:
:
:
:
:
:
:
:
0.00000000E+00
1.00000000E+00
0.00000000E+00
1.00000000E+00
0.00000000E+00
1.00000000E+00
0.00000000E+00
1.00000000E+00
?
?
?
?
?
?
?
?
If you suspect that something has gone wrong with the calibration,
you can use the LI command to return the factory values by entering
the values shown in the example above.
68 __________________________________________________________________ M210912EN-A
Chapter 6 ___________________________________________________Calibration and Adjustment
Feeding Adjustment Information
The information added with the serial line commands below is shown
in the device information fields. You can only use CTEXT and
CDATE commands in ADJUST mode. To put HMP155 in adjustment
mode, just hold down the ADJ button until the green LED lights up.
CTEXT
Use the CTEXT command to enter text to the adjustment information
field.
Example:
>ctext
Cal. info
>
: Helsinki / FIN ? Finland
CDATE
Use the CDATE command to enter date to adjustment information
field. Set the adjustment date in format YYYYMMDD.
Example:
>cdate 20080320
>
Analog Output Adjustment
In the analog output calibration the analog output is forced to the
following values:
- Voltage output: 10 % and 90 % of the range
Connect HMP155 to a calibrated voltage meter in order to measure
voltage.
NOTE
Hold down the ADJ button until a green LED lights up. This puts the
HMP155 in ADJUST mode.
VAISALA _______________________________________________________________________ 69
User's Guide ______________________________________________________________________
NOTE
The serial line command ACAL cannot be used with HMP155
passive output version.
Enter the ACAL command and type the multimeter reading for each
case. Continue by pressing ENTER. When a channel is specified,
only the specified analog output channel is adjusted.
ACAL [0/1]
Example:
Ch 0:
>acal 0
U1 ( V ) ? 1.001
U2 ( V ) ? 9.011
Ch 1:
>acal 1
U1 ( V ) ? 2.0988
U2 ( V ) ? 8.8997
>
MI70 Check and Adjustment
Vaisala MI70 measurement indicator is an optional accessory that can
be used as a display or as a communication device for HMP155.
When it is used, HMP155 is powered via MI70.
With MI70 you can check the HMP155 easily on the field. Both the
active output version and the passive output version (only RH
displayed) can be checked with MI70.
In the active output version relative humidity, temperature and
additional T-probe temperature can be calibrated. In the passive output
version, only relative humidity calibration is possible.
70 __________________________________________________________________ M210912EN-A
Chapter 6 ___________________________________________________Calibration and Adjustment
To check and adjust HMP155 with MI70:
NOTE
1.
Connect HMP155 to MI70 by using a connection cable (Vaisala
item 221801).
2.
Turn MI70 on by pressing the power key and follow the
instructions given on the display.
When turning on the passive output version, always hold down the
ADJ button simultaneously.
3.
Activate the adjustment mode by holding down the ADJ button
on the probe until the message below appears on the MI70
display.
4.
Press OK to move on to the adjustment and select the quantity
you want to adjust. The list of quantities displayed in the figure
below vary according to the configuration of your HMP155.
5.
Follow the instructions given on the display to finish the
adjustment.
VAISALA _______________________________________________________________________ 71
User's Guide ______________________________________________________________________
This page intentionally left blank.
72 __________________________________________________________________ M210912EN-A
Chapter 7 ____________________________________________________________ Technical Data
CHAPTER 7
TECHNICAL DATA
This chapter provides the technical data of the product.
Performance
Relative Humidity
Measurement range
0 ... 100 %RH
Accuracy (including non-linearity, hysteresis and repeatability)
at +15 … 25 °C (59 … 77 °F)
± 1 % RH (0 ... 90 % RH)
± 1.7 % RH (90 ... 100 %RH)
at -20 … +40 °C (-4 … 104 °F)
± (1.0 + 0.008 × reading) % RH
at -40 … -20 °C (-40 … -4 °F)
± (1.2 + 0.012 × reading) % RH
at +40 … +60 °C (104 … 140 °F) ± (1.2 + 0.012 × reading) % RH
at -60 … -40 °C (-76 … -40 °F) ± (1.4 + 0.032 × reading) % RH
Factory calibration uncertainty (+20 °C)
± 0.6 % RH (0 ... 40 % RH)
± 1.0 % RH (40 ... 97 % RH)
(Defined as ± 2 standard deviation limits.
Small variations possible, see also
calibration certificate.)
Recommended humidity sensor
HUMICAP®180R
HUMICAP®180RC
for typical applications
for applications with chemical purge
and/or warmed probe
Response time for HUMICAP®180R(C)
at 20 °C in still air with sintered PTFE filter
63 %
20 s
90 %
60 s
VAISALA _______________________________________________________________________ 73
User's Guide ______________________________________________________________________
Temperature
Measurement range
Accuracy with voltage output
at -80 … +20 °C
at +20 … +60 °C
Accuracy with passive (resistive) output
According to IEC 751 1/3
Class B
Accuracy with RS-485 output
at -80 … +20 °C
at +20 … +60 °C
See graph below
-80 ... +60 °C (-112 ... +140 ºF)
± (0.226 - 0.0028 x temperature) °C
± (0.055 + 0.0057 x temperature) °C
± (0.1 + 0.00167 x |temperature|) °C
± (0.176 - 0.0028 x temperature) °C
± (0.07 + 0.0025 x temperature) °C
0804-032
Figure 15
Accuracy over Temperature Range: Voltage and
RS-485
Temperature sensor
Response time (63 %) for additional
temperature probe in 3 m/s air flow
63 %
90 %
Pt 100 RTD 1/3 Class B IEC 751
< 20 s
< 35 s
Operating Environment
Operating temperature range
for humidity measurement
Storage temperature range
Electromagnetic compatibility
-80 ... +60 °C (-112 ... +140 °F)
-80 ... +60 °C (-112 ... +140 °F)
Complies with EMC standard
EN61326-1, Electrical equipment for
measurement control and laboratory use EMC requirements for use in industrial
locations.
74 __________________________________________________________________ M210912EN-A
Chapter 7 ____________________________________________________________ Technical Data
Calculated Variables
Table 15
Calculated Variables
Quantity
Dewpoint / Frostpoint
Temperature (Td/f)
Dewpoint Temperature (Td)
Mixing ratio (x)
Wetbulb temperature (Tw)
Abbreviation Metric Unit Non Metric
Unit
TDF
ºC
ºF
TD
X
TW
ºC
g/kg
ºC
ºF
gr/lb
ºF
Accuracies of Calculated Variables
Accuracies of the calculated variables depend on the calibration
accuracy of the humidity and temperature sensors; here the accuracies
are given for ± 2 %RH and ± 0.2 °C.
Accuracy of Dewpoint
Temperature °C
Temp.
-40
-20
0
20
40
60
Relative humidity
10
20
30
1.86 1.03
0.76
2.18 1.19
0.88
2.51 1.37
1.00
2.87 1.56
1.13
3.24 1.76
1.27
3.60 1.96
1.42
40
0.63
0.72
0.81
0.92
1.03
1.14
50
0.55
0.62
0.70
0.79
0.88
0.97
60
0.50
0.56
0.63
0.70
0.78
0.86
70
0.46
0.51
0.57
0.64
0.71
0.78
80
0.43
0.48
0.53
0.59
0.65
0.72
90
—
—
0.50
0.55
0.61
0.67
100
—
—
0.48
0.53
0.58
0.64
Accuracy of Mixing Ratio g/kg
(Ambient Pressure 1013 mbar)
Temp.
-40
-20
0
20
40
60
Relative humidity
10
20
30
0.003 0.003 0.003
0.017 0.018 0.019
0.08 0.09
0.09
0.31 0.33
0.35
0.97 1.03
1.10
2.68 2.91
3.16
40
0.003
0.021
0.10
0.37
1.17
3.43
50
0.003
0.022
0.10
0.39
1.24
3.72
60
0.004
0.023
0.11
0.41
1.31
4.04
70
0.004
0.025
0.11
0.43
1.38
4.38
80
0.004
0.026
0.12
0.45
1.46
4.75
90
—
—
0.13
0.47
1.54
5.15
100
—
—
0.13
0.49
1.62
5.58
VAISALA _______________________________________________________________________ 75
User's Guide ______________________________________________________________________
Accuracy of Wet Bulb
Temperature °C
Temp.
-40
-20
0
20
40
60
Relative humidity
10
20
30
0.20 0.20
0.20
0.21 0.21
0.22
0.27 0.28
0.28
0.45 0.45
0.45
0.84 0.77
0.72
1.45 1.20
1.03
40
0.20
0.22
0.29
0.44
0.67
0.91
50
0.20
0.22
0.29
0.44
0.64
0.83
60
0.20
0.22
0.29
0.44
0.61
0.76
70
0.20
0.23
0.30
0.43
0.58
0.71
80
0.20
0.23
0.30
0.43
0.56
0.67
90
—
—
0.31
0.42
0.54
0.63
100
—
—
0.31
0.42
0.52
0.60
Accuracy of Dewpoint
Measurement
Find the intersection of the dewpoint temperature curve and the
dewpoint difference reading (process temperature-dewpoint
temperature) on the x-axis and read the accuracy in dewpoint
measurement on the y-axis.
0508-017
Figure 16
Accuracy of Dewpoint Measurement
76 __________________________________________________________________ M210912EN-A
Chapter 7 ____________________________________________________________ Technical Data
Inputs and Outputs
Outputs
Voltage output
Resistive Pt100 4-wire connection
RS-485
Note: minimum operating voltages
0…5 V output
0…10 V output, probe heating,
chemical purge or XHEAT
Average current consumption
(+15 VDC, load 100 kOhm))
0…1 V output
0…10 V output
RS-485
During chemical purge
With warmed probe
Operating voltage
Settling time at power-up
Voltage output
RS-485
0 ... 1 V, 0 ... 5 V, 0 ... 10 V
12 V
16 V
< 3 mA
+ 0.5 mA
< 4 mA
max. 110 mA
max. 150 mA
7 ... 28 VDC
2s
3s
Mechanics
User cable connector
Connection cable lengths
Cable coating
Max wire size
Additional temperature probe cable length
Additional temperature probe material
Service cables
Filter
Housing material
Housing classification
Weight
Probe
3.5 m cable
30 m cable
M12 series 8-pin connector
(male)
3.5 m, 10 m or 30 m
PUR
AWG 26
2m
Stainless steel (AISI 316L)
USB connection cable 1.45 m
(Item 221040)
MI70 connection cable
(Item 221801)
Sintered PTFE
PC
IP66
86 g
159 g
1260 g
VAISALA _______________________________________________________________________ 77
User's Guide ______________________________________________________________________
Options and Accessories
Table 16
Options and Accessories
Description
Item code
SENSORS
HUMICAP180R
HUMICAP180R
HUMICAP180
HUMICAP180
FILTERS
Sintered Teflon Filter + O-ring
219452SP
TRANSMITTER MOUNTING ACCESSORIES
T-probe Installation Adapter for
221069
DTR13
T-probe Installation Adapter for
221072
DTR502B
HMP155 and T-probe Installation
221321
Adapter for Stevenson Screen
CONNECTION CABLES
USB Cable
221040
MI70 Connection Cable
221801
Connection Cable 3.5m 8-pin M12
220496
Connection Cable 10m 8-pin M12
220497
Connection Cable 30m 8-pin M12
220498
OTHER
Protection Set for Calibration
221318
Buttons: protective cover, 2 O-rings
and protective plug
Humidity Calibrator HMK15
See HMK15 order form
78 __________________________________________________________________ M210912EN-A
Chapter 7 ____________________________________________________________ Technical Data
Dimensions in mm (inches)
HMP155 Probe
279 [10.98]
266 [10.47]
Ø12 [0.47]
20 [0.79]
40 [1.57]
86 [3.39]
24 [0.94]
0801-077
Figure 17
Probe Dimensions
Additional Temperature Probe
0801-078
Figure 18
Additional Temperature Probe Dimensions
VAISALA _______________________________________________________________________ 79
User's Guide ______________________________________________________________________
This page intentionally left blank.
80 __________________________________________________________________ M210912EN-A
Appendix A ______________________________________________________ Calculation Formulas
APPENDIX A
CALCULATION FORMULAS
This Appendix contains the formulas used for the calculated output
quantities.
The HMP155 series probe measures relative humidity and
temperature. From these values dewpoint and frostpoint, mixing ratio,
wet bulb temperature, absolute humidity and enthalpy in normal
pressure are calculated using the following equations:
Dewpoint/frostpoint:
Td / f =
237.3
⎛
⎞
⎜
⎟
7.5
⎜
− 1⎟⎟
⎜
⎛ Pw ⎞
⎜⎜ 10 log⎜
⎟ ⎟⎟
⎝ 6.1078 ⎠ ⎠
⎝
+ 273.15
(1)
Pw is the water vapor pressure. Dewpoint/frostpoint is measured in
Kelvin.
Mixing ratio:
x = 621.99 ×
Pw
p - Pw
(2)
Absolute humidity:
A=C×
Pw
T
(3)
VAISALA _______________________________________________________________________ 81
User's Guide ______________________________________________________________________
where
C
=
216.679
Enthalpy:
h = T ⋅ (1.01 + 0.00189 ⋅ x) + 2.5 ⋅ x
(4)
The water vapor saturation pressure at temperature Tpws is calculated
over water and over ice by using four equations (5-8). These formulas
are taken from Hyland, R.,Wexler, A.:Formulations of the
Thermodynamic Properties of the Saturated Phases of H2O from
173.15 K to 473.15 K, Ashrae transactions 1983, Part 2A. pp 500-513.
PWS over water:
3
Θ = T − ∑ C i T pws
i
(5)
i =0
PWS over ice:
Θ = T pws
(6)
where:
Tpws =
Ci =
C0 =
C1 =
C2 =
C3 =
temperature in K
coefficients
4.931358
-0.46094296 * 10-2
0.13746454 * 10-4
-0.12743214 * 10-7
82 __________________________________________________________________ M210912EN-A
Appendix A ______________________________________________________ Calculation Formulas
Over water:
100 × ln PwsWATER =
3
b−1
+ ∑ bi Θ i + b4 ln Θ
Θ b =0
(7)
Over ice:
100 × ln PwsICE =
4
a −1
+ ∑ ai Θ i + a 6 ln Θ
Θ b =0
(8)
where:
bi
b-1
b0
b1
b2
b3
b4
ai
a-1
a0
a1
a2
a3
a4
a6
=
=
=
=
=
=
=
=
=
=
=
=
=
=
=
Coefficients over water
-0.58002206 * 104
0.13914993 * 101
-0.48640239 * 10-1
0.41764768 * 10-4
-0.14452093 * 10-7
0.65459673 * 101
Coefficients over ice
-0.56745359* 104
0.63925247* 101
-0.96778430* 10-2
0.62215701* 10-6
0.20747825* 10-8
-0.94840240* 10-12
0.41635019* 101
The water vapor pressure is calculated using:
Pw = RH ⋅
Pws
100
(9)
Parts per million by volume is calculated using:
ppmv = 106 ⋅
Pw
( p − Pw )
(10)
VAISALA _______________________________________________________________________ 83
User's Guide ______________________________________________________________________
Symbols:
Td
Pw
Pws
RH
x
p
A
T
h
Θ
=
=
=
=
=
=
=
=
=
=
dewpoint temperature (°C)
water vapor pressure (hPa)
water vapor saturation pressure (hPa)
relative humidity (%)
mixing ratio (g/kg)
atmospheric pressure (hPa)
absolute humidity (g/m3)
temperature (K)
enthalpy (kJ/kg)
virtual temperature
84 __________________________________________________________________ M210912EN-A
www.vaisala.com



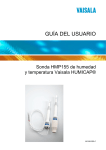


![View a product catalog[PDF/2.6 MB]](http://vs1.manualzilla.com/store/data/005774435_1-dc111fa54cd2566039eb2197a73b68ea-150x150.png)