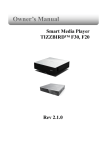
1
Owner’s Guide Smart TV Stick TIZZBIRD™ N1 Rev 3.1.0 Table of Contents 1 2 3 4 5 6 7 Safety Notice ............................................................................. 4 Features .................................................................................... 5 Specifications ............................................................................ 6 Description of Each Part ............................................................. 7 Package Contents ...................................................................... 8 Installation and Connection ........................................................ 9 Initial Setup Wizard .................................................................. 12 1) 2) 3) 4) 5) 6) Language Setup .............................................................................................................. 12 Video Output Setup ........................................................................................................ 13 Screen Fitting Setup....................................................................................................... 14 Network Setup ................................................................................................................ 14 Time Zone & Weather Location Setup .......................................................................... 16 Theme Setup ................................................................................................................... 17 8 Using Remote Controller............................................................ 18 9 The Home Screen (Android Theme) ............................................ 20 10 Start Up and Terminate ............................................................. 22 10.1 10.2 10.3 10.4 Home Screen (Tizzbird Theme) ..................................................................................... 22 Cover-View Style ............................................................................................................ 23 Movie Browser ................................................................................................................ 23 Turning Power Off, Completely Power Off ................................................................... 24 11 Watching Movie ........................................................................ 25 11.1 11.2 11.3 11.4 11.5 11.6 11.7 11.8 11.9 11.10 11.11 11.12 11.13 11.14 11.15 11.16 11.17 Movie Browser ................................................................................................................ 25 Control Widget at Browser Screen ............................................................................... 25 Selecting Device ............................................................................................................. 26 Movie Browser Menu...................................................................................................... 27 To Add Movie Poster ...................................................................................................... 28 Synopsis Screen .............................................................................................................. 30 Resume and Bookmark .................................................................................................. 31 Movie Playback Menu .................................................................................................... 32 Playback Speed Control ................................................................................................. 33 Searching Menu (Time, Chapter, Bookmark) .............................................................. 33 Playback Information Menu .......................................................................................... 34 Subtitle Menu.................................................................................................................. 34 Audio Menu ..................................................................................................................... 34 Video Parameter Menu .................................................................................................. 35 Playback 3D Format Movies .......................................................................................... 35 Skip Playback Position ................................................................................................... 35 Movie Playback Controller ............................................................................................. 36 12 Listening Music ........................................................................ 37 12.1 12.2 12.3 12.4 Music Browser ................................................................................................................ 37 Sorting Music .................................................................................................................. 38 Music Playback Screen ................................................................................................... 38 Music Playback Menu ..................................................................................................... 38 13 Watching Photo ....................................................................... 39 13.1 13.2 13.3 13.4 13.5 Photo Browser ................................................................................................................ 39 Photo Browsing Menu .................................................................................................... 39 Photo Wall ....................................................................................................................... 39 Photo Playback Screen .................................................................................................. 40 Slideshow Control .......................................................................................................... 40 14 Posters, Album Art and Photo Arrangements .............................. 41 2 15 Using File Browser ................................................................... 47 15.1 15.2 15.3 15.4 File Browser Screen ....................................................................................................... 47 Selecting Device at File Browser .................................................................................. 48 Register Subtitle Font File ............................................................................................. 48 Using File Operation ....................................................................................................... 49 16 Connecting Internet ................................................................ 51 16.1 16.2 Execute Internet Browser ............................................................................................. 51 Control Internet Browser .............................................................................................. 51 17 Install and Execute Application .................................................. 52 17.1 17.2 Move applications at Android Phone to TizzBird ......................................................... 52 Execute Application........................................................................................................ 52 18 Settings .................................................................................... 53 18.1 18.2 18.3 18.4 18.5 18.6 18.7 System ............................................................................................................................. 53 Audio and Visual ............................................................................................................. 56 Movie ............................................................................................................................... 57 Music................................................................................................................................ 58 Photo ............................................................................................................................... 59 Network ........................................................................................................................... 60 Cover-View ...................................................................................................................... 60 19 Connecting Network Server or NAS ............................................ 61 19.1 19.1.1 19.1.2 19.1.3 19.1.4 19.1.5 19.2 19.2.1 19.2.2 19.3 Network connection using NFS ..................................................................................... 61 Downloading TizzNFS Server ........................................................................................ 61 Executing TizzNFS Server & Configuration .................................................................. 61 Downloading other NFS Server ..................................................................................... 62 Executing freeNFS Server & Configuration .................................................................. 62 Connecting NFS Server at Device ................................................................................. 63 Network Connection using Samba ............................................................................... 65 Activating PC Share ........................................................................................................ 65 Connecting Samba Server at Device ............................................................................ 65 Accessing Network Drive at File/ Media Browser ....................................................... 67 20 Using DLNA ............................................................................. 68 20.1 20.2 20.3 Preparation for DMR ...................................................................................................... 69 Sending Smartphone’s Contents - iMediaShare APP .................................................. 70 Sending Smartphone’s Contents - TWONKY APP ........................................................ 73 21 Firmware Upgrade .................................................................... 75 21.1 21.2 21.2.1 21.2.2 Online Upgrade (O.T.A – Over the Air Upgrade) ......................................................... 75 Local Upgrade ................................................................................................................. 75 Upgrade at Settings Screen ........................................................................................... 75 Upgrade at File Browser ................................................................................................ 76 22 Using N1 as a Mass Storage ....................................................... 77 23 How to Fix Booting Failure......................................................... 78 23.1 23.2 23.3 23.3.1 23.3.2 Abstract ........................................................................................................................... 78 Repairing by Safe Mode Booting................................................................................... 78 Repairing by System Recovery Mode ........................................................................... 78 Preparation ..................................................................................................................... 78 Entering System Recovery Mode .................................................................................. 79 24 GNU General Public License ....................................................... 81 3 1 Safety Notice Do not try to disassemble the unit. It may cause malfunction or fire. Keep away the unit from magnetized devices. It may erase the data stored in the HDD drive inside. Do not place the unit in places that are exposed to oil, water, dust, humidity, rain or wind. Keep away the unit from overheated areas, such as heaters. Place it well ventilated location. Ensure that a free airflow is maintained around the unit. . Do not touch the power plug with wet hands or use defective power cables and electric outlets. It may cause electric shocks or fire. . Do not drop or shock the unit from heights. Doing so may cause serious damage to the parts inside. Unplug the power cable when the device is not used for a long time. 4 2 Features Tizzbird N1 is so small that let you install it directly to HDMI port of any TV. The power will be supplied by USB port of TV, so no need to install another power adapter. Tizzbird playbacks various full HD movie contents including DVD backup formats as well as AVI, MKV, XVID and TS formats on TV. It supports most recent video formats such as H264 and VC-1. TizzBird provides a full web-browsing capability very similar like PC. Mouse and keyboard can be attached to support various inputs, which enable slick Internet surfing even on the big screen TV. TizzBird playbacks high resolution photo images on TV. It can slideshow the photos while playing back the music in background. Transition effects such as fade-in-out or zooming can be applied during transition of each photo. TizzBird playbacks high quality lossless music such as FLAC, WAV up to 24bit/ 96Khz. It also supports compressed MP3, OGG, AAC and CUE format thru high fidelity Wolfson DAC. TizzBird runs applications on TV exact same APPs installed on the Android Smartphone without any conversion. This also includes 3D games or 3D APPs that utilize the superb OPEN-GL 3D accelerator. Some APPs that fixed screen-aspect ratio cannot be applicable in some cases. It also supports 802.11n Wi-Fi which enables faster wireless networking ever before. TizzBird supports NFS, SAMBA, uPnP network protocols to connect various servers. It also has multiple mounting drive options and automatic browsing capability which maximize the network connection experience. 5 3 Specifications Model TizzBird Stick N1 System TCC8925 Cortex-A5 800Mhz CPU/ 256KB L2 Cache 512M Memory(N1M model)/ 1GB Memory(N1G model)/ 4GB T-flash Booting time from stand-by is less than three seconds. OS Android Rev 4.0 Ice cream sandwich Video Format: AVI/ MKV/ MPG/ WMV/ VOB/ TP/ TRP/ M2TS/ MOV/ FLV/ IFO/ ISO Codec: MPEG 1/2/4, H264, XVID, WMV9([email protected]) VC-1(AP@L3) Resolution: Max 1080p 60Hz Audio MP3/ OGG/ WAV/ AAC/ FLAC/ APE/ WMA Dolby Digital / DTS Down Mixing and Pass-thru Image JPG, JPEG, BMP, PNG, GIF Connection USB 2.0 Host Port 1 EA USB 2.0 OTG Port 1EA (by Cable) Wireless Wi-Fi 802.11n (Embedded) Network Protocol : Samba (CIFS)/ NFS/ uPnP Video Output HDMI 1.3a Audio Output HDMI File System NTFS, FAT32 Subtitle smi, smil, sub, sub/idx, srt, ssa, ass Power Optional 5V 1A power adapter Languages English, French, German, Spanish, Italian, Portuguese, Vietnamese, Swedish, Czech Norwegian, Danish, Japanese, Korean, Traditional Chinese Dimension 75 x 23 x 15 mm 6 4 Description of Each Part Micro USB port HDMI port To connect power and IR receiver cable To connect TV. Connectors Please connect the unit to HDMI port of the TV. Please connect the FLASH DRIVE, MOUSE or KEYBOARD on the USB host port. Please connect MOUSE or KEYBOARD on the USB OTG port. * USB host DOES NOT PROVIDE enough POWER to drive 2.5” HDD. Please use HDD drive with external power supply. * USB OTG port only allows connection of MOUSE or KEYBOARD. 7 5 Package Contents The TizzBird package contains the following items. The shape of items described below may slightly different from the actual contents. Main Unit Remote Controller Y-Cable Quick Guide 8 Power Adapter 6 Installation and Connection Connecting to TV The TizzBird supports HDMI audio and video output for connection to a TV. Connection to HDMI Out Power Cable Connection Connect the TizzBird N1 HDMI to your TV. HDMI can also transfer the audio signal and no need to connect another cable for audio. Connect the power cable of TizzBird N1 to the TV USB port like below. If you experience some problem during playback, you may connect supplied power adapter. 9 Connecting to AV Receiver Tizzbird N1 can be connected to HDMI input AV receiver. Please select the appropriate input at the audio receiver using remote controller after connection. Connection to AV Receiver Connect the Tizzbird N1 HDMI to your AV receivers’ HDMI input. Then connect the AV receivers’ HDMI output to the TV input. 10 Connecting USB Device TizzBird provides two USB 2.0 host ports to connect various external devices, such as FLASH MEMORY drive, external USB HDD enclosure, digital camera/camcorder, keyboard & mouse, or USB video-cam & microphone. Caution!! To connect any external 2.5” HDD drive, please DO USE EXTERNAL POWER SUPPLY of HDD or Y-CABLE for that. The N1 does not guarantee the power to drive the external HDD under any circumstances. The external HDD should be connected to the USB port of device, not USB port on the cable. Recommendation The USB host port on the cable should be used for mouse, keyboard or flash drive. It’s actually USB 2.0 OTG port so may cause compatibility or performance problem on some devices. 11 7 Initial Setup Wizard Initial setup consists of 6 steps of WIZARD style sequences. The sequence of WIZARD will be LANGUAGE SETUP VIDEO OUTPUT SETUP SCREEN FITTING NETWORK SETUP TIME&WEATHER SETUP THEME SETUP The PREV/ NEXT button on the top side of each screen will bring the PREV/ NEXT step 1) Language Setup The first step is setup the menu language. The setup wizard will enumerate all the languages available at this moment. Please select one of the menu languages for your use. 12 2) Video Output Setup The video resolution selection screen will appear as above. Please select the appropriate video output for the display. If you select, the pop-up will ask you keep resolution change or not. If the pop-up screen will appear, please select “Keep It”. 13 3) Screen Fitting Setup The 3rd step is fitting the screen size according to user’s TV. Clicking UP/DOWN button at left-bottom side will increase/ decrease the screen size accordingly. Press OK when done. 4) Network Setup The 4th step is setting up network. Wi-Fi can be configured here. If Wi-Fi button were pressed, the following screen will enumerate all available Wi-Fi AP. Select one of them and click it. 14 The next page screen will pop up to configure the Wi-Fi. Typing the password will finalize the Wi-Fi setup and Internet connection will be made. 15 5) Time Zone & Weather Location Setup The next step is setting up time zone and weather location. Tizzbird provides automatic setup for those as long as network is connected. To setup the time-zone, select the TimeZone button as above screen. Then select “AUTO” if Internet is connected. Otherwise, you can manually input the time-zone. The weather location setup is almost the same. Select “Weather Location” then select “Auto” button if network is connected. 16 6) Theme Setup The final step is setting up theme. Tizzbird N1 provides two type of theme, one is the Android theme, the other is Tizzbird classic theme. If you are familiar with smart phone user interface, please choose “Android”. If you are more familiar with multimedia player, then choose TizzBird theme. The theme can be selected freely at settings later. 17 8 Using Remote Controller 18 19 9 The Home Screen (Android Theme) The HOME SCREEN is very similar with smart phone. The APPs can be located at the surface of HOME SCREEN freely, while the specific browsers like MOVIE/ MUSIC/ PHOTO/ FILE/ WEB/ APP browser will stick as icons at the bottom side of HOME SCREEN. The several WIDGETs will help the user navigate thru the screen. Weather Widget shows the weather, calendar and time. Click the WEATHER WIDGET will bring the configuration screen of location and time-zone. The apps at APP browser can be moved by long-press the apps and drag it to the home screen just like the smart phone. Weather Widget Photo Music Movie App Status Widget File Settings Internet Click to bring left pane Control Widget 20 Click to bring right pane The CONTROL WIDGET lets users control the SCREEN and VOLUME by MOUSE. The CONTROL WIDGET cannot be accessible by REMOTE. It’s because one of the nature of Android. It’s only accessible by MOUSE. The same functional buttons are on the remote already. Please use them. Power Off Back Home Menu Volume Down Volume Up The STATUS WIDGET shows current status of each device. It will highlight when activated. Wi-Fi Click to configure it HDD Click to browse it USB Click to browse it 21 SD card Click to browse it Network Click to browse it (Active) or configure (Inactive) 10 Start Up and Terminate 10.1 Home Screen (Tizzbird Theme) The below HOME SCREEN will appear after booting up. It shows 7 different items. The each item can do the each designated browsing. For example, movies can be browsed at MOVIE BROWSER. HOME SCREEN consists of 7 browsers including (from left to right) FILE/ PHOTO/ MOVIE/ MUSIC/ SETTINGS/ APP/ WEB browsers. To execute each browser, select the browser by arrow buttons on the remote and press <OK> button. File Photo Music Movie Settings App Internet The default selection would be MOVIE BROWSER at first start-up. TizzBird is the unique unit compared to other units, since it retains consistent user-interface based on the powerful database feature of Android OS. TizzBird provides full featured cover-view and imaged oriented browsing, which is highly intuitive. The other units can only provide user interface, mostly text based information with additional images. Movie Browser: Register all movie files and let you browse them on poster based. Music Browser: Register all music files and let you browse them on album-art based. Photo Browser: Register all photo files and let you browse them on folder image based. Settings Browser: Browse available settings. App Browser: Browse registered applications and let you select and execute them. Web Browser: Let you surf Internet. File Browser: Browse files and folders based on the device based. (Legacy mode) 22 10.2 Cover-View Style TizzBird provides Open-GL 3D based Cover-View user interface. But unlike F20 and F30, N1 only provides the fixed mode of Cover-View style at each mode. 10.3 Movie Browser Movie browser will scan movie files on the devices when booting first or attaching external device thru USB. It will take several minutes (depends on size of HDD) for the 1st scanning. Once it’s scanned, it will take much less time on next boot. If movie posters are available for the movies, then cover-view screen like below will appear. 23 10.4 Turning Power Off, Completely Power Off To turn off the power, press <POWER> button on the remote or press power key on the front panel. The unit will be in “STAND-BY” status. Press power button on remote control more than 1 second will bring up the following POWER-OFF DIALOG BOX. Power Off Turn off power completely Reboot Reboot the system Stand-by Make it suspend mode This unit supports high speed booting mode from STAND-BY. It takes less than three seconds to resume to the normal operation status from STAND-BY mode. 24 11 Watching Movie 11.1 Movie Browser If MOVIE BROWSER is selected and if the posters were already scraped or registered for movies, then the following screen will appear. This screen is called “MOVIE BROWSER” screen. Up to 15 movies can be browsed at once per page. Arrow keys can be used to navigate thru posters. Keep press arrow key to browse continuously. 11.2 Control Widget at Browser Screen The each specific browser was changed to support the control widget. Clicking the control pop-up button will bring the CONTROL WIDGET. Control Popup Button 25 The control widget bar will appear to control the overall behavior of the browser. 11.3 Selecting Device The attached device can be selected by RED color button on the remote, like below picture. This kind of device selection can be also available at MUSIC and PHOTO BROWSER. [Device Selection] Selecting DATABASE will scan all the movie files on every device and show them. Selecting each device like HDD, USB or NETWORK DRIVE will just show the folders on that device. It will show the <Movie> folder on that device and will be browsed by FOLDER BASE. 26 11.4 Movie Browser Menu <MENU> button at “MOVIE BROWSER” can be used to do various actions including searching movies, scraping movie posters, jumping based on bookmarks & resuming lists. Press <MENU> button on the remote. “SEARCH” menu like above picture lets you search the movie quickly based on the title names and other information. Press <OK> to bring the following image. Use <UP> or <DOWN> arrow key to select the index, <LEFT> <RIGHT> arrow key let you change the digit of the wheel control, so titles can be browsed fast. Press <OK> to bring the poster of the selected movie. 27 11.5 To Add Movie Poster Movie posters should be added to make fancy movie browser like following screen. TizzBird has built-in poster downloader inside called <SCRAPER> which means scraping the movie information from network. Network should be connected before scraping movie posters. Please refer to section 8.8 to configure network settings. If movie does not have poster, the default image will appear like following screen. Press <MENU> to add movie poster. Select <Scrape Current > on the menu and press <OK>. 28 The following screen will appear when start scraping. The scraping will be performed based on the file name, so there can be a chance the file name is not correct or not good enough. In this case, scraping can be tried again on the same file. The dialog box will be pop-up to enter or revise the file name to scrape. Click the dialog box with mouse to bring the virtual keyboard, so the scraping file name can be changed. Press <DOWN> button on remote or click <SCRAPE> button on the dialog to restart the scraping. ※ It’s quite tedious to do the same things on all movies. There is a menu items to simplify those jobs. <Scrape Advanced> will run on the background since it will take quite long time to do the scraping. Movie can be playback still while the background job is running. Scrape All: Smart Scrape: Ignore previous scraping results, and restart scraping for all movies. Find not scraped files and start scraping. Scrape Files in the folder: Scrape all the files on the designated folder. ※ <Scrape files in the folder> is the only available item at the DEVICE mode. 29 11.6 Synopsis Screen The scraping consists of two steps. One is getting the movie poster, the other is getting the filmography including synopsis of the movie. If scraping is successful, the following screen will come out as a next when the poster is selected. It shows a synopsis, running time, release year, genre, director and actors. Rating Resolution Audio Codec Container Play Button The bottom side of the synopsis screen shows the additional movie information like rating, movie format & resolution and audio information. Click the “start “button on the synopsis screen or press “OK” button on remote to start playback movie. 30 11.7 Resume and Bookmark TizzBird provides RESUME function to the last playback position of movie, so it’s not necessary to search it again manually. Press <MENU> button at MOVIE BROWSER and select <RESUME> menu to pop-up the resuming list. The resume list will appear like following image. Select wanted movie to resume to last playback position. TizzBird also provides BOOKMARK function to memorize the scene position of movie. Press <BOOKMARK> button to memorize at wanted scene when playback the movie. Press <MENU> button at MOVIE BROWSER and select <BOOKMARK> menu to pop-up the bookmark list. The bookmark list will appear like following image. Select wanted movie and position to resume to bookmarked position. 31 11.8 Movie Playback Menu The information pane will appear at bottom side of screen as soon as movie starts like below picture. It will show title, running time, video and audio types. It also shows color buttons on the remote that can be used to control movie playback. RED color button: Select audio GREEN color button: Select and control subtitle parameters. BLUE color button: Select video parameters and 3D movie types. YELLOW color button: Show movie playback information. TizzBird provides various control functions during movie playback. These functions include <TIME/CHAPTER SEARCH>, <INFO>, <SUBTITLE>, <AUDIO> and <VIDEO> settings. Most of functions can be activated by pressing <MENU> button. Press <MENU> button to pop-up the following menu screen. 32 11.9 Playback Speed Control TizzBird provides various playback speeds and skip controls during playback including PAUSE/ FAST-FORWARD/ REWIND/ PREVIOUS/ NEXT. Press <PLAY/PAUSE> button to play or pause the playback. Press <PREV> or <NEXT> button to skip to previous or next chapter. Press <FF> button to fast-forward playback. It will change from 4x > 8x > 16x > 32x then again 4x if press continuously 빨리 감기(FF) Button을 누르면 배속으 Press <REWIND> button누르면 to rewind 로 재생합니다. 연속으로 4x playback. > -8x> … 8x 16x It will 32xchange 순으로-4x 바뀝니다. 11.10 Searching Menu (Time, Chapter, Bookmark) Press <MENU> button and select following image to search the movie by time, chapter or bookmark. Select <SEARCH> image. The following screen will appear after selecting <SEARCH> menu. Playback time position can be changed by arrows keys at wheel user interface. The CHAPTER or BOOKMARK field can be also appeared if they are available. Press <UP> or <DOWN> key to select time. 33 11.11 Playback Information Menu Select <INFO> image at movie playback menu to confirm the movie playback information. Select <INFO> image. The movie information and current playback position will appear like following image. 11.12 Subtitle Menu Select <SUBTITLE> image at movie playback menu to control the subtitle language, position, size, sync and font Select <SUBTITLE> image. The subtitle position would be lowest bottom side at 100% and would be top at 0%. 11.13 Audio Menu Select <AUDIO> image at movie playback menu if multiple audio tracks are available. Select <AUDIO> image. 34 Press <OK> after selecting audio format or language audio to change the audio track. 11.14 Video Parameter Menu Select <VIDEO PARAMETER> image at movie playback to change the video parameters like brightness, contrast or hue. Press <OK> after selecting the value to apply. 11.15 Playback 3D Format Movies TizzBird supports 3D files, if 3D display is available. The supported formats are SIDE-BYSIDE and TOP-AND-BOTTOM. - If file name contains 3D and SBS (or TNB) string, then it will turn TV into 3D mode automatically. - If file name does not contain 3D string, but it contains actually 3D contents, then BLUE button can be pressed to switch the TV into 3D mode. - The subtitle and menu will be switched 3D mode automatically as well. 11.16 Skip Playback Position Press <UP> or <DOWN> key during movie playback to skip movie playback position. The skip duration can be configured at <SETTINGS BROWSER> <MOVIE> <SKIP DURATION>. This function is quite simple to use to skip to the wanted scene . <UP> button Skip forward <DOWN> button Skip backward 35 11.17 Movie Playback Controller The MOVIE PLAYBACK screen was changed as well to support the MOUSE. The CONTROLLER will pop up when LEFT CLICK MOUSE button. Minimize button Menu buttons Playback control buttons Mute button + Volume Bar Scrollbar Click to move position The MENU BUTTON group consists of several menu buttons. Title Menu BD/DVD Subtitle Menu Audio Menu Info Menu 3D+Video Menu 36 Popup-Menu BD/DVD 12 Listening Music 12.1 Music Browser The following MUSIC BROWSER screen will appear if music files contain the album art at their tags. Press <LEFT> or <RIGHT> keys to move each direction. Keep pressing arrow keys to browsing continuously. The album-art screen will keep changing. Press <MENU> button to bring <SEARCH> or <SCRAPE> menu just like MOVIE BROWSER. 37 12.2 Sorting Music Music files at large capacity hard drive need to be sorted since it’s easy to organize and search. TizzBird provides various “SORTING” functions based on the powerful Android database. Press GREEN color button on remote to sort by ALBUM, ARTIST, TITLE or YEAR. The following two images show SORT BY GENRE and SORT BY YEAR. SORT BY GENRE 12.3 SORT BY YEAR Music Playback Screen Select album art to playback the selected music. The following image will appear. Left pane: Shows album-art image, current playback status and position. Right pane: Shows list of songs, song information and album-art thumbnail. Press <UP> or <DOWN> arrow key to browse songs and press <OK> to start playback. Now playing music will be shown in YELLOW and selected music in LIGHT GREEN color. Press <PREV> or <NEXT> button to turn pages, if there are more pages on the song list, 12.4 Music Playback Menu Available button when playback music is like this: <PLAY/PAUSE> button: play or pause the music <UP> or <DOWN> button: skip playback position designated at settings. 38 13 Watching Photo 13.1 Photo Browser The following PHOTO BROWSER screen will appear when selecting PHOTO BROWSER. It’s composed of superb folder thumbnails COVER-VIEW which is quite neat and intuitive. Each image shows thumbnails of photos that folder contains. 13.2 Photo Browsing Menu Press <MENU> button to bring quick <SEARCH FOLDER> function. 13.3 Photo Wall The following screen will appear after selecting one of the folder thumbnails. Photo wall can be used to select one of photos. Use arrow buttons to navigate the photos and press <OK> button to see the photo at full screen. 39 13.4 Photo Playback Screen Photo slide show will start automatically, so next photos will keep appearing with transition effect. The various TRANSITION EFFECTS can be configured at <SETTINGS BROWSER> <PHOTO>. 13.5 Slideshow Control Slideshow can be controlled by arrow and <PLAY/PAUSE> buttons. Press <PLAY/PAUSE> button to pause or resume to playback. Use arrow keys to change the slide direction. 40 14 Posters, Album Art and Photo Arrangements The arrangement of each browser and shape of each item can be configured at each browser. For example, you can change the number of items of movie browsers and shape of posters. Press <Menu> button on the remote at Movie Browser. The <Movie Settings> Menu was added to configure the movie browser directly. This will bring the <Settings Browsers> <Movie> directly. You can configure the movie posters arrangements and shape of posters. Press <Menu> button on the remote at Movie Browser. The <Movie Settings> Menu was added to configure the movie browser directly. This will bring the <Settings Browsers> <Movie> at movie browser. There are new setting items at PAGE2 of movie settings like above screen, which are <Browser 41 Mode> and <Browser Item Mode>. You can configure layouts of browsers at <Browser Mode> and configure shape of each item at <Browser Shape Mode>. For example, the <Browser Item Mode> will bring you the following screen to configure the border type, border alpha value, width, radius and item alpha. Alpha is transparency rate. For example, configure 8x3, rounded border and border width 3 will give you something like this movie browser. 42 This kind of configuration is also possible at MUSIC and PHOTO BROWSER. Please notice the following screen-shots. 43 For example, configure 6x3, rounded border and border width 3 will give you something like this music browser. Here’s the photo setting: 44 45 For example, configure 7x3, rounded border and border width 3 will give you something like this photo browser. 46 15 Using File Browser 15.1 File Browser Screen The following screen will appear when selecting FILE BROWSER. This is quite similar browser user interface that legacy media players provided before. Folder or file based browsing is possible on this browser, and selecting and playback the file directly. The left pane is FOLDER PANE, and the right pane is FILE PANE. Folders can be browsed by arrow keys and press <OK> button to select that folder. The files will be appeared on the right pane if that folder contains the files. The GREEN outline on the pane means it’s selected. Press <RIGHT> arrow button to move the FILE PANE and select the file. Press <OK> to select and start playback that file. 47 15.2 Selecting Device at File Browser External USB, internal HDD storage device, or network drive can be selected at FILE BROWSER. Press <RED> button on the remote and the device drop-down list will pop-up like following image. Use <UP> or <DOWN> arrow key to browse devices. Choose one of them then press <OK> to select it. 15.3 Register Subtitle Font File Subtitle font file can be selected at file browser. Copy or move the font file (true-type font file - .TTF extension) to the USB drive or internal HDD from PC, then connect the drive to TizzBird. Press <RED> button to select drive and navigate into the folder that font file was copied. The font file will appear like the following image. Select one of the font file and press <OK> button to register. Several font files can be registered at once. Registered font files will appear at movie playback screen menu. Press <MENU> button and choose <SUBTITLE> icon. 48 15.4 Using File Operation Rev 1.12 firmware provides the “File Operation” capability which enables COPY, MOVE, DELETE, RENAME and NEW FOLDER functions. Press “MENU” button on the remote then select the “File Operation” ICON at the pop-up window to enter this mode. This will bring the following screen. The left pane is source window and the right pane is target window. The “File Operation” will function from left pane to right pane. The following remote buttons can be used. OK button Browse and enter the folder. Bookmark button Select the item to operate. Menu button Pop-up the FILE OPERATING ICONs. Please use left or right arrow button to move left or right pane. The RED button can be used to select the device at each pane. This RED button enables the selection of source or target device at each pane. 49 Pressing BOOKMARK button will check the selected item like below picture. The check icon will appear on the small box at left side of item. The total size of selected item will be also calculated whenever BOOKMARK button is pressed. It will take some time if there are many items at selected folder. Pressing MENU button will bring the following POP-UP menu to select the function. The COPY, MOVE, DELETE, SELECT ALL, CANCEL, RENAME, NEW FOLDER can be selected. The COPY or MOVE operation will be performed always from LEFT PANE to RIGHT PANE. The DELETE, RENAME, SELECT ALL and CANCEL will be performed always at LEFT PANE. The NEW FOLDER will be performed on selected pane. Please select the wanted icon to execute the operation. 50 16 Connecting Internet 16.1 Execute Internet Browser Web browser will appear if WEB BROWSER was selected at HOME SCREEN and network was connected like following image. ※ Using mouse is highly recommended at WEB BROWSING. Wireless RF or USB mouse can be used. Web address or other information can be entered thru virtual keyboard with mouse. Wanted article or link can be clicked with mouse as well. 16.2 Control Internet Browser Press <BACK> button on remote or click mouse right button to move back to the previous screen. Press <MENU> button on the remote to change the home page and register at there. 51 17 Install and Execute Application 17.1 Move applications at Android Phone to TizzBird The applications on the Android smart phone can be installed on this unit. The procedures are like this. 1) Download or move the applications on the Android smart phone at USB flash drive. - Move the applications on the smart phone to SD card. This can be done by Android application like “App Monster”. This kind of application let user backup their APP to SD card. - Move the APP at SD card to USB flash drive. Attach the USB flash drive to the unit. - Run FILE BROWSER at HOME SCREEN, and select the application that you want to install. The APP at smart phone may have problems when installing or executing since it requires GPS, PHONE or TOUCH function. Or it always shows in portrait mode, since the application is just intended to use on phone. ※ Some APP requires specially touch function. In this case, mouse should be used. So using mouse is highly recommended when running applications. 17.2 Execute Application The following image will appear when running APP BROWSER at home screen. Use arrow buttons to browse the application and press <OK> button to execute it. 52 18 Settings Various set-ups can be configured at SETTINGS BROWSER. 18.1 System Menu language, date & time, system information, firmware information and update can be set-up at this menu. Language Select menu language. Press <OK> to bring the pop-up. Time & Weather Set up the time & weather location, manually or automatically. Network should be configured and connected to get time & weather location automatically. System Information Show current system information like firmware version. Firmware Update Update the firmware. Load Default Settings Clear the previous settings and get back to the default settings Screen Saver Time-Out Set up the screen saver time-out. Screen Saver Mode Configure the screen saver icon or off the saver. Auto Power Off Time Configure automatic power off time Screen Resize Configure the size of graphic user interface screen. TizzRemote Setting Setup the TizzRemote by QR code and setup the System name for TizzRemote searching. Next page contains more system settings. 53 TizzRemote Setting Setup the TizzRemote by QR code and setup the System name for TizzRemote searching. The TizzRemote™ is the remote application for TizzBird which can replace keyboard, mouse and keyboard. There are two methods to install the TizzRemote™. The TizzRemote™ itself is already on the Google Market, so you can directly download it at your smart phone. The other way is using the QR code. If you select the above item at the dialog box, the following dialog box will pop-up. If you have QR code scanner on your smart phone, then scan this QR code with it, the 54 TizzRemote™ APP will be automatically download and installed on your smart phone. External Kbd Layout Select between QWERTY or AZERTY type key board. System Theme Select launcher between TizzBird theme and Android theme Advanced Setting Show advanced (not for casual use) setting. Device Scanning Select between scanning device “Always”, “New Device Only” and “Never”. It will determine the scanner for database will be applied always or new device only or never. Scanning Filename Display It will determine display file name during device scanning or not. Power Button Select between “Power Off” and “Suspend” when pressing power button. If “Power Off” selected, the system will completely be powered off when POWER button pressed. System will boot up completely from initial stage when next POWER-ON. (COLDBOOT) Disk Format Format the attached hard disk drive. OTG Port Mode Select mode of OTG port (the USB port comes with Y-cable). The OTG port can be configured as “Host” (normal USB port) or “UMS” (flash drive can be accessible by PC) or “Debug” (Can be used Android debug mode). Set Factory Default Reset the internal data to original one from factory. It will reset the TV output resolution, internal settings and database. It will preserve the application you installed, though. 55 18.2 Audio and Visual Video Output Select video output port. Resolution Select resolution of the video output. Native Frame Rate Turn On/Off of original frame rate of the source Cinema Original (24p) Enable/ Disable cinema frame rate TV Original (1080i 60Hz) Enable/ Disable TV frame rate. Audio Output Select audio output port and format Analog (PCM) Audio will output as decoded PCM data Digital Audio will output as raw data For HDMI “Digital”, the format of audio can be On/Off for each format. [Configuration for each format] ※ In “Digital (Compressed)” output mode, each format (AC3/ DTS/ AAC/ HD-Audio) can be configured as On/Off independently. It’s because the capability of connected audio device is quite different. Dynamic Range Control Controlling dynamic range or not for audio Brightness, Contrast, Hue Control each video parameter value 56 18.3 Movie Subtitle Language Select subtitle language. Subtitle Setting Select size, position, font, color of subtitle. Please refer 10.10. Resume Select resume screen pop-up method. “On” Automatic resume without asking. “Off” Always startup without resuming. Pop-up Pop window up to ask resume or not. Instant Skip Interval Select instant skip interval. Instant skip will occur when pressing <UP> or <DOWN> key at movie playback. Sort Type Select sorting type of movie. Order Type Select ordering type of movie browser. Movie Scraper Select movie scraping data base. The next page contains more configurations for movie. 57 Poster layout and Poster Shape Please refer to chapter 15. Advanced setting contains more special settings for movie. Blue Button Mode Blue color button on remote can be configured “3D mode change” button or “Repeat mode” button. Show Playback Information up. Turn on/off the information window when movie start- Continuous Movie Playback Turn on/off successive movie playback, if any. 18.4 Music Instant Skip Interval Lyric Mode Select instant skip interval. Instant skip will occur when pressing <UP> or <DOWN> key at movie playback. Turn on/ off or automatic if lyrics are available Sort Type Select sorting type of music. Order Type Select ordering type of music browser. Album Jacket Layout & Shape Please refer to chapter 15. . 58 18.5 Photo Transition Effect Select transition effects of slideshow. Slideshow Interval Select transition interval of slideshow. Slideshow Mode Select showing order of slideshow. Sort Type Select sorting type of photos. Order Type Select ordering type of photos. Photo Frame Layout & Shape Please refer to chapter 15. Wallpaper Mode Keep the aspect ratio or stretching to “Fullscreen” Restore wallpaper Restore default wallpaper if background was changed. Transition Effect 59 18.6 Network Wi-Fi Connection Turn On/Off the Wi-Fi connection Wi-Fi Setting Select Wi-Fi Access Point and configure the SSID and password Network Server … Please see chapter 20 and 20.1.5 for configuration DLNA Turn On/Off the DLNA. See chapter 21 for usage of DLNA. YouTube Cache Size Determine the cache size for YouTube real-time streaming. Network Information Show current connected network information. 18.7 Cover-View This page only shows the current setting of Cover-View style of each browser. You cannot change the style in this model. 60 19 Connecting Network Server or NAS This device provides powerful network browsing and connection capability from Rev 1.12 firmware. This includes multiple mountings of network drives for both SAMBA and NFS. The high performance NFS server software for PC, the TizzNFS will be also provided thru TizzBird WEB-site 19.1 Network connection using NFS The NFS (Network File System) is a simple but powerful networking file system originally created by Sun Microsystems™. The NFS enables high performance file sharing between network devices, so it’s most suitable for multimedia file playback via network. The following section explains how to connect the shared PC folders using NFS server application or NAS (Network Attached Storage) which runs NFS server. 19.1.1 Downloading TizzNFS Server Please download the “TizzNFS” server at Internet at the PC. Please visit our WEB-site (http://www.tizzbird.com) to download the TizzNFS program. Please install it after downloading it. The TizzNFS has following features. Runs on Windows™ XP/ Vista/ 7 (both 32 bit and 64bit) Simple and intuitive user interface. Enables sharing multiple folders thru EXPORT function. Reliable and high performance operation Simple or complex EXPORT name can be selectable. Supports NFS2 and NFS3 protocol completely. 19.1.2 Executing TizzNFS Server & Configuration Execute the TizzNFS. The TizzNFS icon select “Settings” menu item. 61 will appear on Task Bar. Click the icon and Please press button to share the folder. The folder selecting dialog box will appear so the wanted folder can be selected. Please repeat this procedure to select all other desirable folders to share. Please press button to unselect the folder, after clicking the row of unwanted folder at the dialog box. The balloon help will pop-up when pressing OK button like below picture. The TizzNFS will automatically run whenever log-on the PC, so shared folders will be maintained. 19.1.3 Downloading other NFS Server Please download the “freeNFS” or “Allegro” NFS server at Internet at the PC. The “freeNFS” and “Allegro” NFS server was confirmed by TizzBird. The “freeNFS” software can be downloadable at following URL: http://sourceforge.net/projects/freenfs/files/FreeNFS.exe/download FreeNFS can be executed without specific installation. 19.1.4 Executing freeNFS Server & Configuration Execute the freeNFS. The freeNFS icon will appear on Task Bar. Right mouse click the icon and select “Settings” menu item. Please enter shared folder name at “Path” of “Server” Tab like above picture. Please make sure that selecting “65001 (UTF-8)” at the “Codepage” of “Filennames” Tab. 62 19.1.5 Connecting NFS Server at Device Select <Settings Browser Network Network Server Connection”. This will bring the following dialog box. Up to 4 network servers can be connected at this version, and the number of connectable server will be increased at next version. Please select one of the network drive number then press OK. This will bring the following dialog box. Please choose NFS. This will start the SERVER BROWSING dialog box and start browsing of available NFS server at the local network. 63 The available NFS servers will appear with names or IP addresses. The “+” sign on the left side of server name means it has exported folders. There can be no “+” sign server which is not exporting the EXPORT NAMES. If PC runs Windows OS, the PC name can also appear like above picture. If the wanted server list is not appeared, please try RED button on remote to refresh the NFS server list. Please select one of the server then press OK, the exported folders will appear like below picture. Please select one of those then press OK to connect. The following dialog will appear shortly and connection will be made. Caution: Please use RealTEK RTL8188 Wi-Fi module for NFS thru Wi-Fi. The Ralink RT3070 Wi-Fi driver has some problem with NFS connection. The NFS + Ethernet configuration also does not have problem. 64 19.2 Network Connection using Samba The following section explains how to connect the shared PC folders or NAS (Network Attached Storage) which runs Samba Server. 19.2.1 Activating PC Share - Click right mouse button on the folder which will be shared. Select “Property” then “Sharing” TAB on the dialog box. - Select “Share this folder” button on the dialog box - The shared folder can be notified at file explorer, since the shared icon will appear on the left side of folder icon. 19.2.2 Connecting Samba Server at Device Select <Settings Browser Network Network Server Connection > 65 Select “Samba” at dialog box. This will bring the SAMBA BROWSING dialog box like below. If the wanted SAMBA SERVER name is not appeared, please press RED button on remote. The SAMBA server list will appear according to the PC-names or IP address. The “+” sign means it has several shared folders. Press OK button to unfold the server folder list, then select one of the folder to connect. 66 If the selected folder requires ACCESS RIGHT to connect it, the following dialog box will pop-up to enter the log-in account information. Input the “User name” and “Password” using virtual keyboard. Please check “Remember account” checkbox to by-pass this log-in procedure at next connection. The connection will be made after pressing “Connect” button. 19.3 Accessing Network Drive at File/ Media Browser The shared folder connected thru can be accessible at <Movie/ Music/ Photo/ File Browser >. The below picture shows the selecting the NETWORK DRIVE at <File Browser>. Press <RED color> button on remote at File Browser to select the network drive. Select the network icon like following picture. The shared folder will appeared and the files and folders can be browsed or playback. 67 20 Using DLNA Tizzbird fully implements several DLNA stacks includes DMP (Digital Media Player), DMS (Digital Media Server) and DMR (Digital Media Renderer). It can be used very flexibly several ways. DMP (Digital Media Player) TizzBird can browse other DMS (Digital Media Server) servers including DLNA enabled PC, Smart Phone and NAS, and be able to playback the contents on the designated server. DMR (Digital Media Renderer) TizzBird can render (decode & do presentation) the contents which were designated by DMC (Digital Media Controller). For example, SMART PHONE can be used for browsing and controlling the contents on the DMS and designate the contents should playback on TizzBird output. So you can see the movie, photo and listen to the music on the SMART PHONE or DLNA server. The beauty of this DMR is browsing can be done intuitively by smart phone, and output may appear on big screen TV. So user can enjoy the contents on several screens (so called Nscreen) by designating the rendering output to any DMR device. DMS (Digital Media Server) TizzBird can be a DLNA server, so other DLNA device including SMART PHONE can browse and start playback the contents on the TizzBird. So combined overall DLNA stacks, the mutual contents sharing between TizzBird and other device (TAB, SMART PHONE, PC) is quite easy and intuitive. The most important DLNA stack here can be DMR. Because SMART PHONE or TABLET can be used as controller (DMC) and playback can be done on TizzBird. So users can easily browse contents on server or their phones, and see the contents on BIG SCREEN TV. 68 20.1 Preparation for DMR Preparing TizzBird & Access-Point Prepare TizzBird F12 or N1 for demonstrating DMR with Rev 2.90 or later firmware. Connect the Wi-Fi or Ethernet with prepared Access-Point. Enable the DLNA at “Settings Browser Network DLNA” Preparing Smart Phone. Prepare Android Smart Phone (Gingerbread or later) or iPhone and connect the same Access-Point as Tizzbird connected. Download the iMediaShare or Twonky app from the market. Preparing DLNA Server (Optional) If you have a plan to browse or playback DMS using PC, please prepare like this. Download the latest Windows Media Player for DLNA server. Or download the Twonky Server on PC for DLNA server. 69 20.2 Sending Smartphone’s Contents - iMediaShare APP iMediaShare is a good example of DMC, DMS and connects contents to DMR. It has several on-line-site DLNA server examples, which are very good to demonstrate, and some of them are in High-Definition. iMediaShare is also available on iPhone. Execute the iMediaShare APP The iMediaShare startup screen will come up like below. Select the online site example Select one of the on-line site examples. Below screen shows some candidates. 70 “My Photos”, “My Music”, “My Videos” show local contents on your phones. Below screen shows the “Victoria’s Secret” on-line DLNA server. Click one of the contents. Select the final renderer. If you click one of the contents, and TizzBird settings are correct, the “RENDERER” selection pane will pop-up. Select “TizzBird DLNA Renderer”. Demonstrating Smart Phone local contents to Tizzbird 71 Select the contents on the SMART PHONE. Select “My Videos” on the menu. Then following screen will pop-up Select one of the movies you want to playback and Tizzbird will start playback. It’s socalled DMR (Digital Media Renderer). 72 20.3 Sending Smartphone’s Contents - TWONKY APP Twonky is a powerful DLNA app which let you browse overall DLNA server on your local network. It also provides playback controller which is very stable. Run Twonky Select categories of contents that you want to playback. Then select one of the contents 73 Designate the renderer. Then the Tizzbird will start playback. 74 21 Firmware Upgrade 21.1 Online Upgrade (O.T.A – Over the Air Upgrade) TizzBird will connect the firmware update server periodically (once a week) and pop-up upgrade prompt window automatically, if new firmware is available. If TizzBird is connected to the network, the upgrade can be performed as following. 1) Prompt the firmware if new version is available. 2) Select <SETTING BROWSER> <SYTSTEM> <FIRMWARE UPDATE> 3) Setting browser will can the new firmware available on network and pop-up the window. 4) Press <OK> to start upgrade. 21.2 Local Upgrade Separately downloaded firmware (thru PC) can be upgraded like below. The upgrade will not take more than 1 minute. 21.2.1 Upgrade at Settings Screen Copy or move the latest firmware to the root folder of USB flash or HDD drive. - Connect the drive to USB port of the unit. - Select <SETTING BROWSER> <SYSTEM> <FIRMWARE UPDATE>. - SETTINGS BROWSER will scan the new firmware automatically and pop-up the window. - Press <OK> button to start upgrade. 75 21.2.2 Upgrade at File Browser Copy or move the latest firmware to the root folder of USB flash or HDD drive. - Connect the drive to USB port of the unit. - Select <FILLE BROWSER> at HOME SCREEN. . - Browse the firmware file and press <OK> to start upgrade. 76 22 Using N1 as a Mass Storage TizzBird N1 contains T-flash memory which is mainly used for Android system image and working area. Some part of T-flash area is assigned to SD-card area which is used by Android system as an external memory. This SD-card area can be accessible by PC as a USB mass storage device (UMS). So if you have 8G/ 16G/ 32GB version of TizzBird N1, you can use more extra SD card area for storing various multimedia contents. Here’s the procedure to access. Before do that, please prepare normal micro-USB cable to connect PC. The micro-USB cable is normal type that can connect SMART PHONE with PC USB port. 1) Connect N1 to TV and turn it on. 2) Select <SETTING BROWSER> <SYTSTEM> Page2 <Advanced Setting> OTG Port Mode 3) Select “External Storage (UMS)” to connect PC. 4) Turn off the power of N1. 5) Connect PC with micro-USB cable you prepared. 6) The N1 will power-on and work as a MASS STORAGE DEVICE. You can freely access the N1’s storage area including reading, writing & erasing. 7) After done, please restore the <OTG Port Mode> to “Host” when connect the N1 back to TV. Otherwise, the SD card area will not be accessible by Android system of N1. 77 23 How to Fix Booting Failure This documentation is intended to provide repairing guide in case of booting failure of TizzBird. TizzBird F10/F11/F20/F30 is based on Android Gingerbread version while TizzBird N1 is ICS. Detailed specifications can be found at given package or http://www.tizzbird.com. This repairing method is only applied from firmware revision 2.0.6 for F10/ F11/ F20/ F30 and revision 3.0.4 for N1/ F13/ F14. 23.1 Abstract The symptom of booting failure looks like as below. Symptom A: No changes at BOOTING ANIMATION (Animation with black background) Symptom B: No changes at BOOTING LOGO (Tizzbird text with white background) Above symptoms may be caused by several different reasons. There are two ways to fix these symptoms. Symptom A : Can be fixed using “Safe Mode Booting”. Symptom B (or Symptom A) : Can be fixed using “System Recovery Mode”. 23.2 Repairing by Safe Mode Booting Please follow below steps. 1) Power off device completely then turn it on again. 2) As soon as you see BOOT LOGO (TEXT with white background), press and hold <MENU> button on remote until home screen comes up. 3) You can read “Safe Mode” text at left-bottom side of screen, when you enter the SAFE BOOTING MODE. After SAFE MODE BOOTING, you need to do one of below action items. Action item #1 Uninstall last APKs you have installed, as they may cause a booting failure. Action item #2 You need to back up your personal data and installed packages so far. Do “Set Factory Default” by selecting “Settings Browser” “System” “Advanced Settings” “Set Factory Default” with “Erase all” option. 23.3 Repairing by System Recovery Mode 23.3.1 Preparation 1) Prepare USB flash drive which has more than 128MB of free space. 2) Download the latest upgrade firmware from Tizzbird WEB (http://www.tizzbird.com) according to your device. Normally the name of upgrade package is something like “Tizzbird_mmm_update_vvv.tzbird”. “mmm” means model name like “F3x”, “F20”. “vvv” means update version and date like “V2_06_2102115”. 3) Copy downloaded firmware to root folder of USB flash drive. Then rename it “update.zip” 78 23.3.2 Entering System Recovery Mode 1) Power off device completely then turn it on again. If you’re not sure, pull the power cable off then reconnect it. 2) As soon as you turn on power, press <RED> button on remote twice within 3 seconds. The following screen will come out (Require revision 3.0.4 or later firmware) 3) There are four menus. If you want to factory reset status, then select “wipe data/ factory reset”. This will help the situation when some applications you installed cause a problem. 4) Apply “wipe cache partition” first. 5) To make the device reboot again with fresh image, put the USB flash drive on the USB port, then select “apply update from /usb”. Please make sure that you have update.zip on the USB drive. 79 6) On the following screen, select “update.zip” on the drive. 7) The system will erase whole area of internal flash and start to update like below picture. The progress bar will show the current progress. 80 24 GNU General Public License Value Plus Co. Ltd is using a part of Free Software code under the GNU General Public License in operating TizzBird player. This General Public License applies to most of the Free Software Foundation’s code and to any other program whose authors commit by using it. The Free Software is copyrighted by Free Software Foundation, Inc. and the program is licensed “AS IS” without warranty of any kind. Users are free to download the base source code of the TizzBird players at the following address: http://www.tizzbird.com/eng/index.php?mm_code=752&sm_code=754 The source code can be sent to your address via airmail for a charge of actual expense executed. Please contact us at [email protected] GNU GENERAL PUBLIC LICENSE Version 2, June 1991 Copyright (C) 1989, 1991 Free Software Foundation, Inc. 51 Franklin Street, Fifth Floor, Boston, MA 02110-1301, USA Everyone is permitted to copy and distribute verbatim copies of this license document, but changing it is not allowed. Preamble The licenses for most software are designed to take away your freedom to share and change it. By contrast, the GNU General Public License is intended to guarantee your freedom to share and change free software--to make sure the software is free for all its users. This General Public License applies to most of the Free Software Foundation's software and to any other program whose authors commit to using it. (Some other Free Software Foundation software is covered by the GNU Lesser General Public License instead.) You can apply it to your programs, too. When we speak of free software, we are referring to freedom, not price. Our General Public Licenses are designed to make sure that you have the freedom to distribute copies of free software (and charge for this service if you wish), that you receive source code or can get it if you want it, that you can change the software or use pieces of it in new free programs; and that you know you can do these things. To protect your rights, we need to make restrictions that forbid anyone to deny you these rights or to ask you to surrender the rights. These restrictions translate to certain responsibilities for you if you distribute copies of the software, or if you modify it. For example, if you distribute copies of such a program, whether gratis or for a fee, you must give the recipients all the rights that you have. You must make sure that they, too, receive or can get the source code. And you must show them these terms so they know their rights. We protect your rights with two steps: (1) copyright the software, and (2) offer you this license which gives you legal permission to copy, distribute and/or modify the software. Also, for each author's protection and ours, we want to make certain that everyone understands that there is no warranty for this free software. If the software is modified by someone else and passed on, we want its recipients to know that what they have is not the original, so that any problems introduced by others will not reflect on the original authors' reputations. Finally, any free program is threatened constantly by software patents. We wish to avoid the danger that redistributors of a free program will individually obtain patent licenses, in effect making the program proprietary. To prevent this, we have made it clear that any patent must be licensed for everyone's free use or not licensed at all. 81 The precise terms and conditions for copying, distribution and modification follow. TERMS AND CONDITIONS FOR COPYING, DISTRIBUTION AND MODIFICATION 0. This License applies to any program or other work which contains a notice placed by the copyright holder saying it may be distributed under the terms of this General Public License. The "Program", below, refers to any such program or work, and a "work based on the Program" means either the Program or any derivative work under copyright law: that is to say, a work containing the Program or a portion of it, either verbatim or with modifications and/or translated into another language. (Hereinafter, translation is included without limitation in the term "modification".) Each licensee is addressed as "you". Activities other than copying, distribution and modification are not covered by this License; they are outside its scope. The act of running the Program is not restricted, and the output from the Program is covered only if its contents constitute a work based on the Program (independent of having been made by running the Program). Whether that is true depends on what the Program does. 1. You may copy and distribute verbatim copies of the Program's source code as you receive it, in any medium, provided that you conspicuously and appropriately publish on each copy an appropriate copyright notice and disclaimer of warranty; keep intact all the notices that refer to this License and to the absence of any warranty; and give any other recipients of the Program a copy of this License along with the Program. You may charge a fee for the physical act of transferring a copy, and you may at your option offer warranty protection in exchange for a fee. 2. You may modify your copy or copies of the Program or any portion of it, thus forming a work based on the Program, and copy and distribute such modifications or work under the terms of Section 1 above, provided that you also meet all of these conditions: a) You must cause the modified files to carry prominent notices stating that you changed the files and the date of any change. b) You must cause any work that you distribute or publish, that in whole or in part contains or is derived from the Program or any part thereof, to be licensed as a whole at no charge to all third parties under the terms of this License. c) If the modified program normally reads commands interactively when run, you must cause it, when started running for such interactive use in the most ordinary way, to print or display an announcement including an appropriate copyright notice and a notice that there is no warranty (or else, saying that you provide a warranty) and that users may redistribute the program under these conditions, and telling the user how to view a copy of this License. (Exception: if the Program itself is interactive but does not normally print such an announcement, your work based on the Program is not required to print an announcement.) These requirements apply to the modified work as a whole. If identifiable sections of that work are not derived from the Program, and can be reasonably considered independent and separate works in themselves, then this License, and its terms, do not apply to those sections when you distribute them as separate works. But when you distribute the same sections as part of a whole which is a work based on the Program, the distribution of the whole must be on the terms of this License, whose permissions for other licensees extend to the entire whole, and thus to each and every part regardless of who wrote it. Thus, it is not the intent of this section to claim rights or contest your rights to work written entirely by you; rather, the intent is to exercise the right to control the distribution of derivative or collective works based on the Program. In addition, mere aggregation of another work not based on the Program with the Program (or with a work based on the Program) on a volume of a storage or distribution medium does not bring the other work under the scope of this License. 3. You may copy and distribute the Program (or a work based on it, under Section 2) in object code or executable form under the terms of Sections 1 and 2 above provided that you also do one of the following: 82 a) Accompany it with the complete corresponding machine-readable source code, which must be distributed under the terms of Sections 1 and 2 above on a medium customarily used for software interchange; or, b) Accompany it with a written offer, valid for at least three years, to give any third party, for a charge no more than your cost of physically performing source distribution, a complete machine-readable copy of the corresponding source code, to be distributed under the terms of Sections 1 and 2 above on a medium customarily used for software interchange; or, c) Accompany it with the information you received as to the offer to distribute corresponding source code. (This alternative is allowed only for noncommercial distribution and only if you received the program in object code or executable form with such an offer, in accord with Subsection b above.) The source code for a work means the preferred form of the work for making modifications to it. For an executable work, complete source code means all the source code for all modules it contains, plus any associated interface definition files, plus the scripts used to control compilation and installation of the executable. However, as a special exception, the source code distributed need not include anything that is normally distributed (in either source or binary form) with the major components (compiler, kernel, and so on) of the operating system on which the executable runs, unless that component itself accompanies the executable. If distribution of executable or object code is made by offering access to copy from a designated place, then offering equivalent access to copy the source code from the same place counts as distribution of the source code, even though third parties are not compelled to copy the source along with the object code. 4. You may not copy, modify, sublicense, or distribute the Program except as expressly provided under this License. Any attempt otherwise to copy, modify, sublicense or distribute the Program is void, and will automatically terminate your rights under this License. However, parties who have received copies, or rights, from you under this License will not have their licenses terminated so long as such parties remain in full compliance. 5. You are not required to accept this License, since you have not signed it. However, nothing else grants you permission to modify or distribute the Program or its derivative works. These actions are prohibited by law if you do not accept this License. Therefore, by modifying or distributing the Program (or any work based on the Program), you indicate your acceptance of this License to do so, and all its terms and conditions for copying, distributing or modifying the Program or works based on it. 6. Each time you redistribute the Program (or any work based on the Program), the recipient automatically receives a license from the original licensor to copy, distribute or modify the Program subject to these terms and conditions. You may not impose any further restrictions on the recipients' exercise of the rights granted herein. You are not responsible for enforcing compliance by third parties to this License. 7. If, as a consequence of a court judgment or allegation of patent infringement or for any other reason (not limited to patent issues), conditions are imposed on you (whether by court order, agreement or otherwise) that contradict the conditions of this License, they do not excuse you from the conditions of this License. If you cannot distribute so as to satisfy simultaneously your obligations under this License and any other pertinent obligations, then as a consequence you may not distribute the Program at all. For example, if a patent license would not permit royalty-free redistribution of the Program by all those who receive copies directly or indirectly through you, then the only way you could satisfy both it and this License would be to refrain entirely from distribution of the Program. If any portion of this section is held invalid or unenforceable under any particular circumstance, the balance of the section is intended to apply and the section as a whole is intended to apply in other circumstances. It is not the purpose of this section to induce you to infringe any patents or other property right claims or to contest validity of any such claims; this section has the sole purpose of protecting the integrity of the free 83 software distribution system, which is implemented by public license practices. Many people have made generous contributions to the wide range of software distributed through that system in reliance on consistent application of that system; it is up to the author/donor to decide if he or she is willing to distribute software through any other system and a licensee cannot impose that choice. This section is intended to make thoroughly clear what is believed to be a consequence of the rest of this License. 8. If the distribution and/or use of the Program is restricted in certain countries either by patents or by copyrighted interfaces, the original copyright holder who places the Program under this License may add an explicit geographical distribution limitation excluding those countries, so that distribution is permitted only in or among countries not thus excluded. In such case, this License incorporates the limitation as if written in the body of this License. 9. The Free Software Foundation may publish revised and/or new versions of the General Public License from time to time. Such new versions will be similar in spirit to the present version, but may differ in detail to address new problems or concerns. Each version is given a distinguishing version number. If the Program specifies a version number of this License which applies to it and "any later version", you have the option of following the terms and conditions either of that version or of any later version published by the Free Software Foundation. If the Program does not specify a version number of this License, you may choose any version ever published by the Free Software Foundation. 10. If you wish to incorporate parts of the Program into other free programs whose distribution conditions are different, write to the author to ask for permission. For software which is copyrighted by the Free Software Foundation, write to the Free Software Foundation; we sometimes make exceptions for this. Our decision will be guided by the two goals of preserving the free status of all derivatives of our free software and of promoting the sharing and reuse of software generally. NO WARRANTY 11. BECAUSE THE PROGRAM IS LICENSED FREE OF CHARGE, THERE IS NO WARRANTY FOR THE PROGRAM, TO THE EXTENT PERMITTED BY APPLICABLE LAW. EXCEPT WHEN OTHERWISE STATED IN WRITING THE COPYRIGHT HOLDERS AND/OR OTHER PARTIES PROVIDE THE PROGRAM "AS IS" WITHOUT WARRANTY OF ANY KIND, EITHER EXPRESSED OR IMPLIED, INCLUDING, BUT NOT LIMITED TO, THE IMPLIED WARRANTIES OF MERCHANTABILITY AND FITNESS FOR A PARTICULAR PURPOSE. THE ENTIRE RISK AS TO THE QUALITY AND PERFORMANCE OF THE PROGRAM IS WITH YOU. SHOULD THE PROGRAM PROVE DEFECTIVE, YOU ASSUME THE COST OF ALL NECESSARY SERVICING, REPAIR OR CORRECTION. 12. IN NO EVENT UNLESS REQUIRED BY APPLICABLE LAW OR AGREED TO IN WRITING WILL ANY COPYRIGHT HOLDER, OR ANY OTHER PARTY WHO MAY MODIFY AND/OR REDISTRIBUTE THE PROGRAM AS PERMITTED ABOVE, BE LIABLE TO YOU FOR DAMAGES, INCLUDING ANY GENERAL, SPECIAL, INCIDENTAL OR CONSEQUENTIAL DAMAGES ARISING OUT OF THE USE OR INABILITY TO USE THE PROGRAM (INCLUDING BUT NOT LIMITED TO LOSS OF DATA OR DATA BEING RENDERED INACCURATE OR LOSSES SUSTAINED BY YOU OR THIRD PARTIES OR A FAILURE OF THE PROGRAM TO OPERATE WITH ANY OTHER PROGRAMS), EVEN IF SUCH HOLDER OR OTHER PARTY HAS BEEN ADVISED OF THE POSSIBILITY OF SUCH DAMAGES. END OF TERMS AND CONDITIONS 84