1
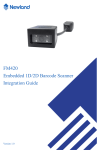
NLS-FR40 Series
Desktop Barcode Scanner
User Guide
Disclaimer
© 2015 Fujian Newland Auto-ID Tech. Co., Ltd. All rights reserved.
Please read through the manual carefully before using the product and operate it according to the manual. It is advised that you
should keep this manual for future reference.
Do not disassemble the device or remove the seal label from the device. Otherwise, FuJian Newland Auto-ID Tech. Co., Ltd.
does not assume responsibility for the warranty or replacement.
All pictures in this manual are for reference only and actual product may differ. Regarding to the product modification and
update, FuJian Newland Auto-ID Tech. Co., Ltd. reserves the right to make changes to any software or product to improve
reliability, function, or design at any time without notice. Besides, the information contained herein is subject to change without
prior notice.
The products depicted in this manual may include software copyrighted by FuJian Newland Auto-ID Tech. Co., Ltd or a third
party. The user, corporation or individual, shall not duplicate, in whole or in part, distribute, modify, decompile, disassemble,
decode, reverse engineer, rent, transfer or sublicense such software without prior written consent from the copyright holders.
This manual is copyrighted. No part of this publication may be reproduced or used in any form without written permission from
Newland.
FuJian Newland Auto-ID Tech. Co., Ltd. reserves the right to make final interpretation of the statement above.
FuJian Newland Auto-ID Tech. Co., Ltd.
3F, Building A, No.1, Rujiang Xi Rd., Mawei, Fuzhou, Fujian, China
http://www.nlscan.com
350015
Revision History
Version
V1.0.0
Description
Initial release.
Date
April 10, 2015
Table of Contents
Revision History .....................................................................................................................................................................- 3 Preface ...................................................................................................................................................................................... 12
Introduction .................................................................................................................................................................. 12
Chapter Description ..................................................................................................................................................... 12
Explanation of Icons ..................................................................................................................................................... 13
Chapter 1 Getting Started ........................................................................................................................................................ 14
Introduction .................................................................................................................................................................. 14
Features of the FR40 ................................................................................................................................................... 14
Unpacking .................................................................................................................................................................... 14
FR40 Scanner .............................................................................................................................................................. 15
The Pinout of the Data Port (default)............................................................................................................................ 16
Connect FR40 to a Host............................................................................................................................................... 16
Use USB Cable ..................................................................................................................................................... 17
Use RS-232 Cable ................................................................................................................................................ 18
Power On, Sleep, Power Off, Reboot........................................................................................................................... 19
Maintenance ................................................................................................................................................................ 19
Dimensions (unit: mm) ................................................................................................................................................. 20
Left View ............................................................................................................................................................... 20
Front View ............................................................................................................................................................. 20
Right View ............................................................................................................................................................. 21
Scanning Instructions ................................................................................................................................................... 22
Chapter 2 QuickSet .................................................................................................................................................................. 23
Chapter 3 System Settings ...................................................................................................................................................... 24
Introduction .................................................................................................................................................................. 24
Barcode Programming .......................................................................................................................................... 24
Command Programming ....................................................................................................................................... 24
QuickSet Programming ......................................................................................................................................... 24
Programming Barcode/Command/Function ................................................................................................................. 25
Use of Programming Barcodes .................................................................................................................................... 25
Illumination ................................................................................................................................................................... 26
Beep............................................................................................................................................................................. 27
Good Read Beep .................................................................................................................................................. 27
Good Read Beep Type ......................................................................................................................................... 27
Good Read Beep Duration (Type 1)...................................................................................................................... 28
Good Read Beep Frequency (Type 1) .................................................................................................................. 28
Good Read Beep Volume ..................................................................................................................................... 29
Startup Beep ......................................................................................................................................................... 29
Beep Definitions .................................................................................................................................................... 29
Scan Mode ................................................................................................................................................................... 30
Decode Area ................................................................................................................................................................ 31
Whole Area Decoding ........................................................................................................................................... 31
Central Area Decoding .......................................................................................................................................... 31
Specify Central Area ............................................................................................................................................. 31
Default Settings............................................................................................................................................................ 32
Factory Defaults .................................................................................................................................................... 32
Custom Defaults ................................................................................................................................................... 32
Product Information ...................................................................................................................................................... 33
Chapter 4 RS-232 Interface ...................................................................................................................................................... 35
Introduction .................................................................................................................................................................. 35
RS-232 Parameters ..................................................................................................................................................... 35
Baud Rate ............................................................................................................................................................. 36
Parity Check ......................................................................................................................................................... 37
Data Bit ................................................................................................................................................................. 38
Stop Bit ................................................................................................................................................................. 38
Hardware Auto Flow Control ................................................................................................................................. 39
Chapter 5 USB Interface .......................................................................................................................................................... 40
Introduction .................................................................................................................................................................. 40
USB HID-KBW ............................................................................................................................................................. 41
USB Country Keyboard Types .............................................................................................................................. 42
Country Code Table .............................................................................................................................................. 43
Beep on Unknown Character ................................................................................................................................ 44
Emulate ALT+Keypad ........................................................................................................................................... 45
Function Key Mapping .......................................................................................................................................... 46
ASCII Function Key Mapping Table ...................................................................................................................... 47
ASCII Function Key Mapping Table (Continued) ................................................................................................... 48
Inter-Keystroke Delay ........................................................................................................................................... 49
Caps Lock ............................................................................................................................................................. 50
Convert Case ........................................................................................................................................................ 51
Emulate Numeric Keypad ..................................................................................................................................... 52
USB DataPipe .............................................................................................................................................................. 54
USB COM Port Emulation ............................................................................................................................................ 55
HID-POS ...................................................................................................................................................................... 55
Introduction ........................................................................................................................................................... 55
Access the Scanner with Your Program ................................................................................................................ 56
Acquire Scanned Data .......................................................................................................................................... 56
VID/PID ................................................................................................................................................................. 56
Chapter 6 Symbologies ........................................................................................................................................................... 57
Introduction .................................................................................................................................................................. 57
General Settings .......................................................................................................................................................... 57
Disable All Symbologies ........................................................................................................................................ 57
Enable All Symbologies ........................................................................................................................................ 57
Enable 1D Symbologies........................................................................................................................................ 58
Disable 1D Symbologies ....................................................................................................................................... 58
Enable 2D Symbologies........................................................................................................................................ 58
Disable 2D Symbologies ....................................................................................................................................... 58
Code 128 ..................................................................................................................................................................... 59
Restore Factory Defaults ...................................................................................................................................... 59
Enable/Disable Code 128 ..................................................................................................................................... 59
Set Length Range for Code 128 ........................................................................................................................... 60
EAN-8 .......................................................................................................................................................................... 61
Restore Factory Defaults ...................................................................................................................................... 61
Enable/Disable EAN-8 .......................................................................................................................................... 61
Transmit Check Digit ............................................................................................................................................. 62
2-Digit Add-On Code ............................................................................................................................................. 62
5-Digit Add-On Code ............................................................................................................................................. 63
EAN-8 Extension................................................................................................................................................... 63
EAN-13 ........................................................................................................................................................................ 64
Restore Factory Defaults ...................................................................................................................................... 64
Enable/Disable EAN-13 ........................................................................................................................................ 64
Transmit Check Digit ............................................................................................................................................. 65
2-Digit Add-On Code ............................................................................................................................................. 65
5-Digit Add-On Code ............................................................................................................................................. 66
UPC-E .......................................................................................................................................................................... 67
Restore Factory Defaults ...................................................................................................................................... 67
Enable/Disable UPC-E.......................................................................................................................................... 67
Transmit Check Digit ............................................................................................................................................. 68
2-Digit Add-On Code ............................................................................................................................................. 68
5-Digit Add-On Code ............................................................................................................................................. 69
Transmit System Character “0” ............................................................................................................................. 70
UPC-E Extension .................................................................................................................................................. 70
UPC-A .......................................................................................................................................................................... 71
Restore Factory Defaults ...................................................................................................................................... 71
Enable/Disable UPC-A.......................................................................................................................................... 71
Transmit Check Digit ............................................................................................................................................. 72
2-Digit Add-On Code ............................................................................................................................................. 72
5-Digit Add-On Code ............................................................................................................................................. 73
Transmit Preamble Character “0” .......................................................................................................................... 74
Interleaved 2 of 5 ......................................................................................................................................................... 75
Restore Factory Defaults ...................................................................................................................................... 75
Enable/Disable Interleaved 2 of 5 ......................................................................................................................... 75
Set Length Range for Interleaved 2 of 5 ............................................................................................................... 76
Check Digit Verification ......................................................................................................................................... 77
Set Discrete Lengths for Interleaved 2 of 5 ........................................................................................................... 78
ITF-14 .......................................................................................................................................................................... 80
ITF-6 ............................................................................................................................................................................ 81
Matrix 2 of 5 ................................................................................................................................................................. 82
Restore Factory Defaults ...................................................................................................................................... 82
Enable/Disable Matrix 2 of 5 ................................................................................................................................. 82
Set Length Range for Matrix 2 of 5 ....................................................................................................................... 83
Check Digit Verification ......................................................................................................................................... 84
Code 39 ....................................................................................................................................................................... 85
Restore Factory Defaults ...................................................................................................................................... 85
Enable/Disable Code 39 ....................................................................................................................................... 85
Transmit Start/Stop Character .............................................................................................................................. 86
Set Length Range for Code 39 ............................................................................................................................. 87
Check Digit Verification ......................................................................................................................................... 88
Enable/Disable Code 39 Full ASCII ...................................................................................................................... 89
Codabar ....................................................................................................................................................................... 90
Restore Factory Defaults ...................................................................................................................................... 90
Enable/Disable Codabar ....................................................................................................................................... 90
Set Length Range for Codabar ............................................................................................................................. 91
Check Digit Verification ......................................................................................................................................... 92
Start/Stop Character ............................................................................................................................................. 93
Code 93 ....................................................................................................................................................................... 94
Restore Factory Defaults ...................................................................................................................................... 94
Enable/Disable Code 93 ....................................................................................................................................... 94
Set Length Range for Code 93 ............................................................................................................................. 95
Check Digit Verification ......................................................................................................................................... 96
UCC/EAN-128 .............................................................................................................................................................. 97
Restore Factory Defaults ...................................................................................................................................... 97
Enable/Disable UCC/EAN-128 ............................................................................................................................. 97
GS1 Databar ................................................................................................................................................................ 98
Restore Factory Defaults ...................................................................................................................................... 98
Enable/Disable GS1 Databar ................................................................................................................................ 98
Transmit Application Identifier “01” ........................................................................................................................ 99
EAN·UCC Composite................................................................................................................................................. 100
Restore Factory Defaults .................................................................................................................................... 100
Enable/Disable EAN·UCC Composite ................................................................................................................ 100
Code 11...................................................................................................................................................................... 101
Restore Factory Defaults .................................................................................................................................... 101
Enable/Disable Code 11 ..................................................................................................................................... 101
Set Length Range for Code 11............................................................................................................................ 102
Check Digit Verification ....................................................................................................................................... 103
ISBN........................................................................................................................................................................... 105
Restore Factory Defaults .................................................................................................................................... 105
Enable/Disable ISBN .......................................................................................................................................... 105
Set ISBN Format ................................................................................................................................................. 106
Industrial 25 ............................................................................................................................................................... 107
Restore Factory Defaults .................................................................................................................................... 107
Enable/Disable Industrial 25 ............................................................................................................................... 107
Set Length Range for Industrial 25 ..................................................................................................................... 108
Check Digit Verification ....................................................................................................................................... 109
Standard 25 ............................................................................................................................................................... 110
Restore Factory Defaults .................................................................................................................................... 110
Enable/Disable Standard 25 ............................................................................................................................... 110
Set Length Range for Standard 25 ..................................................................................................................... 111
Check Digit Verification ....................................................................................................................................... 112
Plessey ...................................................................................................................................................................... 113
Restore Factory Defaults .................................................................................................................................... 113
Enable/Disable Plessey ...................................................................................................................................... 113
Set Length Range for Plessey ............................................................................................................................ 114
Check Digit Verification ....................................................................................................................................... 115
MSI-Plessey ............................................................................................................................................................... 116
Restore Factory Defaults .................................................................................................................................... 116
Enable/Disable MSI-Plessey............................................................................................................................... 116
Set Length Range for MSI-Plessey ..................................................................................................................... 117
Check Digit Verification ....................................................................................................................................... 118
PDF417 ...................................................................................................................................................................... 119
Restore Factory Defaults .................................................................................................................................... 119
Enable/Disable PDF417...................................................................................................................................... 119
Set Length Range for PDF417 ............................................................................................................................ 120
PDF417 Twin Code ............................................................................................................................................. 121
PDF417 Inverse .................................................................................................................................................. 122
QR Code .................................................................................................................................................................... 123
Restore Factory Defaults .................................................................................................................................... 123
Enable/Disable QR Code .................................................................................................................................... 123
Set Length Range for QR Code .......................................................................................................................... 124
QR Twin Code..................................................................................................................................................... 125
Aztec .......................................................................................................................................................................... 126
Restore Factory Defaults .................................................................................................................................... 126
Enable/Disable Aztec Code ................................................................................................................................ 126
Set Length Range for Aztec Code....................................................................................................................... 127
Read Multi-barcodes on an Image ...................................................................................................................... 128
Set the Number of Barcodes ............................................................................................................................... 129
Data Matrix................................................................................................................................................................. 130
Restore Factory Defaults .................................................................................................................................... 130
Enable/Disable Data Matrix ................................................................................................................................ 130
Set Length Range for Data Matrix....................................................................................................................... 131
Data Matrix Twin Code ........................................................................................................................................ 132
Rectangular Barcode .......................................................................................................................................... 133
Data Matrix Inverse ............................................................................................................................................. 133
Maxicode.................................................................................................................................................................... 134
Restore Factory Defaults .................................................................................................................................... 134
Enable/Disable Maxicode ................................................................................................................................... 134
Set Length Range for Maxicode ......................................................................................................................... 135
Chinese Sensible Code.............................................................................................................................................. 136
Restore Factory Defaults .................................................................................................................................... 136
Enable/Disable Chinese Sensible Code ............................................................................................................. 136
Set Length Range for Chinese Sensible Code ................................................................................................... 137
Chinese Sensible Twin Code .............................................................................................................................. 138
Chinese Sensible Code Inverse .......................................................................................................................... 139
Chapter 7 Prefix & Suffix ....................................................................................................................................................... 140
Introduction ................................................................................................................................................................ 140
General Settings ........................................................................................................................................................ 141
Enable/Disable All Prefix/Suffix ........................................................................................................................... 141
Prefix Sequences ....................................................................................................................................................... 141
Custom Prefix ............................................................................................................................................................ 142
Enable/Disable Custom Prefix ............................................................................................................................ 142
Set Custom Prefix ............................................................................................................................................... 142
AIM ID Prefix .............................................................................................................................................................. 143
Code ID Prefix............................................................................................................................................................ 143
Restore All Default Code IDs .............................................................................................................................. 144
Modify Code ID ................................................................................................................................................... 144
Custom Suffix ............................................................................................................................................................. 148
Enable/Disable Custom Suffix............................................................................................................................. 148
Set Custom Suffix ............................................................................................................................................... 148
Terminating Character Suffix ...................................................................................................................................... 149
Enable/Disable Terminating Character Suffix ...................................................................................................... 149
Set Terminating Character Suffix ........................................................................................................................ 150
Chapter 8 Data Extraction & Packing ................................................................................................................................... 151
Introduction ................................................................................................................................................................ 151
Data Extraction .......................................................................................................................................................... 151
Program 1D Extraction Option ............................................................................................................................ 153
Program 2D Extraction Option ............................................................................................................................ 155
Data Packaging.......................................................................................................................................................... 156
Introduction ......................................................................................................................................................... 156
Normal Pack ....................................................................................................................................................... 157
Chapter 9 Batch Programming.............................................................................................................................................. 158
Introduction ................................................................................................................................................................ 158
Create a Batch Command.......................................................................................................................................... 159
Create a Batch Barcode ............................................................................................................................................. 160
Use Batch Barcode .................................................................................................................................................... 161
Chapter 10 Data Formatter .................................................................................................................................................... 162
Introduction ................................................................................................................................................................ 162
Enable/Disable Data Formatter .................................................................................................................................. 162
Data Formatter Commands........................................................................................................................................ 163
Send Commands ................................................................................................................................................ 163
Move Commands ................................................................................................................................................ 166
Search Commands ............................................................................................................................................. 168
Miscellaneous Commands .................................................................................................................................. 171
Appendix ................................................................................................................................................................................. 173
Digit Barcodes............................................................................................................................................................ 173
Save/Cancel Barcodes............................................................................................................................................... 175
Factory Defaults Table ............................................................................................................................................... 176
AIM ID Table .............................................................................................................................................................. 182
Code ID Table ............................................................................................................................................................ 183
Symbology ID Number ............................................................................................................................................... 184
ASCII Table ................................................................................................................................................................ 185
Preface
Introduction
This manual provides detailed instructions for setting up and using the NLS-FR40 series desktop barcode scanner
(hereinafter referred to as “FR40 scanner” or “the scanner”).
Chapter Description
Chapter 1, Getting Started
: Gives a general description of FR40 scanner including its technical
parameters.
Chapter 2, QuickSet
: Introduces a useful tool you can use to set up FR40 scanner and develop
new applications.
Chapter 3, System Settings
: Introduces three configuration methods and describes how to configure
general parameters of FR40 scanner.
Chapter 4, RS-232 Interface
: Describes how to configure RS-232 communication parameters.
Chapter 5, USB Interface
: Describes how to configure USB communication parameters.
Chapter 6, Symbologies
: Lists all compatible symbologies and describes how to configure the
relevant parameters..
Chapter 7, Prefix & Suffix
: Describes how to use prefix and suffix to customize scanned data.
Chapter 8, Data Extraction & Packing
: Describes how to extract a particular portion of scanned data and to
enable data packing feature.
Chapter 9, Batch Programming
: Explains how to integrate a complex programming task into a single
barcode.
Chapter 10, Data Formatter
: Explains how to customize scanned data with the data formatter.
Appendix
: Provides factory defaults table and a bunch of frequently used
programming barcodes.
12
Explanation of Icons
This icon indicates something relevant to this manual.
This icon indicates this information requires extra attention from the reader.
This icon indicates handy tips that can help you use or configure the scanner with ease.
This icon indicates practical examples that can help you to acquaint yourself with operations.
13
Chapter 1 Getting Started
Introduction
The FR40 scanner reads a 1D or 2D barcode by capturing its image. Adopting the advanced
technology
independently developed by Newland Auto-ID Tech, it provides users with Sense scan mode and Screen scan mode,
tailored to different scanning needs.
An illustrated introduction to the FR40 scanner is included in this chapter. If you have an FR40 scanner at hand, make
good use of it to develop a better understanding of this manual. This chapter is written for normal users, maintenance staff
and software developers.
Features of the FR40
Comprehensive data capture: most 1D and 2D barcodes including Chinese Sensible Code.
Fast and accurate decoding capability: integrates high-performance processor and barcode decoder board.
Easy to configure and update.
Unpacking
Open the package and take out FR40 scanner and its accessories. Check to make sure everything on the packing list is
present and intact. If any contents are damaged or missing, please keep the original package and contact your dealer
immediately for after-sale service.
14
FR40 Scanner
Sense/Screen Scan Mode Switch
(LED)
Sense/Screen Scan Mode Switch:
Press it to toggle between the Screen scan
Trigger (Left)
Scan Window
mode (red LED lights up) and Sense scan
mode (green LED lights up).
LED:
LED flashes once: Barcode is decoded
successfully.
Trigger (Right)
Data Port
15
The Pinout of the Data Port (default)
PIN
Signal
Type
Function
1
NC
-
No connection
2
NC
-
No connection
3
VCC
P
Power+ (+5V)
4
TXD
O
RS-232 output
5
RXD
I
RS-232 input
6
CTS
I
Clear to send
7
RTS
O
Request to send
8
GND
P
Ground
9
D-
I/O
10
D+
I/O
USB signal
Connect FR40 to a Host
The FR40 scanner must be connected to a Host in actual application, such as PC, POS or any intelligent terminal with
USB or RS-232 port, via a communication cable, either USB or RS-232 cable.
USB
USB port on the Host
RS-232
RS-232 port on the Host
16
Use USB Cable
Fig. 1-3
Connect the FR40 scanner to a Host through a USB cable with RJ45 and USB connectors:
17
1.
Plug the RJ45 connector into the data port (see Fig.1-1) on the scanner.
2.
Plug the USB connector into the USB port on the Host.
Use RS-232 Cable
Fig. 1-4
Connect the FR40 scanner to a Host through a RS-232 cable with RJ45, RS-232 and power connectors:
1.
Plug the RJ45 connector into the data port (see Fig.1-1) on the scanner.
2.
Plug the RS-232 connector into the RS-232 port on the Host.
3.
Connect the supplied power adaptor to the power connector of the RS-232 cable.
18
Power On, Sleep, Power Off, Reboot
Power on the scanner
Connect the FR40 scanner to a Host. Then the scanner will be turned on and automatically enter the sleep mode.
Enter the sleep mode
If no operation is performed on the device for some time, the device will automatically enter the sleep state.
Power off the scanner
Remove the communication cable from the FR40 scanner; or remove the USB cable from the Host; or disconnect the
power adaptor from mains.
Reboot the scanner
If the FR40 scanner stops responding to input or runs abnormally, turn off the scanner and then turn it back on.
Maintenance
The scan window should be kept clean.
Do not scratch the scan window.
Use soft brush to remove the stain from the scan window.
Use the soft cloth to clean the window, such as eyeglass cleaning cloth.
Do not spray any liquid on the scan window.
Do not use any detergent to clean other parts of the device except for water.
The warranty DOES NOT cover damages caused by inappropriate care and maintenance.
19
Dimensions (unit: mm)
Left View
Fig. 1-6
Front View
Fig. 1-7
20
Right View
Fig. 1-8
21
Scanning Instructions
When the FR40 scanner is in the Sense scan mode, you can follow the steps below to scan a barcode:
Connect the scanner to a Host with the cable. Then the scanner will be powered on.
Present a barcode to the center of the scan window. Then the scanner will project a red beam and start to decode the
barcode.
If the barcode is decoded successfully, the scanner will emit a good read beep and the decoded data will be sent to
the Host.
22
Chapter 2 QuickSet
QuickSet is Windows-based barcode reading software developed by Newland Auto-ID Tech. Users can use it to develop
applications, troubleshoot problems and configure FR40 scanners.
Fig. 2-1
23
【Enter Setup】
Chapter 3 System Settings
Introduction
There are three ways to configure the FR40 scanner: barcode programming, command programming and QuickSet
programming.
Barcode Programming
The FR40 scanner can be configured through scanning programming barcodes. In the following sections, we will explain
the available options and features and provide the barcodes to program them.
This programming method is most straightforward. However, it requires manually scanning barcodes. As a result, errors
are more likely to occur.
Command Programming
The FR40 scanner can also be configured by command strings sent from the Host. In the following sections, the
commands will be provided along with programming barcodes.
Users can also design an application to send those command strings to their scanners.
QuickSet Programming
Besides the two methods mentioned above, you can conveniently perform scanner configuration through QuickSet too.
QuickSet is a Windows-based GUI program, enabling users to gain access to decoded data and captured images and to
configure scanners.
This method is quite similar to the command programming. QuickSet is a software program particularly designed for
Newland products.
Note: All settings except temporary ones are stored in non-volatile memory of the scanner and will not be lost by
removing power from the scanner.
**【Exit Setup】
24
【Enter Setup】
Programming Barcode/Command/Function
The figure above is an example that shows you the programming barcode and command for the Exit Setup function:
1. The Exit Setup barcode
2. The Exit Setup command
3. The function/feature that can be enabled by using the programming barcode or command listed above.
4. ** indicates factory default settings.
Use of Programming Barcodes
Scanning the Enter Setup barcode can enable the scanner to enter the setup mode. Then you can scan a number of
programming barcodes to configure your scanner. To exit the setup mode, scan the Exit Setup barcode.
Some functions or options may involve parameter value settings that require scanning numeric barcodes. To find the
numeric barcodes, see the “Digit Barcodes” section in Appendix.
**【Exit Setup】
【Enter Setup】
25
**【Exit Setup】
【Enter Setup】
Programming barcode data can be transmitted to the Host. Scan the appropriate barcode below to enable or disable the
transmission of programming barcode data (programming commands) to the Host.
**【Do Not Transmit Programming Barcode Data】
【Transmit Programming Barcode Data】
Illumination
A couple of illumination options are provided to improve the lighting conditions during every image capture:
Mode 1: Turn on the two red LEDs on the upper row for illumination.
Mode 2: Turn on the two red LEDs on the lower row for illumination.
Mode 3: Turn on all four red LEDs for illumination.
**【Mode 1】
【Mode 2】
【Mode 3】
Note: It is recommended that you select Mode 3 when scanning barcodes on moving objects.
**【Exit Setup】
26
【Enter Setup】
Beep
Good Read Beep
Scanning the Good Read Beep Off barcode disables the scanner’s ability to beep upon a successful decode of
non-programming barcode; scanning the Good Read Beep On barcode can enable it.
**【Good Read Beep On】
【Good Read Beep Off】
Good Read Beep Type
**【Type 1】
【Type 3】
【Type 2】
27
**【Exit Setup】
【Enter Setup】
Good Read Beep Duration (Type 1)
**【Medium (80ms)】
【Short (40ms)】
【Custom (20-300ms)】
Good Read Beep Frequency (Type 1)
【Extra Low (800Hz)】
【Low (1600Hz)】
**【Medium (2730Hz)】
【High (4200Hz)】
【Custom (20-20000Hz)】
**【Exit Setup】
28
【Enter Setup】
Good Read Beep Volume
**【Loud】
【Low】
【Medium】
Startup Beep
**【Startup Beep On】
【Startup Beep Off】
Beep Definitions
Beep Sequence
Indication
4 ascending beeps
The scanner is powered up (if the Startup Beep is on).
1 beep
A non-programming barcode was decoded (if the Good Read Beep is on).
2 beeps
A programming barcode was decoded.
3 short low beeps and 2 high beeps
The scanner failed to decode a programming barcode.
1 long low beep
29
The scanner detected an unknown character when using USB HID-KBW (if the Beep on
Unknown Character is enabled).
**【Exit Setup】
【Enter Setup】
Scan Mode
Sense Mode: Presenting a barcode to the scan window activates a decode session. Pressing and hold the trigger can
also activate a decode session.
Screen Mode: Presenting an on-screen barcode to the scan window activates a decode session.
Switch between the Sense and Screen scan modes:
Method 1: Press the button at the top of the scanner.
Method 2: Scan the Screen Mode barcode to activate the Screen scan mode (indicated by red LED); scan the Motion
Mode barcode to activate the Sense scan mode (indicated by green LED).
**【Motion Mode】
【Screen Mode】
**【Exit Setup】
30
【Enter Setup】
Decode Area
Whole Area Decoding
The scanner attempts to decode barcode(s) within its field of view and transmits the barcode that has been first decoded.
Central Area Decoding
The scanner attempts to decode barcode(s) within a specified central area and transmits the barcode that has been first
decoded. This feature allows the scanner to narrow its field of view to make sure the scanner reads only those barcodes
intended by the user. For instance, if multiple barcodes are placed closely together, central area decoding will insure that
only the desired barcode is read.
Specify Central Area
The default central area is a (Width*20%) by (Height*20%) area in the center of the scanner’s field of view, as shown in the
figure below. You can define the central area by scanning the Specify Central Area barcode and numeric barcode(s)
corresponding to a desired percentage (1-100). If Central Area Decoding is enabled by scanning the Central Area
Decoding barcode, the scanner only reads barcodes that intersect the predefined central area.
**【Whole Area Decoding】
【Central Area Decoding】
【Specify Central Area】
31
**【Exit Setup】
【Enter Setup】
Default Settings
Factory Defaults
Scanning the following barcode can restore the scanner to the factory defaults.
You may need to reset all parameters to the factory defaults when:
scanner is not properly configured so that it fails to decode barcodes.
you forget previous configuration and want to avoid its impact.
**【Restore All Factory Defaults】
Custom Defaults
Custom defaults make it possible to save the frequently-used settings on the scanner.
Scanning the Save as Custom Defaults barcode can save the current settings as custom defaults. Once custom default
settings are stored, they can be recovered at any time by scanning the Restore All Custom Defaults barcode.
Custom defaults are stored in the non-volatile memory.
【Save as Custom Defaults】
【Restore All Custom Defaults】
Restoring the scanner to the factory defaults will not remove the custom defaults from the scanner.
**【Exit Setup】
32
【Enter Setup】
Product Information
Obtain Product Information: Transmit the product information to the Host straight away.
Send Product Information at Startup: Transmit the product information to the Host when the scanner is powered
on. This feature only applies to scanners using an RS-232 interface.
【Obtain Product Information】
**【Do Not Send Product Information at Startup】
【Send Product Information at Startup】
33
**【Exit Setup】
【Enter Setup】
Details of product information are described in the table below:
Item
Description
Firmware Ver
Firmware Version
Build Time
Firmware Build Time
Device ID
Device Type
App Ver
Application Version
uIMG Ver
uIMG Version
Date
Manufacture Date
S/N
Factory Serial Number
ESN
User-defined Serial Number
Manufacture ID
Device Name
Interface
1. RS-232, baud rate, parity check, data bit, stop bit.
2. USB, type of USB interface.
Indicate reading 1D is allowed. Enabled symbologies are separated by a comma. Additional
information includes:
1D
1. “+” is followed by the additional feature of the symbology.
2. Minimum length -> maximum length
3. “No Check Digit” or “Check Digit” 4. “Fixed Length”: i.e. discrete length, even number(s) between 2 and 64.
2D
Indicate reading 2D is allowed. Enabled symbologies are separated by a comma.
Additional information includes: minimum length -> maximum length
MCU Mode
1. Sense
(Scanning Preference)
2. Motion
Scan Mode
**【Exit Setup】
1. Sense Scan
2. Screen Scan
34
【Enter Setup】
Chapter 4 RS-232 Interface
Introduction
When the scanner is connected to the RS-232 port of a Host, the scanner will select RS-232 Connection by default.
However, you need to set communication parameters (including baud rate, parity check, data bit and stop bit) to match the
Host.
The RS-232 Connection barcode is used when the scanner is connected to the RS-232 port of a Host.
【RS-232 Connection】
RS-232 Parameters
When the scanner is connected to the Host via serial port, it is necessary to maintain consistency in communication
parameters configuration on both devices to ensure smooth communication between them.
35
**【Exit Setup】
【Enter Setup】
Baud Rate
Baud rate is the number of bits of data transmitted per second. Set the baud rate to match the Host requirements. The
default baud rate is 9600 bps.
**【Baud Rate 9600】
【Baud Rate 19200】
【Baud Rate 1200】
【Baud Rate 38400】
【Baud Rate 2400】
【Baud Rate 57600】
【Baud Rate 4800】
【Baud Rate 115200】
【Baud Rate 14400】
**【Exit Setup】
36
【Enter Setup】
Parity Check
Set the parity type to match the Host requirements. The default setting is No Parity.
Odd Parity: If the data contains an odd number of 1 bits, the parity bit value is set to 0.
Even Parity: If the data contains an even number of 1 bits, the parity bit value is set to 0.
None: Select this option when no parity bit is required.
**【None】
【Odd Parity】
【Even Parity】
37
**【Exit Setup】
【Enter Setup】
Data Bit
Set the number of data bits to match the Host requirements. The default setting is 8 Data Bits.
**【8 Data Bits】
【6 Data Bits】
【7 Data Bits】
【5 Data Bits】
Stop Bit
The stop bit(s) at the end of each transmitted character marks the end of transmission of one character and prepares the
receiving device for the next character in the serial data stream. Set the number of stop bits to match the Host requirements.
The default setting is 1 Stop Bit.
**【1 Stop Bit】
【2 Stop Bits】
**【Exit Setup】
38
【Enter Setup】
Hardware Auto Flow Control
If this feature is enabled, the scanner determines whether to transmit data based on CTS signal level. When CTS signal is
at a low level which means the serial port’s cache memory of receiving device (such as PC) is full, the scanner sends data
through RS-232 port until CTS signal is set to high level by receiving device. When the scanner is not ready for receiving, it
will set RTS signal to low level. When sending device (such as PC) detects it, it will not send data to the scanner any more
to prevent data loss.
If this feature is disabled, reception/transmission of serial data will not be influenced by RTS/CTS signal.
**【Disable Hardware Auto Flow Control】
【Enable Hardware Auto Flow Control】
Before enabling this feature, make sure that RTS/CTS signal line is contained in RS-232 cable.
Without the signal line, RS-232 communication errors will occur.
39
**【Exit Setup】
【Enter Setup】
Chapter 5 USB Interface
Introduction
There are four options for USB connection.
USB HID-KBW: The scanner’s transmission is simulated as USB keyboard input with no need for command
configuration or a driver. The barcode data could be entered by the virtual keyboard directly and it is also convenient
for the Host to receive data.
USB DataPipe: USB DataPipe is a transport protocol developed by Newland Auto-ID Tech, which requires
installation of a specific driver on the Host. It supports data transmission and device configuration on QuickSet. The
DataPipe driver for Windows is available at http://www.nlscan.com.
USB COM Port Emulation: The USB port on the Host is emulated as a RS-232 port with the same data transmission
and configuration as a real RS-232 port. This mode is based on USB DataPipe protocol and requires the USB
DataPipe driver, too.
HID-POS: It is based on the HID interface, with no need of a custom driver. It excels virtual keyboard and traditional
RS-232 interface in transmission speed.
When the scanner is connected to both USB and RS-232 ports on a Host, it will select the USB connection by default.
**【Exit Setup】
40
【Enter Setup】
USB HID-KBW
When the scanner is connected to the USB port on a Host, you can enable the USB HID-KBW feature by scanning the
barcode below. Then scanner’s transmission will be simulated as USB keyboard input. The Host receives keystrokes on
the virtual keyboard. It works on a Plug and Play basis and no driver is required.
【USB HID-KBW】
If the Host allows keyboard input, then no extra software is needed for HID-KBW input.
41
**【Exit Setup】
【Enter Setup】
USB Country Keyboard Types
Keyboard layouts and country codes vary from country to country. The default setting is US keyboard type. Follow the
steps below to program the keyboard type for your country or language.
1.
Scan the Enter Setup barcode.
2.
Scan the Select Country Code barcode.
3.
Scan the code of your country. (See the “Country CodeTable”)
4.
Scan the Save barcode.
5.
Scan the Exit Setup barcode.
【Select Country Code】
Program the scanner to emulate Norwegian keyboard (Norway):
**【Exit Setup】
1.
Scan the Enter Setup barcode.
2.
Scan the Select Country Code barcode.
3.
Scan the numeric barcodes “1” and “5”. (See the “Digit Barcodes” section in Appendix))
4.
Scan the Save barcode. (See the “Save/Cancel Barcodes” section in Appendix)
5.
Scan the Exit Setup barcode.
42
【Enter Setup】
Country Code Table
43
Country/Language
Code
Country/Language
Code
US
0
Netherlands (Dutch)
14
Belgium
1
Norway
15
Brazil
2
Poland
16
Canada (French)
3
Portugal
17
Czechoslovakia
4
Romania
18
Denmark
5
Russia
19
Finland (Swedish)
6
Slovakia
21
France
7
Spain
22
Germany/Austria
8
Sweden
23
Greece
9
Switzerland (German)
24
Hungary
10
Turkey F
25
Israel (Hebrew)
11
Turkey Q
26
Italy
12
UK
27
Latin-American
13
Japan
28
**【Exit Setup】
【Enter Setup】
Beep on Unknown Character
Due to the differences in keyboard layouts, some characters contained in barcode data may be unavailable on the selected
keyboard. As a result, the scanner fails to transmit the unknown characters.
Scan the appropriate barcode below to enable or disable the emission of beep when an unknown character is detected.
**【Do Not Beep on Unknown Character】
【Beep on Unknown Character】
Supposing French keyboard (Country Code: 7) is selected and barcode data ”AÐF” is being dealted with,
the keyboard will fail to locate the “Д (0xD0) character and the scanner will ignore the character and
continue to process the next one.
Do Not Beep on Unknown Character: The scanner does not beep and the Host receives “AF”.
Beep on Unknown Character: The scanner beeps and the Host still receives “AF”.
If Emulate ALT+Keypad ON is selected, Beep on Unknown Character does not function.
**【Exit Setup】
44
【Enter Setup】
Emulate ALT+Keypad
When Emulate ALT+Keypad is turned on, any ASCII character (0x00 - 0xff) is sent over the numeric keypad no matter
which keyboard type is selected.
1.
ALT Make
2.
Enter the number corresponding to a desired character on the keypad.
3.
ALT Break
**【Emulate ALT+Keypad OFF】
【Emulate ALT+Keypad ON】
Since sending a character involves multiple keystroke emulations, this method appears less efficient.
Supposing French keyboard (Country Code: 7) is selected and Emulate ALT+Keypad is ON, barcode
data ”AÐF” (65/208/70) is sent as below:
“A” – “ALT Make” + “065” + “ALT Break”
“Д -- “ALT Make” + “208” + “ALT Break” “F” -- “ALT Make” + “070” + “ALT Break” 45
**【Exit Setup】
【Enter Setup】
Function Key Mapping
When Function Key Mapping is enabled, function character (0x00 - 0x1F) are sent as ASCII sequences over the numeric
keypad.
1.
CTRL Make
2.
Press function key
3.
CTRL Break
**【Disable Function Key Mapping】
【Enable Function Key Mapping】
Supposing the Function Key Mapping feature is enabled and other parameters of USB HID-KBW adopt
factory defaults, barcode data “A<HT>(i.e. Horizontal Tab)F” (0x41/0x09/0x46) is sent as below:
1.
“A” - Keystroke “A”.
2. “Ctrl I” - “Ctrl Make” + Keystroke “I” + “Ctrl Break”
3.
“F” - Keystroke “F”
For some text editors, “Ctrl I” means italic convert. So the output may be “AF”.
Emulate ALT+Keypad ON prevails over Enable Function Key Mapping.
**【Exit Setup】
46
【Enter Setup】
ASCII Function Key Mapping Table
47
ASCII Function
ASCII Value (HEX)
No Function Key Mapping
Function Key Mapping
NUL
00
Null
Ctrl+2
SOH
01
Keypad Enter
Ctrl+A
STX
02
Caps Lock
Ctrl+B
ETX
03
Null
Ctrl+C
EOT
04
Null
Ctrl+D
ENQ
05
Null
Ctrl+E
ACK
06
Null
Ctrl+F
BEL
07
Enter
Ctrl+G
BS
08
Left Arrow
Ctrl+H
HT
09
Horizontal Tab
Ctrl+I
LF
0A
Down Arrow
Ctrl+J
VT
0B
Vertical Tab
Ctrl+K
FF
0C
Backspace
Ctrl+L
CR
0D
Enter
Ctrl+M
SO
0E
Insert
Ctrl+N
SI
0F
Esc
Ctrl+O
DLE
10
F11
Ctrl+P
DC1
11
Home
Ctrl+Q
DC2
12
Print Screen
Ctrl+R
DC3
13
Delete
Ctrl+S
DC4
14
tab+shift
Ctrl+T
NAK
15
F12
Ctrl+U
SYN
16
F1
Ctrl+V
ETB
17
F2
Ctrl+W
CAN
18
F3
Ctrl+X
EM
19
F4
Ctrl+Y
SUB
1A
F5
Ctrl+Z
ESC
11
F6
Ctrl+[
FS
1C
F7
Ctrl+\
GS
1D
F8
Ctrl+]
RS
1E
F9
Ctrl+6
US
1F
F10
Ctrl+-
**【Exit Setup】
【Enter Setup】
ASCII Function Key Mapping Table (Continued)
The last five characters (0x1B~0x1F) in the table above apply to US keyboard layout only. The following chart provides the
equivalents of these five characters for other countries.
Country
Code
United
[
\
]
6
-
Belgium
[
<
]
6
-
Scandinavia
8
<
9
6
-
France
^
8
$
6
=
Germany
Ã
+
6
-
Italy
\
+
6
-
Switzerland
<
..
6
-
United Kingdom
[
¢
]
6
-
Denmark
8
\
9
6
-
Norway
8
\
9
6
-
Spain
[
\
]
6
-
**【Exit Setup】
48
【Enter Setup】
Inter-Keystroke Delay
This parameter specifies the delay between emulated keystrokes.
**【No Delay】
【Long Delay (40ms)】
【Short Delay (20ms)】
49
**【Exit Setup】
【Enter Setup】
Caps Lock
The Caps Lock ON option can invert upper and lower case characters contained in barcode data. This inversion occurs
regardless of the state of Caps Lock key on the Host’s keyboard.
**【Caps Lock OFF】
【Caps Lock ON】
Emulate ALT+Keypad ON/ Convert All to Upper Case/ Convert All to Lower Case prevails over Caps
Lock ON.
When the Caps Lock ON is selected, barcode data “AbC” is transmitted as “aBc”.
**【Exit Setup】
50
【Enter Setup】
Convert Case
Scan the appropriate barcode below to convert all bar code data to your desired case.
**【No Case Conversion】
【Convert All to Lower Case】
【Convert All to Upper Case】
When the Convert All to Lower Case feature is enabled, barcode data “AbC” is transmitted as “abc”.
If Emulate ALT+Keypad ON is selected, Convert All to Lower Case and Convert All to Upper Case do
not function.
51
**【Exit Setup】
【Enter Setup】
Emulate Numeric Keypad
When this feature is disabled, sending barcode data is emulated as keystroke(s) on main keyboard.
To enable this feature, scan the Emulate Numeric Keypad barcode. Sending a number (0-9) is emulated as keystroke(s)
on numeric keypad, whereas sending other character like “+”, “_”, “*” , “/” and “.” is still emulated as keystrokes on main keyboard.
Numeric keypad is usually situated at the right of the main keyboard. The state of Num Lock on the simulated numeric
keypad is determined by its equivalent on the Host. If Num Lock on the Host is turned off, the output of simulated numeric
keypad is function key instead of number.
**【Do Not Emulate Numeric Keypad】
【Emulate Numeric Keypad】
Make sure the Num Lock light of the Host is turned ON before enabling this feature.
Emulate ALT+Keypad ON prevails over Emulate Numeric Keypad.
**【Exit Setup】
52
【Enter Setup】
Supposing the Emulate Numeric Keypad feature is enabled:
if Num Lock on the Host is ON, “A4.5” is transmitted as “A4.5”;;
if Num Lock on the Host is OFF, “A4.5” is transmitted as follows:
53
1.
“A” is sent as is because it is not included in numeric keypad;;
2.
“4” is sent as the function key “Cursor Move to Left”;;
3.
“.” is sent as the function key “Delete After the Cursor”;
4.
“5” is not sent as it does not correspond to any function key.
**【Exit Setup】
【Enter Setup】
USB DataPipe
This protocol is defined by Newland. A driver is required when using this protocol to communicate with scanner.
Its advantages include fast data transmission and easy integration of the SDK into application system.
【USB DataPipe】
**【Exit Setup】
54
【Enter Setup】
USB COM Port Emulation
If your scanner is connected to the USB port on a Host, the USB COM Port Emulation feature allows the Host to receive
data in the way as a serial port does. However, you need to set communication parameters on the scanner to match the
Host requirements. To learn how to program communication parameters, see the “RS-232 Parameters” section in
Chapter 4.
【USB COM Port Emulation】
HID-POS
Introduction
The HID-POS interface is recommended for new application programs. It can send up to 56 characters in a single USB
report and appears more efficient than keyboard emulation.
Features:
HID based, no custom driver required.
Way more efficient in communication than keyboard emulation and traditional RS-232 interface.
Note: HID-POS does not require a custom driver. However, a HID interface on Windows 98 does. All HID interfaces
employ standard driver provided by the operating system. Use defaults when installing the driver.
【HID-POS】
55
**【Exit Setup】
【Enter Setup】
Access the Scanner with Your Program
Use CreateFile to access the scanner as a HID device and then use ReadFile to deliver the scanned data to the
application program. Use WriteFile to send data to the scanner.
For detailed information about USB and HID interfaces, go to www.USB.org.
Acquire Scanned Data
After a barcode is decoded, the scanner sends an input report as below:
Bit
Byte
7
6
5
4
3
2
0
Report ID = 0x02
1
Barcode Length
2-57
Decoded Data (1-56)
58-61
Reserved (1-4)
62
Newland Symbology Identifier or N/C: 0x00
63
-
-
-
-
-
-
1
0
Decode Data
-
Continued
VID/PID
USB uses VID (Vendor ID) and PID (Product ID) to identify and locate a device. The VID is assigned by USB
Implementers Forum. Newland’s vendor ID is 1EAB (Hex). A range of PIDs are used for each Newland product family.
Every PID contains a base number and interface type (keyboard, COM port, etc.).
Product
FR40
**【Exit Setup】
Interface
PID (Hex)
PID (Dec)
Base
0000
0
HID POS
0010
16
56
【Enter Setup】
Chapter 6 Symbologies
Introduction
Every symbology (barcode type) has its own unique attributes. This chapter provides programming barcodes for
configuring the scanner so that it can identify various barcode symbologies. The more symbologies you enable, the slower
your scanner decodes. It is recommended to disable those that are rarely used to improve the performance of the scanner.
General Settings
Disable All Symbologies
If the Disable All Symbologies feature is enabled, the scanner can only identify the programming barcodes.
【Disable All Symbologies】
Enable All Symbologies
If the Enable All Symbologies feature is enabled, the scanner will be able to read all compatible barcode symbologies as
well as the programming barcodes.
【Enable All Symbologies】
57
**【Exit Setup】
【Enter Setup】
Enable 1D Symbologies
【Enable 1D Symbologies】
Disable 1D Symbologies
【Disable 1D Symbologies】
Enable 2D Symbologies
【Enable 2D Symbologies】
Disable 2D Symbologies
【Disable 2D Symbologies】
**【Exit Setup】
58
【Enter Setup】
Code 128
Restore Factory Defaults
**【Restore the Factory Defaults of Code 128】
Enable/Disable Code 128
**【Enable Code 128】
【Disable Code 128】
If the scanner fails to identify Code 128 barcodes, you may first try this solution by scanning the Enter
Setup barcode and then Enable Code 128 barcode.
59
**【Exit Setup】
【Enter Setup】
Set Length Range for Code 128
The scanner can be configured to only decode Code 128 barcodes with lengths that fall between (inclusive) the minimum
and maximum lengths. To accomplish it, you need to set the minimum and maximum lengths.
【Set the Minimum Length (Default: 1)】
【Set the Maximum Length (Default: 48)】
If minimum length is set to be greater than maximum length, the scanner only decodes Code 128
barcodes with either the minimum or maximum length. If minimum length is same as maximum length,
only Code 128 barcodes with that length are to be decoded.
Set the scanner to decode Code 128 barcodes containing between 8 and 12 characters:
**【Exit Setup】
1.
Scan the Enter Setup barcode.
2.
Scan the Set the Minimum Length barcode.
3.
Scan the numeric barcode “8”. (See the “Digit Barcodes” section in Appendix)
4.
Scan the Save barcode. (See the “Save/Cancel Barcodes” section in Appendix)
5.
Scan the Set the Maximum Length barcode.
6.
Scan the numeric barcode “1”. 7.
Scan the numeric barcode “2”.
8.
Scan the Save barcode.
9.
Scan the Exit Setup barcode.
60
【Enter Setup】
EAN-8
Restore Factory Defaults
**【Restore the Factory Defaults of EAN-8】
Enable/Disable EAN-8
**【Enable EAN-8】
【Disable EAN-8】
If the scanner fails to identify EAN-8 barcodes, you may first try this solution by scanning the Enter
Setup barcode and then Enable EAN-8 barcode.
61
**【Exit Setup】
【Enter Setup】
Transmit Check Digit
EAN-8 is 8 digits in length with the last one as its check digit used to verify the integrity of the data.
**【Transmit EAN-8 Check Digit】
【Do Not Transmit EAN-8 Check Digit】
2-Digit Add-On Code
An EAN-8 barcode can be augmented with a two-digit add-on code to form a new one. In the example below, the part
surrounded by blue dotted line is an EAN-8 barcode while the part circled by red dotted line is a two-digit add-on code.
**【Disable 2-Digit Add-On Code】
【Enable 2-Digit Add-On Code】
Disable 2-Digit Add-On Code: The scanner decodes EAN-8 and ignores the add-on code when
presented with an EAN-8 plus 2-digit add-on barcode. It can also decode EAN-8 barcodes without 2-digit
add-on codes.
Enable 2-Digit Add-On Code: The scanner decodes a mix of EAN-8 barcodes with and without 2-digit
add-on codes.
**【Exit Setup】
62
【Enter Setup】
5-Digit Add-On Code
An EAN-8 barcode can be augmented with a five-digit add-on code to form a new one. In the example below, the part
surrounded by blue dotted line is an EAN-8 barcode while the part circled by red dotted line is a five-digit add-on code.
**【Disable 5-Digit Add-On Code】
【Enable 5-Digit Add-On Code】
Disable 5-Digit Add-On Code: The scanner decodes EAN-8 and ignores the add-on code when
presented with an EAN-8 plus 5-digit add-on barcode. It can also decode EAN-8 barcodes without 5-digit
add-on codes.
Enable 5-Digit Add-On Code: The scanner decodes a mix of EAN-8 barcodes with and without 5-digit
add-on codes.
EAN-8 Extension
Disable EAN-8 Zero Extend: Transmit EAN-8 barcodes as is.
Enable EAN-8 Zero Extend: Add five leading zeros to decoded EAN-8 barcodes to extend to 13 digits.
**【Disable EAN-8 Zero Extend】
【Enable EAN-8 Zero Extend】
63
**【Exit Setup】
【Enter Setup】
EAN-13
Restore Factory Defaults
**【Restore the Factory Defaults of EAN-13】
Enable/Disable EAN-13
**【Enable EAN-13】
【Disable EAN-13】
If the scanner fails to identify EAN-13 barcodes, you may first try this solution by scanning the Enter
Setup barcode and then Enable EAN-13 barcode.
**【Exit Setup】
64
【Enter Setup】
Transmit Check Digit
**【Transmit EAN-13 Check Digit】
【Do Not Transmit EAN-13 Check Digit】
2-Digit Add-On Code
An EAN-13 barcode can be augmented with a two-digit add-on code to form a new one. In the example below, the part
surrounded by blue dotted line is an EAN-13 barcode while the part circled by red dotted line is a two-digit add-on code.
**【Disable 2-Digit Add-On Code】
【Enable 2-Digit Add-On Code】
Disable 2-Digit Add-On Code: The scanner decodes EAN-13 and ignores the add-on code when
presented with an EAN-13 plus 2-digit add-on barcode. It can also decode EAN-13 barcodes without
2-digit add-on codes.
Enable 2-Digit Add-On Code: The scanner decodes a mix of EAN-13 barcodes with and without 2-digit
add-on codes.
65
**【Exit Setup】
【Enter Setup】
5-Digit Add-On Code
An EAN-13 barcode can be augmented with a five-digit add-on code to form a new one. In the example below, the part
surrounded by blue dotted line is an EAN-13 barcode while the part circled by red dotted line is a five-digit add-on code.
**【Disable 5-Digit Add-On Code】
【Enable 5-Digit Add-On Code】
Disable 5-Digit Add-On Code: The scanner decodes EAN-13 and ignores the add-on code when
presented with an EAN-13 plus 5-digit add-on barcode. It can also decode EAN-13 barcodes without
5-digit add-on codes.
Enable 5-Digit Add-On Code: The scanner decodes a mix of EAN-13 barcodes with and without 5-digit
add-on codes.
**【Exit Setup】
66
【Enter Setup】
UPC-E
Restore Factory Defaults
**【Restore the Factory Defaults of UPC-E】
Enable/Disable UPC-E
**【Enable UPC-E】
【Disable UPC-E】
If the scanner fails to identify UPC-E barcodes, you may first try this solution by scanning the Enter Setup
barcode and then Enable UPC-E barcode.
67
**【Exit Setup】
【Enter Setup】
Transmit Check Digit
UPC-E is 8 digits in length with the last one as its check digit used to verify the integrity of the data.
**【Transmit UPC-E Check Digit】
【Do Not Transmit UPC-E Check Digit】
2-Digit Add-On Code
A UPC-E barcode can be augmented with a two-digit add-on code to form a new one. In the example below, the part
surrounded by blue dotted line is a UPC-E barcode while the part circled by red dotted line is a two-digit add-on code.
**【Disable 2-Digit Add-On Code】
【Enable 2-Digit Add-On Code】
Disable 2-Digit Add-On Code: The scanner decodes UPC-E and ignores the add-on code when
presented with a UPC-E plus 2-digit add-on barcode. It can also decode UPC-E barcodes without 2-digit
add-on codes.
Enable 2-Digit Add-On Code: The scanner decodes a mix of UPC-E barcodes with and without 2-digit
add-on codes.
**【Exit Setup】
68
【Enter Setup】
5-Digit Add-On Code
A UPC-E barcode can be augmented with a five-digit add-on code to form a new one. In the example below, the part
surrounded by blue dotted line is a UPC-E barcode while the part circled by red dotted line is a five-digit add-on code.
**【Disable 5-Digit Add-On Code】
【Enable 5-Digit Add-On Code】
Disable 5-Digit Add-On Code: The scanner decodes UPC-E and ignores the add-on code when
presented with a UPC-E plus 5-digit add-on barcode. It can also decode UPC-E barcodes without 5-digit
add-on codes.
Enable 5-Digit Add-On Code: The scanner decodes a mix of UPC-E barcodes with and without 5-digit
add-on codes.
69
**【Exit Setup】
【Enter Setup】
Transmit System Character “0”
The first character of UPC-E barcode is the system character “0”.
**【Do Not Transmit System Character “0”】
【Transmit System Character “0”】
UPC-E Extension
Disable UPC-E Extend: Transmit UPC-E barcodes as is.
Enable UPC-E Extend”: Extend UPC-E barcodes to make them compatible in length to UPC-A.
**【Disable UPC-E Extend】
【Enable UPC-E Extend】
**【Exit Setup】
70
【Enter Setup】
UPC-A
Restore Factory Defaults
**【Restore the Factory Defaults of UPC-A】
Enable/Disable UPC-A
**【Enable UPC-A】
【Disable UPC-A】
If the scanner fails to identify UPC-A barcodes, you may first try this solution by scanning the Enter Setup
barcode and then Enable UPC-A barcode.
71
**【Exit Setup】
【Enter Setup】
Transmit Check Digit
UPC-A is 12 digits in length with the last one as its check digit used to verify the integrity of the data.
**【Transmit UPC-A Check Digit】
【Do Not Transmit UPC-A Check Digit】
2-Digit Add-On Code
A UPC-A barcode can be augmented with a two-digit add-on code to form a new one. In the example below, the part
surrounded by blue dotted line is a UPC-A barcode while the part circled by red dotted line is a two-digit add-on code.
**【Disable 2-Digit Add-On Code】
【Enable 2-Digit Add-On Code】
Disable 2-Digit Add-On Code: The scanner decodes UPC-A and ignores the add-on code when
presented with a UPC-A plus 2-digit add-on barcode. It can also decode UPC-A barcodes without 2-digit
add-on codes.
Enable 2-Digit Add-On Code: The scanner decodes a mix of UPC-A barcodes with and without 2-digit
add-on codes.
**【Exit Setup】
72
【Enter Setup】
5-Digit Add-On Code
A UPC-A barcode can be augmented with a five-digit add-on code to form a new one. In the example below, the part
surrounded by blue dotted line is a UPC-A barcode while the part circled by red dotted line is a five-digit add-on code.
**【Disable 5-Digit Add-On Code】
【Enable 5-Digit Add-On Code】
Disable 5-Digit Add-On Code: The scanner decodes UPC-A and ignores the add-on code when
presented with a UPC-A plus 5-digit add-on barcode. It can also decode UPC-A barcodes without 5-digit
add-on codes.
Enable 5-Digit Add-On Code: The scanner decodes a mix of UPC-A barcodes with and without 5-digit
add-on codes.
73
**【Exit Setup】
【Enter Setup】
Transmit Preamble Character “0”
The preamble character “0” is part of the UPC-A barcode.
**【Do Not Transmit Preamble Character “0”】
【Transmit Preamble Character “0”】
The preamble character “0” usually does not appear in printed UPC-A barcodes.
**【Exit Setup】
74
【Enter Setup】
Interleaved 2 of 5
Restore Factory Defaults
**【Restore the Factory Defaults of Interleaved 2 of 5】
Enable/Disable Interleaved 2 of 5
**【Enable Interleaved 2 of 5】
【Disable Interleaved 2 of 5】
If the scanner fails to identify Interleaved 2 of 5 barcodes, you may first try this solution by scanning the
Enter Setup barcode and then Enable Interleaved 2 of 5 barcode.
75
**【Exit Setup】
【Enter Setup】
Set Length Range for Interleaved 2 of 5
The scanner can be configured to only decode Interleaved 2 of 5 barcodes with lengths that fall between (inclusive) the
minimum and maximum lengths. To accomplish it, you need to set the minimum and maximum lengths.
【Set the Minimum Length (Default: 6)】
【Set the Maximum Length (Default: 80)】
If minimum length is set to be greater than maximum length, the scanner only decodes Interleaved 2 of 5
barcodes with either the minimum or maximum length. If minimum length is same as maximum length,
only Interleaved 2 of 5 barcodes with that length are to be decoded.
Set the scanner to decode Interleaved 2 of 5 barcodes containing between 8 and 12 characters:
**【Exit Setup】
1.
Scan the Enter Setup barcode.
2.
Scan the Set the Minimum Length barcode.
3.
Scan the numeric barcode “8”. (See the “Digit Barcodes” section in Appendix)
4.
Scan the Save barcode. (See the “Save/Cancel Barcodes” section in Appendix)
5.
Scan the Set the Maximum Length barcode.
6.
Scan the numeric barcode “1”. 7.
Scan the numeric barcode “2”.
8.
Scan the Save barcode.
9.
Scan the Exit Setup barcode.
76
【Enter Setup】
Check Digit Verification
A check digit is optional for Interleaved 2 o 5 and can be added as the last digit. It is a calculated value used to verify the
integrity of the data.
Disable: The scanner transmits Interleaved 2 of 5 barcodes as is.
Do Not Transmit Check Digit After Verification: The scanner checks the integrity of all Interleaved 2 of 5 barcodes
to verify that the data complies with the check digit algorithm. Barcodes passing the check will be transmitted except
the last digit, whereas those failing it will not be transmitted.
Transmit Check Digit After Verification: The scanner checks the integrity of all Interleaved 2 of 5 barcodes to verify
that the data complies with the check digit algorithm. Barcodes passing the check will be transmitted, whereas those
failing it will not be transmitted.
Since Interleaved 2 of 5 must always have an even number of digits, a zero may need to be added as the first digit when
the check digit is added. The check digit is automatically generated when making Interleaved 2 of 5 barcodes.
**【Disable】
【Do Not Transmit Check Digit After Verification】
【Transmit Check Digit After Verification】
If the Do Not Transmit Check Digit After Verification option is enabled, Interleaved 2 of 5 barcodes with
a length that is less than the configured minimum length after having the check digit excluded will not be
decoded. (For example, when the Do Not Transmit Check Digit After Verification option is enabled and
the minimum length is set to 4, Interleaved 2 of 5 barcodes with a total length of 4 characters including the
check digit cannot be read.)
77
**【Exit Setup】
【Enter Setup】
Set Discrete Lengths for Interleaved 2 of 5
The scanner can be configured to only decode Interleaved 2 of 5 barcodes within a specific length range or with a couple
of discrete lengths. The length must be an even number not greater than 64 and consist of three digits (a leading zero or
zeros may need to be added to meet the length requirement).
The discrete lengths become valid only when the Enable the Discrete Lengths option is enabled.
**【Disable the Discrete Lengths】
【Set a Discrete Length】
【Enable the Discrete Lengths】
【Delete a Discrete Length】
Set the scanner to decode Interleaved 2 of 5 barcodes containing either 12 or 24 characters:
**【Exit Setup】
1.
Scan the Enter Setup barcode.
2.
Scan the Enable the Discrete Lengths barcode.
3.
Scan the Set a Discrete Length barcode.
4.
Scan the numeric barcodes “0”, “1” and “2”. (See the “Digit Barcodes” section in Appendix)
5.
Scan the Save barcode. (See the “Save/Cancel Barcodes” section in Appendix)
6.
Scan the Set a Discrete Length barcode.
7.
Scan the numeric barcodes “0”, “2” and “4”.
8.
Scan the Save barcode.
9.
Scan the Exit Setup barcode.
78
【Enter Setup】
Set the scanner to decode Interleaved 2 of 5 barcodes containing between 12 and 24 characters:
79
1.
Scan the Enter Setup barcode.
2.
Scan the Enable the Discrete Lengths barcode.
3.
Scan the Set a Discrete Length barcode.
4.
Scan the numeric barcodes “0”, “1” and “2”.
5.
Scan the numeric barcodes “0”, “2” and “4”.
6.
Scan the Save barcode.
7.
Scan the Exit Setup barcode.
**【Exit Setup】
【Enter Setup】
ITF-14
ITF-14 is a special kind of Interleaved 2 of 5 with a length of 14 characters and the last character as the check character.
By default, ITF-14 is disabled.
ITF-14 priority principle: For the Interleaved 2 of 5 barcodes with a length of 14 characters and the last character as the
check character, the ITF-14 configurations shall take precedence over the Interleaved 2 of 5 settings.
**【Disable ITF-14】
【Enable ITF-14 But Do Not Transmit Check Digit】
【Enable ITF-14 and Transmit Check Digit】
An example of the ITF-14 priority principle: when ITF-14 is enabled and Interleaved 2 of 5 is disabled, the
scanner only decodes Interleaved 2 of 5 barcodes with a length of 14 characters and the last character as
the check character.
**【Exit Setup】
80
【Enter Setup】
ITF-6
ITF-6 is a special kind of Interleaved 2 of 5 with a length of 6 characters and the last character as the check character. By
default, ITF-6 is disabled.
ITF-6 priority principle: For the Interleaved 2 of 5 barcodes with a length of 6 characters and the last character as the
check character, the ITF-6 configurations shall take precedence over the Interleaved 2 of 5 settings.
**【Disable ITF-6】
【Enable ITF-6 But Do Not Transmit Check Digit】
【Enable ITF-6 and Transmit Check Digit】
An example of the ITF-6 priority principle: when ITF-6 is enabled and Interleaved 2 of 5 is disabled, the
scanner only decodes Interleaved 2 of 5 barcodes with a length of 6 characters and the last character as
the check character.
81
**【Exit Setup】
【Enter Setup】
Matrix 2 of 5
Restore Factory Defaults
**【Restore the Factory Defaults of Matrix 2 of 5】
Enable/Disable Matrix 2 of 5
【Enable Matrix 2 of 5】
**【Disable Matrix 2 of 5】
If the scanner fails to identify Matrix 2 of 5 barcodes, you may first try this solution by scanning the Enter
Setup barcode and then Enable Matrix 2 of 5 barcode.
**【Exit Setup】
82
【Enter Setup】
Set Length Range for Matrix 2 of 5
The scanner can be configured to only decode Matrix 2 of 5 barcodes with lengths that fall between (inclusive) the
minimum and maximum lengths. To accomplish it, you need to set the minimum and maximum lengths.
【Set the Minimum Length (Default: 4)】
【Set the Maximum Length (Default: 80)】
If minimum length is set to be greater than maximum length, the scanner only decodes Matrix 2 of 5
barcodes with either the minimum or maximum length. If minimum length is same as maximum length,
only Matrix 2 of 5 barcodes with that length are to be decoded.
Set the scanner to decode Matrix 2 of 5 barcodes containing between 8 and 12 characters:
83
1.
Scan the Enter Setup barcode.
2.
Scan the Set the Minimum Length barcode.
3.
Scan the numeric barcode “8”. (See the “Digit Barcodes” section in Appendix)
4.
Scan the Save barcode. (See the “Save/Cancel Barcodes” section in Appendix)
5.
Scan the Set the Maximum Length barcode.
6.
Scan the numeric barcode “1”. 7.
Scan the numeric barcode “2”.
8.
Scan the Save barcode.
9.
Scan the Exit Setup barcode.
**【Exit Setup】
【Enter Setup】
Check Digit Verification
A check digit is optional for Matrix 2 of 5 and can be added as the last digit. It is a calculated value used to verify the
integrity of the data.
Disable: The scanner transmits Matrix 2 of 5 barcodes as is.
Do Not Transmit Check Digit After Verification: The scanner checks the integrity of all Matrix 2 of 5 barcodes to
verify that the data complies with the check digit algorithm. Barcodes passing the check will be transmitted except the
last digit, whereas those failing it will not be transmitted.
Transmit Check Digit After Verification: The scanner checks the integrity of all Matrix 2 of 5 barcodes to verify that
the data complies with the check digit algorithm. Barcodes passing the check will be transmitted, whereas those
failing it will not be transmitted.
Since Matrix 2 of 5 must always have an even number of digits, a zero may need to be added as the first digit when the
check digit is added. The check digit is automatically generated when making Matrix 2 of 5 barcodes.
**【Disable】
【Do Not Transmit Check Digit After Verification】
【Transmit Check Digit After Verification】
If the Do Not Transmit Check Digit After Verification option is enabled, Matrix 2 of 5 barcodes with a
length that is less than the configured minimum length after having the check digit excluded will not be
decoded. (For example, when the Do Not Transmit Check Digit After Verification option is enabled and
the minimum length is set to 4, Matrix 2 of 5 barcodes with a total length of 4 characters including the
check digit cannot be read.)
**【Exit Setup】
84
【Enter Setup】
Code 39
Restore Factory Defaults
**【Restore the Factory Defaults of Code 39】
Enable/Disable Code 39
**【Enable Code 39】
【Disable Code 39】
If the scanner fails to identify Code 39 barcodes, you may first try this solution by scanning the Enter
Setup barcode and then Enable Code 39 barcode.
85
**【Exit Setup】
【Enter Setup】
Transmit Start/Stop Character
Code 39 uses an asterisk (*) for both the start and the stop characters. You can choose whether or not to transmit the
start/stop characters by scanning the appropriate barcode below.
**【Transmit Start/Stop Character】
【Do Not Transmit Start/Stop Character】
**【Exit Setup】
86
【Enter Setup】
Set Length Range for Code 39
The scanner can be configured to only decode Code 39 barcodes with lengths that fall between (inclusive) the minimum
and maximum lengths. To accomplish it, you need to set the minimum and maximum lengths.
【Set the Minimum Length (Default: 4)】
【Set the Maximum Length (Default: 48)】
If minimum length is set to be greater than maximum length, the scanner only decodes Code 39 barcodes
with either the minimum or maximum length. If minimum length is same as maximum length, only Code 39
barcodes with that length are to be decoded.
Set the scanner to decode Code 39 barcodes containing between 8 and 12 characters:
87
1.
Scan the Enter Setup barcode.
2.
Scan the Set the Minimum Length barcode.
3.
Scan the numeric barcode “8”. (See the “Digit Barcodes” section in Appendix)
4.
Scan the Save barcode. (See the “Save/Cancel Barcodes” section in Appendix)
5.
Scan the Set the Maximum Length barcode.
6.
Scan the numeric barcode “1”. 7.
Scan the numeric barcode “2”.
8.
Scan the Save barcode.
9.
Scan the Exit Setup barcode.
**【Exit Setup】
【Enter Setup】
Check Digit Verification
A check digit is optional for Code 39 and can be added as the last digit. It is a calculated value used to verify the integrity of
the data.
Disable: The scanner transmits Code 39 barcodes as is.
Do Not Transmit Check Digit After Verification: The scanner checks the integrity of all Code 39 barcodes to verify
that the data complies with the check digit algorithm. Barcodes passing the check will be transmitted except the last
digit, whereas those failing it will not be transmitted.
Transmit Check Digit After Verification: The scanner checks the integrity of all Code 39 barcodes to verify that the
data complies with the check digit algorithm. Barcodes passing the check will be transmitted, whereas those failing it
will not be transmitted.
**【Disable】
【Do Not Transmit Check Digit After Verification】
【Transmit Check Digit After Verification】
If the Do Not Transmit Check Digit After Verification option is enabled, Code 39 barcodes with a length
that is less than the configured minimum length after having the check digit excluded will not be decoded.
(For example, when the Do Not Transmit Check Digit After Verification option is enabled and the
minimum length is set to 4, Code 39 barcodes with a total length of 4 characters including the check digit
cannot be read.)
**【Exit Setup】
88
【Enter Setup】
Enable/Disable Code 39 Full ASCII
By default, the scanner is only able to read some ASCII characters. You can configure your scanner to identify all ASCII
characters by scanning the appropriate barcode below.
**【Disable Code 39 Full ASCII】
【Enable Code 39 Full ASCII】
89
**【Exit Setup】
【Enter Setup】
Codabar
Restore Factory Defaults
**【Restore the Factory Defaults of Codabar】
Enable/Disable Codabar
**【Enable Codabar】
【Disable Codabar】
If the scanner fails to identify Codabar barcodes, you may first try this solution by scanning the Enter
Setup barcode and then Enable Codabar barcode.
**【Exit Setup】
90
【Enter Setup】
Set Length Range for Codabar
The scanner can be configured to only decode Codabar barcodes with lengths that fall between (inclusive) the minimum
and maximum lengths. To accomplish it, you need to set the minimum and maximum lengths.
【Set the Minimum Length (Default: 2)】
【Set the Maximum Length (Default: 60)】
If minimum length is set to be greater than maximum length, the scanner only decodes Codabar barcodes
with either the minimum or maximum length. If minimum length is same as maximum length, only Codabar
barcodes with that length are to be decoded.
Set the scanner to decode Codabar barcodes containing between 8 and 12 characters:
91
1.
Scan the Enter Setup barcode.
2.
Scan the Set the Minimum Length barcode.
3.
Scan the numeric barcode “8”. (See the “Digit Barcodes” section in Appendix)
4.
Scan the Save barcode. (See the “Save/Cancel Barcodes” section in Appendix)
5.
Scan the Set the Maximum Length barcode.
6.
Scan the numeric barcode “1”. 7.
Scan the numeric barcode “2”.
8.
Scan the Save barcode.
9.
Scan the Exit Setup barcode.
**【Exit Setup】
【Enter Setup】
Check Digit Verification
A check digit is optional for Codabar and can be added as the last digit. It is a calculated value used to verify the integrity of
the data.
Disable: The scanner transmits Codabar barcodes as is.
Do Not Transmit Check Digit After Verification: The scanner checks the integrity of all Codabar barcodes to verify
that the data complies with the check digit algorithm. Barcodes passing the check will be transmitted except the last
digit, whereas those failing it will not be transmitted.
Transmit Check Digit After Verification: The scanner checks the integrity of all Codabar barcodes to verify that the
data complies with the check digit algorithm. Barcodes passing the check will be transmitted, whereas those failing it
will not be transmitted.
**【Disable】
【Do Not Transmit Check Digit After Verification】
【Transmit Check Digit After Verification】
If the Do Not Transmit Check Digit After Verification option is enabled, Codabar barcodes with a length
that is less than the configured minimum length after having the check digit excluded will not be decoded.
(For example, when the Do Not Transmit Check Digit After Verification option is enabled and the
minimum length is set to 4, Codabar barcodes with a total length of 4 characters including the check digit
cannot be read.)
**【Exit Setup】
92
【Enter Setup】
Start/Stop Character
You can set the start/stop characters and choose whether or not to transmit the start/stop characters by scanning the
appropriate barcode below.
**【Transmit Start/Stop Character】
【Do Not Transmit Start/Stop Character】
**【ABCD/ABCD as the Start/Stop Character】
**【Start/Stop Character in Uppercase】
【ABCD/TN*E as the Start/Stop Character】
【Start/Stop Character in Lowercase】
93
**【Exit Setup】
【Enter Setup】
Code 93
Restore Factory Defaults
**【Restore the Factory Defaults of Code 93】
Enable/Disable Code 93
**【Disable Code 93】
【Enable Code 93】
If the scanner fails to identify Code 93 barcodes, you may first try this solution by scanning the Enter
Setup barcode and then Enable Code 93 barcode.
**【Exit Setup】
94
【Enter Setup】
Set Length Range for Code 93
The scanner can be configured to only decode Code 93 barcodes with lengths that fall between (inclusive) the minimum
and maximum lengths. To accomplish it, you need to set the minimum and maximum lengths.
【Set the Minimum Length (Default: 1)】
【Set the Maximum Length (Default: 48)】
If minimum length is set to be greater than maximum length, the scanner only decodes Code 93 barcodes
with either the minimum or maximum length. If minimum length is same as maximum length, only Code 93
barcodes with that length are to be decoded.
Set the scanner to decode Code 93 barcodes containing between 8 and 12 characters:
95
1.
Scan the Enter Setup barcode.
2.
Scan the Set the Minimum Length barcode.
3.
Scan the numeric barcode “8”. (See the “Digit Barcodes” section in Appendix)
4.
Scan the Save barcode. (See the “Save/Cancel Barcodes” section in Appendix)
5.
Scan the Set the Maximum Length barcode.
6.
Scan the numeric barcode “1”. 7.
Scan the numeric barcode “2”.
8.
Scan the Save barcode.
9.
Scan the Exit Setup barcode.
**【Exit Setup】
【Enter Setup】
Check Digit Verification
Check digits are optional for Code 93 and can be added as the last two digits, which are calculated values used to verify
the integrity of the data.
Disable: The scanner transmits Code 93 barcodes as is.
Do Not Transmit Check Digit After Verification: The scanner checks the integrity of all Code 93 barcodes to verify
that the data complies with the check digit algorithm. Barcodes passing the checks will be transmitted except the last
two digits, whereas those failing them will not be transmitted.
Transmit Check Digit After Verification: The scanner checks the integrity of all Code 93 barcodes to verify that the
data complies with the check digit algorithm. Barcodes passing the checks will be transmitted, whereas those failing
them will not be transmitted.
【Disable】
**【Do Not Transmit Check Digit After Verification】
【Transmit Check Digit After Verification】
If the Do Not Transmit Check Digit After Verification option is enabled, Code 93 barcodes with a length
that is less than the configured minimum length after having the two check digits excluded will not be
decoded. (For example, when the Do Not Transmit Check Digit After Verification option is enabled and
the minimum length is set to 4, Code 93 barcodes with a total length of 4 characters including the two
check digits cannot be read.)
**【Exit Setup】
96
【Enter Setup】
UCC/EAN-128
Restore Factory Defaults
**【Restore the Factory Defaults of UCC/EAN-128】
Enable/Disable UCC/EAN-128
**【Enable UCC/EAN-128】
【Disable UCC/EAN-128】
If the scanner fails to identify UCC/EAN-128 barcodes, you may first try this solution by scanning the
Enter Setup barcode and then Enable UCC/EAN-128 barcode.
97
**【Exit Setup】
【Enter Setup】
GS1 Databar
Restore Factory Defaults
**【Restore the Factory Defaults of GS1 Databar】
Enable/Disable GS1 Databar
**【Enable GS1 Databar】
【Disable GS1 Databar】
If the scanner fails to identify GS1 Databar barcodes, you may first try this solution by scanning the Enter
Setup barcode and then Enable GS1 Databar barcode.
**【Exit Setup】
98
【Enter Setup】
Transmit Application Identifier “01”
**【Transmit Application Identifier “01”】
【Do Not Transmit Application Identifier “01”】
99
**【Exit Setup】
【Enter Setup】
EAN·UCC Composite
Restore Factory Defaults
**【Restore the Factory Defaults of EAN·UCC Composite】
Enable/Disable EAN·UCC Composite
【Enable EAN·UCC Composite】
**【Disable EAN·UCC Composite】
【Enable UPC/EAN Composite】
**【Disable UPC/EAN Composite】
If the scanner fails to identify EAN·UCC Composite barcodes, you may first try this solution by scanning
the Enter Setup barcode and then Enable EAN·UCC Composite barcode.
**【Exit Setup】
100
【Enter Setup】
Code 11
Restore Factory Defaults
**【Restore the Factory Defaults of Code 11】
Enable/Disable Code 11
【Enable Code 11】
**【Disable Code 11】
If the scanner fails to identify Code 11 barcodes, you may first try this solution by scanning the Enter
Setup barcode and then Enable Code 11 barcode.
101
**
【Exit Setup】
【Enter Setup】
Set Length Range for Code 11
The scanner can be configured to only decode Code 11 barcodes with lengths that fall between (inclusive) the minimum
and maximum lengths. To accomplish it, you need to set the minimum and maximum lengths.
【Set the Minimum Length (Default: 4)】
【Set the Maximum Length (Default: 48)】
If minimum length is set to be greater than maximum length, the scanner only decodes Code 11 barcodes
with either the minimum or maximum length. If minimum length is same as maximum length, only Code 11
barcodes with that length are to be decoded.
Set the scanner to decode Code 11 barcodes containing between 8 and 12 characters:
**【Exit Setup】
1.
Scan the Enter Setup barcode.
2.
Scan the Set the Minimum Length barcode.
3.
Scan the numeric barcode “8”. (See the “Digit Barcodes” section in Appendix)
4.
Scan the Save barcode. (See the “Save/Cancel Barcodes” section in Appendix)
5.
Scan the Set the Maximum Length barcode.
6.
Scan the numeric barcode “1”. 7.
Scan the numeric barcode “2”.
8.
Scan the Save barcode.
9.
Scan the Exit Setup barcode.
102
【Enter Setup】
Check Digit Verification
Check digits are optional for Code 11 and can be added as the last one or two digits, which are calculated values used to
verify the integrity of the data.
If the Disable option is enabled, the scanner transmits Code 11 barcodes as is.
【Disable】
【One Check Digit, MOD11 (Len<=10) 】
【Two Check Digits, MOD11/MOD11(Len>10)】
**【One Check Digit, MOD11】
【One Check Digit, MOD11 (Len<=10) 】
【Two Check Digits, MOD11/MOD9 (Len>10)】
【Two Check Digits, MOD11/MOD11】
【Do Not Transmit Check Digit】
【Two Check Digits, MOD11/MOD9】
**【Transmit Check Digit】
103
**
【Exit Setup】
【Enter Setup】
If you select a check digit algorithm and the Do Not Transmit Check Digit option, Code 11 barcodes with
a length that is less than the configured minimum length after having the check digit(s) excluded will not be
decoded. (For example, when the One Check Digit, MOD11 and Do Not Transmit Check Digit options
are enabled and the minimum length is set to 4, Code 11 barcodes with a total length of 4 characters
including the check digit cannot be read.)
**【Exit Setup】
104
【Enter Setup】
ISBN
Restore Factory Defaults
**【Restore the Factory Defaults of ISBN】
Enable/Disable ISBN
【Enable ISBN】
**【Disable ISBN】
If the scanner fails to identify ISBN barcodes, you may first try this solution by scanning the Enter Setup
barcode and then Enable ISBN barcode.
105
**
【Exit Setup】
【Enter Setup】
Set ISBN Format
**【ISBN-13】
【ISBN-10】
**【Exit Setup】
106
【Enter Setup】
Industrial 25
Restore Factory Defaults
**【Restore the Factory Defaults of Industrial 25】
Enable/Disable Industrial 25
【Enable Industrial 25】
**【Disable Industrial 25】
If the scanner fails to identify Industrial 25 barcodes, you may first try this solution by scanning the Enter
Setup barcode and then Enable Industrial 25 barcode.
107
**
【Exit Setup】
【Enter Setup】
Set Length Range for Industrial 25
The scanner can be configured to only decode Industrial 25 barcodes with lengths that fall between (inclusive) the
minimum and maximum lengths. To accomplish it, you need to set the minimum and maximum lengths.
【Set the Minimum Length (Default: 6)】
【Set the Maximum Length (Default: 48)】
If minimum length is set to be greater than maximum length, the scanner only decodes Industrial 25
barcodes with either the minimum or maximum length. If minimum length is same as maximum length,
only Industrial 25 barcodes with that length are to be decoded.
Set the scanner to decode Industrial 25 barcodes containing between 8 and 12 characters:
**【Exit Setup】
1.
Scan the Enter Setup barcode.
2.
Scan the Set the Minimum Length barcode.
3.
Scan the numeric barcode “8”. (See the “Digit Barcodes” section in Appendix)
4.
Scan the Save barcode. (See the “Save/Cancel Barcodes” section in Appendix)
5.
Scan the Set the Maximum Length barcode.
6.
Scan the numeric barcode “1”. 7.
Scan the numeric barcode “2”.
8.
Scan the Save barcode.
9.
Scan the Exit Setup barcode.
108
【Enter Setup】
Check Digit Verification
A check digit is optional for Industrial 25 and can be added as the last digit. It is a calculated value used to verify the
integrity of the data.
Disable: The scanner transmits Industrial 25 barcodes as is.
Do Not Transmit Check Digit After Verification: The scanner checks the integrity of all Industrial 25 barcodes to
verify that the data complies with the check digit algorithm. Barcodes passing the check will be transmitted except the
last digit, whereas those failing it will not be transmitted.
Transmit Check Digit After Verification: The scanner checks the integrity of all Industrial 25 barcodes to verify that
the data complies with the check digit algorithm. Barcodes passing the check will be transmitted, whereas those
failing it will not be transmitted.
**【Disable】
【Do Not Transmit Check Digit After Verification】
【Transmit Check Digit After Verification】
If the Do Not Transmit Check Digit After Verification option is enabled, Industrial 25 barcodes with a
length that is less than the configured minimum length after having the check digit excluded will not be
decoded. (For example, when the Do Not Transmit Check Digit After Verification option is enabled and
the minimum length is set to 4, Industrial 25 barcodes with a total length of 4 characters including the
check digit cannot be read.)
109
**
【Exit Setup】
【Enter Setup】
Standard 25
Restore Factory Defaults
**【Restore the Factory Defaults of Standard 25】
Enable/Disable Standard 25
【Enable Standard 25】
**【Disable Standard 25】
If the scanner fails to identify Standard 25 barcodes, you may first try this solution by scanning the Enter
Setup barcode and then Enable Standard 25 barcode.
**【Exit Setup】
110
【Enter Setup】
Set Length Range for Standard 25
The scanner can be configured to only decode Standard 25 barcodes with lengths that fall between (inclusive) the
minimum and maximum lengths. To accomplish it, you need to set the minimum and maximum lengths.
【Set the Minimum Length (Default: 6)】
【Set the Maximum Length (Default: 48)】
If minimum length is set to be greater than maximum length, the scanner only decodes Standard 25
barcodes with either the minimum or maximum length. If minimum length is same as maximum length,
only Standard 25 barcodes with that length are to be decoded.
Set the scanner to decode Standard 25 barcodes containing between 8 and 12 characters:
111
1.
Scan the Enter Setup barcode.
2.
Scan the Set the Minimum Length barcode.
3.
Scan the numeric barcode “8”. (See the “Digit Barcodes” section in Appendix)
4.
Scan the Save barcode. (See the “Save/Cancel Barcodes” section in Appendix)
5.
Scan the Set the Maximum Length barcode.
6.
Scan the numeric barcode “1”. 7.
Scan the numeric barcode “2”.
8.
Scan the Save barcode.
9.
Scan the Exit Setup barcode.
**【Exit Setup】
【Enter Setup】
Check Digit Verification
A check digit is optional for Standard 25 and can be added as the last digit. It is a calculated value used to verify the
integrity of the data.
Disable: The scanner transmits Standard 25 barcodes as is.
Do Not Transmit Check Digit After Verification: The scanner checks the integrity of all Standard 25 barcodes to
verify that the data complies with the check digit algorithm. Barcodes passing the check will be transmitted except the
last digit, whereas those failing it will not be transmitted.
Transmit Check Digit After Verification: The scanner checks the integrity of all Standard 25 barcodes to verify that
the data complies with the check digit algorithm. Barcodes passing the check will be transmitted, whereas those
failing it will not be transmitted.
**【Disable】
【Do Not Transmit Check Digit After Verification】
【Transmit Check Digit After Verification】
If the Do Not Transmit Check Digit After Verification option is enabled, Standard 25 barcodes with a
length that is less than the configured minimum length after having the check digit excluded will not be
decoded. (For example, when the Do Not Transmit Check Digit After Verification option is enabled and
the minimum length is set to 4, Standard 25 barcodes with a total length of 4 characters including the
check digit cannot be read.)
**【Exit Setup】
112
【Enter Setup】
Plessey
Restore Factory Defaults
**【Restore the Factory Defaults of Plessey】
Enable/Disable Plessey
【Enable Plessey】
**【Disable Plessey】
If the scanner fails to identify Plessey barcodes, you may first try this solution by scanning the Enter
Setup barcode and then Enable Plessey barcode.
113
**【Exit Setup】
【Enter Setup】
Set Length Range for Plessey
The scanner can be configured to only decode Plessey barcodes with lengths that fall between (inclusive) the minimum
and maximum lengths. To accomplish it, you need to set the minimum and maximum lengths.
【Set the Minimum Length (Default: 4)】
【Set the Maximum Length (Default: 48)】
If minimum length is set to be greater than maximum length, the scanner only decodes Plessey barcodes
with either the minimum or maximum length. If minimum length is same as maximum length, only Plessey
barcodes with that length are to be decoded.
Set the scanner to decode Plessey barcodes containing between 8 and 12 characters:
**【Exit Setup】
1.
Scan the Enter Setup barcode.
2.
Scan the Set the Minimum Length barcode.
3.
Scan the numeric barcode “8”. (See the “Digit Barcodes” section in Appendix)
4.
Scan the Save barcode. (See the “Save/Cancel Barcodes” section in Appendix)
5.
Scan the Set the Maximum Length barcode.
6.
Scan the numeric barcode “1”. 7.
Scan the numeric barcode “2”.
8.
Scan the Save barcode.
9.
Scan the Exit Setup barcode.
114
【Enter Setup】
Check Digit Verification
Check digits are optional for Plessey and can be added as the last two digits, which are calculated values used to verify
the integrity of the data.
Disable: The scanner transmits Plessey barcodes as is.
Do Not Transmit Check Digit After Verification: The scanner checks the integrity of all Plessey barcodes to verify
that the data complies with the check digit algorithm. Barcodes passing the checks will be transmitted except the last
two digits, whereas those failing them will not be transmitted.
Transmit Check Digit After Verification: The scanner checks the integrity of all Plessey barcodes to verify that the
data complies with the check digit algorithm. Barcodes passing the checks will be transmitted, whereas those failing
them will not be transmitted.
【Disable】
【Do Not Transmit Check Digit After Verification】
**【Transmit Check Digit After Verification】
If the Do Not Transmit Check Digit After Verification option is enabled, Plessey barcodes with a length
that is less than the configured minimum length after having the check digits excluded will not be decoded.
(For example, when the Do Not Transmit Check Digit After Verification option is enabled and the
minimum length is set to 4, Plessey barcodes with a total length of 4 characters including the check digits
cannot be read.)
115
**【Exit Setup】
【Enter Setup】
MSI-Plessey
Restore Factory Defaults
**【Restore the Factory Defaults of MSI-Plessey】
Enable/Disable MSI-Plessey
【Enable MSI-Plessey】
**【Disable MSI-Plessey】
If the scanner fails to identify MSI-Plessey barcodes, you may first try this solution by scanning the Enter
Setup barcode and then Enable MSI-Plessey barcode.
**【Exit Setup】
116
【Enter Setup】
Set Length Range for MSI-Plessey
The scanner can be configured to only decode MSI-Plessey barcodes with lengths that fall between (inclusive) the
minimum and maximum lengths. To accomplish it, you need to set the minimum and maximum lengths.
【Set the Minimum Length (Default: 4)】
【Set the Maximum Length (Default: 48)】
If minimum length is set to be greater than maximum length, the scanner only decodes MSI-Plessey
barcodes with either the minimum or maximum length. If minimum length is same as maximum length,
only MSI-Plessey barcodes with that length are to be decoded.
Set the scanner to decode MSI-Plessey barcodes containing between 8 and 12 characters:
117
1.
Scan the Enter Setup barcode.
2.
Scan the Set the Minimum Length barcode.
3.
Scan the numeric barcode “8”. (See the “Digit Barcodes” section in Appendix)
4.
Scan the Save barcode. (See the “Save/Cancel Barcodes” section in Appendix)
5.
Scan the Set the Maximum Length barcode.
6.
Scan the numeric barcode “1”. 7.
Scan the numeric barcode “2”.
8.
Scan the Save barcode.
9.
Scan the Exit Setup barcode.
**【Exit Setup】
【Enter Setup】
Check Digit Verification
Check digits are optional for MSI-Plessey and can be added as the last one or two digits, which are calculated values used
to verify the integrity of the data.
If the Disable option is enabled, the scanner transmits MSI-Plessey barcodes as is.
【Disable】
【Two Check Digits, MOD10/MOD11】
**【One Check Digit, MOD10】
【Do Not Transmit Check Digit】
【Two Check Digits, MOD10/MOD10】
**【Transmit Check Digit】
If you select a check digit algorithm and the Do Not Transmit Check Digit option, MSI-Plessey barcodes
with a length that is less than the configured minimum length after having the check digit(s) excluded will
not be decoded. (For example, when the One Check Digit, MOD10 and Do Not Transmit Check Digit
options are enabled and the minimum length is set to 4, MSI-Plessey barcodes with a total length of 4
characters including the check digit cannot be read.)
**【Exit Setup】
118
【Enter Setup】
PDF417
Restore Factory Defaults
**【Restore the Factory Defaults of PDF417】
Enable/Disable PDF417
**【Enable PDF417】
【Disable PDF417】
If the scanner fails to identify PDF417 barcodes, you may first try this solution by scanning the Enter
Setup barcode and then Enable PDF417 barcode.
119
**【Exit Setup】
【Enter Setup】
Set Length Range for PDF417
The scanner can be configured to only decode PDF417 barcodes with lengths that fall between (inclusive) the minimum
and maximum lengths. To accomplish it, you need to set the minimum and maximum lengths.
【Set the Minimum Length (Default: 1)】
【Set the Maximum Length (Default: 2710)】
Minimum length is not allowed to be greater than maximum length. If you only want to read PDF417
barcodes with a specific length, set both minimum and maximum lengths to be that desired length.
Set the scanner to decode PDF417 barcodes containing between 8 and 12 bytes:
**【Exit Setup】
1.
Scan the Enter Setup barcode.
2.
Scan the Set the Minimum Length barcode.
3.
Scan the numeric barcode “8”. (See the “Digit Barcodes” section in Appendix)
4.
Scan the Save barcode. (See the “Save/Cancel Barcodes” section in Appendix)
5.
Scan the Set the Maximum Length barcode.
6.
Scan the numeric barcode “1”. 7.
Scan the numeric barcode “2”.
8.
Scan the Save barcode.
9.
Scan the Exit Setup barcode.
120
【Enter Setup】
PDF417 Twin Code
PDF417 twin code is 2 PDF417 barcodes paralleled vertically or horizontally. Two of them must have the same direction
and similar specifications and be placed closely together.
There are 3 options for reading PDF417 twin codes:
Single PDF417 Only: Read either PDF417 code.
Twin PDF417 Only: Read both PDF417 codes.
Both Single & Twin: Read both PDF417 codes. If successful, transmit as twin PDF417 only. Otherwise, try single
PDF417 only.
**【Single PDF417 Only】
【Twin PDF417 Only】
【Both Single & Twin】
121
**
【Exit Setup】
【Enter Setup】
PDF417 Inverse
Regular barcode: Dark bars on a bright background.
Inverse barcode: Bright bars on a dark background.
**【Decode Regular PDF417 Barcodes Only】
【Decode Inverse PDF417 Barcodes Only】
【Decode Both】
**【Exit Setup】
122
【Enter Setup】
QR Code
Restore Factory Defaults
**【Restore the Factory Defaults of QR Code】
Enable/Disable QR Code
**【Enable QR Code】
【Disable QR Code】
If the scanner fails to identify QR Code barcodes, you may first try this solution by scanning the Enter
Setup barcode and then Enable QR Code barcode.
123
**
【Exit Setup】
【Enter Setup】
Set Length Range for QR Code
The scanner can be configured to only decode QR Code barcodes with lengths that fall between (inclusive) the minimum
and maximum lengths. To accomplish it, you need to set the minimum and maximum lengths.
【Set the Minimum Length (Default: 1)】
【Set the Maximum Length (Default: 7089)】
Minimum length is not allowed to be greater than maximum length. If you only want to read QR Code
barcodes with a specific length, set both minimum and maximum lengths to be that desired length.
Set the scanner to decode QR Code barcodes containing between 8 and 12 bytes:
**【Exit Setup】
1.
Scan the Enter Setup barcode.
2.
Scan the Set the Minimum Length barcode.
3.
Scan the numeric barcode “8”. (See the “Digit Barcodes” section in Appendix)
4.
Scan the Save barcode. (See the “Save/Cancel Barcodes” section in Appendix)
5.
Scan the Set the Maximum Length barcode.
6.
Scan the numeric barcode “1”. 7.
Scan the numeric barcode “2”.
8.
Scan the Save barcode.
9.
Scan the Exit Setup barcode.
124
【Enter Setup】
QR Twin Code
QR twin code is 2 QR barcodes paralleled vertically or horizontally. Two of them must have the same direction and similar
specifications and be placed closely together.
There are 3 options for reading QR twin codes:
Single QR Only: Read either QR code.
Twin QR Only: Read both QR codes. Transmission sequence: left (upper) QR code followed by right (lower) QR
code.
Both Single & Twin: Read both QR codes. If successful, transmit as twin QR only. Otherwise, try single QR only.
**【Single QR Only】
【Both Single & Twin】
【Twin QR Only】
125
**
【Exit Setup】
【Enter Setup】
Aztec
Restore Factory Defaults
**【Restore the Factory Defaults of Aztec Code】
Enable/Disable Aztec Code
【Enable Aztec Code】
**【Disable Aztec Code】
If the scanner fails to identify Aztec barcodes, you may first try this solution by scanning the Enter Setup
barcode and then Enable Aztec Code barcode.
**【Exit Setup】
126
【Enter Setup】
Set Length Range for Aztec Code
The scanner can be configured to only decode Aztec barcodes with lengths that fall between (inclusive) the minimum and
maximum lengths. To accomplish it, you need to set the minimum and maximum lengths.
【Set the Minimum Length (Default: 1)】
【Set the Maximum Length (Default: 3832)】
Minimum length is not allowed to be greater than maximum length. If you only want to read Aztec
barcodes with a specific length, set both minimum and maximum lengths to be that desired length.
Set the scanner to decode Aztec barcodes containing between 8 and 12 bytes:
127
1.
Scan the Enter Setup barcode.
2.
Scan the Set the Minimum Length barcode.
3.
Scan the numeric barcode “8”. (See the “Digit Barcodes” section in Appendix)
4.
Scan the Save barcode. (See the “Save/Cancel Barcodes” section in Appendix)
5.
Scan the Set the Maximum Length barcode.
6.
Scan the numeric barcode “1”. 7.
Scan the numeric barcode “2”.
8.
Scan the Save barcode.
9.
Scan the Exit Setup barcode.
**
【Exit Setup】
【Enter Setup】
Read Multi-barcodes on an Image
There are three modes:
Mode 1: Read one barcode only.
Mode 2: Read fixed number of barcodes only.
Mode 3: Composite Reading. Read fixed number of barcodes first. If unsuccessful, read one barcode only.
**【Mode 1】
【Mode 2】
【Mode 3】
**【Exit Setup】
128
【Enter Setup】
Set the Number of Barcodes
**【1】
【5】
【2】
【6】
【3】
【7】
【4】
【8】
129
**
【Exit Setup】
【Enter Setup】
Data Matrix
Restore Factory Defaults
**【Restore the Factory Defaults of Data Matrix】
Enable/Disable Data Matrix
**【Enable Data Matrix】
【Disable Data Matrix】
If the scanner fails to identify Data Matrix barcodes, you may first try this solution by scanning the Enter
Setup barcode and then Enable Data Matrix barcode.
**【Exit Setup】
130
【Enter Setup】
Set Length Range for Data Matrix
The scanner can be configured to only decode Data Matrix barcodes with lengths that fall between (inclusive) the minimum
and maximum lengths. To accomplish it, you need to set the minimum and maximum lengths.
【Set the Minimum Length (Default: 1)】
【Set the Maximum Length (Default: 3116)】
Minimum length is not allowed to be greater than maximum length. If you only want to read Data Matrix
barcodes with a specific length, set both minimum and maximum lengths to be that desired length.
Set the scanner to decode Data Matrix barcodes containing between 8 and 12 bytes:
131
1.
Scan the Enter Setup barcode.
2.
Scan the Set the Minimum Length barcode.
3.
Scan the numeric barcode “8”. (See the “Digit Barcodes” section in Appendix)
4.
Scan the Save barcode. (See the “Save/Cancel Barcodes” section in Appendix)
5.
Scan the Set the Maximum Length barcode.
6.
Scan the numeric barcode “1”. 7.
Scan the numeric barcode “2”.
8.
Scan the Save barcode.
9.
Scan the Exit Setup barcode.
**
【Exit Setup】
【Enter Setup】
Data Matrix Twin Code
Data Matrix twin code is 2 Data Matrix barcodes paralleled vertically or horizontally. Two of them must have the same
direction and similar specifications and be placed closely together.
There are 3 options for reading Data Matrix twin codes:
Single Data Matrix Only: Read either Data Matrix code.
Twin Data Matrix Only: Read both Data Matrix codes. Transmission sequence: left (upper) Data Matrix code
followed by right (lower) Data Matrix code.
Both Single & Twin: Read both Data Matrix codes. If successful, transmit as twin Data Matrix only. Otherwise, try
single Data Matrix only.
**【Single Data Matrix Only】
【Both Single & Twin】
【Twin Data Matrix Only】
**【Exit Setup】
132
【Enter Setup】
Rectangular Barcode
Data Matrix has two formats:
Square barcodes having the same amount of modules in length and width: 10*10, 12*12.... 144*144.
Rectangular barcodes having different amounts of models in length and width: 6*16, 6*14... 14*22.
**【Enable Rectangular Barcode】
【Disable Rectangular Barcode】
Data Matrix Inverse
Regular barcode: Dark bars on a bright background.
Inverse barcode: Bright bars on a dark background.
**【Decode Regular Data Matrix Barcodes Only】
【Decode Inverse Data Matrix Barcodes Only】
【Decode Both】
133
**
【Exit Setup】
【Enter Setup】
Maxicode
Restore Factory Defaults
**【Restore the Factory Defaults of Maxicode】
Enable/Disable Maxicode
【Enable Maxicode】
**【Disable Maxicode】
If the scanner fails to identify Maxicode barcodes, you may first try this solution by scanning the Enter
Setup barcode and then Enable Maxicode barcode.
**【Exit Setup】
134
【Enter Setup】
Set Length Range for Maxicode
The scanner can be configured to only decode Maxicode barcodes with lengths that fall between (inclusive) the minimum
and maximum lengths. To accomplish it, you need to set the minimum and maximum lengths.
【Set the Minimum Length (Default: 1)】
【Set the Maximum Length (Default: 150)】
Minimum length is not allowed to be greater than maximum length. If you only want to read Maxicode
barcodes with a specific length, set both minimum and maximum lengths to be that desired length.
Set the scanner to decode Maxicode barcodes containing between 8 and 12 bytes:
135
1.
Scan the Enter Setup barcode.
2.
Scan the Set the Minimum Length barcode.
3.
Scan the numeric barcode “8”. (See the “Digit Barcodes” section in Appendix)
4.
Scan the Save barcode. (See the “Save/Cancel Barcodes” section in Appendix)
5.
Scan the Set the Maximum Length barcode.
6.
Scan the numeric barcode “1”. 7.
Scan the numeric barcode “2”.
8.
Scan the Save barcode.
9.
Scan the Exit Setup barcode.
**
【Exit Setup】
【Enter Setup】
Chinese Sensible Code
Restore Factory Defaults
**【Restore the Factory Defaults of Chinese Sensible Code】
Enable/Disable Chinese Sensible Code
【Enable Chinese Sensible Code】
**【Disable Chinese Sensible Code】
If the scanner fails to identify Chinese Sensible Code barcodes, you may first try this solution by scanning
the Enter Setup barcode and then Enable Chinese Sensible Code barcode.
**【Exit Setup】
136
【Enter Setup】
Set Length Range for Chinese Sensible Code
The scanner can be configured to only decode Chinese Sensible Code barcodes with lengths that fall between (inclusive)
the minimum and maximum lengths. To accomplish it, you need to set the minimum and maximum lengths.
【Set the Minimum Length (Default: 1)】
【Set the Maximum Length (Default: 7827)】
Minimum length is not allowed to be greater than maximum length. If you only want to read Chinese
Sensible Code barcodes with a specific length, set both minimum and maximum lengths to be that desired
length.
Set the scanner to decode Chinese Sensible Code barcodes containing between 8 and 12 bytes:
137
1.
Scan the Enter Setup barcode.
2.
Scan the Set the Minimum Length barcode.
3.
Scan the numeric barcode “8”. (See the “Digit Barcodes” section in Appendix)
4.
Scan the Save barcode. (See the “Save/Cancel Barcodes” section in Appendix)
5.
Scan the Set the Maximum Length barcode.
6.
Scan the numeric barcode “1”. 7.
Scan the numeric barcode “2”.
8.
Scan the Save barcode.
9.
Scan the Exit Setup barcode.
**
【Exit Setup】
【Enter Setup】
Chinese Sensible Twin Code
Chinese Sensible twin code is 2 Chinese Sensible barcodes paralleled vertically or horizontally. Two of them must have the
same direction and similar specifications and be placed closely together.
There are 3 options for reading Chinese Sensible twin codes:
Single Chinese Sensible Code Only: Read either Chinese Sensible code.
Twin Chinese Sensible Code Only: Read both Chinese Sensible codes. Transmission sequence: left (upper)
Chinese Sensible code followed by right (lower) Chinese Sensible code.
Both Single & Twin: Read both Chinese Sensible codes. If successful, transmit as twin Chinese Sensible Code only.
Otherwise, try single Chinese Sensible Code only.
**【Single Chinese Sensible Code Only】
【Twin Chinese Sensible Code Only】
【Both Single & Twin】
**【Exit Setup】
138
【Enter Setup】
Chinese Sensible Code Inverse
Regular barcode: Dark bars on a bright background.
Inverse barcode: Bright bars on a dark background.
**【Decode Regular Chinese Sensible Barcodes Only】
【Decode Inverse Chinese Sensible Barcodes Only】
【Decode Both】
139
**
【Exit Setup】
【Enter Setup】
Chapter 7 Prefix & Suffix
Introduction
A 1D barcode could contain digits, letters, symbols, etc. A 2D barcode could contain more data, such as Chinese
characters and other multi-byte characters. However, in real applications, they do not and should not have all information
we need, such as barcode type, data acquisition time and delimiter, in order to keep the barcodes short and flexible.
Preffix and suffix are how to fulfill the needs mentioned above. They can be added, removed and modified while the
original barcode data remains intact.
Barcode processing procedure:
**【Exit Setup】
1.
Extract barcode data
2.
Append prefix/suffix
3.
Pack data
4.
Append terminating character and transmit data
140
【Enter Setup】
General Settings
Enable/Disable All Prefix/Suffix
Disable All Prefix/Suffix: Transmit barcode data with no prefix/suffix.
Enable All Prefix/Suffix: Allow to append Code ID prefix, AIM ID prefix, custom prefix/suffix and terminating character to
the barcode data before the transmission.
**【Disable All Prefix/Suffix】
【Enable All Prefix/Suffix】
Prefix Sequences
2 prefix sequence options:
【Code ID + Custom + AIM ID】
【Custom + Code ID + AIM ID】
141
**
【Exit Setup】
【Enter Setup】
Custom Prefix
Enable/Disable Custom Prefix
If custom prefix is enabled, you are allowed to append to the data a user-defined prefix that cannot exceed 10 characters.
For example, if the custom prefix is “AB” and the barcode data is “123”, the Host will receive “AB123”.
**【Disable Custom Prefix】
【Enable Custom Prefix】
Set Custom Prefix
To set a custom prefix, scan the Set Custom Prefix barcode and then the numeric barcodes corresponding to the
hexadecimal value of a desired prefix. To save the settings, scan the Save barcode.
Note: A custom prefix cannot exceed 10 characters.
【Set Custom Prefix】
Set the custom prefix to “CODE” (its hexadecimal value is 0x43/0x4F/0x44/0x45):
1.
Scan the Enter Setup barcode.
2.
Scan the Set Custom Prefix barcode.
3.
Scan the numeric barcodes “4”,“3”,“4”,“F”,“4”,“4”,“4” and “5”. (See the “Digit Barcodes” section in Appendix)
**【Exit Setup】
4.
Scan the Save barcode. (See the “Save/Cancel Barcodes” section in Appendix)
5.
Scan the Enable Custom Prefix barcode.
6.
Scan the Exit Setup barcode.
142
【Enter Setup】
AIM ID Prefix
AIM (Automatic Identification Manufacturers) ID defines symbology identifier (For the details, see the “Appendix 2: AIM
ID Table” section). If AIM ID prefix is enabled, the scanner will add the symbology identifier before the scanned data after
decoding.
**【Disable AIM ID Prefix】
【Enable AIM ID Prefix】
AIM ID is not user programmable.
Code ID Prefix
Code ID can also be used to identify barcode type. Unlike AIM ID, Code ID is user programmable. Code ID can only
consist of one or two English letters.
**【Disable Code ID Prefix】
【Enable Code ID Prefix】
143
**
【Exit Setup】
【Enter Setup】
Restore All Default Code IDs
For the information of default Code IDs, see the “Code ID Table” section in Appendix.
【Restore All Default Code IDs】
Modify Code ID
See the examples below to learn how to modify a Code ID and restore the default Code IDs of all symbologies.
Modify PDF417 Code ID to be “p” (its hexadecimal value is 0x70):
1.
Scan the Enter Setup barcode.
2.
Scan the Modify PDF417 Code ID barcode.
3.
Scan the numeric barcodes “7” and “0”. (See the “Digit Barcodes” section in Appendix)
4.
Scan the Save barcode. (See the “Save/Cancel Barcodes” section in Appendix)
5.
Scan the Exit Setup barcode.
Restore the default Code IDs of all symbologies:
**【Exit Setup】
1.
Scan the Enter Setup barcode.
2.
Scan the Restore All Default Code IDs barcode.
3.
Scan the Exit Setup barcode.
144
【Enter Setup】
【Modify PDF417 Code ID】
【Modify Data Matrix Code ID】
【Modify QR Code ID】
【Modify Maxicode Code ID】
【Modify Aztec Code ID】
【Modify Chinese Sensible Code ID】
【Modify EAN-8 Code ID】
【Modify ITF-6 Code ID】
【Modify EAN-13 Code ID】
【Modify Code 39 Code ID】
145
**
【Exit Setup】
【Enter Setup】
【Modify UPC-E Code ID】
【Modify Codabar Code ID】
【Modify UPC-A Code ID】
【Modify Code 93 Code ID】
【Modify Interleaved 2 of 5 Code ID】
【Modify Code 128 Code ID】
【Modify ITF-14 Code ID】
【Modify ISBN Code ID】
【Modify UCC/EAN-128 Code ID】
【Modify Industrial 25 Code ID】
**【Exit Setup】
146
【Enter Setup】
【Modify Code 11 Code ID】
【Modify Standard 25 Code ID】
【Modify EAN•UCC Composite Code ID】
【Modify Plessey Code ID】
【Modify GS1 Databar Code ID】
【Modify MSI-Plessey Code ID】
【Modify Matrix 2 of 5 Code ID】
147
**
【Exit Setup】
【Enter Setup】
Custom Suffix
Enable/Disable Custom Suffix
If custom suffix is enabled, you are allowed to append to the data a user-defined suffix that cannot exceed 10 characters.
For example, if the custom suffix is “AB” and the barcode data is “123”, the Host will receive “123AB”.
**【Disable Custom Suffix】
【Enable Custom Suffix】
Set Custom Suffix
To set a custom suffix, scan the Set Custom Suffix barcode and then the numeric barcodes corresponding to the
hexadecimal value of a desired suffix. To save the settings, scan the Save barcode.
Note: A custom suffix cannot exceed 10 characters.
【Set Custom Suffix】
Set the custom suffix to “CODE” (its hexadecimal value is 0x43/0x4F/0x44/0x45):
1.
Scan the Enter Setup barcode.
2.
Scan the Set Custom Suffix barcode.
3.
Scan the numeric barcodes “4”,“3”,“4”,“F”,“4”,“4”,“4” and “5”. (See the “Digit Barcodes” section in Appendix)
**【Exit Setup】
4.
Scan the Save barcode. (See the “Save/Cancel Barcodes” section in Appendix)
5.
Scan the Enable Custom Suffix barcode.
6.
Scan the Exit Setup barcode.
148
【Enter Setup】
Terminating Character Suffix
Enable/Disable Terminating Character Suffix
A terminating character such as carriage return (CR) or carriage return/line feed pair (CRLF) can only be used to mark the
end of data, which means nothing can be added after it.
A terminating character suffix cannot be formatted or packed as a custom suffix does.
**【Disable Terminating Character Suffix】
【Enable Terminating Character Suffix】
149
**
【Exit Setup】
【Enter Setup】
Set Terminating Character Suffix
To set a terminating character suffix, scan the Set Terminating Character Suffix barcode and then the numeric barcodes
corresponding to the hexadecimal value of a desired terminating character. To save the settings, scan the Save barcode.
Note: A terminating character suffix cannot exceed 2 characters.
【Set Terminating Character Suffix】
【Terminating Character 0x0D】
【Terminating Character 0x0D,0x0A】
**【Exit Setup】
150
【Enter Setup】
Chapter 8 Data Extraction & Packing
Introduction
In real applications, barcode data could be divided into several sections, each of which delivers different information, such
as the manufacturer ID and product ID. If you only want to transmit the product ID and ignore the manufacturer ID, data
extraction can fill the bill. Data extraction makes it possible to transmit selected section(s) of raw barcode data.
Regular data transmission:
Decode barcode—>Append prefix—>Append Suffix—>Append terminating character
suffix—>Transmit data to the Host
Data transmission with extraction: Decode barcode—>Extract data—>Append prefix—>Append suffix—>Append
terminating character suffix—>Transmit data to the Host
Data packing puts the desired data into a certain format.
Data transmission with extraction and packing: Decode barcode—>Extract data—>Append prefix—>Append suffix—>
Pack data—>Append terminating character suffix—>Transmit data to the Host
Data Extraction
General Rule No.1: It is symbology specific extraction, which means barcodes of the same type can only adopt one
extraction option.
General Rule No.2: The scanner allows up to three extraction options to be stored in the non-volatile memory. If more than
three options are programmed, only the last three are to be stored. For instance, if an option is programmed for Code 128,
Code 39, QR Code and UPC-A respectively, only the options for Code 39, QR Code and UPC-A will be stored.
General Rule No.3: If different options are programmed for a symbology, only the last option will be stored. For instance,
Option A has been programmed for Code 128 and later Option B is programmed for the same barcode type, then Option A
will be replaced by Option B.
To enable extraction option(s), scan the Enable Extraction barcode
151
**【Exit Setup】
【Enter Setup】
If you want to remove the extraction option of a barcode type, follow the steps below:
1.
Scan the Enter Setup barcode.
2.
Scan the Erase the Extraction Option of a Symbology barcode.
3.
Scan the ID number of the barcode type. (e.g. EAN-13, its ID number is 005. For more information, see the
“Symbology ID Number” section in Appendix)
4.
Scan the Save barcode. (See the “Save/Cancel Barcodes” section in Appendix)
5.
Scan the Exit Setup barcode.
**【Disable Extraction】
【Erase the Extraction Option of a Symbology】
【Enable Extraction】
【Erase the Last Extraction Option】
【Program Extraction Option】
【Erase All Extraction Options】
**【Exit Setup】
152
【Enter Setup】
Program 1D Extraction Option
When programming a 1D extraction option, you need to scan a string of decimal digit barcodes and obey the following
rules:
The extraction option is usually comprised of one barcode type section (symbology ID number) and one or more data
extraction sections.
A barcode type section is composed of a 3-digit symbology ID (e.g. “005”, EAN-13) while a data extraction section
include 9 decimal digits, with the first 3 digits indicating extraction direction (000: extract from left to right; 001: extract
from right to left), the next 3 digits indicating start position and the last 3 digits indicating end position.
153
One extraction option can only apply to one barcode type.
**【Exit Setup】
【Enter Setup】
When scanning an EAN-13 barcode, send the leftmost character through the 3rd and the last 4th
character through the rightmost of the data:
1.
Scan the Enter Setup barcode.
2.
Scan the Enable Extraction barcode.
3.
Scan the Program Extraction Option barcode.
4.
Scan the numberic barcodes in the following table, the Save barcode and the Exit Setup barcode.
Digit
005
000
Meaning
EAN-13 ID
Left to Right
Barcode Type Section
001
003
Start with
End with
leftmost char
3rd char
001
Right to Left
Data Extraction Section 1
004
001
Start with last
End with
4th char
rightmost char
Data Extraction Section 2
Note:
1.
Up to 5 data extraction sections are allowed for one 1D extraction option.
2.
Neither the start position nor end position can be greater than 127.
3.
Data extraction sections can be overlapped. For instance, section 1: 1st character through the 5th (Left to
Right); section 2: 2rd character through the 4th (Left to Right).
4.
Start position can be greater than end position. In the example above, data extraction section 2 is “001 004 001”, that means the order of extraction is the last 4th, the last 3rd, the last 2nd and the rightmost.
5.
To extract only one character, make start position equal to end position.
**【Exit Setup】
154
【Enter Setup】
Program 2D Extraction Option
When programming a 2D extraction option, you need to scan a string of decimal digit barcodes and obey the following
rules:
The extraction option is usually comprised of one barcode type section (symbology ID number) and one or more data
extraction sections.
A barcode type section is composed of a 3-digit symbology ID (e.g. “033”, QR Code) while a data extraction section
include 15 decimal digits, with the first 3 digits indicating extraction direction (000: extract from left to right; 001:
extract from right to left), the next 6 digits indicating start position and the last 6 digits indicating end position. The 6
digits are used to represent a 4-digit decimal number: 0, thousands, hundreds, 0, tens, ones (e.g. “001013” for 113).
155
One extraction option can only apply to one barcode type.
**【Exit Setup】
【Enter Setup】
When scanning a QR Code barcode, send the leftmost character through the 20th and the 113th
character through the 140th of the data:
1.
Scan the Enter Setup barcode.
2.
Scan the Enable Extraction barcode.
3.
Scan the Program Extraction Option barcode.
4.
Scan the numberic barcodes in the following table, the Save barcode and the Exit Setup barcode.
Digit
033
000
Meaning
QR Code ID
Left to Right
Barcode Type Section
000001
000020
Start with
End with
leftmost char
20th char
000
Left to Right
Data Extraction Section 1
001013
001040
Start with
End with
113th char
140th char
Data Extraction Section 2
Note:
1.
Up to 3 data extraction sections are allowed for one 2D extraction option.
2.
Neither the start position nor end position can be greater than 9999.
3.
Data extraction sections can be overlapped. For instance, section 1: 1st character through the 50th (Left to
Right); section 2: 2rd character through the 40th (Left to Right).
4.
Start position can be greater than end position. In the example above, if data extraction section 1 is “000
000020 000001”, then the order of the extraction will be the 20th, 19th, 18th… and the leftmost.
5.
To extract only one character, make start position equal to end position.
Data Packaging
Introduction
Data packing is designed for a specific group of users who want to have the data packed before transmission. Data
packing influences data format, so it is advised to disable this feature when it is not required.
**【Exit Setup】
156
【Enter Setup】
**【Disable Data Packing】
Normal Pack
Normal Pack format: [STX + ATTR + LEN] + [AL_TYPE + DATA] + [LRC]
STX: 0x02
ATTR: 0x00
LEN: Barcode data length is expressed in 2 bytes ranging from 0x0000 (0) to 0xFFFF (65535).
AL_TYPE: 0x36
DATA: Raw barcode data.
LRC: Check digit.
LRC calculation algorithm: computation sequence: 0xFF+LEN+AL_TYPE+DATA; computation method is XOR, byte
by byte.
【Normal Pack】
157
**【Exit Setup】
【Enter Setup】
Chapter 9 Batch Programming
Introduction
Batch programming enables users to integrate a batch of commands into a single batch barcode .
Listed below are batch programming rules:
1.
Command format: Command + “=” + Parameter Value.
2.
Each command is terminated by semicolon. Note that there is no space between a command and its terminator
semicolon.
3.
The last command must be the Save command (0000160).
4.
Use the barcode generator software to generate a 2D batch barcode.
Example: Create a batch barcode for llumination Always On (0200030), Sense Mode (0302010), Decode Session
Timeout (0313000) = 2s, Disable the Discrete Lengths for Interleaved 2 of 5 (0405140):
1.
Input the commands:
0200030; 0302010;0313000=2000; 0405140;0000160;
2.
Generate a batch barcode.
When setting up a scanner with the above configuration, scan the Enable Batch Barcode barcode and then the batch
barcode generated.
【Enable Batch Barcode】
**【Exit Setup】
158
【Enter Setup】
Create a Batch Command
A batch command may contain a number of individual commands each of which is terminated by a semicolon. It must be
ended with the Save command.
Command Structure: Command (+ “=” + Parameter Value)
4 command syntaxes are described as below:
1.
Syntax 1: Command
This syntax applies to most configuration situations.
Example:
Set the Baud Rate to 38400bps: 0100060
Enable the Sense Mode: 0302010
2.
Syntax 2: Command + “=” + Decimal Digit(s)
This syntax applies to the options/features programming which requires the entry of parameter value (decimal), such
as the Maximum/Minimum Length, Decode Session Timeout, Timeout Between Decodes (Same Barcode) and
Sensitivity.
Example:
Set the Decode Session Timeout to 3000ms: 0313000=3000
Set the Sensitivity to (level) 10: 0312040=10
3.
Syntax 3: Command + “=” + Hexadecimal Digit(s) (e.g., 0x101a, 0x2C03)
This syntax applies to the features/options programming like the Custom Prefix/Suffix, Terminating Character Suffix,
Code ID Suffix, Set/Delete the Discrete Length and Program Extraction Option, which requires the entry of parameter
value (hexadecimal).
Example:
Decode Interleaved 2 of 5 barcodes containing between 4 and 26 characters: 0405160=0x041a
Set the Terminating Character Suffix to CR/LF: 0310000=0x0d0a
4.
Syntax 4: Command + “=” + Double Quotation Marks
For situations where the parameter value is visible character in Syntax 3, this syntax is also appropriate.
Example:
Set the Custom Prefix to AUTO-ID: 0300000=“AUTO-ID”
159
**【Exit Setup】
【Enter Setup】
Create a Batch Barcode
Batch barcodes can be produced in the format of PDF417, QR Code or DataMatrix.
Example: Create a batch barcode for llumination Always On, Sense Mode, Decode Session Timeout = 2s, Disable the
Discrete Lengths for Interleaved 2 of 5:
1.
Input the following commands:
0200030;0302010;0313000=2000;0405140;0000160;
2.
Generate a PDF417 batch barcode.
**【Exit Setup】
160
【Enter Setup】
Use Batch Barcode
To put a batch barcode into use, scan the following barcodes.
【Enter Setup】
【Enable Batch Barcode】
【Batch Barcode】
【Exit Setup】
161
**【Exit Setup】
【Enter Setup】
Chapter 10 Data Formatter
Introduction
Normally, when you scan a barcode, it gets outputted automatically; however, when you do a format, you must use a “send”
command (see the “Send Commands” section) to output data. The maximum size of a data format configuration is 256
bytes, which includes header information. No format can contain more than 50 bytes. By default, the data formatter is
disabled. Enable it when required. If you have changed data format settings, and wish to clear all formats and return to the
factory defaults, scan the Default Data Format code below.
**【Default Data Format】
Enable/Disable Data Formatter
Scan the appropriate barcode below to enable or disable the data formatter. By default, the data formatter is disabled.
**【Disable】
**【Exit Setup】
【Enable】
162
【Enter Setup】
Data Formatter Commands
When working with the Data Formatter, a virtual cursor is moved along your input data string. The following commands are
used to both move this cursor to different positions, and to select, replace, and insert data into the final output. For the hex
value of ASCII characters involved in the commands, refer to the “ASCII Table” in Appendix.
Send Commands
F1 Send all characters
Syntax=F1xx (xx: The insert character’s hex value)
Include in the output message all of the characters from the input message, starting from current cursor position, followed
by an insert character.
F2 Send a number of characters
Syntax=F2nnxx (nn: The numeric value (00-99) for the number of characters; xx: The insert character’s hex value)
Include in the output message a number of characters followed by an insert character. Start from the current cursor position
and continue for “nn” characters or through the last character in the input message, followed by character “xx.”
F2 Example: Send a number of characters
Send the first 10 characters from the barcode above, followed by a carriage return.
Command string: F2100D
F2 is the “Send a number of characters” command
10 is the number of characters to send
0D is the hex value for a CR
The data is output as: 1234567890
<CR>
163
**【Exit Setup】
【Enter Setup】
F3 Send all characters up to a particular character
Syntax=F3ssxx (ss: The particular character’s hex value; xx: The insert character’s hex value)
Include in the output message all characters from the input message, starting with the character at the current cursor
position and continuing to, but not including, the particular character “ss,” followed by character “xx.” The cursor is moved
forward to the “ss” character.
F3 Example: Send all characters up to a particular character
Using the barcode above, send all characters up to but not including “D,” followed by a carriage return.
Command string: F3440D
F3 is the “Send all characters up to a particular character” command
44 is the hex value for a “D”
0D is the hex value for a CR
The data is output as: 1234567890ABC
<CR>
E9 Send all but the last characters
Syntax=E9nn (nn: The numeric value (00-99) for the number of characters that will not be sent at the end of the message)
Include in the output message all but the last “nn” characters, starting from the current cursor position. The cursor is moved
forward to one position past the last input message character included.
F4 Insert a character multiple times
Syntax=F4xxnn (xx: The insert character’s hex value; nn: The numeric value (00-99) for the number of times it should be
sent)
Send “xx” character “nn” times in the output message, leaving the cursor in the current position.
**【Exit Setup】
164
【Enter Setup】
E9 and F4 Example: Send all but the last characters, followed by 2 tabs
Send all characters except for the last 8 from the barcode above, followed by 2 tabs.
Command string: E908F40902
E9 is the “Send all but the last characters” command
08 is the number of characters at the end to ignore
F4 is the “Insert a character multiple times” command
09 is the hex value for a horizontal tab
02 is the number of time the tab character is sent
The data is output as: 1234567890AB<tab><tab>
B3 Insert symbology name
Insert the name of the barcode’s symbology in the output message, without moving the cursor.
B4 Insert barcode length
Insert the barcode’s length in the output message, without moving the cursor. The length is expressed as a numeric string
and does not include leading zeros.
165
**【Exit Setup】
【Enter Setup】
B3 and B4 Example: Insert the symbology name and length
Send the symbology name and length before the barcode data from the barcode above. Break up these insertions with
spaces. End with a carriage return.
Command string: B3F42001B4F42001F10D
B3 is the “Insert symbology name” command
F4 is the “Insert a character multiple times” command
20 is the hex value for a space
01 is the number of time the space character is sent
B4 is the “Insert barcode length” command
F4 is the “Insert a character multiple times” command
20 is the hex value for a space
01 is the number of time the space character is sent
F1 is the “Send all characters” command
0D is the hex value for a CR
The data is output as: Code128 20 1234567890ABCDEFGHIJ
<CR>
Move Commands
F5 Move the cursor forward a number of characters
Syntax=F5nn (nn: The numeric value (00-99) for the number of characters the cursor should be moved ahead)
Move the cursor ahead “nn” characters from current cursor position.
**【Exit Setup】
166
【Enter Setup】
F5 Example: Move the cursor forward and send the data
Move the cursor forward 3 characters, then send the rest of the barcode data from the barcode above. End with a carriage
return.
Command string: F503F10D
F5 is the “Move the cursor forward a number of characters” command
03 is the number of characters to move the cursor
F1 is the “Send all characters” command
0D is the hex value for a CR
The data is output as: 4567890ABCDEFGHIJ
<CR>
F6 Move the cursor backward a number of characters
Syntax=F6nn (nn: The numeric value (00-99) for the number of characters the cursor should be moved back)
Move the cursor back “nn” characters from current cursor position.
F7 Move the cursor to the beginning
Syntax=F7
Move the cursor to the first character in the input message.
EA Move the cursor to the end
Syntax=EA
Move the cursor to the last character in the input message.
167
**【Exit Setup】
【Enter Setup】
Search Commands
F8 Search forward for a character
Syntax=F8xx (xx: The search character’s hex value)
Search the input message forward for “xx” character from the current cursor position, leaving the cursor pointing to the “xx”
character.
F8 Example: Send barcode data that starts after a particular character
Search for the letter “D” in barcodes and send all the data that follows, including the “D”. Using the barcode above:
Command string: F844F10D
F8 is the “Search forward for a character” command
44 is the hex value for “D”
F1 is the “Send all characters” command
0D is the hex value for a CR
The data is output as: DEFGHIJ
<CR>
F9 Search backward for a character
Syntax=F9xx (xx: The search character’s hex value)
Search the input message backward for “xx” character from the current cursor position, leaving the cursor pointing to the
“xx” character.
**【Exit Setup】
168
【Enter Setup】
B0 Search forward for a string
Syntax=B0nnnnS (nnnn: The string length (up to 9999); S: The ASCII hex value of each character in the string)
Search forward for “S” string from the current cursor position, leaving cursor pointing to “S” string. For example,
B0000454657374 will search forward for the first occurrence of the 4-character string “Test.”
B0 Example: Send barcode data that starts after a string of characters
Search for the letters “FGH” in barcodes and send all the data that follows, including “FGH.” Using the barcode above:
Command string: B00003464748F10D
B0 is the “Search forward for a string” command
0003 is the string length (3 characters)
46 is the hex value for “F”
47 is the hex value for “G”
48 is the hex value for “H”
F1 is the “Send all characters” command
0D is the hex value for a CR
The data is output as: FGHIJ
<CR>
B1 Search backward for a string
Syntax=B1nnnnS (nnnn: The string length (up to 9999); S: The ASCII hex value of each character in the string)
Search backward for “S” string from the current cursor position, leaving cursor pointing to “S” string. For example,
B0000454657374 will search backward for the first occurrence of the 4-character string “Test.”
169
**【Exit Setup】
【Enter Setup】
E6 Search forward for a non-matching character
Syntax=E6xx (xx: The search character’s hex value)
Search the input message forward for the first non-“xx” character from the current cursor position, leaving the cursor
pointing to the non-“xx” character.
E6 Example: Remove zeros at the beginning of barcode data
This example shows a barcode that has been zero filled. You may want to ignore the zeros and send all the data that
follows. E6 searches forward for the first character that is not zero, then sends all the data after, followed by a carriage
return. Using the barcode above:
Command string: E630F10D
E6 is the “Search forward for a non-matching character” command
30 is the hex value for 0
F1 is the “Send all characters” command
0D is the hex value for a CR
The data is output as: 37692
<CR>
E7 Search backward for a non-matching character
Syntax=E7xx (xx: The search character’s hex value)
Search the input message backward for the first non-“xx” character from the current cursor position, leaving the cursor
pointing to the non-“xx” character.
**【Exit Setup】
170
【Enter Setup】
Miscellaneous Commands
FB Suppress characters
Syntax=FBnnxxyy..zz (nn: The numeric value (00-15) for the number of suppressed characters; xxyy..zz: The hex value of
the characters to be suppressed)
Suppress all occurrences of up to 15 different characters, starting at the current cursor position, as the cursor is advanced
by other commands.
FB Example: Remove spaces in barcode data
This example shows a barcode that has spaces in the data. You may want to remove the spaces before sending the data.
Using the barcode above:
Command string: FB0120F10D
FB is the “Suppress characters” command
01 is the number of the characters to be suppressed
20 is the hex value for a space
F1 is the “Send all characters” command
0D is the hex value for a CR
The data is output as: 34567890
<CR>
E4 Replace characters
Syntax=E4nnxx1xx2yy1yy2…zz1zz2 (nn: The total count of the number of characters (characters to be replaced plus
replacement characters; xx1: The characters to be replaced, xx2: The replacement characters, continuing through zz1 and
zz2)
Replaces up to 15 characters in the output message, without moving the cursor.
171
**【Exit Setup】
【Enter Setup】
E4 Example: Replace zeros with CRs in barcode data
If the barcode has characters that the host application does not want included, you can use the E4 command to replace
those characters with something else. In this example, you will replace the zeros in the barcode above with carriage
returns.
Command string: E402300DF10D
E4 is the “Replace characters” command
02 is the total count of characters to be replaced, plus the replacement characters (0 is replaced by CR, so total
characters=2)
30 is the hex value for 0
0D is the hex value for a CR (the character that will replace the 0)
F1 is the “Send all characters” command
0D is the hex value for a CR
The data is output as: 1234
5678
ABC
<CR>
**【Exit Setup】
172
Appendix
Digit Barcodes
After scanning numeric barcode(s), you need to scan the Save barcode to save the data.
0~9
【0】
【1】
【2】
【3】
【4】
【5】
【6】
【7】
【8】
【9】
173
A~F
【A】
【B】
【C】
【D】
【E】
【F】
174
Save/Cancel Barcodes
After reading numeric barcode(s), you need to scan the Save barcode to save the data. If you scan the wrong digit(s), you
can either scan the Cancel barcode and then start the configuration all over again, or scan the Delete the Last Digit
barcode and then the correct digit, or scan the Delete All digits barcode and then the digits you want.
For instance, after reading the Maximum Length barcode and numeric barcodes “1”, “2” and “3”, you scan:
Delete the Last Digit: The last digit “3” will be removed.
Delete All Digits: All digits “123” will be removed.
Cancel: The maximum length configuration will be canceled. And the scanner still remains ready to read
programming barcode.
【Save】
【Cancel】
【Delete the Last Digit】
【Delete All Digits】
175
Factory Defaults Table
Parameter
Factory Default
Remark
Symbologies
Code 128
Code 128
Enabled
Maximum Length
48
Minimum Length
1
EAN-8
EAN-8
Enabled
Check Digit
Transmit
2-Digit Add-On Code
Disabled
5-Digit Add-On Code
Disabled
Extend to EAN-13
Disabled
EAN-13
EAN-13
Enabled
Check Digit
Transmit
2-Digit Add-On Code
Disabled
5-Digit Add-On Code
Disabled
UPC-E
UPC-E
Enabled
Check Digit
Transmit
2-Digit Add-On Code
Disabled
5-Digit Add-On Code
Disabled
Extend to UPC-A
Disabled
System Character “0”
Do not transmit
UPC-A
UPC-A
Enabled
176
Parameter
Factory Default
Check Digit
Transmit
2-Digit Add-On Code
Disabled
5-Digit Add-On Code
Disabled
Preamble Character “0”
Do not transmit
Remark
Interleaved 2 of 5
Interleaved 2 of 5
Enabled
Check Digit Verification
Disabled
Check Digit
Do not transmit
Maximum Length
80
Minimum Length
6
Discrete Length
Disabled
Minimum length supported: 4
ITF-6
ITF-6
Disabled
ITF-14
ITF-14
Disabled
Matrix 2 of 5
Matrix 2 of 5
Disabled
Check Digit Verification
Disabled
Check Digit
Do not transmit
Maximum Length
80
Minimum Length
4
Code 39
Code 39
Enabled
Check Digit Verification
Disabled
Check Digit
Do not transmit
Start/Stop Character
Transmit
Code 39 Full ASCII
Disabled
177
Minimum length supported: 4
Parameter
Factory Default
Maximum Length
48
Minimum Length
4
Remark
Codabar
Codebar
Enabled
Check Digit Verification
Disabled
Check Digit
Do not transmit
ABCD/ABCD format
Start/Stop Character
Uppercase
Transmit
Maximum Length
60
Minimum Length
2
Code 93
Code 93
Disabled
Check Digit Verification
Enabled
Check Digit
Do not transmit
Maximum Length
48
Minimum Length
1
Minimum length supported: 1
UCC/EAN-128
UCC/EAN-128
Enabled
GS1 Databar
GS1 Databar
Enabled
Application Identifier (AI) “01”
Transmit
EAN•UCC Composite
EAN•UCC Composite
Disabled
UPC/EAN Composite
Disabled
Code 11
Code 11
Disabled
178
Parameter
Factory Default
Check Digit
Transmit
Check Digit Verification
1 Check Digit, MOD11
Maximum Length
48
Minimum Length
4
Remark
Minimum length supported: 4
ISBN
ISBN
Disabled
ISBN Format
ISBN-13
Industrial 25
Industrial 25
Disabled
Check Digit Verification
Disabled
Check Digit
Do not transmit
Maximum Length
48
Minimum Length
6
Minimum length supported: 4
Standard 25
Standard 25
Disabled
Check Digit Verification
Disabled
Check Digit
Do not transmit
Maximum Length
48
Minimum Length
6
Minimum length supported: 4
Plessey
Plessey
Disabled
Check Digit Verification
Enabled
Check Digit
Transmit
Maximum Length
48
Minimum Length
4
MSI-Plessey
MSI-Plessey
179
Disabled
Minimum length supported: 4
Parameter
Factory Default
Check Digit
Transmit
Check Digit Verification
1 Check Digit, MOD10
Maximum Length
48
Minimum Length
4
Remark
Minimum length supported: 4
PDF 417
PDF 417
Enabled
Read Single PDF417 Only
Enabled
Decode regular PDF417
PDF417 Inverse
barcodes only
Maximum Length
2710
Minimum Length
1
QR Code
QR Code
Enabled
Read Single QR Only
Enabled
Maximum Length
7089
Minimum Length
1
Aztec
Aztec
Disabled
Read Multi-barcodes on an Image
Disabled
Maximum Length
3832
Minimum Length
1
Data Matrix
Data Matrix
Enabled
Read Single Data Matrix Only
Enabled
Read Rectangular Barcode
Enabled
Data Matrix Inverse
Maximum Length
Decode regular Data Matrix
barcodes only
3116
180
Parameter
Minimum Length
Factory Default
1
Maxicode
Maxicode
Disabled
Maximum Length
150
Minimum Length
1
Chinese Sensible Code
Chinese Sensible Code
Disabled
Read Single Chinese Sensible Code Only
Enabled
Chinese Sensible Code Inverse
Decode regular Chinese
Sensible barcodes only
Maximum Length
7827
Minimum Length
1
181
Remark
AIM ID Table
Symbology
AIM ID
Possible AIM ID Modifiers (m)
Code 128
]C0
UCC/EAN-128
]C1
EAN-8
]E4
EAN-13
]E0
EAN-13 with Add-On
]E3
UPC-E
]E0
UPC-E with Add-On
]E3
UPC-A
]E0
UPC-A with Add-On
]E3
Interleaved 2 of 5
]Im
0, 1, 3
ITF-6
]Im
1, 3
ITF-14
]Im
1, 3
Matrix 2 of 5
]X0
Code 39
]Am
0, 1, 3, 4, 5, 7
Codabar
]Fm
0, 2, 4
Code 93
]G0
Code 11
]Hm
ISBN
]X0
Industrial 25
]S0
Standard 25
]R0
Plessey
]P0
MSI-Plessey
]Mm
GS1 Databar
]e0
EAN•UCC Composite
]em
0-3
PDF417
]Lm
0-2
QR Code
]Qm
0-6
Aztec
]zm
0-9, A-C
Data Matrix
]dm
0-6
Maxicode
]Um
0-3
Chinese Sensible Code
]X0
0, 1, 3
0, 1
Note: “m” represents the AIM modifier character. Refer to ISO/IEC 15424:2008 Information technology – Automatic
identification and data capture techniques – Data Carrier Identifiers (including Symbology Identifiers) for AIM modifier character
details.
182
Code ID Table
Symbology
Code ID
Code 128
j
UCC/EAN-128
j
EAN-8
d
EAN-13
d
UPC-E
c
UPC-A
c
Interleaved 2 of 5
e
ITF-6
e
ITF-14
e
Matrix 2 of 5
v
Code 39
b
Codabar
a
Code 93
i
Code 11
H
GS1 Databar
R
EAN•UCC Composite
y
ISBN
B
Industrial 25
I
Standard 25
f
Plessey
n
MSI-Plessey
m
PDF417
r
QR Code
s
Aztec
z
Data Matrix
u
Maxicode
x
Chinese Sensible Code
h
183
Symbology ID Number
Symbology
ID Number
Code 128
002
UCC/EAN128
003
EAN-8
004
EAN-13
005
UPC-E
006
UPC-A
007
Interleaved 2 OF 5
008
ITF-14
009
ITF-6
010
Matrix 2 of 5
011
Code 39
013
Codabar
015
Code 93
017
ISBN
024
Industrial25
025
Standard25
026
Plessey
027
Code11
028
MSI-Plessey
029
EAN•UCC Composite
030
GS1 Databar
031
PDF417
032
QR Code
033
Aztec
034
DataMatrix
035
Maxicode
036
Chinese Sensible Code
039
184
ASCII Table
185
Hex
Dec
Char
00
0
NUL
(Null char.)
01
1
SOH
(Start of Header)
02
2
STX
(Start of Text)
03
3
ETX
(End of Text)
04
4
EOT
(End of Transmission)
05
5
ENQ
(Enquiry)
06
6
ACK
(Acknowledgment)
07
7
BEL
(Bell)
08
8
BS
(Backspace)
09
9
HT
(Horizontal Tab)
0a
10
LF
(Line Feed)
0b
11
VT
(Vertical Tab)
0c
12
FF
(Form Feed)
0d
13
CR
(Carriage Return)
0e
14
SO
(Shift Out)
0f
15
SI
(Shift In)
10
16
DLE
(Data Link Escape)
11
17
DC1
(XON) (Device Control 1)
12
18
DC2
(Device Control 2)
13
19
DC3
(XOFF) (Device Control 3)
14
20
DC4
(Device Control 4)
15
21
NAK
(Negative Acknowledgment)
16
22
SYN
(Synchronous Idle)
17
23
ETB
(End of Trans. Block)
18
24
CAN
(Cancel)
19
25
EM
(End of Medium)
1a
26
SUB
(Substitute)
1b
27
ESC
(Escape)
1c
28
FS
(File Separator)
1d
29
GS
(Group Separator)
1e
30
RS
(Request to Send)
1f
31
US
(Unit Separator)
20
32
SP
(Space)
21
33
!
(Exclamation Mark)
22
34
"
(Double Quote)
23
35
#
(Number Sign)
24
36
$
(Dollar Sign)
25
37
%
(Percent)
26
38
&
(Ampersand)
27
39
`
(Single Quote)
28
40
(
(Right / Closing Parenthesis)
29
41
)
(Right / Closing Parenthesis)
2a
42
*
(Asterisk)
2b
43
+
(Plus)
2c
44
,
(Comma)
186
187
2d
45
-
(Minus / Dash)
2e
46
.
(Dot)
2f
47
/
(Forward Slash)
30
48
0
31
49
1
32
50
2
33
51
3
34
52
4
35
53
5
36
54
6
37
55
7
38
56
8
39
57
9
3a
58
:
(Colon)
3b
59
;
(Semi-colon)
3c
60
<
(Less Than)
3d
61
=
(Equal Sign)
3e
62
>
(Greater Than)
3f
63
?
(Question Mark)
40
64
@
(AT Symbol)
41
65
A
42
66
B
43
67
C
44
68
D
45
69
E
46
70
F
47
71
G
48
72
H
49
73
I
4a
74
J
4b
75
K
4c
76
L
4d
77
M
4e
78
N
4f
79
O
50
80
P
51
81
Q
52
82
R
53
83
S
54
84
T
55
85
U
56
86
V
57
87
W
58
88
X
59
89
Y
5a
90
Z
5b
91
[
(Left / Opening Bracket)
5c
92
\
(Back Slash)
188
189
5d
93
]
(Right / Closing Bracket)
5e
94
^
(Caret / Circumflex)
5f
95
_
(Underscore)
60
96
'
(Grave Accent)
61
97
a
62
98
b
63
99
c
64
100
d
65
101
e
66
102
f
67
103
g
68
104
h
69
105
i
6a
106
j
6b
107
k
6c
108
l
6d
109
m
6e
110
n
6f
111
o
70
112
p
71
113
q
72
114
r
73
115
s
74
116
t
75
117
u
76
118
v
77
119
w
78
120
x
79
121
y
7a
122
z
7b
123
{
(Left/ Opening Brace)
7c
124
|
(Vertical Bar)
7d
125
}
(Right/Closing Brace)
7e
126
~
(Tilde)
7f
127
DEL
(Delete)
190