1
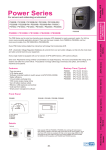
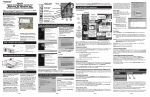
User Guide Power Series Models PS1000C, PS1250C, PS1500C PS2000C, PS3000C 1 IMPORTANT SAFETY INSTRUCTIONS IMPORTANT SAFETY INSTRUCTIONS SAVE THESE INSTRUCTIONS CAUTION (UPS Having Internal Batteries): Risk of electric shock - Hazardous live parts inside this unit are energized from the battery supply even when the input AC power is disconnected. CAUTION (No User serviceable Parts): Risk of electric shock, do not remove cover. No user serviceable parts inside. Refer servicing to qualified service personnel. CAUTION (Non-isolated Battery supply): Risk of electric shock, battery circuit is not isolated from AC input, hazardous voltage may exist between battery terminals and ground. Test before touching. WARNING (Fuses): WARNING: Intend for installation in a controlled environment. CAUTION: Do not dispose of batteries in a fire, the battery may explore. CAUTION: To reduce the risk of fire, replace only with the same type and rating of fuse. Do not open or mutilate the battery, released electrolyte is harmful to the skin and eyes. CAUTION: A battery can present a risk of electric shock and high short circuit current. The following precaution should be observed when working on batteries Remove watches, rings or other metal objects. Use tools with insulated handles. To reduce the risk of electric shock, disconnect the UPS from the mains supply before installing a computer interface signal cable. Reconnect the powers cord only after signaling interconnections have been made. Servicing of batteries should be performed or supervised by personnel knowledge of batteries and the required precautions. Keep unauthorized personnel away from batteries When replacing batteries, replace with four 12V/7Ah 2 TABLE OF CONTENTS Important Safety Instructions ..................................................................................................... 2 Introduction................................................................................................................................. 3 1. Presentation ........................................................................................................................... 5 2. Installation .............................................................................................................................. 8 3. Operation................................................................................................................................ 9 4. Alarm .................................................................................................................................... 10 5. Software and Interface Port ................................................................................................. 10 6. Maintenance and Storage .................................................................................................... 14 7. Battery and Battery Cabinet ................................................................................................. 14 Appendix A. Troubleshooting ................................................................................................... 15 Appendix B. Specification ........................................................................................................ 16 INTRODUCTION SAVE THESE INSTRUCTIONS Please read and save this manual! Thank you for selecting this uninterruptible power system (UPS). It provides you with a perfect protection for connected equipment. The manual is a guide to install and use the UPS. It includes important safety instructions for operation and correct installation of the UPS. If you should have any problems with the UPS, please refer to this manual before calling customer service. Please save or recycle the packaging materials! The UPS‘s shipping materials are designed with great care to provide protection within delivery. These materials are invaluable if you ever have to return the UPS for service. Damage happened during transit is not covered under the warranty. Intelligent microprocessor control The product is an advanced line-interactive UPS based on microprocessor control. This means that it operates with the newest technology, high performance and powerful function. The line-interactive UPS is an intelligent protector and provides pure, reliable AC power to the critical loads - protecting them from utility power blackout, swells, sags, surges and interference. The loads could include sensitively medical instruments, computers, telecommunication systems, and industrially automatic equipment. Under power normal condition, the line-interactive design enables the system to adjust and filter power fluctuations continuously and automatically. In the event of power failure, it can provide immediately back-up power from the batteries without any interruption. Complete transference will be achieved within 4m seconds, with no interruption. Beside this, when the utility power is connected, the charger would work automatically even under power switch is OFF. Furthermore, in order to save the battery energy, UPS can 3 automatically turn it off under backup mode if none of the connected loads is operating. Advanced battery management The visual and audible indications of the UPS present the battery’s status including capacity degree and battery condition. Self-test function let UPS detect a weak battery before it is put into service. The UPS normally perform a self-test at power up and manual self-test condition. Self-test function can be conducted manually with the ON/TEST switch at any time. Advanced monitoring software The line-interactive UPS and SENTINEL series monitoring software (optional kits) make your computer operate intelligent and provide you with the ability of perfect protection of your critical devices. The software is available for most operation systems and is supplied with a communication cable that connects to the UPS. Note: There is no guarantee that interference to radio/TV will not occur in a particular installation. If this UPS causes interference to radio or television reception, which can be determined by turning the UPS off and on, the user is encouraged to try to correct the interference by one or more of following measures: 1. Connect the equipment to an outlet at a circuit different from the connected radio/TV. 2. Increase the separation between the equipment and the receiver or reorient the receiving antenna. 4 1. PRESENTATION 1.1 Front LED Panel ` _ o r p s q t n a For 1-3KVA n “ON/TEST” button: With the UPS plugged in, press the ON/TEST button to turn on the UPS and power the loads. ON/TEST also activates the UPS‘s self-test and utility line voltage displays. o “OVERLOAD” indicator (RED LED): The LED lights when the loads connected to the UPS exceed the UPS‘s capacity. p “BACK UP” indicator (GREEN LED): The LED illuminates when the UPS is supplying battery power to the loads. q “REPLACE BATTERY” indicator (RED LED): The LED illuminates when the UPS‘s battery is no longer useful and must be replaced. Note: When replace battery, disconnect the utility power then open the case and take notice of the battery‘s polarity while install the new battery to avoid short circuit. r “BUCK AVR (VOLTAGE REDUCTION)” indicator (YELLOW LED): The LED illuminates when the UPS is correcting a high utility voltage condition. The loads receive normal power. s “LINE NORMAL” indicator (GREEN LED): The LED illuminate when the line input voltage is normal. t “BOOST AVR (VOLTAGE BOOST)” indicator (YELLOW LED): The LED illuminates when the UPS is correcting a low utility voltage condition. The loads receive normal power. _ LOAD bar graph: The display shows the power being drawn by the load. ` POWER bar graph (BATTERY CHARGE): The display shows the present battery charge as a percentage of battery capacity. 5 a “OFF” button: Press the OFF button to turn off the UPS and the loads. Load Indicator Light no.5 Light no.4 Light no.3 Light no.2 Light no.1 % of Load Value over 96% 76-95 % 51-75 % 26-50 % 10-25 % Battery Indicator Light no.5 Light no.4 Light no.3 Light no.2 Light no.1 % of Bat Level over 91 % 76-90 % 51-75 % 26-50% 0-25% 1.3 Rear Panel For 1-2KVA s _ n s _ n p p q t t o r o For 3KVA q r s o n u t r p n TEL/MODEM connector Telecom transfer ports provide users to extend the applications. CAUTION: To reduce the risk of fire, use only No. 26AWG or larger telecommunication line cord. o EXTERNAL BATTERY PACK CONNECTOR (optional) CAUTION: Use only factory supplied or authorized connecting cable for external battery! 6 p OUTPUT POWER RECEPTACLES q AC INPUT POWER RECEPTACLE r INPUT CIRCUIT BREAKER It trips when the connected loads exceed the protected receptacle‘s capacity, The center plungers of the circuit breakers extend when tripped. s RS232 INTERFACE Provide both RS-232 and relay signal to support NOVELL, UNIX, DOS, WINDOWS and other operating systems. t SNMP INTERFACE PORT (optional) Provide the SNMP adapters for 10-BaseT Ethernet and Token Ring connectors. Through the SNMP adapter, your UPS becomes “SNMP manageable”. It provides a real time UPS and power status information for the network manager. CAUTION: Use only factory supplied or authorized SNMP monitoring cable! _ USB INTERFACE Provide USB signal to support WINDOWS 98SE/Windows 2000/Widnows XP/Windows NT4.0 operating systems. 7 2. INSTALLATION Inspect the UPS upon receipt. The packaging is recyclable; keep it for reuse or be disposed of properly. 2.1 Placement: Install the UPS in a protected area with adequate flowing air and free of excessive dust. Do not operate the UPS where the temperature and humidity is out of the specified limits. 2.5cm (1 inch) 2.2 Connect Computer Interface (optional): SENTINEL series software (or other power management software) and an interface kits can be used with this UPS. Use only kits supplied or approved by the manufacturer. If used, connect the interface cable to the 9-pin computer interface port on the back panel of the UPS. Note: Computer interface connection is optional. The UPS works properly without a computer interface connection. CAUTION: Use only factory supplied or authorized UPS monitoring cable! 2.3 Connect external battery pack (optional): Before connecting, make sure the external battery pack and the connector cable are compatible. Note: External battery connection is not necessary. The UPS works properly without external battery pack connection. (Except AL models only) CAUTION: Use only factory supplied or external battery connection cable! 2.4 Charge the battery: The UPS charges its battery whenever it is connected to utility power. For best results, charge the battery for 8 hours in the initial use. 2.5 Connect to Utility: See figure a. Please check the following items to connect the AC input power to terminal block and power up the UPS. 2.6 Connect the loads: Connect the loads with the terminal block at the rear of the UPS. To use the UPS as a master on/off switch, make sure all of the loads are switched on. CAUTION: Never connect a laser printer or plotter to the UPS with other computer equipment. A laser printer or plotter periodically draws significantly more power than when its idle status, and may overload the UPS. 8 3. OPERATION 3.1 Switch on: While utility input is connected to the UPS, press the "ON" button and keep pressing over than 0.5 second. After that, connect the electrical cords of the equipment that is going to be used such as computer or monitor with the terminal on the rear panel of UPS. Don't overload the machine with all the equipment used. The buzzer will beep continuously to indicate overload status. UPS will shut down automatically to protect the machine. Attention: If the power of UPS isn't supplied by utility but by the internal batteries to engage the UPS, press the "ON" button and keep pressing for over 3 seconds. CAUTION: Never connect a laser printer or plotter to the UPS with other computer equipment. A laser printer or plotter periodically draws significantly more power than when its idle status, and may overload the UPS. 3.2 Switch off: By pressing and holding OFF button until the “LINE NORMAL” or “BACK UP” LED off. 3.3 Silence: When UPS is under “BACKUP” mode, press “ON” button more than 1 second to silence the audible alarm. (The function is disable when UPS is under condition of “LOW BATTERY” or “OVERLOAD”) Note: At back-up mode, UPS can be automatically turned off if none of the connected loads is operating. 3.4 Self-test: Use the self-test to verify both the operation of the UPS and the condition of the battery. In normal utility power, push the ON/TEST button more than 1 second and UPS performs a self-test function. During the self-test, the UPS operates a back up mode. Note: During the self-test, the UPS briefly operates the loads on-battery (the on-battery LED comes on). If the UPS passed the self-test, it returns to line-interactive operation. The on-battery LED goes off and the line-interactive LED goes on steadily. If the UPS is failed to pass the self-test, it returns to line-interactive operation and lights the replace battery LED. The loads are not affected. Recharge the battery overnight and perform the self-test again. If the replace battery LED is still on, ask our nearest dealer to replace battery. 3.5 Load bar graph: The 5-LED display shows the power drawn from the UPS by load. The display indicates the percentage of the UPS‘s rated capacity. For example. If three LEDs are lit, the load is drawing between 50% and 67% of the UPS’s capacity. If the UPS is overloaded, the overload LED lights and alarm sounds. 3.6 Battery charge bar graph: The 5-LED display shows the present charge of the UPS‘s battery as a percentage of the battery capacity. When all five LEDs light, the battery is fully charged. When only two LED lights, the battery can supply less than two minutes of run time for the load. 3.7 Cold start: 9 When the UPS is off and there is no utility power, use the cold start feature to apply power to the loads from UPS‘s battery. Press the ON/TEST button until the UPS beeps. 3.8 Shutdown mode: In shutdown mode the UPS stops supplying power to the load, waiting for return of utility power. If there is no utility power present, external devices (e.g., servers) connected to the computer interface can command the UPS to shutdown. This is normally done to preserve battery capacity after the graceful shutdown of protected servers. The UPS will scroll the front panel indicators sequentially in shutdown mode. 4. ALARM 4.1 “BACKUP”(slow alarm): When the UPS is working under “BACKUP” mode, the UPS would emit audible alarm. The alarm stops when the UPS is return to “LINE” mode operation. Anyone can stop the alarm by press the “ON” button during backup mode. Attention: The alarm of “BACKUP” is going to beep every four seconds. (Slow-speed beep). Attention: The UPS provides mute function for the warning. When the beeping sound occurs, press "ON" to stop it; and press "ON" again to regain the sound. 4.2 “LOW BATTERY” (rapid alarm): In the “BACKUP” mode, when the energy of battery becomes to lower level. (about 20%~30%) The UPS beeps rapidly until the UPS shuts down from battery exhaustion or returns to “LINE” mode operation. Attention: The alarm of the batteries caused by low voltage beeps every second. (Fast-speed beep). Attention: The rapid alarm under “LOW BATTERY” condition can't be erased. When the UPS is working under overload condition (the connected loads exceed the maximum rated capacity), the UPS will emit continuous alarm to warn an overload condition. In order to protect the unit and the loads, the UPS will be automatic shutdown. Disconnect nonessential devices from UPS to eliminate the overload alarm. 5. SOFTWARE AND INTERFACE PORT 5.1 Power Monitoring Software The SENTINEL series software is applied standard RS-232 or USB interface to perform monitoring functions, and then provides an orderly shutdown of a computer in the event of power failure. Moreover, SENTINEL displays all the diagnostic symptoms on monitor, such as Voltage, Frequency, Battery level and so on. For RS-232 interface, the software is available for Windows 95, Windows 98, Windows Me, Windows 2000, Windows XP, Windows NT 4.0 or later, Novell Netware, Linux, and others. For USB interface, the software is available for Windows 98SE, Windows 2000, Windows Me, Windows XP, Windows NT4.0 or later. Call your dealer for more information on computer OS compatible solutions. 10 5.2 Installing software To perform monitoring functions, you must install SENTINEL series software accompanied with the UPS. Please do the following steps to complete installation of SENTINEL series software. 1. Insert the SENTINEL CD into your CD-ROM drive. The installation program should starts automatically and installation menu appears as shown in Fig 5.1. Please select the operating system applied for your computer and then click on it. (For example if your operating system is Windows 98, please click select item Windows 95/ 98/ Me/ 2000/NT/ XP. Note : If the installation program doesn’t start automatically, select StartÎProgramsÎWindows Explorer (for Windows 98) and then double-click on the setup icon (in your CD-ROM drive as shown in picture 5.2). Fig 5.1 Fig5.2 2. A window labeled Welcome appears, please read and follow instruction written in the window and click “Next”. (see Fig 5.3) Fig 5.3 11 3. Select a location for installing program. Please read and follow instruction written in the window and click Next. (see Fig 5.4) Fig 5.4 4. Please read and follow instructions appearing in the window to complete installation of the software. 5.3 Connecting interface cable A series of interface kits is available for operation systems that provide UPS monitoring. Each interface kit includes the special interface cable required to convert status signals from the UPS into signals which individual operating system recognizes. The interface cable at UPS side must be connected to REMOTE PORT, at computer side can be either COM 1, COM 2, COM 3, COM 4 or USB. CAUTION: Use only factory supplied or authorized UPS monitoring cable! 5.4 The characteristics of software SENTINEL The communication port on the back of the UPS may be connected to host computer. Through utilizing SENTINEL software the computer is allowed monitor the status of the UPS and control the operation of the UPS in some cases. Its major functions normally include some or all of the following: z To broadcast a warning when power fails. z To close any open file before the battery is exhausted. z To turn-off the UPS. 5.5 How to Use Software “SENTINEL” After you have completed installation of software SENTINEL, you can lunch the software by clicking on the icon on the Control Strip on your desktop (see Fig 5.5) Fig 5.5 12 Then main menu of SENTINEL appears as shown in Fig 5.6 Fig 5.6 The main menu contains tools and feather for monitoring UPS operation and controlling UPS. For details on each tool and function of SENTINEL, please click on Help button on main menu of SENTINEL as shown in Fig. 5.7 Fig. 5.7 13 6. MAINTENANCE AND STORAGE 6.1 Maintenance 6.1.1. Keep the unit clean and vacuum the ventilation intake periodically. 6.1.2. Wipe with soft loose and damp cloth. 6.1.3. Check for loose and bad connections monthly. 6.1.4. Never leave the unit on an uneven surface. 6.1.5. Position the unit to allow at least 10 cm clearance between the rear panel and the wall. Keep the ventilation intake open. 6.1.6. Avoid direct sunlight, rain and high humidity. 6.1.7. Stay away from fire and extremely hot location. 6.1.8. Do not stack materials on top of the unit. 6.1.9. The unit should not be exposed to corrosive air. 6.1.10. The normal operating temperature is 0-40 ºC. 6.2 Storage conditions: Store the UPS covered and upright in a cool and dry location, with its battery fully charged. Before storing, charger the UPS for at least 4 hours. Remove any accessories in the accessory slot and disconnect any cables connected to the computer interface port to avoid unnecessary draining the battery. 6.3 To extend the storage: 6.3.1. During the environment where the ambient temperature is -15 to +30 ℃ (+5 to +86 ℉), charge the UPS‘s battery every 6 months. 6.3.2. During the environment where the ambient temperature is +30 to +45 ℃ (+86 to +113 ℉), charge the UPS‘s battery every 3 months. 7. BATTERY AND BATTERY CABINET 7.1 Battery’s life of UPS The battery’s life of UPS is about 3-6 years under normal usage. 7.2 Installation of battery cabinet and UPS (For AL and AXL models only): Please follow the listed steps to complete the installation. 7.2.1 Turn off the UPS and remove the connector metal cover from the back panel of UPS. 7.2.2 Connect the battery cabinet’s DC wire to the UPS and fix the motel cover via a screwdriver. Beside this, make sure the connection is reliable. 7.2.3 Turn on the UPS and plug the loads behind the UPS. CAUTION: Do not dispose of battery in fire. CAUTION: Do not attempt to open the battery. CAUTION: The following precautions should be taken when replacing the battery a. Remove watches, rings, etc… b. Use tools with insulated handles 14 APPENDIX A TROUBLESHOOTING Problems 1. UPS can't operate after pressing On/Off switches 2. No lights on, no warning sounds Possible Reasons Solutions Input power source mistake Check out the power source Non-fuse switch on the rear Press the non-fuse switch to its "on" panel hasn't been opened position Time of pressing the ON Keep pressing the ON button over 1 button is too short second Output short circuit or Turn off UPS, take off all load to make overload on UPS sure there are no problems on it or any internal short circuit. Keep pressing the ON button over 1 second Indicates no utility, andNo power source input Check out the input power source it warns every several Non-fuse switch on the rear Press the Non-fuse switch to its "on" seconds panel hasn't been opened position Fault light is on, the buzzer keeps beeping Buzzer keeps beeping Utility Indicating light is shining PCB failure Contact the dealer or service center for help Overload Take off some load There is an open circuit on Move the Input Non-fuse switch back to UPS input protector its normal position, re-engage UPS The voltage of utility is Save the digital data and shutdown the exceeding UPS input range applying program to make sure utility is within UPS range Available time of the 1. Batteries haven't been Keep UPS "ON" for over 3 hours to batteries is too short charged recharge the batteries. Check out the 2. UPS overload loading and take off any non-crucial load 3. Batteries are aged and equipment can't be charged fully The charger is out of order Contact the dealer or service center for help The battery’s light is The voltage of batteries is Check out the batteries part of UPS, flashing when the too low or the batteries make sure they are well connected. If power of UPS is haven't been connected there is any damage on battery packs, supplied by utility. replace new ones ASAP 15 APPENDIX B SPECIFICATION Model Capacity Input PS1000C PS1250C PS1500C PS2000C PS3000C 1000VA 600W 1250VA 750W 1500VA 900W 2000VA 1200W 3000VA 1800W Voltage +/-25%,Single phase Frequency 50 or 60Hz +/-5% (auto sensing) Voltage (on battery) Pure sine wave output at nominal +/-5% Frequency (on battery) 50 or 60Hz +/-0.5% Output Voltage Regulation (AVR) Spike Protection AVR automatically increase output voltage 15% above input voltage if -9% to-25% of nominal. AVR decrease output voltage 13% below input voltage if+9% to +25% of nominal 420 Joules (2x0V)/225 Joules(1x0V), 8/20µs Unit Input Circuit breaker protection EMI/RFI filter Protection and Filtering Overload Protection 10dB at 0.15MHz, 50dB at 30MHz UPS automatic shutdown if overload exceeds 110% of nominal at 20 second and 125% at 2 seconds. Transfer Time 6~8 milliseconds (typical), including detection time Short Circuit UPS output cut off immediately or input circuit breaker protection Type Hot swappable, Sealed, Maintenance-free lead acid, with 3-6 years lifetime Typical Recharge Time Battery Physical Alarm Protection 4 hours (to 90% of full capacity) Automatic self-test & discharge protection, Replace battery indicator Back – up Time (one PC and one 17” LCD monitor) ≒30 min. Net Weight Kg (lbs) 13.9 (35.0) 13.9 (35.0) 13.9 (35.0) 15.0 (36.1) 28.4 (62.6) ≒40 min. ≒45 min. 378×140×201 Dimension (mm) L×W×H (14.9”×5.5”×7.9”) Battery Back-Up Slow beeping sound (about 0.25Hz) Battery Low Rapid beeping sound (about 1.00Hz) Overload Interface ≒35 min. Continue beeping sound RS-232 Interface Yes 16 ≒90 min. 450×170× 226 (17.7” ×6.7”×8.9”) USB Dry Contact Sends AC fail and battery low singals, and receives shutdown signal from computer. SNMP Slot Yes Ambient Operation Environment Yes 3,500 meters max, elevation, 0%-95% humidity noncondensing, Temperature: 0-40ºC Audible noise <45dBA (1 meter from surface) Storage condition 15,000 meters max. elevation Note: Characteristics are subject to change without prior notice 17