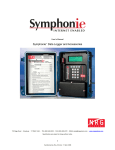
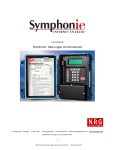
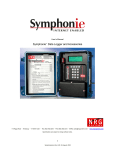
1
User‟s Manual SymphoniePLUS3® Data Logger and Accessories 110 Riggs Road · Hinesburg · VT 05461 USA · TEL (802) 482-2255 · FAX (802) 482-2272 · EMAIL [email protected] · www.nrgsystems.com 1 nrg_symphonieplus3_data_logger_manual.docx Rev 6 11 December, 2012 Specifications are subject to change without notice. © NRG Systems, Inc. PO Box 509 Hinesburg VT 05461 Tel: 802-482-2255 Fax: 802-482-2272 e-mail: [email protected] 2 nrg_symphonieplus3_data_logger_manual.docx Rev 6 11 December, 2012 Table of Contents Customer Support ............................................................................................................................................11 Introduction .......................................................................................................................................................13 Welcome! ........................................................................................................................................................................ 13 Using This Manual ......................................................................................................................................................... 13 Definitions....................................................................................................................................................................... 13 SymphoniePLUS3 Set-up Overview ............................................................................................................................. 14 Stand Alone Users (no iPack) .................................................................................................................................................... 14 Internet Enabled Users (with iPack or iPackGPS installation) .................................................................................................... 14 Theory of Operation ....................................................................................................................................................... 14 Features of the SymphoniePLUS3 Logger System .................................................................................................... 15 Precautions .......................................................................................................................................................17 Notes for First Time Users ............................................................................................................................................ 17 Grounding ....................................................................................................................................................................... 17 Recharging the iPack Battery ....................................................................................................................................... 17 Environmental Considerations ..................................................................................................................................... 18 Site Records ................................................................................................................................................................... 18 SymphoniePLUS3 Logger Components (Quick Tour) ..................................................................................21 Unpacking the SymphoniePLUS3 Logger System ..................................................................................................... 21 SymphoniePLUS3 Logger Components Map ............................................................................................................. 22 Keypad ....................................................................................................................................................................................... 22 Navigation keys .......................................................................................................................................................................... 22 Display ....................................................................................................................................................................................... 23 D-cell Batteries ........................................................................................................................................................................... 23 Input connector .......................................................................................................................................................................... 23 iPack access port ....................................................................................................................................................................... 23 Ground stud ............................................................................................................................................................................... 23 Clock battery .............................................................................................................................................................................. 23 Clock battery warning LED ......................................................................................................................................................... 23 Reset Button .............................................................................................................................................................................. 23 SD Card Slot .............................................................................................................................................................................. 24 Channel Description ................................................................................................................................................................... 24 Channels 1 – 3 and 13 – 15 (Counters) ..................................................................................................................................... 24 SCM slots for flex channels 4, 5 and 6 (analog or counter / anemometer) ................................................................................. 24 Channels 7 – 12 (Analogs) ......................................................................................................................................................... 24 SCM slots for analog channels 9,10,11 and 12 .......................................................................................................................... 24 Pre-Installation Setup: Logger Configuration ...............................................................................................25 Grounding ....................................................................................................................................................................... 25 Installing SCMs .............................................................................................................................................................. 25 Installing D-Cell Batteries ............................................................................................................................................. 25 Setting Logger Display Contrast .................................................................................................................................. 26 Setting and Verifying Logger Units (Imperial or SI) ................................................................................................... 26 Channel Configuration Sequence – choosing a sensor, setting and verifying each logger channel................... 27 Channel Configuration Using SDR‟s Logger Parameter Editor .................................................................................................. 27 Channel Configuration Using the Logger‟s Keypad.................................................................................................................... 28 -> Description (Sensor Model) ................................................................................................................................................... 28 -> Scale Factor ........................................................................................................................................................................... 28 -> Offset ..................................................................................................................................................................................... 28 -> Units....................................................................................................................................................................................... 29 -> Height .................................................................................................................................................................................... 29 -> Serial Number ........................................................................................................................................................................ 29 Setting and Verifying Site information, Time Zone, Clock and Data Encryption .................................................... 29 3 nrg_symphonieplus3_data_logger_manual.docx Rev 6 11 December, 2012 Time Zone and Logger Clock (Time and Date) .......................................................................................................................... 29 Site Number ............................................................................................................................................................................... 29 Site Altitude (Elevation) (optional) .............................................................................................................................................. 29 Site Latitude and Longitude (optional) ........................................................................................................................................ 30 Data Encryption PIN Number (optional) ..................................................................................................................................... 30 Keypad Security (optional) ......................................................................................................................................................... 30 Symphonie Data Retriever Software and Accessories .................................................................................31 Symphonie Data Retriever Software Functions.......................................................................................................... 31 System Requirements ................................................................................................................................................... 31 Related Hardware Accessories .................................................................................................................................... 31 Installation ...................................................................................................................................................................... 31 Pre-installation Setup: iPack Accounts ..........................................................................................................33 WindLinx Wireless Service ........................................................................................................................................... 33 GSM Cellular Account ................................................................................................................................................... 33 CDMA Cellular Account (Verizon) ................................................................................................................................ 34 Satellite Account ............................................................................................................................................................ 34 Internet Service Provider (ISP) Account (all iPacks) .................................................................................................. 34 Pre-installation Setup: iPack Configuration ..................................................................................................37 Items required to configure (program) an iPack......................................................................................................... 37 Configuration (Programming) recommendations ...................................................................................................... 37 Grounding ....................................................................................................................................................................... 37 Connecting the iPack to the Computer ....................................................................................................................... 37 Starting Symphonie Data Retriever iPack Configuration Software .......................................................................... 37 Establishing communication between the computer and iPack............................................................................... 37 Phone Programming & Initialization Overview - Set Up Phone ................................................................................ 38 Phone Programming - GSM cellular ............................................................................................................................ 39 Installing a SIM card into a GSM iPack ...................................................................................................................................... 39 Opening the iPack ...................................................................................................................................................................... 39 Closing the iPack ....................................................................................................................................................................... 41 PIN Number ............................................................................................................................................................................... 41 Phone Programming – Satellite .................................................................................................................................... 42 Phone Programming – CDMA (Verizon) ...................................................................................................................... 42 ISP Programming Overview (All iPack types) ............................................................................................................. 43 Viewing the Pre-Loaded iPack Settings ...................................................................................................................... 44 ISP Programming – ISP Access Tab ............................................................................................................................ 44 Primary ISP Phone Number ....................................................................................................................................................... 45 Primary DNS Number and Secondary DNS Number ................................................................................................................. 45 Authentication Method ............................................................................................................................................................... 45 User Name ................................................................................................................................................................................. 45 User Password ........................................................................................................................................................................... 45 ISP Programming – Mail Access Tab ........................................................................................................................... 46 SMTP Server Name ................................................................................................................................................................... 46 My SMTP Server requires authentication ................................................................................................................................... 47 POP3 Server Name ................................................................................................................................................................... 47 Mailbox Name ............................................................................................................................................................................ 47 Mailbox Password ...................................................................................................................................................................... 47 ISP Programming – Email Info Tab .............................................................................................................................. 48 Recipient‟s E-Mail Address ........................................................................................................................................................ 48 Recipient‟s Name ....................................................................................................................................................................... 48 CC E-Mail Address..................................................................................................................................................................... 49 CC E-Mail Address 2.................................................................................................................................................................. 49 Sender‟s E-Mail Address ............................................................................................................................................................ 49 E-Mail Subject Line .................................................................................................................................................................... 49 Patch Password ......................................................................................................................................................................... 49 4 nrg_symphonieplus3_data_logger_manual.docx Rev 6 11 December, 2012 Call Schedule Programming – Call Schedule Tab ...................................................................................................... 49 Next Call Time and Call Interval ................................................................................................................................................. 50 Setting iPack Preferences – iPackGPS Tab (iPackGPS only) .................................................................................. 50 Settings ...................................................................................................................................................................................... 51 Actions ....................................................................................................................................................................................... 52 Saving the iPack Displayed Setup to the connected iPack ....................................................................................... 53 Saving a copy of the iPack File (.ipk) to your computer ............................................................................................ 53 Opening a Saved iPack File (.ipk) ................................................................................................................................ 54 Office Testing ....................................................................................................................................................55 Why It’s Important .......................................................................................................................................................... 55 What You’ll Need ............................................................................................................................................................ 55 Installing the iPack to the Logger (iPack users only) ................................................................................................ 55 Pre-Installation Testing ................................................................................................................................................. 55 Recharging the iPack Battery ....................................................................................................................................... 56 Field Installation ...............................................................................................................................................57 Tools Required ............................................................................................................................................................... 57 Site Grounding Recommendations .............................................................................................................................. 57 Installing a Stand Alone SymphoniePLUS3 Logger ................................................................................................... 58 Mounting the iPack and Logger to the Shelter Box ................................................................................................... 58 Removing protective sticker from Logger ................................................................................................................................... 59 Inserting Screws into Shelter Box .............................................................................................................................................. 59 Mounting inside the Shelter Box................................................................................................................................................. 59 Connecting the iPack Ground Wire to the Logger ...................................................................................................................... 59 Connecting the PV Panel and/or External Battery Wires ........................................................................................................... 61 Mounting the Shelter Box to the Tower ...................................................................................................................................... 62 Trimming the Hose Clamps ........................................................................................................................................................ 62 Mounting Technique................................................................................................................................................................... 62 Field Wiring Panel ...................................................................................................................................................................... 63 Sensor Connection ........................................................................................................................................................ 64 Wiring Sequence ........................................................................................................................................................................ 64 Sensor Connections ................................................................................................................................................................... 65 Antenna Connection................................................................................................................................................................... 66 SymphoniePLUS3 Start-up ..............................................................................................................................67 Checking logger status (battery, date and time, internal temperature, revision) ................................................... 67 Checking logger measurements (all 15 channels) ..................................................................................................... 68 Installing the SD Card.................................................................................................................................................... 68 Formatting the SD Card................................................................................................................................................. 68 Checking SD status (logging, files stored, days left) ................................................................................................. 68 Checking iPack status (if present) ............................................................................................................................... 69 Checking iPack Battery Voltage from the logger ....................................................................................................... 69 Verifying Signal Strength with the antenna test ......................................................................................................... 69 GSM iPacks (s/n 38607905 and earlier): ................................................................................................................................... 70 Satellite iPack:............................................................................................................................................................................ 70 CDMA iPack: .............................................................................................................................................................................. 70 Verifying iPack data transfer to ISP (Call Now) .......................................................................................................... 71 Checking the iPack’s Modem Status – Modem Status Screen (iPackGPS only) .................................................... 73 Checking the iPack’s GPS Status – GPS Status Screen (iPackGPS only) .............................................................. 73 Checking the iPack Event Log – iPack Event Log Screen (iPackGPS only) ........................................................... 73 Using the Manual Dial feature – Manual Dial Screen (iPackGPS only) .................................................................... 73 Verifying iPack settings with your computer at the site using the iPack Access Port .......................................... 73 Installing the programming adapter ............................................................................................................................................ 73 Before Leaving the Site ................................................................................................................................................. 73 5 nrg_symphonieplus3_data_logger_manual.docx Rev 6 11 December, 2012 Site Visits...........................................................................................................................................................75 Recommended Tools and Supplies ............................................................................................................................. 75 Changing SD and Routine Site Visit Check List ......................................................................................................... 75 Cleaning .......................................................................................................................................................................... 75 Symphonie Data Retriever Software: Data Processing ...............................................................................77 Backing up data files ..................................................................................................................................................... 77 Transferring Raw Data Files onto your computer hard drive .................................................................................... 77 Using an SD Reader and Windows Explorer to copy Raw Data Files to your Raw Files working directory ............................... 77 Saving Raw Data Files received as email attachments from your email program to your Raw Files working directory (iPack users only) ................................................................................................................................................................................. 77 Data Processing Utilities ............................................................................................................................................................ 77 Opening the SDR software............................................................................................................................................ 77 Checking what version of SDR is installed ................................................................................................................. 78 Viewing Data Header ..................................................................................................................................................... 78 Reading Data to the Data Viewer with settings from data file ................................................................................... 80 Reading Data to the Data Viewer with settings from site file .................................................................................... 80 Logger Channels and Graph......................................................................................................................................... 81 Choosing logger channel to view in graph ................................................................................................................. 81 Choosing parameters from selected logger channel to view in graph .................................................................... 81 Saving Data from the Data Viewer to a TXT file .......................................................................................................... 81 Importing the data into the site database (when viewing with settings from Site only) ........................................ 82 Closing the Data Viewer ................................................................................................................................................ 82 Batch Processing data files (Converting a group of raw data files to .txt files and importing into the database) ......................................................................................................................................................................................... 82 Options............................................................................................................................................................................ 82 Disabling Descriptive Headers from Output Files ....................................................................................................................... 82 Output Hourly Averages ............................................................................................................................................................. 82 Delimit with commas instead of tabs .......................................................................................................................................... 83 Setting the working directory for Raw files (where Raw files from the SD or email program should be saved so SDR can find them) .......................................................................................................................................................................................... 83 Setting the working directory for Saved TXT files (where scaled data files are stored) .............................................................. 83 Setting the working directory for Site files (where site information used to scale data is stored) ............................................... 83 Setting the working directory for Reports (.wmf file format) ........................................................................................................ 83 SDR Event Log ............................................................................................................................................................... 83 SDR Troubleshooting Wizard ....................................................................................................................................... 86 Fixing Timestamps ..................................................................................................................................................................... 86 Sensor Connections ................................................................................................................................................................... 86 Sensor History............................................................................................................................................................................ 87 SDR Database and Reporting Functions ........................................................................................................89 Selecting a site to open (View database) .................................................................................................................... 89 Database main window displayed settings:................................................................................................................ 89 Importing Data from the Database main window ....................................................................................................... 89 Importing raw (.rwd) files ............................................................................................................................................................ 90 Importing scaled ASCII (.txt) files ............................................................................................................................................... 91 Exporting Data as 10 minute, 60 minute or WAsP...................................................................................................... 91 Database Export File Formats.................................................................................................................................................... 92 Data Filtering .................................................................................................................................................................. 92 Creating a Data Filter ................................................................................................................................................................. 92 Running a Data Filter ................................................................................................................................................................. 93 Blanket Filtering / Unmarking all data in database ..................................................................................................................... 94 Data Flag types .......................................................................................................................................................................... 94 Filtering all channels .................................................................................................................................................................. 95 Filtering any channel individually................................................................................................................................................ 95 Unfiltering (Unmarking) all data for all channels ......................................................................................................................... 95 Creating (Configuring) Reports .................................................................................................................................... 95 6 nrg_symphonieplus3_data_logger_manual.docx Rev 6 11 December, 2012 Selecting the report type ............................................................................................................................................................ 95 Selecting the sensors to be included in the report (Configuring your report) .............................................................................. 96 Saving the configured report type for this site ............................................................................................................................ 96 Generating (Running) Reports ..................................................................................................................................... 96 Selecting reports to be generated from the list ........................................................................................................................... 96 Editing and Deleting selected reports ......................................................................................................................................... 97 Running and printing the selected reports .................................................................................................................................. 97 Data Retriever Software: Site Information & Site History ............................................................................99 Creating a New Site ....................................................................................................................................................... 99 The Site File ............................................................................................................................................................................... 99 Creating a Site File From Data File (Recommended) ................................................................................................................ 99 Creating a Site File Manually ................................................................................................................................................... 100 Site Information Editor - Site Information Parameters ............................................................................................. 100 Site # ........................................................................................................................................................................................ 100 Site Desc (Site Description) ..................................................................................................................................................... 100 Project Code ............................................................................................................................................................................ 100 Project Desc (Project Description) ........................................................................................................................................... 100 Site Location ............................................................................................................................................................................ 100 Site Elevation (Altitude) ............................................................................................................................................................ 100 Base Time Zone (the time zone the logger is located in) ......................................................................................................... 101 Latitude .................................................................................................................................................................................... 101 Longitude ................................................................................................................................................................................. 101 Logger Serial Number (5-digit suffix)........................................................................................................................................ 101 Hardware Rev. (Logger Hardware Revision) ........................................................................................................................... 101 Site Information Editor - Baseline Sensor Information Parameters ....................................................................... 101 Channel .................................................................................................................................................................................... 101 Load Defaults ........................................................................................................................................................................... 101 Description ............................................................................................................................................................................... 101 Details ...................................................................................................................................................................................... 101 Serial Number .......................................................................................................................................................................... 101 Sensor Type ............................................................................................................................................................................. 101 Height ....................................................................................................................................................................................... 101 Scale Factor ............................................................................................................................................................................. 101 Offset ....................................................................................................................................................................................... 102 Print Precision .......................................................................................................................................................................... 102 Units (Imperial or SI) ................................................................................................................................................................ 102 Notes ........................................................................................................................................................................................ 102 Saving the Site File .................................................................................................................................................................. 102 Site History Entries ...................................................................................................................................................... 102 Selecting the Site and Sensor .................................................................................................................................................. 102 Make New Change................................................................................................................................................................... 102 Site History Concepts ............................................................................................................................................................... 103 Data Retriever Software: Changing iPack and Sensor Settings from a Remote Location by Creating a Patch File .........................................................................................................................................................105 Cautions ........................................................................................................................................................................ 105 Creating the Patch File ................................................................................................................................................ 105 Sensor Patch............................................................................................................................................................................ 105 Configuration Patch.................................................................................................................................................................. 106 Saving the Patch File ................................................................................................................................................... 107 Sending the Patch File to the iPack via email ........................................................................................................... 107 Confirming the change ................................................................................................................................................ 108 Data Retriever Software: iPackGPS Features .............................................................................................109 Settings .................................................................................................................................................................................... 109 Actions ..................................................................................................................................................................................... 110 7 nrg_symphonieplus3_data_logger_manual.docx Rev 6 11 December, 2012 Data Retriever Software: Processing Data from 9200-PLUS, Wind Explorer and 9300 Loggers ............111 Leave Time Zone set to 0 ............................................................................................................................................ 111 Importing and Processing Data .................................................................................................................................. 111 Introduction to SDR ChipReader ................................................................................................................................ 111 Reading a DataPlug from a WindExplorer................................................................................................................. 111 Reading a DataChip from a 9200-Plus ....................................................................................................................... 112 Troubleshooting Guide ..................................................................................................................................115 Communication Problems .......................................................................................................................................... 115 GSM iPacks................................................................................................................................................................... 115 Phone Service .......................................................................................................................................................................... 115 ISP Service .............................................................................................................................................................................. 115 At the site ................................................................................................................................................................................. 115 General GSM System Information ........................................................................................................................................... 116 CDMA iPacks ................................................................................................................................................................ 116 Phone Service .......................................................................................................................................................................... 116 ISP Service .............................................................................................................................................................................. 116 At the site ................................................................................................................................................................................. 116 Satellite iPacks ............................................................................................................................................................. 117 Phone Service .......................................................................................................................................................................... 117 Satellite System ....................................................................................................................................................................... 117 Installation ................................................................................................................................................................................ 117 At the site ................................................................................................................................................................................. 117 Internet Error Codes as Displayed by SymphoniePLUS3 Logger .......................................................................... 117 iPackGPS Event Codes ............................................................................................................................................... 118 Other iPack Error Codes ............................................................................................................................................. 119 Problem: Problem: Problem: Problem: Problem: Problem: Problem: Problem: Problem: Problem: Problem: Problem: Problem: Problem: Problem: Problem: Problem: Problem: Problem: Problem: Problem: Problem: Problem: Problem: Internet error 001: iPack timeout error ..................................................................................................................... 119 at + ixfh error:........................................................................................................................................................... 119 Internet errors 41 – 52: ............................................................................................................................................ 120 Internet error 57: Error when trying to establish PPP ............................................................................................... 120 Internet error 58: Error when trying to establish SMTP ............................................................................................ 120 Internet error 59: Error when trying to establish POP3 ............................................................................................ 120 Internet error 60: Single session body for MIME exceeds the maximum allowed .................................................... 120 Internet error 61: Internal memory failure................................................................................................................. 120 Internet error 69: Timeout on host communication .................................................................................................. 120 Internet error 70: Modem failed to respond .............................................................................................................. 120 Internet error 71: No dial tone response. ................................................................................................................. 121 Internet error 72: No carrier modem response ......................................................................................................... 121 Internet error 73: Dial failed ..................................................................................................................................... 121 Internet error 74: Connection with ISP lost .............................................................................................................. 121 Internet error 75: Access denied to ISP server ........................................................................................................ 121 Internet error 76: Unable to locate POP3 server ...................................................................................................... 122 Internet error 77: POP3 server timed out. ................................................................................................................ 122 Internet error 78: Access denied to POP3 server. ................................................................................................... 122 Internet error 79: POP3 failed .................................................................................................................................. 122 Internet error 81: Unable to locate SMTP Server ..................................................................................................... 122 Internet error 82: SMTP server timed out................................................................................................................. 122 Internet error 83: SMTP failed .................................................................................................................................. 122 Internet errors 101 through 109: Parameter not defined .......................................................................................... 122 Internet error 110: No SMTP defined. ..................................................................................................................... 123 SymphoniePLUS3 Data Retriever and iPack Programming .................................................................................... 123 Problem: ''iPack communication failed'' ................................................................................................................................... 123 SDR installation ........................................................................................................................................................... 123 Problem: SDR software can‟t find serial port. .......................................................................................................................... 123 SymphoniePLUS3 Logger Problems ......................................................................................................................... 123 Problem: SD is blank but should contain data. ........................................................................................................................ 123 Problem: Received error message “One or more CRCs do not match: possible bad data” when trying to read data file in SDR software ................................................................................................................................................................................... 123 Problem: Receiving message “iPack Not Present.”................................................................................................................. 124 8 nrg_symphonieplus3_data_logger_manual.docx Rev 6 11 December, 2012 Data / SD ....................................................................................................................................................................... 124 Problem: SD Card does not format correctly first time. ............................................................................................................ 124 Logger Error Log / SDR Event Log ............................................................................................................................ 124 Battery messages ........................................................................................................................................................ 125 Logger Only (no iPack) ............................................................................................................................................................ 125 Logger with iPack Connected .................................................................................................................................................. 125 Appendices .....................................................................................................................................................127 Opening & Closing the iPack ...................................................................................................................................... 127 Opening the iPack .................................................................................................................................................................... 127 Closing the iPack ..................................................................................................................................................................... 127 Technical Specifications ............................................................................................................................................. 129 Glossary ........................................................................................................................................................................ 133 Two Year Limited Warranty......................................................................................................................................... 137 Sending Repair Items to NRG Systems ..................................................................................................................... 139 iPack Data Sheet .......................................................................................................................................................... 142 Site Data Sheet ............................................................................................................................................................. 143 Time Zones ................................................................................................................................................................... 147 EU Declaration of Conformity ..................................................................................................................................... 150 References .................................................................................................................................................................... 151 9 nrg_symphonieplus3_data_logger_manual.docx Rev 6 11 December, 2012 Customer Support Customer Support NRG Systems offers a variety of support options to help you get the most from your NRG product. If you have questions about your NRG product, first look in the printed product documentation, the Knowledge Base, or in the Technical Forum in the Tech Support section of NRG‟s web site. If you cannot find the answer, contact your salesperson or NRG Systems Technical Support for assistance using the information below. Customer support is available 8:30 AM to 5:00 PM EST, Monday through Friday. NRG Systems, Inc. 110 Riggs Road Hinesburg, Vermont 05461 U.S.A. Telephone: 802-482-2255 Toll Free (USA only): 800-448-WIND (800-448-9463) FAX: 802-482-2272 Email: [email protected] When you call or email, you should have the appropriate product documentation at hand and be prepared to give the following information: Customer name Who purchased equipment Item number or description Serial numbers of logger and iPack When equipment was purchased Where equipment is installed - terrain conditions Description of the problem with some detail What events took place leading up to the problem What you have tried while attempting to solve the problem NRG Systems maintains an extensive website which includes an in-depth customer support area for NRG customers. If you need assistance at times other than our regular business hours, we suggest visiting our website, www.nrgsystems.com. All instruments, sensors, software and towers manufactured by NRG Systems are designed to be reliable and easy to use. We welcome your comments and appreciate your help in making NRG products the best available. 11 nrg_symphonieplus3_data_logger_manual.docx Rev 6 11 December, 2012 Introduction Introduction Welcome! Congratulations on your purchase of the SymphoniePLUS3 data logger. The revolutionary SymphoniePLUS3 data logger is part of the world‟s most advanced Internet enabled data logger system. It gives you all the accuracy and durability of other NRG loggers, but allows you to collect data without leaving your desk. SymphoniePLUS3 stores data on a standard SD card. With an optional NRG iPack or iPackGPS, you can send data via your Internet provider over an embedded standard, satellite, or cellular phone. You get an email with an attached data file at any interval you choose. The SymphoniePLUS3 is a further evolution of the Symphonie-PLUS logger. Built on the proven designs of the Symphonie and SymphoniePLUS, SymphoniePLUS3 offers 3 “flex” channels compatible with either analog or digital sensors with the addition of an SCM. The universal anemometer inputs of the SymphoniePLUS3 are compatible with most commonly used anemometers – no SCMs required! Optional plug-in Signal Conditioning Modules (SCMs) are available and pre-configured to work with analog sensors from NRG or other manufacturers. The look and feel of SymphoniePLUS3 as well as the menu structure and user programming tasks remain largely unchanged from Symphonie and SymphoniePLUS. SCM auto-detection allows the logger to display flex channel information according to whatever SCM is inserted in the corresponding channel. A new programming feature in the SDR software allows logger programming using a laptop through the iPack programming port. If you can program a SymphoniePLUS, you already know how to program a SymphoniePLUS3! The complete Internet enabled SymphoniePLUS3 data logger system is comprised of the SymphoniePLUS3 data logger; optional iPackGPS kit for CDMA cellular, GSM cellular, or satellite communications, plus Symphonie Data Retriever Software. Starting in June 2010, all Symphonie iPacks will ship pre-configured for WindLinx wireless service. WindLinx allows for uniform activation of communications services and features the WindLinx web portal, which allows for remote management and monitoring of wireless account activity. Using This Manual The SymphoniePLUS3 logger User‟s Manual is an indispensable part of the SymphoniePLUS3 logger system. Read this manual completely before installing and operating the SymphoniePLUS3 logger. Follow all instructions and recommendations closely. Several checklists and forms have been included to facilitate preparing for installation and site visits. Avoid jeopardizing the reliability of your data collection system by being prepared with the required information and tools. This document and the instruments described herein may use the following symbols: Earth (Ground) Read the Manual DC Voltage Definitions This type style is used for the general body of this manual and is used for general descriptions and instructions to the user. Instructions in Bold Type refer to Symphonie Data Retriever Software and require you to press a button on the computer screen, open a file, or select from a program menu. For example: File>Open. 13 nrg_symphonieplus3_data_logger_manual.docx Rev 6 11 December, 2012 Instructions in [Brackets] refer to SymphoniePLUS3 logger keypad navigation and require you to press a series of keys to perform a specific function. For example, pressing the [Home/Esc] key will always return the display to the Main Menu. This type style is used to show actual prompts and messages that appear on the logger display. This type style is used to warn users of a potential danger, either to themselves or to the equipment or data. SymphoniePLUS3 Set-up Overview SymphoniePLUS3 is a very flexible logging system that can be set up as a stand alone unit or as an Internet enabled logging system. When used as a stand alone unit, data files are retrieved manually through regular site visits. When used in conjunction with a snap-on CDMA, GSM, or satellite communications iPack, data files are delivered to the user as email attachments. Stand Alone Users (no iPack) Stand alone SymphoniePLUS3 configuration is fairly straightforward for those familiar with data loggers. Follow the sections on logger setup carefully. Stand alone users may skip the headings in this manual referring to iPacks and do not need to install the SDR software in order to configure a logger. All software related operations including software installation can be skipped until files need to be processed. Internet Enabled Users (with iPack or iPackGPS installation) This manual provides full instructions in a chronological order for SymphoniePLUS3 / iPack / iPackGPS systems. It is recommended that the manual be followed in chronological order for configuring an iPack or iPackGPS System. The term “iPack” as used throughout this manual refers to either the iPack or iPackGPS except where a difference in programming or features is explicitly noted. As of June 2010, all iPacks ship pre-configured for WindLinx wireless service. Through WindLinx unified wireless service, iPack and iPackGPS users can set up Internet service provider accounts in addition to cellular or satellite accounts from a single provider. The WindLinx web portal will generate necessary programming parameters for the iPack. Instructions for programming the iPackGPS, released February 2011, are the same as for iPacks except where explicitly noted. Theory of Operation The NRG SymphoniePLUS3 data logger is an Internet ready, ultra-low power microprocessor-controlled data logging system specifically designed for the wind energy industry. Addition of communication iPacks allows for Internet transfer of data via email. CDMA, GSM, and satellite iPacks can be easily connected to the back of the SymphoniePLUS3 logger to enable remote Internet communications. The SymphoniePLUS3 logger has a fixed averaging interval of 10 minutes. Each of the 15 channels‟ averages, standard deviations, and other statistical values are calculated from continuous 1 second data samples. Data intervals are calculated every 10 minutes, time stamped with the beginning time of each interval and written to the SD Card (SD) at the top of each hour. Symphonie Data Retriever (SDR) software is then used to process raw data files stored on your computer either from an SD Reader or email. Configuration of iPacks is also performed by the SDR software with the use of a programming cable. Sensor scales and offsets programmed into the SymphoniePLUS3 logger can be edited later with SDR if there is a mistake or if a sensor is added or changed. The parameters in SDR‟s Site Information Editor are used to create the tabdelimited text file (ASCII), so there is always an opportunity to make changes to how the raw files will be processed before generating ASCII data files. 14 nrg_symphonieplus3_data_logger_manual.docx Rev 6 11 December, 2012 Introduction Features of the SymphoniePLUS3 Logger System The SymphoniePLUS3 logger is a 15 channel data logger optimized for the needs of the wind energy assessment user. It is designed to be easy to install and reliable in any climate. Wherever you need to measure the wind, no matter how demanding the environment, SymphoniePLUS3 and the “plug and play” iPacks make data collection as easy as reading your email. It provides up to 9 counter inputs used for measuring wind speed or other frequency signals such as rain gauges or other totalizer type sensors. All counter inputs can accommodate the NRG Systems Class 1 Anemometer, NRG #40C Anemometer or other digital anemometers and do not require SCMs. Only flex channels (channels 4, 5, and 6) require SCMs. 3 flex channels can be configured for analog or anemometer/counter input signals by inserting an SCM card. It provides up to 9 analog channels (6 dedicated analog channels plus 3 flex channels) used for measuring wind direction or a range of other parameters including temperature, barometric pressure, relative humidity and solar energy. The SymphoniePLUS3 logger is wind energy industry specific and pre-configured to industry standards. All features for wind energy assessment are built in. SymphoniePLUS3 requires no complex configuration. Convenient “plug and play” Signal Conditioning Modules (SCMs) are pre-configured for a large variety of additional sensors. Configuration of channels 4-6 and 9-12 can be altered at any time for different sensors by simply changing the corresponding SCM. Channels 4 – 6 offer the option of accepting either analog or anemometer/counter SCMs. SymphoniePLUS3 uses standard, non-volatile Secure Digital (SD) Cards (SD) for data storage. Cards are available almost anywhere in the world and provide secure data storage. The SD card provides over 2 years of data storage. Average, Standard Deviation, Maximum and Minimum values are recorded for all wind speeds and most analog channels at every 10 minute interval. Set up is done for you. Free Symphonie Data Retriever Software is included and produces versatile tab-delimited text files. Data files can be used with a wide range of data processing software, including SQL databases, Microsoft Excel and Access, and more. International numeric formats are supported. The 4 line x 20 character display is easy to read and provides easy to understand real-time data and configuration information. Dedicated navigation buttons (up, down, left, right, home), plus a data entry keypad make the full-text, menu driven display easy to use. Separate lithium battery-backed real-time clock provides accurate and reliable time stamping. Wiring panel provides additional gas tube electro-static damage (ESD) protection for each input channel. SymphoniePLUS3 runs on two alkaline D-cells (included) for up to one year, depending on sensor configuration. iPack kits for CDMA cellular, GSM cellular, and satellite communications provide remote data collection via email. PV-only iPack kits provide additional power for higher consumption sensors such as barometric pressure sensors 15 nrg_symphonieplus3_data_logger_manual.docx Rev 6 11 December, 2012 or relative humidity sensors. Loggers with iPacks allow remote changes to sensor configuration and communication parameters via email. Symphonie Data Retriever Software allows pre-installation programming of iPacks and Symphonie loggers through a programming cable. Call Now and antenna test features allow on-site testing of iPack communications. iPack battery can be recharged after office testing using a convenient wall charger (available from NRG). Symphonie Data Retriever Software version 7 and later is compatible with data from SymphoniePLUS3, Symphonie, Wind Explorers, 9200-PLUS, and 9300 series loggers and their readers (DataPlug Reader, EEReader II). Improved support for DBCS systems. Data filtering in Symphonie Data Retriever Software can exclude icing data and faulty sensor data from reports. Support for SMTP authentication for iPacks version 14 and later. iPackGPS can have its firmware upgraded via e-mail or on site using SDR and the iPack programming cable. POPAuto feature included with Symphonie Data Retriever Software automates extraction of emailed data. Convenient access to complete sensor history information in the Site Information Editor screen. Customized ASCII export available. Integrated Global Positioning System (GPS) in iPackGPS More detailed iPackGPS info such as iPackGPS serial number, signal strength, modem identifier, and firmware version available in header of each raw data file. 16 nrg_symphonieplus3_data_logger_manual.docx Rev 6 11 December, 2012 Precautions Precautions Notes for First Time Users It is recommended that you take the time to become familiar with your new logger and its operation before going out in the field. Please read the manual and experiment with all the functions and features of the SymphoniePLUS3 data logger. Practice the following in your office before going to the field: installing SCM cards setting SymphoniePLUS3 parameters (through the keypad, or through the iPack with the iPack programming cable) attaching the sensors to the SymphoniePLUS3 logger using the keypad formatting and changing SD cards changing batteries installing and configuring iPacks (ALWAYS verify successful data transfer before field installation!) using Symphonie Data Retriever Software transferring data from the SD card to your PC Grounding Whenever coming in contact with the SymphoniePLUS3 logger, either in the field or indoors, it is good practice to first grasp a piece of grounded (earthed) metal to avoid a potentially damaging electrostatic discharge (ESD) to the logger. Meteorological sensors, loggers, and towers will accumulate static charge unless they are properly grounded. Both high wind speeds and low humidity increase the rate of charge accumulation. Static charge can change the electric potential of the logger and sensors by thousands of volts relative to ground. Charge will continue to accumulate until the developed voltage difference causes dielectric breakdown and static discharge. Electrostatic discharge will damage any scientific instrument, including a SymphoniePLUS3 logger. It is very important that you ground your logger immediately after mounting and prior to connecting a sensor. If a ground rod cannot be driven into the ground at the base of the tower, a grounding cable should be buried in the ground for sufficient distance to reduce the resistance between the logger ground stud and the earth. Failure to adequately ground a SymphoniePLUS3 logger will cause damage to the logger, sensor damage, and loss of data. Equipment that is not properly grounded is not covered by NRG Systems’ warranty. Recharging the iPack Battery Lead acid batteries such as the one used in the SymphoniePLUS3 iPack need to be kept fully charged. It is very important to recharge the iPack before installing it in the field, especially after programming or communications testing. All lead acid batteries will lose their capacity over time. The battery must be recharged if an iPack is kept in storage or is unused for any period of time. 17 nrg_symphonieplus3_data_logger_manual.docx Rev 6 11 December, 2012 An iPack battery charger is available from NRG Systems (item #3615). iPack models released after April 2006 have an additional set of terminals for a 12 V external power source (battery bank with charge controller, for example). Please review the following table to make sure you are making the correct connections. Do Do NOT PV Terminals Do…connect PV panels, DC power sources between 14 and 28 V DC Do NOT…connect power sources in excess of 28 V DC, including large PV panels External Battery Terminals Do…connect 12 V battery and/or external charge controller up to 14.3 V DC Ground Terminal Do…connect to logger ground stud Connection Point Functional Notes The PV terminals will charge the iPack‟s internal battery; the PV terminals will NOT charge an external battery. The external battery terminals are an input Do NOT…connect PV panel or power only, an external battery will NOT be sources in excess of 14.3 V DC charged from the iPack through these terminals nor will the internal iPack battery. This terminal will help provide protection Do NOT…leave disconnected or connect from electrostatic discharge for the iPack other wires such as shields and logger. If the iPack battery is not fully charged before being installed in the field, the battery may discharge faster than the photovoltaic panel can recharge it. This is more likely when using sensors with greater rates of power consumption such as barometric pressure and relative humidity sensors. Like most lead acid batteries, if the iPack battery remains at low capacity for an extended period of time, the battery will no longer accept or maintain a charge. Environmental Considerations Grounding requirements are site specific; determine soil type before installation. Sensor cables become less flexible and are more easily damaged at very low temperatures. Make sure that all sensor cables are securely fastened to the tower so they do not flap in the wind. Be sure that all connections are tight and securely fastened to ensure reliability in high winds. Low temperatures can diminish battery performance. Always use good quality alkaline batteries, and always stay within reasonable limits when establishing your battery replacement schedule. Replace alkaline batteries at least once per year to avoid leakage. Make sure that all sensor cables are spiral wrapped (2 wraps every three meters) around the tower to discourage natural frequency vibrations. Use a high quality electrical tape rated for extreme conditions to further secure the cables to the tower. Coat terminal connections with anti-corrosive or petroleum jelly to reduce corrosion. Site Records Understanding the assignment of site numbers is the single most important step in setting up a wind assessment system. The SymphoniePLUS3 logger system requires that you assign a unique site number to each logger site. The assigned site number must stay with the site even if the tower, sensors, and logger are dismantled and moved to another location. An abandoned site number is never re-used or assigned to a new location. It remains as a reference to the historical data from the abandoned site. An accurate description of each site is essential to your wind measurement program. Your SymphoniePLUS3 logger can be configured to label datasets with the following information: Latitude and longitude (programmed automatically when using iPackGPS) Site elevation (programmed automatically when using iPackGPS) 18 nrg_symphonieplus3_data_logger_manual.docx Rev 6 11 December, 2012 Precautions Sensor heights It is advisable to record additional site information that may help in the analysis of your data: Type of terrain (open plain, mountainous forest, etc.) Type and height of trees Type of climate A topographic map of the area Additional procedures and recommendations for keeping good site records can be found in the American Wind Energy Association‟s siting standards document: Standard Procedures for Meteorological Measurements at a Potential Wind Turbine Site. This document can be found on the AWEA web site, www.awea.org. Other good resources for site configuration guidelines can be found here: http://www.nyserda.org/publications/wind_resource_assessment_handbook10_30.pdf http://www.measnet.com/measnet_siteassessment_v1_0.pdf In the Appendices, we‟ve provided some blank site data sheets that may be helpful in organizing site information. 19 nrg_symphonieplus3_data_logger_manual.docx Rev 6 11 December, 2012 SymphoniePLUS3 Logger Components (Quick Tour) SymphoniePLUS3 Logger Components (Quick Tour) Unpacking the SymphoniePLUS3 Logger System Follow standard precautions for handling electronic components when unpacking the SymphoniePLUS3 logger. Discharge static electricity from your body by touching a piece of grounded metal or wearing a ground strap. Do not remove the brown desiccant pack from the clear plastic package at this time. During the field installation procedure, you will remove the clear wrapper and place the desiccant pack inside the logger enclosure to keep it dry. Confirm that you have received all components by comparing your order to the packing list shown below. Immediately contact NRG Systems if any of the components are missing. You should find the following standard equipment: 1 – SymphoniePLUS3 data logger unit 2 – 1.5 volt D-cell alkaline batteries 1 – 3 volt lithium clock battery (installed) 1 – 8 foot (2.43 meter) 10 Ga. ground cable with connector 2 – 10-32 hex machine nuts 4 – 10-32 x 0.50 inch (13 mm) mounting screws 1 – desiccant pack 1 – NRG SD card with protective case 1 – field wiring panel 1 – sheet of paper referring users to NRG‟s website for downloading the latest version of Symphonie Data Retriever Software and the SymphoniePLUS3 User‟s Manual 1 – screwdriver with NRG logo Be sure to double-check your order for any optional equipment ordered, such as SCMs, extra SDs, etc. 21 nrg_symphonieplus3_data_logger_manual.docx Rev 6 11 December, 2012 SymphoniePLUS3 Logger Components Map Here is an illustration of the logger with the cover open and the battery cover removed. Keypad Two field types are utilized when programming the SymphoniePLUS3 logger - numeric only and alphanumeric. While in a numeric only field, pushing a numbered key allows direct entry of any numeric value. While in alphanumeric fields, the keys will scroll through each of the assigned characters. For example, push the [2] key, and it types the number “2.” Push the same key again and it types the letter “A” or “a.” Press the same key again, and it types the letter “B” or “b.” The navigation keys in the top row are used to toggle between upper and lower case letters (see below). In this manner, the digits 0-9, the entire alphabet, as well as special characters, can all be entered utilizing only ten keys. The zero [0] key can be used to enter a blank space or the characters “*” and “#.” Pressing the [Home/Esc] key will always return the display to the Main Menu. Take some time to experiment with the keypad to become familiar with its operation. Navigation keys The keys in the top row are the navigation keys – left, down, up and right. These keys can be used to page forward and 22 nrg_symphonieplus3_data_logger_manual.docx Rev 6 11 December, 2012 SymphoniePLUS3 Logger Components (Quick Tour) backward, move the cursor on data entry screens, and enter decimal points “.” or negative “-” characters. Additionally, the up and down keys are used to toggle between capital and lower case letters in alphanumeric fields. The exception to this is that the up and down arrow keys are used for the semi-colon and colon characters while in the Manual Dial screen of the iPackGPS. Display The liquid crystal display is built into the logger to facilitate site visits and is activated by pressing any key on the logger keypad. The user can view present wind conditions and logger parameters without additional equipment. As a power saving function, the display will always shut off after one minute without any key inputs. The logger continues to collect data while the display is off. D-cell Batteries The logger runs on standard D-cell batteries which are protected by a battery cover. a time so that logging operations are not disrupted during the battery change. Batteries should be changed one at It is recommended that high quality alkaline batteries are used (such as Energizer or Duracell), and they should be changed at least once per year to avoid leakage and equipment damage. Input connector This male DB-62 connector interfaces to the field wiring panel. Sensor wires are connected to the field wiring panel with the supplied NRG screwdriver. iPack access port This port allows connection of the Programming Adapter for iPack and logger programming while the iPack or iPackGPS is connected to the logger. Ground stud This 10-32 stud is designed to be connected directly to earth ground with the supplied ground cable. The logger must be grounded! Clock battery A lithium battery powers the logger clock even if D-cell batteries are not present. This allows the logger to retain date and time in the event of a reboot. Clock batteries will last many years under normal use. Clock battery warning LED This LED illuminates if the clock battery has been installed backwards. Reset Button Any time the reset button is pressed, the logger will begin a new data file. A reset button is provided in the unlikely event that a nearby lightning strike or ESD event causes the SymphoniePLUS3 data logger electronics to lock up. It is located between the battery box and the clock battery. Should it become necessary to reset the SymphoniePLUS3 logger, place the NRG screwdriver (provided) in the upper corner just to the left of the “Channel 4” SCM slot and slide down. Resetting the unit will cause up to 10 minutes of data to be lost (depending on how long since data was last written to memory) and will start a new data file. SymphoniePLUS3 loggers with attached iPacks will initiate an automatic call (“cold boot call”) 10 minutes after the logger is powered up. If no antenna is attached or the call can‟t be completed, no attempt will be made to call again until the next scheduled call or a “Call Now” is initiated by the user. Collected data already written to memory and all configuration settings will be retained. The reset button can also be used during field installation to start a new data file from the point at which all sensors have been connected. 23 nrg_symphonieplus3_data_logger_manual.docx Rev 6 11 December, 2012 Note that a reset can be also be initiated by the built-in watchdog in response to an ESD (electrostatic discharge) event. When an iPack is connected to a logger with no D-cells, this will also initiate a reset. The iPack provides auxiliary power to the logger and therefore powers it up in the absence of D-cells. SD Card Slot The SD memory card installs into this slot with the beveled front corner down. Channel Description The SymphoniePLUS3 Logger has 15 input channels; 6 channels are counters, 6 are analog, and 3 channels can be either counter or analog. Channels 1 – 3 and 13 – 15 (Counters) Channels 1 through 3 and 13 through 15 have built-in sensor interfaces for the NRG Systems Class 1 Anemometer, NRG #40C Anemometer and other anemometers such as the P2546A WindSensor, Thies First Class, Vector, etc. Flex channels 4 through 6 can be configured for anemometers or analog sensors by plugging an SCM into the corresponding SCM slot for that channel. The SCM provides the electronics to configure the input for the connected sensor. The SCM also sets up the channel as a speed (frequency) or totalizer for sensors such as tipping-bucket rain gauges or kWh meters. SCM slots for flex channels 4, 5 and 6 (analog or counter / anemometer) Each slot accepts an analog or counter / anemometer type Signal Conditioning Module (SCM). These are used to configure the logger for additional analog or counter /anemometer channels (in addition to the 6 built-in counter/anemometer channels). When you insert the SCM, the correct type of sensor should be automatically detected by the logger and only show programming options appropriate for that type of sensor. Channels 7 – 12 (Analogs) Channels 7 and 8 have built-in sensor interfaces for the NRG #200P wind vane or other wind vanes with similar output signals. Channels 9 through 12 are configured by plugging an SCM into the corresponding SCM slot for that channel. The SCM provides the electronics to configure the input for the connected sensor. Appropriate SCMs in analog channels 9 through 12 also describe to the logger whether the analog channel is a vane or other type of analog sensor (relative humidity, barometric pressure, temperature, etc.). SCM slots for analog channels 9,10,11 and 12 Each slot accepts an analog type Signal Conditioning Module (SCM). These are used to configure the logger for additional wind vanes (in addition to the 2 built-in vanes channels) or other analog type sensors. 24 nrg_symphonieplus3_data_logger_manual.docx Rev 6 11 December, 2012 Pre-Installation Setup: Logger Configuration Pre-Installation Setup: Logger Configuration It is important to follow the instructions in this section in the sequence presented. Logger programming can be done using the logger‟s keypad, or programming information can be uploaded to the logger using SDR. Uploading from SDR requires an iPack and connection through the logger‟s iPack access port. The Logger Direct Editor screen is accessed through SDR‟s Modify iPack Settings screen. Grounding Whenever coming in contact with the SymphoniePLUS3 logger, either in the field or indoors, it is good practice to first grasp a piece of grounded (earthed) metal before touching the logger to avoid a potentially damaging electrostatic discharge (ESD) to the logger. Installing SCMs If your site configuration requires more than the 6 built-in anemometer / counter channels and 2 built-in vane channels, it will be necessary to install appropriate Signal Conditioning Modules (SCMs) for each additional anemometer / counter sensor (channels 4 through 6) and each additional analog sensor (channels 4 through 6, and channels 9 through 12) to be connected to the SymphoniePLUS3 logger. Each SCM provides the necessary signal conditioning (filtering, gain, buffering and protection) electronics for the specific sensor type to be connected to the channel. Additionally, each SCM automatically sets the logging mode for the channel. The logging mode determines how the SymphoniePLUS3 logger will process data gathered by each channel. For each flex channel 4 through 6, the SCM identifies the logging mode as a vane or analog (other than vane), frequency (speed), or totalizer, and for each analog channel 9 through 12, the SCM identifies the logging mode as vane or analog (other than vane). Before inserting an SCM in the appropriate slot, be sure to grasp the ground stud on the logger to prevent a potentially harmful static discharge. The SCM has a metal strip on the top edge to facilitate grounding while being handled. In order to install an SCM, it is necessary to remove the battery cover by loosening the three thumbscrews. It is preferable that the logger is not powered while installing or removing SCMs, so the D-cells or iPack should not be installed at this time. Install the SCM into the appropriate slot with the pins facing downward and the circuit components facing to the right. Do not force the SCM. The pins and connectors are “keyed” so that a counter SCM cannot be inserted into an analog slot. Once the SCMs have been installed, the D-cell batteries can be installed, and the channels can be configured. Allow 4 seconds between inserting and removing SCMs as they take a few seconds to be recognized by the logger Installing D-Cell Batteries Open the logger enclosure and remove the battery box cover. If you just installed SCMs, the cover should already be off. 25 nrg_symphonieplus3_data_logger_manual.docx Rev 6 11 December, 2012 Insert two fresh D-cell batteries, one at a time, into the battery holders with the positive terminals of the batteries (the end with the bump) oriented towards the sides of the enclosure. When the batteries are first inserted, the display will read: NRG Systems, Inc. SymphoniePLUS3 SN: 00000 Press [HOME] Replace the battery box cover. As a power saving function, the display will always shut off after one minute without any key inputs. The display may also be shut off by pressing [Home] [3] [3]. The logger continues to collect data while the display is off. SCM cards installed under battery cover Setting Logger Display Contrast The SymphoniePLUS3‟s display contrast is pre-set at the factory but can be adjusted if necessary. Please note that changes in contrast are temporary. When the display is powered up again, the default contrast setting will appear. This is to avoid the screen being accidentally set so that it can‟t be read (completely black or completely white). [Home][3][2] = Set Display Contrast Use up and down keys to adjust contrast ESC=Quit Set=Accept Setting and Verifying Logger Units (Imperial or SI) Sensor lists are used to configure each channel of the logger. There are two internally stored factory loaded sensor lists, one with scale factors in Imperial units and one with scale factors in SI (metric) units. Setting the logger units to Imperial will load the sensor list with the scale factors in miles per hour, and the site elevation and sensor height units will default to feet. Setting the logger units to SI will load the sensor list with the scale factors in m/s, and the site elevation and sensor height units will default to meters. 26 nrg_symphonieplus3_data_logger_manual.docx Rev 6 11 December, 2012 Pre-Installation Setup: Logger Configuration Note that this will not change the currently stored scale factors for each channel in the logger. You must always confirm the scale factors and units for each logger channel individually. Press [Home][4][3][3] Use the [UP] and [DOWN] navigation keys to select Imperial or SI. Press the [Set] key to accept the selected units or press [ESC] to quit without changing the units. With an iPack connected and using the programming adapter in the logger‟s iPack access port, you may set the Default Units using SDR‟s Logger Direct Editor Screen (found in the File menu of the Modify iPack Settings screen). Channel Configuration Sequence – choosing a sensor, setting and verifying each logger channel It is recommended that the channels are configured only after the logger units have been set to either Imperial or SI as described above. Default sensor configuration values are preprogrammed for NRG sensors and can typically be used to simplify the configuration process. With an iPack connected and using the programming adapter in the logger‟s iPack access port, you may configure each sensor channel using SDR‟s Logger Direct Editor Screen (found in the File menu of the Modify iPack Settings screen). Channel Configuration Using SDR’s Logger Parameter Editor To begin the configuration process using SDR, make sure your logger is connected to an iPack and that you have a programming adapter installed in the logger‟s iPack access port. Connect your computer running SDR to the programming adapter, and choose Modify iPack Settings from the Site menu. Then choose Logger Parameter Editor from the File menu. Click the Load from Logger button to see the current settings in the logger. Use the arrow buttons to scroll through each channel to review current settings and make changes as needed. If a channel isn‟t listed, it means there is no SCM currently installed for that channel and it is therefore inactive. Once changes are complete, click the Save to Logger button. 27 nrg_symphonieplus3_data_logger_manual.docx Rev 6 11 December, 2012 Click Yes to accept the changes or No to discard them. Channel Configuration Using the Logger’s Keypad To begin the configuration process using the logger‟s keypad, press [Home][4]. The following display will appear: 1. Counter Channels 2. Analog Channels 3. Logger Settings Pressing [1] will display a list of the currently active counter channel descriptions. Pressing [2] will display a list of the currently active analog channel descriptions. Scroll through the list of channels using the [UP] and [DOWN] arrows. If a channel isn‟t listed, it means there is no SCM currently installed for that channel and it is therefore inactive. Press the corresponding number for the channel you wish to configure [for example, 1, 4 for channel 14]. This will display the currently active channel description. You may now edit the currently displayed channel by pressing [SET], or you may select a new configuration from the loaded sensor list by pressing the [Down] arrow key to scroll until the desired sensor description appears. When you have scrolled to the correct sensor description, press [SET] to edit. Any changes will be loaded as a working copy into temporary memory and will be saved and finalized after the configuration process for the channel is completed. Note that the currently selected sensor description will be followed by [Set] to Change on the LCD. Channel 1: Frequency NRG #40C Anem m/s [Set] to Change [Down] for Defaults Other available sensor description choices will be followed by Up, Down to select and ESC=QUIT SET=ACCEPT. -> Description (Sensor Model) Edit the sensor description if desired by using the keypad and navigation keys. Press [SET] when the sensor description is correct. The description is now loaded into the temporary memory and will be saved after the configuration process for this channel is completed. The scale factor editing screen will appear next. -> Scale Factor Enter the scale factor exactly and be careful to place the decimal point into the correct place. Edit the sensor scale factor if desired by using the keypad and navigation keys. Press [SET] when the sensor scale factor is correct. The scale factor is now loaded into the temporary memory and will be saved after the configuration process for this channel is completed. The offset editing screen will appear next. -> Offset Edit the sensor offset if desired by using the keypad and navigation keys. Press [SET] when the sensor offset is correct. The offset is now loaded into the temporary memory and will be saved after the configuration process for this channel is completed. The units editing screen will appear next. 28 nrg_symphonieplus3_data_logger_manual.docx Rev 6 11 December, 2012 Pre-Installation Setup: Logger Configuration -> Units The SymphoniePLUS3 Logger may be set to use “mixed” units – that is, one can use SI units for some channels and Imperial units for others. Additionally, the units for each channel do not need to match the units that have been set for site elevation (altitude) and sensor height. Edit the sensor units if desired by using the keypad and navigation keys. Press [SET] when the sensor units are correct. The units are now loaded into the temporary memory and will be saved after the configuration process for this channel is completed. The height editing screen will appear next. -> Height Edit the sensor height if desired by using the keypad and navigation keys. The sensor height may be up to 4 characters. Press [SET] when the sensor height is correct. The height is now loaded into the temporary memory and will be saved after the configuration process for this channel is completed. The serial number editing screen will appear next. -> Serial Number Edit the sensor Serial Number (SN) if desired by using the keypad and navigation keys. It is an 8 character alphanumeric field. Press [SET] when the sensor Serial Number (SN) is correct. All channel parameters that were loaded into temporary memory during editing are now finalized, and the configuration of this channel is now complete. The SymphoniePLUS3 data logger will return to the channel selection menu, and the process is repeated for the next channel. Setting and Verifying Site information, Time Zone, Clock and Data Encryption Time Zone and Logger Clock (Time and Date) Press [Home] [4] [3] [1] to display the screen that sets the appropriate time zone (the logger defaults to zone –5: American Eastern Standard Time). Use the [Up] or [Down] arrows to scroll to the proper zone for your site, then press [Set] to accept. The logger will update the time zone and then display the prompt: Set Date and Time 02/15/2003 15:26 mm/dd/yyyy hh:mm ESC=Quit SET=Accept Remember to use local standard time (not daylight savings time). Press [Set] to accept. With an iPack connected and using the programming adapter in the logger‟s iPack access port, you may set the Time Zone using SDR‟s Logger Direct Editor screen (found in the File menu of the Modify iPack Settings screen). Site Number Press [Home [4] [3] [2] to set your unique site number. The Site Number field initially defaults to the logger‟s serial number but can be reset to any four digit number. With an iPack connected and using the programming adapter in the logger‟s iPack access port, you may set the Site Number using SDR‟s Logger Direct Editor screen (found in the File menu of the Modify iPack Settings screen). Site Altitude (Elevation) (optional) Press [Home] [4] [3] [4] to set site elevation. Site elevations will be expressed using the units (Imperial or SI) previously selected. Site elevations below sea level can be set by using a “-” in the first position. The “-“ can be found in the navigation keys (the top row of the keypad). If an iPackGPS with adequate GPS signal is connected to the logger, this setting will be updated automatically at the end of a successful call. With an iPack connected and using the programming adapter in the logger‟s iPack access port, you set the Site Elevation using SDR‟s Logger Direct Editor screen (found in the File menu of the Modify iPack Settings screen). 29 nrg_symphonieplus3_data_logger_manual.docx Rev 6 11 December, 2012 Site Latitude and Longitude (optional) Press [Home] [4] [3] [5] to set site latitude. Use the [Up] [Down] navigation keys to toggle between north and south (“N” and “S”), and use the keypad to edit the displayed latitude information. When the latitude information appears as desired, press [SET]. Use the [Up] [Down] navigation keys to toggle between east and west (“E” and “W”), and use the keypad to edit the displayed longitude information. When the longitude information appears as desired, press [SET]. Enter latitude and longitude in decimal degrees (rather than degrees, minutes, seconds) If an iPackGPS with adequate GPS signal is connected to the logger, this setting will be updated automatically at the end of a successful call. With an iPack connected and using the programming adapter in the logger‟s iPack access port, you may set the Latitude and Longitude using SDR‟s Logger Direct Editor screen (found in the File menu of the Modify iPack Settings screen). Data Encryption PIN Number (optional) As a security measure, SymphoniePLUS3 can encrypt data before storing it on the SD. A Data Encryption PIN Number can be entered into the logger to enable data encryption. Note that this is an optional feature intended only for those for whom data theft is a risk. Data encryption can be disabled by setting the PIN to 0000. The data encryption PIN number is set to 0000 (disabled) at NRG before shipment. If the data are stored in encrypted format on the SD, the encryption PIN number will also be needed for the SDR software to decrypt the data. Do not lose the Data Encryption PIN number! You must know the PIN in order to disable or change it. Keypad Security (optional) As an added security measure, SymphoniePLUS3 allows you to set a 6 digit lockout code for the logger‟s keypad. When a key is pressed, the first screen displayed will be: NRG Systems, Inc. SymphoniePLUS3 SN: 00000 Enter Security Key Failure to enter the correct security key will result in a message: NRG Systems, Inc. SymphoniePLUS3 SN: 00000 Locked, 7 tries left If the correct security key isn‟t entered during one of the remaining attempts, the keypad will lock out the user for approximately 2 days. Note that this is an optional feature intended only for use by those for whom logger theft is a serious risk. Keypad security can be disabled by setting the security key to 000000. The security key is set to 000000 (disabled) at NRG before shipment. Failure to enter the correct security code within 8 attempts will lock the SymphoniePLUS3’s keypad for approximately 2 days, and there is no way to defeat the lockout – use caution! 30 nrg_symphonieplus3_data_logger_manual.docx Rev 6 11 December, 2012 Symphonie Data Retriever Software and Accessories Symphonie Data Retriever Software and Accessories Symphonie Data Retriever Software Functions Reads binary data files that have been stored on the computer hard disk from an email or SD card reader, or MMC card reader source. Stores site information. Configures iPacks and SymphoniePLUS3 loggers through the use of a programming cable. Reads files generated by SymphoniePLUS3, SymphoniePLUS, Symphonie, 9300, 9200-PLUS, and Wind Explorer data loggers, scales them according to a user-defined site file, and converts them to tab-delimited ASCII files readable by Notepad, Excel, etc. Imports data into a self-contained Microsoft Access compatible database. Exports data as tab-delimited 10 minute, 60 minute .txt files or WASP format for any time range. Generates Wind Rose, Frequency Distribution and Summary reports for any time range. Please be sure to open the “Read Me” file and check for any updates that may not have been included in the printing of this manual. System Requirements Symphonie Data Retriever runs on Windows 95/98/2000, Windows ME, Windows XP Home, Windows XP Professional, Windows 7, and Vista computer operating systems and can be downloaded from www.nrgsystems.com. An SD card reader is required to read the SD Card. This may be built into your computer or may be an external reader. A standard DB9 COM port is required to program the iPack parameters. Note that in many cases, a USB to serial converter can be used in place of a real COM port. Related Hardware Accessories iPack programming cable Optional USB to serial converter cable with driver Installation Symphonie Data Retriever Software must be installed in order to program iPacks or read data files. Download the latest version from NRG‟s website. 1. Go to the NRG Systems web site at http://www.nrgsystems.com, and go to the Free Software Downloads section of the Tech Support page. 2. Click on the link for Symphonie Data Retriever Software and when asked, choose “Run from current location.” 3. When the download is complete, the program will start. 4. Select the options you want to install. If you are not sure, leave all the boxes checked. Hit “Next.” 5. Choose the target directory for your installation. If you are not sure, leave it un-changed and hit “Next.” 6. When the installation is complete, hit “Close.” If you are prompted to restart, do so now. 7. You are now ready to program iPacks or SymphoniePLUS3 loggers or process files. Please note that a default printer driver must be assigned before the software will run. You may use Windows Control 31 nrg_symphonieplus3_data_logger_manual.docx Rev 6 11 December, 2012 Panel to do this. Some versions of Windows do not allow users without administrator access to modify Windows system files. The user must have access privileges to install Symphonie Data Retriever. 32 nrg_symphonieplus3_data_logger_manual.docx Rev 6 11 December, 2012 Pre-installation Setup: iPack Accounts Pre-installation Setup: iPack Accounts WindLinx Wireless Service iPacks shipped after June 1, 2010 are pre-configured for WindLinx wireless service. WindLinx streamlines the wireless account set-up process and simplifies overall management of met tower data transfer from multiple sites around the world. WindLinx provides satellite, GSM, or CDMA service plus Internet service via the WindLinx web portal, all from a single supplier. A form with instructions for activating and managing WindLinx accounts is included with each iPack. To activate the WindLinx service, go to the WindLinx web portal at www.windlinx.com and click the link under New Users: During the setup process, the WindLinx web portal will generate necessary programming parameters for the iPack (an *.ipk file), so much of the information provided in this section and the next chapter, Pre-installation Setup: iPack Configuration is not required for WindLinx subscribers. Customers wishing to work with their own service providers have the option to do so according to the instructions provided below. GSM Cellular Account Before installing your GSM iPack, a GSM cellular account must be activated by a cellular service provider. Your GSM service provider will supply you with a SIM card that contains the GSM cellular account programming information. The account associated with the SIM should be set up for GPRS (data account). Be sure to ask your GSM provider about 33 nrg_symphonieplus3_data_logger_manual.docx Rev 6 11 December, 2012 the different types of accounts and service availability for your area. The SIM card must be installed into the GSM iPack before the iPack can be installed. Detailed instructions for opening and closing the iPack can be found in the next chapter of this manual. A PIN (Personal Identification Number) number may also be provided and its use is supported by the iPack. Be sure to inform your cellular service provider that you need the account enabled for data service. Record your GSM iPack cellular parameters using the GSM iPack Data Sheet worksheet found in the Appendices of this manual. CDMA Cellular Account (Verizon) Before using your CDMA iPack, a data account must be established with Verizon. In order to activate your CDMA account, you will need to provide Verizon with the CDMA iPack‟s Electronic Serial Number (ESN). The iPack‟s unique ESN can be found on a label on the CDMA iPack. Once you have given the ESN to the cellular provider and the account has been activated, you will need to register the phone in a Verizon home area. This is done through SDR by connecting the iPack directly to your computer, or by accessing the iPack through the logger‟s iPack access port, or through menus accessed from the logger‟s keypad. The phone will then download the account information automatically. It is absolutely essential that a test call is performed prior to installing the CDMA iPack in the field. iPackGPS users can use the Manual Dial feature [Home][3][4][5] to switch a CDMA iPackGPS to WindLinx or from WindLinx to Verizon through use of an initialization string (*22899;). Sending this initialization string updates the iPackGPS modem‟s PRL (Preferred Roaming List). When entering *22899; in the Manual Dial screen, use the up arrow to enter a *, use the right arrow key to enter a semi-colon, and then press the “SET” button on the logger‟s keypad. NOTE: If opting out of WindLinx service for a CDMA iPackGPS, it is necessary to contact Wireless Innovations with the serial number and ESN before registering with Verizon. Satellite Account Before installing your satellite iPack, an account must be established with a satellite service provider that utilizes the Iridium satellite network. Complete the Windlinx activation form included with the satellite iPack and fax to the satellite service provider as instructed on the form. The satellite phone in the iPack will be active once confirmation is received from the satellite service provider. Internet Service Provider (ISP) Account (all iPacks) Before installing your iPack, an Internet Service Provider (ISP) account must be activated. iPacks shipped after June 1, 2010 are pre-configured for WindLinx wireless service, which includes Internet service. If you choose a different ISP, it must be capable of handling dial-up connections, be compatible with either PAP or CHAP authentication methods, be able to recommend Domain Name Service (DNS) servers, and have an SMTP server available for use. The SMTP server must connect over port 25. A POP3 server name, mailbox name and mailbox password are required, and you may use the ones provided by your ISP. With GPRS service, SMTP server information can sometimes be obtained from the cellular service provider. Remember that SMTP servers are used to send email from the logger. However, you will still need a POP3 mail account (to receive patch files), which will likely not be provided by the cellular carrier. Multiple loggers can share one POP3 account between them, but this account should not be used for anything other than SymphoniePLUS3. If you do not already have a POP3 account for your loggers, you can obtain one from an email provider. The POP3 mailbox MUST remain clear of SPAM and other email. The iPack checks the POP3 mailbox at the end of each successful data transmission. Email other than a patch file residing in this mailbox will increase airtime unnecessarily. Multiple loggers can share a single ISP account just as multiple users can share one ISP account. Check with your ISP provider to see if more than one user can be logged in to an ISP at any one time. NRG recommends having a separate, iPack-only ISP account to make handling your data easier and avoid access 34 nrg_symphonieplus3_data_logger_manual.docx Rev 6 11 December, 2012 Pre-installation Setup: iPack Accounts conflicts. It is recommended that the assigned iPack ISP account is NOT the same account you use for your personal Internet access. Each ISP account allows access for one user at any given time. This means that your day-to-day office Internet access could obstruct the iPack‟s Internet access. If the ISP is busy with another user, the iPack will try again later. Repeated attempts to access the Internet should be avoided. 35 nrg_symphonieplus3_data_logger_manual.docx Rev 6 11 December, 2012 Pre-installation Setup: iPack Configuration Pre-installation Setup: iPack Configuration Items required to configure (program) an iPack You will need the following items to configure an iPack or iPackGPS. Be sure you have all of these items before continuing: Symphonie Data Retriever Software Computer - system requirements are specified in the Symphonie Data Retriever Software and Accessories section of this manual. You must follow the instructions to install the software before proceeding. iPack programming cable (available from NRG Systems) USB to serial converter with driver (if your computer does not have a 9-pin serial port) All ISP and phone account information (WindLinx subscribers will be provided this information and an *.ipk file from the WindLinx web portal) Configuration (Programming) recommendations iPack configuration should always be done in the office before going to the field. Bringing an “active, ready to go” iPack to the field will insure the installation can be performed as quickly as possible, saving valuable field time and expense. Please note that if your logger revision is 8, 7, 11 or later, you have the ability to program the iPack through the logger‟s iPack Access Port. However, the iPack Access Port is intended for field use. For pre-installation programming of iPacks in your office, we recommend using the programming cable with PC as described below. Grounding Please take care to observe good grounding practices when configuring your iPack. If you are in a dry office environment, make sure to discharge yourself before handling the iPack. The best solution is to place the iPack on a grounded antistatic mat. Connecting the iPack to the Computer Connect the iPack using a standard 9-pin female to 25-pin male AT Modem cable to the serial port on your PC. The 9-pin end goes to the PC, and the 25-pin end goes to the iPack. Connect the computer end first, and then connect the iPack end. If your computer doesn‟t have a 9-pin serial port, you will need to use a USB to serial converter. Starting Symphonie Data Retriever iPack Configuration Software Start the Symphonie Data Retriever Software from the Windows Start menu. The program is usually found here: C:\NRG\SymDR\SDR.exe. Establishing communication between the computer and iPack From the main SDR Window, select Site>Modify iPack Settings. Check the lower left hand corner of the Modify iPack Settings window for a message. If you receive no message or “iPack Communication Failed,” it is likely that the COMM port on your computer is not configured properly. You must disable any programs such as Palm HotSync that might be trying to access the COMM port. Select Options>Comm Port from the menu, and select the communication port you will be using to connect to the iPack. The COMM port setting will be restored the next time you use the program and only needs to be entered the first time you use the program or following a reinstallation of SDR software. 37 nrg_symphonieplus3_data_logger_manual.docx Rev 6 11 December, 2012 Note: If none of the COMM ports in the Select Comm Port window can be selected, you will need to use Windows Control Panel’s Device Manager to change the available COMM port number to 1, 2, 3, or 4. Please note that iPackGPS users may choose COMM ports 1 through 16. If the port is properly configured, you should see the message “Verifying iPack Connection” and then “iPack detected” at the bottom of the window. iPackGPS users will see a tab labeled “Extended” displayed. The “Extended” tab (shown in many of the following screen shots) will not be visible if an older iPack is detected. Phone Programming & Initialization Overview - Set Up Phone You will want to take extra care during this section. It is strongly recommended that you get the iPack working before bringing it to the field for installation! At this point, you have established communication between the iPack and your computer. The embedded GSM phone will need to be programmed through SDR with the account information provided by your cellular service provider. iPacks with WindLinx are pre-initialized at the factory; non-WindLinx CDMA and Satellite iPacks require initialization. Note that you may select Options>Set up Phone, and then use the Get button to retrieve the IMEI Number or ESN Number from the iPack‟s phone modem. The appropriate type of phone (GSM, CDMA, Satellite, etc.) button should 38 nrg_symphonieplus3_data_logger_manual.docx Rev 6 11 December, 2012 Pre-installation Setup: iPack Configuration already be selected Other options available on this screen are the ability to set a PIN Number using the Send button or perform an antenna test without a logger attached to the iPack using the Start Antenna Test button. Phone Programming - GSM cellular The GSM phone programming functions are performed through the GSM SIM (Subscriber Identity Module, a smart card containing the telephone number of the subscriber, encoded network identification details, the PIN and other user data such as the phone book). Your GSM provider will supply you with a SIM that you will install into the phone. GSM accounts should be configured for General Packet Radio Service (GPRS) since Circuit Switched Data (CSD) is no longer available in most areas. Please note that GSM iPacks shipped prior to April 2006 (SN:3122xxxx) cannot handle GPRS connections. GSM iPacks shipped after June 1, 2010 include a WindLinx enabled SIM. Installing a SIM card into a GSM iPack WindLinx subscribers do not need to open the iPack as the WindLinx SIM is already installed. However, other GSM users will need to open the iPack and install a SIM card into the GSM Data Modem. Opening the iPack Be sure to touch the metal shell of the DB25 connector on the iPack before opening the enclosure in order to safely discharge any static electricity. The iPack enclosure consists of two halves secured together by four recessed screws, two from each side of the enclosure. A gasket in between the two halves and 8 o-rings provide an environmental seal for the iPack protecting the internal electronics from the elements. 39 nrg_symphonieplus3_data_logger_manual.docx Rev 6 11 December, 2012 GSM Transceiver Remove the four recessed screws, and the iPack will separate into two halves. For older iPack models a short cable will connect the two halves. One half contains the iPack electronics, and the other half contains the rectangular battery which is secured by Velcro. Newer GSM iPacks will have the battery and electronics on the same half. The GSM transceiver is located to the left of the battery. Try not to lose any of the o-rings, and be careful not to rip or tear the gasket if it should come loose. Once the iPack cover is off, find the GSM transceiver. Install the SIM in the GSM Data Modem by gently sliding it in. Older GSM Data Modems will have an outline of the correct SIM orientation. Be sure to install the SIM so that the gold contacts are facing down and the SIM card‟s notched corner is aligned to the top right, as seen in the picture above. Firstgeneration GSM Data Modems will have a hatch that needs to be opened before the SIM can be inserted. Secure the hatch (if applicable), and then reassemble the iPack. 40 nrg_symphonieplus3_data_logger_manual.docx Rev 6 11 December, 2012 Pre-installation Setup: iPack Configuration Closing the iPack Insert the (4) 2-½ inch mounting screws up through the half of the enclosure that contains the iPack electronics. Set the gasket into the groove of the shell. Slide the cover (the half with the battery) over screws being careful not to pinch the battery cable. Make sure the gasket is not pinched, and then install the screws. It is a good idea to make sure the screws fall back into the existing threads in the iPack enclosure. An easy way to do this is to gently turn the screw counterclockwise one turn – it will fall into the existing threads in the iPack enclosure. PIN Number Setup parameters for GSM phones are stored on the user-installed SIM card. Some SIM cards, however, require an unlocking PIN number to be entered every time the phone is used. The iPack uses this PIN number to initiate a call. The PIN should be a 4 to 8 character string and must be entered in the Set Up Phone screen shown below. Press Send to send the PIN number into the modem. If your iPack does not require a PIN, do not press Send, and make sure the PIN Number Required box is un-checked and no characters appear in the PIN Number field. Return to the Modify iPack Settings window by closing the Set Up Phone window when done. 41 nrg_symphonieplus3_data_logger_manual.docx Rev 6 11 December, 2012 Phone Programming – Satellite The satellite phone in the iPack will be active once confirmation is received from the satellite service provider. There are no phone parameters to program. Clicking “Get” will provide the satellite phone‟s IMEI number. Phone Programming – CDMA (Verizon) The CDMA phone in the iPack will be active once confirmation is received from Verizon. Clicking “Get” will provide the CDMA phone‟s electronic serial number. The CDMA phone must be initialized on Verizon‟s network by clicking the “Initialize Phone” button. The CDMA iPack will configure the same way as a wireless card on Verizon‟s network (using an initialization string of *22899). The phone can also be initialized through the logger‟s keypad by pressing [Home][3][4][4]. 42 nrg_symphonieplus3_data_logger_manual.docx Rev 6 11 December, 2012 Pre-installation Setup: iPack Configuration For iPackGPS, the initialization is done through the Manual Dial screen, [Home][3][4][5]. When entering *22899; in the Manual Dial screen, use the up arrow to enter a *, use the right arrow key to enter a semi-colon, and then press the “SET” button on the logger‟s keypad. In order for the iPack to work, the CDMA phone must be initialized (registered) on Verizon’s home network! The cellular provider that Verizon is partnering with in the "extended coverage area" must support the CDMA IS95 call protocol and also provide a "modem pool" for the CDMA iPack. To insure a successful installation, we recommend that you determine who the Verizon partner is in the extended coverage area and contact them to see if they support IS95 and have a modem pool available. As a result, placing a call from a Verizon handheld phone is not a complete test of a site's compatibility with a CDMA iPack. Note that you ALWAYS need to activate the CDMA iPack in a Verizon "home" area network and then bring the unit to the site. When setting up service with Verizon, find out which system (A or B) the phone will register on for your intended installation site. When performing an antenna test, if your iPack accesses the other system, your site is likely in an “extended coverage area.” A manual initialization process may sometimes resolve the issue (contact NRG for assistance). CDMA iPacks with WindLinx are pre-initialized at the factory and therefore do not require this step. ISP Programming Overview (All iPack types) You are now ready to enter all of your ISP settings. WindLinx subscribers will be provided this information through the WindLinx web portal. For non-WindLinx iPacks, the process for programming ISP information is the same for every type of iPack. You must have all of your ISP information (obtained from your Internet service provider) to program the iPack and connect to the Internet. The process is much the same as if you were configuring a PC to connect to the Internet. You may want to ask your company‟s IT department for assistance if they regularly configure your computer systems for Internet access. The programming has been organized into a familiar folder-tab system. The programming will be discussed tab by tab. You will want to take extra care during this section. Even a minor typographical error will prevent the iPack from connecting to the Internet. It is strongly recommended that you get the iPack working before bringing it to the field for installation! 43 nrg_symphonieplus3_data_logger_manual.docx Rev 6 11 December, 2012 Viewing the Pre-Loaded iPack Settings From SDR‟s Modify iPack Settings window, select File>Load from iPack from the menu. The status line on the bottom of the screen should show the message “Transferring >>>>>>” followed by the message “Done!” You will now see the fields populated with information that is currently programmed into your iPack. ISP Programming – ISP Access Tab You may edit the pre-loaded iPack configuration (*.ipk file) that is currently being viewed with the information you have obtained from your ISP by selecting the checkbox to the right of each setting. To select all the checkboxes, select Options>Check All. All the checkboxes will be checked, and you may now edit each setting. General information regarding each setting is 44 nrg_symphonieplus3_data_logger_manual.docx Rev 6 11 December, 2012 Pre-installation Setup: iPack Configuration provided below. Primary ISP Phone Number This is the number the iPack will use to dial and access the Internet Service Provider (ISP). Enter the number with no spaces or dashes. GSM iPack users with GPRS service will set the ISP phone number to: *99***1# CDMA iPack users will set the ISP phone number to #777 Satellite iPack users will use the ISP phone number in the default satellite *.ipk file Check that there are no leading or trailing spaces in your entry. If you are using a satellite iPack, two leading zeroes are required for the ISP phone number (0088160000603, for example). This is standard Iridium satellite dialing protocol. Primary DNS Number and Secondary DNS Number These are the Domain Name Server entries that the ISP uses. GPRS, CDMA, and satellite iPack and iPackGPS users will enter primary and secondary DNS numbers of: 0.0.0.0 Enter the numbers with no spaces. Be sure to enter the decimal points between numbers. Check that there are no leading or trailing spaces in your entries. Authentication Method SymphoniePLUS3 supports both PAP and CHAP authentication methods. Select the authentication method provided by your ISP. User Name This is the account level user name your phone service provider gives you or you select when you sign up for an account. Satellite iPack users will typically enter: michmail GSM iPack users with WindLinx accounts will typically enter: web GSM iPack users with non-WindLinx accounts will typically enter something like: [email protected] Web Internet movistar Or something else provided by your GSM service provider. CDMA iPack users with WindLinx accounts will typically enter: web CDMA iPack users with Verizon accounts will typically enter the 10 digit Verizon phone number followed by @vzw3g.com Example: [email protected] Enter it exactly as provided, and do not enter any extra spaces or quotation marks. Check that there are no leading or trailing spaces in your entry. User Password This is the account level password your phone service provider gave you or you selected. Enter it exactly as it is provided to you. Satellite iPack users utilizing the michmail service will leave the User Password field blank. GSM iPack users with WindLinx accounts will typically enter: web GSM iPack users with non-WindLinx accounts will need to enter the user password provided by their GSM service provider. CDMA iPack users with WindLinx accounts will typically enter: web CDMA iPack users with Verizon accounts will typically enter: vzw 45 nrg_symphonieplus3_data_logger_manual.docx Rev 6 11 December, 2012 When you enter your password, it will be displayed as asterisks (*) so it will be secure if someone else reads the information from the iPack. When you read the parameters from the iPack and then save them to the iPack, all parameters, including the password, are returned unchanged unless the user changes them and then chooses File>Save to iPack. APN Name (GPRS only) GSM users configuring GPRS accounts will need to set the APN Name to whatever the provider gives you. GSM iPack users with WindLinx accounts will use an APN of: Internet The format may be something like “apn.provider.com.” An APN is NOT required for CDMA or Satellite iPacks (leave APN blank). Once the information on this tab has been edited and double checked, move to the Mail Access tab. More details regarding programming requirements for specific service providers can be found in the Knowledge Base section of NRG‟s web site. ISP Programming – Mail Access Tab All the checkboxes should still be checked, and you may edit each Mail Access setting. General information regarding each setting is provided below. Note that the SMTP server setting is used to send the email from the logger and should not be confused with the POP3 server, which is used to access patch files addressed to the logger and iPack and firmware updates addressed to the iPackGPS. GSM iPack users with GPRS accounts may obtain the SMTP server setting from their GSM service provider but will need to obtain access to a POP3 server through another provider. SMTP Server Name This is the SMTP server name that your ISP will provide and/or you can find on your ISP‟s web site. It is used to send mail from the logger. GSM iPack users with GPRS service will need to get the SMTP server name from the cellular service provider rather than from an ISP. CDMA iPack users utilizing packet switched connections (1xRTT) will need to make sure that the SMTP server is authenticated. Enter it exactly as your ISP provided. WindLinx users will use an SMTP server name of: smtp.packet-mail.net 46 nrg_symphonieplus3_data_logger_manual.docx Rev 6 11 December, 2012 Pre-installation Setup: iPack Configuration Do not enter any extra spaces or quotation marks. Check that there are no leading or trailing spaces in your entry. Non-WindLinx users will enter an SMTP Server name that looks something like: smtp.myisp.com smtpauth.myisp.net My SMTP Server requires authentication Some SMTP servers require a login and password before allowing you to send mail. If the SMTP server does not require authentication, select “No.” If your ISP requires SMTP server authentication, select “Yes” and enter the SMTP login and password. WindLinx requires SMTP Server authentication. The formats are often identical to those of the mailbox name and password. However, check with your ISP if you are unsure. Please note that CDMA iPack users will need to use an authenticated SMTP server. POP3 Server Name This is the name of the POP3 server that your ISP will provide and/or you can find on your ISP‟s web site. Enter it exactly as your ISP provided, and do not enter any extra spaces or quotation marks. Check that there are no leading or trailing spaces in your entry. WindLinx users will use a POP3 server name of: pop3.packet-mail.net Non-WindLinx users will enter a POP3 Server name that looks something like: pop.myisp.com mail.myisp.net Mailbox Name This is the mailbox account name your ISP provided or you selected when you set up your email account for the iPack. This is the mailbox account name on the POP3 server that the logger points to in order to retrieve mail (patch files, for example). Enter it exactly as your ISP provided. Do not enter any extra spaces or quotation marks. Check that there are no leading or trailing spaces in your entry. It should be something like: Logger 7345552555 Mailbox Password This is the mailbox password your ISP provided or you selected that allows access to your mailbox. Enter it exactly as it is provided to you. When you enter your password, it will be displayed as asterisks (*) so it will be secure if someone else reads the information from the iPack. When you read the parameters from the iPack and then save them to the iPack, all parameters, including the mailbox password, are returned unchanged unless the user changes them and then chooses File>Save to iPack. Internet Time Server Name As part of the iPack‟s calling routine, it gets the current time (in UTC) from the Internet and updates the SymphoniePLUS3‟s clock. The user must enter a local time server for the iPack to use. o NOTE: for standard iPacks (rev 40 and older) the local time server must be compliant with RFC 868 time servers that respond to requests on port 37. There are many on the Internet, and your ISP may be able to suggest one that is RFC 868 compliant. The iPackGPS (rev 50 and newer) uses SNTP protocol on port 123 o Enter the time server name exactly as provided, and do not enter any extra spaces or quotation marks. Check that there are no leading or trailing spaces in your entry. Be sure to include the decimal points in the name. 47 nrg_symphonieplus3_data_logger_manual.docx Rev 6 11 December, 2012 WindLinx users will use an Internet Time Server Name of: time.packet-mail.net For non-WindLinx users, this entry should look something like one of the following: wwv.nist.gov nist1-atl.ustiming.org Once the information on this tab has been edited and double checked, move to the E-Mail Info tab. ISP Programming – Email Info Tab All the checkboxes should still be checked, and you may edit each Email Info setting. General information regarding each setting is provided below. Recipient’s E-Mail Address This is the primary e-mail address where the SymphoniePLUS3‟s iPack is going to send the data. This can be your e-mail at work. Enter it exactly as your ISP provided. Do not enter any extra spaces or quotation marks. Check that there are no leading or trailing spaces in your entry. It should look something like: [email protected] Recipient’s Name This field is the text portion of the e-mail address. If you look at an e-mail in your in-box, it will have the “To” item as something like, “John Smith” <[email protected]>. This entry is the “John Smith” portion of the recipient‟s e-mail address. 48 nrg_symphonieplus3_data_logger_manual.docx Rev 6 11 December, 2012 Pre-installation Setup: iPack Configuration This field is optional but is useful if someone has to sort through incoming emails. It could look something like: John Smith CC E-Mail Address This is an additional e-mail address where the SymphoniePLUS3 „s iPack is going to send the data. CC E-Mail Address 2 This is also an additional e-mail address where the SymphoniePLUS3‟s iPack is going to send the data. Sender’s E-Mail Address This is the e-mail address that will appear in the “from” of the emails being sent to the recipient‟s email address from the iPack. It is often identical to the Mailbox Name plus the “@myisp.com” part of the email address. However, the Sender’s E-Mail Address is NOT necessarily the address to which patch files should be sent. Do not enter any extra spaces or quotation marks. Check that there are no leading or trailing spaces in your entry. It should look something like: [email protected] E-Mail Subject Line This entry will become the subject line of the e-mail that you receive from the iPack and may contain letters, numbers and other symbols. It is typically a description of the logger that will be calling. It should look something like: Site 1234 – Derry Mountain Patch Password The patch password is a security measure that protects your data logger from unwanted or accidental patching. Enter a patch password – do not leave blank. Once the information on this tab has been edited and double checked, move to the Call Schedule tab. Call Schedule Programming – Call Schedule Tab 49 nrg_symphonieplus3_data_logger_manual.docx Rev 6 11 December, 2012 Next Call Time and Call Interval These entries give the iPack a first time to call and how often to call thereafter. The Next Call Time entry can actually be in the past, but the logger will initiate its call schedule calculations using this entry as a starting time. Using the Next Call Time and date entered in this screen, the logger calculates the next possible time to call. This combination is used to force iPacks to call at specific times during the day or week. If you want an iPack to call daily at 6:45am, set the next call time to any day at 6:45am and the call interval to 1 day. If you want an iPack to call every 2 days at 7:30pm starting tomorrow, then set the next call time and date to tomorrow at 7:30pm and the call interval to 2 days. If you set the next call time to a week from now and set the call interval to 1 day, the iPack will not wait until next week to call but will immediately start calling daily at the time specified in the next call time field. You can determine when the iPack will make the first call by taking the difference between the scheduled call time and the current time, dividing the total time by the call interval and work your way backwards (or forwards) from the “next scheduled call time” by subtracting (or adding) the call interval from the “next scheduled call time.” Notice that if the call interval is less than the amount of time between the current time and the “next scheduled call time”, the iPack will call before the next scheduled call time. iPack GPS users can enter a 10-minute call interval; more frequent call intervals are not supported. Due to increased phone power requirements and potential problems with overlapping phone calls, use caution when choosing a multiple daily call schedule. Setting iPack Preferences – iPackGPS Tab (iPackGPS only) This screen provides access to new features of the iPackGPS unavailable in previous iPack versions. 50 nrg_symphonieplus3_data_logger_manual.docx Rev 6 11 December, 2012 Pre-installation Setup: iPack Configuration Settings Like all other screens in the Modify iPack Settings window, once you have made a change, you must go to File and choose Save to iPack. The “Download partial files” setting allows the user to toggle on and off downloading of partial files. A “partial file” refers to a file that includes less than 24 hours of data, typically from midnight up until the iPack‟s scheduled call time. Disabling the downloading of partial files and checking of POP3 can reduce air time. However, this is generally not recommended for remote sites. If POP3 checking is disabled, the iPack will not be able to receive patches or firmware updates until the setting is changed via a direct connection to SDR. 51 nrg_symphonieplus3_data_logger_manual.docx Rev 6 11 December, 2012 Actions iPack battery voltage and voltages from various locations on the iPack‟s circuit board are displayed here when the Get Voltages button is clicked. iPackGPS firmware version can be updated via SDR and the iPack programming cable using the Firmware Upload button. A link to the site used for remote firmware updates is also displayed on this screen. The iPackGPS event log will show “UPDATE_DOWNLOAD_EVT” and “UPDATE_APPLY_EVT” to help track the installation of the new firmware. Remote firmware updates for some iPackGPS types (satellite) will be completed over the course of several calls. Firmware updates via SDR and the iPack programming cable are completed in a few seconds. 52 nrg_symphonieplus3_data_logger_manual.docx Rev 6 11 December, 2012 Pre-installation Setup: iPack Configuration Saving the iPack Displayed Setup to the connected iPack After editing the parameters on the screen, save the changed parameters to the iPack by selecting File>Save to iPack. This will download all of the checked settings to the attached iPack. On the lower left of the Modify iPack Settings window you should see the message “Transferring>>>>>>” and then “Done!” You‟ve now completed programming the iPack. Saving a copy of the iPack File (.ipk) to your computer Save a copy of the iPack settings by selecting File>Load from iPack. This will load the current iPack configuration to your computer screen. Then choose File>Save iPack File. This will save a copy of the iPack configuration (*.ipk file) to your computer. Remember to send a copy of the iPack file to your site management team – it is important to keep the *.ipk file safe! 53 nrg_symphonieplus3_data_logger_manual.docx Rev 6 11 December, 2012 Opening a Saved iPack File (.ipk) From the Modify iPack Settings Window, select File>Open iPack File. In the future, you may want to open a saved iPack file, edit the settings and then send it back to the iPack. You can also do this to check the saved iPack file. 54 nrg_symphonieplus3_data_logger_manual.docx Rev 6 11 December, 2012 Office Testing Office Testing Why It’s Important Office testing your SymphoniePLUS3 system prior to installation in the field will save you time and money. Internet access capabilities rely on perfect coordination between iPack, cellular phone, and ISP settings – if these are not set up correctly, the system will not work. Troubleshooting is much easier in the comfort of your office than in the field, in foul weather, with a crackling, intermittent handheld cellular phone connection as your only lifeline to civilization. It is likely that if you experience communication problems, you will need to contact your cellular account representative or your ISP to resolve the problem. During office testing, be sure to fill out Data Sheet forms (found in Appendices) with setup parameters. A copy of these forms should be made for field personnel so setup parameters are readily available. What You’ll Need If you haven‟t done so already, read the rest of this manual, paying particular attention to the chapter covering SymphoniePLUS3 Start-up. If you are ready to begin office testing your SymphoniePLUS3 system, you should have already completed the tasks found in the chapters Pre-Installation Setup: Logger Configuration, Pre-Installation Setup: iPack Accounts, and Pre-Installation Setup: iPack Configuration. You‟ll also need a few test sensors with cables, the field wiring panel and related hardware, an SD card, the antenna(s) included with your iPack or iPackGPS, a Phillips head (+) screwdriver, and a computer running the latest version of Symphonie Data Retriever Software. Installing the iPack to the Logger (iPack users only) Connect the antenna to the iPack. GSM iPackGPS and CDMA iPackGPS users will also connect the GPS antenna. Carefully set the iPack (connector facing up) flat on a table, preferably on an anti-static mat. Connect an earth ground to the logger‟s ground lug. Place the logger (connector facing down) over the iPack and mate the two units together, and connect the iPack‟s ground wire to the logger‟s ground lug. While mated, handle the units with care. While performing office tests, it is recommended that you connect a 15 V DC regulated and fused adapter to the iPack PV input to prevent draining the batteries during testing. However, this is necessary only if initiating more than 5 calls. Note that a cold boot call can be triggered when an iPack is initially connected to the logger. During a call, the Call Now, Antenna Test, and iPack programming features are unavailable, but all other logger programming functions are available. The iPackGPS allows further navigation to iPackGPS menus and logger menus while a call is in progress. If no D-cells are installed in the logger and then the logger is plugged onto the iPack, the iPack provides auxiliary power to the logger and therefore powers it up regardless of the lack of D-cells. The iPack will then dial the ISP to transfer data, and the iPack status screen will indicate that a call is being made (“iPack busy or not present”, or in the case of iPackGPS, a sequence of status screens such as “checking for file”, “detecting GSM band”, “connecting modem”, etc.). However, if you have already completed the logger programming in the Pre-installation Setup: Logger Configuration chapter, the logger batteries are already installed, so attachment of the iPack will not initiate the automatic call. Pre-Installation Testing To test before installing in the field, do the following: 1) If using an iPack or iPackGPS, connect it to the logger as described above. 2) Check logger status (battery voltage, date, time, internal temperature, revision numbers). 3) Connect the wiring panel according to instructions in the Field Installation chapter. 4) Connect the test sensor(s) and verify logger programming of each input channel. 55 nrg_symphonieplus3_data_logger_manual.docx Rev 6 11 December, 2012 5) Install and format SD card. 6) Check SD status (logging, files stored, days left). 7) Check iPack status (if present), noting the iPack battery voltage. 8) Verify cellular signal strength with the antenna test. 9) Verify iPack communications by performing a Call Now. 10) Verify that the *.rwd files are successfully received by the intended recipient(s). For detailed instructions on performing these tests, refer to the chapter on SymphoniePLUS3 Start-Up. Recharging the iPack Battery Under normal use, the iPack battery will stay charged through an installed 5 Watt 12 V photovoltaic (PV) panel. However, the iPack battery must be fully charged before field installation. Connect a regulated and fused 15 V DC source to the PV input of the iPack. The iPack‟s charging circuit will draw a maximum of 750 mA (earlier iPacks will draw a maximum of 500 mA). A completely discharged battery can be recharged in about 6 hours with such an adapter. An iPack charger is available from NRG Systems (item #3615). After completing tests, you may want to pre-assemble the logger and iPack in the logger‟s shelter box. This can simplify the transport of the equipment and save time. See the Field Installation chapter for detailed instructions. The iPack has two sets of terminals. When recharging the iPack battery, you MUST use the PV terminals; do not use the 12 V external battery terminals. For more information about these terminals, see the following sections regarding connecting a PV panel to the iPack. 56 nrg_symphonieplus3_data_logger_manual.docx Rev 6 11 December, 2012 Field Installation Field Installation Tools Required diagonal wire cutters to trim sensor wire leads wire strippers to strip sensor cables if necessary 7/16 inch nut driver or wrench for installing optional yagi antenna 5/16 inch nut driver for hose clamps, mounting screws (PV and logger) ½ inch crescent wrench to tighten ground acorn nut ¼ inch nut driver for sensor terminals 3/8 inch nut driver or wrench for ground stud nut electrical tape small flat blade NRG screwdriver (included with logger) for sensor wires Phillips head screw driver for PV terminals 5/16 inch open end wrench drill to tighten hose clamps - optional tin snips to cut excess hose clamp - optional Site Grounding Recommendations For many sites, the NRG Grounding Kit provides all the needed parts to earth ground your TallTowerand instrumentation. The Grounding Kit includes a copper-clad lightning spike, copper ground wire, and two copper-clad ground rods. It is recommended that you determine the soil type of your site and classify its resistivity. The lower the resistivity, the better the earth ground is. Soil Type Average 1. ashes, cinders, brine, waste 2. Clay, shale, gumbo, loam 3. Same, with varying proportions of sand and gravel 4. Gravel, sand, stones with little clay or loam Soil Resistivity per cm (Ohms/cm) 2370 4060 15800 94000 The NRG Grounding Kit will perform adequately in type 1 and 2 soils. For other soil types, or for sites with a high incidence of lightning, you will need to augment the earth grounding system. The best approach to grounding will depend on the soil type in your area. Soil resistivity is directly related to moisture content AND temperature. The colder it gets, the higher the resistivity will be for a specific moisture content. Any moisture content below 20% quickly increases ground resistivity exponentially to dangerous levels. In most climates, moisture content and soil temperature change seasonally. During times of the year when the soil is very dry or very cold, soil resistivity is at its highest, and getting a good ground is more difficult. Keep this in mind when evaluating your site - it's better to put in too much grounding than not enough. You may want to consult a local utility regarding grounding techniques they've successfully used in the site area. Use longer ground rods, and/or install additional rods. Additional contact surface helps, and soil conductivity improves with depth. If multiple rods are used, they must be installed far enough away from each other [at least 2 meters (6 feet)] so that each rod's effective resistance area does not overlap. Use high compression fittings at all conductor/rod connections. Ensure that the single strand, bare copper conductor is 10 gauge. 57 nrg_symphonieplus3_data_logger_manual.docx Rev 6 11 December, 2012 Ensure that the grounding rod(s) is free from non-conducting coatings such as paint or enamel. Wire all grounding rods together to provide electrical continuity. Where rock is encountered, drive the ground rod at a 45 degree angle, or bury it in a trench at least 0.6 m (2 feet) deep (deeper is better; the key is to maximize the soil contact area). Protect the above-soil end of the rod and its electrical conductor attachment against damage. Where the soil can become frozen, drive grounding rods below the frost line. Apply a anti-oxidation agent to all grounding connections. Installing a Stand Alone SymphoniePLUS3 Logger To install a stand alone SymphoniePLUS3 logger (no iPack), insert 10-32 x ½ inch mounting bolts through the mounting holes in the back of the shelter box, and then align with the threaded mounting holes in the back of the logger and tighten. You may now skip the instructions related to iPack installation and proceed to the instructions for Mounting the Shelter Box to the Tower. Mounting the iPack and Logger to the Shelter Box Prior to mounting to an NRG TallTower, the SymphoniePLUS3 logger and iPack should first be installed in a shelter box to protect the unit from the elements. You may find it easier to remove the cover of the shelter box prior to attaching the logger, iPack, or PV panel. 58 nrg_symphonieplus3_data_logger_manual.docx Rev 6 11 December, 2012 Field Installation Removing protective sticker from Logger When ready to install the iPack to the logger, remove the protective water resistant sticker from the back of the logger. Inserting Screws into Shelter Box Continue installation of the shelter box according to the following instructions. Mounting holes are pre-drilled in the optional SymphoniePLUS3 shelter box. To install a SymphoniePLUS3 with an iPack, insert four 10-32 x 2 ½ inches mounting bolts through the mounting holes in the back of the shelter box, through the iPack, and then align with the threaded mounting holes in the back of the logger and tighten. Mounting inside the Shelter Box If your shelter box has keyhole slots, insert the mounting bolts through the iPack and logger assembly and screw them in until they are about 1 cm away from the back of the iPack. The SymphoniePLUS3 and iPack can be hung in the shelter box by inserting the mounting screws in the keyhole slots. The mounting screws can then be tightened from the back of the shelter box. Connecting the iPack Ground Wire to the Logger If you haven‟t done so already, connect the iPack‟s green/yellow striped ground wire to the logger‟s ground stud. To do this, remove the nut and lock washer from the logger ground stud, place the ground wire lug from the iPack over the logger ground stud, replace the lock washer and nut; tighten the nut. 59 nrg_symphonieplus3_data_logger_manual.docx Rev 6 11 December, 2012 Installing the optional PV panel (iPack users only) Inside the PV panel carton you will find a PV panel and four screws. Remove the five plastic plugs from the SymphoniePLUS3 shelter box door. Read the back of the PV panel and note the polarity of the wires. Feed the PV panel wire through the center hole in the shelter box door, and then secure the PV to the shelter box door with the four mounting screws. Feed any excess PV wire back into the hole behind the PV panel. Connect the PV wires with the polarity that you noted 60 nrg_symphonieplus3_data_logger_manual.docx Rev 6 11 December, 2012 Field Installation to the iPack PV input screw terminals located on the right side of the iPack. Shade the PV panel from direct sunlight while wires are being connected to avoid sparks. Connecting the PV Panel and/or External Battery Wires The iPack has an extra set of terminals that allow for connection of an external 12 V DC power source such as a battery in addition to the PV panel. There are some basic rules for these terminals as described below. Do Do NOT PV Terminals Do…connect PV panels, DC power sources between 14 and 28 V DC Do NOT…connect power sources in excess of 28 V DC, including large PV panels External Battery Terminals Do…connect 12 V battery and/or external charge controller up to 14.3 V DC Ground Terminal Do…connect to logger ground stud Connection Point Functional Notes The PV terminals will charge the iPack‟s internal battery; The PV terminals will NOT charge an external battery. The external battery terminals are an input Do NOT…connect PV panel or power only, an external battery will NOT be sources in excess of 14.3 V DC charged from the iPack through these terminals nor will the internal iPack battery. This terminal will help provide protection Do NOT…leave disconnected or connect from electrostatic discharge for the iPack other wires such as shields and logger. 61 nrg_symphonieplus3_data_logger_manual.docx Rev 6 11 December, 2012 Mounting the Shelter Box to the Tower The SymphoniePLUS3 shelter box is mounted to the tower 1.5 to 2.0 meters (5 to 6 feet) above the ground (or above the maximum height of the annual snowfall) using the two stainless steel hose clamps (provided). Trimming the Hose Clamps The hose clamps are long enough to mount the shelter box to towers up 10 inches (25 cm) diameter. If your tower is a smaller diameter, it will speed up the installation to trial fit the clamps to your tower and trim them to length. Place your hand between the tower and the clamp to allow for the logger. Trim off the excess hose clamp material using a pair of tin snips. Be careful not to cut off too much. Note that if you have a drill on site, it may not be necessary to trim the hose clamps. Mounting Technique Mount the logger and shelter box to the tower using the hose clamps. Thread the hose clamps through the slots in the back of the shelter box from the inside. It is best to pass the end of the hose clamp through the right slot first (as viewed from inside the enclosure), then around the tower, and back through the left slot, since this will provide easier access when tightening the hose clamp. Connect the logger ground wire to the ground rod at the base of the tower, passing the ground wire into the shelter box through either the lower wire slot or through one of the upper wire knockouts. 62 nrg_symphonieplus3_data_logger_manual.docx Rev 6 11 December, 2012 Field Installation Field Wiring Panel All sensor wires connect to the field wiring panel. Please note that the SymphoniePLUS3, SymphoniePLUS, and Symphonie wiring panels are NOT interchangeable. Front of Wiring Panel Back of Wiring Panel The field wiring panel connects to the 62 pin connector on the side of the logger and is held in place by the ground nut and a mounting screw. If you haven‟t done so already, connect the logger ground wire to earth ground. Connect the logger ground wire to the earth ground rod before connecting any sensors! To install the field wiring panel, remove the warning label from the logger‟s ground stud. Then touch the ground wire to the wiring panel‟s ground lug and the logger‟s ground stud. This will safely discharge any electrostatic build-up that could damage your logger. Slide the ground wire over the logger‟s ground stud. Connect the wiring panel by gently pushing it securely onto the logger‟s 62-pin connector. Finally, secure the ground wire with the washer and nut on the ground stud (as shown below) and tightening the wiring panel‟s mounting screw until the wiring panel and ground wire are secure. 63 nrg_symphonieplus3_data_logger_manual.docx Rev 6 11 December, 2012 Note that the field wiring panel mounts over the grounding stud and can be removed from the logger without having to disconnect the sensor wires. This is particularly useful in the event a logger needs to be swapped out for service. Sensor Connection Make sure that the logger ground wire is connected to the earth ground rod before connecting sensor wires! Pass sensor wires into the shelter box, either through the lower wire slot or through one of the upper wire knockouts. All wires coming down the tower and into the shelter box should be secured to the tower below the shelter-box and then brought back up, to form a drip-loop, before entering the shelter-box. Sensor wires should be stripped to expose only 5 mm (1/4 inch) of bare wire. Stripping off more insulation could allow the wires to touch and cause an electrical short. If using standard NRG sensor cables, you may need to trim off some of the exposed wire. Wiring Sequence Connect sensor wires to the field wiring panel according to the Sensor Connections diagram (see below) using the following sequence: Make sure that the logger ground wire is connected to the earth ground rod before connecting sensor wires! 1. 2. 3. 8. Touch the shield wire to the ground stud, and then connect it to the SHD (shield) terminal. Connect the black wire of the sensor to the “GND” terminal of the appropriate channel‟s input. Connect the signal (white or clear) wire to the “SIG” (signal input) terminal. For three terminal devices ONLY (such as vanes or anemometers requiring 12 V power), connect the red wire (excitation/power) to the “EXC” terminal. 9. Confirm correct wiring by reviewing each sensor channel on the logger‟s display. 10. Coat the wiring panel‟s terminal screws with an anti-corrosive product (such as PreserveIT P100L from Caig Labs or Vaseline petroleum jelly). 11. Systems that include an iPack will be on as soon as the iPack is connected and supplying power to the logger. For systems without an iPack, install the D-cells now as described in the Logger Setup section of this manual. NOTE: Connecting sensors to the back terminals first may be easier in terms of installation. Sequence: (9-12, 7-8, 15, 46, 1-3, 13-14) 64 nrg_symphonieplus3_data_logger_manual.docx Rev 6 11 December, 2012 Field Installation Sensor Connections / NRG Class 1 65 nrg_symphonieplus3_data_logger_manual.docx Rev 6 11 December, 2012 Antenna Connection After connecting sensors to the field wiring panel, connect the iPack antenna and GPS antenna (for iPackGPS). Mount the GPS antenna to the top of the shelter box (outside). Satellite iPacks S/N: 35333300 and above have an SMA type antenna connector; older satellite iPacks have a TNC type antenna connector, so if you need to replace the older antenna or iPack, you will need an adapter. Be sure to form a drip-loop with the antenna cables to protect the iPack from water that may get inside the cable jacket. You may now proceed to the next chapter, SymphoniePLUS3 Start-up, to complete the installation process. 66 nrg_symphonieplus3_data_logger_manual.docx Rev 6 11 December, 2012 SymphoniePLUS3 Start-up SymphoniePLUS3 Start-up At this point, you should have already completed the tasks described in the Pre-Installation Setup: Logger Configuration chapter (all users). If using an iPack, you will also need to have completed the tasks in Pre-Installation Setup: iPack Accounts and Pre-Installation Setup: iPack Configuration. Pressing any key will activate the logger display. NRG Systems, Inc. SymphoniePLUS3 SN: 00000 Press [HOME] Pressing the [Home] key at any time will always bring you back to the home menu of SymphoniePLUS3. 1. 2. 3. 4. Measurements Status Utilities Settings It is recommended that the user check the logger functions in the order presented in this section. Checking logger status (battery, date and time, internal temperature, revision) [Home][2] = Status Menu 1. 2. 3. 4. Logger Status Mem Card Status iPack Status Event Log The Status menu allows the user to check current operating status of the SymphoniePLUS3 data logger system. [Home][2][1] = Logger Status Screen 14 Apr 2002 14:02:50 Batt 1.19V REPLACE Site:0150 Temp -10 C Revision: 26, 27, 53 The message Waiting for update should display for a few seconds. The logger status screen displays current date and time in Standard Time (remember that this may appear one hour off during daylight savings time). It also displays current logger battery voltage and condition (Good, Fair, or Replace) as well as the firmware revision levels of the logger and iPack. 67 nrg_symphonieplus3_data_logger_manual.docx Rev 6 11 December, 2012 Checking logger measurements (all 15 channels) Press [Home][1], then scroll using [Down] to see each sensor‟s current readings. Readings that vary widely with expected norms may indicate a sensor malfunction, incorrect channel configuration, or incorrect wiring. If a channel number displays no information, it means there is no SCM currently installed for that channel and it is therefore inactive. Installing the SD Card Place a new SD card in the SD card slot with the beveled front corner down. Note that the card cannot be inserted backwards. If the SD was not the last SD formatted by this logger the following message will display: Initializing SD Card Please wait… Formatting the SD Card Formatting the SD card may take up to 60 seconds and will beep every few seconds, after which a Format complete message will briefly display before changing to the Home menu. If an SD does not format after the first attempt, it could indicate a damaged or corrupted SD card. Always have spare cards available. When the logger writes data to the SD card, it beeps to warn you that the card is active. To be sure that all the data files have been transferred, do not remove the card until five seconds have passed since the last beep. Since the logger is always storing data to its internal non-volatile memory, there will be several data files created during installation. These files will be written to the card as soon as formatting is complete. The logger‟s internal memory stores the most recent 1.5 days. The data files created during installation may have incorrect readings because sensors were being connected during these intervals. As part of your site data, note the date and time of the start of logging with your completed connections and settings. [Home][3][1] = Erase RWD Files, are you sure? All RWD Data Files will be erased! Are you sure ?? Press [9] to Erase [Home] aborts the formatting function and returns home. Data will not be recorded onto an unformatted SD. Checking SD status (logging, files stored, days left) [Home][2][2] = Memory Card Status Screen Card In, or Card Inserted Logging 3 Files Stored 665 Days Left Card Out Please Insert another card Memory card status displays the number of files stored on the SD card, as well as the number of days remaining until the card is full. The SymphoniePLUS3 data logger emits a beep when it writes to the SD card. The process of writing to the card takes about two seconds, so should the unit beep just as the card is about to be changed, wait until five seconds have passed before pulling the card. 68 nrg_symphonieplus3_data_logger_manual.docx Rev 6 11 December, 2012 SymphoniePLUS3 Start-up Checking iPack status (if present) [Home][2][3] = iPack Status Screen 1. 2. 3. 4. Call Now Modem Status GPS Status iPack Event Log * If an iPack is attached to the SymphoniePLUS3, the status screen will display the above menu. If an iPackGPS is not connected, then “No iPack present” will be displayed. The + symbol will alternate with the * symbol during an antenna test to indicate the iPackGPS is on. [Home][3][4][2] will show the iPackGPS‟s live Modem Status page which displays the model of iPack in use, the revision level, the next scheduled call, and the status of the last operation performed. iPackGPS v50 GSM Registered Roaming Sched: 8 Feb 15:15 Batt: 12.8 Ant: 79% + Checking iPack Battery Voltage from the logger You can check the voltage of the iPack internal 12 V battery from the logger. Go to [Home][3][4][2] for iPackGPS or [Home][3][4] for older iPacks. The battery voltage displayed is the iPack‟s internal 12 V battery being measured in real time with one second updates to the display. If you want to continuously monitor iPack voltage, there is an SCM available (Item #3585) specifically for this purpose. When installed in one of the logger‟s analog or flex channels, the iPack voltage SCM will provide an iPack voltage reading for each 10-minute averaging interval. Verifying Signal Strength with the antenna test An antenna test function has been built in so that you can determine signal strength and point a directional yagi antenna towards a cellular tower. The test works in near real time with one second updates. Please note that the values displayed reflect the strength of the received signal from the tower or satellite, not the strength of the transmission signal of your phone. Alternatively, you can perform the antenna test by directly connecting the iPack to your computer and running the antenna test from the SDR software. Older GSM iPack antenna tests using SDR will give a Signal Strength value between 0 and 31, followed by a Bit Error Rate value between 0 and 7. GSM iPackGPS, CDMA iPacks and satellite iPacks will all display Signal Strength as a percentage. Note that antenna tests made on a fair day are optimistic, and local conditions can dramatically affect connection reliability. Cell radio signals are weakened by local cellular traffic, rain, and even high humidity in the signal path. To begin the antenna test, press [Home][3][4]. Wait for the menu to change while the iPack powers up. Then press [2]. To perform an antenna test for an iPackGPS, press [Home][3][4][2]. A message will tell you if service is available and will display the strength of the signal as a percentage (CDMA and satellite) or on a relative scale (GSM). Powering up phone is displayed briefly, and then a screen similar to the one below appears: iPack/GSM Cellular Rev 9 RSSI: 24 BER: 2 REGISTERED (HOME) or iPackGPS v50 GSM Registered Roaming Sched: 8 Feb 10:15 Batt: 12.8 Ant: 75% + 69 nrg_symphonieplus3_data_logger_manual.docx Rev 6 11 December, 2012 GSM iPacks (s/n 38607905 and earlier): RSSI (RECEIVED SIGNAL STRENGTH INDICATOR): 24 to 31 (75% to 100%) 9 to 23 (30% to 75%) 0 to 8 (less than 30%) 99 (0%) BER (BIT ERROR RATE): 0 to 2 3 to 7 99 Service availability message Not searching Registered (Home) Searching Registration denied Unknown Registered (Roaming) Status Good (31 is best). On the edge. It may miss calls, especially on foul weather days. May not even get service. No signal. Status Good (0 is best). May not even get service. No signal. Status Not registered and not searching Registered on the home network Not registered, searching Recognized but service denied – call provider. Call provider. Registered on different provider‟s network. Satellite iPack: The satellite iPack antenna test will provide results ranging from 0 to 100% in increments of 20%. A result of 100% indicates optimal signal strength, and a result of 50% indicates only fair signal strength. An antenna mounting boom is included with each satellite iPack. However, the satellite antenna easily mounts to any boom with a terminal end of ¾” IPT. The threaded ¾” IPT socket of the antenna will screw onto the end of the boom. Installation considerations include: The antenna MUST have a clear view to the satellite at ALL TIMES. Any obstructions can cause an interruption between the communications of the iPack and the satellite and could cause the data call to be terminated before complete. The antenna must be upright/facing the sky to ensure maximum exposure. The antenna must be located so that it has a good view of the sky, ideally horizon-to-horizon coverage. The antenna should be mounted so that it is away from structures by a distance of at least 0.5 meters. The NRG mounting boom meets this requirement. The satellites fly in a South-to-North orbit; the antenna must be mounted such that no obstructions occur in this plane. We suggest orienting the antenna South in the northern hemisphere, and North in the southern hemisphere. An antenna test should be performed on the satellite iPack once it is attached to the logger. Go to iPack Utilities from the SymphoniePLUS3 logger main menu to perform this function (iPackGPS users will choose [2] Modem Status to perform an antenna test). Signal strength is reported from 0% to 100% and may fluctuate depending on site conditions. If a value other than 0% is returned, the user can try to establish a call. A value of 0% indicates that no direct connection has been established between the antenna and the satellite. Try mounting the antenna in a different location. CDMA iPack: The CDMA iPack antenna test will provide results ranging from 0 to 100%. A result of 100% indicates optimal signal strength, and a result of 50% indicates only fair signal strength. Powering up phone is displayed briefly, followed by Contacting Carrier, and then a screen similar to this appears: iPack/CDMA rv21d 10-26 Signal Strength: 45% Carrier: B SID: 300 70 nrg_symphonieplus3_data_logger_manual.docx Rev 6 11 December, 2012 SymphoniePLUS3 Start-up The screen below shows the same results when the antenna test is done using SDR software (from the Modify iPack Settings screen, choose Options, and then Set Up Phone). Verifying iPack data transfer to ISP (Call Now) Once you have verified that the logger is functioning and that the iPack is present by pressing [Home][2][3], you will want to perform a Call Now to verify communications with your ISP. During a call, the Call Now and Antenna Test features are unavailable, but all other logger programming functions are available. The iPackGPS‟s Call Now screen displays the antenna signal strength and allows the user to navigate other menus while a Call Now is in progress. Press [Home][3][4] or [Home][2][3], and wait for the menu to change while the iPack powers up. Then press [1] to initiate a “Call Now”. The logger will display the series of messages shown below as it performs the call. Please note that loggers with an iPackGPS will display slightly different progress messages as follows: Checking for file, getting next file, starting modem, detecting modem, detecting GSM band (GSM iPackGPS only), registering modem, initializing modem, connecting modem, connecting Internet, Internet connected, getting time info., starting email send, starting email recv, email in progress, disconnecting, checking GPS. Call Now Requested iPack displays this message when a Call Now is requested. Battery OK for Call iPack checks internal gel cell battery voltage and displays this message if it is above 10.5 V. Initializing iPack retrieves necessary settings from non-volatile memory. Detecting GSM band (GSM Only) iPack automatically detects bandwidth of cellular network. Programming Modem iPack loads retrieved settings into the Internet processor, modem, and cellular transceiver (GSM iPacks). Getting SD File or Retrying Last File iPack retrieves a copy of the file from the SD and loads the entire file into a non-volatile memory location (or if a file is already loaded in the iPack‟s non-volatile memory, it will retry to send that file). Retries can occur if data transmission is 71 nrg_symphonieplus3_data_logger_manual.docx Rev 6 11 December, 2012 interrupted during a call. Emailing Data iPack begins to move data from non-volatile memory to the Internet processor. Waiting for Internet This message is displayed while the phone is powered, dials the ISP, and the iPack logs onto the Internet. The message could be displayed up to 3 minutes. If the logger can‟t log on to the Internet within 3 minutes, a retry will occur automatically in 10 minutes. While logging onto the Internet, the iPack checks for successful completion of the authentication process, confirms availability of DNS service, locates the SMTP server, and confirms that service is available. During communications, the iPack status screen [Home] [2] [3] will indicate that a call is being made (“iPack busy or not present” or a series of status messages for iPackGPS). Percent Sent % iPack data transfer progress of the file currently being sent is displayed as a percentage. File was Sent A file was successfully transferred to the ISP, and the iPack checks the SD for another unsent file. If another unsent file is found, the logger returns to the step of the process where the SD file is retrieved. The logger will keep returning to that step in the process in a loop type fashion until all files have been sent, data transmission has been cut off, or the iPack times out after a 20 minute on-air period. Note: Under normal use, an iPack should never need to exceed 20 minutes of on-air time. In fact, each daily call should take under 2 minutes to transfer data. The 20 minute on-air time out protects both your battery from running down and your phone account bill from running up should something go wrong. Getting Time Once all the files from the SD have been sent, the iPack gets the time from the defined time server. Note that the iPack is compliant with RFC 868 time servers which respond to requests on port 37. Your ISP can recommend a time server that is RFC 868 compliant. Checking Mail The iPack logs onto the POP3 server (with the proper Mailbox Name and Mailbox Password settings) and searches each email header for a patch file that is addressed to the logger. If the logger finds a patch email, it downloads it and updates the iPack programming parameters or sensor configuration settings in non-volatile memory based on the patch file. Tip: Keep the mailbox clean and regularly delete SPAM to reduce air time and save money on phone bills. Also, any changes in your account status may result in the ISP sending an email to this mailbox. It is a good idea to log on (through a web-mail type interface such as mail2web.com) and check for important mail from your ISP regarding your account status. Patch Applied If the iPack finds a patch file, the logger will briefly display this message. Shutting Down This is always the last message of the series after checking mail or patch applied. Success or Internet Error XXX This is the same message as would be found in the iPack status screen. The call is properly terminated by the iPack with all data transfer a success, or an error has occurred. Note the error code number and look up the error on the iPack Error Code Chart in the Troubleshooting chapter of this manual or in the Tech Support area of NRG‟s website. 72 nrg_symphonieplus3_data_logger_manual.docx Rev 6 11 December, 2012 SymphoniePLUS3 Start-up Checking the iPack’s Modem Status – Modem Status Screen (iPackGPS only) The Modem Status screen [Home][3][4][2] displays the iPack firmware version battery voltage along with the registration state (Home, Roaming, Searching, Not Registered), the next scheduled call time, and the antenna signal strength. From this menu, the back arrow button can be used to return to the iPack menu. Checking the iPack’s GPS Status – GPS Status Screen (iPackGPS only) The GPS Status screen [Home][3][4][3] displays the iPackGPS‟s version number and type (CDMA, GPS, or Satellite), along with the latitude, longitude, altitude, and number of acquired GPS satellites. The latitude and longitude are shown in degrees and decimal minutes (rather than in degrees, minutes, and seconds). Checking the iPack Event Log – iPack Event Log Screen (iPackGPS only) The iPack Event Log [Home][3][4][4] allows the user to scroll through numbered events by pressing the up and down arrow keys. The most recent events are displayed first. Using the numeric keypad, the user can enter a number jump to a particular event. Using the Manual Dial feature – Manual Dial Screen (iPackGPS only) The Manual Dial feature [Home][3][4][5] allows a CDMA iPackGPS to be switched from Verizon to WindLinx or from WindLinx to Verizon through use of an initialization string (*22899;). Sending this initialization string updates the iPackGPS modem‟s PRL (Preferred Roaming List). Manual Dial also provides Voice Call functionality (voice accounts only; not available with data accounts). When entering *22899; in the Manual Dial screen, use the up arrow to enter a *, use the right arrow key to enter a semicolon, and then press the “SET” button on the logger‟s keypad. If you are unsure about how to use this feature, please contact NRG Technical Support for assistance. Verifying iPack settings with your computer at the site using the iPack Access Port Sometimes it is necessary to check the current iPack ISP and phone settings while on site. The programming adapter along with the DB9 field programming cable will allow you to do this by connecting a portable computer equipped with a COM port to the logger‟s iPack access port (see SymphoniePLUS3 Logger Components Map). The front panel iPack access port works exactly the same way as the DB25 port but allows the user to access the iPack while the logger is connected to the iPack. Note that if the logger is controlling the iPack at the moment you plug it in, the computer will not be able to communicate with the iPack until the logger commands are finished. The iPack can only communicate with one device (logger or computer) at a time. With the iPack connected to the computer through the access port, you may perform all the same functions as found in the Pre-Installation Setup: iPack Configuration section. Installing the programming adapter On one side of the adapter you should see symbols for a headphone and microphone. NRG supplies the DB9 cable with the adapter. Plug the DB9 cable into the adapter. To install the adapter, remove the logger battery cover and very carefully insert the programming adapter with the 1/8 inch phone jacks pointing down. Be careful not to bump the SCMs! Electrical damage could result! Do not force the adapter! Make sure you are inserting the adapter into the correct port! Once installed, the headset and microphone symbols should be on the right side of the adapter. Before Leaving the Site 1. Check sensor readings to assess sensor condition. Readings that vary widely with expected norms may indicate a faulty connection. Press [Home][1], then [Up] or [Down] to scroll through the sensors. 2. Check all sensor cables, making sure they are firmly attached to the tower. 3. Check the batteries and clock. Note battery condition. Press [Home][2][1]. 73 nrg_symphonieplus3_data_logger_manual.docx Rev 6 11 December, 2012 4. 5. 6. 7. Confirm that the SD has been installed and formatted. Review the time and date settings, and the next call scheduled (remember the clock is set to Standard time). Remove the desiccant pack from its plastic bag, and clip it under the gray clip in the logger‟s door. Install the battery cover to securely hold the D-cells and the SCMs. Tighten the thumbscrews by hand only (do not over-tighten or use tools). 8. Close the logger‟s door, and secure both latches. 9. Check that the wiring panel is secured to the logger. 10. Close, latch and lock the shelter box. 74 nrg_symphonieplus3_data_logger_manual.docx Rev 6 11 December, 2012 SymphoniePLUS3 Start-up Site Visits Recommended Tools and Supplies diagonal wire cutters to trim sensor wire leads wire strippers to strip sensor cables if necessary 7/16 inch nut driver or wrench for installing yagi antenna 5/16 inch nut driver for hose clamps, mounting screws (PV and logger) ½ inch crescent wrench to tighten ground acorn nut ¼ inch nut driver for sensor terminals 3/8 inch nut driver or wrench for ground stud nut electrical tape small flat blade NRG screwdriver (included with logger) for sensor wires Phillips head screw driver for PV terminals & attaching iPack to logger drill to tighten hose clamps - optional tin snips to cut excess hose clamp – optional extra desiccant pack Changing SD and Routine Site Visit Check List A routine site visit should include the following activities: 1. Check sensor readings to assess sensor condition. Readings that vary widely with expected norms may indicate a sensor malfunction. Press [Home][1], then [Up] or [Down] to scroll through the sensors. 2. Check the batteries and clock. Note battery condition. Press [Home][2][1]. 3. Pull SD and label it with the date and site number. The SD can be pulled at any time. 4. If battery status was “Replace”, replace batteries now, one at a time. Use only alkaline D-cells, IEC type LR20. 5. Correct the clock, if needed (remember the clock is set to Standard time). 6. Insert and format a new SD card. 7. Check SD status. 8. If any condensation is noticed inside the enclosure, replace the desiccant pack with a fresh one from a sealed package. Cleaning If it should become necessary to clean the SymphoniePLUS3 data logger, use a cloth slightly dampened with water and wipe clean. Do not use solvents. Never submerge the unit. 75 nrg_symphonieplus3_data_logger_manual.docx Rev 6 11 December, 2012 Symphonie Data Retriever Software: Data Processing Symphonie Data Retriever Software: Data Processing Backing up data files It is very important that your data is backed up at regular intervals. It is a good idea to back up and archive all your raw data files (.rwd) as well as the SDR site database (.nsd). A simple backup method is to copy/burn your entire NRG directory to an external drive or CD after every successful data processing session. Always consult with your IT professional if unsure how to copy or back up files. Make sure to back up your data! Transferring Raw Data Files onto your computer hard drive Using an SD Reader and Windows Explorer to copy Raw Data Files to your Raw Files working directory Once you have successfully installed the SD Reader and have a drive mapped to it, you may use standard commands in Windows Explorer to copy the raw files from the SD to the Raw Files working directory (see Options) on your computer system. Many computers have a built-in SD card reader. It is important to remember that when viewing the raw data files (*.rwd) on the SD Reader, they only exist in the SD Card and do not exist on your computer until you copy them to your system hard disk. It is very important that the drive to which the raw data files are copied is backed up at regular intervals. Consult with your IT professional if unsure how to copy or backup files. Saving Raw Data Files received as email attachments from your email program to your Raw Files working directory (iPack users only) Once you have successfully received a raw data file as an email attachment, use standard commands in your email program to save the raw data files (*.rwd) to the Raw Files working directory (see Options under SDR‟s File menu). It is very important that the drive to which the raw data files are copied is backed up at regular intervals. Ask your IT professional if unsure how to save or backup files. Data Processing Utilities SDR installs utilities on your computer that assist in data handling. PopAuto.exe can be used to automate the extraction of SymphoniePLUS3 data from emails. Application notes that explain how to use PopAuto.exe can be found in the Tech Support section of NRG‟s web site. Opening the SDR software From the Windows Start menu, go to Programs>NRG>Symphonie Data Retriever. The SDR main window will open. 77 nrg_symphonieplus3_data_logger_manual.docx Rev 6 11 December, 2012 Checking what version of SDR is installed From time to time it is necessary to check which version of SDR is installed on your computer so you may check for an update or submit a technical support inquiry. Go to the Help>About menu to check the version number. Be sure to check the NRG website for updates! Viewing Data Header The data header contains basic site and logger information such as site number, site description, latitude, longitude, altitude, time zone, logger serial number, model number, hardware revision, iPack, and logger time stamp for the data file. This information should always be checked before reading a data file. If anything is corrupt in the header information, take note and proceed with caution. Press the “Load Header” button to view the header information. 78 nrg_symphonieplus3_data_logger_manual.docx Rev 6 11 December, 2012 Symphonie Data Retriever Software: Data Processing Select a file and press “Open.” If files are not *.rwd, choose the correct type of file from the “Files of type” drop-down menu at the bottom of the window. If a site for this file does not exist, you should see the following message: Note that if a site file does not exist, SDR will prompt you to create one at this point. See the section called “Creating a New Site” found in the chapter called “Data Retriever Site Information” if you choose to create a site file at this point. You will want to have the site commissioning data at this point to be able to successfully create the site. To view the file header without creating the site, choose No. You should see the following window with the file header information: iPackGPS users can click on the iPack link shown above to access more detailed iPackGPS information such as iPackGPS serial number, modem identifier, battery voltage, and antenna signal strength at the time of the call: 79 nrg_symphonieplus3_data_logger_manual.docx Rev 6 11 December, 2012 Reading Data to the Data Viewer with settings from data file Once you have loaded the header of a raw data file, you may “Read” the data into the graphical data viewer. If you wish to use the settings that are included in the data file (the settings that were programmed into the logger), select “Scale using settings from: Logger.” The interpreted data in the data viewer will be based on the logger settings as they were configured by field personnel. Reading Data to the Data Viewer with settings from site file Once you have loaded the header of a raw data file, you may “Read” the data into the graphical data viewer. If you wish to use the settings that are included in the Site Information Editor window, select “scale using settings from: Site.” The interpreted data in the data viewer will be based on the site information as it was configured with the SDR software. 80 nrg_symphonieplus3_data_logger_manual.docx Rev 6 11 December, 2012 Symphonie Data Retriever Software: Data Processing Logger Channels and Graph The data viewer allows users to graphically view each channel or even multiple adjacent channels simultaneously in the graph located at the top of the screen. The channel descriptions run down the left side of the screen. Choosing logger channel to view in graph To select a channel to view in the graph, click on the channel with your mouse. You may select multiple adjacent channels simultaneously by holding down the shift key and clicking on the channels with your mouse. Each channel will be represented by a different color on the graph, and a key is included to the right. Choosing parameters from selected logger channel to view in graph Once you have selected channels to view in the graph, you may change the parameter you are viewing for the channel by selecting from the View menu. For example, to view the standard deviation instead of 10 minute averages, select View>Standard Deviation. Saving Data from the Data Viewer to a TXT file Once you have viewed the data and wish to create an ASCII (.txt) file for further data processing, choose File>Save TXT File. SDR will save a tab delimited ASCII file with the .txt extension into the scaled data working directory (see Options under SDR‟s File menu). 81 nrg_symphonieplus3_data_logger_manual.docx Rev 6 11 December, 2012 Note: When creating an ASCII file from data scaled from settings from the logger, scale factors from the logger will applied rather than scale factors from the Site Information Editor window. Importing the data into the site database (when viewing with settings from Site only) Once you have viewed the data using the settings from the site and wish to import the data into the SDR site database, choose File>Import to database. SDR will import the data into the corresponding site database file (.nsd) where the data can be accumulated over time. Closing the Data Viewer Select File>Close from the Interpreted Data Window to close the Data Viewer. The SDR Main menu will appear once the Data Viewer has been closed. Batch Processing data files (Converting a group of raw data files to .txt files and importing into the database) If you wish to convert many raw data files into scaled ASCII data files and/or import many raw files into the database together in a single process, you may do so using the batch processing feature. Select File>Batch Process. SDR allows you to choose if the scaling information will come from the site file and if this data will also be imported into the database with or without generating corresponding daily .txt files. SDR also allows import using the settings from each raw file – in this case the data cannot be imported into the site database. If selected, text files will be written to your scaled data folder. If a file cannot be processed, filename.log will be written in the scaled data folder. Options Disabling Descriptive Headers from Output Files Certain data processing tasks require that the header information is not included in each saved ASCII (.txt) file. Go to File>Options and check the “skip descriptive headers” box if descriptive headers are unwanted in the file output. Additionally, if the “skip descriptive headers” box is checked, the option to skip column headers is also available by checking the “skip column headers” box. Output Hourly Averages Check the “Output Hourly Averages” box if you wish the daily .txt file format to contain data with hourly averages 82 nrg_symphonieplus3_data_logger_manual.docx Rev 6 11 December, 2012 Symphonie Data Retriever Software: Data Processing instead of 10 minute averages. Delimit with commas instead of tabs Check the “Delimit with commas instead of tabs” box if you wish the daily .txt file format to use commas as a delimiter instead of tabs. This is not recommended for users outside of the USA! Setting the working directory for Raw files (where Raw files from the SD or email program should be saved so SDR can find them) Go to the File>Options menu to change the working directory for raw data files. This is the directory that SDR will point to for reading raw data files. You will see the working directory path and can either edit the path or browse to a new location by clicking on the box with three dots to the right of the Raw Data path. Setting the working directory for Saved TXT files (where scaled data files are stored) Go to the File>Options menu to change this working directory. This is the directory that SDR will point to for saving scaled data files. You will see the working directory path and can either edit the path or browse to a new location by clicking on the box with three dots to the right of the Scaled Data path. Setting the working directory for Site files (where site information used to scale data is stored) Go to the File>Options menu to change this working directory. This is the directory that SDR will point to for saving site files. It is also the directory that SDR will point to when utilizing a site file to process raw data. You will see the working directory path and can either edit the path or browse to a new location by clicking on the box with three dots to the right of the Site Files path. Setting the working directory for Reports (.wmf file format) Go to the File>Options menu to change this working directory. This is the directory that SDR will point to for saving reports. Each time you run reports in SDR, they will be saved to this directory. The .wmf report files easily import into MicroSoft office documents and can be easily exchanged through email. You will see the working directory path and can either edit the path or browse to a new location by clicking on the box with three dots to the right of the Site Files path. SDR Event Log The SymphoniePLUS3 logger stores internal events into a log viewable from the logger display. The event log is transferred into the Data File header whenever a new file is created for any reason. The SDR software imports these events into the SDR “Event Log” which is viewable from SDR (from SDR‟s main menu, choose Site>View Event Log, choose the site number from the list, and click OK). A typical Event Log looks like this: 83 nrg_symphonieplus3_data_logger_manual.docx Rev 6 11 December, 2012 84 nrg_symphonieplus3_data_logger_manual.docx Rev 6 11 December, 2012 Symphonie Data Retriever Software: Data Processing In addition to logger events, iPackGPS users can also view events generated by the iPackGPS. If an iPackGPS is connected to the logger, you will see iPack events like these: 85 nrg_symphonieplus3_data_logger_manual.docx Rev 6 11 December, 2012 The screen below shows events generated by a failed call: A comprehensive list of Symphonie logger events and iPackGPS events and their definitions can be found in the Troubleshooting section of this manual. SDR Troubleshooting Wizard The troubleshooting wizard can assist in solving problems with data files in the unlikely event data corruption has occurred. The wizard will step you through the process by first asking “What is the problem?” To open the troubleshooting wizard, select File>Troubleshooting from the Interpreted Data window. Fixing Timestamps Selecting this wizard makes it possible to fix timestamps (see Time Offset History Window). More details on fixing timestamp issues can be found in NRG‟s Technical Support Forum at www.nrgsystems.com. Sensor Connections Selecting this wizard makes it possible to see if sensors are disconnected or have no SCM installed. 86 nrg_symphonieplus3_data_logger_manual.docx Rev 6 11 December, 2012 Symphonie Data Retriever Software: Data Processing Sensor History Selecting this wizard makes it possible to see if an incorrect sensor history entry is skewing data. 87 nrg_symphonieplus3_data_logger_manual.docx Rev 6 11 December, 2012 SDR Database and Reporting Functions SDR Database and Reporting Functions SDR includes a self-contained MicroSoft Access compatible database to store imported SymphoniePLUS3 data. SymphoniePLUS3 raw files (.rwd) and ASCII files (.txt) can be imported, and all data are stored, after scale factors from the site information settings have been applied for each sensor. This section will provide an overview of the most useful features of the database. Selecting a site to open (View database) Go to Site>View Database, and you will see the following window: Choose the site you wish to work with and click OK. Database main window displayed settings: Site Number - based on Site Information window Site Description - based on Site Information window Location - based on Site Information window Elevation - based on Site Information window Data Range – shows date range of data files that have been imported into the selected database Reports –shows the reports that have been configured for the selected database Importing Data from the Database main window You should see the Main Database window with the information from the selected site database you have opened. 89 nrg_symphonieplus3_data_logger_manual.docx Rev 6 11 December, 2012 Importing raw (.rwd) files To import raw SymphoniePLUS3 data files (.rwd), click on “Import RWD Files.” A Windows “File Open” box should appear pointing to the raw files directory you have previously configured under the File>Options menu. Select the files you wish to import, and click “Open.” Notice the “Files of type” entry contains a filter for only the site with which you are currently working. The “Batch Processing” window should appear. Uncheck the “Do not output text files” box only if you want daily text files to be placed into the “scaled data” folder. Most users prefer to use SDR‟s export function rather than scaling individual daily text files. The “scaled data” folder has previously been configured under the File>Options menu. Press “Go” to import the data into the database. Note that this is the exact same function as choosing “batch processing” mentioned earlier in the “Data Processing” section. 90 nrg_symphonieplus3_data_logger_manual.docx Rev 6 11 December, 2012 SDR Database and Reporting Functions The Events / Errors viewer will display the status of the process. Click “Done.” Once data files are imported, you may export or create and generate reports. Importing scaled ASCII (.txt) files Symphonie Data Retriever Software provides an ASCII import feature for use in the unfortunate event that the original raw files have been lost. To import SymphoniePLUS3 scaled ASCII data files (.txt), click on “Import .TXT Files.” A Windows “File Open” box should appear pointing to the scaled files directory you have previously configured under the File>Options menu. Select the files you wish to import and click “Open.” Notice the “Files of type” entry contains a filter for only the site with which you are currently working. A standard status bar will appear showing the progress of the .txt import. Warning: Import .txt files only if they are standard SymphoniePLUS3 converted ASCII files. Files converted with header modifications or alternate delimiters will not import correctly. This feature should only be used when the original raw files have been lost. Exporting Data as 10 minute, 60 minute or WAsP SDR‟s export feature allows you to export data for a particular month or date range for use with a spreadsheet or other software program that accepts .txt format. Click “Export.” The “Select Span for Report” window should appear. You may select a monthly or comprehensive date range for the data export. Also, if you wish to export only data that has had bad data removed, select the “Export data with filters applied” check box. See the section on removing data if you are interested in filtering the data for export. 91 nrg_symphonieplus3_data_logger_manual.docx Rev 6 11 December, 2012 Select a range and click “OK.” A standard Windows “File Save” box should appear pointing to the scaled data folder. Enter a file name for the exported file and choose the file Save as type; here is where you may choose 10 minute, 60 minute or WAsP data. Click “Save.” A standard status bar will appear showing the progress of the export. Database Export File Formats Data can be exported from the database in the following formats: tab delimited 10 minute data (.txt) tab delimited 60 minute data (.txt) WAsP data Remember that the exported data has been scaled according to the site information stored in the transferable user defined site file (.nsd). Data Filtering SDR has the ability to filter data through user-configurable filters. Data filters can be created and saved for each site. Saved filters can then be run on each site periodically. Creating a Data Filter Go to Site>View Database and select the site database for which you wish to create filters. From the Site Database window, click “Filter.” 92 nrg_symphonieplus3_data_logger_manual.docx Rev 6 11 December, 2012 SDR Database and Reporting Functions This brings up the “Saved Data Filters” Window. Click “Create New” which brings up the “Create New Filter” window. Here you can assign your filter a name and choose the logical definition for your filter based on the data of up to 3 different channels. The “Mark Channels” checkboxes allow you to identify which channels to mark if the filter conditions are all found to apply. The “Mark Data as Type” boxes allow you select the code with which the data will be marked in the SDR database. Click “OK” to save your filter. Note: Data marked by a filter are not deleted from the database. However, SDR will know to not include those records in report calculations. When exporting, you will have the option to export the data with or without applying filters. Running a Data Filter From the “Saved Data Filter” window, check the filters you want to run and select the time span for the filter. 93 nrg_symphonieplus3_data_logger_manual.docx Rev 6 11 December, 2012 Click “OK” to run the filter. SDR will return the “Filters applied” message when done. Blanket Filtering / Unmarking all data in database From the “Saved Data Filters” window, click on “Blanket Filter.” You should see the “Data Filtering” window. This window allows you to filter based on time range and channel and is handy when you may want to remove all marked data from the database. Data Flag types You can choose from the following flags to mark data: Good Data – applies no filter Ice Data – marks data so it can be filtered Bad Sensor – marks data so it can be filtered Invalid Data – marks data so it can be filtered The flags “Ice Data”, “Bad Sensor”, and “Invalid Data” all exclude the data selected from calculations and graphs. SDR does not identify the data flag types on the reports. If you wish to include all data, make sure that the “Good Data” flag is selected for all 12 channels for the entire time range. 94 nrg_symphonieplus3_data_logger_manual.docx Rev 6 11 December, 2012 SDR Database and Reporting Functions Filtering all channels Select the desired data range and make your flag selection from the “All Channels” drop down box. You should see the 12 channel flags change when doing this. Click “OK.” Filtering any channel individually Select a date range and adjust the flags for each channel. Note that only the “Good Data” flag being selected for a channel for a given time range will be included in reports or exports (exports have a checkbox option to include filtered data or not). Unfiltering (Unmarking) all data for all channels Select the entire date range. Select “Good Data” from the “All Channels” drop down box. You should see the 12 channel flags change to “Good Data” when doing this. Click “OK.” Creating (Configuring) Reports From the Main database window, click “Create New” in the Reports section. You should see the “Create New Report” window. Selecting the report type Select the desired report from the “Report Type” pull down menu Report types include the following: Wind Rose Frequency Distribution Hourly Averages Table Hourly Averages Graph Summary Report Note that certain options will appear based on the report type selected. You may create as many report types as you want for each site. 95 nrg_symphonieplus3_data_logger_manual.docx Rev 6 11 December, 2012 Selecting the sensors to be included in the report (Configuring your report) Click on the sensors you wish to include in the report. The report name will be generated from these selections. A good example is choosing the top level and top level vane to generate the Wind Rose as shown above. Saving the configured report type for this site Click “OK.” You will now see the report you created in the “reports” section of the Main database window. Generating (Running) Reports Each time you run reports in SDR, they will be saved to the “Reports” directory previously configured under the File>Options menu of SDR. The .wmf report files can be imported into MicroSoft Office documents and can be easily exchanged through email. You can also print these reports directly from SDR. Selecting reports to be generated from the list Click on the checkbox to the left of each report you wish to run. 96 nrg_symphonieplus3_data_logger_manual.docx Rev 6 11 December, 2012 SDR Database and Reporting Functions Editing and Deleting selected reports If you wish to edit a report before running, highlight the report by clicking on it, and then click the “Edit” button. You should see an “Editing report…” window. Make your changes and click “OK.” Running and printing the selected reports Once you have selected all the reports you wish to run in the Main database window, click on “Run Checked.” You should see the “Select Span for Report” window. Select the desired month or date range, check the “preview before printing” box, and then click “OK.” SDR will then show standard status bars as each report is generated. Click “Print Setup” and make sure your printer selection is correct. Exit the print setup, and click “Print and Next” to print the currently displayed report and then display the next report that has been generated. Note that all these reports also now exist on your computer‟s hard drive in the “Reports” folder that SDR has set up. Always make sure your site’s sensor scale factors are correct before generating reports! 97 nrg_symphonieplus3_data_logger_manual.docx Rev 6 11 December, 2012 Data Retriever Software: Site Information & Site History Data Retriever Software: Site Information & Site History Creating a New Site The Site File A site file contains all the information necessary to successfully process raw data files from each individual site. The site file also contains all the scaled data that has been imported into the SDR database. The site files are of the format: SSSS.nsd where SSSS = the site number. For example, 0125.nsd is the site file for site 0125. Remember, the site file contains scaled data, so if you change the scale factors for old data, you will need to re-import that old data to apply the new scale factors. When you create a new site, a new site file is created and stored in the SDR subdirectory (as set in the SDR Main Window File>Options menu). The site file contains information about the site location, description, what sensors are connected, and how SDR will scale the data from each of the 12 logger channels. It is very important to get the site file set up correctly. You will want to have the site data sheet when creating a new site. All of the specific parameters that are included in each site file are described in this section. Creating a Site File From Data File (Recommended) The recommended way to create a new site file is to load the header for a data file from a new site. At that point, a warning message will appear on your screen informing you that “No local site corresponds to the one referenced in this data file! Create a new site with the data file parameters?” Click Yes when prompted at the warning message. This will bring you into the Site Information Editor window. The site fields will be populated with the information passed from the logger as programmed by the field personnel. At this point, you will be able to edit all the fields and then save the site file. You will want to have the site data sheet when creating the new site. The site data sheet will include the information you need to enter into the site editor if field personnel did not program the logger completely. Once the site file is saved, any raw data files (.rwd) from the corresponding site that are converted based on this site file will use the settings stored in the site file to create the ASCII (.txt) file. For this reason, it is essential that the information in the site file is correct. 99 nrg_symphonieplus3_data_logger_manual.docx Rev 6 11 December, 2012 Creating a Site File Manually To manually create a site, select Site>New Site from the SDR main window. This will bring you into the Site Information Editor Window. The site fields will appear empty. At this point, you will be able to populate all the fields and then save the site file. You will want to have the site data sheet when creating the new site. The site data sheet will include the information you need to enter into the site editor if the field personnel did not program the logger completely. Once the site file is saved, any raw data files from the corresponding site that are converted based on this site file will use the settings stored in the site file to create the ASCII (.txt) file. Note that you cannot return to the SDR main window until you close the Site Information Editor window. Subsequent changes to the site can be made by choosing Edit Site from the Site menu. This will bring you into the Site Information Editor window. You cannot return to SDR‟s main window until you close the Site Information Editor window. Site Information Editor - Site Information Parameters These parameters are found on the left side of the Site Information Editor window. Site # The site number is reported as a four-digit number. Site Desc (Site Description) A site description of up to 80 characters can be entered here. Project Code A six-character parameter used to code sites within a project can be entered here. Project Desc (Project Description) An 80-character project description can be entered here. Site Location An 80-character site location can be entered here. Site Elevation (Altitude) A six-character field reporting the Site Elevation as referenced from sea level can be entered here. Units are not stored. For site elevations below sea level, include a “-“ sign before the number. 100 nrg_symphonieplus3_data_logger_manual.docx Rev 6 11 December, 2012 Data Retriever Software: Site Information & Site History Base Time Zone (the time zone the logger is located in) A pull down menu that determines how your data‟s timestamps (in UTC) are adjusted to match the local time. Make sure it is set to the logger local time zone. Time settings should always be in Standard Time (NOT Daylight Savings Time). Latitude Enter latitude data in this field. Note that WAsP export only allows the latitude degrees, minutes, and seconds (North or South) or decimal formats to be exported. Longitude Enter longitude data in this field. Note that WAsP export only allows the longitude degrees, minutes, and seconds (East or West) or decimal formats to be exported. Logger Serial Number (5-digit suffix) The logger serial number appearing in this field should be the last five digits of the logger serial number. Hardware Rev. (Logger Hardware Revision) The hardware revision is reported as a masked three number sequence signifying the current revisions of the logger core, logger SD controller, and the iPack firmware revision number. Site Information Editor - Baseline Sensor Information Parameters These parameters are found on the right side of the Site Information Editor window. Channel Reports the logger channel for which the sensor information is being displayed. Use the up and down arrows to scroll to the desired channel. Load Defaults To the right of the Channel # field, the Load Defaults button can be used to load a default scale factor and offset for the type of sensor shown in the Sensor Type field (see below). Note that you will see transfer functions (scale factors) in both SI and Imperial units, allowing the user to specify which units are used for individual channels. Description Enter up to a 20-character sensor description. For NRG sensors, this is the same as the sensor model. Details Enter up to 80 characters in this field for reporting any sensor details. Serial Number A sensor serial number of up to 8 characters can be entered here. Sensor Type The sensor type and therefore the logging mode of the logger for this channel can be chosen using a pull-down menu to the right of the Serial Number field. For a counter channel, the sensor type can be either frequency (Speed), totalizer (Total), or Unknown. For flex channels, the sensor type can be defined as either Unknown, Speed, Total, Vane, or Analog. For analog channels, the sensor type can be definite as either Unknown, Vane, or Analog. Height Enter the sensor height in this field. Scale Factor A numerical sensor scale factor up to 8 characters is entered here. 101 nrg_symphonieplus3_data_logger_manual.docx Rev 6 11 December, 2012 Offset A numerical sensor offset up to 8 characters is entered here. Print Precision The Print Precision field has a pull down menu that reports how many decimals and leading zeros the scaled data will have. Units (Imperial or SI) This five-character field reports appropriate SI or Imperial units for the sensor selected. Note that you may choose SI units for some sensors and Imperial units for others (wind speeds in m/s but barometric pressure in inches of Hg, for example). Notes Clicking the Notes button opens a text field in which site notes can be entered. The Notes button will be in bold if any notes are contained. The notes are not output in the ASCII (.txt) files. Saving the Site File When all the site information is entered and has been confirmed as correct, it is time to save the site file. From the Site Information Editor window, select File>Save Site. Site History Entries The Site Information Editor contains a powerful site history tool that can be used when a sensor at a particular site is changed. History entries will mark the point in time the change is made and then patch in the new sensor information from that point forward. Since many projects last several years, it is not uncommon to have sensor changes. For example, you may want to replace an unheated anemometer with a heated anemometer and document this change in your database. Selecting the Site and Sensor Select Site>Edit Site from SDR‟s main screen. Choose the site from the “Select a Site” screen and click “OK.” In the Site Information Editor screen, click the “History” button to display the sensor history table. The table displayed will show the history for the sensor channel selected under “Sensor Information.” If you scroll through the sensor channels, you will see the history for each channel. Make New Change To make a sensor history change, click the “Make New Change” button. The sensor information fields are now “live” and will be applied to this entry when the site file is saved. 102 nrg_symphonieplus3_data_logger_manual.docx Rev 6 11 December, 2012 Data Retriever Software: Site Information & Site History Site History Concepts There are several important concepts to understand regarding the history editor. First, whatever row in the history table is selected will be affected by whatever changes are made in the “Sensor Information” fields. For example, in the screen shown below, changing the height from 5 m to 50 m would change the row highlighted in the table. To change the height, put your cursor in the field to the right of “Height,” type in the new height, and press Tab. In the table below, you would see the new height displayed in the highlighted row. The next important concept to understand is that the “Make New Change” button adds a row to the history table. The new row can then be edited by entering new values in the Sensor Information fields above. Once the entries look good on the screen, the site file must be saved. Don‟t forget to save your changes! Select File>Save Site. The most important concept is that whatever information appears in each row of the history table is applied until the date of the next entry. For example, if a logger was originally installed with an NRG Systems Class 1 Anemometer which was replaced 3 months later with an IceFree anemometer, the Baseline entry would show a description and scaling information for the NRG Systems Class 1 Anemometer for the first 3 months, and then the next history entry would show the time and date the IceFree anemometer was installed and its scaling information. If you are making a change in your database, you will typically need to re-import any files from the time period after the change occurred. For example, if your field crew installed a new sensor in August, and it‟s now October, and you have just made a history entry that shows the new sensor, you will need to re-import all raw data from August through October. 103 nrg_symphonieplus3_data_logger_manual.docx Rev 6 11 December, 2012 Data Retriever Software: Changing iPack and Sensor Settings from a Remote Location by Creating a Patch File Data Retriever Software: Changing iPack and Sensor Settings from a Remote Location by Creating a Patch File Cautions Extreme care must be taken when patching ISP parameters. If you make a mistake (specifying the wrong ISP phone number, for example), you risk cutting communication with the logger, and a site visit will be required. Creating the Patch File A “patch” is a change to the iPack or logger configuration information. Patch files are generated by SDR and manually sent to the iPack‟s mailbox by the user. The iPackGPS event log will show “PATCH_DOWNLOAD_EVT” and “PATCH_APPLY_EVT” to help track the installation of the patch. Sensor Patch If you need to add or change a sensor, go to the “Site Information Editor” window. Select the sensor entry that you wish to change, make changes, and then select File>Save Site to save changes (or create a new entry by following instructions in “Creating a New Site History Entry”). Close the Site Editor window and go to Site>Create Sensor Patch. Select the site, and click “OK.” In the “Create Patch File” window, enter the time and date at which the change occurred, and check the boxes corresponding to the sensor channels affected by the change. Then enter your patch password, click “Save Patch,” and then “Save” in the Windows dialog box. The Patch Viewer will then show the entry for each field as it will be patched to the logger. Check the changes you made to be sure they are correct. Confirm that the logger serial number and logger hardware revision number are correct. These numbers must be correct for the patch to be applied. 105 nrg_symphonieplus3_data_logger_manual.docx Rev 6 11 December, 2012 When you are satisfied that the patch information is correct, click the X in the upper right corner of the window to exit the Patch Viewer window. SDR will now display a message notifying you that the Patch File has been written and the file name has been copied to your Windows clipboard: The file name will be used as the subject line of the outgoing email to which the Patch File will be attached. Open your email program, and address an email message to the iPack (usually addressed to the email address in the Mailbox Name field of the *.ipk file). Paste the Patch File name from your Windows clipboard into the subject field of your email and into the body of the email message. Failure to paste the patch file name into the body of the email message may cause some email clients (such as Outlook, Pegasus, Eudora, etc.) to incorrectly attach the patch file. Also note that patch emails need to be in Plain Text format, not HTML. In Outlook, you can switch your outgoing message to Plain Text format in the Options menu. Attach the Patch File and send the message. Configuration Patch From the SDR Main Window, select Site>Modify iPack Settings. This will bring up the Modify iPack Settings window. From here, select File>Open iPack File. Browse and select the iPack file you wish to modify. Once you have selected the file, you will notice check boxes on the right side of the window. Be sure to uncheck any parameter that you wish to keep the same. Parameters you wish to edit should remain checked. 106 nrg_symphonieplus3_data_logger_manual.docx Rev 6 11 December, 2012 Data Retriever Software: Changing iPack and Sensor Settings from a Remote Location by Creating a Patch File Review the Pre-Installation Set-up: iPack Configuration section of this manual for an explanation of all parameters. Enter new parameter information in checked boxes. Once you‟ve confirmed the settings are correct, it is time to save the Patch File. Saving the Patch File Select File>Save To Patch File. This will bring up the Select A Site window. With your mouse, select the site you wish to patch, and then click OK. This will bring up the Save As dialog box. SDR will generate an appropriate file name under which this patch file will be saved. Do not change it. Select Save. This will bring up the Patch Viewer window. Confirm that the logger serial number and logger hardware revision number are correct. These numbers must be correct (match the hardware revision number of the equipment in the field) for the patch to be applied. Click the X in the upper right corner of the window to exit the Patch Viewer window. SDR will now display a message notifying you that the Patch File has been written and the file name has been copied to your Windows clipboard. The file name will be used as the subject line of the outgoing email to which the Patch File will be attached. Sending the Patch File to the iPack via email Open your email program, and address an email message to the iPack (usually addressed to the email address in the Mailbox Name field of the *.ipk file). The address you choose must be one that will get the mail delivered into the mailbox on the pop3 server that the iPack will check for email. This is typically of the format: [email protected]. Do not send the patch email as a response to a logger email! The “from” field from incoming data emails is user configurable; be sure to use the email address assigned to your account by your ISP. Paste the Patch File name from your Windows clipboard into the subject field of your email and into the body of the email message. Attach the Patch File and send the message. 107 nrg_symphonieplus3_data_logger_manual.docx Rev 6 11 December, 2012 Failure to paste the patch file name into the body of the email message may cause some email clients (such as Outlook, Pegasus, Eudora, etc.) to incorrectly attach the patch file. Also note that patch emails need to be in Plain Text format, not HTML. In Outlook, you can switch your outgoing message to Plain Text format in the Options menu. Confirming the change Depending on when the Patch File is delivered and the iPack‟s call interval, changes may not be immediately visible in the next received data file. Subsequent files, however, should reflect the changes. The iPackGPS event log will show “PATCH_DOWNLOAD_EVT” and “PATCH_APPLY_EVT” to help track the installation of the patch. If the patch file is successfully retrieved, the email will be deleted from the Internet server by the iPack. If the email is not deleted from the Internet server, the patch was unsuccessful and must be tried again after identifying the problem. Once the logger has received a new patch, if it is unable to download data or connect with a POP3 server within 12 attempts (within 2 scheduled calls), the iPack will revert to the previous configuration. This ensures that communication can be restored if faulty patch information is uploaded and disrupts the logger‟s ability to successfully download data (a patch with an incorrect ISP phone number, for example). Communication will eventually resume on the third scheduled call. An incorrect entry in any parameter field can result in a bad patch. The only exception to this is the time server field – an incorrect entry in this field alone will not prevent the iPack from calling. 108 nrg_symphonieplus3_data_logger_manual.docx Rev 6 11 December, 2012 Data Retriever Software: Changing iPack and Sensor Settings from a Remote Location by Creating a Patch File Data Retriever Software: iPackGPS Features The “iPackGPS” tab‟s Settings and Actions screens provide access to new features of the iPackGPS unavailable in previous iPack versions. Settings In the Settings window, the “Download partial files” and “Check POP mailbox” features can be turned on and off here once the boxes to the right are checked. Like all other screens in the Modify iPack Settings window, once you have made a change, you must go to File and choose Save to iPack. The “Download partial files” setting allows the user to toggle on and off downloading of partial files. Disabling the downloading of partial files and checking of POP3 can reduce air time. However, this is generally not recommended for remote sites. If POP3 checking is disabled, the iPack will not be able to receive patches or firmware updates until the setting is changed via a direct connection to SDR. 109 nrg_symphonieplus3_data_logger_manual.docx Rev 6 11 December, 2012 Actions The iPackGPS can have its firmware upgraded via email using the link in the Actions window seen below or on site using SDR‟s Firmware upload button and the iPack programming cable. iPack battery voltage and voltages from various locations on the iPack‟s circuit board are displayed here when the Get Voltages button is clicked. iPackGPS firmware version can be updated via SDR and the iPack programming cable using the Firmware upload button. A link to the site used for remote firmware updates is also displayed on this screen. Remote firmware updates for some iPackGPS types (satellite) will be completed over the course of several calls. Firmware updates via SDR and the iPack programming cable are completed in a few seconds. The iPackGPS event log will show “UPDATE_DOWNLOAD_EVT” and “UPDATE_APPLY_EVT” to help track the installation of the new firmware. 110 nrg_symphonieplus3_data_logger_manual.docx Rev 6 11 December, 2012 Data Retriever Software: Processing Data from 9200-PLUS, Wind Explorer and 9300 Loggers In addition to processing data from SymphoniePLUS3 loggers, Symphonie Data Retriever can import and process data from Symphonie, 9200-PLUS, Wind Explorer, and 9300 loggers. This provides users with older NRG loggers an upgrade path to SymphoniePLUS3. Each NRG logger had some different features, and to maintain uniformity in the database, there are a few things to pay attention to when using SDR to process data from these loggers. Leave Time Zone set to 0 The 9200-PLUS, Wind Explorer and 9300 logger systems all record data in “logger local time.” This is different from the Symphonie, SymphoniePLUS, and SymphoniePLUS3 loggers, which record data with time and date stamps relative to UTC. Because of this difference in time zone configuration, leave the time zone setting at “0 UTC” for all loggers except SymphoniePLUS3, SymphoniePLUS, or Symphonie NRG loggers. Importing and Processing Data Importing and processing data should otherwise be the same for these loggers as for SymphoniePLUS3; please refer to the sections on processing SymphoniePLUS3 raw data files in this manual. Introduction to SDR ChipReader Versions 5 and higher of the SDR software includes a built in “Chip Reader” utility that is capable of reading 9200-PLUS DataChips and WindExplorer DataPlugs. SDR is not compatible with the TermReader and will not read 9300 DataCards. In order to read a DataPlug you will need a DataPlug Reader complete with the supplied null modem cable. To read a DataChip, you will need an EEReader complete with the phone cable and its RS-232 connector. Your computer will need a serial COM port or a USB port with a reliable USB to serial converter. The EEReader should be installed on COM 1 or COM 2. Reading a DataPlug from a WindExplorer Connect the DataPlug Reader to your computer with the null-modem cable and place the DataPlug into the Reader. Go to File>Chip Reader (WE/9200+). You should see the following screen: Press the “Get Raw File” button and SDR will read the DataPlug. When done you will see the following message: 111 nrg_symphonieplus3_data_logger_manual.docx Rev 6 11 December, 2012 You may press OK. The reading process is done; a raw file now exists in the specified directory and this data can be imported and processed with SDR. Reading a DataChip from a 9200-Plus Connect the EE Reader to your computer with the phone cable and RS232 connector and place a DataChip into the EE Reader. Please remember that the EE Reader can only read one DataChip at a time. Go to File>Chip Reader (WE/9200+). You should see the following screen: Press the “Get Raw File” button, and SDR will read the DataChip and display the following: Confirm everything looks Ok and press the “Save” button. You will see the following: 112 nrg_symphonieplus3_data_logger_manual.docx Rev 6 11 December, 2012 You may press OK. The reading process is done; a raw file now exists in the specified directory and this data can be imported and processed with SDR. If you receive an error message that the EEReader is not found, click the right mouse button, choose “Options” and then set the COM port to 1 or 2. 113 nrg_symphonieplus3_data_logger_manual.docx Rev 6 11 December, 2012 Troubleshooting Guide Troubleshooting Guide Be sure to visit the support section of the NRG Systems website at: http://www.nrgsystems.com/TechSupport.aspx for the most up to date troubleshooting information. Communication Problems Although the SymphoniePLUS3 system was designed to be as robust and simple as possible, it relies on phone service and the Internet to perform its functions. From time to time, things do not go as smoothly as anticipated. If you have stopped receiving or have never received emails from your SymphoniePLUS3 logger and iPack, check the following before visiting the site: GSM iPacks Phone Service Request a copy of the installation crew field notes. What did the antenna test results show? What error message appeared when a “Call Now” was attempted? iPackGPS users can use the Event Log Viewer [Home][3][4][4] to see all errors that occurred during the call. Did you remember to send an APN to the phone modem? Obtain a copy of the .ipk file that was programmed into the iPack. Call your GSM cell provider and make sure that the account is active. Is the SIM active? Have you tried the SIM in another phone or in another iPack? Has the SIM been properly activated for data transfer, and has the SIM been installed into the iPack? Get the cell account records and check the duration and frequency of the activity. Do you see cellular activity around the time a scheduled call is supposed to occur? Do you see re-tries every 10 minutes (up to six total)? Give the cell provider the exact coordinates of where the logger is installed AND the ISP phone number it is dialing. Ask them if the number is being dialed correctly. Most GSM iPacks should dial *99***1#. ISP Service Get the ISP account records and check the duration and frequency of the activity. Do you see activity around the time a scheduled call is supposed to occur? Do you see re-tries every 10 minutes (up to six total)? Use www.mail2web.com or a similar website used to check email remotely, and try to log in to the account using ISP settings that are in the .ipk file. If you are unable to login to the ISP from a computer, you will need to review all the ISP settings with your provider. NRG has seen ISPs that have unexpectedly changed the user name on an account. If you are having a particularly difficult time, you may send the .ipk file to NRG as an email attachment. We may be able to check (but not necessarily test) the settings for you. At the site Perform an antenna test and record the result. Try dialing the ISP phone number from a personal handheld cell phone at the site. You should hear modem tones on the other end. If you hear a "fast busy," there may be compatibility issues between the cell system and the ISP modem bank it is dialing into. Contact your ISP provider and ask if there are any restrictions or problems associated with cellular phones calling into the modem bank. Perform the "Call Now" function on the logger and note the resulting message. If the message "Internet error" appears, 115 nrg_symphonieplus3_data_logger_manual.docx Rev 6 11 December, 2012 record the error number (and text decription if using iPackGPS). iPackGPS users can use the Event Log Viewer [Home][3][4][4] to see all errors that occurred during the call. Is the SIM active? Have you tried the SIM in another phone? Has the SIM been properly activated for data transfer, and has the SIM been installed into the iPack? Be sure that the SIM card is activated for transparent data mode. General GSM System Information When a GSM phone is powered, it registers with the cellular system, and when it powers down, it de-registers with the system. The GSM iPack follows this protocol closely. Using GSM in marginal signal areas can cause registration problems. The iPack de-registers when powering down. However, if signal is lost, the de-registration is never seen by the cell. The next time the GSM phone in the iPack is powered up, it will try to register with the system and will be blocked out because the system thinks it is already registered. The only solution is to have the central GSM office perform a de-registration and then bring the account back up. We learned this information by talking with Vodafone and a customer in Europe who encountered this issue. CDMA iPacks Phone Service Request a copy of the installation crew field notes. What did the antenna test results show? What error message appeared when a “Call Now” was attempted? iPackGPS users can use the Event Log Viewer to see all errors that occurred during the call. What were the results of the phone initialization process? Verizon users only: Are you certain that you were in a home area during the phone initialization process? Obtain a copy of the .ipk file that was programmed into the iPack. Call your CDMA service provider and make sure that the MIN and ESN pair are active on your account. Get the cell account records and check the duration and frequency of the activity. Do you see activity around the time a scheduled call is supposed to occur? Do you see re-tries every 10 minutes (up to six total)? Give the CDMA provider the exact coordinates of where the logger is installed AND the ISP phone number it is dialing. Most CDMA users will use #777 as the Primary ISP Phone Number. NRG has already seen situations where the provider unexpectedly changed the dialing requirements for a given area as well as a provider accidentally shutting off a customer's account ESN. ISP Service Get the ISP account records and check the duration and frequency of the activity. Do you see activity around the time a scheduled call is supposed to occur? Do you see re-tries every 10 minutes (up to six total)? Use www.mail2web.com or a similar website used to check email remotely, and try to log in to the account using ISP settings that are in the .ipk file. If you are unable to login to the ISP from a computer, you will need to review all the ISP settings with your provider. NRG has seen ISPs that have unexpectedly changed the user name on an account. If you are having a particularly difficult time, you may send the .ipk file to NRG as an email attachment. We may be able to check (but not necessarily test) the settings for you. At the site Perform an antenna test and record the result. Verizon users only: Try dialing *228 from a handheld CDMA cell phone at the site. Do you receive a “welcome to Verizon” message or a message from another carrier? Try dialing the ISP phone number (usually #777) from a personal handheld CDMA cell phone at the site. You should hear modem tones on the other end. If you hear a "fast busy," there may be compatibility issues between the cell system and the ISP modem bank it is dialing into. Contact your ISP and ask if there are any restrictions or problems associated 116 nrg_symphonieplus3_data_logger_manual.docx Rev 6 11 December, 2012 Troubleshooting Guide with cellular phones calling into the modem bank. Perform the "Call Now" function on the logger and note the resulting message. If the message "Internet error" appears, record the error number. iPackGPS users can use the Event Log Viewer [Home][3][4][4] to see all errors that occurred during the call. Re-register the phone in home area. Satellite iPacks Phone Service Instructions are included with each Satellite iPack to turn on the phone service. This includes a registration form that needs to be filled out and faxed to the provider. Satellite System The Satellite iPacks use Wireless Innovation as the satellite service provider. The Iridium satellites circle the earth once every100 minutes traveling in a roughly South to North direction and depend on "line of sight" signals from the iPack transceiver. Every region on the globe is covered by at least one satellite at all times. Each (daily) call should take around 3 minutes per day and probably not more than 4 minutes. This may be slightly longer than other iPacks. The variables in the call length are login, UTC timeserver check, and POP mail check. These events happen each call regardless of the number of files sent and can be considered "overhead.” Using Wireless Innovation‟s email service (which is included with air time minutes) can reduce connection times. Installation Obstructions such as a tower or trees can cause an interruption between the communications of the modem to the Iridium satellite and therefore can cause untimely termination of the data call. Installations must therefore take into account the following: The antenna must be upright/facing the sky to ensure maximum exposure for the satellite. The antenna must be located so that it has a good view of the sky, ideally horizon to horizon coverage. The antenna should be mounted offset from the mast by a distance of at least 0.5 meters, with no other obstructions in the line of sight view. The satellites fly in a South-North orbit so the antenna must be mounted such that no obstructions will occur in this plane. In the northern hemisphere, the antenna mast should point south, and in the southern hemisphere, the antenna should point north. At the site Perform an antenna test and record the result. Perform the "Call Now" function on the logger and note the resulting message. If the message "Internet error" appears, record the error number. iPackGPS users can use the Event Log Viewer [Home][3][4][4] to see all errors that occurred during the call. Internet Error Codes as Displayed by SymphoniePLUS3 Logger Rev 009 iPacks and higher are capable of reporting numeric Internet error codes on the logger display. The iPackGPS offers enhanced descriptive text error codes as shown in the table below. The error code is the last message displayed if data transmission is unsuccessful. The user can also review the iPack status screen to see the error code. The error codes are useful tools in determining the source of a transmission problem. These error codes are trapped by the Internet processor inside the iPack. The error codes do not necessarily give a specific resolution to a particular issue. However, they will point you to the set of settings most likely causing the problem 117 nrg_symphonieplus3_data_logger_manual.docx Rev 6 11 December, 2012 and give you an indication of the phase of the calling process in which the problem was encountered. If you receive an error code not listed below, please contact NRG for assistance. iPackGPS Event Codes DISPLAYED MESSAGE DISPLAYED NUMBER CONTACT_NRG_ERR RECOMMENDED ACTION/EVENT DETAILS Contact NRG for assistance. DNS_ERR 2102 DNS server not responding. INVALID_IPSTRING_ERR 2103 Incorrect format of server name. SNTP_ERR 2104 Incorrect Time Server Name or Time Server not responding. PPP_ERR 2105 Incorrect User Name or User Password. MODEM_ACTIVE_ERR 2106 Internet service is active and modem already in use. SMTP_CONNECT_ERR 2123 iPack unable to establish connection with SMTP server. SMTP_SERVER_ERR 2124 Mailbox Name or Mailbox Password incorrect; authentication setting is incorrect. SMTP_TIMEOUT_ERR 2125 SMTP server not responding. SMTP_CLOSED_ERR 2126 SMTP server shuts down prematurely. Try again. SMTP_NO_NAME_ERR 2132 SMTP server name left blank. SMTP_TCPCONN_ERR 2134 POP3_CONNECT_ERR 2138 iPack is unable to connect to the SMTP server. Could be invalid SMTP name or mail server is down. iPack unable to establish connection with POP3 server. Server could be down. POP3_SERVER_ERR 2139 Mailbox Name or Mailbox Password incorrect. POP3_TIMEOUT_ERR 2140 POP3 server not responding. POP3_CLOSED_ERR 2141 POP3 server shuts down prematurely. Try again. POP3_NO_USER_ERR 2147 Mailbox name is missing. POP3_NO_PASS_ERR 2148 Mailbox password is missing. POP3_NO_NAME_ERR 2150 POP3 server name left blank. POP3_TCPCONN_ERR 2134 SYNC_FAILED_ERR 10047 iPack is unable to connect to the POP3 server. Could be invalid POP3 name or mail server is down. Modem failure. Contact NRG for assistance. UNKNOWN_MODEM_ERR 10048 Modem failure. Contact NRG for assistance. UNKNOWN_RSSI_ERR 10049 No antenna connected or damaged antenna or antenna cable. INVALID_APN_ERR 10055 Missing or invalid Access Point Name. INVALID_PIN_ERR 10056 Assigned PIN is incorrect. NO_SIM_ERR 10057 No SIM card installed in GSM modem. NOT_REGISTERED_ERR 10059 Phone account not set up; CDMA phone not properly provisioned. NO_SIGNAL_ERR 10061 CONNECT_TIMEOUT_ERR 10063 No antenna signal strength. GSM phone configured on wrong band; damaged antenna cable. Communication network (satellite, GSM, CDMA) connection failure. LOGR_IPACK_COMM_FAIL 25026 Logger is no longer communicating with the iPack. LOGR_IPACK_CONN_FAIL 25028 PRIMARY_ISP_ERR 25042 Unable to establish communication with the logger due to bent pin or corrosion on connector. Primary ISP phone number missing or incorrect. TIME_SERVER_ERR 25043 Internet Time Server name is missing or incorrect. SMTP_SERVER_NAME_ERR 25044 SMTP Server name is missing or incorrect. 118 nrg_symphonieplus3_data_logger_manual.docx Rev 6 11 December, 2012 Troubleshooting Guide SENDER_EMAIL_ADD_ERR 24045 Sender’s Email Address is missing or incorrect. RECIP_EMAIL_ADD_ERR 25046 Recipient Email address is missing or incorrect. POP3_SERV_NAME_ERR 25047 POP3 Server name is missing or incorrect. MAILBOX_NAME_ERR 25048 Mailbox Name is missing or incorrect. MAILBOX_PASS_ERR 25049 Mailbox Password is missing or incorrect. PATCH_DOWNLOAD_EVT 25051 iPack has initiated patch file download from the POP3 server. UPDATE_DOWNLOAD_EVT 25052 iPack has initiated firmware download from the POP3 server. CALL_ACTIVE_ERR 25101 Call in progress while “Call Now” is requested. DIAL_FAILED_ERR 25102 PATCH_NOT_APPL_ERR 25103 Modem can’t connect to network. Satellite down and therefore unavailable; incorrect ISP phone number programmed into iPack; inadequate antenna signal strength. Data in patch file could not be validated and therefore patch was not applied. IPACK_LOW_BAT_ERR 25104 iPack 12V batteries below 10.5 volts; iPack will not attempt call under this condition. PATCH_APPLY_EVT 25105 UPDATE_APPLY_EVT 25106 iPack has successfully applied a sensor patch or iPack configuration patch at indicated date and time. iPack has successfully applied a firmware update at indicated date and time. CALL_SUCCESS_EVT 25108 Normal successful call (you will see one of these events per day on daily call schedule). CALL_FAILED_EVT 25109 GPS_SET_EVT 25110 IPACK_DEAD_BAT_ERR 25111 CALL_NOW_EVT 25112 Call failed due to lack of antenna signal strength, proper phone account setup, modem registration problem, etc. Other event(s) in Event Log just prior to this message will indicate failure source. Adequate satellites acquired to update GPS coordinates in the logger (you will see one of these events per day on daily call schedule). iPack 12V batteries below 9.6 volts; iPack will not power up modem or attempt call under this condition. “IPack busy or not present” message will be displayed soon after this event is logged. Operator initiated a “Call Now” from the logger’s keypad. CALL_SCHED_EVT 25113 Normal scheduled call (you will see one of these events per day on daily call schedule). CALL_BOOT_EVT 25114 Call was initiated following a complete power loss by the logger. Other iPack Error Codes Problem: Internet error 001: iPack timeout error This message is received when the iPack processor sends a command to the iPack‟s Internet processor to initiate data transfer and does not receive any message from the iPack‟s Internet processor for three minutes. Possible cause(s): No cellular service; interference, or poor signal strength. Possible solution: Perform antenna test to confirm signal strength and check for service. Contact your service provider and make sure the account is active. Problem: at + ixfh error: The "at+ixfh error" comes up when the Internet processor is busy trying to talk to the cellular modem and cannot process commands from the iPack‟s main microprocessor. Possible cause(s): Bad iPack phone; cellular account is improperly configured and confusing the modem. Possible solution: Disassemble the iPack and remove the iPack battery for several minutes to re-boot; contact NRG for return authorization number and return iPack for repair. 119 nrg_symphonieplus3_data_logger_manual.docx Rev 6 11 December, 2012 Problem: Internet errors 41 – 52: Error messages 41 through 52 indicate an incorrect format was entered in an iPack programming field in SDR. Possible cause(s): Typographical error; incorrect format (for example, the DNS field must contain only numbers). Possible solution: Check the format of each entry; consult ISP for assistance. Problem: Internet error 57: Error when trying to establish PPP This error indicates a problem with an ISP setting. Possible cause(s): Incorrect DNS, username, password, or authentication method. Possible solution: Check all ISP settings; consult ISP for assistance. Problem: Internet error 58: Error when trying to establish SMTP This error is received when SMTP authorization (authentication) is required by the ISP but the iPack‟s SMTP authentication setting is “No.” Possible cause(s): SMTP authentication setting is incorrect; SMTP authorization username (SMPT login) or password (SMTP password) is incorrect. Possible solution: Change iPack‟s SMTP authentication setting to “Yes” and enter the correct username and password (usually the same as the Mailbox Name and Mailbox Password); consult ISP for assistance. Problem: Internet error 59: Error when trying to establish POP3 This error indicates a problem with the POP3 setting. Possible cause(s): Incorrect POP3 server name. Possible solution: Check POP3 setting; consult ISP for assistance. Problem: Internet error 60: Single session body for MIME exceeds the maximum allowed This error indicates that the file size exceeds that allowed by the ISP. Possible cause(s): The ISP has limited the size of email messages to less than 20 KB. Possible solution: Contact ISP for assistance. Problem: Internet error 61: Internal memory failure Contact NRG Systems for assistance. Problem: Internet error 69: Timeout on host communication iPack timeout error similar to Internet error 001. This message is received when the iPack processor sends a command to the ISP to initiate data transfer and does not receive any message from the ISP for three minutes. Possible cause(s): Lost Internet connection due to lack of cellular service, interference, or poor signal strength. Possible solution: Perform antenna test to confirm signal strength and check for service. Problem: Internet error 70: Modem failed to respond The iPack‟s Internet processor sent ATDT (dial) command to cellular modem and did not receive a response before timeout (about 2 minutes). 120 nrg_symphonieplus3_data_logger_manual.docx Rev 6 11 December, 2012 Troubleshooting Guide Possible cause(s): Bad iPack phone; inactive account (wrong ESN or ESN not active) in an area where service is available. The phone dials but at that point, an operator voice message or special series of tones comes on the line from the service provider with instructions. Possible solution: Confirm that ESN is active; contact NRG for assistance. Problem: Internet error 71: No dial tone response. This error message indicates a problem with the cellular service. Possible cause(s): No cellular service; incorrect system setting; interference or poor signal strength. Possible solution: Perform antenna test to confirm signal strength and check for service; change system setting and try again; contact cellular service provider for assistance. Problem: Internet error 72: No carrier modem response This error message is received when the phone dials a phone number that does not have a modem answer (may not be an ISP phone number). Possible cause(s): Incorrect ISP phone number; ISP has changed their phone number or the area code has changed. For satellite iPacks, a missing or incorrect Sender‟s Email Address. For CDMA iPacks, a wrong ESN or incorrect MIN configuration by Verizon can also produce this error message; CDMA network incompatible with CDMA iPack. Possible solution: Correct ISP phone number, enter correct Sender‟s Email Address (satellite iPacks); initialize CDMA iPack in Verizon Home area, see information below. The cellular provider that Verizon is partnering with in the "extended coverage area" must support the CDMA IS95 call protocol and also provide a "modem pool" for the CDMA iPack. To insure a successful installation, we recommend that you determine who the Verizon partner is in the extended coverage area and contact them to see if they support IS95 and have a modem pool available. As a result, placing a call from a Verizon handheld phone is not a complete test of a site's compatibility with a CDMA iPack. Note that you ALWAYS need to activate the CDMA iPack in a Verizon "home" area network and then bring the unit to the site. When setting up service with Verizon, find out which system (A or B) the phone will register on for your intended installation site. When performing an antenna test, if your iPack accesses the other system, your site is likely in an “extended coverage area.” A manual initialization process may sometimes resolve the issue (contact NRG for assistance). Problem: Internet error 73: Dial failed Similar to Internet error 71; indicates a problem with the cellular service. Possible cause(s): No cellular service; incorrect system setting; interference or poor signal strength Possible solution: Perform antenna test to confirm signal strength and check for service; change system setting and try again; contact cellular service provider for assistance. Problem: Internet error 74: Connection with ISP lost Possible cause(s): Poor audio quality on phone line / weak cell signal. Possible solution: Perform antenna test to confirm signal strength and check for service. Problem: Internet error 75: Access denied to ISP server Possible cause(s): Wrong ISP phone number; incorrect authentication method, incorrect username and/or user password; missing APN (GSM iPacks); Modem is locked to incorrect frequency band (GSM iPacks). 121 nrg_symphonieplus3_data_logger_manual.docx Rev 6 11 December, 2012 Possible solution: Confirm that entries for ISP phone number, authentication method, username, and password are correct. Confirm that APN was sent to GSM iPack‟s modem (Set Up Phone screen in SDR). Problem: Internet error 76: Unable to locate POP3 server Possible cause(s): Wrong POP3 server name. Possible solution: Confirm that POP3 server name is correct. Problem: Internet error 77: POP3 server timed out. Possible cause: POP3 server is down. Possible solution: Try again later; contact your ISP. Problem: Internet error 78: Access denied to POP3 server. Possible cause(s): Password is wrong; mailbox name is wrong or needs to be changed to include ISP name. Possible solution: Correct password; try changing mailbox name to [email protected] Problem: Internet error 79: POP3 failed Possible cause(s): Wrong POP3 server name. Possible solution: Confirm that POP3 server name is correct; confirm that the POP3 server is your ISP‟s POP3 server (i.e. don‟t try to use another ISP‟s POP3 server). Problem: Internet error 81: Unable to locate SMTP Server Possible cause(s): Wrong SMTP server name, SMTP server temporarily down. Possible solution: Confirm SMTP server name is correct (not entered as “STMP”, for example), contact ISP and check that SMTP server is up and running. Problem: Internet error 82: SMTP server timed out This message is received when the iPack sends a command to the SMTP server to initiate mail transfer and does not receive any message from the SMTP server for three minutes. Possible cause(s): Unavailable for overloaded SMTP server; cellular signal drop; SMTP server name programmed into iPack does not connect over port 25 (Hotmail and gmail, for example) and is therefore incompatible with the iPack. Possible solution: Perform antenna test to confirm signal strength and check for service; try different SMTP server; contact ISP for assistance. Problem: Internet error 83: SMTP failed Possible cause(s): SMTP server is down or overloaded; GSM units need to have “data mode” enabled on SIM; no cellular service; interference or poor signal strength. Possible solution: Try again later; confirm that GSM iPack SIM has “data mode” enabled; perform antenna test to confirm signal strength and check for service. Problem: Internet errors 101 through 109: Parameter not defined Possible cause: An iPack setting has been left blank. Possible solution: Enter all required iPack settings in SDR. 122 nrg_symphonieplus3_data_logger_manual.docx Rev 6 11 December, 2012 Troubleshooting Guide Problem: Internet error 110: No SMTP defined. Possible cause: SMTP server field left empty. Possible solution: Add SMTP server name to field. SymphoniePLUS3 Data Retriever and iPack Programming Problem: ''iPack communication failed'' When opening the ''Modify iPack Settings'' window, the message: ''Verifying iPack connection'' appears in the lower status bar, but then the message ''iPack communication failed'' appears. Possible causes(s): The iPack utilizes a sense line on the COM port in order to initiate communications and expects standardized states for the COM port on and off conditions. On certain models of computer and operating system combinations, the COM port default off state does not return to the expected off state, and the iPack gets "hung" in a state where handshaking cannot take place. Solution: unplug the DB25 cable from the iPack. close the ''Modify iPack'' window. reconnect the DB25 cable to the iPack. reopen the ''Modify iPack'' window. You should now be connected to the iPack and be able to load a file from the iPack. Note: When the ''Modify iPack Settings'' window is opened, a request is made by SDR to open the configured COM port. Conversely, when the ''Modify iPack Settings'' window is closed, a request to close the COM port is made. A dead iPack battery can also produce this error message, so if the above solution doesn‟t resolve the problem, try replacing the iPack‟s battery. SDR installation Problem: SDR software can’t find serial port. Possible cause(s): Computer hardware compatibility problem. Solution: Use USB to serial converter, install manually to COM2. SymphoniePLUS3 Logger Problems Problem: SD is blank but should contain data. Possible cause: SD was never formatted (can‟t save data); while attempting to read the SD, data files were cut and pasted instead of copied and pasted. SD was formatted after it was read, and files are present but hidden. Solution: Format SD. Contact NRG. Problem: Received error message “One or more CRCs do not match: possible bad data” when trying to read data file in SDR software Possible cause(s): Data encryption PIN number in SymphoniePLUS3 logger settings doesn‟t match PIN number enabled in Symphonie Data Retriever Software‟s Site Information Editor window. Solution: Change data encryption PIN number in Symphonie Data Retriever Software‟s Site Information Editor window to match PIN number in SymphoniePLUS3 logger settings. 123 nrg_symphonieplus3_data_logger_manual.docx Rev 6 11 December, 2012 Problem: Receiving message “iPack Not Present.” Possible cause(s): iPack battery is dead; iPack is plugged into SDR; iPack is busy trying to make a call. Solution: Recharge iPack battery; wait for iPack to stop its communication with SDR software; wait for iPack to complete call. As a failsafe, the logger will check at noon every day to see if an iPack has been connected. To force detection of the iPack, remove the logger‟s D-cell batteries and then connect the iPack. Data / SD Problem: SD Card does not format correctly first time. Possible cause(s): SD card has damaged memory locations. Solution: Identify SD markings and notify NRG with all details. NRG runs qualification tests on SD Cards we ship. Obtain SD Card from NRG. Logger Error Log / SDR Event Log The SymphoniePLUS3 logger stores internal events into a log viewable from the logger display. The event log is transferred into the Data File header whenever a new file is created for any reason. The SDR software imports these events into the SDR “Event Log” which is viewable from SDR (from SDR‟s main menu, choose Site>View Event Log, choose the site number from the list, and click OK). iPackGPS users will also be able to view events generated by the iPackGPS. Event/Error Meaning 0 Internet Time Adjust. Time of event is the new time after adjustment has been applied. Clock was adjusted by less than 2 minutes by an Internet time update from the iPack. Note: a < 2 minute time correction will not cause a new file. The clock correction will be applied in the middle of the first interval after the call completes. Loggers with firmware version 10 or lower will automatically begin a new file if a correction of more than 2 minutes is required, but nothing will be noted in the Event Log. 1 EEPROM initialized. This event is recorded when the logger is restarted and the internal nonvolatile memory was reset. 2 Reboot. This event is recorded when the logger is restarted following a power loss or electrostatic event. 3 Reserved for future use 4 Clock set. This event is recorded when the keys of the logger‟s keypad are pressed (for updating the logger clock, for example). Note: In loggers with firmware rev 10 and older, event 4 is logged for any completed request from the user. These include manual clock set, a manual call ("call now"), or entering the Utilities, iPack menu [Home][3][4]. 5 Reserved for future use 6 I2C error. This event is recorded if the logger encounters an internal data transfer error. 7 SD Failure. This event is recorded if the logger could not write to SD card due to a damaged SD microprocessor, damaged SD, or bad sector on the SD. Try a different SD card. 8 Reserved for future use 9 Reserved for future use 124 nrg_symphonieplus3_data_logger_manual.docx Rev 6 11 December, 2012 Troubleshooting Guide 10 Reserved for future use 11 Bad Command. Invalid command request to logger from user or iPack. 12 Internet clock set. For loggers with firmware revision 11 and higher, this event is recorded each time the iPack successfully accesses an Internet time server and adjusts the time by more than two minutes. Time of event is the new time after adjustment has been applied. This time change will cause a new file, with this event, right after call ends. Since there was more than 2 minutes time discrepancy, this event usually implies that there was a real time clock problem, or it has been a long time since the last successful Internet time update. Internet Clock Set in the event log for loggers with firmware revision 10 or lower indicates that the iPack successfully accessed the Internet time server and adjusted the logger‟s clock by less than 2 minutes. 13 User Activated iPack. Logged whenever a manual call ("Call Now") is requested, or when entering the Utilities, iPack menu [Home][3][4]. Battery messages Note that when an iPack is connected to the logger the logger is powered from the iPack 2 volt regulator. Fresh D Cell batteries can output a voltage as high as 1.6 volts. Always use high quality Alkaline D-Cell batteries in your loggers! Lithium D-Cells should be used when the logger will be left unattended for an extended period of time extreme in cold environments. Logger Only (no iPack) 1.25 V or better 1.15 V to 1.25 V below 1.15 V Good Fair Replace Logger with iPack Connected 1.90 V or higher 1.15 V to 1.89 V Good Danger! Logger is not being powered by the iPack battery. iPack battery is likely depleted and logger is being powered by D-Cells only. If the battery needs to be changed, refer to instructions for “Opening & Closing the iPack” and change the battery as follows: Pull the battery loose from the Velcro and gently unclip the battery. Clip on the new battery. Be sure the clip fully engages the locking tab. Install the new battery into the iPack by fixing it to the Velcro. Use a slight “rubbing” motion to make sure the Velcro sticks. Carefully close the iPack according to instructions. 125 nrg_symphonieplus3_data_logger_manual.docx Rev 6 11 December, 2012 Troubleshooting Guide Appendices Opening & Closing the iPack Installing or changing a GSM SIM card or iPack battery requires opening the iPack. It is important that this is done carefully to avoid damaging internal wiring or the iPack‟s weatherproof seal. Opening the iPack Be sure to touch the metal shell of the DB25 connector on the iPack before opening the enclosure in order to safely discharge any static electricity. The iPack enclosure consists of two halves secured together by four recessed screws, two from each side of the enclosure. A gasket in between the two halves and 8 o-rings provide an environmental seal for the iPack and protect the internal electronics from the elements. Remove the four recessed screws, and the iPack will separate into two halves connected by a short cable. One half contains the iPack electronics and the other half contains the rectangular battery, which is secured by Velcro. Try not to lose any of the o-rings, and be careful not to rip or tear the gasket if it should come loose. Closing the iPack Insert the (4) 2-½ inch mounting screws up through the half of the enclosure that contains the iPack electronics. Slide the (4) o-rings over the screws. Set the gasket into the groove of the shell. Slide the cover (the half with the battery) over screws, being careful not to pinch the battery cable. Make sure the gasket is not pinched and then install the screws. It is a good idea to make sure the screws fall back into the existing threads in the iPack enclosure. An easy way to do this is to gently turn the screw counterclockwise one turn – it will fall into the existing threads in the iPack enclosure. 127 nrg_symphonieplus3_data_logger_manual.docx Rev 6 11 December, 2012 Troubleshooting Guide Technical Specifications 15 channel Internet-enabled micropower wind energy data logger Wind resource assessment Turbine power performance verification NRG Systems #40C anemometer or compatible NRG Systems Class 1 anemometer Opto anemometer Reed switch anemometer NRG Systems #200P direction vane NRG Systems #110S temperature sensor Li-Cor #200SZ pyranometer NRG Systems #BP20 absolute pressure (requires optional iPack power) NRG Systems RH-5X relative humidity (requires optional iPack power) Channels 1-3 and 13-15 are always counter inputs supporting: NRG Systems #40C anemometer or compatible NRG Systems Class 1 anemometer Opto anemometer Reed switch anemometer Instrument type Applications Sensor compatibility - counter channels Description Sensor compatibility - analog channels Counter channels Maximum counter input frequency is 2500 Hz Channels 7-12 are always analog inputs: Channels 7 and 8 dedicated for NRG Systems #200P direction vane Channels 9-12 use analog Signal Conditioning Modules (SCMs) to configure each channel for a particular sensor Channels 4-6 are 'Flex' Channels Analog or Counter Accept Signal Conditioning Modules (SCMs) to configure the channel for a particular sensor type 1 second 10 minute fixed Internal battery-backed with leap year correction, 2000 to 2099 128MB NRG formatted SD Card, non-volatile FLASH 672 files Each data interval is time-stamped Average Standard deviation Min* Max* Analog channels Flex channels Data Collection Sampling interval Averaging interval Real time clock Storage medium Maximum data storage Parameters recorded for each channel * Min and Max not used for wind direction vanes Windows compatible One (1) 14KB binary file per day Header includes site, serial number, and sensor information Symphonie Data Retriever (SDR) for Windows File format Software 129 nrg_symphonieplus3_data_logger_manual.docx Rev 6 11 December, 2012 Reader Data delivery Resolution Analog measurement resolution Counter average stored resolution Analog average stored resolution Min / Max stored resolution Standard deviation stored resolution User interface Configurable parameters Configuration iPack options Sensor wiring Connections Expansion slots Communication ports Batteries Power requirements External power input External solar input Other Mounting Installation Tools required Scales raw data Creates measurement database for each site Creates basic reports Maintains site and sensor information Configures iPacks Windows compatible SD Card reader SD Cards Internet email via GSM, CDMA, or Iridium Satellite with optional iPack 0.1% of full scale (1024 counts) 0.1% of the value stored 0.1% of the value stored 0.4% of the value stored 4% of the value stored Liquid Crystal Display (LCD) 4 x 20 characters 16 key pad (6 navigation keys plus numeric/phone pad) with audible feedback Clock Time zone Site number Display scaling (defaults are provided for each channel based on the channel type) iPack configured via serial port connection to your PC Serial connection direct to iPack or through logger's iPack access port Symphonie Data Retriever for Windows integrates iPack settings Sensors connected to field wiring panel Field wiring panel plugs into logger Ground stud connects to earth ground with included ground cable Three (3) SCM slots accept analog or counter SCMs Four (4) SCM slots accept only analog SCMs Male DB25 interfaces to one optional iPack communications module iPack access port provides a connection to the iPack programming port without dismounting the iPack or logger Two (2) 1.5 Volt D-Cell Batteries (included) Nominal voltage: 1.5 Volts Minimum voltage: 0.9 Volts Battery life approximately one year, depending on configuration Provided by any iPack Provided by any iPack Optional iPacks provide 12V power required by some sensors. PV/Battery only iPack provides power to sensors and logger for stand alone configurations. Mounts with 4 bolts (included) to keyed slots inside of metal shelter box Shelter box attaches to tower with hose clamps Screwdriver for input terminals (included) 8 mm (5/16 inch) wrench or nut driver for logger 130 nrg_symphonieplus3_data_logger_manual.docx Rev 6 11 December, 2012 Troubleshooting Guide mounting screws and logger ground nuts -40 °C to 65 °C (-40 °F to 149 °F) Note: display readable -30 °C to 55 °C (-22 °F to 130 °F) 0 to 100% RH non-condensing 10 years + 1.3 kg (2.6 pounds), including batteries (Including Field Wiring Panel) 22.2 cm height, 18.8 cm width, 7.7 cm depth (8.7 x 7.4 x 3.0 in.) Injection molded black ABS White elastomer dome keypad Fiberglass-epoxy terminal board, sealed gold plated pins, zinc plated screws and terminals Weatherproof polycarbonate Operating temperature range Environmental Operating humidity range Lifespan Weight Physical Dimensions Faceplate Buttons Materials Wiring panel Enclosure 131 nrg_symphonieplus3_data_logger_manual.docx Rev 6 11 December, 2012 Glossary Glossary “A carrier” A non-wireline or “cellular only” phone company. alphanumeric Any string of characters that contains letters and numbers in combination. The SymphoniePLUS3 display is capable of alphanumeric strings. analog channel An input channel that accepts a voltage or current type sensor such as a 200P Wind Direction Vane, 110S Temperature Sensor, Relative Humidity Sensor, or Pyranometer. AMPS cellular Advanced Mobile Telephone System. AMPS is the cellular phone system that was widely deployed in North America, parts of South America, Australia, and New Zealand. It is now often referred to as “analog” cellular to distinguish it from the various digital systems that use the same channels. anemometer A sensing device that is used to measure wind velocity. The SymphoniePLUS3 logger collects data from anemometers and other measurement sensors. The NRG Systems Class 1 Anemometer and NRG #40C Anemometer are 3-cup anemometers. ASCII file format American Standard code for Computer Information Interchange. ASCII files are “common currency” in the computer world. The code contains characters including numbers, letters, and standard punctuation. SymphoniePLUS3 converts raw binary data to ASCII format files. averaging interval The time period over which the logger collects data for averaging. The averaging interval for the SymphoniePLUS3 Logger is fixed at 10 minutes. “B” carrier A wireline or “regular” telephone company that also provides cellular service. cellular carrier A cellular phone company. counter channel An input channel that is designed to accept frequency or totalizer type sensors such as anemometers and rain gauges. GSM cellular Global System for Mobile telecommunications. GSM is the digital cellular phone system widely deployed in Europe and elsewhere to replace the various analog systems that were in use before GSM was adopted. GPS Global Positioning System non-volatile Computer storage that is not affected by a loss of power. The SymphoniePLUS3 logger uses non-volatile data storage and therefore does not require a battery to retain information in its memory. offset Also known as intercept. The offset is the measured value for zero output from a sensor. SymphoniePLUS3 includes an offset field 133 nrg_symphonieplus3_data_logger_manual.docx Rev 6 11 December, 2012 that can be used for sensors that have non-zero offsets or to correct for wind direction sensors that are referenced to directions other than true north. The number that you enter in the offset field is added to the value that is recorded by SymphoniePLUS3. For example, the NRG 110S Temperature Sensor outputs 0 volts at 86.39 °C. The offset you would enter for the 110S sensor is – 86.39. POP3 Post Office Protocol is a protocol used to retrieve email from a specified server. POP3 is a newer version of the POP protocol. print precision Print precision is the number of decimal places you specify in scaled data numbers. For wind assessment studies, specifying two decimal places is appropriate. For example, print precision of (###.##) yields a number up to 999.99. PV panel Photovoltaic panel. A 5 watt PV panel is an available option for the SymphoniePLUS3 logger. The PV panel attaches to the outside of the SymphoniePLUS3 shelter box and uses solar energy to charge the logger‟s batteries. pyranometer A sensor that is used to measure total solar radiation. NRG‟s #LI200SA Li-Cor Pyranometer is a dependable and low-cost pyranometer that can be used for energy studies, site evaluation, passive solar system analysis, or irrigation scheduling. roaming Switching from your cellular carrier to another in order to transmit a call. An example of when roaming is necessary is when a car with a cellular phone travels beyond the area covered by the primary cellular carrier. RS-232 serial port A standard interface that allows communication between a computer and other devices. On PC‟s, the port is often referred to as a “Comm Port.” Serial ports typically use a 9-pin D shaped connector. sampling interval The time period between samples of the input sensors. The SymphoniePLUS3 logger samples data once every two seconds. At the end of the averaging interval, the SymphoniePLUS3 Logger calculates and stores an average and standard deviation of these samples. scale factor A number that is used as a multiplier to convert raw data from the SymphoniePLUS3 logger to useful units of measure (such as °F, or m/s). The scale factor is often called the “slope” or “transfer function”. For example, the scale factor for the NRG #40C Anemometer is 0.765 m/s per Hz. shelter box The lockable steel enclosure that mounts to a tower or structure and protects a logger from weather and vandalism. SCM Signal Conditioning Module. An optional plug in module that provides the electronics to configure the input on channels 4-6 and 9-12 on the SymphoniePLUS3 logger for a particular sensor. The SCM also tells the logger whether the sensor is a counter (frequency output), totalizer, vane or linear signal. 134 nrg_symphonieplus3_data_logger_manual.docx Rev 6 11 December, 2012 Glossary site The installation location of the SymphoniePLUS3 logger, TallTower, and sensors. A site is a unique and permanent location. SymphoniePLUS3 loggers store a site number you assign to identify the site. standard deviation A measure of the central tendency of a collection of data. A small standard deviation means the data do not vary widely. A large standard deviation means the data vary more widely. Standard deviation is calculated as the square root of the variance, where variance is the average of the squared deviations about the mean. storage intervals The period of time that data are gathered before being stored to non-volatile memory. In SymphoniePLUS3 loggers, the storage interval is always 10 minutes. SymphoniePLUS3 Data Retriever Software supplied by NRG Systems used to produce versatile tabdelimited text Data Retriever files from raw data files collected by the SymphoniePLUS3 logger. Text files can be used with a wide range of data processing software, including SQL databases, Microsoft Excel, Microsoft Access, and more. Supports international numeric formats. TallTower NRG TallTowers are the original tilt-up tubular steel meteorological tower. TallTowers are delivered in complete kits, assembled on the ground and then tilted up and secured with guy wires. text editor A simple utility program that can be used to view or edit text files. text file A computer file containing only text in ASCll format. time stamp The time and date that identifies when a record was recorded. All SymphoniePLUS3 logger data files are time stamped with the beginning time of the interval. turbulence intensity (TI) A measure of the irregularity of air flow over a site. TI is related to wind speed and terrain and is defined as the ratio of the standard deviation of the wind speed to the mean of the wind speed. Average turbulence intensity is the arithmetic mean of the valid TI values for the reporting period. UTC Coordinated Universal Time (UTC) is the international time standard. It is the current term for what was commonly referred to as Greenwich Meridian Time (GMT). Zero (0) hours UTC is midnight in Greenwich, England, which lies on the zero longitudinal meridian. Universal time is based on a 24 hour clock. Afternoon hours such as 5 pm UTC are expressed as 17:00 UTC (seventeen hours, zero minutes). wind direction The compass direction, as compass points (NE, NNE, etc.) or degrees (0 to 360°) from which the wind is blowing. wind shear The stress that occurs when adjacent wind layers move at different speeds or in different directions. Wind shear is measured as the change in wind speed from a measured anemometer to a reference anemometer. The measured anemometer is normally the anemometer at the top of the tower. The reference 135 nrg_symphonieplus3_data_logger_manual.docx Rev 6 11 December, 2012 anemometer is the lowest anemometer on the tower. 136 nrg_symphonieplus3_data_logger_manual.docx Rev 6 11 December, 2012 Glossary Two Year Limited Warranty NRG Systems, Inc. (NRG) warrants its products for a period of two years from date of original purchase solely for the benefit of the original consumer purchaser. If this NRG product is determined to be defective in materials or workmanship, NRG will, at NRG‟s option, repair or replace this product without charge. This warranty does not cover damage due to improper installation or use, accident or misuse, lightning or damages due to any unauthorized service. This warranty also will not apply if any seal on any instrument or sensor is broken, if any cable has been severed, or the equipment was not adequately grounded. To return a defective product, call NRG Systems at the telephone number listed below for a RMA return authorization number. You must also have available when you call the serial number of the item as well as date of purchase. No products will be accepted for warranty work without a RMA number. The product must be returned, postage prepaid, to NRG with a brief description of the problem, RMA number and a return address with phone number. The foregoing limited warranty is given in lieu of all other warranties, express or implied. NRG specifically disclaims all implied warranties including, but not limited to, any implied warranties of merchantability and fitness for a particular purpose. The above limited warranty expressly excludes, and NRG shall not be liable for, any incidental or consequential damages caused by or related to the use of, inability to use or malfunction of this product. Prompt disposition: NRG will make a good faith effort for prompt correction or other adjustment with respect to any product which proves to be defective within the warranty period. First, contact NRG or the representative from whom the product was purchased and ask for a RMA number. NRG will also make a good faith effort for prompt service after the warranty period of a product has expired. Please contact NRG with the nature of the problem and serial number to obtain a RMA number. Inspect your shipments for damage to packages or missing packages immediately upon receipt. Record any such exceptions on the freight receipt of the delivery agent. If any contents are damaged or missing, report this in writing to the freight carrier and send NRG a copy of the damage report. If you insured the shipment yourself, report any damages to your insurance carrier. TEL: 802-482-2255 FAX: 802-482-2272 EMAIL: [email protected] 137 nrg_symphonieplus3_data_logger_manual.docx Rev 6 11 December, 2012 Glossary Sending Repair Items to NRG Systems INTERNATIONAL CUSTOMERS 1. Contact NRG Systems to obtain an RMA number (Return Material Authorization). Write the RMA number clearly on all shipping cartons. 2. Send your item to NRG Systems "Delivery Duty Paid" to NRG Systems (see address below) using a door-to-door courier service such as UPS, FedEx, or DHL. If the repair is not urgent, please send your package by Airmail. (Courier services deliver the package directly to us, customs cleared.) NRG will not accept packages shipped Freight Collect or with Collect charges. If NRG refuses the shipment, the courier service will charge your account return freight charges. DO NOT send return items by direct or consolidated air freight service with an airline. The cost for air freight may seem lower than the courier service, but air freight costs do not include customs clearance, airport handling, break bulk fees, and inland delivery to NRG Systems. 3. Attach a Commercial Invoice to the carton. The Commercial Invoice should include the following information: Name and address of the shipper. NRG Systems' complete address and telephone number as the consignee. Description of the items being returned. Quantity of each item being returned. Value for customs / insurance (purchase price or replacement cost). Number of cartons with respective weights and dimensions. Please include the following statement to avoid paying US import duties: "These items are being returned to their U.S. manufacturer. Country of manufacture and origin is USA, HTS CODE 9801.00.1012." 4. Pack your repair item in a sturdy packing carton. Tag each item with a brief description of the problem. 5. Insure your shipment against damage or loss in transit. Be sure to check the appropriate box and enter a "Value for Carriage" (insurance) on your air waybill. The value is the purchase price of the equipment or what it would cost to replace the equipment if the shipment were lost. Keep a record of the tracking number. Once your item arrives, we will assess the item and notify you of the repair cost. Any repair charges and freight costs, if applicable, are payable before NRG Systems will return the repaired item to you via door-to-door courier service. NRG Systems will send you a shipment advisement when the repaired item is shipped. International Customers: Before sending the repair item to NRG Systems, check with your local customs authorities about provisions in your country for exporting and re-importing repair items. Some countries treat repair shipments like new shipments and charge import duties and taxes again upon re-importation. Other countries have specific steps to follow or specific forms to complete which help reduce the import duties upon re-import of the item. US CUSTOMERS Please see items 1, 4, and 5 above. Send your item(s) to NRG Systems “Freight Prepaid and Insured.” Shipments sent freight collect will not be accepted by NRG Systems. NRG Systems, Inc. Attn: RMA- __________ 110 Riggs Road Hinesburg VT 05461 USA 139 nrg_symphonieplus3_data_logger_manual.docx Rev 6 11 December, 2012 Glossary GSM iPack Data Sheet GSM Cellular Account Information: PARAMETER Symphonie Serial Number GSM Service Provider PIN ORIGIN Found on inside front cover of Symphonie logger Name of company providing GSM service Provided by user, found on iPack label Programming the iPack for internet connection: PARAMETER ORIGIN Internet Service Provider (ISP) Name of company providing internet service Provided by ISP Provided by ISP, found on ISP‟s web page Earthlink.com Secondary DNS Number Provided by ISP, found on ISP‟s web page 0.0.0.0 Authentication Method Provided by ISP User Name Provided/approved by ISP [email protected] User Password Provided/approved by ISP Provided by user CINGULAR1 Primary ISP Phone Number Primary DNS Number Internet Time Server Name *99***1# 0.0.0.0. PAP Time-a.nist.gov Mailbox Name Provided/approved by ISP logger Mailbox Password Provided/approved by ISP Provided by ISP Boat6873 POP3 Server Name Pop.myisp.com Cwmx.com SMTP Server Name Provided/approved by ISP Patch Password SMTP Login SMTP Password Recipient’s E-mail Address Provided by user Provided by ISP Provided by ISP Provided by user 8J5!*66 [email protected] Boat6873 [email protected] Recipient’s Name Provided by user John Smith Sender’s E-mail Address Provided/approved by ISP E-mail Subject Line Provided by user Site 1234 – Derry Mountain Next Call Time Provided by user 20:45 Call Interval Provided by user 1 day [email protected] 141 nrg_symphonieplus3_data_logger_manual.docx Rev 6 11 December, 2012 iPack Data Sheet Account Information: PARAMETER SymphoniePLUS3 Serial Number Cellular / Satellite Service Provider PIN ORIGIN Found on inside front cover of SymphoniePLUS3 logger Name of company providing wireless service Usually provided by wireless service provider Programming the iPack for Internet connection: PARAMETER ORIGIN Name of company Internet Service Provider providing Internet (ISP) service Primary ISP Phone Number Primary DNS Number Provided by ISP Provided by ISP, found on ISP‟s web page Secondary DNS Number Provided by ISP, found on ISP‟s web page Authentication Method Provided by ISP User Name Provided/approved by wireless service provider Provided/approved by wireless service provider Provided by GPRS service provider (GSM only) Provided/approved by ISP or wireless service provider Provided by ISP Provided by ISP Provided by ISP Provided by user Provided/approved by ISP Provided/approved by ISP Provided by user Provided by user Provided by user Provided by user Provided by user Provided/approved by ISP Provided by user Provided by user Provided by user Provided by user User Password APN Name SMTP Server Name SMTP Login SMTP Password POP3 Server Name Internet Time Server Name Mailbox Name Mailbox Password Internet Time Server Recipient’s E-mail Address Recipient’s Name CC Email Address CC Email Address 2 Sender’s E-mail Address E-mail Subject Line Patch Password Next Call Time Call Interval 142 nrg_symphonieplus3_data_logger_manual.docx Rev 6 11 December, 2012 References Site Data Sheet Site Number Site Name Site Location Latitude Longitude Elevation Installation Crew Project Number Project Name Time Zone Magnetic Declination Prevailing Winds Phone Numbers: (hotel, cell phone, etc.) Site description (tree types, hills, etc.) Terrain Features (obstructions, distances from tower) Soil Type Installation Date Removal Date Field Contact Information Company Contact Person Address Phone Number Fax Number e-mail Address 143 nrg_symphonieplus3_data_logger_manual.docx Rev 6 11 December, 2012 Sensors Anemometers – Attach calibration sheets for any calibrated anemometers Anemometer 1 Anemometer 2 Anemometer 3 Anemometer 7 Anemometer 8 Anemometer 9 Anemometer 4 Anemometer 5 Monitoring height Serial Number Primary or Redundant? Mounting Orientation (degrees – magnetic) Boom length Calibration Date Slope Offset Logger Channel Number: Comments: Monitoring height Serial Number Primary or Redundant? Mounting Orientation (degrees – magnetic) Boom length Calibration Date Slope Offset Logger Channel Number: Comments: 144 nrg_symphonieplus3_data_logger_manual.docx Rev 6 11 December, 2012 Anemometer 6 References Wind Vanes Wind Vane1 Wind Vane 2 Wind Vane 3 Wind Vane 4 Wind Vane 5 Wind Vane 6 Monitoring Height Serial Number Mounting Orientation (degrees – magnetic) Boom Length Deadband Orientation (degrees) Logger Channel Number Comments Other Sensors Sensor 1 Sensor 2 Sensor 3 Sensor 4 Sensor 5 Sensor 6 Sensor Type Monitoring Height Serial Number Mounting Orientation (degrees – magnetic) Slope Offset Logger Channel Number Comment Tower Tower Type Height Diameter Comments Site Photographs Take pictures in 8 directions at tower base and several pictures showing the surrounding terrain. ____ ____ ____ ____ ____ ____ ____ ____ ____ North Northeast East Southeast South Southwest West Northwest Site & surrounding area 145 nrg_symphonieplus3_data_logger_manual.docx Rev 6 11 December, 2012 Sensor 7 References Time Zones 147 nrg_symphonieplus3_data_logger_manual.docx Rev 6 11 December, 2012 References 149 nrg_symphonieplus3_data_logger_manual.docx Rev 6 11 December, 2012 EU Declaration of Conformity 150 nrg_symphonieplus3_data_logger_manual.docx Rev 6 11 December, 2012 References References Some of our products incorporate software that is available in the open source community, including www.freertos.org (version 6.00) and www.savannah.nongnu.org. The information that follows is provided to comply with the terms of use. www.freertos.org FreeRTOS is a real time operating system available in the open source community and utilized in the iPackGPS. Source code is available from NRG upon request. www.savannah.nongnu.org We are using the lwIP lightweight TCP/IP stack in the iPackGPS. (Copyright (c) 2001-2004 Swedish Institute of Computer Science. All rights reserved.) Redistribution and use in source and binary forms, with or without modification, are permitted provided that the following conditions are met: 1. Redistributions of source code must retain the above copyright notice, this list of conditions and the following disclaimer. 2. Redistributions in binary form must reproduce the above copyright notice, this list of conditions and the following disclaimer in the documentation and/or other materials provided with the distribution. 3. The name of the author may not be used to endorse or promote products derived from this software without specific prior written permission. THIS SOFTWARE IS PROVIDED BY THE AUTHOR ``AS IS'' AND ANY EXPRESS OR IMPLIED WARRANTIES, INCLUDING, BUT NOT LIMITED TO, THE IMPLIED WARRANTIES OF MERCHANTABILITY AND FITNESS FOR A PARTICULAR PURPOSE ARE DISCLAIMED. IN NO EVENT SHALL THE AUTHOR BE LIABLE FOR ANY DIRECT, INDIRECT, INCIDENTAL, SPECIAL, EXEMPLARY, OR CONSEQUENTIAL DAMAGES (INCLUDING, BUT NOT LIMITED TO, PROCUREMENT OF SUBSTITUTE GOODS OR SERVICES; LOSS OF USE, DATA, OR PROFITS; OR BUSINESS INTERRUPTION) HOWEVER CAUSED AND ON ANY THEORY OF LIABILITY, WHETHER IN CONTRACT, STRICT LIABILITY, OR TORT (INCLUDING NEGLIGENCE OR OTHERWISE) ARISING IN ANY WAY OUT OF THE USE OF THIS SOFTWARE, EVEN IF ADVISED OF THE POSSIBILITY OF SUCH DAMAGE. 151 nrg_symphonieplus3_data_logger_manual.docx Rev 6 11 December, 2012 Index Index (.wmf file format), 83 Analog channels, SCM slots, 24 Anemometer, 28 Antenna Connection, 66 antenna test, 69 antenna test from SDR software, 69 ASCII files (.txt), 81 ATModem cable, 37 Authentication Method, 45 Backing up data files, 77 Batch processing, 82 Batch Processing” window, 90 Batteries, 15, 23, 24, 25, 26, 55, 74, 75 battery messages, 125 battery, changing iPack, 125 BER. See Bit Error Rate Bit error rate, 70 Cable, ATModem, 37 Call Interval, 50 Call Now function, 71 Call Schedule Programming, 49 Card Reader, MMC, 31 Card Reader, SD, 14, 77 Card slot, SD, 68 Cellular Signal Strength, 69 Changing iPack settings, 105 CHAP authentication method, 34 Checking iPack status, 69 Checking logger measurements, 68 Checking logger status, 67 Checking SD status, 68 Cleaning, 75 Clock, 23, 29 Clock battery, 23 Clock battery, longevity, 23 commas, 83 Configuration patch, 106 Configuration, iPack, 53 Connector, field wiring panel, 23 convert raw data files, 82 Counter channel, 24 Counter channels, SCM slots, 24 Creating a new site, 99 Creating a patch file, 105 Creating a site file manually, 100 Creating reports, 95 Data Encryption PIN Number, 30 Data Filtering window, 94 Data Flag types, 94 Data header, viewing, 78 Data Retriever software, 15, 17, 21 Data Viewer, SDR, 80, 81, 82 D-cells, 23, 26 Descriptive Headers, 82 Dial-Up iPacks, 14, 34, 44 Disabling descriptive headers, 82 Display, 23, 26 DNS, primary, 45 DNS, secondary, 45 Domain Name Service (DNS), 34 Editing Height, 29, 101 Editing Offset, 28, 86, 102 Editing reports, 97 editing scale factor, 101 Editing Serial number, 11 Editing Units, 29, 100, 102 Electronic Serial Number (ESN), 34 Electrostatic discharge (ESD), 17, 25 Erase, 68 ESD, 17, 23, 24, 25 Export file formats, 92 Exporting data, 91 Field Installation, 57 Field wiring panel, 23 Field Wiring Panel, 63 File, iPack (.ipk), 106 File, text, 135 filename.log, 82 Filtering all channels, 95 filtering data for export, 91 Fixing timestamps, 86 Grounding, 17, 18, 23, 25, 37, 57 GSM iPack, 33, 34, 39 GSM iPack Data Sheet, 34 Height, 29, 101 Hose Clamps, 62 Hourly averages, 82 Icing data, 94 Imperial units, 26, 27, 29, 102 Importing data, 89 Importing raw (.rwd) files, 90 Importing scaled ASCII (.txt) files, 91 Input connector, 23 Installing a Stand Alone Symphonie Logger, 58 Installing SCMs, 25 Installing the iPack to the Logger, 55 Internet Service Provider (ISP), 34, 45 Invalid data, 94 IPack, 13, 14, 15, 24, 25, 31, 33, 34, 37, 39, 41, 43, 44, 45, 46, 47, 49, 50, 53, 54, 55, 56, 58, 59, 60, 61, 67, 69, 71, 72, 73, 77, 78, 101, 106 IPack access port, 23 iPack battery, changing, 125 iPack configuration, 53 iPack configuration, Symphonie Data Retriever software, 37 iPack file (.ipk), 106 iPack settings, changing, 105 iPack, checking status, 69 iPack, Dial-up, 14, 34, 44 - 153 – NRG_SymphoniePLUS3_Data_Logger_Manual.docx 15 February 2011 iPack, GSM, 33, 34, 39 iPack, opening and closing, 127 ISP Programming, 43, 44, 46, 48, 50 Keypad, 22 Keypad Security, 30 Latitude & longitude, 30 Logger Status Screen, 67 Maintenance check list, 75 Measurement units, 29, 100, 102 MMC Card Reader, 31 Modify iPack Window, 44, 54 Mounting holes, 59 Mounting the Shelter Box, 62 Navigation keys, 22 Next Call Time, 50 Office Testing, 55 Offset, 28, 86, 102 on-air time, 72 opening and closing the iPack, 127 PAP authentication method, 34 Patch file, 105 Patch files, 105 Patch Password, 49 Personal Identification Number (PIN), 30, 34, 41 Phone number, secondary ISP, 45 Photovoltaic panel, 56, 60 POP3 server, 34, 47 Primary DNS, 45 programming adapter, 23 PV panel, 56, 60 raw data files (.rwd), 77 Raw Files working directory, 77 Reader, MMC Cards, 31 Reader, SD Cards, 14, 77 Received Signal Strength Indicator, 70 Report types, 95 Reports, 95 Reset Button, 23 RSSI, 70 Scale factor, 101 scaled data working directory, 81 SCM slots, analog channels, 24 SCM slots, counter channels, 24 SCMs, 15, 17, 23, 24, 25, 26, 86 SCMs, installing, 25 SD Card, 13, 14, 15, 17, 21, 24, 30, 31, 68, 75, 77, 83, 101 SD card reader, 31 SD Card reader, 31 SD Card Reader, 14, 77 SD card slot, 68 SD, checking status, 68 SDR main window, 77 Secondary DNS, 45 Secondary ISP Phone Number, 45 security key, 30 Sending a patch file, 107 Sensor Connection, 64 Sensor connections, troubleshooting wizard, 86 Sensor history, troubleshooting wizard, 86 Sensor lists, 26 Sensor patch, 105 Sensor wires, 64 Serial number, 11 Serial number, electronic (ESN), 34 Setting & verifying, latitude & longitude, 29 Setting & verifying, logger clock, 29 Setting & verifying, site altitude (elevation), 29 Setting & verifying, site number, 29 Setting & verifying, time zone, 29 SI (metric) units, 26, 27, 29, 102 Signal conditioning module (SCM), 15, 17, 23, 24, 25, 26, 86 SIM card, GSM, 33, 39, 41 site commissioning data, 79 Site file, 99 site files, 77 Site information editor, SDR, 100, 101, 102 Site information parameters, SDR, 100 Site information, SDR, 79, 99, 100, 101, 102 Site maintenance, 75 Site Visits, 75 SMTP Server Name, 46 Standard deviation, 135 Standard Time, 29, 67 Static, 17 Status menu, 67 Status, iPack, 69 Status, SD card, 68 Symphonie Data Retriever software, 15, 17, 21 Symphonie Data Retriever software, iPack configuration, 37 System requirements, Symphonie Data Retriever software, 31 tabs, 83 TallTower, 57, 58 Technical support, 11, 31 Text file, 135 time server, 72 Time zone, 101 Tools, field installation, 57, 75 Troubleshooting wizard, SDR, 86 Unfiltering all data, 95 Units, 29, 100, 102 Units, measurement, 29, 100, 102 USB port, 31 User name, 45 User password, 45 version number, SDR, 78 View database, 89 Viewing Data Header, 78 Warning LED, clock battery, 23 154 nrg_symphonieplus3_data_logger_manual.docx Rev 6 11 December, 2012 Index WAsP data, 92 Wind shear, 135 WindLinx, 13, 14, 33, 34, 37, 38, 39, 43 Wiring, 64 working directory for raw files, 83 working directory for Reports, 83 working directory for saved TXT files, 83 working directory for Site files, 83 yagi antenna, 69 155 nrg_symphonieplus3_data_logger_manual.docx Rev 6 11 December, 2012