1
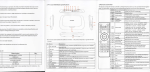
DIAGNOSIS REVOLUTION
PC-BASED TESTER REPLACING
TRADITIONAL HAND-HELD TESTER
DIAGNOSIS REVOLUTION
USER MANUAL
(For diagnosis with PC)
V200602
WIN-STAR (For diagnose)
System Requirements ....................................................G1-1
WIN-STAR Interface ......................................................G1-1
Accessory list ................................................................G1-2
Installation & Operation manual of Feedback file ...............G1-3
Software installation .......................................................G1-8
Software activation with activation code .........................G1-10
Software and Hardware /Firmware upgrade ....................G1-13
Software upgrade with charge .......................................G1-15
Hardware /Firmware upgrade ........................................G1-16
Upgrade Procedure of WIN-STAR Firmware ................... G1-18
Instruction for ADRC ....................................................G1-23
Troubleshooting ..........................................................G1-28
w w w. i c m . c o m . t w
DIAGNOSIS REVOLUTION
3.
In “add or remove program”
Operation system
Windows XP or 2000 is required
Find the indicated car model
CPU
CPU Pentium III 1GHz or higher
and click “Remove”.
Memory
256MB RAM or higher
Hardware requirement
Free space more than 1GB
Display
Resolution 1024*768
w w w. i c m . c o m . t w
w w w. i c m . c o m . t w
System Requirements
If there is no RS232 serial
port but USB com port in
your computer, please buy
a USB converter to transfer
RS232 to USB
4.
WIN-STAR Multiplexer
The program is removed
successfully.
A dialogue window will pop out
RS232 serial port
and ask for your confirmation.
Click “Yes” and close
all the windows after the process.
Multiplexer
RESET
RESET reconnection button
Power signal light
Hardware upgrade button
Diagnostic System
DW-2002-TW-V1
DC12V 0.7SA
U
Rubber cover
Stabilizing Rings
DIAGNOSIS REVOLUTION
G1-1
50 PIN connector plug
for main connector cable
DIAGNOSIS REVOLUTION
G1-34
Accessor y List
Using Timing:
You may not install the program successfully due to limited free space or
downloading program not complete. You will be required to remove the program
and reinstall it.
Carrying box
E-21 Basic accessories
Program CD
w w w. i c m . c o m . t w
w w w. i c m . c o m . t w
II.Program Removal
Multiplexer
Correct removal process
1.
Click “Start” at down left bottom.
→ open “Control Panel”
Main Connector Cable for
Diagnostic Connector
38 PIN Diagnostic Connector
(Free with BENZ software)
RS232 Computer
Connector Cable
Sprinter 14 PIN
Diagnostic Connector
16 PIN OBD II
Diagnostic Connector
4 PIN Diagnostic Connector
(Free with BENZ HHT old car model software)
(Optional purchase)
20 PIN Diagnostic Connector
(Free with BMW-S1 software)
2.
In “Control Panel”
Find “add or remove program” and
2*2 PIN Diagnostic Connector
(Free with VW/AUDI software)
4 PIN Diagnostic Connector and Extension
Signal Cable
(Free with VOLVO old car model software)
23PIN, 17PIN Diagnostic Connector
(Free with TOYOTA software)
click to open.
12 PIN Diagnostic Connector
(Free with MITSUBISHI software)
Power Supply Cable
(Free with TOYOTA or MITSUBISHI software
for old models)
USB converter
(Optional purchase)
DIAGNOSIS REVOLUTION
G1-33
DIAGNOSIS REVOLUTION
G1-2
Purpose: This is one of our top special designs to control your diagnosis
condition even if we are far from you.
w w w. i c m . c o m . t w
w w w. i c m . c o m . t w
Installation & Operation manual of Feedback file
Case III:Operation System with “WINDOW XP SP2” following the server (the client)
Solution:
a.“Start” Menu → Settings → Network connections → Local Area Connection
b. You should find some setting locations are different from WINDOW XP.
Please find his information engineer to complete the required check or the same
setting as below:
I. Installation Procedure
Option 1 (CD disc following WIN-STAR diagnosis program):
1.When CD runs automatically, please follow its steps to finish two files installation (one
for WIN-STAR diagnosis program; the other for Feedback file)
2.If CD doesn't run automatically , please click your CD/DVD ROM → “Feedback_F0605”
folder → “Installer” folder → setup.exe → to follow its steps to finish all programs
installation
Option 2 (Download by internet)
1. Please make a folder named “Feedback” and download Feedback file into this folder
from our website (www.icm.com.tw → Downloads)
2. And then, please find “f0605.exe” in “Feedback” folder and unzip it into “Feedback” folder.
3.Please install this file from “Feedback” folder → “Installer” folder → setup.exe → to
follow its steps to finish all program installation
Note: You only need to install Feedback file one time and it will record diagnostic vehicle
data automatically for possible troubleshooting.
II. Operation Procedure
Option 1 (Automatic by e-mail)
1.To select the vehicle make you need
from “Start” Menu → Programs →
Win_star → Feedback_f0605
3.Still disconnection:
Please confirm the computers of the viewer (the supplier) and server (the client)
are both on line when ADRC is ready to run.
Note: Please often change the password of the server (the client) for use to protect
its private data security in the internet.
DIAGNOSIS REVOLUTION
G1-3
DIAGNOSIS REVOLUTION
G1-32
w w w. i c m . c o m . t w
w w w. i c m . c o m . t w
Figure 6
To type in the same data shown at
Figure 6 and click “OK”
2.Please confirm your internet is
connected and e-mail account has
been set.
3.After selecting car model and filling
in basic data, please click “send”
button and the data will be back to us
for further analysis.
Figure 6
Figure 7
So you will find VNC menu to show up.
Option 2 (Manual by e-mail)
Outlook Express for example
If you have trouble at Option 1, you
could try Option 2.
1.To create a mail as like figure 1
figure 1
2.To key mail account of receiver
and mail title (figure 2)
Figure 7
figure 2
DIAGNOSIS REVOLUTION
G1-31
DIAGNOSIS REVOLUTION
G1-4
w w w. i c m . c o m . t w
w w w. i c m . c o m . t w
3. Please attach the feedback file.
Figure 4:
To tick the first circle means the firewall
for PC is working so that following
setting is necessary.
figure 3
4. From My computer → C drive
Figure 4
figure 4
5. To select “Win_star” folder
figure 5
Figure 5
DIAGNOSIS REVOLUTION
G1-5
DIAGNOSIS REVOLUTION
G1-30
w w w. i c m . c o m . t w
w w w. i c m . c o m . t w
6.To select ” Log” folder
figure 6
Figure 2
7. To select the requested
vehicle make
Taking Smart as an example:
Figure 3:
No tick in this icon means to be fitted
to run VNC program without extra
setting.
figure 7
8. To select all files
Figure 3
figure 8
DIAGNOSIS REVOLUTION
G1-29
DIAGNOSIS REVOLUTION
G1-6
w w w. i c m . c o m . t w
w w w. i c m . c o m . t w
Troubleshooting
9. To describe your trouble briefly
with your basic contact data
I. Fail to disconnect ADRC
(Automotive Diagnosis by Remote Control)
1.To confirm IP address of VNC server (the client) by three conditions below:
Case I: With the router (NAT) following the server
Solution: The client must find the real IP address. So please surf our website
(www.icm.com.tw) and its IP address will show up at down right side of the front page
(language menu)
figure 9
10. Please confirm your internet is
connected and e-mail account
has been set in advance
before to send it out.
Case II: With modem directly W/O the router following the server
Solution: The client could find IP address each time when he moves the mouse over
VNC icon with green “V” letter at the down right side (task bar).
Note: If the client doesn’t find VNC icon at this task bar, please open it first from
“Start” Menu → Programs→ RealVNC → Run VNC Server
Case III: With the same router (NAT) following the server and viewer
Solution: The client always gets virtual IP address each time when he moves the mouse
over VNC icon with green “V” letter at the down right side (task bar).
Note: If the client doesn’t find VNC icon at this task bar , please open it first from
“Start” Menu → Programs → RealVNC → Run VNC Server
2.To confirm to disable VNC's firewall
Note: Please refer to this website to help you disable your firewall successfully.
Website:http://www.portforward.com/english/routers/port_forwarding/routerindex.htm
Case I: With the router (NAT) following the server
Solution: Finding his information engineer to disable VNC’s firewall
Case II: Operation System with “WINDOW XP” following the server
figure 10
Solution:
a.“Start” Menu → Settings → Network connections → Local Area Connection
(Figure 1 & 2)
Figure 1
DIAGNOSIS REVOLUTION
G1-7
DIAGNOSIS REVOLUTION
G1-28
A.To be a viewer (to control the distant PC with WIN-STAR)
1.To contact your server (client) to connect the internet
2.To execute VNC Viewer from Start Menu → Programs as the figure below
or by its shortcut:
B. To be a server (to be controlled with his WIN-STAR by distant viewer)
1.To contact your viewer (supplier) to connect the internet
2.To execute VNC Server from Start Menu → Programs as the figure below
or by its shortcut:
Software Installation
w w w. i c m . c o m . t w
w w w. i c m . c o m . t w
II. How to run ADRC (Automotive Diagnosis Remote Control)
after downloading VNC program?
C orrect installation process
This example is based on Windows XP.
Please follow every step to complete the installation.
1 Start the computer.
2 Insert WIN-STAR program CD
Installation window pops out.
Click “Next”.
If the installation window does not
pop out, click “My Computer” and
find “CD drive” - “Installer” folder
and select “setup.exe” to execute
installation.
Continues
In “Connection details”, you are
required to type VNC server IP address
which displays the vehicle diagnosis
trouble.
※ How to know its IP address required
when you are ready to control this
computer?
Please check Troubleshooting I (P.28).
3 Choose the destination folder
to install files
The recommended path is
C:\Program Files\Win_star
Please click “Next”.
In the VNC Authentication dialog, enter
the password of the client’s computer
to control its WIN-STAR or MAGUS
diagnosis software running remotely.
DIAGNOSIS REVOLUTION
G1-27
DIAGNOSIS REVOLUTION
G1-8
w w w. i c m . c o m . t w
w w w. i c m . c o m . t w
Note:
To restart the computer may be
necessary.(Figure 8)
4 Installation confirmation
Please click “Next”.
Figure 8
After running VNC Server at the first
time (from Start Menu → Programs →
RealVNC → Run VNC Server), you
will be asked to enter a password for
VNC as like Figure 9-10.
5 Click “Finish” to accomplish
the process
The installation is completed and
Figure 9
reboot is not required.
Please type the password you
indicate with numbers or letter
(Any mark is not allowed).
Figure 10
DIAGNOSIS REVOLUTION
G1-9
DIAGNOSIS REVOLUTION
G1-26
1.
2.
Please connect your WIN-STAR with your laptop and the car, and make sure
that the power supply light of the multiplexer is on.
Taking Benz program as an example:
Start WIN-STAR program (Please be patient that due to graphic-base it will
take some time to run the program),and then please follow the procedure
below.
Figure 5
3.
Click “Install” as shown at Figure 6
After starting the program, the 14
serial No. will show up automatically in the initial screen (as the
right picture). Please write down
this number and click “OK” button.
Then take this number to get the
activation code from ICM
website.
Figure 6
After the program is installed, you will
see Figure 7 and click
“Next”.
4.
Please find some computer
allowing Internet surfing to access
our website(www.icm.com.tw)
Then choose the language you
need and enter “Registration”on
the upper right button.
Figure 7
DIAGNOSIS REVOLUTION
G1-25
DIAGNOSIS REVOLUTION
G1-10
w w w. i c m . c o m . t w
w w w. i c m . c o m . t w
Softwar e activation with activation code
IMPORTANT STEP - to mark with a tick
in the two lower boxes as shown at
Figure 5 and click “Next”.
w w w. i c m . c o m . t w
w w w. i c m . c o m . t w
5.
And select “English.”
Figure 2
6.
Then enter “WIN-STAR.”
Figure 3
7.
Accept the default values shown
at Figure 4 and click “Next”.
Please key in 14 serial No. and
click “OK” button when this
screen appears.
Figure 4
DIAGNOSIS REVOLUTION
G1-11
DIAGNOSIS REVOLUTION
G1-24
ADRC (Automotive Diagnosis Remote Control) is a new trend in the global automotive
aftermarket and made based on the mechanics' demand. It is an assistance function with
that suppliers enable to provide the best and efficient service for their clients by
remote control on the network while diagnosing WIN-STAR or MAGUS products on car with
repair problems if the suppliers can’t go to the client’s workshop.
Before accessing ADRC, we need the basic VNC program.
w w w. i c m . c o m . t w
w w w. i c m . c o m . t w
8.
Instruction for ADRC
You will be required to fill in
your information when to ask
for password at the first time.
You will not need to do that
again unless your multiplexer
number (10 codes) is
changed.
I.How to download and install VNC program?
VNC is a remote control program that can allow one computer on the network to control
another computer in other places.
Procedure:
1. VNC must be installed in your computer.
2. A password must be entered each time in order to prevent anonymous access to your
computer.
9.
3. The IP address and password assigned to VNC program must be given to the remote
administrator.
How to get VNC Server IP address required?
Please check Troubleshooting I. (P.28)
This screen will display your
activation code, the software
you purchase, and important
notes.
4. Where to download?
Contact I. C. M. Inc. or the supplier
Please install VNC program
(vnc-3.3.7-x86_win32.exe) after
downloading ADRC package.
Click “Yes” to begin the installation.
You will see the setup window.
10.
Then click “Next”. The following window
will display the default location
(Figure1~3).
Please key in this activation
code (21 codes) to your PC
with WIN-STAR software and
click“OK”. When the activation
code is correct, it will display
the software version and you
are allowed to use its diagnosis
functions directly.
Note: All letters are capital.
Figure 1
DIAGNOSIS REVOLUTION
G1-23
DIAGNOSIS REVOLUTION
G1-12
5. To select the update file for
Press “OK.” Then you can
enter the program and start
to diagnose cars.
w w w. i c m . c o m . t w
w w w. i c m . c o m . t w
11.
upgrade from C:\Program Files
\Win_star → CAN V6.56
After replacing Computer (Laptop or Desktop):
To reinstall WIN-STAR program, you need to connect the multiplexer
and the car to request the activation code one more time.
(The WIN-STAR program in the original computer will not be activated
any more.)
6. After confirming the upgrade
file, please click “Upgrade”
Software and Hardware/ Firmware upgrade
Software upqrade without charge
Note: To remove the older version is not requested.
Option 1 (Download by internet — www.icm.com.tw →Downloads →
SOFTWARE DOWNLOAD)
1.To make a folder named “software upgrade” for example
7.
Hardware upgrade is completed.
→
DIAGNOSIS REVOLUTION
G1-13
DIAGNOSIS REVOLUTION
G1-22
1.
2.To download upgrade software in need to the desktop of your PC
w w w. i c m . c o m . t w
w w w. i c m . c o m . t w
CAN Board Upgrade:
Start the upgrade program
Start hardware upgrade program
from Start Menu → Programs
→ Win_star folder
→ Firmware v3.2
2.
Choose “Upgrade CAN BUS
Hardware”.
3.To click twice this software at the desktop and unzip it into “software upgrade” folder by
“Browse” button
1→
2→
3→
4→
5→
6
3. This screen displays the current
version of your CAN board. To
make sure current version is
older than the one you are ready
to upgrade ,and click “Start
CAN upgrade.”
4.
Please click the folder to
select the upgrade file.
DIAGNOSIS REVOLUTION
G1-21
DIAGNOSIS REVOLUTION
G1-14
7.
w w w. i c m . c o m . t w
w w w. i c m . c o m . t w
4.To execute upgrade installation from “software upgrade” folder
“Installer” folder → setup.exe →
to complete this installation by its following steps
Now, please follow the procedure
in the program to execute the
hardware upgrade.
Option 2 (Upgrade by CD disc)
Please follow #4 in Option 1 after inserting the upgrade CD.
8. Please note that the new
Software upgrade with charge
multiplexer is designed with “U”
button instead of putting magnet
on it and the procedure is as
same as the program
description.
WIN-STAR programs can be upgraded by using CD-disc or downloading
the program and request the activation code from our website (http://www.
Icm.com.tw). Broadband network is suggested.
To access to the new purchased software, please connect WIN-STAR to
the computer with the car and then start WIN-STAR software.
9. Finally, please check again if
Then click the “UPGRADE” button on your upper right side
Input “5577691” in the small pop out window and another 14 serial No. will
come out. After this procedure, please refer to “software activation with
activation code(P10) to execute purchased software upgrade
DIAGNOSIS REVOLUTION
G1-15
your hardware is upgraded
successfully. If yes, please
select “EXIT” and close the
program. If not, please select
“Upgrade again” to re-execute
the hardware upgrade procedure.
DIAGNOSIS REVOLUTION
G1-20
Please click the folder to
select the upgrade file.
Hardware / Firmware upgrade
To upgrade the software with new diagnosis systems, the hardware upgrade is
required sometimes.
Installation Procedure of WIN-STAR Fir mware
Procedure I (To install the main program):
Taking Firmware v3.2 as an example:
Option 1 (CD disc):
1.Place the firmware upgrade disc into your CD-ROM (or DVD-ROM) drive.
2.The autorun function will start up the program.
3.If it doesn't run automatically, please follow the procedure as below :
To execute your CD ROM or DVD-ROM drive → “Installer” folder → “setup.exe”
to complete the installation.
5.
To select the update file for
upgrade from C:\Program
Files\Win_star→ “Win_star
VERSION 7.0 TEX”
6.
After confirming the upgrade
file, please click “Start
upgrade procedure”.
Note: Please confirm installation destination is C:\Program Files\Win_star\
Firmware v3.2\
Option 2 (Download by internet)
1.Please add a folder “Firmware” at the desktop of your PC.
2.To download “Firmware” main program from our website (www.icm.com.tw →
Downloads →FIRMWARE DOWNLOAD) and unzip into “Firmware” folder.
3.Please accomplish installation from “Firmware” folder→ “Installer” folder→
“setup.exe” .
Note: Please confirm installation destination is C:\Program Files\Win_star\
Firmware v3.2\
DIAGNOSIS REVOLUTION
G1-19
DIAGNOSIS REVOLUTION
G1-16
w w w. i c m . c o m . t w
w w w. i c m . c o m . t w
4.
Upgrade Procedure of WIN-STAR Firmware
w w w. i c m . c o m . t w
w w w. i c m . c o m . t w
Procedure II (To download and execute the upgrade file you request, for example:
Main board for WIN-STAR/E-21 or CAN board for Mercedes-Benz)
It can be divided in two: Main board and Mercedes-Benz CAN board upgrade.
1.Please download the sub-program requested from our website
(www.icm.com.tw → Downloads → FIRMWARE DOWNLOAD)
into “Firmware” folder you made.
2.To unzip this sub-program from “Firmware” folder and confirm its destination is
C:\Program Files\Win_star (default)
Example 1: hw7.exe (sub-program)
for WIN-STAR/E-21 Main board
Main Board upgrade:
1. Start hardware upgrade program
from Start Menu → Programs
→ Win_star folder
→ Firmware v3.2
2. Choose “Upgrade Main Board
Hardware” to execute firmware
upgrade of the main board.
3. This screen displays the current
Example 2: can656.exe
(sub-program) for WIN-STAR/
Mercedes-Benz CAN board
DIAGNOSIS REVOLUTION
G1-17
version of your multiplexer. If
you confirm this version is older
than the one you are ready to
upgrade, please click “Start
WIN_STAR HW upgrade”.
DIAGNOSIS REVOLUTION
G1-18