1
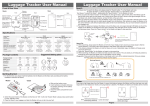
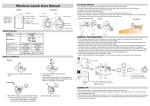
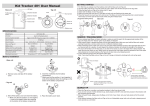
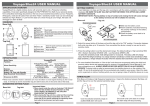
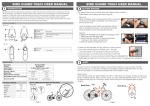
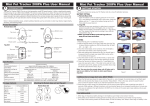
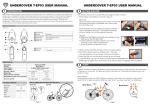
Pet Mini Tracker User Manual Front & Rear View Master Slave Front Distance indication Hanging hole for strap Buzzer Right LED Mute Button Back Front Back Left LED 2. On the back of the Master Switch to the desired distance detection setting on the back as shown in the diagram. It will now start pairing with the Slave assuming both units are on. Once it beeps and flashes simultaneously, press the “Search Button”, it is now paired and in “Stand by” mode. 3. Place the Slave into the provided silicon case and strap with the provided velcro strap through the two ventilation cuts at the back of the silicon case. 4. Now Strap the Slave onto the Pet’s collar using the Velcro strap. IMPORTANT: Leave Slave on the back of the Pet’s neck facing up for best reception/detection. Signal Status indicator Long Distance Search Button Short Distance Search Under Standby mode, press the “Search” button once on the Master. The LED Signal statuses will start blinking left and right as it tries to link up with the Slave to find it’s approximate position. When the Master links up, it will show the signal strength and direction via the LED indicators as well as via Sound. The closer the Master is to the Slave the more rapid the beeping sound and LED signals. Use the LED indicator and the sounding melody to help you track down the Slave. Power off Hanging hole for strap Signal Indicator Battery cover Clip Specifications Pet Mini Tracker 505P Alert & Search 0 ~ 200m/656ft Short Distance : 25± 10m / 82± 32ft Long Distance : 50± 10m / 164± 32ft Master(M05AM) x1 Slave(S05) x1 LR44x2 LR1130x2 30 days(8hrs) 30 days(8hrs) Over 90 days Over 90 days 75± 3(db) 95db± 3(db) Vibration Motor 52.8x39x13.2mm 19x29x7.9mm 2x1.6x0.52inch 0.7x1.1x0.3inch Model Name Function Search Range Alarm Distance Devices Battery Type Battery Life Time with Standby Battery Life Time with Sleep Beep Sound (at 10cm/3.9inch) Built-in Dimension (L/W/H) Package Contents Press and release working range 0~200m/656ft (line of sight) (the distance may be short depends on the terrain environment ) Search Tip: a) While searching, always place the Tracking in front of you pointing forward. Turn slowly around you following the direction indicator. Once pointed at the right direction more LED’s will be shown and the Melody tone will increase rapidly. b) If the distance between the Master and Slave is out of detectable range and becomes . undetectable. The Master will then beep every second to remind you to keep searching. c) Press the “Search” Button on the Master again if you would like to stop searching. d) While in search mode the Slave makes a low beeping sound every second. This can assist you in finding its location via sound when near by. (Suggestion: Press and hold the mute button on the Master to listen for the Slave’s beeping sound.) Suggested Setting place Model Name 505P Master Unit 1 set Master Slave 1 set Slave Unit LR44x2 Batteries LR1130x2 User manual During Search Strap/Silicon Sleeve 1/1 Correct Holding 1. For first time usage please insert the batteries into the Master as shown accordingly to the installation instructions below. ( The Slave is already fitted with batteries, simply pull the plastic tag out to activate. Use instructions below for battery replacements in the future) - Master *** Do not sway Master, always make sure its in forward position when turning and searching. Holding Way - Slave 2 Correct Holding 2 1 *** Do not cover the Master 1 3 3 1. Slide out the battery cover. 2. Insert batteries (included) following the polarity markings in the battery compartment. 3. Close the battery compartment cover as shown. 1. Open from the fillister on the button of housing or curve side by your nail, like open shell. 2. Insert batteries (included) following the polarity markings in the battery compartment. 3. Close the battery compartment cover as shown. Wrong Holding Alert If the Master makes a high frequency beeping tone and starts vibrating, it means the distance between the Master and the Slave is over the set alert distance. (Check the specification for Alarm distance settings.) Alarm from Master and Slave Over 25±10m(short distance) . Distance Alert will sound! 50±10m(long distance) Stop alarm (beep) if both devices comes within safe range again. Mute Press the Mute button on the Master for short range detection by way of listening to the Slave’s alarm sound. Wake up / Standby a.) Switch the Master’s power on, and pull the plastic power strip off the Slave to start the synchronizing process. The Signal indicator on the Master will start blinking simultaneously which will take 8~15 seconds to pair up provided the Slave is within range of the Master and NOT being blocked. After the pair up, the Master will enter search mode so press the Search button to go back to Standby mode. b.) Under Standby mode, the Master’s LEDs will blink every second. However if the Master gets turned off and on again, it will enter Search mode automatically. If the Master cannot pair up with the Slave within 50 seconds, due to blocked or out of range signals, it will enter Standby mode and beep to indicate pairing failure due to loss of signal. The search button can be pressed every 50 seconds for retrying pairings. c.) Slave will beep when it’s being tracked or when out of range. Under Standby mode, the Slave’s LED will blink every second to indicate its battery is still healthy. Important: Please turn off the Master when not in use to save battery life, the Slave will automatically go into sleep mode to save battery until the Master tries to pair up again. Out of range or Loss signal a.) The Master will beep, vibrate and blink it’s LED for 20 seconds when out of range or loss of signal is detected, the Master will then go into sleep mode automatically if it cannot detect the Slave. b.) The Master will then beep once every two minutes to notify the user no Slave has been paired. c.) To pair up or find the Slave with the Master, press the search button to go to wake-up process. d.) The Slave’s LED blinks for 20 seconds and goes into sleep mode when not paired. Low battery When the Master and Slave unit is under low battery mode, it will beep in a interval of every 2 minutes interval, please change the battery. Important: Under low battery mode, abnormal function will occur and the units may not function properly. Please Note a. The connection range is based on a clear line of sight. Actual range will vary depending on usage, environment and location. b. When the Master and Slave units are turned ON, it takes 8 to 15 seconds for the synchronization. c. The disconnection alarm from the Master unit will sound every 2 minutes after disconnection of 30 seconds for power-saving purposes. Care and Maintenance a). Keep the device dry. Precipitation, humidity, and all types of liquids/moisture can contain minerals that may corrode electronic circuits. If your device gets wet, remove the battery, and allow the device to dry completely before replacing. b). Do not use or store the device in dusty, dirty areas as its moving parts and electronic components can be damaged. c). Do not store the device in hot areas. High temperatures can shorten the life of electronic device, damage Batteries, and warp or melt certain plastics. d). Do not store the device in cold areas. When the device returns to its normal temperature, moisture can from inside the device and damage electronic circuit boards. e). Do not attempt to open the device other than as instructed in this guide. f). Do not drop ,knock or shake the device. Rough handling can break internal circuit boards and fine mechanics. g). Do not use harsh chemicals, cleaning solvents,or strong detergents to clean the device. h). Do not paint the device. paint can clog the moving parts and prevent proper operation. i). Do not put the Master and Slave away as it’s made to stay with your loved Pets. j). Search, detection, and alarm range will depend on the terrain environment. k). If the beeping sound is not loud enough, the batteries may be getting flat. Change to new batteries for louder alarm sounding. l). This product only assists in providing a warning alarm to remind the user. It does not guarantee to prevent theft or robbery of personal property. m). If you want to use the device during flight trips, please comply with the flight safety law according to each country. n). We reserve the right in changing the specification of the hardware and software designs to manuals at any time and without prior notice. Information in this document is subject to change without notice. o). This product operational temperature is between 32℉ ~131℉(0˚C~50˚C). Storage Temperature is between -4℉~185℉(-20˚C~85˚C) . Recycle: The Batteries provided in this product should be recycled to protect the local environment. Please contact your local recycle department for detail. Warning: Do not put the batteries into the fire or heat sources. It may cause danger or even explosion. FCC Certifications Federal Communication Commission Interference Statement This equipment has been tested and improved to comply with the limits of a Class B digital device, pursuant to Part 15 of the FCC Rules. These limits are designed to provide reasonable protection against harmful interference in a residential installation. This FCC Certifications equipment generates, uses and can radiate radio frequency energy, if installed and used not in accordance with the instructions, may cause harmful interference to radio communications. However, there is no guarantee that interference will not occur in a particular installation. If this equipment does cause harmful interference to radio or television reception, which can be determinedly turning the equipment off and on, the user is encouraged to try to correct the interference by one of the following measures: ■Reorient or relocate the receiving antenna. ■Increase the separation between the equipment and receiver. ■Connect the equipment into an outlet on a circuit different from that to which the receiver is connected. ■Consult the dealer or an experienced radio/TV technician for help. This device complies with Part 15 of the FCC Rules. Operation is subject to the following two conditions: (1) This device may not cause harmful interference, and (2) this device must accept an interference received, including interference that may cause undesired operation. FCC Caution: Any changes or modifications are not expressly approved by the party responsible for compliance which could void the user's authority to operate this equipment. EU Declaration Conformity This product is carrying the CE-Mark in accordance with the related European Directives. 91E-02B1-U50G12