1
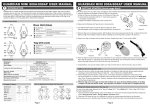
GUARDIAN ANGEL USER MANUAL 1 INTRODUCTION Guardian Angel is a digital wireless personal tracking device that keeps children, pets, keys and other valuables close by your side. The Guardian Angel comes with a Base tracking unit and four Tag units that are each attached to tracked items (e.g. keys). This product can alert you when a tracked item goes out-of-range and can search for the item within a 1,600 foot radius.. A child or an elderly person can also press a panic button on the Tag unit to call/alert the Base unit. KEY FEATURES - Works indoors and outdoors. - Lightweight and easy-to-use. - No assembly or installation (only batteries). - Uses safe 2.4 GHz RF technology. - Base unit tracks up to four tags. - Out-of-range distances for a Tag unit can be configured at 16 feet, 32 feet, or 64 feet (with some variability due to terrain and other factors). - 1,600 foot search radius (distance will vary depending on terrain and other factors.). - Base unit has a direction indicator to facilitate tag search. - Alerts are issued with a 95 dB alarm and vibration. - Tag units can issue a Panic/Stress alert to the Base unit. SPECIFICATIONS Model Name Search Range Function Alarm Distance Base Unit / Tag Unit Specs Battery Type Battery Life Time on Standby Beep Sound (at 10 cm / 3.9 inches) Vibration Dimensions (L/W/H) 807G 0~500m/1600 ft Alarm & Search 1 to 4 Tags Near:32’±16’ Middle:64’±32’ :160’±64’ Base (M07A) Tag (S08A) AAA x 2 CR2032 30 days (8 hrs) 60 days (8 hrs) 95 dB 95 dB None Vibration Motor 3.75” x 2.56” x 0.56” Page 1 2.38” x 1.5” x 0.42” PACKAGE CONTENTS 807G2 Model Name 1 pc Base Unit 2 pc Tag Unit AAAx2 Batteries CR2032x2 Strap 2 Hook/Ring 1/1 User manual 807G4 1 pc 4 pc AAAx2 CR2032x4 3 1/1 OVERVIEW Base Unit 1 Back Front 1 9 2 3 10 5 6 5 6 4 7 8 2 3 4 11 Tag Unit 1 Front 7 8 9 10 11 Back 1 2 2 3 4 3 5 4 6 5 SUGGESTED LOCATION TO PLACE BASE / TAG units Tag Unit Base Unit Page 2 6 Strap attachment Connect status LED Power switch Search/Set button Direction indicator Configuration button Signal strength lights Mute button Speaker Clip Battery cover Ring attachment Speaker Connect status LED Panic button Power switch Battery cover 2 GETTING STARTED - Out-of-range Alerts This section shows how to quickly setup and trigger an alert condition when the Base unit is separated from the Tag units. 1. Insert the batteries into the Base unit and the four Tag units. - Slide out (remove) the battery covers on the Base and Tag Units. - Insert batteries (included) according to the polarity markings (+/-) in the battery compartments. - Replace the battery compartment covers on both units. Base unit Install Battery - + Tag unit + - Install Battery Remove Cover Replace Cover Remove Cover Replace Cover 2. Switch “On” the power button on the Base and Tag units. Disregard any alerts while the Base unit and 4 Tag units are linking up. After the Base and all Tags link up, they will display blinking lights at regular intervals. 3. Place the Tags in a stationary location, and with the Base unit in hand, walk away from the Tags. At about 64 feet, the Base unit will begin to vibrate and beep. The Tag units will also beep. 4. Return the Base unit to the vicinity of the Tag units and all beeping will cease. 64 Feet Page 3 ADDITIONAL NOTES ON OUT-OF-RANGE ALERTS a) When the Base loses the signal to a Tag unit (i.e. out-of-range), the Base unit beeps and vibrates for 10 seconds; the Tag unit beeps for 15 seconds. The Base unit will not alert continuously while the Tag is out-of-range, but will continue to issue a beep every 30 seconds and try to relink to the Tag at regular intervals. b) When the Tag Units and Base Unit are within close proximity, lights on all units blink dimly at regular intervals, indicating active link statuses between Base and Tag units – this is referred to as “Standby Mode”. c) You can Mute the Base unit alarm at anytime by pressing the “Mute” button on the right side. MANAGING ALL 4 TAG UNITS FROM THE BASE UNIT In the “Getting Started” section, you learned how to set off the out-of-range alerts for all the Tag units. You now need to be prepared to manage all 4 tagged items from the Base unit at the same time – with a little practice, operations can easily be mastered. There are 4 “Connect Status” lights on the Base unit. The Blue Red Green Yellow blue Tag unit is associated with the far left status light (#1), the red with the second, the green with the third and the yellow with the fourth light. If a single Tag unit goes out-of-range, the respective Connect Status light will blink a bright red color. On the Base unit, below each “Connect Status” light, is an Connect Status associated “Search/Set” button Lights dedicated to one of the tag Search/Set units. In subsequent sections, Buttons you will use this button to manage individual Tag units from the Base unit. Page 4 SET OUT-OF-RANGE DISTANCES – NEAR, MIDDLE AND FAR The Base unit can configure more or less tolerable out-of-range distance limits (Near, Middle, Far) for each individual tag. You can also deactivate the tracking function (DISALARM) to a certain Tag Unit. 1. Hold down the the “Configuration” button on the side of the Base unit. One of the “Connection Status” lights will illuminate red indicating one of the Tag units. If it is NOT the Tag unit you want to configure, then let go of the “Configuration” button and press down on it again – the “Connection Status” light will illuminate for the next Tag unit in sequence. Do this until you reach the desired Tag unit. 2. While continuing to hold down the “Configuration” Button on the Base unit, press the “Search/Set” button underneath the illuminated “Connection Status” light. Notice that the illuminated “Strength indicator” light will change from “Near”, “Middle”, “Far” and “Disalarm” (as marked on the Base Unit) each time you press the “Search/Set” button. When you arrive at the desired setting, let go of the “Configuraton” button and the changes will take effect for that Tag unit. Note: You can configure the out-of-range distance for a Tag unit only if that Tag unit and the Base unit are currently linked. DISALARMING A TAG UNIT If there are one or more Tags that are not in use, you can deactivate or “Disalarm” them so that the Base will not issue any alerts for them. In the instructions above for setting out-of-range distances, there is a fourth option marked “Disalarm” on the Base Unit. You can set a Tag to this option if want the Base unit to disregard that Tag unit. Page 5 3 SEARCHING FOR A MISPLACED TAGGED ITEM When a tagged item is misplaced, you can use the Base unit to search for it, if it is within a 1,600 foot (500m) radius. Test this for Tag unit #1 in an open area (e.g. large room, or in your yard). 1. On the Base unit, press the “Search/Set” Button once for Tag unit #1 – one or more of the 5 “Signal Strength” lights will illuminate on the Base unit, indicating the relative distance from Base to Tag. The Base Press and unit will also begin to chirp at regular release intervals. The Tag unit will also begin to beep, allowing you to follow the audible to pin-point its location, if it is near by. 2. You must first calibrate the Base to the current environment. Hold the Base unit in front of you, at chest level and scan the area slowly in a circular direction, from right to left for 360° and again from left to right (one 360° turn in 3-4 seconds). Note: If the “Direction Indicator” illuminates green on the Base unit during this calibration process, it does not yet indicate a Tag unit’s direction. 4. Next, slowly scan a third time from right to left. The “Direction Indicator” on the Base Unit will illuminate (green) when it establishes the direction of the tagged item location. Note: You don’t have to scan a full 360°; you can use a narrower search angle (e.g. 180°), but you must still calibrate the Base unit from left to right, right to left and then scan to search. Page 6 Press and release 360 Press and release SEARCHING FOR A MISPLACED TAGGED ITEM (continued) 5. Move in the direction in-line with where the front of the Base Unit points when the Green light is lit. As you move closer and closer to the Tag unit, the Base unit chirp intervals will increase in frequency and the “Signal Strength” lights will display additional red lights. If the Base unit chirp intervals slow and the red “Signal Strength” lights become fewer, you may be moving in the wrong direction and losing signal strength – at this point you may need to stop and recalibrate again. 6. As you become very close to the Tag unit, the “Signal Strength” lights will all be illuminated – however, if you are right on top of or very close to the Tag unit, the “Direction Indicator” may give inaccurate readings. At this point you should mute the Base unit (Mute button on the side of the Base unit) and follow the Tag unit’s beep in order to pin-point its location. 7. Once the Tag unit is found, press the “Search/Set” button on the Base unit again to cease the search function. Press and release Press and release SILENT SEARCH In quiet areas (e.g. libraries), it is possible to conduct a silent search, where both the Base and Tag units are muted. To do this simply, turn on the “Mute” button on the Base unit before pressing the “Search/Set” button and then use the Direction Indicator and Signal Strength lights. MUTE MODE (on the Base unit) The “Mute” button on the side of the Base unit can be switched on at any time to silence the Base unit to avoid distraction in quiet areas (e.g. libraries). Page 7 4 ACTIVATING THE PANIC ALERT (from a Tag unit) The Tag units have an additional function of allowing a child or elderly dependent to call the Base unit for help. To activate the Panic alert, press and hold down the panic button on the Tag unit; the Base unit will beep and vibrate, and a solid, bright red blinking “Connect Status” light on the Base unit will clearly indicate which Tag has activated the panic alert. 5 BATTERY INFO - MAINTENANCE & LOW BATTERY CHARGE When the Base unit or Tag unit is not in use, it is advised that you turn them off to conserve battery power. When the Base unit or Tag unit battery charge runs low, both units will issue a low level beep every 2 minutes, alerting you to change the batteries. If you run your units on low batteries, operations may become unpredictable or results may be innacurate. 6 BASE UNIT and TAG UNIT PAIRING The Base and each of the Tag units are “Paired” before shipment - that is, each Base-to-Tag combination must have it’s own unique communication handshake, so that the Base does not get confused between the Tag units. The procedures below are used to re-establish the “Pairing” in case a Tag unit is replaced or a Tag unit cannot communicate with the Base unit. For this example we “Pair” the Base unit and Tag #2 (red) - follow the instructions below 1. Make sure the Base unit and ALL the Tag units are turned off. 2. To enter “Registration” mode, hold down the “Configuration” button (on the Base unit) and the “Search” button for Tag #2 (also on the Base unit) and then, at the same time, turn on the Base unit - as soon as the red light above the “Search” button (for Tag #2) flashes exactly twice, release the buttons (if you’ve already reached the 3rd flash, you have to start again). If you’ve entered the “Registration” mode successfully, the light above “Search” button and the light below the “Dis-alarm” light on the Base unit will flash together. 3. Finally, bring Tag #2 to within 10 cm of the Base Unit and turn it on. The Tag unit will beep twice, indicating a successful “Pairing”. Page 8 7 FAQ Q. In search mode, why does the Base unit show the Tag location to be in several directions? A. The Base unit collects and compares RF signal strength from the Tag unit to determine location. However, when the Tag unit is already very close to the Base unit, the signals can appear emanating from several directions. This can also occur when both units are in an enclosed environment, which causes signal reflection off of walls from different directions, indicating a false location. If this is the case, you can mute the Base unit, and simply follow the audio beep issued by the Tag unit during search mode. Q. Why does the Base unit occasionally indicate a false direction? A. This is also caused by the reflection or blockage of the signal. Signal reflection from walls or wire fences sometimes may indicate a false location. A body of water (e.g. fish tank) for even people may block the signal and weaker reflected signals from surrounding metal objects may indicate a false direction. To remedy this problem, try adjusting your position, wait for the “Status Indicators” to settle and try your search again. Q. What can cause false out-of-range alarm? A. False alarms are caused by: - Base and Tag units are too close to each other. - Low battery power will cause unpredictable behavior such as false alarms. - Either the Base or Tag unit has been placed in a pocket with other items, blocking the signals. Q. Why is range alarm distance not consistent? A. Because radio signal strength and signal reflection are affected by the environment and terrain, users may need to adjust the out-of-range distances to compensate for environment factors. Q. No Alert when the Tag unit is out of range A. - Check whether the Tag unit is “Disalarmed” on the Base unit - Check for low battery on both units - Check the out-of-range distance - if the Tag unit is set for “Far”, you may need a greater distance before setting off an Alert. Page 9 8 WARNINGS and IMPORTANT INFORMATION 1. If you want to use the device during air flight, please comply with the air safety regulations for each respective country. 2. We reserve the right to change the hardware/software specifications and designs, and the information in the manuals at any time without prior notice. 3. Proper operating temperatures for this product are between 14˚F ~140˚F (-10˚C~60˚C). Proper Storage Temperatures are between -4˚F~185˚F (-20˚C~85˚C) . 4. The Batteries provided in this product should be disposed of properly according to national or regional recycling regulations - contact local authorities for more information. Warning: Do not expose the batteries to fire or heat - this may result in danger from explosions. 9 Federal Communication Interference Statement Federal Communication Commission Commision Interference Statement This equipment has been tested and proved to comply with the limits of a Class B digital device, pursuant to Part 15 of the FCC Rules. These limits are designed to provide reasonable protection against harmful interference in a residential installation. This FCC Certifications equipment generates, uses and can radiate radio frequency energy, if not installed and used in accordance with the instructions, it may cause harmful interference to radio communications. However, there is no guarantee that interference will not occur ˚in a particular installation. If this equipment does cause harmful interference to radio or television reception, which can be determinedly turning the equipment off and on, the user is encouraged to try to correct the interference by one of the following measures: ■ Reorient or relocate the receiving antenna. ■ Increase the separation between the equipment and receiver. ■ Connect the equipment into an outlet on a circuit different from that to which the receiver is connected. ■ Consult the dealer or an experienced radio/TV technician for help. This device complies with Part 15 of the FCC Rules. Operation is subject to the following two conditions: (1) This device may not cause harmful interference, and (2) this device must accept an interference received, including interference that may cause undesired operation. FCC Caution: Any changes or modifications are not expressly approved by the party responsible for compliance which could void the user's authority to operate this equipment. Page 10