1
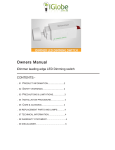
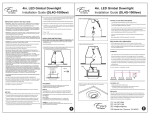
Owners Manual 10W and 12W LED DOWNLIGHT MAXX KIT Series CONTENTS:. 01 PRODUCT INFORMATION............................2 . 02 SAFETY WARNINGS.................................... 2 . 03 PRECAUTIONS & LIMITATIONS....................3 . 04 INSTALLATION PROCEDURE....................... 3 . 05 CARE & CLEANING...................................... 4 . 06 REPLACEMENT PARTS AND LAMPS………..4 . 07 TECHNICAL INFORMATION……………………4 . 08 WARRANTY STATEMENT……………………….4 . 09 DISCALAIMER…………………………………….5 01 Product information 01.1 Model:10W/12W LED DOWNLIGHT Series 01.2 Description: Adjustable 10W/12W LED DOWNLIGHT consists of aluminum lamp body and 12volt driver for lamp power, connected with a 2 pin plug. Luminaire is a Citizen Japan model retained into the ceiling by two ‘mouse trap’ style helical torsion springs. 01.3 Variants: 01.3.1 10W 70mm DOWNLIGHT MAXX–Warm white light gloss white fitting 01.3.2 10W 70mm DOWNLIGHT MAXX–Cool white light gloss white fitting. 01.3.3 10W 70mm DOWNLIGHT MAXX–Warm white light Brushed aluminum fitting. 01.3.4 10W 70mm DOWNLIGHT MAXX-‐Cool white light Brushed aluminum fitting. 01.3.5 12W 90mm DOWNLIGHT MAXX – Warm white light gloss white fitting 01.3.5 12W 90mm DOWNLIGHT MAXX – Warm white light Brushed aluminium fitting 02 SAFETY WARNINGS 02.1 This product must be installed by an Australian licensed electrician in accordance with current version of Australian/New Zealand Wiring Rules AS/NZS3000. 02.2 Always read the instructions fully before installation & use; keep for future reference. 02.3 Before attempting to insert/remove lamp, always ensure the circuit is not energised (switch to OFF) then ensure lamps are fully cooled. 02.4 Always use the light fitting on the correct power supply and do not exceed the maximum lamp wattage as per rating details(as over heating and damage may occur). 02.5 Lamps will produce some heat in the illuminated surface/object and may become hot. Ensure the downlight is installed to allow a minimum separation of 0.6 meters to any illuminated surface or object to prevent heat sensitive & flammable materials attaining excessive temperature. Allow suitable ventilation & air flow around the light fitting. 02.6 Do not cover with any material and install clear of curtains or drapes. 02.7 Do not immerse any part of the light fitting in water or any other liquids. 02.8 Always ensure light fitting is fully assembled before connecting to the power supply. 02.9 Not suitable for use near flammable liquids, vapors, gases or in explosive environments. 02.10 Regularly inspect the light fitting for any damage. If found defective in any way immediately cease use and replace. 02.11 There are no user maintainable components in this fitting. Only the lamps may be replaced. 02.12 Do not attempt to modify this fitting in any way from the condition ‘as supplied’. 03 PRECAUTIONS & LIMITATIONS 03.1 LOCALTITY: This 10W/12W LED DOWNLIGHT is suitable only for ‘indoor’ locations. 03.2 POSITIONING: The individual downlights can be positioned on any horizontal rigid stable ceiling surface (refer also to ‘Safety Warnings’ above). The springs that retain the downlight support the weight of the downlight under any static condition. If the structure is subject to vibrations or shock loadings, the downlight may not be appropriate for this application. 03.3 INSTALLATIONS CLEARANCES: Due to moderate operating temperature of the lamp, a minimum clearance of 25mm on sides and 25mm on top is required between the luminaire and structural members, thermal insulation (of a type that is fixed in position) and any other normally flammable substance. In addition, a heat resistant barrier must separate the downlight from any loose fill insulation or loose combustible material. We recommend the use of the iMitt. 03.3.1 Before making fixing hole(s), check that there are no obstructions hidden beneath the mounting surface such as pipes or cables. 03.4 COMPATIBLE ON SAME CIRCUIT: This 10/12W LED downlight cannot be installed on a switched circuit that also have inductive loads e.g,fluorescent lamps, wired in. 03.5 DIMMABLE: This 10W/12W LED downlight can be used in conjunction with Universal, Trailing edge and Leading edge dimmers. It is the installer’s responsibility to ensure that the dimmer selected is compatible with the characteristics of the lamp. 04 INSTALLATION PROCEDURE 04.1 Ensure the power to the circuit being used is isolated and will stay isolated until the job is complete Lock out & Tag out. 04.2 Select the appropriate mounting position for your downlight . 04.3 Route the supply to the intended position of the hole in the ceiling. The supply wiring chosen for this installation is to be selected, installed and tested in accordance with AS/NZS3000-Wiring Rules. 04.4 Select the appropriate position for your downlight. Mark out and cut a 70/90mm for fitting (tolerance is +2/-0mm) template first and check the accuracy of fitting. Safety precautions above apply for selecting and drilling using a hole saw. 04.5 Fix the downlight kit into position by: 04.5.1 Press the ends of the helical torsion springs upwards against the body of the fitting and place the body into the fixing hole. 04.5.2 Press the fitting firmly into place until it is retained by the strength of the springs. Do not enlarge the hole to make fitting easier. 04.5.3 Wire driver assembly into circuit or flex cord as appropriate – Refer AS/NZS3000-Wiring Rules 04.5.3 Check for insulation and heat dissipation safety margins, Remove the Lock-Out Tag, Energise the circuit at the switchboard; turn the switch to ‘ON’. 05 CARE & CLEANING 05.1 Ensure bare hands do not contact any part of the lamp 05.2 To clean, turn off at the wall switch, when the lamps are cool to the touch, wipe over with a damp cloth. Do not use solvent based or abrasive cleaning compounds. 05.3 Do not insert any object or substance into the lamp or driver for cleaning purpose. 06 REPLACEMENT PARTS & LAMPS 06.1 There are no user maintainable items on this luminaire except for the drivers. 06.1.1 Use only iGlobe supplied iDrive or replacement 12V LED Downlight drivers. 7 TECHNICAL INFORMATION 7.1 10W/12W Lamp Operating position: Vertical, face down 7.2 Electrical Class:2 7.3 Electrical Safety: Complies with:AS/NZS 60598.2.2 7.4 EMC: Level 1 7.5 Complies with: AS/NZS CISPR15 7.6 Supply:180-265V 48-62Hz 7.7 Installation Cut-out: 70mm/90mm 8 WARRANTY STATEMENT 8.1 The benefits conferred herein are in addition to ,and in no way shall be deemed to derogate; either expressly or by implication, any or all other rights and remedies in respect to the company product, which the consumer has under the Commonwealth Trade Practices Act or any other similar State or Territory Laws. 8.2 The warrantor is The iGlobe Group Pty Ltd 8.3 This Lighting Products is guaranteed against faulty workmanship and materials for a period of five(5) years from the date of installation. 8.4 The Company reserves the right, at its discretion, to either repair free of parts and labour charges, replace or offer refund in respect to any article found to be faulty due to materials, parts or workmanship. 9.5 This warranty is expressly subject to the company product being installed, wired, tested, operated and used in accordance with the manufacture’s instructions 8.5 All costs of a claim shall be met by the company, however should the product that is the subject of the claim, be found to be in good working order all such costs shall be met by the claimant. 8.6 When making a claim the consumer shall forward this product to the point where it was purchased (PO BOX for internet orders) for refund along with complete details of the date and place of purchase, details of installing electrician(name, contact, details and license number);description of load, and circumstances of malfunction; within 28 days of the fault occurring. 8.7 It is the retailer or wholesaler’s responsibility to forward to the Company Product for credit to the nearest office of the Company with adequate particulars of the incident/malfunction. The product is to be returned securely packed and will not be accepted without the correct goods return authority(GRA) number being written on packing slip attached to the item and the claim. 9 DISCLAIMER 9.1 The Company reserves the right to change the contents, specifications or designs described in these instructions without notice and without obligation. Please contact us to get the latest information before installation and use. 9.2 This document subject to E & O.E.