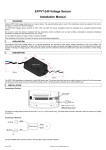
1
 Owners Manual
iDimmer leading edge LED Dimming switch
CONTENTS:. 01 PRODUCT INFORMATION............................2
. 02 SAFETY WARNINGS.................................... 2
. 03 PRECAUTIONS & LIMITATIONS....................3
. 04 INSTALLATION PROCEDURE....................... 3
. 05 CARE & CLEANING...................................... 4
. 06 REPLACEMENT PARTS AND LAMPS………..4
. 07 TECHNICAL INFORMATION……………………4
. 08 WARRANTY STATEMENT……………………….4
. 09 DISCALAIMER…………………………………….5
01 Product information
01.1 Model:IDimmer LED dimming switch
01.2 Description: Leading edge controlled LED dimming switch for control of 1 to 30 iGlobe LED MAXX or SMD series downlights 01.3 Variants:
01.3.1 iDimmer leading edge 500watt
02 SAFETY WARNINGS
02.1 This product must be installed by an Australian licensed electrician in accordance with current version
of Australian/New Zealand Wiring Rules AS/NZS3000.
02.2 Always read the instructions fully before installation & use; keep for future reference.
02.3 Before attempting to insert/remove dimmer, always ensure the circuit is not energised (switch to OFF
and RCD off) then ensure lamps and drivers are not connected to the circuit.
02.4 Always use the dimmer on the correct power supply and do not exceed the maximum usable dimmer
wattage of 400 watts.
02.5 This dimming unit is optimized for Clipsal’s range of standard and slim line switch plates, however
types will vary.
02.6 Do not cover with any material and install clear of curtains or drapes.
02.7 Do not immerse any part of the dimmer in water or any other liquids.
02.8 Always ensure dimmer is fully assembled before connecting to the power supply.
02.9 Not suitable for use near flammable liquids, vapors, gases or in explosive environments.
02.10 Regularly inspect the dimmer for any damage. If found defective in any way immediately cease use
and replace.
02.11 There are no user maintainable components in this fitting. The dimmer should never be opened.
02.12 Do not attempt to modify this fitting in any way from the condition ‘as supplied’.
03 PRECAUTIONS & LIMITATIONS
03.1 LOCALTITY: This iDimmer is suitable only for ‘indoor’ locations.
03.2 POSITIONING: The dimmer can be positioned in any standard switch plate. (Optimised for Clipsal and
HPM switch plates).
03.3 INSTALLATIONS CLEARANCES: Depending upon the installation of the switch plate position, the
dimming unit must be clear of all internal wiring and building materials. The iDimmer does not create
significant heat, however precautions should be required to keep the rear of the switch plate clean and clear
of obstructions. If installed by an A grade Australian licensed electrician to Australian electrical code, the
iDimmer will be safe to use.
03.3.1 Before making fixing hole(s), check that there are no obstructions hidden beneath the mounting
surface such as pipes or cables.
03.4 COMPATIBLE ON SAME CIRCUIT: Make sure that all loads on the same circuit are of the same load
strength (same type of light fitting). Mixing 10w and 12w Downlight Maxx units on the same circuit is not
recommended.
03.5 iGlobe LED only: This product has been tested to comply with Australian EMC and SAA safety
precautions when using with iGlobe LED down lights only. This product is not recommended nor guaranteed
under these policies for use with any other light fittings or other electrical products. DO NOT USE TO
SWITCH SPEED FANS OR OTHER ELECTRICAL EQUIPMENT.
04 INSTALLATION PROCEDURE
04.1 Ensure the power to the circuit being used is isolated and will stay isolated until the job is complete
Lock out & Tag out.
04.2 Select the appropriate mounting position for your switch plate .
04.3 Route the supply to the intended position of the hole wall. The supply wiring chosen for this installation
is to be selected, installed and tested in accordance with AS/NZS3000-Wiring Rules.
04.4 Select the appropriate position for your dimmer in the switch plate. Make sure the rear of the pertruding
dimmer and associated wiring is not in conflict with any objects or building materials inside the wall cavity.
Make sure all wiring is hidden securely and safely. Safety precautions above apply for selecting and drilling
using a hole saw and other tools for making cavities.
04.5 Fix the dimmer kit into position by:
04.5.1 complete the wiring as per the below wiring diagram before installing the removable dimming cap.
04.5.2 Press the fitting firmly into place and apply dimming cap to hold the dimmer securely into the switch
plate. If the dimmer does not fit securely, change the switch plate. Loose fitting dimmers can be a safety
hazard.
04.5.3 Have all electrical work asses by an Australian A grade licensed electrician (Refer AS/NZS3000Wiring Rules). Failure to comply with this will void manufacturers warranty and obligations.
04.5.3 Check for safe installation, Remove the Lock-Out Tag, Energise the circuit at the switchboard; turn
the switch to ‘ON’.
Test dimming capabilities only with a full circuit.
04.5.4Wiring diagram: iDimmer leading edge dimming unit
05 CARE & CLEANING
05.1 Do not use water to clean this product
05.2 To clean, remove cap and use a lightly dampened cloth to clean cap and dimming collar. Do not use
excess water. Consult an electrician if significantly soiled..
05.3 Do not insert any object or substance into the dimmer or switch plate for cleaning purpose.
06 REPLACEMENT PARTS & LAMPS
06.1 There are no user maintainable items on this dimmer.
06.1.1 Use only iGlobe supplied iDrive or replacement 12V LED Downlight drivers.
7 TECHNICAL INFORMATION
7.1 500w (400 watt usable) Leading edge dimming unit
7.2 Electrical Class:2
7.3 Electrical Safety: Complies with:AS/NZS 60598.2.2
7.4 EMC: Level 1
7.5 Complies with: AS/NZS CISPR15
7.6 Supply:180-265V 48-62Hz
7.7 Switch plate: Clipsal standard and slimline, HPM standard and slimline.
8 WARRANTY STATEMENT
8.1 The benefits conferred herein are in addition to ,and in no way shall be deemed to derogate; either
expressly or by implication, any or all other rights and remedies in respect to the company product, which
the consumer has under the Commonwealth Trade Practices Act or any other similar State or Territory
Laws.
8.2 The warrantor is The iGlobe Group Pty Ltd
8.3 This Lighting Products is guaranteed against faulty workmanship and materials for a period of five(5)
years from the date of installation.
8.4 The Company reserves the right, at its discretion, to either repair free of parts and labour charges,
replace or offer refund in respect to any article found to be faulty due to materials, parts or workmanship.
9.5
This warranty is expressly subject to the company product being installed, wired, tested, operated and used
in accordance with the manufacture’s instructions
8.5 All costs of a claim shall be met by the company, however should the product that is the subject of the
claim, be found to be in good working order all such costs shall be met by the claimant.
8.6 When making a claim the consumer shall forward this product to the point where it was purchased (PO
BOX for internet orders) for refund along with complete details of the date and place of purchase, details of
installing electrician(name, contact, details and license number);description of load, and circumstances of
malfunction; within 28 days of the fault occurring.
8.7 It is the retailer or wholesaler’s responsibility to forward to the Company Product for credit to the nearest
office of the Company with adequate particulars of the incident/malfunction. The product is to be returned
securely packed and will not be accepted without the correct goods return authority(GRA) number being
written on packing slip attached to the item and the claim.
9 DISCLAIMER
9.1 The Company reserves the right to change the contents, specifications or designs described in these
instructions without notice and without obligation. Please contact us to get the latest information before
installation and use.
9.2 This document subject to E & O.E.