1
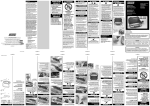
1 And Operators Manual Owner: ___________ Serial Number: __________ 2 Tecfarm Pty Ltd Lot 29 Liebeck Road Bruce Rock WA PO Box 64 Bruce Rock WA 6418 Ph. 08 9061 1808 www.tecfarm.com.au August 2014 – Version 1.1 Copyright Tecfarm Pty. Ltd. 2014 Tecfarm Smartcarts are protected by Australian Patents 2011100910, 2011100919 and Registered Design: 338660 3 CONTENTS Introduction - Machine Overview - Serial Number 4 5 5 Safety 6 6 7 8 - Health and Safety Risk Statement - Additional Safety Precautions - Safety Decals Initial Setup - Hitch Installation - Harvester Hydraulic Setup - Harvester Electrics and Loom - Chute/Baffling to direct chaff - Testing/Calibrating - Clearances 9 9 13 13 14 14 15 Smartcart Controller - Control Panel Layout - Normal Operation - Controller Setup/Calibration 16 16 17 17 Field Operation - Conveyor Settings - Transport - Harvester Unloading Auger - Operational Considerations 20 20 20 21 21 Maintenance - Lubrication - Replacement Part Specifications - List of Suppliers 22 22 22 23 Troubleshooting 24 Warranty 25 25 - Declaration 4 INTRODUCTION Thankyou for purchasing a Tecfarm Smartcart 30 or 50 cubic metre conveyor fed chaff cart. The machine is suitable for use as a residue collection unit in the broad-acre cropping environment. The Smartcart is a tough and user friendly machine which is simple to attach to most makes of Harvester. This Manual has been prepared to assist with cart attachment and setup as well as enable you to operate the machine in a safe and effective manner. This Manual is considered part if the machine and should be transferred to future owners. Replacement copies are available from Tecfarm. Tecfarm can assist with genuine parts and advice relating to maintenance, repair and operation. A list of major component suppliers is also included in the maintenance section at the rear of this manual. This manual, the photographs, illustrations and data used were current at the time of printing (not specific to machine model and size). Due to possible changes resulting from Tecfarm’s commitment to research and development, your machine may vary slightly in detail from the manual. The manufacturer reserves the right to change specifications without notification. Some procedures may vary slightly depending on particular harvester used. IMPORTANT! - After reading this manual, the attached form must be signed and returned to Tecfarm as a condition of Warranty (clear photo of signed page sent to Tecfarm is acceptable). This ensures that the owner is aware of the safety hazards and correct procedures for operating the machine and assumes responsibility to pass on this information to other users. This Symbol will appear throughout this manual to call attention to instructions involving your personal safety and that of others. The signal words DANGER, WARNING and CAUTION are used with the safety messages. The appropriate signal word has been selected using the following guidelines. DANGER: Indicates an imminently hazardous situation that, if not avoided, will result in death or serious injury. This signal word is to be limited to the most extreme situations typically for machine components that, for functional purpose, cannot be guarded. WARNING: Indicates a potentially hazardous situation that, if not avoided, could result in equipment damage or injury. It may also be used to alert against unsafe practices. CAUTION: Indicates a potentially hazardous situation that, if not avoided, may result in moderate injury. It may also be used to alert against unsafe practices. 5 Machine Overview The Following Diagram shows the position and Layout of all major components as referenced in this Manual (Smartcart 30 represented). Note: Machine orientation - “Right”, “Left”, “Front” and “Rear” are used throughout this manual, from a perspective facing the direction of machine travel when operating. Serial Number A serial number is used to identify your machine. For serial numbers prior to SCP-050, this number is stamped onto the top edge of the axle stub mounting plate on the left hand side. Later models have the serial number stamped on top of main A-frame under ladder. 6 Safety The manufacturer of this product is concerned about your safety as the operator. Many safety features have been built into the machine, however accidents can still occur due to poor operating procedures, poor understanding of the machine and lack of maintenance. To avoid personal injury, study the manual and observe the precautions and insist everyone operating the machine follows them. All operators must read and ensure they fully understand all safety, operating and maintenance instructions contained in this manual before using the machine. HEALTH & SAFETY RISK STATEMENT Hazard Crushing/Impact risk within and around the rear door area (particularly between open door and main bin). Recommended Hazard Controls Maintain a minimum 3 metre clear zone around door area when header engine is running. If maintenance in this area is required with the door open – ensure header is turned off with key removed and sufficient mechanical restraint is in place in case of failure of hydraulic lockout system or unforeseen door closing. Pinch points between Remain clear of danger areas associated with moving moving belt and rollers or conveyor and rollers. Take particular care when adjusting associated framework with conveyor flow divider to keep hands clear of belt area. possibility of entanglement. Turn off header and remove key before working in this area. Proximity to rear of parent Remain clear of, and/or disable, potentially hazardous machine (header). moving parts at the rear of attached header when approaching cart for inspection or maintenance. Damaged hydraulic hoses or Ensure all hydraulic hoses are regularly inspected, working with pressurised maintained and replaced if required. Depressurise hoses may lead to ejection hydraulic system before carrying out maintenance on of fluid with enough force hydraulic components and wear appropriate protective to penetrate skin. clothing. Persons may slip or fall Only climb on provided access ladder as required for while climbing on provided inspection/maintenance (do not climb on other parts of access ladder or elsewhere cart). Do not climb ladder unless the cart is stationary on Cart (hazard increased and measures are in place to ensure it will remain so (eg. by build-up of fine dust on header operator informed, chocks in place). Exercise surfaces). caution, use handrails and ensure three points of contact while climbing. Manual handling of short Do not attempt to lift conveyor alone. A minimum of two conveyor. Injury may result persons are required to safely lift the conveyor. Ensure from heavy lift or conveyor O-Clips/R-Clips are removed from locating pins before slipping/falling back down. lifting. 7 Draw-bar of cart may fall if not properly supported. Competency of operator. Fire risk with moving parts and chaff/straw buildup. Transport on public roads. Only disconnect the cart from the header on level ground with wheel chocks and Jack stand in place. Stay clear of area under drawbar at all times to avoid crushing risk. Ensure all persons operating the machinery are competent to do so and have received appropriate training with regard to the safe operation of the machine within its limitations. Training should include, but not be limited to reading this manual. Monitor levels of chaff/straw build up near moving parts and remove as necessary. Also ensure bearings and hydramotors are properly maintained (grease bearings as required and replace if worn) to minimise fire risk. Ensure that adequate lights, warning signs etc. are used when transporting the machine on public roads. Local authorities should be contacted for regulations appropriate to the area. Additional Safety Precautions Never operate the machine unless you are in good physical and mental health Never operate the machine under the influence of alcohol, drugs or anything which may impair vision, dexterity or judgement Never operate the machine with worn damaged or missing parts. Only use genuine replacement parts. Never ride on the machine while in operation or being towed. Always wear close fitting clothing in the vicinity of the machine, tie back long hair and remove jewellery or anything that may become entangled with moving parts. Always wear appropriate safety equipment to protect eyes, ears, feet, hands and body when close to operating machine. 8 Safety Decals Safety decals are placed on the machine to identify hazards involved in the operation of the machine. Familiarise yourself with the location of the signs and always be aware of the hazard they identify. Safety Decals located on the cart as shown below must be kept clean and legible at all times. Decals are available from Tecfarm and must be replaced if missing or illegible. Behind lower Ram mounts – both sides Above Access ladder Safety Decal Detail Views Conveyor (folded) - both sides Front of Bin – left side only 9 Initial Setup The following instructions will help you to set up your Tecfarm Smartcart with a minimum of fuss and avoid some of the issues that can prove costly or time consuming if not discovered until harvest is in full swing. However, if you need further clarification or advice specific to your Header and requirements, please don’t hesitate to contact the Tecfarm team who will be happy to help with advice where possible. Step 1 – Hitch Installation Attach Crossbar mounting brackets (left and Right) to front axle as per drawing, ensuring clearance from brake components etc. Note: Harvester should not require any modification to accommodate brackets. Mount crossbar to front of crossbar brackets with U-bolts, ensure clevis faces forward and is central to harvester. Use short 1”-1/8th pin provided to locate Main Beam attachment bracket with 40x40mm square tube port facing forward (see relevant drawing). Mount rear attach bracket to rear axle or mounting plate as appropriate to harvester model. Lay out main hitch beam on ground with clevis to rear (correct side up – see drawing) and position harvester over beam. If possible at this point, determine final fore/aft hitch position considering; o Chaff delivery to short conveyor (roughly over clevis so no material is lost during turns), o Turning clearance (for front corners of short conveyor) o Clearance between rear extremities of harvester, including folded grain auger, and main conveyor wind guards. Note: Hitch clevis hole must be a minimum of 900mm aft of rear hitch support bracket (or other obstacles) to ensure short conveyor clearance in sharp turns. Lift front of beam into position (using car jack or similar) and secure loosely with two U-bolts to ‘main beam attachment bracket’ on crossbar. Lift rear of beam into position between clamping plates to desired height (considering short conveyor clearance under rear of header), securing with two M20x150mm bolts underneath and one above beam. Place 30mm threaded rod though hole in main beam front plate (with nut and spring washer either side) and locate rear of rod in port on main beam attachment bracket. Leave nuts/U-bolts loose until final position confirmed. 10 Case/New Holland Hitch- Front View Rear View 11 John Deere 9000 Series Hitch- Front View Rear View 12 John Deere S-series Hitch- Front View Rear View 13 Step 2 - Harvester Hydraulic Setup Both the conveyor hydramotors and the door opening Hydraulic Rams on the Smartcart are powered by Hydraulic systems on the Harvester, however some re-plumbing will be required to provide two 1/2’’ female breakaway couplings and a 3/8’’ female case drain connector (direct return to tank) alongside the installed Smartcart hitch. Female breakaways should be secured in a manner that allows disconnection of all hoses without damage (eg if harvester pulls away with hitch disconnected). Most often hydraulic flow can be drawn from an existing system such as that used to power the straw/chaff spinners or an accelerator roller. If the function of the existing system is still required, plumbing to the cart will need to run in series with existing header hydramotors and it is strongly recommended that the chaff cart is placed last in the system. This ensures that no additional back-pressure will affect cart components and all pressure relief valve settings can be expected to allow normal function as per factory testing. Important! Ensure that any hydramotors placed prior to the cart in the system have case drain hoses directly back to tank (otherwise leaking seals can be expected). In certain instances where sufficient flow is not available or the addition of a chaff cart to an existing system will raise pressures beyond acceptable limits, an independent hydraulic pump may need to be installed in an appropriate location on the harvester (consult with header manufacturer) to provide power to the cart. Important! All harvesters require a cross-line relief valve in the harvester’s hydraulic system, appropriately situated to allow short term oil return to tank in the event of accidental disconnection of the carts’ hydraulic breakaway couplings. Otherwise destruction of the hydraulic pump may result. Regardless of the particular hydraulic system - flow provided to the cart must be within an appropriate range. Tecfarm recommend between 30 and 50 litres/minute. If flow cannot be ascertained from harvester manufacturer, the amount of time taken for the door to fully open can be used as a guide when testing cart (5 seconds relates to about 40 litres/min at operating revs). If harvester flow is greater than 50 l/min a flow divider kit can be purchased from Tecfarm. Step 3 - Harvester Electrics and Loom Mount Smartcart Controller to an appropriate attachment point in Harvester Cab using supplied RAM mounts. Run Harvester Wiring Loom from Cab along a suitable path to rear of hitch beam securing as appropriate. Often the most practical route will be directly down to the front axle area then along the top of the main hitch beam. Keep the loom clear of areas prone to physical damage (belts/pulleys etc) or high temperatures. Connect 2metre power supply loom to 12V keyed power in Cab and plug into controller. Note: Cutting and re-joining of electrical looms is to be avoided and may affect warranty. 14 Step 4 - Chute/Baffling to direct chaff A chute to deliver chaff to the short conveyor will be required. Ideally chaff should contact the belt approximately 1/3rd from the front (over the drawbar pin) to ensure no material is lost when turning. Due to significant variation between Harvester makes/models and operational preferences this chute is the owners responsibility and must be custom made and fitted during setup. It is best to keep baffling/chute to the minimum required to do the job, ensuring adequate width of exit point and sufficient slope to avoid blockages. Step 5 - Testing/Calibrating Connect cart, electrics and hydraulics to harvester taking care to keep lines clear of contact with belt or stubble damage (guard as required) and ensure turning capability. Important! Check correct oil flow direction - top hose on cart A-frame must connect to pressure from harvester or damage may result. Test electrical continuity by turning on controller in cab noting ‘MANUAL READY’ (or ‘cart ready’) indication on screen. Screen should also read ‘Door shut’ (or ‘Door is closed’) assuming door close sensor is set to 5mm from corner of rear door tube (red light on sensor illuminated). Test activation of door solenoid by pressing ‘OPEN’ while checking for LED illumination on solenoid electrical terminal situated behind flow controller on cart (solenoid will only activate for 6 seconds). Repeat for ‘CLOSE’ function. Test Bin-full sensor checking for audible alarm and ‘BIN-FULL’ indication on screen when sensor is depressed by second person. Also test bin light on/off function. Ensure conveyor flow controller is set to zero flow (handle up) and area is clear before starting harvester and activating hydraulic circuit to cart (ensure harvester at operating revs). Gradually advance conveyor flow control until conveyor belt runs smoothly at operating speed (normally between 2 and 3 metres per second). While belt is running, cycle the door OPEN and CLOSED using the controller to check for normal operation. Note: A few cycles may be required to clear air from the hydraulic system and allow correct function of hydraulic components. 15 Calibrate your Smartcart controller ‘door fully open’ time as per instructions given in section 3 and 7 of the Smartcart Controller Setup section of this manual. An opening time of 4 seconds or less indicates that oil flow is too high and will likely result in structural damage. Ram operating speed is normally determined only by available harvester hydraulic flow; however, Tecfarm can supply an optional pressure compensated flow divider kit if required. Important! - Do not continue operating cart if door opening takes less than 4 seconds. Tecfarm cannot warrant structural integrity if the door is opened/closed too rapidly. Other variables in the Controller ‘Setup mode’, such as ‘dwell time’, may be adjusted up or down from default settings at any time. Test door opening in Auto mode (press ‘Auto’ on controller to cycle between auto and manual modes) checking that open/hold/close sequence is performed as per settings entered in setup mode. BE AWARE that the door will close automatically shortly after opening when “AUTO” mode is enabled. Ensure door area remains clear of persons and obstacles. Step 6 - Clearances Test cornering clearance between rear wheels of harvester and short conveyor while moving harvester slowly forward. If contact on turns is likely ‘Doughnuts’ on the steering rams of the harvester may be advisable to limit overall turn radius, especially with multiple and/or less experienced operators. Note: A full lock turn may be achievable but be aware that a rapid turn in the opposite direction may cause the harvester wheel to make contact with the conveyor before the cart has begun to straighten out in relation to the harvester. Also note clearance between folded harvester auger and main conveyor windguards, particularly in a slight left hand turn while going through a dip. Depending on your configuration such situations may need to be avoided in operation to prevent contact. Height of short conveyor front end can be adjusted as required using 20mm allthread support rods as long as clearance above hitch is maintained allowing for uneven terrain. The Lower end of main conveyor may also be adjusted though this is not usually necessary. Any adjustment must be even on both sides. 16 Smartcart Controller The Tecfarm Smartcart controller is designed for use with a compatible chaff cart to: Control Door Opening in Manual mode: o Open the rear door with (one button press) – to a pre-defined percentage of maximum opening. o Close the door (second button press). Control Door Opening in Automatic mode: o With a single button press - Open the main door to a pre-defined percentage, hold open for a pre-defined time, then close automatically. Control a small floodlight in the bin (no more than 30 Watts if replaced). Monitor and alert when the cart is full (audible and visual indication). Monitor if the door is closed (visual indication only). Control Panel Layout The control panel has nine membrane switches and one 16x2 character liquid crystal display panel (LCD). At right is an image showing the layout of the controller faceplate with buttons and screen. Below is an explanation of the function performed by each button. The three buttons on the right control the door. o LOCK can be pressed at any time to stop/prevent the door from moving (double press to unlock). LOCK is also required to enter SETUP mode. o CLOSE will close the door at any time, if the sensor indicates that the door is not already closed. o OPEN will open the door in manual or automatic mode at any time. If the door is already open then the controller will confirm if you would like to open again. AUTO controls whether automatic door operation is enabled/disabled. o In manual mode the display will read “Manual Ready” (or “Cart Ready”). o In automatic mode the display will read “AUTO Ready”. LIGHT turns the bin floodlight on and off. o The symbol “*”will appear in the bottom left of the LCD to indicate that the light is ON. The four buttons on the left are used only for controller setup. o BACK will exit SETUP or exit a value change. o ENTER will select a parameter to adjust or confirm changes in values. o UP will cycle through setup modes or increase a setup value. o DOWN will cycle through setup modes or decrease a setup value. 17 Normal operation The controller will allow normal operation provided it has acceptable values recorded in the setup modes. The door can be opened in either Manual or Auto modes; the following describes how to control Door Opening. Manual door open operation The controller will display “Manual Ready” when in manual mode (or “Cart Ready”). When “OPEN” is pressed, the door will open to an amount determined by a combination of the “DOOR OPEN PERCENT” adjustment and the “DOORFULLY OPEN” time (see Setup modes 1 and 3). If the last button pressed was open, the controller will request “OPEN” be pressed again within 5 seconds. Otherwise the controller will assume that the door is already open, and will not try to open it again. When “CLOSE” is pressed, the door close solenoid will activate until the door closed sensor reads, OR until a calculated time has elapsed (if sensor fails to register, a relief valve will prevent damage until calculated elapsed time). Automatic Door operation The controller will display “AUTO READY” when in automatic mode. When “OPEN” is pressed the door will begin to open as per manual mode, however, there is no need to press “CLOSE”. After the door has opened to the predetermined amount, and remained open for the pre-determined ‘dwell time’, the door will automatically close. BE AWARE that the door will close automatically shortly after opening when “AUTO” mode is enabled. Ensure door area remains clear of persons and obstacles. “CLOSE” can be pressed at any time in this cycle to override the automatic timers, and manually close the door. “LOCK” can be pressed at any time to stop the door moving regardless of mode of operation. This is an important safety feature of the Controller. Controller Setup and Calibration To enter controller SETUP press “LOCK” followed by “ENTER”. The Smartcart controller has seven setup modes as described below. To cycle through these modes, press the Up or Down arrows located in the lower left of the controller. When the desired mode is displayed, press “ENTER” to select. Once selected, the parameter applicable to that mode may be adjusted by pressing the Up or Down arrows (press “BACK” to exit with no change). When the desired value has been set, press “ENTER” to confirm and return to the main setup menu to continue cycling though setup modes. To exit SETUP, press “BACK” followed by “LOCK” twice (within 4 seconds). Note: The controller uses deciseconds for all time values (1 second = 10 deciseconds). 18 1 Door open percent This setting is applicable to both ‘Manual’ and ‘Automatic’ door operation modes and is used to adjust how far the door opens, from 0% to 100%, in 5% increments. The controller applies the “door open percent” to the “door fully open time” to calculate how long to activate the door open solenoid. For example if it takes 8 seconds to fully open the door (ie. 80 deciseconds is set as the ‘door fully open” time), and the ‘door open percent’ is set to 50%, the hydraulic solenoid will be activated for 4 seconds, opening the door to around halfway. 2 Door dwell time This setting will only be applicable in AUTOMATIC door operation mode. When the controller is set to “AUTO Ready”, and “OPEN” has been pressed, the door will open to the amount determined by “door open percent”, then wait for the “door dwell time” value before automatically closing. This setting allows you to adjust ‘door dwell time’ (in deciseconds). 3 Door fully open time This allows you to set the time (in deciseconds) taken for the door to move from fully closed to fully opened. It is important that this is entered accurately (within 5 ds if possible). Setup mode 7 (below) may be used to assist with this calibration, otherwise door opening can be timed independently and the value adjusted using this setting alone. 4 Buzzer volume When the chaff cart is full of chaff an internal buzzer will sound. This setting controls how loud the buzzer will be, with 0 being muted and 10 being the loudest possible. 5 Controller software version This displays the current software version the controller is using. This can only be changed by a software update uploaded to the microcontroller over USB. 6 Reset ALL values to default This resets ALL changeable values to pre-defined conservative defaults. 7 Door time to fully open calibration It is important that the harvester hydraulic system is functioning at normal operating pressure and flow in order for this calibration to accurately reflect the ‘time to fully open’ in working conditions. This setup mode WILL OPEN THE DOOR when confirmed. Ensure area is clear before proceeding with calibration sequence. 19 This mode is used to time accurately how long it takes the door to go from fully closed to fully open, however, as there is no door full open sensor, the operator is required to press “CLOSE” when the hydraulic rams reach maximum extension. A second person may be required to alert the operator when the door is fully open in order for the operator to press CLOSE to end the calibration. If it is not pressed within 20 seconds the operation will automatically terminate. After the calibration sequence, the value (in deciseconds) will be displayed to the operator and the operator asked to confirm if they want to save the new value as the “door fully open” value. The value can be altered if it is deemed inaccurate after calibration (as per mode 3 above). Note: after the calibration sequence the door the door remains open and can only be closed by exiting setup mode (“BACK” then “LOCK” twice) and pressing “CLOSE”. Setup mode overview Mode 1. Door open percent Units percent 2. Door dwell time Min 0 Max 100 Step 5 Default 100 Purpose Demines how far the door will open as a percent of the doors maximum time to fully open. Determines how long the door will hold open for in AUTOMATIC mode. Deci0 seconds 200 5 30 3. Door fully open time Deci0 seconds 120 5 60 4. Buzzer volume Deci0 seconds 10 1 10 Sets the system reference time for length of time taken for the door to go from fully closed to fully open. Adjusts the bin full alarm volume. 5 Software Version N/A N/A N/A N/A N/A Displays current software version. 6. Reset to defaults N/A N/A N/A N/A N/A Resets all values to default. 7. Door fully open time calibration N/A N/A N/A N/A N/A Physically times the door opening to assist in setting the ‘Door fully open time”. 20 Field Operation While we believe you have purchased the best chaff cart available, it is important to be aware that the task of collecting and strategically dumping chaff/straw while harvesting will add another layer of complexity to your harvesting operation. The Smartcart has been designed to be user friendly and as trouble-free as possible, but will require a degree of monitoring and management from the header operator. Conveyor Settings Particular care must be taken with regard to overfilling the cart as this will initially cause material to be dragged out the front (by returning belt) but will eventually stop the conveyor turning and likely result in material blocking up the back of the header. A relief valve on the conveyor flow controller can be adjusted to alter the resistance point at which the belt will stop, (as oil bypasses the conveyor circuit). Do not set conveyor relief valve too high, otherwise potential slippage of rollers on belt may create a friction fire hazard. Conveyor Belt Speed can be adjusted by rotating the Handle on the ‘Conveyor Flow Controller’ (pictured above). As a guide belt speed should normally be between 2 and 3 metres per second. Speeds greater than 3 m/sec. (ie. Less than two seconds to travel full length of main conveyor) may cause undue wear on belt and conveyor components. O-clips/R-clips to secure short conveyor crossbar must be present at all times when in operation and should be placed so as to reduce chance of clips being knocked out (in which case the conveyor support crossbar can jump out of locating holes). Transport If transporting cart with a vehicle other than the harvester, take off removable rubber wind-guard frames, remove clips from pins on short conveyor crossbar and fold the short conveyor back through approximately 150 degrees to rest on rubber stops (on main conveyor). Two people are required to safely fold the conveyor back to transport position. If road or ‘on farm’ transport is required, the cart should always be towed at a safe speed with consideration given to such factors as tow vehicle weight and braking capacity. Under no circumstances should the cart be towed at greater than 50km/hr. Always abide by local regulations regarding towing vehicle mass, escort vehicles, signage, lighting etc when transporting the cart on public roads. 21 Harvester Unloading Auger The Operator must be aware of harvester unloading auger proximity to the upper windguard area of the main conveyor in order to avoid contact and resultant damage in certain situations. Important! Take care when turning left on undulating terrain, particularly through a dip, as harvester auger may make contact with upper conveyor wind guard area. Important! Do not turn left while extending or retracting harvester auger as it is possible for auger to contact cart (if cart is at a significant angle relative to the harvester). Operational Considerations Under Normal working conditions, the cart can be towed and periodically emptied on the run at optimum harvesting speed, however speeds above 15km per hour are not recommended while the door is being opened – particularly when travelling over ground which is uneven or has a significant transverse slope. Speed may be reduced while emptying if a more upright heap is required (eg if heaps will be collected later) otherwise a slightly more ‘spread-out’ heap may be of benefit to allow shorter burning times (less depth of material). Other considerations for the height of chaff heaps include preference of stock (if heaps will be grazed in situ) and the possibility of direct passage of tillage equipment through unburnt heaps. When using the Smartcart Controller in ‘auto’ mode, the ‘door open Percent’ and ‘dwell time’ adjustments (in the setup menu) can be used in conjunction with emptying forward speed to achieve the desired spread of chaff when dumping. The rear door geometry allows for dragging the heap out at a very low height if required. Important! Be aware that a low ‘door open percent’ setting combined with a short ‘dwell time’ may result in door closing on chaff which has not yet exited the bin completely. If the intent is to burn heaps post-harvest, chaff can be dumped strategically on consecutive passes so that the heaps line up (perpendicular to harvester runs). This allows firebreaks to be created around a row of heaps rather than individually. Bin-full sensor position may be adjusted to allow for varying residue characteristics (2014 production onward) and/or operator preference. 22 Maintenance Apart from initial set-up and testing, the cart should be thoroughly checked after the first few hours of use to ensure all nuts and bolts and Hydraulic fittings are secure and no oil leaks are visible. Wheel nuts should also be checked for appropriate torque as per decal on side of bin above each wheel (shown right). Maintain tyre pressures at the settings indicated to ensure smooth running and minimal soil compaction. Inspect all Hydraulic hoses periodically for signs of wear, particularly in areas exposed to contact with stubble. Replace worn hoses as required. Check conveyor spring tension after a few days of operation (annually thereafter) as conveyor belts will stretch marginally. The measurement for the main conveyor should be 1490mm (from outside front of roller bearing block to rear of nut head on tensioning rod). For the short conveyor, spring compressed length should be 190mm. Lubrication Six Roller bearings (3 per conveyor) – grease 100 hourly Two Main Door Hinges – grease 500 hourly Wheel Bearings – grease 500 hourly Monitor and replace any bearings showing signs of wear or overheating as defective/worn bearings present a significant fire risk. Replacement Part Specifications - Conveyor Belt: WCCO Raptor single guide, 41.6 inch (see Primary Sales below) - Conveyor Rollers - Idler roller - TFE IR -Drive roller - TFE DR (see Tecfarm) - Bearings Door hinge - SB 209 Bearing Block -YET 209-112 Bearing - Bearings Conveyor roller - SB 205 Bearing Block -YET 205-100 bearing (see Northam Bearings) - Axles and Wheel bearings – Colaert/ADR (see STW) - Hydramotors – PL40 (and other hydraulic components - see Gerrard) - Bin LED Flood light – Replacement must be no more than 30W 23 List of Suppliers Tecfarm Pty Ltd - Lot 29 Liebeck Road, Bruce Rock WA 6418 Ph. 08 9061 1808, 0428 611 309, 0447 180 958 [email protected] Primary Sales Australia – 44 Meliador Way, Midvale WA 6056 Ph. 08 92503500 [email protected] Gerrard Hydraulics - 39 Sorbonne Crsnt, Canning Vale WA 6155 Ph. 08 9455 2344 [email protected] Specialised Tyre and Wheel (STW) - 5-7 Burwash Pl, Maddington WA 6109 Ph. 08 9363 5006 [email protected] Mulford Plastics – 145 Balcatta Rd, Balcatta WA 6021 Ph.08 92406655 [email protected] Northam Bearings - 100 Old York Road, Northam WA 6401 Ph. 9622 2922 [email protected] 24 Troubleshooting Rear Door Does not open when activated: o Check LED on solenoid lights up when ‘Open’ pressed – if not, check wiring loom connectors. o Adjust (tighten) Pressure Relief valve on front of Aluminium Hydraulic Block under solenoid valve (shown right). Oil may be bypassing door circuit at a lower pressure than that required to open the door. Conveyor Stops turning as soon as Bin is Full: o Adjust Pressure Relief valve on Conveyor Flow controller (screw in) so more resistance is required to stop belt. Conveyor Occasionally stops due to Blockage between Conveyor and Lid o Increase conveyor belt speed. o Conveyor flow controller relief may be set to low (see above). o The four screws securing rear of HDPE may be removed, allowing this centre section of the Lid to ‘float’ as required to clear a potential blockage (light rope loosely between lid lifting lugs may prevent wind damage to HDPE). Door does not open fully: o Check “Door open percent” is at a suitable value. o Check accuracy of “Door fully open time” value. Controller says the cart door is open when closed: o Check that the door closed sensor is connected, operational, and correctly positioned. The light on the back of the sensor should illuminate when the face of the sensor is within 7mm of a metal object. Controller has become unresponsive: o Turn the controller off and on again. o Try to reset to default values in setup mode (4.6). o Ensure the controller is not getting too hot. o In event of controller failure disconnect and use manual door switch provided while problem is resolved. Light does not turn on: o Check relevant plugs/connectors on wiring loom. o Replace light if faulty (no more than 30 watts) 25 Warranty Tecfarm Smartcarts are warranted for a period of 12 months from the date of delivery to the original purchaser. Warranty extends to repair or replacement of components designed or fabricated by Tecfarm. Tecfarm accepts no responsibility for time or income lost due to machinery breakdown relating to the use of a Smartcart. Components supplied to Tecfarm by third parties (eg hydraulics, axle stubs, draper belt etc) may be warranted by original manufacturers or by Tecfarm at its discretion. Operation of Smartcarts in accordance with the guidelines and limitations described in this manual is a condition of this warranty. Any failures or faults which may develop due to operations outside of these recommendations or due to alterations made to any part of the machine may not be warranted, at Tecfarm’s discretion. Tecfarm Pty Ltd accepts no personal liability for any injury which may occur, as a result of the use of a Smartcart, other than that required by law. Every effort has been made to alert the operator to inherent risks associated with the operation of this machine. It is a requirement for warranty purposes that this manual is read and understood, that the statement below is signed as a declaration to this effect and that a copy is returned to Tecfarm (photo sent via email is acceptable). ……………………………………………………………………………………………………………………………………..Cut Declaration I ………………………………………………………………. the purchaser/operator of this Smartcart have read and understood all information regarding the inherent safety risks and limitations associated with the use of this machine as presented in this operators manual. I also accept responsibility for conveying this information to all other persons who may operate the machine and for ensuring safety decals on the machine remain present and clearly visible. Serial No. ……………………………………. Signed ……………………………………. Name ……………………………………………………..... Date ………………….