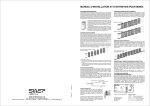
Download Getit user guide for Prescribers
Transcript
CHEMTRONICS
DIRECT
SWEP REISSUE DATABASE USER GUIDE FOR PRESCRIBERS
When you first connect to the
Re-issue database.
You must use the standard login
Username of ‘SWEP’ which is
all in uppercase.
The password field is left blank.
Then click on ‘Log In’ button.
Once you have connected, you
will be prompted to:
1. Enter your prescriber
number.
2. You should click the fill
button next to the field to
confirm your entry is correct
3. Click ‘Save’ to continue.
You have three attempts to
enter your correct ID before the
system will disconnect you.
REMEMBER:
Occupational Therapists, the ‘O’
in your ID is a letter not a zero.
After you have successfully entered
your prescriber number, you will
see this screen.
On the left hand side you will
notice a menu sidebar. This menu
is the easiest way to navigate the
system, however to see the full
menu you will need to click on each
the button to see menu contents.
This user guide document is also
available under the ‘Utils’ section.
After clicking on each menu item it
should look like this.
The first step when you are looking
to reserve an asset for Re-issue, is
to search for the assets you are
interested in by clicking on the
‘View Assets available for Re-Issue’
link.
Although it is possible to restrict
your search to very specific details,
outlined in ‘Advanced Search’ it is
important not miss assets if your
filter it too specific.
To start your search, select the
subtype. In the example you can
see Pressure Care has been
selected.
Additional Tip:
In this screen make use of the
‘Manufacturer’ or ‘Model’ fields.
For example a quick way of seeing
all Roho products available is by
entering Roho in the manufacturer
field. No other information is
needed. Or if you were looking for
a Karma Eagle just enter Eagle in
the Model field.
After clicking ‘Search’ you will be
shown a list of assets matching
your search criteria.
If you click on the Asset number it
will display the details of the asset
Additional Tip:
Do not use the web browser’s
navigation buttons. Only use the
buttons at the lower section of the
database screen.
After entering any details do not
hit the enter key to proceed, click
on screen buttons only.
Using the appropriate details tab
you can see the specific details of
the asset to assist you with
determining suitability for your
client.
Additional Tip:
Look in the ‘Images/Web links’ tab
on the asset information screen to
find extra details.
For example; ILC or manufacturers
websites, product user guider or
catalogues for ordering additional
components.
Using ‘Advanced Search’:
Using the ‘Advanced Search’
feature to be more specific.
1. Select a category from the
Subtype list.
2. Click on the Advanced Search link
on the search screen.
You will be presented with a more
comprehensive screen after
selecting the subtype. (e.g. Manual
Wheelchairs).
At this point you can type in data
or use dropdowns to assist you in
narrowing your search.
Only use this Advanced search if
you find the standard search brings
back too many records to view the
details.
Reserving an asset:
To add the asset to your cart,
simply click ‘Add asset to cart for
Re-issue request’
This link will be indicated on the
‘Physical’ tab.
After clicking this link you will
notice the message at the top of
the screen informs you it has been
added to your cart.
At this point the asset has not been
reserved – only placed in the cart.
You will need to submit the
request in order to actually reserve
the asset (instructions follow).
Click on the ‘Save & Exit’ button at
the bottom of the screen if you
wish to return to the asset list to
select more assets.
You can view all the assets in your
cart at any time by clicking on the
sidebar menu option.
Select Submit a Request
On the second tab on this screen
you can view the assets you
previously added to your cart.
You can remove assets you don’t
require from your cart by clicking
in the box next to the asset you
wish to remove then clicking on
the ‘Remove Selected Items’ link.
Click on the ‘General’ tab.
You will be presented with this
screen.
You must enter a value for any
field marked with an asterisk (*).
You will notice the prescriber
name is greyed out can’t be
amended.
Enter either a phone number or
an email address (or both if you
wish) and these details will be
saved for your next visit.
You must provide the client’s
name and address as well as a
brief description or comment.
Click on the ‘Submit’ button.
Once you have submitted the
request you will see a notification
at the top of the screen and an
email will be sent to you with a
copy of the request.
You can also view requests you
have previously submitted using
the ‘View My Open Requests’ link
in the sidebar menu. You can also
re-print these requests as shown
below. In here you will be able to
view the details of the asset/s you
have reserved.
For further information contact SWEP:


