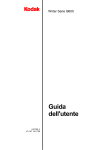
1
Desktop 3 Microfilmer A-61036 Part No. 4C2063 User’s Guide Safety Information for the Kodak Desktop 3 Microfilmer IMPORTANT: Equipment shall be installed by qualified personnel. WARNING: Dangerous voltage. Disconnect the main power before installation. CAUTION: Moving parts, avoid contact ATTENTION: Eviter le contact, pieces en mouvement VORSICHT: Bewegliche teile, berüehrung vermeiden CAUTION: Hot surface, avoid contact ATTENTION: Eviter le contact, pieces brulantes VORSICHT: Heisse oberfläeche, berüehrung vermeiden CAUTION: Risk of explosion if battery is replaced by an incorrect type. ATTENTION: une explosion peut se produire si la pile est remplacée par un modèle incorrect. VORSICHT: Bei Verwendung eines falschen Batterietyps besteht Explosionsgefahr. Acoustic Emission Maschinenläerminformations verordnung – 3, GSGV Der arbeitsplatzbezogene Emissionswert betraegt <70 dB(A). [ Machine Noise Information Ordinance – 3, GSGV – The operator-position noise emission value is <70 dB(A) ]. This equipment was designed for connection to IT Power Systems. Safety and Regulatory Information Following is some additional safety and regulatory information. Warning: To prevent fire or shock hazard, do not expose unit to rain or moisture. To prevent possibility of injury or damage to the unit, do not operate with any covers or panels removed. • Read and Follow Instructions — Read and follow all the safety and operating instructions before operating the unit. • Heed Warnings — Heed all warnings on the equipment and in the operating instructions. • Power Sources — The unit should be operated only from the type of power source indicated on the dataplate label. If you are not sure of the type of power supply that will be used, consult a dealer or local power company. • Power Cord Damage — Avoid damage to the power cord. If damage should occur, replace it with the specific cord for this unit. • Power Cord Protection — Power supply cords should be routed so they are not likely to be walked on or pinched by items placed upon or against them; pay particular attention to cords at plugs, convenience receptacles, and the point where they leave the units. NOTE: The power cord must have appropriate Safety Agency approval for the country where the unit is installed. • Grounding — The unit is equipped with a 3-wire groundingtype plug, a plug having a third (grounding) pin. The 3-wire grounding-type plug will fit into a grounding-type power outlet. This is a safety feature. If you are unable to insert the plug into the outlet, contact an electrician to replace the obsolete outlet. Do not defeat the safety purpose of the grounding-type plug. Regulatory Information The Kodak Imagelink Desktop 3 Microfilmer (including the Image Mark and Endorser accessories) has been tested and complies with the following standard. Product Safety • CSA NRTL/C marked and certified by Canadian Standards Association to CSA 22.2 No. 950 and UL 1950. • TUV GS marked and licensed to EN 60950 by Techniscer Uberwachungs - Verein Rheinland of North America, Inc. • The standards and specifications are in accordance with the 73/23 EEC directive and amendments. Electromagnetic Compatibility (EMC) • The equipment has been found to comply with the EN 55014/1987 and EN 50082-1/1992 standards for Information Technology Equipment. • The standards and specifications are in accordance with the 89/336 EEC directive and amendments. Introduction The Kodak Desktop 3 Microfilmer is intended for medium-to low-volume operations that require rapid, high-reduction microfilming. Documents up to 9.00 inches (22.9 cm) wide and 11.7 inches (29.7 cm) long can be microfilmed, with images captured on 16 mm film at a 40:1 reduction ratio. Thick-base (5 mil) film cassettes accept 100 ft. (30.5 m) lengths of microfilm. Thin-base (2.5 mil) film cassettes accept 215 ft. (65.5 m) lengths. A choice of duplex or duo modes provide flexibility in microfilming. Documents to be microfilmed are placed in the automatic feeder in the front of the unit, photographed as they pass between two clear document guides, and exit into an adjustable receiving area at the upper front of the microfilmer. No special skills or knowledge are required to operate the Desktop 3 Microfilmer. A-61036 July 2000 1 1 Overview Product description You should become acquainted with the Kodak Desktop 3 Microfilmer before operating it. Important parts of the microfilmer are identified in Figure 1. Control Panel Cabinet Cover Document Exit Guides and Stop Receiving Area Power Switch Latch Gap Release Feeder Adjustment Knob Document Feeder Film Cassette Compartment Figure 1 Kodak Desktop 3 Microfilmer Cabinet Cover: Opens for access to the interior of the microfilmer. Control Panel: Location of displays and external switches (except power). Latch: Rotates to release the film cassette. Film Cassette Compartment: Holds the film cassette. Gap Release: Allows thick documents, such as envelopes, check carriers, or folded papers, to be microfilmed. Document Feeder: Automatically feeds documents into the microfilmer. Feeder Adjustment Knob: Adjusts the feed rollers to accept one document at a time. Power Switch: Turns the microfilmer on and off. Document Exit Guides and Stop: Documents are guided and stopped as they exit into the receiving area. The guides and stop adjust for different document sizes. Receiving Area: Collects and stacks documents as they are ejected from the microfilmer. 2 A-61036 July 2000 The control panel contains the following displays and switches, plus the Desktop Image Marker switches (See Optional Accessories later in this section). 1 2 Document Counter 3 Reset 1 Out of Film Indicator Lamp Failure Feeder Adjust Indicators Reset 2 Film Odometer Slow Film Advance Endorser On/Off Fast Film Advance Filming On/Off Image Marker Switches (optional) Figure 2 Control Panel Reset 1: Press this button to reset the Document Counter to zero. Reset 2: Press this button to reset the Film Odometer to zero. Lamp Failure: Illuminates when a lamp needs to be replaced. Feeder Adjust Indicators: Lamp Failure and Out of Film indicators flash along with an audible beep when the feeder requires adjustment. Film Odometer: An eight-digit odometer display is provided to index the film images. Pressing the button below the display resets it to zero. The display is also used to measure the leader and trailer when loading and unloading film. Each unit on the display equals 4.8 inches (12.2 cm) of film that have been advanced. Endorser Power Switch (optional accessory): Turns the optional Endorser on and off. When turned on, the green light above is illuminated. Filming Switch: Turns the filming unit on and off. The microfilmer powers up in filming mode, and a green light indicates that you can begin microfilming. A blinking yellow light indicates that the film unit has been turned off. Documents can be counted or endorsed without exposing film when the filming switch is turned off. A-61036 July 2000 3 Document Counter: An eight-digit counter that shows how many documents have been processed by the microfilmer. Pressing the button below the display resets the counter to zero. It is possible to count documents without microfilming them (See Filming Switch on the previous page). Out of Film Indicator: Illuminates when the film supply is almost empty. Slow Film Advance: Advances film at approximately 7 inches (17.8 cm) per second when this switch is pressed. Film is automatically advanced 1.5 to 2.0 inches (3.8 cm to 5.1 cm) when the microfilmer is turned on or when a different film cassette is installed. Fast Film Advance Switch: Advances film approximately 48 inches (121.9 cm) when pressed. Used when the operator loads and unloads film. Image Marker Switches: By pressing one of these optional switches, you can determine the size of the image mark placed adjacent to each film image. III = large; II - medium; I = small; 0 = none. Alarm and interlocks Built-in alarms and interlocks provide safe and reliable operation and contribute to high-quality microfilm images. • An alarm sounds and a light is illuminated when the filming switch is on and the film supply is low or empty. • A blinking light above the filming switch indicates that filming is shut off. • An alarm sounds, a light is illuminated, and the microfilmer transport shuts off automatically if either of the exposure lamps fail. • The microfilmer transport shuts off automatically if a document becomes lodged in the document conveyor system. • The microfilmer will not operate when the cabinet cover is open. • Operator-replaceable fuses, mounted in the rear of the microfilmer, shut off the microfilmer in the event of an electrical overload. • An alarm sounds and the top two lights on the control panel flash if the document spacing becomes too close, and the feeder needs adjustment. 4 A-61036 July 2000 Optional accessories Kodak Desktop III Endorser The Desktop Endorser automatically endorses checks and other documents after they are microfilmed but before they are discharged into the receiving area. Features include: • Disposable ink supply rollers available in red, purple, green or black • Date changing with a single knob • Imprint location control • Selectable endorsing of checks or long documents • Custom imprint dies Kodak Desktop Image Marker The Image Marker exposes rectangular exposure marks along the edge of the microfilm, making rapid document retrieval possible. Three different image mark sizes, or no mark at all, can be selected by pressing the appropriate switch on the microfilmer control panel or by using an optional Footswitch. Automatic decrementing of the image mark can be deactivated with an internal switch if desired. Kodak Microimage Footswitch Image mark levels can be changed conveniently with the optional Microimage Footswitch when selected documents need varying image mark sizes. Kodak Reliant Cassette 100 Kodak Reliant Cassette 215 Convenient, drop-in film cassettes permit you to change quickly from one microfilming task to another. A choice of cassettes is available to accommodate 100-foot (30.5 m) lengths of film or 215-foot (65.5 m) lengths of film. A-61036 July 2000 5 2 Document/Film Overview Film requirements The Kodak Desktop 3 Microfilmer uses single, 16 mm rolls of Kodak Microfilm or equivalent. Recommended films include: • Kodak Imagelink HQ Microfilm 1461 • Kodak Imagelink HQ Microfilm 3461 NOTE: When using Kodak Imagelink FS Microfilm, an exposure adjustment and a filter addition must be made. For more information, contact your Equipment Service Representative for Kodak products. Document requirements Acceptable widths: 2.25 to 9.00 inches (5.7 to 22.9 cm) Minimum length: 2.5 inches (6.4 cm) Maximum length: 14 inches (35.6 cm). Longer documents can be accommodated, but require special handling at the receiving area. Minimum thickness: onion skin paper (.0015 inches/.0381 mm)Maximum thickness: index card (.015 inches/0.38 mm) 6 A-61036 July 2000 3 Operating Requirements Physical dimensions The Kodak Desktop 3 Microfilmer has the following physical dimensions: Height: Width: Depth: Weight: Space planning 13.0 inches (33.0 cm) 19.0 inches (48.3 cm) 23.0 inches (58.4 cm) 98.0 pounds (44.5 kg) You should allow for additional space in which to operate the microfilmer: • 17.0 inches (43.2 cm) overhead. • 9.0 inches (22.9 cm) at the rear for opening the microfilmer cover. Place the microfilmer on a desk, table, counter top, or stand which is firm, level, and strong enough to support the microfilmer's weight. NOTE: Heat ventilation grills and the bottom of the microfilmer must not be covered or blocked in any way that could restrict air flow. CAUTIONS: Lightning — For added equipment protection during a lightning storm, or any time when the equipment will be left unattended and unused for long periods of time, unplug the unit from the power outlets. Unplugging the equipment will protect the equipment from damage caused by lightning or power surges. Overloading — Do not overload power outlets and extension cords. This increases the risk of fire or electric shock. Object or Liquid Entry — Never push objects into the equipment openings. They could touch dangerous voltage points or short-out parts and result in a fire or electric shock. Never spill liquid of any kind on the equipment. Damage Requiring Services — Unplug the unit from the wall outlet and refer all servicing to qualified service personnel under the following conditions: • When the power supply cord or plug is damaged. • If liquid has been spilled or if objects have fallen in the equipment. • If the equipment has been exposed to rain or water. • If a unit does not operate normally according to the operating instructions. Adjust only those controls that are documented in the operating instructions. • If a unit has been dropped or the housing has been damaged. • When the system exhibits a distinct change in performance. Replacement Parts — When replacement parts are required, be sure the service technician has used replacement parts specified by the manufacturer, or parts which have the same characteristics as the original parts. Unauthorized substitutions may result in fire, electric shock, or other hazards. A-61036 July 2000 7 Safety Check — Upon completion of any service or repairs to the unit, ask the service technician to perform safety checks to determine that the unit is in proper operating condition. Moving the Microfilmer Do not attempt to move the microfilm by grasping anything inside the cover to use as leverage. Damage to the microfilmer, or lost images, could occur. Power requirements The Kodak Desktop 3 Microfilmer can operate on the following power supplies: • 100 volts ac, 50 Hz or 60 Hz, 3.5 amps • 120 volts ac, 50 Hz or 60 Hz, 3.0 amps • 220 volts ac, 50 Hz or 60 Hz, 1.5 amps • 240 volts ac, 50 Hz or 60 Hz, 1.5 amps • 230 volts ac, 50 Hz or 60 Hz, 1.5 amps A standard three-prong, grounded power outlet is required for operation within the United States and Canada. CAUTION: The Desktop 3 Microfilmer is set at the factory for 120 volts ac operation in the United States and Canada. If you require a different power configuration, contact your Equipment Services Representative for Kodak products. Electrical current requirements can vary from country to country, depending upon operating voltage. Environmental requirements 8 The Kodak Desktop 3 Microfilmer can be operated in a typical office environment that is maintained at 59°-86°F (15°-30°C). The acceptable relative humidity range is 15-76 percent. Total heat dissipation is approximately 1024 BTUs per hour (300 watts/hour). A-61036 July 2000 4 Operating the Microfilmer If the cover has been raised or power has been unavailable for 15 minutes or longer and the room temperature has fallen below 70°F (21°C), the microfilmer should be powered up for 10 minutes before microfilming is begun. Standard operation The Desktop 3 Microfilmer is capable of either duplex or duo microfilming. In the duplex mode, the front and back of each document are microfilmed simultaneously and imaged side-by-side across the film width. Information about duo microfilming is available in Appendix A. Duplex Duo Figure 3 Duplex and Duo Microfilming Orientation A-61036 July 2000 9 Loading film You should become acquainted with the cassette before loading film the first time. It can be inserted into the microfilmer only one way. Supply Alarm Arm Supply Spindle Figure 4 Microfilm Cassette IMPORTANT: • Whenever possible, film should be loaded in subdued lighting. This greatly reduces the likelihood of fogging the film. • Any time the microfilm is not in use or the cover is opened, with the film cassette installed, the film compartment latch must be unlocked (by rotating the latch downward) to prevent room light or bright ambient light from exposing (fogging) the film. To load a new roll of film: 1. Select the desired film and appropriate cassette. Thick-base (5 mil) film is inserted into a Kodak Reliant Cassette 100; thin-base (2.5 mil) film is inserted into a Kodak Reliant Cassette 215. 2. Place the cassette on a flat surface, latch side up. Press down on the cover latch and turn it counterclockwise. Remove the cassette cover. If the cassette contains an empty supply spool, rotate the supply alarm arm away from the spool and remove the spool. Keep the spool handy for reuse. 3. Pull off the sealer strip from the film box, and open it by pushing up the lid at the corner recesses with your thumbs. To protect the film from exposure to light, hold the roll in a horizontal position and do not allow it to unwind except as required for loading. 4. Remove the roll of film but do not discard the box. It may be needed to package the film before processing and/or for storing the film after processing. NOTE: Do not let the film unwind when you perform the following steps. Peel the paper band off the outer surface of the film. Keep pressure on the film with your finger. 5. Move the supply alarm arm away from the center spindle. 10 A-61036 July 2000 6. Hold the roll with its No. 2 side up and place it on the supply spindle so that the No. 2 on the spool is aligned with the No. 2 on the spindle. Rotate the spool so that the spindle hole and post holes line up with the supply spindle and its flange posts in the cassette. Seat the spool to the bottom of the spindle. Film Drive Roller Film Guide Rollers Film Guide Rollers Take-up Spindle Figure 5 Loading Microfilm into the Cassette 7. Slowly release the supply alarm arm so that the roller rests against the film. 8. Pull out approximately 18 inches (46 cm) of film. Follow the path indicated by the loading arrows in the cassette and thread the film around the film guide rollers, the film drive roller, and the take-up guide roller. 9. Fold one-half inch (1.3 cm) of film back on itself. Hold the take-up spool with its No. 1 side up, and locate the slot in the spool's core which is indicated by the arrow on the flange. Then, insert the folded-over end of the film into the slot. Keep pressure on the film with your fingers. Rotate the spool clockwise to bind the film around the core. 10. Keeping the No. 1 side up, place the spool on the take-up spindle so that the No. 1 is aligned with the No. 1 on the spindle. The off-center spindle posts will engage the off-center holes in the spool core. A-61036 July 2000 11 11. Seat the spool on the spindle. Be sure the film can move freely and is not twisted. When properly loaded, it will look like Figure 6. Figure 6 Properly Loaded Microfilm Cassette 12. Place the cover on the cassette. To secure the cover, press down on the latch and turn it clockwise. 13. Use one of the finger slots on the take-up wheel of the cassette to turn the take-up wheel approximately one and one-half turns or until you feel a light resistance. While doing so, make sure the film supply indicator moves back and forth. If the indicator does not move, open the cassette and repeat steps 5-11 above. 14. Rotate the film compartment latch downward until it locks. NOTE: The cassette inserts into the microfilmer only one way. Position the cassette so that the label faces up and would be readable if you were to stand to the right of the cassette. 15. Slide the cassette into the microfilmer and rotate the film compartment latch upward until it locks. 16. Press the odometer reset button to reset the odometer indexer to 000; then, turn on the microfilmer. 17. Press the fast film advance switch. This automatically advances the film approximately 48 inches (121.9 cm). NOTE: Do not feed documents when the fast film advance is cycling. 18. After pressing the switch, the odometer should read 010. Reset the display to 000 and begin to microfilm (See Microfilming Documents later in this section). 12 A-61036 July 2000 Unloading full rolls When a roll of film is almost at its end, an alarm will sound and the supply indicator will be at or near the clear circle on the cassette label. IMPORTANT: Unload film in an area with subdued lighting. To unload the film and prepare it for processing: 1. Remove any documents from the feeder. Wait until all documents have been discharged into the receiving area. 2. Press and hold the fast film advance switch until the film supply indicator no longer moves. This advances all film to the take-up spool. The last few feet of film will protect the exposed images from room light when film is removed from the cassette. 3. Rotate the film compartment latch downward until it locks. Pull out the cassette, and lay it on a flat surface with the cover latch up. 4. Press down on the cassette cover latch and turn it counterclockwise. 5. Remove the cassette cover. 6. Place your fingers over the flange of the take-up spool so that the film cannot unwind. Then lift the roll out of the film compartment. 7. Place the roll in the film box and catch the end of the film under the lid of the box. This prevents the film from unwinding. Tightly close the film box cover. Figure 7 Loading a Roll of Microfilm in the Film Box Make any indexing notations on the box labels. The film is now ready for processing. 8. Rotate the supply alarm arm away from the empty spool and hold it. 9. Lift out the empty supply spool and release the lever. Since this spool will be used for take-up for the next roll, keep it handy. A-61036 July 2000 13 Unloading partial rolls A partial roll can also be removed for processing. It can be cut and removed, leaving the remaining film in the cassette for additional microfilming. Have a pair of scissors and an extra film box handy and proceed as follows: CAUTION: Advance film before removing and opening cassette for cutting the film to avoid fogging images. The following steps should be performed in subdued lighting. 1. When microfilming is complete, press the fast film advance switch and wait until the odometer advances 10 units. This provides a 4-foot protective wrap of film around the images on the partial roll while it is being unloaded. 2. Turn off the microfilmer. 3. Rotate the film compartment latch downward, until it locks. Remove the cassette. 4. Place the cassette on a flat surface (latch-side up) and have a film box ready with the lid open. 5. Press down on the cassette cover latch, turn it counterclockwise, and remove the cover. 6. Lift the take-up spool off from its spindle. Keep pressure on the film so that it does not unwind; then, cut the film. 7. Bring the end of the film over the edge of the film box and place the film into the box. Close the lid tightly, catching the end of the film under the lid. This will hold the film in place and indicates that undeveloped film is in the box (See Figure 7). 8. Pull out approximately 18 inches (45.7 cm) of film from the supply spool and reload the cassette as you would a new roll of film. 9. Place the cover back on the cassette, press down on the latch, and turn it clockwise until it is secure. 10. Turn the cassette over for access to the take-up wheel. 11. Turn the wheel using one of the finger slots to make sure the film supply indicator moves back and forth. This indicates that film is advancing properly. If it does not move, reinsert the film end into the core slot and bind the film around the core again. 12. Replace the cassette in the compartment. Then rotate the film cassette latch upward until it locks. 13. Reset the odometer to 000 and turn on the microfilmer. 14. Press the fast film advance switch once. 15. When the film odometer reaches 010 and the film stops moving, reset the odometer to 000 and start microfilming (See Microfilming Documents). 14 A-61036 July 2000 Adjusting exposure CAUTION: Any time the microfilmer cover is opened with the film cassette installed, the film compartment latch must be unlocked (by rotating the latch downward) to prevent room light from exposing (fogging) the film. A rotating thumbwheel control at the inside rear of the microfilmer calibrates film exposure. A setting of nine provides the highest intensity exposure; zero, the lowest. The higher the setting, the greater the density (darkness) of your processed microfilm. Typically, the setting should be 6 or less for microfilming white documents. If a higher number is required, you should carefully clean the mirrors. When a setting higher than 6 is required and mirror cleaning does not help, you should call your equipment service representative. In the meantime, you may continue to use the microfilmer. NOTE: Whenever you clean the mirrors, also clean the document guides. (See the Maintenance section for cleaning instructions). Exposure Setup Control Figure 8 Adjusting the Exposure Setting A-61036 July 2000 15 Adjusting the feeder Feed rollers may need to be adjusted when there has been a significant change in document thickness. When adjusted properly, the feeder allows one document at a time to enter the microfilmer. This controls document feeding and avoids overlapping or lost images. Various conditions may require readjustment of the feeder rollers. These conditions include, but are not limited to, the following: • significant change in document thickness • extended use of the microfilmer • buildup of ink or other materials on the rollers • wear on the rollers If such conditions are not corrected, erratic document feeding may occur. This may result in the intermittent interruption of filming, and document images may be lost or cut off. Be sure to adjust the feeder properly. This will help prevent documents from overlapping and reduce the possibility of transport shutdowns. The feeder adjustment knob, located under the right side of the feeder, increases or decreases the space or gap between the feed and separating rollers. A label identifies this control. To adjust the feeder: 1. Turn on the microfilmer. 2. Press the filming switch to shut off filming. You should see a yellow blinking light. 3. Select a piece of paper similar in texture and thickness to the documents you will be microfilming. 4. Double the sheet over as though it were two documents and lightly crease it. With the two open ends towards the feed rollers, feed the test document into the feeder. Figure 9 Adjusting the Feeder 5. If the document unfolds without damage, the feeder needs no adjustment. Proceed to step 8. 16 A-61036 July 2000 6. If the test document does not feed into the microfilmer, the gap is too small. Turn the feeder adjustment knob two clicks to the left until the document feeds into the microfilmer and unfolds as it passes between the feed rollers. 7. If the document feeds into the microfilmer but does not unfold as it passes between the feed rollers, the gap is too large. Turn the feeder adjustment knob two clicks to the right until the document feeds into the microfilmer and unfolds as it passes between the feed rollers. Then turn the adjustment knob two more clicks to the right. 8. Turn on the filming switch. The green light should come on. 9. Advance the film one unit on the odometer at slow speed. 10. Place the stack of documents to be microfilmed onto the feeding shelf and continue microfilming. NOTE: The top two lights on the control panel will flash whenever the feeder needs adjustment. 11. Examine the first stack of microfilmed documents after any feeder adjustment. If the leading edges of the documents are marked, feathered, or worn in appearance, the gap is too small. Open the gap by slowly turning the feeder adjustment knob to the left until the documents feed without damage. Do not adjust the gap while feeding documents. Misadjustment can make feeder parts wear prematurely. Odometer indexing The film odometer displays the approximate amount of film movement in linear increments as documents are microfilmed. Indexing provides a convenient means of locating a document image when a microfilm reader is equipped with a similar odometer. A one-digit advance on the meter is equal to approximately 4.8 inches (12.2 cm) of film travel. To use the film odometer for document imaging: 1. Reset the odometer to 000; then start feeding documents. Stop at the beginning of each section of documents you wish to index. 2. Write the odometer reading on the film box together with a brief description of the section. 3. If you cannot finish a job and have to continue it later, stop, press the film advance switch once, record the odometer reading, and remove the cassette. When you resume microfilming, reinsert the film cassette, and determine if the film odometer has changed. If it has, reset the odometer to zero, press the film advance switch once, and add the last reading on the cassette to each new reading. This should keep the numbers accurate throughout the roll. 4. Continue microfilming for the entire roll of film. After the film has been processed, it will be returned in the indexed box. When viewed on a microfilm reader equipped with an odometer, the film can be advanced rapidly and the desired section of documents conveniently located using the index. A-61036 July 2000 17 Microfilming documents Before you start microfilming, be sure documents are free of paper clips, rubber bands, staples, and loose pieces of tape. Foreign objects can cause document jams and damage the feeder and conveyor system. Also determine how much film is available by checking the film supply indicator on the film cassette. When the indicator is positioned at the: • Solid (red) circle — full film supply. • Half-clear, half-solid circle — one half the film has been exposed. • Clear (tan) circle — all film has been used (a small amount of film remains to protect the exposed film from light). If low on film, replenish the film (See Loading Film); otherwise, proceed: 1. Turn on the microfilmer. NOTE: When you power up the microfilmer, wait at least 10 seconds before feeding documents to allow the microfilm to cinch and the lamps to illuminate, or If the cover has been raised or power has been unavailable for 15 minutes or longer and the room temperature has fallen below 70°F (21°C), the microfilmer should be powered up for 10 minutes before microfilming is begun. 2. Adjust the document side guides so documents will be centered in the feeder with approximately 1/16-inch (.2 cm) clearance on each side of the widest document. NOTE: If documents are to be endorsed and off-center imprinting is desired, it may be necessary to feed documents to one side. 3. Adjust the document stop and exit guides so documents will stack properly. 4. Reset the odometer indexer and document counter to zero if starting a new roll of film. 5. Since the microfilmer powers up in filming mode, the light near the filming switch should be green. This indicates that images will be generated. 6. For automatic feeding, pick up a 1 to 1 1/2-inch (2.5 to 3.8 cm) stack of documents (about 100 to 150 checks) to be microfilmed. Hold the stack with the front side away from you and with the top edge down. Jog the stack against a flat surface until the tops and sides of the documents are even. 18 A-61036 July 2000 7. Fan the stack of documents by alternating pressure at the front and back edges as shown in Figure 10. Figure 10 Fanning a Stack of Documents 8. Place the fanned stack of documents into the feeder. The leading edge of the first document should be between the feed rollers. The documents will be discharged face down into the receiving area in their original sequence. Figure 11 Feeding Documents NOTE: For proper transport through the microfilmer, feed long, narrow documents (such as adding machine tapes) so that they are centered beneath the register tapes arrow label on the left side of the feeder. 9. While microfilming, check the following for proper operation: Film Supply Indicator (on upper right edge of film cassette): Travels slowly back and forth to show film movement during microfilming. If the indicator does not move, the film may not be loaded properly. Document Guides and Stop: For proper document stacking, readjust the document stop and side guides if necessary. Document Counter: Should increment as each document is microfilmed. Feeder Adjust Alarm: If an audible alarm is heard, and the top two lights on the control panel flash constantly, adjust the feeder adjustment knob (clockwise) until the alarm stops. 10. If a film movement problem cannot be corrected, stop microfilming and call your Equipment Service Representative. A-61036 July 2000 19 Clearing a jam 1. Turn the microfilmer off. CAUTION: Any time the microfilmer cover is opened with the film cassette installed, the film compartment latch must be unlocked (by rotating the latch downward) to prevent room light from exposing (fogging) the film. 2. Remove loose documents from the feeder and receiving area. By pushing down on the gap release arm, remove any remaining documents caught between the feed rollers.3. Unlatch cassette. 4. Lift cabinet cover. 5. Remove documents from the upper transport by pushing the top springs to the left and right and pushing the plate back. NOTE: If an Endorser is installed, see Figure 19 for instructions. Figure 12 6. Press the upper transport latch to the left; then lift up the upper transport and remove any jammed documents. Figure 13 20 A-61036 July 2000 7. Lift the document guides, remove any documents and replace the guides. Figure 14 8. Lower the upper transport and latch. 9. Remove any documents under the lower conveyor belt assembly by pushing the two latches outward to release the assembly. Figure 15 10. Push the lower conveyor belt assembly back into place, making sure it is latched into position. 11. Close cabinet cover. 12. Latch cassette. 13. Turn the microfilmer on. NOTE: If the cover has been raised or power has been unavailable for 15 minutes or longer and the room temperature has fallen below 70°F (21°C), the microfilmer should be powered up for 10 minutes before microfilming is begun. 14. Check feeder adjustment for proper setting. 15. Continue filming. A-61036 July 2000 21 5 Operating the Desktop Endorser Operating controls and indicators You should become acquainted with the Endorser controls and indicators before operating the Endorser. Mode Swtich Imprint Location Control Die Drum Date Knob Figure 16 CAUTION: Any time the microfilmer cover is opened with the film cassette installed, the film compartment latch must be unlocked (by rotating the latch downward) to prevent room light from exposing (fogging) the film. The Endorser switch on the control panel turns the Endorser on and off. A green indicator is illuminated when the Endorser is on. Lift the microfilmer cover to view the Endorser. A label on the inside rear of the microfilmer shows Endorser settings. The mode switch sets the Endorser to imprint either check-size documents or documents having a feeding length greater than 5 inches (12.7 cm). The imprint location control adjusts the endorsement location from approximately 1 to 12 inches (2.5 to 30.5 cm) from the leading edge of the document. 22 A-61036 July 2000 The date knob rotates to change the date and code number. To change either, slide the knob to the right, from its “run position.” The index label indicates the correct knob position for changing the date and code number. Before you begin to use the Endorser, make certain that the: • proper die drum is installed. • belts are set correctly for date and code number. • mode switch is set properly. • imprint location control is set properly. • date knob is in the run position. To imprint the back of the documents, feed them face up. To imprint the face of the documents, feed them face down. Setting the date and code number The date knob sets the month, day, year, and three-digit code number printed by the Endorser. CAUTION: Any time the microfilmer cover is opened with the film cassette installed, the film compartment latch must be unlocked (by rotating the latch downward) to prevent room light from exposing (fogging) the film. To change any part of the date or code number: 1. Lift the microfilmer cover. Notice that the marks on the index label are identified and arranged in the same order as the seven date and code number belts in the die drum. 2. Slide the date knob to the right until the light-colored band is opposite the appropriate mark on the index plate. 3. Turn the knob clockwise or counterclockwise to obtain the month or number you require. 4. Be sure all the numbers are flat (not tipped up or down) and in line. Readjust if necessary. 5. Push the knob back to its run position. 6. Close the microfilmer cover. Latch the film compartment. 7. Turn on the microfilmer. Then turn on the Endorser. 8. Turn off the film unit. The yellow light will blink. Run two or three test documents to verify the date and code number settings and to ink-up the die drum. 9. Turn on the film unit. The green indicator will light. You can begin microfilming documents. A-61036 July 2000 23 Setting the mode switch The mode switch is a two-position switch that sets the Endorser to imprint check-size documents or documents having a feeding length greater than 5 inches (12.7 cm). To set the mode switch: CAUTION: Any time the microfilmer cover is opened with the film cassette installed, the film compartment latch must be unlocked (by rotating the latch downward) to prevent room light from exposing (fogging) the film. 1. Lift the microfilmer cover. Mode Switch Figure 17 Setting the Mode Switch 2. For check-size documents, move the mode switch left to the CHECKS position. 3. For documents having a feeding length of more than 5 inches (12.7 cm), move the mode switch right to the LONG DOCUMENTS position. NOTE: Long documents will receive more than one imprint if they are microfilmed with this switch in the CHECKS position. 4. Close the microfilmer cover and latch the film compartment. 24 A-61036 July 2000 Setting the imprint location control The imprint location control can be set so the Endorser will imprint the document at any point between approximately 1 and 12 inches (2.5 and 30.5 cm) from its leading edge, depending upon document length. To set the imprint location control: CAUTION: Any time the microfilmer cover is opened with the film cassette installed, the film compartment latch must be unlocked (by rotating the latch downward) to prevent room light from exposing (fogging) the film. 1. Lift the microfilmer cover. Imprint Location Control Figure 18 Setting the Imprint Location Control A-61036 July 2000 25 2. The imprint location control rotates between two limits, fully clockwise and fully counterclockwise. Adjusting this control varies the location of the imprint. IMPORTANT: Each of the following adjustments begins with the imprint location control turned fully clockwise. • To imprint 1 inch (2.5 cm) from the document's leading edge, set the control one-tenth of the distance it can rotate. • To imprint 2 to 3 inches (5.1 to 7.6 cm) from the document's leading edge, turn the control counterclockwise one-quarter of the distance it can rotate. • To imprint 7 to 8 inches (17.8 to 20.3 cm) from the leading edge, turn the control counterclockwise three-quarters of the distance it can rotate. NOTE: The Endorser will not imprint documents if the control setting is greater than the document length. 3. Close the microfilmer cover and latch the film compartment. 4. Turn off the film unit. You should see a yellow blinking light. 5. Run a test document to verify the imprint location. A small readjustment may be necessary. When adjusted satisfactorily, turn on the film unit. The green light will come on. 6. Proceed to microfilm. 26 A-61036 July 2000 Endorser accessory — clearing a jam If an Endorser is installed, follow the steps below to clear a jam that occurs in the upper transport area. To clear a jam: CAUTION: Any time the microfilmer cover is opened with the film cassette installed, the film compartment latch must be unlocked (by rotating the latch downward) to prevent room light from exposing (fogging) the film. 1. Lift the microfilmer cover. 2. Lift the Endorser release lever. Endorser Release Lever Figure 19 Lifting the Endorser Release Lever 3. Push the left-hand spring to the left. 4. While holding the spring to the left, remove the jammed documents. Figure 20 Clearing Jammed Documents from the Endorser’s Upper Transport Area 5. Release the spring and push it back into place. 6. Push the Endorser release lever back into place. 7. Close the microfilmer cover. 8. Lock the film compartment latch. A-61036 July 2000 27 Changing the ink roller The ink roller will need to be replaced when the entire imprint on documents becomes uniformly weak. CAUTION: Any time the microfilmer cover is opened with the film cassette installed, the film compartment latch must be unlocked (by rotating the latch downward) to prevent room light from exposing (fogging) the film. To change the ink roller: A plastic glove is provided in the new ink roller container for you to use when changing the ink roller. 1. Turn off the microfilmer and lift the cabinet cover. 2. Place several sheets of paper towel on a flat work surface. 3. Open the new ink roller container and remove the plastic glove. Put the plastic glove on your hand so your fingers do not touch the roller. 4. Press down on the ink roller handle and remove the roller from its brackets by lifting it straight out. Figure 21 Removing the Ink Roller 28 A-61036 July 2000 4. Discard the roller. 5. Remove the new ink roller from the container and take it out of the plastic bag. 6. While holding ink roller handle down, lower the new ink roller into its brackets as shown. 7. Close the microfilmer cover. 8. Lock the film compartment latch. Figure 22 Installing the Ink Roller A-61036 July 2000 29 Removing and replacing the Endorser die drum The Endorser die drum can be easily removed for cleaning, exchanging die drums, or replacing Endorser dies. CAUTION: Any time the microfilmer cover is opened with the film cassette installed, the film compartment latch must be unlocked (by rotating the latch downward) to prevent room light from exposing (fogging) the film. To remove or replace the die drum: 1. Lift the microfilmer cover. 2. Lift the Endorser release lever. Endorser Release Lever Figure 23 Lifting the Endorser Release Lever 30 A-61036 July 2000 3. Use a plastic glove or paper towel to hold the die drum while sliding the date knob to the right. Figure 24 Removing the Endorser Die Drum 4. Slide the die drum off of the die drum holders. Figure 25 Removing the Endorser Die Drum 5. Once the die drum is removed, you can proceed with cleaning, exchanging die drums, or replacing Endorser dies. See the appropriate section in this manual for the procedure you need. A-61036 July 2000 31 Changing Endorser dies The Endorser dies are two identical curved printing plates mounted on the exterior of the die drum. New dies will be necessary when the old dies become worn. CAUTION: Any time the microfilmer cover is opened with the film cassette installed, the film compartment latch must be unlocked (by rotating the latch downward) to prevent room light from exposing (fogging) the film. To change the dies: 1. Turn off the microfilmer and open the microfilmer cover. 2. Hold the die drum with a piece of cloth or paper towel and slide the date knob out as far as possible to remove the drum. Figure 26 Removing the Endorser Die Drum 3. Slide the die drum off of the die drum holders. 4. Place a coin or similar metal object in the slot at the bottom edge of the die. Remove the die by twisting or prying with the coin. Figure 27 Removing the Die 5. Orient a new die so it reads in the same direction as the date and code number. Position it on the die drum and press down to snap it in place. 6. Repeat this procedure with the other die. 7. Reinstall the die drum in the Endorser. 8. Close the microfilmer cover. 9. Run two or three sample documents through the microfilmer to ink-up the new Endorser dies and to check the orientation of both dies. 32 A-61036 July 2000 6 Operating the Image Marker Image marks are rectangular, black exposures placed along the edge of the film by the microfilmer. The marks are used to locate individual documents and sets of documents during retrieval. Image marks can also separate jobs on the processed roll of film. Three image mark sizes or levels can be thought of in terms of books, chapters, and pages. A large image mark could be equivalent to a book; a medium image mark, a chapter in a book; and a small image mark, a page in a specific chapter. Level III corresponds to a large mark, Level II corresponds to a medium mark, and Level I corresponds to a small mark. Level III Image Mark Level II Image Mark Level I Image Marks Figure 28 Image Mark Levels You have three options for setting image mark levels: (1) manually from the microfilmer control panel, (2) using the Footswitch accessory, or (3) using automatic decrement, which automatically decreases image mark levels from the level you have manually selected from the control panel. 1. To select the image mark size or no mark at all, press the appropriate Image Marker Switch: • None—press 0. • Small image mark—press I. • Medium image mark—press II. • Large image mark—press III. An indicator will light above the switch you have pressed. 2. To change image mark levels, press the appropriate level switch. A-61036 July 2000 33 3. To turn off automatic decrement: Lift the microfilmer cover. At the left rear side of the microfilmer, slide automatic decrement switch #5 to the OFF position. Figure 29 Setting the Automatic Decrement Switch (Switch #5) Notice that switch #5 is one of eight switches located next to each other on a circuit board at the left rear side of the microfilmer. The switches are accessible through a long slot in the top of a cover which protects the circuit board. You can override auto decrementing at any time by pressing an image mark level switch on the control panel or by pressing the optional Footswitch. After decrementing to level I, image marking remains at level I until another level is selected on the control panel or until the Footswitch is pressed. 34 A-61036 July 2000 7 Operating the Footswitch This optional accessory allows you to change image mark levels with your foot without using the control panel. (Your Equipment Service Representative for Kodak products will install and preset the Footswitch to meet your needs.) Actuating the Footswitch changes the image mark level to the level which has been preselected. Continuing to press the Footswitch maintains the preset image mark level until the Footswitch is released. A-61036 July 2000 35 8 Maintenance Procedures Use of attachments that are not recommended may cause hazards and serious damage to the equipment. Microfilmer care IMPORTANT: DO NOT use commercial cleaning solvents in any of the following cleaning instructions. Wipe the exterior of the microfilmer with a soft cloth, water-dampened if necessary, to remove fingerprints, stains, or other soil marks. Using a cloth, remove dust from the feeder and receiving area as required. NOTE: Excessive dust levels may damage internal parts. Cleaning the cassette Before loading a new roll of film into the film cassette, remove dust, debris, or other foreign material from the interior of the cassette. Once a month, carefully clean the film drive roller and idler rollers with a clean, water-dampened cloth. Cleaning the guides Since documents are photographed through clear document guides, the guides must be kept clean in order to maintain high-quality film images. Inspect the guides for dust and smudges at each film change. Clean the guides when necessary. 1. Turn off the microfilmer. CAUTION: Any time the microfilmer cover is opened with the film cassette installed, the film compartment latch must be unlocked (by rotating the latch downward) to prevent room light from exposing (fogging) the film. 2. Rotate the film compartment latch downward, until it locks. Remove the cassette. 3. Lift the cabinet cover. 36 A-61036 July 2000 4. Press the upper transport latch to the left; then, lift up the upper transport. Upper Transport Latch Figure 30 Lifting the Upper Transport 5. Lift the document guides out of the spring holder on the left side and pull up both guides simultaneously. Document Guides Figure 31 Lifting the Document Guides for Cleaning Inspect the guides for smudges. If necessary, clean the guides with lens tissue or a clean, water-dampened cloth. Wipe until dry. 6. Be careful not to get fingerprints on the guides during the next step. Pivot both document guides to the left, and push them all the way into their holders. 7. Make certain that the guides are seated properly before lowering the upper transport and cabinet cover. A-61036 July 2000 37 Cleaning the mirrors Four mirrors in the optical system of the microfilmer must be kept clean to maintain high-quality film images. The mirrors are the Front 45° Mirror, two Rear 45° Mirrors, and the Lens Mirror. Lens Mirror Rear 45° Mirror Rear Lamp Housing Front Lamp Housing Front 45° Mirror Figure 32 Cleaning the Mirrors Once a week, inspect the mirrors for smudges, dirt, and dust. Clean the mirrors when necessary. IMPORTANT: When cleaning the four mirrors in the microfilmer’s optical system, do not remove or move the mirrors while cleaning. 1. Turn off the microfilmer. 2. Lift the cabinet cover. 3. Press the upper transport latch to the left; then, lift up the upper transport (See Figure 30). 4. The effective surfaces of the front 45° mirror and one rear 45° mirror face the left side of the machine. Examine these surfaces for lint, dust, and fingerprints. If necessary, clean the mirrors with a soft, clean, lint-free cloth. For a more thorough cleaning, dampen the cloth with a little lens cleaner or use lens cleaning paper. Wipe gently until dry. 5. The other rear 45° mirror and the lens mirror may also need cleaning. Clean the surfaces of these two mirrors with a soft, clean, lint-free cloth whenever any of the other mirrors are being cleaned. 6. After gently cleaning the mirrors, verify that they are still clipped into position against their adjustment screws. 7. Lower the upper transport and close the cabinet cover. 38 A-61036 July 2000 Cleaning feed rollers Clean the feed rollers occasionally with a water-dampened cloth in order to retain their frictional characteristics, especially if carbon copies are microfilmed. CAUTION: If a solvent is required, use a soft cloth, moistened with clean water only. Never clean rollers with the power on. Exposure lamps The fluorescent exposure lamps have the same long-life characteristics as fluorescent lamps used in homes and offices. If either lamp should fail, the microfilmer will shut off automatically and cannot be restarted until the burned-out lamp has been replaced. For lamp replacement, contact your equipment service representative for Kodak products. Caring for the Endorser Routine maintenance will keep the Endorser in good operating condition and printing high-quality impressions. Install a new ink roller whenever the entire imprint becomes uniformly light on the documents. Install new Endorser dies when poor imprints are the result of normal die wear. Replacing fuses If one or both of the microfilmer's fuses blow, they should be replaced with fuses having identical ratings. A label, located near the power module at the rear of the microfilmer, specifies fuses for different operating voltages and current. Select the fuse that applies. To replace one or both fuses: 1. Unplug the microfilmer from the power outlet. 2. The power cord entry point at the rear of the microfilmer is called the power module. Extract the power cord from the power module and carefully pry the cover from the power module. Voltage Selection Cylinder Power Module Fuses Figure 33 Gaining Access to the Fuses A-61036 July 2000 39 WARNING: Do not disturb the position of the voltage selection cylinder near the top of the module! If the cylinder is removed and the position is changed to an incorrect setting, fuses may blow, the microfilmer will not function properly, and/or the microfilmer could be damaged. If in doubt, call your service representative for Kodak products. CAUTION: Be careful not to break the fuses when you remove them. 3. The fuses are located in the lower portion of the module. Verify that a fuse has blown. If a fuse has not blown, refer to the Microfilmer Troubleshooting Chart for assistance or contact your service representative. If blown, replace one or both of the fuses and remount the power module plate. Then, reinsert the power cord into the microfilmer. Finally, plug the cord into the power outlet. 4. Verify proper operation and resume microfilming. 40 A-61036 July 2000 9 Troubleshooting Charts Microfilmer Trouble Microfilmer does not start. Probable Cause Remedy Power cord not connected properly. Push the plug all the way into receptacle and into the power module. Power supply fuse blown. Check fuses in power module. Replace blown fuse(s) with identical type and rating. If trouble persists, call your Equipment Service Representative. Cabinet cover not fully closed. Correct any condition preventing the cover from closing completely. Burned out lamp. Contact your equipment service representative for lamp replacement. Document is blocking lower or upper sensor. Clear documents from sensor(s). See Clearing a Jam. Film supply completely used up. NOTE: This alarm is disabled during Not Filming mode. Remove the exposed film and reload. See Unloading Full Rolls. Burned out lamp. Contact your equipment service representative for lamp replacement. Feeder not adjusted. Adjust the feeder. Documents not feeding straight. Document guides not adjusted. Adjust the guides so that the documents are centered. Provide 1/16-inch (.2 cm) clearance between guides and end of widest document. Documents not stacking properly. Document stop out of adjustment. Readjust the document stop so the receiving area is slightly longer than the longest document. Uneven image density on film. Dirt or fingerprints on the clear document guides or the mirrors. Clean the document guides and mirrors as instructed in Maintenance Procedures. Front or back of documents not being photographed in duplex operation. Mirrors removed or covered. Check mirrors. Clean mirrors if necessary. Clear streak seen through film images. Foreign object in the optical path. Check the optical path from the document guides to the lens. Remove any object that would obstruct the passage of light rays. Audible alarm sounds, indicator lights on control panel light up. A-61036 July 2000 41 Trouble Probable Cause Remedy No images on film. Filming switch in the Not Filming mode. Press filming switch to turn on filming mode. Dot (.) appears in upper left corner of document counter and/or film odometer. Counter needs to be reset or batteries are weak. Press the reset button. If this does not help, the batteries need to be replaced. Contact your equipment service representative for battery replacement. Film images out of focus. Wrong film type in cassette. Be sure to use 100-foot (30.5 m) rolls of thick film (5 mil) in Cassette 100 and 215-foot (65.5 m) rolls of thin film (2.5 mil) in Cassette 215. Documents lodging in conveyor system. Fasteners catching on plates or guides. Before microfilming, make sure all staples, paper clips, and other fasteners are removed. Lower/upper transport guides are not latched in place. Latch guides into place. Wrong film speed. Use a filter for fine grain film. Exposure misadjusted. Perform exposure setup. Image density too light or too dark on film. Endorser Trouble Endorser doesn't operate. Probable Cause Remedy Endorser not on. Press Endorser button. Endorser not plugged in. Plug in Endorser. First document not imprinted. Not enough ink on die drum after a change of date, code number, or dies. Run two or three test documents. Endorser operating but documents not being imprinted. Imprint location control setting greater than document length. Adjust imprint location control. Die drum missing. Install the die drum. Check to see if ink roller is positioned correctly. Long documents receiving more than one imprint. Mode switch set for checks. Set mode switch for long documents. Date or code number changes during Endorser operation. Date knob not pushed in after date or code number adjustment. Reset date or code number and push knob to RUN position. 42 A-61036 July 2000 10 Accessories, Supplies and Parts Optional accessories Kodak Desktop III Endorser (w/o Die Drum)........................................................ CAT 194 3091 Kodak Imagelink Desktop Die Drum ....................... CAT 198 1521 Kodak Reliant Cassette 100 ................................... CAT 122 9632 Kodak Reliant Cassette 215 ................................... CAT 122 9699 Film supplies Recommended: Kodak Imagelink HQ Microfilm 1461 (Estar Base) 16 mm x 100 feet (30.5 m)...................................... CAT 822 3232 Kodak Imagelink HQ Microfilm 3461 (Estar Thin Base) 16 mm x 215 feet (65.5 m)...................................... CAT 845 1502 Acceptable but not recommended for the Desktop 3 Microfilmer: (Equipment requires modification by an Equipment Service Representative for Kodak products if these film products are used.) Kodak Imagelink FS Microfilm 1455 (Estar Base) 16 mm x 100 feet (30.5 m)...................................... CAT 833 0896 Kodak Imagelink FS Microfilm 3455 (Estar Thin Base) 16 mm x 215 feet (65.5 m)...................................... CAT 826 5779 Equipment supplies Kodak Imagelink Desktop Endorser Die Drum ....... CAT 198 1521 Reliant Endorser Die Set ........................................ CAT 104 6929 Reliant Endorser Die Set, Special........................... CAT 131 6249 Kodak Imagelink Desktop II Endorser Ink Roller/Red ............................................................... CAT 167 7897 Kodak Imagelink Desktop II Endorser Ink Roller/Purple ........................................................... CAT 158 3889 Kodak Imagelink Desktop II Endorser Ink Roller/Green............................................................ CAT 173 9002 Kodak Imagelink Desktop II Endorser Ink Roller/Black ............................................................. CAT 127 6542 Replacement parts Kodak Duo Take-Up Spool .................................. Part No. 543785 Fuse, 250v 4 amp, slow blow .............................. Part No. 141049 Fuse, 250v 2 amp, slow blow .............................. Part No. 208611 For information about accessories, supplies, and replacement parts, contact your nearest distributor of Kodak products. A-61036 July 2000 43 Appendix A Duo Microfilming If duo microfilming mode is desired, a special mask must be ordered from and installed by your Equipment Service Representative for Kodak products. The mask prevents the other half of the film from being exposed to light. Reversing and reloading duo film In duo mode, the front side of a document is microfilmed on one half of the film width while the other half of the film remains unexposed. The spool is turned over and reloaded to expose the second side after the roll has been fully exposed on one side. An audible alarm will sound and the supply indicator will be at or near the clear circle when the first side has been fully exposed. To load the second side: 1. Remove any remaining documents from the feeder. 2. Press the fast film advance switch to wind any remaining film onto the take-up spool. The trailer, attached to the end of the film, will protect the film from room light when the roll is removed and turned over for reloading. 3. Turn off the microfilmer. 4. Remove the cassette and lay it on a flat surface with the latch up. 5. Press down on the latch, turn it counterclockwise, and remove the cassette cover. 6. The take-up spool contains a roll of film with half of its width exposed. NOTE: Put a gummed label on the No. 2 side of this spool to indicate you are microfilming in duo mode. 7. Rotate the supply alarm arm away from the empty supply spool and remove the spool. 8. Remove the full duo take-up roll and turn it over before placing it on the supply spindle. Make sure that side No. 2 is up. 9. Using the empty spool as the take-up spool, reload the cassette just as though it were a new roll of unexposed film. Make sure that the supply side shows the No. 2 side of the spool or that the gummed identifying label is up. 10. Place the cassette in the microfilmer. Press the fast film advance once, and continue microfilming. 11. When both sides of the duo film have been exposed, unload the cassette as previously described and package the film prior to processing. The take-up roll will not display the duo label, indicating that both sides of the film have been exposed. NOTE: Avoid unloading partial rolls of film if you are using the duo mode to avoid wasting the unexposed portion of the film. Do not unload the film until the end of the roll if side two has already been started. 44 A-61036 July 2000 New Equipment Warranty FOR INSTALLATIONS IN THE UNITED STATES OF AMERICA Kodak Desktop 3 Microfilmer Kodak warrants this Kodak Desktop 3 Microfilmer to function properly for three months from date of shipment. This warranty covers the purchaser of this equipment as well as anyone else who owns it during the warranty period. Warranty Repair Coverage If this equipment does not function properly during the warranty period, a Kodak’s Global Customer Service and Support (GCSS) Field Engineer will repair the equipment without charge during Kodak's normal working hours (usually 8:00 a.m. to 5:00 p.m. Monday through Friday) excluding Kodak holidays celebrated locally. Such repair service will include any adjustments and/or replacement of parts necessary to maintain the equipment in good working order. Off-hours service is available at overtime rates. How to Obtain Service Inside the United States, call 1-800-3KODAK3 Outside the United States, call your nearest Kodak GCSS District/Regional Office. Limitations Warranty service is limited to the contiguous United States, the island of Oahu in Hawaii, and certain areas of Alaska. This warranty does not cover: circumstances beyond Kodak's control; misuse; abuse; any attachments, accessories, or alterations not marketed by Kodak (including service or parts to correct problems resulting from the use of such attachments, accessories, or alterations); failure to follow Kodak's operating instructions; or supply items. Kodak makes no other warranties, express, implied, or of merchantability for this equipment. Repair or replacement without charge are Kodak's only obligations under this warranty. Kodak will not be responsible for any consequential or incidental damages resulting from the sale, use, or improper functioning of this equipment even if loss or damage is caused by the negligence or other fault of Kodak. Such damages for which Kodak will not be responsible include, but are not limited to, loss of revenue or profit, downtime costs, loss of use of the equipment, cost of any substitute equipment, facilities, services, or claims of your customers for such damages. This limitation of liability will not apply to claims for injury to persons or damage to property caused by the sole negligence or fault of Kodak or by persons under its direction or control. A-61036 July 2000 45 FOR INSTALLATIONS OUTSIDE THE UNITED STATES OF AMERICA For installations in countries other than the United States, the terms and conditions of the new equipment warranty will be provided by the Kodak company in the country in which the sale is finalized, or by a Kodakappointed distributor in those countries where Kodak does not have direct sales representation. 46 A-61036 July 2000 EASTMAN KODAK COMPANY Document Imaging Rochester, New York 14650 Kodak, Recordak, Reliant, Infocapture, Imagecapture, AHU, and Estar are trademarks. Printed on recycled paper. A-61036 7/00 Eastman Kodak Company, 2000 Printed in U.S.A. DOCUMENT IMAGING