1
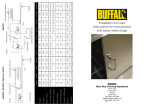
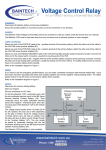
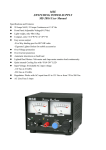
Compact Solar Panel User Guide.
There is a wallet on the solar panel bag. In this wallet is 5m of wire.
There is a short lead, a round connector on one end and on the other end
there is a connector which will plug into the 5m lead coming from the
solar panel.
The lead shown here on the right.
Plug this lead into the 5m solar panel lead. This lead is used for charging
the phone and the laptop.
PHONE CHARGE CONNECTION
There is also a short lead which has a female end and an offset rectangle
connection at the other end.
The lead shown on the right.
This lead plugs into the small voltage controller and the lead shown in the
previous photo.
On the other end of the voltage controller, plug in the lead with the USB
connection end.
On the other end of the USB lead plug the connector which fits your
phone or use your phones USB charger lead.
LAPTOP CHARGING
Using the lead shown in the first photo select the connector which fits
your laptop and plug the laptop connector in to this lead. Plug the short
lead into the 5m lead from the solar panel (as per the first photo).
Plug this lead into your laptop.
12V BATTERY CHARGING
The other lead in the kit which has two bare wires is used with the 5 amp
regular.
Plug the lead into the 5m of wire from the solar panel.
Then plug the two bare wires positive in to the positive solar bus on the
5amp regulator and the negative wire into the negative bus on the solar
regulator.
The battery wires (not included) go into the positive and negative bus of
the regulator which has a battery icon above the connection point.
To charge the 12v battery you will need a lead and connections to your
battery. (this is not supplied).
After selecting the required attachments to charge your device put the
solar panel out in the sun and it will start charging your laptop.
FIRST TIME.
Remove the protective plastic covering of each solar panel. This plastic is
not needed and can be discarded.