1
User Manual - Astro40D
1. Check the Camera after open the case.
Component:
-Astro40D, cooling unit`s power
cable,
-Thermometer cable,
-Thermometer
-Canon Manual & CD,
-Charger,
-Camera battery,
-Strap,
-USB cable
2. Please connect the Red clip of power cable to plus terminal on the DC 12V battery.
Please connect the Black clip of power cable to minus terminal on the DC 12V battery.
If you use SMPS or DC adapter, Please choose 12V 3.5Amp~ products.
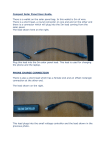
3. Put in the Thermometer cable jack in the Thermometer and Put in another side in to the
Temp terminal on the camera.
1
4. Please Connect the Remote controller of Canon (TC80N3) with camera.
5. Please check whether Fan and Excooler are operated or not after DC12V Jack is connected.
And check the LED whether it’s connected properly on the Excooler.
6. Please confirm the temperature on CMOS (=OUT) and air temperature (=IN) through push
the Mode button.
CMOS temperature is dropped by degrees to the lowest temperature and slowly risen to
-18°C(±2) compared with the normal temperature.
(Eliminate the tape on the battery in Thermometer to turn on at first time)
7. Start to take a photograph.
2
NOTICE
1. A stain happens on the LCD if you try to
see it at an angle to the LCD.
LCD panel has one 1nn thickness FPC
connector at the inner side. And it is
contacting with airtight chamber (=cooling
unit). This delivers unequal pressure at LCD
panel. Therefore a smear will be seen at right
upper side.
To fix this we must cut cold finger partially. But
this makes impossible equal CMOS cooling.
It's a more serious problem.
Modifying camera in a narrow space of
camera is very difficult work. With courtesy we
seek customer's understanding about this.
2. The housing of Astro40D does not guarantee dust protection & moisture-proofing. Please
handle with care.
3. If camera placed at wet air or dewing environment with cooling unit power off, the
condensation of the housing might make a short circuit. After taking a picture, keep the camera
indoors.
3