1
–5–
–4–
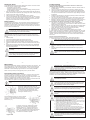
Starting the Pump
To operate efficiently and prevent pump damage there must be a free flow of water
to and from the pump. Before starting ensure that:
- all pipework is correctly sealed.
- the pool/spa water level is at the correct height.
- that all appropriate valves are open and there is nothing preventing the flow
of water through the system.
1. First prime the pump by removing the strainer basket lid and filling the strainer
basket area with water. Replace the lid, ensuring that it seals on the large oring.
2. Connect to the power supply and switch on.
3. Allow the pump to run, so that any air trapped may be expelled.
4. If prime is not established within approximately two minutes, as evidenced by a
strong flow of water, switch off the pump and repeat the procedure. Continued
evidence of air under the strainer basket lid indicates an air leak in the suction
piping which should be rectified to avoid pump damage.
Pump operation
For optimum pump performance, the strainer basket housing should always be full
of water and free from air bubbles. The water level of the pool should always be
maintained to at least halfway up the skimmer box ensuring water is in the pump at
all times. From time to time it may be necessary to re-prime the pump. This should
be carried out as described above.
Never run pump dry. Running the pump with no water may damage the
mechanical seals, causing leakage and flooding. Dry running damage and
associated damage is not covered under warranty.
Emptying the Strainer Basket
The strainer basket should be inspected frequently through the transparent lid
and emptied when a build up of rubbish is evident. The directions below should be
followed.
1. Switch off pump.
2. Unscrew the strainer basket lid anti-clockwise and remove.
3. Remove the strainer basket by lifting upwards from its housing.
4. Empty the trapped refuse from the basket. Hose out with water if necessary.
5. Check the strainer basket for cracks, replace the strainer basket in the pump if
OK.
6. Replace the lid and ensure that it seals on the large rubber oring. Firm hand
tightness only is required. The oring & thread can be lubricated with Hydra
slip or equivalent products.
Failure to undertake regular maintenance may cause damage not covered
by warranty.
Power supply to this pump needs to be through an isolating transformer
on RCD, having a rated operating current not exceeding 30mA.
If the pump runs but there is no water flow or water flow is reduced, the
following condition may apply:
1. The filter requires backwashing or it is blocked. Refer to the relevant section in
the Filter Manual.
2. The pump is not primed. Re-prime as per instruction in ‘Starting the pump’
3. There are air leaks in the suction piping. Check all piping and eliminate leaks,
also check for a loose strainer basket lid. Air bubbles in the water flowing back
to the pool would indicate a leak in the suction to the pump allowing air to enter
the pipework.
4. A leaking pump shaft seal may also prevent operating. Evidence of this would
be water on the ground under the pump.
5. The pump is not able to get water from the pool. Check that the valves to the
pump are fully open and that the pool water level is up to the skimmer box.
6. Blockage in the piping or pump. Remove the strainer basket and check for any
blockage to the pump impeller entry. Check the skimmer box for blockage.
If the pump does not operate, the following conditions may apply:
1. The power is not connected. For 240 volt only, check the power point by
plugging in a portable appliance to ensure power is available. Also check fuses
and the main power supply switch
2. Automatic overload is tripped. The pump has an in-built thermal overload which
will re-set automatically after the motor has cooled following an overheating
period. Determine the cause of the overload tripping and rectify.
3. Blockage is preventing the pump from rotating.
4. Motor is burnt out - burning smell is evident. Replacement is required.
If you are unable to resolve any installation or operation difficulties with your Power
Master®, contact the supplier from whom the pump was purchased or your nearest
Authorised Davey Pool Equipment Service Centre. If any further assistance is
required, contact the Davey Customer Service Centre at the address indicated in
this manual.
Removal of the Pump from Pipework
Should it be necessary to remove the pump, follow these instructions:
1. Switch off the power and remove the plug from the power source.
NOTE: If the pump is wired into a time clock or another automatic
control, the wiring should be removed by a qualified electrician.
2. Close the water valves on the pool return and the pump inlet pipework.
3. Remove the discharge & suction barrel unions taking care not to lose the
orings.
4. Move the pipework with the barrel unions attached until the pump can be
pulled clear.
NOTE: When making any enquiries about your Power Master® be
certain to quote the model number from the nameplate located on
motor.
–7–
–6–
Water Quality
Maintaining balanced water chemistry is important to the life of your pool pump. This
pump is designed to be used with Pool & Spa water, balanced in accordance with
Langlier Saturation Index, with a pH level of between 7.2 and 7.8 and is regularly
treated with a chlorine sanitising agent with the level not exceeding 3000PPM.
Please consult your local pool shop regularly to have your water tested.
Three Phase Power Connection
Three phase models are designed for connection to a nominal 415V power supply,
but must be wired with a contactor with ‘quick-trip’ overloads set at 4.3 amps.
Davey recommend the use of overloads which also have the ability to detect “single
phasing” or “dropped phase” conditions in the power supply.
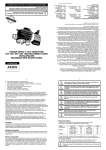
Three phase PM450 models have been designed to allow for connection either side
of the capacitor cover (marked “A” in figure one) on the motor.
NOTE: Three phase motors do not have capacitors fitted in the capacitor
cover.
This is achieved by way of either of the two 19mm
access holes (marked “B” in figure one). The
access holes are designed to accept most standard
cable grommets. The unused hole can be sealed
by inserting the plug enclosed with the pump.
To connect a three phase PM450 pump start by
removing the terminal cover (“C”)
Figure One
Insert the blanking grommet (“F”) into the capacitor
cover (“A”). Fix the short lead (“D”) into the path
provided in the non-drive end-shield and replace the
terminal cover (“C”).
Figure Two
A short four core flex (“D”) is fitted from the motor
terminals (“E”). This lead is inserted through the
blanking grommet (“F”). Pressure switch or other
control leads (“G”) can be fitted as well. Incoming
power (“H”) can be fitted through the preferred access
hole, and terminated as shown in Figure Three. A termination kit is available if required.
Figure Three
Trouble Shooting
IMPORTANT NOTE:- THREE PHASE MODELS ONLY
BEFORE FINALISING WIRING CONNECTIONS, CHECK THAT THE MOTOR ROTATES
IN DIRECTION OF ARROW (CLOCKWISE WHEN THE SHAFT IS VIEWED FROM THE
WIRING CONNECTION END). TO ALTER ROTATION, CHANGE ANY TWO POWER
LEADS AT MOTOR TERMINALS.
When the unit is connected and operating the phase balance should be checked.
This should be within 5% variation. “Rolling” the leads may help to improve a small
unbalance, but major phase unbalance will usually be attributable to an input power
unbalance. This must be addressed before the pump is used.
POWER CONNECTIONS AND WIRING MUST BE CARRIED OUT BY AN
AUTHORISED ELECTRICIAN.
DANGER - Hazardous suction. Do not block water entry into filtration
system with any part of your body as the pressure can trap hair or body
parts, causing severe injury or death. Do not block suction. Turn off
pump immediately if someone becomes trapped.
Caution! Do not add chemicals directly to the pool skimmer. Adding undiluted chemicals may damage pump and filter and void warranty.
Small children using the pool or spa must ALWAYS have close adult supervision.
Routine Maintenance tasks – to maximise the life of your pool equipment
& personal safety, use this checklist once a week. Turn pump off first.
a. Make sure that any pressure gauges are in working condition and the operating pressure is within limits as specified on the product.
b. Make sure that each suction inlet, and main drain has a cover that is securely attached and in safe working condition.
c. Make sure that all skimmer covers are securely attached and in safe working
condition. These should be replaced every 3 to 4 years.
d. Remove any obstructions or debris from the main drain cover.
e. Ensure the skimmer baskets and the pump hair and lint pots are free of
leaves and debris at least once a week.
f. Remove obstructions and combustibles from around the pump motor.
g. Make sure all wiring connections are clean and that all wiring and electrical
equipment is in good condition. Damaged wiring must be repaired or replaced by a qualified electrician as soon as damage is discovered.
h. Check water balance and sanitiser levels at your local pool shop.
WARNING! Pump suction is hazardous and can trap and drown or disembowel bathers. Do not block suction. Do not use or operate swimming
pools, spas or spa baths if a suction cover is broken, missing or loose.
Two suction covers and inlets must be provided into every pump to avoid
suction entrapment.