1
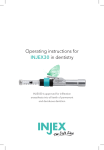
Operating instructions for
INJEX30 in dentistry
INJEX30 is approved for infiltration
anaesthesia into all teeth of permanent
and deciduous dentition
How it works
The Injex30 system for Dental application is a stainless steel device for delivery of
anaesthetic from sterile disposable 0.3ml ampoules and sterile disposable silicone
cushioning caps though a micro nozzle in the ampoule into the gum at a consistent
pressure by means of an integrated spring.
0.3ml of anaesthetic injected with Injex is sufficient for superficial fillings to all
teeth of deciduous and permanent dentition under normal circumstances.
Top up anaesthetic as required for other procedures.
The anaesthetic is transferred from standard containers into the ampoules using
a range of adapters.
Recommendations for injection site selection
There are two accepted practices for injecting:
1
The Injector is placed in the same position and angle as
the traditional needle into the buccogingival sulcus, at
the point of the sulcus that is as close as possible to the
attached gingival, ensuring that the Injector is held with
medium pressure and at 90 degrees to the point of injection
(Not at 90 degrees to the teeth)
WARNING: The injection must be into the buccogingival area at the point of the
sulcus that is as close as possible to the attached gingival. If the injection is too close
to the buccal and lip areas there may be some bruising or bleeding.
2
The injection is at the apex of the tooth ensuring that the
Injector is held with medium pressure and at 90 degrees
to the point of injection (Not at 90 degrees to the teeth).
Both are correct. The first option is considered to be the preferred method for
least patient sensation but the second option does allow the injection to be
given with the patient’s mouth only partially open.
The sensation that the patient should feel will vary from none, to a flick of the
fingernail – instant then gone immediately.
2
The injection
INJEX30 can be used on all teeth. Prepare the Injector following the guidelines on
pages 4 and 5. Always inform your patients of the trigger sound before injecting.
Once your Injector is ready proceed as follows:
1
Open the sterile packaging and remove one SiliTop. Push the
Ampoule tip completely into the SiliTop. Now withdraw the Injector
with the SiliTop attached to the Ampoule tip, out of the package.
2
Place a sterile, disposable bag over the body of the Injector
if required.
3
Push the green safety ring forward into the ‘safe off’ position.
Now the second safety mechanism is deactivated and the
Injector is ready for use.
4
The Injector can be used on all teeth in the same position
and angle as with a traditional needle (See recommendations
for site selection).
5
Hold the Injector between thumb and index finger to the injection
site with medium pressure and activate.
6
Unscrew the Ampoule from the Injector. The used Ampoules are
disposable as normal domestic waste. Push the green safety ring
back into the ‘safe’ position.
Store the secured and non-reset Injector and its accessories in the INJEX Bag.
Note that storage of a reset Injector in the Reset Box will shorten the life of
the product.
CAUTION: For the best patient experience, fully brief the patient on what to expect. For the
first treatment, a demonstration using water into a foam ‘Smiley Ball’ is very effective, especially
for children. A 3.2.1 countdown will avoid reflex reactions to the sound.
CAUTION: Please consider general contraindication for local anaesthesia. One should not
inject with INJEX over nerval – exits (i.e. N. mentalis). Please follow the same general guidelines
when injection in inflamed gingiva/tissue is considered necessary (i.e. antibiotic prophylaxis).
3
Filling the Ampoule
from injection vials with the Vial Adapter 14 or Vial Adapter 22
Preparing the Vial Adapter 14 or Vial Adapter 22
1
Depending on the diameter of the bottle neck, the
Vial Adapter 14 or 22 is used. Take a medicine vial out
of its packaging and remove the protective cap.
2
Take the Vial Adapter out of its sterile packaging.
3
Pierce the rubber stopper of the medicine vial with the
needle of the Vial Adapter. Make sure the Vial Adapter is
firmly in place.
To guarantee sterility and eliminate the risk of injuries:
•
Avoid any contact with the head of the Ampoule!
•
Avoid any contact with openings and needles of the Adapters!
Filling the Ampoule
1
Take an Ampoule out of its sterile packaging and pull the
Ampoule plunger about halfway out.
2
Open the lid of the Vial Adapter and screw the Ampoule
as far as it will go into the Adapter.
3
Invert the bottle including the Adapter and press the
Ampoule plunger back into the Ampoule.
4
Slowly pull out the Ampoule plunger until the desired
dose has been drawn out without air bubbles. Unscrew
the Ampoule from the Adapter and reseal with the lid.
Note: If filling the Ampoule from cartridges, please visit our
website for instructions.
4
Preparing the Injector
1
Put the Injector into the Reset Box. Make sure that the green
safety ring is in ‘safe’ position.
2
Close the lid of the Reset Box.
3
Open the lid of the Reset Box and take out the reset and
secured Injector.
Preparing for the injection
1
Unscrew the filled Ampoule from the Adapter and close
the lid.
2
Screw the filled Ampoule as far as it will go into the
open end of the Injector. NOTE: As the screw tightens,
the first safety mechanism will be deactivated.
3
If required, place a sterile disposable bag over the body
of the Injector.
4
Push the green safety ring forward into the ‘safe off’
position. Now the second safety mechanism is deactivated
and the Injector is ready for use.
5
Warnings and precautions
•
After preparing the Injector for injection do not point the Injector at
yourself or other persons (especially the eyes and other sensitive body
parts). Accidental release may cause injuries!
•
Do not place anything other than the Ampoule into the open end of
the Injector.
•
Check to see that the sterile packaging of the Ampoule and the Adapter
is intact prior to opening. Do not use if packaging is damaged.
•
Fill the medication into the Ampoule without air bubbles.
•
Avoid any contact with the Ampoule tip before and after filling it with
medication to avoid contamination.
•
The Adapter needle is sharp. Take care to avoid injury.
•
Always hold the Injector perpendicular (90°) to the injection site and press
it with medium pressure onto the surface before activating the trigger.
•
During the injection, always hold the Injector firmly in position with a
medium pressure as injuries can otherwise occur. Do not crease the skin!
•
After activation hold the Injector in place for two seconds to allow the
anaesthetic to be fully absorbed. If this is not done some anaesthetic may
leak out.
•
Do not autoclave the Injector. Protect with a sterile plastic bag if required
by the procedure. Clean the Injector between patients using a sterile
antiseptic wipe.
•
In the event of loss or malfunction of the INJEX, you should always have
a backup injection method available.
Caution
Use
by
Serial
number
Single use
only
Sterilized using
irradiation
Catalogue
number
Do not use if
package is broken
Batch
identification
Keep away
from moisture
Temperature
limit
Caution, consult
accompanying
documents
Name of the
manufacturer
6
Cleaning and storage
It is important that you keep your INJEX Injector clean and free from dust and
medication residues. Clean the outside of the Injector with a solvent-free cloth.
The Transporter may be cleaned by rinsing it with (warm) water. If soiled (e.g. sticky
threads due to medication residues) soak the Transporter in water. For maintaining
function, please make sure that all liquid has been removed after cleaning.
The INJEX30 System and its accessories should be stored between +5°C and +35°C,
as malfunctions could otherwise occur. Store the secured and non-reset Injector and
its accessories in the INJEX Bag. Note that storage of the reset Injector in the Reset
Box can cause functional damage to the Injector and shorten the life of the product.
CAUTION: The Injector and its accessories must not be sterilized. Avoid getting water
or cleaning liquid inside the Injector.
CAUTION: Do not use the Ampoule and Adapter after the expiry date
(see packaging).
Disclaimer and warranty
The INJEX30 System has been produced with the utmost care and has been
delivered in perfect technical condition. The warranty period after the date
of purchase for the proper working order of the INJEX System is in accordance
with current legislation.
Should, contrary to expectations and despite careful handling of the INJEX30
System, any material or production related defect occur during the warranty period,
we will, at our own discretion, replace products which prove to be defective. In the
event of a claim please provide the defective product together with your purchase
receipt, your complete contact data and the address of the source of supply.
Please note that we do not assume any liability for damage caused by improper
handling of the INJEX30 System and its accessories.
Please address your claim to:
INJEX UK Ltd
Bella Vista Court
Fourth Avenue
Greytree
Ross on Wye
HR9 7HR
[email protected]
7
Manufactured by
Injex Pharma
Buchower Damm 114
12349 Berlin
Germany
Distributed in the UK & Ireland by
INJEX UK Ltd
[email protected]
www.injexuk.com
0845 116 8900
Version 15.01.2012