1
OPERATING INSTRUCTIONS
PLEASE NOTE:
The following information is provided specifically for the use of Nerrigundah Brigade Members.
Whilst information has been sourced from the owners manual provided, it has been interpreted and
targetted for use specifically on our Category7 and 9 appliances. No responsibility will taken for
injury or loss from use of the information by others.
GENERAL
The Jump Starter Unit has been designed as a portable jump start system for both 12 and 24 volt
systems. Both Nerrigundah Cat 9 and Cat 7 appliances have 12 volt systems. Note that not all
Cat 7 appliances have 12 volt systems.
There is a 3 way voltage selector switch on the front of the unit. This switch should normally be in
the OFF position and the apppropriate voltage selected for jump starting ONLY after the battery
clamps have been correctly connected to a vehicle OR when the unit is being charged from a 240
volt supply. (See Charging)
Also on the front of the unit is a colour-coded voltage meter that indicates the charge level of the
unit's battery when the red button is pushed.
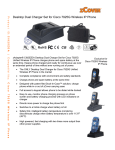
The battery clamps should always be stored clipped to the sides of the unit as shown in the picture
unless being used for jump starting.
CHARGING THE UNIT FROM 240 VOLT SUPPLY
1. Place the Voltage Selector Switch in the 12 VOLT POSITION.
2. Plug the charger jack into the socket in the unit front panel and connect to 240 volt supply.
3. Switch on the 240 volt switch and continue to charge until the voltmeter indicates full
capacity in the green area when the test button is pushed. IMPORTANT - do not stop
charging before the meter indicates FULL capacity in the green area.
4. When the 240 volt supply is turned off and disconnected, return the Voltage Selector Switch
to the OFF position.
The unit can remain plugged into the power socket indefinitely as there is an automatic “Float
Charging Circuit” which will not allow an overcharge condition or damage to the unit's
battery.
JUMP-STARTING NERRIGUNDAH 9
1. Turn off ignition switch, all radios and other switches such as working lights etc.
2. Connect the RED (+) Jump Starter Clamp to the Positive (+) battery terminal.
3. Connect the BLACK (-) Jump Starter Clamp to a non-moving metal part of the engine
(NOT TO THE NEGATIVE BATTERY TERMINAL).
4.
5.
6.
7.
8.
9.
Turn the Jump-Start Unit's Selector Switch to the 12 Volt position.
Wait about 2 minutes whilst the vehicle battery accepts some charge.
Turn the ignition switch ON.
Attempt to start the vehicle for no more than 5-6 seconds.
Wait at least 3 minutes before cranking again.
Once the engine is running disconnect the BLACK (-) clamp first and return to its stored
position on the Jump-Start Unit.
10. Disconnect the RED (+) clamp and return to its stored position on the Jump-Start Unit.
11. Connect the Jump-Start Unit to 240 volts for re-charging. (See Charging the Unit from 240
Volt Supply above)
NOTE: Much of the trouble experienced starting the Cat 9 is attributed to not allowing time for the
glow plugs to warm by leaving the ignition switch in the ON position for a while. (This is an ol'
girl - 1982 model). Information about glow plugs is at http://en.wikipedia.org/wiki/Glowplug
1.
2.
3.
4.
JUMP-STARTING NERRIGUNDAH 7 (12 VOLT SYSTEM)
Turn off ignition switch, all radios and other switches such as working lights etc.
Locate the batteries on the LHS of the vehicle under the tray. Note that Nerrigundah7
operates on a 12 volt doubled capacity system achieved by connecting two 12 volt batteries
in parallel. (See http://www.zbattery.com/Connecting-Batteries-in-Series-or-Parallel for an
explanation).
To access the batteries, tap open the tapered locking pin and slide out the batteries 2-3
inches. Care is required not to slide too far out as live cables remain connected.
The positive battery terminals are located furthest in (unfortunately).
Remove the 2 wingnuts and washers holding the plastic cover and lift the cover clear.
5. Connect the RED (+) Jump Starter Clamp to either of the Positive (+) battery terminals.
6. Connect the BLACK (-) Jump Starter Clamp to a non-moving metal part of the body (NOT
TO THE NEGATIVE BATTERY TERMINALS).
7. Turn the Jump-Start Unit's Selector Switch to the 12 Volt position.
8. Wait about 2 minutes whilst the vehicle battery accepts some charge.
9. Attempt to start the vehicle for no more than 5-6 seconds.
10. Wait at least 3 minutes before cranking again.
11. Once the engine is running disconnect the BLACK (-) clamp first and return to its stored
position on the Jump-Start Unit.
12. Disconnect the RED (+) clamp and return to its stored position on the Jump-Start Unit.
13. Carefully slide the batteries back into position and replace the tapered locking pin.
14. Replace the plastic battery cover and tighten the wingnuts.
15. Connect the Jump-Start Unit to 240 volts for re-charging. (See Charging the Unit from 240
Volt Supply above)