1
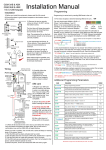
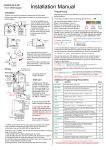
Installation manual Software revisions : V3.01 .............First Release V3.02..............Relay Time values modified V3.03..............SD Card Time / Date stamping added V3.04..............Test Key code added V3.05..............Boot loaded added Complex Gate Receiver Model: COMPLEX_RX_V3 2 Channel receiver, 8000 remotes total capacity, real time clock, 2000 Events internal, microSD card, USB 2.0, GSM connectivity. GSM Connectivity (future release) USB 2.0 microSD Card Sherlotronics SA (Pty) Ltd, Aintree Street, Northriding, Johannesburg South Africa. Tel: +27(11) 462-5101 Fax: +27(11) 462-8177 www.sherlotronics.co.za pg11 Rev:3.01 Installing the Remotes backup file. Contents 2 2 3 4 5 6 7 8 8 9 10 If you need to install a new unit due to a product been struck by lightning or if an electrical malfunction occured, please follow this guide in successfully install all the remotes back into the replacement unit. Insert a microSD card into your pc, and make sure it is formatted as a FAT32 file system. Now copy just the backup file you saved and make sure it is still called : BACKUP.txt Now insert the microSD card into the units onboard card holder and follow the steps below: Please carefully follow the installation manual to install the unit and get familiar with its operating functions. Please note that the new model unit is backward compatible to the older ver 2 unit. This means that you can unplug the 25LC1024 eEprom memory IC from the older model and plug it into this new VER3 model and your remotes will still operate. The software application that is supplied in this package will only work with this new VER 3 model and will not work on the older model. MODE ^ UP ENTER DOWN DELETE ESC ^ This device is covered by a 3 year manufactures warranty. If you have any electrical trouble with the device, please send it in to our technical department and it will get attended to the problem within 24 Hours. micro SD Thank you for purchasing our latest model Complex gate access control receiver. We hope your installation experiences many years of trouble free remote control. 1. Press the MODE Button until the screen displays INSTALL MODE 2. Press ENTER. The unit will prompt you for a password. 3. Using the UP/DOWN keys enter the PASSWORD The default is 1;2;3;4. 4. Press ENTER for each digit. 5. Press the UP/DOWN key to find INSTALL BACKUP 6. Press ENTER. 7. The unit will say: BUSY STORING. This takes 1 minute to complete. 8. To EXIT out of the INSTALL BACKUP mode press the MODE button. Then press the Down button till EXIT MODE displays. Then press ENTER. ScanDisk Description of functions and features...........................pg Specifications......................................................... pg Wiring diagram....................................................... pg Learning in Remotes................................................ pg Deleting remotes from the unit...................................pg Setting the time & date............................................. pg Setting the Relay contact closure time......................... pg Changing the Password............................................. pg Viewing the event log............................................... pg Saving to the microSD card....................................... pg Installing a Saved backup from a microSD card............. pg 2 GB 1 2 3 4 5 6 7 8 9 10 11 Remote Access Control System COMPLEX-RX : V3 Recommend ScanDisk Tested with: 128mB 2GB 4GB We trust that you will find it straight forward enough to program and setup. If you have any questions or technical advice please phone our technical division on 011 462-5101. Please note: The unit will not have any history of the events that were logged on the previous. We do not cater for Installing old events back into a unit. Any new events will be stored on the new units eEprom as they occur. Sherlotronics SA (Pty) Ltd, Aintree Street, Northriding, Johannesburg South Africa. Tel: +27(11) 462-5101 Fax: +27(11) 462-8177 www.sherlotronics.co.za pg 1 Sherlotronics SA (Pty) Ltd, Aintree Street, Northriding, Johannesburg South Africa. Tel: +27(11) 462-5101 Fax: +27(11) 462-8177 www.sherlotronics.co.za pg10 Description of Functions and Features 1. The Complex-Rx_VER3 unit can Store up to 4000, Sherlotronics Codehopping remotes per relay, that is a total of 8000 into its memory. The memory starts from UNIT 1 to 500. Each UNIT can be programmed with up to 8 users. The Users are letters starting from A to H. The Table below shows how the units memory mapping works. 2. The Complex-RX_V3 can save up to 2000 time & date stamped Events to its internal memory. Each event that is saved will show the Remote no; Time; Day; and Month. 3. The unit is password protected for accessing functions such as learning in or deleting remotes, setting the time & date, changing the password, or installing a backup to the system. 4. The unit can be connected to a PC via a standard USB 2.0 port to down-load its events, install a backup file, set independent timers, and create a Data base to register each remote control to a residents personalised details. 5. The Computer application Software is available on line at:ww.sherlotronics.co.za 6. A standard microSD card will allow you to backup the units entire memory which includes the remote that were learnt in and the previous 2000 event log, as well as Install a previously saved backup file to a new Complex-Rx_V3 unit. Saving to the microSD card A microSD card must first be formatted to a FAT32 File system. micro SD ^ UP ENTER Recommend ScanDisk DOWN DELETE ESC ^ Press the MODE button twice or till the display says SAVE TO SD CARD. Press ENTER. The display will say, Busy Writing. This takes approx 40s to complete. ScanDisk MODE To make a backup to the microSD card follow the steps below: 2 GB Carefully plug the card into the card holder. The display will ready SD Card inserted. Tested with: 128mB 2GB 4GB Remote Access Control System COMPLEX-RX : V3 You may now remove the card. The display will say, SD Card Ejected. Memory mapping table: User 1 A A User 2 B B User 3 C C 500 A B C User 4 D D D User 5 E E E User 6 F F User 7 G G F G User 8 H H H microSD Adapter SD CARD Encryption.......................................................Keeloq, Code-Hopping Frequency....................................................... 403.55Mhz Range : Line of site.......................................... 100m Voltage range.................................................. 10 - 14 Volt DC Current drain................................................... 80mA, 12VDC Relay output’s.................................................. 1 to 10 sec momentary Temperature.................................................... -7° C ~ +65° C Dimensions...................................................... 116 x 84 x 35mm Software version:..............................................Ver 3:01 Release date:....................................................March 2012 micro SD ScanDisk We recommend that you look at saving these three files in a folder or safe place for future use. Please do not alter the file names or information within the files in any way or this will corrupt the backup. Specifications 2 GB Once you have inserted microSD card into a pc, with either a SD Card adaptor or USB multi adaptor open the file. There should be (3) two folders called: EVENTS.txt ; BACKUP.txt and 2000.txt Unit 1 2 Note: The unit will auto Exit out of this mode if no key is pressed after 30 seconds. Sherlotronics SA (Pty) Ltd, Aintree Street, Northriding, Johannesburg South Africa. Tel: +27(11) 462-5101 Fax: +27(11) 462-8177 www.sherlotronics.co.za pg 9 Sherlotronics SA (Pty) Ltd, Aintree Street, Northriding, Johannesburg South Africa. Tel: +27(11) 462-5101 Fax: +27(11) 462-8177 www.sherlotronics.co.za pg 2 Wiring Diagram Changing the password ^ UP ENTER N.O RELAY 1 COM DOWN ^ DELETE ESC N.O RELAY 2 COM NEGATIVE +12V DC Remote Access Control System COMPLEX-RX : V3 5. 6. 7. 8. 9. Press the MODE key to find SET PASSWORD Press ENTER. Scroll UP / DOWN to a set the digit Press ENTER to save the setting. To EXIT out of the SET PASSWORD mode press the MODE button. Then press the Down button till EXIT MODE displays. Then press ENTER. This diagram serves as an example of a typical gate motor wiring MODE ^ UP ENTER 2,4 DOWN DELETE ESC 3 Remote Access Control System COMPLEX-RX : V3 set password 5 MODE ^ UP ENTER 6,8 DOWN DELETE ESC ^ MODE install mode 1 ^ 1. Press the MODE Button until the screen displays INSTALL MODE 2. Press ENTER. The unit will prompt you for a password. 3. Using the UP/DOWN keys enter the PASSWORD The default is 1;2;3;4. 4. Press ENTER for each digit. N.O = Normally Open COM = Common 7 Remote Access Control System COMPLEX-RX : V3 View the Event Log MODE 1. Press the MODE Button once. The screen displays VIEW EVENTS 2. Press ENTER. The unit will display the time / date it received an activation. 3. Press the DOWN key to view the UNIT/ USER and the RELAY that was triggered. 4. Continue with step 3 pressing the DOWN key to view each event one at a time. 5. To EXIT out of the VIEW EVENTS mode press the MODE button till the display show the current time & date screen. ^ UP ENTER DOWN Note: The unit will auto Exit out of this mode if no key is pressed after 30 seconds. ^ DELETE ESC Remote Access Control System COMPLEX-RX : V3 Example diagram Sherlotronics SA (Pty) Ltd, Aintree Street, Northriding, Johannesburg South Africa. Tel: +27(11) 462-5101 Fax: +27(11) 462-8177 www.sherlotronics.co.za pg 3 Sherlotronics SA (Pty) Ltd, Aintree Street, Northriding, Johannesburg South Africa. Tel: +27(11) 462-5101 Fax: +27(11) 462-8177 www.sherlotronics.co.za pg 8 Setting the Relay time 7 5. Press the MODE key to find LEARN / DELETE 6. Press ENTER. The display will read : UNIT 1A / RELAY 1 7. Scroll UP / DOWN to a UNIT no you wish to program. To switch between RELAY 1 & 2 press the UP & DOWN keys quickly together. 8. Press the ENTER button if you wish to program the remote TX into the unit. The unit will display, Press now. 9. Activate the remote TX. The unit will display, install mode 1 MODE ^ UP ENTER ESC 1 MODE ^ UP ENTER 2,4 DOWN DELETE ESC 3 Remote Access Control System COMPLEX-RX : V3 Remote Access Control System COMPLEX-RX : V3 relay TIME ^ UP ENTER DOWN DELETE ESC learn / delete 5 MODE ENTER 6,8 DOWN DELETE ESC Remote Access Control System COMPLEX-RX : V3 Press together to switch between RELAY 7 1&2 Press again. Once the remote TX is learnt in a *star will display on the bottom right hand of the screen. Remote Access Control System COMPLEX-RX : V3 10 UNIT 1a relay1 * 9 Note: Both relays are globally programmed to switch between 1 - 10 Seconds. Some gate motors require a longer or shorter trigger input, so the relay settings may be programmed accordingly to motor you are connecting this unit. The Complex Rx_V3 is factory set to 1.0 Second. Sherlotronics SA (Pty) Ltd, Aintree Street, Northriding, Johannesburg South Africa. Tel: +27(11) 462-5101 Fax: +27(11) 462-8177 www.sherlotronics.co.za ^ UP . 10.To EXIT out of the LEARN/DETETE mode press the MODE button. Then press the Down button till EXIT MODE displays. Then press ENTER. pg 7 MODE ^ UP ENTER 10 Remote TX UNIT 1a relay1 DOWN DELETE ESC ^ MODE ^ Press the UP/DOWN key to find RELAY TIME Press ENTER. 5 Scroll UP / DOWN to a set the required digit Press ENTER to save the setting. To EXIT out of the RELAY TIME mode 6,8 press the MODE button. Then press the Down button till EXIT MODE displays. Then press ENTER. DELETE install mode ^ 2,4 DOWN ^ 5. 6. 7. 8. 9. 3 1. Press the MODE Button until the screen displays INSTALL MODE 2. Press ENTER. The unit will prompt you for a password. 3. Using the UP/DOWN keys enter the PASSWORD The default is 1;2;3;4. 4. Press ENTER for each digit. ^ 1. Press the MODE Button until the screen displays INSTALL MODE 2. Press ENTER. The unit will prompt you for a password. 3. Using the UP/DOWN keys enter the PASSWORD The default is 1;2;3;4. 4. Press ENTER for each digit. Learning in Remotes 10 Remote Access Control System COMPLEX-RX : V3 Sherlotronics SA (Pty) Ltd, Aintree Street, Northriding, Johannesburg South Africa. Tel: +27(11) 462-5101 Fax: +27(11) 462-8177 www.sherlotronics.co.za pg 4 Deleting Remotes install mode 1 MODE ^ UP ENTER DOWN ^ 2,4 DELETE ESC 3 Remote Access Control System COMPLEX-RX : V3 1 MODE ^ UP ENTER 2,4 DELETE ESC DOWN 3 Remote Access Control System COMPLEX-RX : V3 ^ UP ENTER DOWN DELETE ESC 8 Remote Access Control System COMPLEX-RX : V3 Press together to switch between RELAY 7 1&2 8. Press and HOLD the DELETE key if you wish to Delete the remote TX from the unit. The unit will say 5. 6. 7. 8. 9. Press the MODE key to find SET TIME or SET DATE Press ENTER. Scroll UP / DOWN to a set the required digit Press ENTER for each setting. To EXIT out of the SET TIME or SET DATE mode press the MODE button. Then press the Down button till EXIT MODE displays. Then press ENTER. 5 set time MODE ENTER 6,8 DELETE ESC ^ UP DOWN 7 ^ MODE 6 Remote Access Control System COMPLEX-RX : V3 10 Star goes away UNIT 1a relay1 MODE ^ UP ENTER 10 DOWN DELETE ESC ^ DELETING REMOTE, after 3 seconds The *star will no longer be on the bottom right side of the screen. 9. To EXIT out of the LEARN/DELETE mode press the MODE button. Then press the Down button till EXIT MODE displays. Then press ENTER. install mode learn / delete 5 ^ 5. Press the MODE key to find LEARN / DELETE 6. Press ENTER. The display will read : UNIT 1A / RELAY 1 7. Scroll UP / DOWN to a UNIT no you wish to Delete. To switch between RELAY 1 & 2 press the UP & DOWN keys together. 1. Press the MODE Button until the screen displays INSTALL MODE 2. Press ENTER. The unit will prompt you for a password. 3. Using the UP/DOWN keys enter the PASSWORD The default is 1;2;3;4. 4. Press ENTER for each digit. ^ 1. Press the MODE Button until the screen displays INSTALL MODE 2. Press ENTER. The unit will prompt you for a password. 3. Using the UP/DOWN keys enter the PASSWORD The default is 1;2;3;4. 4. Press ENTER for each digit. Setting the Time & Date 10 Remote Access Control System COMPLEX-RX : V3 Please note: If you release the Delete key for a short time the remote TX will not be erased. Sherlotronics SA (Pty) Ltd, Aintree Street, Northriding, Johannesburg South Africa. Tel: +27(11) 462-5101 Fax: +27(11) 462-8177 www.sherlotronics.co.za set time hh,mm,ss 17;59;55 pg 5 set date dd,mm,yy 27/02/12 Sherlotronics SA (Pty) Ltd, Aintree Street, Northriding, Johannesburg South Africa. Tel: +27(11) 462-5101 Fax: +27(11) 462-8177 www.sherlotronics.co.za pg 6 SELF INSTALL - NEED TECHNICAL ASSISTANCE? OPTION 1: DIRECT WITH THE SERVICE DESK – QUICKEST AND MOST EFFECTIVE METHOD Submit your enquiry direct with the service desk at – [email protected] The service desk has the most experienced staff in Australia to help with your problem but they need your help. Describe your problem in detail and as clearly as possible. Don’t forget to include a telephone number. Be certain to detail which model or models of you are working with. Send photos of the installation – they love photos. The people at the service desk are good but they are even better when they can see the installation. Send photos of the overall scene so they can see the entire installation. Also send photos of the wiring to the control board and any other part of the installation you think is relevant. Send video if appropriate. Smartphone’s these days take remarkably good video in small file sizes which can be emailed in a moment. If your problem needs a video to show the issue please feel free to send it. NOTE: THIS IS BY FAR THE FASTEST AND MOST SUCCESFUL WAY TO SOLVE YOUR PROBLEM PHOTOS AND VIDEOS ARE THE NEXT BEST THING TO BEING THERE OPTION 2: LODGE YOUR ENQUIRY LOCALLY - SLOWER BUT CAN STILL BE EFFECTIVE Make contact with the store of purchase. Branch staffs are typically not technicians and dependent on their length of service will have varying degrees of technical knowledge. If they cannot help however they will certainly either source help locally from their technicians or make contact with the service technicians on your behalf. OPTION 3: SERVICE CALL WITH AUTOMATIC SOLUTIONS TECHNICIAN – SLOWEST METHOD If you fall within the local branch service area it may be possible to book a local technician to look at your installation. Wait times will vary dependent on local workloads. The cost is a service fee which includes the first half hour and the hourly rate thereafter. If any Automatic Solutions provided parts are found to be defective and within warranty these will be provided free of charge. (NOTE: If you suspect that any parts are defective and within warranty you may wish to consider option 4) A note on this option: If you decide on this option you will be asked to sign an “authorisation to proceed” which will provide legal authority and payment security. This form has three options available of which only the first two are available to you. The third option is for warranty repairs only for full install customers. Self install customers requiring warranty only service need to refer to option four below. IMPORTANT: IN SHORT THIS OPTION WILL INCUR CHARGES OPTION 4: RETURN THE PRODUCT IF BELIEVED TO BE FAULTY As a self install customer who has purchased product if you believe the product to be faulty rather than an installation or site problem you have the option of returning the product for evaluation and to exercise your right to a replacement, repair or refund as applicable. All returned product is forwarded immediately to the service technicians for evaluation and response. There are two main methods available to return product – Direct to the service centre – this is the quickest method as it cuts out the branch delay Via the branch of purchase – slower because of the delay at the branch When choosing this option you need to complete a product return form. This form gives you all the information on procedure involved and where to send to. These are available at the branch of purchase, can be emailed to you (contact your branch), or available here - http://automaticsolutions.com.au/page/warranty.php