1
––––––––––––––––––––––––––––––––––––––––––––––
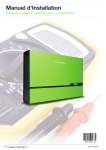
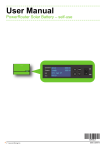
Installation Manual
PowerRouter Solar Battery – self-use
––––––––––––––––––––––––––––––––––––––––––––––
Version 011212
PowerRouter • Solar battery • Installation manual
Illustrations
1
2
Drill template the PowerRouter
the PowerRouter
i
+
Read the installation manual for details
mounting bracket
570 mm max. ø 5.5 mm
600 mm max. ø 10 mm
A
A
Standby
Standby
!
A
Max.40°C
B
20 KG
Standby
Standby
Min.-10°C
Standby
Standby
Standby
B min. 800 mm
370 mm
A min. 300 mm
A
Drill template the PowerRouter
Drill template the PowerRouter
Installation steps
Standby
2x
Standby
4x
1
2x
2
4x
3
4
5
6
690 mm max. ø 5.5 mm
Partno. 5555426,1
1
Illustrations
PowerRouter • Solar battery • Installation manual
3
4
N
N
L
NO
AC GRID
NC NO
L
NC
NO
AC LOCAL OUT
AC GRID
5
6
+
-
7
8
+BAT
-BAT
TMPS
GND
0
1
7
7 6
3
0
1
7
7 6
3
SH+
SH-
Fuse
300 A
2
N
AC LOCAL OUT
NC NO
NC
L
PowerRouter • Solar battery • Installation manual
9
Illustrations
10
2
1
11
AC
GRID
CAN
300A
0
1
7
7 6
3
0
1
7
7 6
3
3
Illustrations
PowerRouter • Solar battery • Installation manual
12
0
1
7
7 6
3
N L
0
1
7
7 6
3
N L
0
1
7
7 6
3
0
N L
1
7
7 6
3
0
13
AC
LOCAL
OUT
CAN
300A
0
1
7
7 6
3
230Vac
40A
0
4
1
7
7 6
3
7
7
6
3
N L1 L2 L3
N L
AC
GRID
1
0
1
7
7
6
3
N L1 L2 L3
0
1
7
7
6
3
N L1 L2 L3
PowerRouter • Solar battery • Installation manual
14
Illustrations
15
ETHERNET RJ45
USB
CAN BUS CAN
16
d
c
a
b
17
fuse 315 mA
to the grid
11 N
1 L1
4 L2
7 L3
to the installation
9 L3
6 L2
3 L1
5
Illustrations
PowerRouter • Solar battery • Installation manual
18
19
N
L
NO
N
NC
N
L
AC grid
AC local out
0
1
7
7 6
NO
L
NC
AC grid
3
0
1
7
7 6
3
A1
A2
A1
A2
5
6
R7
R8
R7
R8
3
4
R1
R2
L
N
5
6
R1
R2
3
4
L
N
N
L1
L2
L3
0
1
7
7 6
N
L1
L2
L3
3
0
N L1 L2 L3
1
7
7 6
3
N L1 L2 L3
20
21
N
L
AC grid
1
3
A2
7 6
R8
R2
7
A1
1
R7
R1
0
100%
3
N
L1
L2
L3
Rundfunksteuerempfänger
0
1
7
7 6
6
4
2
3
5
N L1 L2 L3
22
23
1
1
4
2
3
3
8
6
5
5
2
2
6
4
6
7
PowerRouter • Solar battery • Installation manual
24
25
26
27
Illustrations
7
Illustrations
28
29
8
PowerRouter • Solar battery • Installation manual
PowerRouter • Solar battery • Installation manual
Contents
Contents
EN
Contents ............................................................................................................................................. 9
1
Introduction ..................................................................................................................................... 12
1.1 Applicability ............................................................................................................................. 12
1.2 Symbols used in the documentation ..................................................................................... 12
1.3 Warranty ................................................................................................................................... 12
2
Safety ................................................................................................................................................ 14
2.1 General safety .......................................................................................................................... 14
2.2 Symbols and labels on the equipment .................................................................................. 15
2.3 Intended use ............................................................................................................................. 15
2.4 Batteries ................................................................................................................................... 15
3
General description ......................................................................................................................... 16
3.1 The PowerRouter ..................................................................................................................... 16
3.1.1 Internet connection .......................................................................................................... 16
3.2 1-phase sensor ........................................................................................................................ 16
3.3 3-phase sensor (optional) ....................................................................................................... 16
3.4 External relay (optional) .......................................................................................................... 17
3.5 Batteries ................................................................................................................................... 17
3.6 Battery temperature sensor .................................................................................................... 17
4
Installation ....................................................................................................................................... 18
4.1 Check the contents of the PowerRouter box ........................................................................ 18
4.2 Determine the mounting location ........................................................................................... 18
4.3 Mount the PowerRouter .......................................................................................................... 19
4.4 Connect the AC grid ................................................................................................................ 20
4.5 Connect the solar panels ........................................................................................................ 20
4.6 Connect the batteries .............................................................................................................. 21
4.7 Connect the temperature sensor ........................................................................................... 22
4.8 Connect a self-use sensor ...................................................................................................... 22
4.8.1 Connect the 1-phase sensor (standard) .......................................................................... 22
4.8.2 Connect the 3-phase sensor (optional) ........................................................................... 22
4.9 Connect the external relay (optional) .................................................................................... 23
4.9.1 Connect the external relay for load management ............................................................ 23
4.9.2 Connect the external relay to isolate the PowerRouter from the public grid .................... 23
4.9.3 Connect the external relay for a backup power supply .................................................... 23
9
Contents
PowerRouter • Solar battery • Installation manual
4.10 Switch on the system .............................................................................................................. 24
EN
4.11 Initialise the PowerRouter ....................................................................................................... 24
4.11.1Installation wizard (on the display) .................................................................................. 24
4.11.2PC software installation tool (for advanced settings) ....................................................... 24
4.12 Connect the PowerRouter to the internet .............................................................................. 25
4.12.1Connect to an internet router ........................................................................................... 25
4.12.2Connect via a Switch to an Internet Router ..................................................................... 25
4.12.3Connect to a wireless access point ................................................................................. 25
4.12.4Register the PowerRouter on www.myPowerRouter.com ............................................... 25
4.12.5Register additional PowerRouters on one login .............................................................. 26
5
Advanced settings .......................................................................................................................... 27
5.1 Introduction .............................................................................................................................. 27
5.2 Display settings ....................................................................................................................... 27
5.2.1 Backlight .......................................................................................................................... 27
5.2.2 Display ............................................................................................................................. 27
5.2.3 Language ......................................................................................................................... 27
5.3 PowerRouter settings .............................................................................................................. 27
5.3.1 Scenario .......................................................................................................................... 27
5.3.2 Alarm 1 / Alarm 2 ............................................................................................................. 28
5.3.3 Standby ........................................................................................................................... 28
5.3.4 Standby timer .................................................................................................................. 29
5.4 Grid
5.4.1
5.4.2
5.4.3
5.4.4
5.4.5
5.4.6
5.4.7
5.4.8
5.4.9
6
........................................................................................................................................... 29
Country ............................................................................................................................ 29
EEG 2012 ........................................................................................................................ 29
VDE 4105 ........................................................................................................................ 29
Dynamic Feed-in Limiter .................................................................................................. 29
Battery pack ..................................................................................................................... 29
Battery charging .............................................................................................................. 30
Maintenance charge ........................................................................................................ 30
Self-use battery settings .................................................................................................. 30
Wintermode ..................................................................................................................... 30
Operation ......................................................................................................................................... 31
6.1 Service menu ........................................................................................................................... 31
7
Troubleshoot ................................................................................................................................... 32
7.1 Troubleshooting ...................................................................................................................... 32
7.2 Check the LED status .............................................................................................................. 32
7.3 Check the error messages ...................................................................................................... 32
7.4 Error explanation ..................................................................................................................... 33
7.4.1 Hard error ........................................................................................................................ 33
7.4.2 Soft error .......................................................................................................................... 33
7.4.3 Error code ........................................................................................................................ 33
7.5 Procedures ............................................................................................................................... 33
7.5.1 Restart the PowerRouter ................................................................................................. 33
7.5.2 Check the PowerRouter airflow ....................................................................................... 33
10
PowerRouter • Solar battery • Installation manual
Contents
7.6 Errors ........................................................................................................................................ 34
7.7 Check the internet connection ............................................................................................... 38
7.8 Look up the software versions and id number ..................................................................... 38
7.9 Reset the PowerRouter ........................................................................................................... 38
7.10 Self test (for Italy) .................................................................................................................... 38
8
De-installation .................................................................................................................................. 39
8.1 De-install ................................................................................................................................... 39
8.2 Disposal .................................................................................................................................... 39
9
Technical specifications ................................................................................................................. 40
9.1 Technical specifications of the PowerRouter ....................................................................... 40
9.2 Example of possible battery types ......................................................................................... 41
11
EN
1 Introduction
EN
1
1.1
PowerRouter • Solar battery • Installation manual
Introduction
Applicability
This installation manual is intended for qualified installation personnel. It describes how you can safely
install, connect and start the following PowerRouter types:
•
PR50SB-BS
•
PR37SB-BS
•
PR30SB-BS
1.2
Symbols used in the documentation
DANGER
This symbol indicates a hazardous situation which, if not avoided, could result in death or serious
injury.
WARNING
This symbol indicates a situation which, if the instructions are not followed, could result in injury and
damage to the equipment.
CAUTION
This symbol indicates a situation which, if the instructions are not followed, could result in damage to the
equipment.
i
This symbol indicates additional information to ensure optimal operation of the system.
1.3
Warranty
PowerRouter factory warranty conditions
Our quality control program ensures that each PowerRouter product is manufactured to exact
specifications and is thoroughly tested before leaving the factory.
5 year warranty
The Nedap factory warranty period is 5 years from the purchase date of the PowerRouter system. The
warranty conditions are based on EU Directive 99/44/EC, without prejudice to any legal rights.
12
PowerRouter • Solar battery • Installation manual
1 Introduction
Extended warranty
For all PowerRouter systems you can acquire a 5-year extension to the PowerRouter factory warranty, for
a total of 10 years of warranty coverage. The extended warranty can only be purchased within 6 months of
the PowerRouter delivery date.
Warranty conditions
If a PowerRouter becomes defective during its warranty period, one of the following services will be
performed at no charge for materials, but exclusive of labour costs, at the discretion of the PowerRouter
Helpdesk:
•
Repair at Nedap N.V.
•
Repair on site
•
Exchange for a replacement unit (of equivalent value according to model and age)
Exclusion of liability
Warranty claims and liability for direct or indirect damage are excluded if arising from:
•
Transport and storage damage
•
Incorrect installation and/or commissioning
•
Modifications, changes or attempted repairs by untrained and unauthorised personnel
•
Incorrect use or inappropriate operation
•
Insufficient ventilation of the device
•
Failure to observe the applicable safety regulations
•
Force majeure (e.g. lightning, overvoltage, storm, fire)
•
Cosmetic shortcomings which do not influence the functioning of the unit
•
Damage due to moisture and/or other environmental conditions
i
The installer/dealer who installed the PowerRouter must report the defective PowerRouter system to the
PowerRouter Helpdesk. Nedap reserves the right to replace the unit with one having equal or better
specifications, at Nedap's judgement.
Disclaimer
All rights to the content of this manual are owned by N.V. Nederlandsche Apparatenfabriek 'Nedap'
(hereinafter Nedap). By using this manual you accept the terms of this disclaimer.
Nedap has made every effort to ensure that this manual is accurate. Nedap accepts no liability for any
inaccuracies or omissions in this manual nor for any damages arising from or related to its use.
No data published in this manual may be reproduced or published in any form or by any means without the
prior written consent of Nedap. Information in this manual is subject to change without notice and does not
represent any commitment on the part of Nedap. Nedap does not assume any obligation to update the
information in this manual after publication and reserves the right to make improvements to this manual
and/or to the products described in this manual at any time without notice. If you find information in this
manual that is incorrect, misleading or incomplete, we would appreciate your comments and suggestions.
13
EN
2 Safety
EN
2
2.1
PowerRouter • Solar battery • Installation manual
Safety
General safety
Before installing or using the PowerRouter, read all of the instructions, cautions, and warnings on the
PowerRouter and solar panels and in this installation manual.
DANGER
Solar panels produce electrical power when exposed to light and can cause an electric shock,
energy, or fire hazard.
DANGER
Batteries deliver electric power (max. 24 V, 200 A) and can cause an energy or fire hazard when
they are shorted, or wrongly installed.
DANGER
The AC grid delivers electrical power (230 V, 50 Hz).
WARNING
As an extra safety measure it is recommended that a 2-pole emergency switch is installed at the AC
LOCAL OUT connection (if used). This emergency switch must be connected in accordance with the UPSsafety standard.
WARNING
Series fuse protection of solar panels. Series fuse protection may be required, depending on the type and
configuration of the solar panels used in the system.
WARNING
Series fuse protection is required for the batteries.
CAUTION
Contact the local utility company before connecting the PowerRouter to the Public grid.
14
PowerRouter • Solar battery • Installation manual
2.2
2 Safety
Symbols and labels on the equipment
EN
There are two labels on the PowerRouter (figure 1):
•
A warning label indicating potential risks.
•
A type label that provides technical specifications.
2.3
Intended use
The PowerRouter is a solar inverter, designed for indoor use. It is designed for use with solar panels and
battery storage to optimise self-use. The PowerRouter can be used for self-use purposes. In case of a grid
failure, the optional AC local out supplies backup power to the connected load.
2.4
Batteries
WARNING
Batteries must be located in a designated battery charging area. A battery charging area must comply with
the local regulations.This is because of the dangers of hydrogen gas and battery acid.
WARNING
Explosive gasses. Prevent flames and sparks. Provide adequate ventilation during charging.
i
As a feature the batteries are equipped with a temperature sensor, the PowerRouter uses the sensor input
to control charging of the batteries. If batteries become too hot, the PowerRouter will stop charging the
batteries.
15
3 General description
EN
3
3.1
PowerRouter • Solar battery • Installation manual
General description
The PowerRouter
The PowerRouter is a solar inverter for use with solar panels and battery storage. The PowerRouter's
optional AC LOCAL OUT connection supplies backup power to the connected load in the event of a grid
failure. The ability to do so depends on the amount of power the system is producing. For more information
visit www.PowerRouter.com.
The PowerRouter is compliant with the following standards:
•
2004/108/EC (EMI)
•
2006/95/EC (low voltage directive)
3.1.1 Internet connection
When the PowerRouter is connected to the internet the myPowerRouter.com web portal provides detailed
system information (for example performance, profit) for your PowerRouter. The PowerRouter can even be
remotely updated with new firmware containing the latest features, so the system is always kept up to
date.
3.2
1-phase sensor
The 1-phase sensor is supplied with the PowerRouter Solar Battery. With the signal from the 1-phase
sensor, the PowerRouter determines the energy exchange with the public grid on one phase.
3.3
3-phase sensor (optional)
With the signal from the 3-phase sensor, the PowerRouter determines the energy exchange with the public
grid for a 3-phase system. The 3-phase sensor can be ordered at Nedap, or via you local business partner.
16
PowerRouter • Solar battery • Installation manual
3.4
3 General description
External relay (optional)
EN
You can use the external relay to:
•
Setup a backup power supply (figure 18).
If the public grid fails, the external relay is energised. The switch over to the local AC grid is done via
one of the user-selectable relays (K201 / K202) of the PowerRouter (section 5.3).
•
Load management (figure 19).
If the amount of solar energy fed to the public grid exceeds the programmed value, the PowerRouter
can switch on additional loads via the external relay. How long the load stays switched on can be
programmed in the PowerRouter, via advanced settings in the PC software installation tool (section
5.3).
•
Isolate the PowerRouter from the public grid (figure 20).
The disconnection are according to the German directive EEG2012. Only the disconnect contacts of
the relay are used (section 4.9).
The external relay can be ordered at Nedap, or via your local business partner.
3.5
Batteries
The PowerRouter functions with any lead-acid batteries, for examples see section 9.2. Proper settings can
be made via advanced settings in the PC software installation tool (section 5.4).
3.6
Battery temperature sensor
The battery temperature sensor is installed on the batteries. The PowerRouter uses the sensor input to
optimise charging of the batteries. When the batteries overheat, the PowerRouter stops charging the
batteries. Proper settings can be made via advanced settings in the PC software installation tool (section
5.4).
17
4 Installation
EN
4
4.1
PowerRouter • Solar battery • Installation manual
Installation
Check the contents of the PowerRouter box
The PowerRouter box must contain the following:
•
The PowerRouter.
•
Wall-mounting bracket.
•
1-phase sensor, sensor cable and UTP coupler.
•
Set of manuals, including the drill template.
•
Temperatures sensor.
4.2
Determine the mounting location
The installation location of the PowerRouter must meet the following:
•
The PowerRouter must be mounted indoors (IP20).
•
Mount the PowerRouter as close as possible to the meter cupboard.
•
Use wires with a conductor size of 4 mm2.
•
Do not mount the PowerRouter in direct sunlight.
•
Do not mount the PowerRouter on flammable construction materials.
•
Do not mount the PowerRouter in areas where highly flammable materials are stored.
•
Do not mount the PowerRouter in areas where there is a danger of explosion.
•
Do not mount the PowerRouter during periods of precipitation or high humidity (>95%). Moisture
trapped within the location may cause corrosion and damage to the electronic components.
•
The ambient air temperature must not exceed 40 °C; this is necessary to maintain a safe temperature
of the internal components. The PowerRouter reduces the power output if the ambient air
temperature exceeds 40 °C.
•
The location is not accessible for children.
•
The PowerRouter emits a slight hum during operation. This noise is normal and has no effect on
performance, but it can be disturbing if the unit is installed on a wall in a living area, on the outside of
a wall that is near a living area, or on certain types of materials (thin wood panels or sheet metal).
•
The wall should be within ± 5° vertical.
•
The mounting surface must be able to support the weight of the PowerRouter (20.5 kg).
•
The type information sticker must be visible after mounting the PowerRouter. The sticker contains the
serial number which is the login code for the install wizard, the software installation tool and to register
at www.myPowerRouter.com for logging and monitoring (figure 1).
18
PowerRouter • Solar battery • Installation manual
4 Installation
•
The outside dimensions of the PowerRouter are 765 x 502 x 149 mm (W x H x D).
•
The PowerRouter must be installed with 300 mm clearance at the top and bottom of the unit.
•
If multiple PowerRouters are stacked there must be 800 mm of clearance between each
PowerRouter.
EN
DANGER
Do not mount the PowerRouter on or underneath flammable construction materials.
DANGER
Do not mount the PowerRouter in areas where highly flammable materials are stored.
DANGER
Do not mount the PowerRouter in areas where there is a danger of explosion.
WARNING
To prevent electric shock or other injury, check for existing electrical or plumbing installations in the walls
before drilling the holes for the PowerRouter.
CAUTION
Ensure that there is sufficient clearance for the airflow around the PowerRouter! Local regulations may
require larger working clearances.
CAUTION
If you mount the PowerRouter in a cabinet, closet or other relatively small enclosed area, sufficient air
circulation must be provided in order to dissipate the heat generated by the unit.
4.3
Mount the PowerRouter
The PowerRouter is shipped with a wall-mounting bracket that is suitable for use on most walls.
To mount the PowerRouter:
1.
Use the drill template provided with the PowerRouter to drill the holes for the wall-mounting bracket.
(Follow the illustrated instructions on the drill template, figure 2.)
2.
Mount the wall-mounting bracket.
3.
Mount the PowerRouter.
4.
Open the front cover.
5.
Mount the additional screws (use a screwdriver with a blade-length of at least 160 mm).
19
4 Installation
EN
4.4
PowerRouter • Solar battery • Installation manual
Connect the AC grid
See figure 11 for the schematic overview of an AC Grid.
1.
Install an AC Disconnect Switch between the PowerRouter and the AC grid (figure 11).
2.
Strip the insulation off the wires.
3.
Pass the wires through the strain-reliefs at the bottom of the PowerRouter.
4.
Connect the earth ( ), phase (L) and neutral (N) wire from the AC grid to the AC disconnect switch,
and from the AC disconnect switch to the GRID terminal on the PowerRouter (figure 3).
5.
Tighten the strain-reliefs with a torque between 1.2 Nm and 1.5 Nm.
WARNING
Before you connect the PowerRouter to the Public AC grid, contact the local utility company. They have to
confirm that it is allowed to connect the system.
CAUTION
To prevent overheating of the wires, you must use wires with a conductor size of 4 mm².
4.5
Connect the solar panels
1.
Make sure the DC Disconnect Switch (figure 5) on the PowerRouter is OFF.
2.
Verify that the DC voltage and current of your solar installation do not exceed the maximum values
specified on the type plate of the PowerRouter (600 VDC, 15 A).
3.
Check the polarity of the solar panel string by performing a voltage measurement.
4.
Use a suitable tool to attach the MC4 plug to the solar panel string wires.
5.
Connect one string to the left solar panel string input terminals (Use mating MC4 connectors, figure 5
/ figure 6).
6.
If you have a second string connect it to the other solar panel string input terminals.
DANGER
The wires from the solar panels are always energised. The maximum string voltage for solar panels
is 600 V. The current may not exceed 15 A.
DANGER
Use copper wire (4 mm2) for all wiring from the solar panel string to the PowerRouter. Only use
solid or stranded wire. Do not use fine stranded wire.
CAUTION
Do not connect a single solar panel string to both solar panel string terminals simultaneously (parallel
connection) (figure 6).
20
PowerRouter • Solar battery • Installation manual
4 Installation
EN
CAUTION
Do not connect a single solar panel string to both solar panel string terminals in series (figure 6).
i
The PowerRouter PR30SB models only have one solar panel string input.
i
To prevent static charge we advice to ground the supporting frame of your solar panels. Read the
instructions of the manufacturer.
4.6
Connect the batteries
1.
Install a Battery Disconnect Switch (2-pole isolation) between the PowerRouter and the batteries
(figure 11).
2.
Install a fuse (300 A slow-blow) in series with the positive battery cable. It must be installed on a fixed
surface, as close as possible to the battery (figure 7).
3.
Strip approximately 25 mm of insulation from the cable.
4.
Insert the cable into the terminal of the PowerRouter (red to the positive terminal, black to the
negative terminal).
5.
Tighten the cable connection with a torque between 15 Nm and 20 Nm.
6.
Use cable lug (eyelet terminal) on the other end of the battery cable.
DANGER
Use battery cables with a cross sectional area of 70 mm2 to 95 mm2 and a maximum length of 2.5 m
per cable.
WARNING
Batteries must be located in designated battery charging areas, and must comply with the local
requirements. This is because of the dangers of hydrogen gas and battery acid.
WARNING
Do not smoke or bring open flames near hydrogen gas.
CAUTION
Miswiring can cause damage to the PowerRouter. Read the label on the battery.
21
4 Installation
EN
4.7
PowerRouter • Solar battery • Installation manual
Connect the temperature sensor
1.
Stick the self-adhesive temperature sensor onto the battery near the (+) pole.
2.
Connect the sensor wires to the TMPS (red wire) and GND (black wire) terminals of the PowerRouter
(figure 7).
4.8
Connect a self-use sensor
4.8.1 Connect the 1-phase sensor (standard)
1.
Remove the protective cap from the PowerRouter's CANBUS connector (figure 15).
2.
Place the 1-phase sensor (figure 14) around the phase wire (L) to which the PowerRouter is
connected (figure 8 and figure 12).
3.
Connect the 1-phase sensor cable to the UTP coupler (figure 16), or directly to the PowerRouter.
4.
If necessary connect a CAT5e UTP cable between the PowerRouter CAN port and the UTP coupler
(figure 16).
CAUTION
Make sure the 1-phase sensor is installed in the right direction: the arrow on the sensor must point away
from the PowerRouter (towards the public grid).
CAUTION
The length of the CAT5e UTP cable must not exceed 25 meters.
4.8.2 Connect the 3-phase sensor (optional)
The optional 3-phase sensor can be ordered at Nedap, or via you local business partner. The order code is
PRA3SENSE.
The sensor is configured by the PowerRouter and requires no setup; only hard wiring is required.
1.
Connect the 3-phase sensor in accordance with the “3P.n” configuration shown in figure 17.
2.
Connect the 1 meter sensor cable to the 3-phase sensor (figure 17).
a. Green/white wire -> sensor terminal 41.
b. Green wire -> sensor terminal 42.
c. Orange/white wire -> sensor terminal 43.
3.
Insert the RJ45 plug at the end of the sensor cable into the PowerRouter CAN port. A CAT5e network
cable up to 25m in length may be used to extend the connection (RJ45-connector type: T-568B).
4.
After initialising (section 4.11), check the PowerRouter display for correct operation of the sensor –
“Service menu –Status – Sensor”. If correct, “OK” will appear on the display (approx. 1.5 minutes after
start-up).
WARNING
Make sure the PowerRouter is disconnected from the Public AC grid during installation.
22
PowerRouter • Solar battery • Installation manual
4 Installation
EN
CAUTION
The length of the CAT5e UTP cable must not exceed 25 metres.
CAUTION
The 3-phase sensor must not be in the lock position (figure 17).
CAUTION
Make sure the sensor is correctly installed. Wrong installation will result in no self-use, or will deplete the
battery, and will not recharge the battery.
4.9
Connect the external relay (optional)
The optional external relay can be ordered at Nedap, or via you local business partner. The order code is
PRA1RLY.
4.9.1 Connect the external relay for load management
1.
Connect the external relay (figure 19). Use one of the user-selectable relays K201 / K202.
2.
Program the contact K201 / K202 via advanced settings in the PC software installation tool (section
5.3).
CAUTION
The load that is connected to the relay must be 1-phase.
4.9.2 Connect the external relay to isolate the PowerRouter from the public grid
This connection is for EEG2012, which separates the PowerRouter 100% from the public grid. This option
is only applicable for Germany
1.
Connect the external relay (figure 20).
2.
Program the advanced settings in the PC software installation tool (section 5.4.2).
CAUTION
The load that is connected to the relay must be 1-phase.
4.9.3 Connect the external relay for a backup power supply
1.
Install an AC Disconnect Switch between the PowerRouter and the AC local out (figure 13).
2.
Connect the AC local out (figure 4).
3.
Strip the insulation off the wires.
4.
Pass the wires through the strain-reliefs at the bottom of the PowerRouter.
5.
Connect the earth ( ), phase (L) and neutral (N) wire from the AC loads to the AC LOCAL OUT
terminal on the PowerRouter (figure 4).
23
4 Installation
EN
PowerRouter • Solar battery • Installation manual
6.
Tighten the strain-reliefs with a torque between 1.2 Nm and 1.5 Nm.
7.
Connect the external relay (figure 18). Use one of the user-selectable relays K201 / K202.
8.
Program the user-selectable relays K201 / K202 via advanced settings in the PC software installation
tool (section 5.4).
DANGER
There is a risk of electrical shock if a 3-phase load is connected to the relay. The load that is
connected to the relay must be 1-phase.
CAUTION
To prevent overheating of the wires, you must use wires with a conductor size of 4 mm².
4.10 Switch on the system
1.
Set the external battery disconnect switch to on.
2.
Set the solar switch, on the PowerRouter, to on.
3.
Set the external AC disconnect switch to on.
4.
Switch on the PowerRouter (switch on the display).
4.11 Initialise the PowerRouter
The PowerRouter must be initialised by setting system parameters. After setting the parameters, the
PowerRouter is ready to use. There are two methods to set the system parameters.
4.11.1 Installation wizard (on the display)
1.
The installation wizard starts automatically the first time you switch on the PowerRouter.
2.
Set the PowerRouter system parameters using the installation wizard.
4.11.2 PC software installation tool (for advanced settings)
1.
Connect a PC, with the software installation tool, to the PowerRouter's USB port (use a USB cable as
shown in figure 10).
2.
Use the software installation tool to set the system parameters.
i
You can download the PowerRouter software installation tool and driver via the PowerRouter website. You
need your login details for this website. You can request login details via www.PowerRouter.com. Check
the website regularly for updates to the PowerRouter software installation tool.
24
PowerRouter • Solar battery • Installation manual
4 Installation
4.12 Connect the PowerRouter to the internet
EN
4.12.1 Connect to an internet router
An example of a connection is shown in figure 21. The PowerRouter can be connected to any of the
available ports. The numbers in the drawing are:
1.
Internet Router.
2.
Connected computers.
3.
CAT5e UTP cable.
4.
PowerRouter.
5.
ADSL, ISDN, or cable connection.
6.
Power adapter for the internet router.
4.12.2 Connect via a Switch to an Internet Router
An example of a connection is shown in figure 22. The PowerRouter can be connected to any of the
available ports of the switch. The numbers in the drawing are:
1.
Internet Router.
2.
CAT5e UTP cable.
3.
Ethernet switch.
4.
PowerRouter.
5.
Connected computers.
6.
Internet modem.
7.
ADSL, ISDN, or cable connection.
8.
Power adapter for the internet router.
4.12.3 Connect to a wireless access point
An example of a connection is shown in figure 23. The numbers in the drawing are:
1.
Internet Router.
2.
ADSL, ISDN, or cable connection.
3.
Power adapter for the internet router.
4.
Wireless access point.
5.
CAT5e UTP cable.
6.
PowerRouter.
CAUTION
The wireless access point must support wireless client function, and it must have a RJ45 connection. If in
doubt consult your supplier.
4.12.4 Register the PowerRouter on www.myPowerRouter.com
1.
Make sure you have the Part.no., Serial no., and Control code as mentioned on the type label of the
PowerRouter (figure 1).
2.
Check the internet connection via menu > service > status > internet connection. The display should
show OK.
3.
Go to a computer and open www.myPowerRouter.com.
4.
In the login screen click New user (figure 24).
5.
Fill out the Part.no., Serial no., and Control code.
25
4 Installation
EN
PowerRouter • Solar battery • Installation manual
6.
Click Register (figure 25).
7.
Fill out the fields in the window (figure 26), and click Continue.
8.
Fill out the fields in the window (figure 27), and click Continue.
9.
You will receive a confirmation e-mail.
4.12.5 Register additional PowerRouters on one login
You can register two additional PowerRouters on the same login. To do this:
1.
Login on www.myPowerRouter.com.
2.
Click My PowerRouter.
3.
Click Register a new PowerRouter (figure 28).
4.
Fill out the Part.no., Serial no., and Control code.
5.
Click Register (figure 29).
CAUTION
The PowerRouter internet connection will not work if a proxy server is being used.
CAUTION
Do not use the AC local out of the PowerRouter to provide power to the internet router, or internet switch.
i
The PowerRouter only uses internet port 80. This is the default setting on most networks.
i
The PowerRouter needs a DHCP server within the network. This should be provided by the internet router
or the intenet switch.
i
To test the connection, connect a PC to the connection that you will use for the PowerRouter. Open a web
page. If the web page opens, the connection works.
i
The maximum length of the CAT5e UTP cable is 20 meters. If you need to clear a longer distance, you can
use an additional router, and an additional cable of 20 meters.
i
Powerline communication may result in an unreliable internet connection.
26
PowerRouter • Solar Battery • Installation Manual
5
5.1
5 Advanced settings
Advanced settings
EN
Introduction
After the installation with the PC software installation tool it is possible to make advanced settings to
further optimise the PowerRouter for self-use.
Below you find an overview of features that are available in the PC software installation tool, under
advanced settings. Each feature has a short description, for detailed information refer to the help available
in the PC software installation tool.
5.2
Display settings
5.2.1 Backlight
Sets the time the PowerRouter's backlight stays on after
pressing a button.
5.2.2 Display
Select the information that will be shown by default in the
status display of the system.
5.2.3 Language
Select the language of the display of the PowerRouter.
5.3
PowerRouter settings
5.3.1 Scenario
Change the scenario of the PowerRouter. Not available on all
systems.
27
5 Advanced settings
EN
PowerRouter • Solar Battery • Installation Manual
5.3.2 Alarm 1 / Alarm 2
The PowerRouter is provided with 2 user-selectable relays
referred as K201 and K202. This chapter describes the
different alarms you may assign. After specifying the alarm it
needs to be assigned to the relay icon, appearing next to the
alarm icon in the installation tool. The relay icon can be
selected after configuring the alarm.
Off
This is the default selection for an alarm relay. It is off or not used.
Grid voltage alarm
When the grid voltage is outside of the desired range the alarm relay is inactive. This can be used to switch
on loads or sound an alarm when the grid voltage is out of range.
For example to protect sensitive loads against high voltage. Or to switch on additional loads when the grid
voltage is high. Which is usually an indication of high feed-in power.
Battery State of Charge (SoC)
Alarm based on the battery state of charge. The alarm relay is activated when the battery State of Charge
is outside the specified range.
Battery temperature alarm
Alarm based on the temperature of the battery pack. The alarm relay is activated when the temperature of
the battery pack is above the specified range.
Battery voltage alarm
Alarm based on the voltage of the battery pack. The alarm relay is activated when the battery voltage
below the specified range.
Grid connection alarm
Alarm based on whether the system is connected to the grid. The relays are inactive if the system is in
standby and no grid is available to power the relays. This alarm is not used for backup functionality.
Load management
Switch on additional loads when a surplus of solar energy is available to increase the self-use.
Self use with backup
Alarm based on whether the system is connected to the grid. When disconnected from the grid, the
PowerRouter will switch to backup mode.
5.3.3 Standby
Select that the PowerRouter can go in standby. The
PowerRouter will go in to standby when there is no solar
power or battery power available.
28
PowerRouter • Solar Battery • Installation Manual
5 Advanced settings
5.3.4 Standby timer
EN
Select a time interval, in which the PowerRouter goes to
standby.
5.4
Grid
5.4.1 Country
Set the country grid settings for a specific country.
CAUTION
It is not allowed to select another country, than the country
the PowerRouter will be installed.
5.4.2 EEG 2012
Set the dedicated parameters to your installation size to
comply with the German EEG 2012 regulation.
5.4.3 VDE 4105
Change the grid settings to comply with the VDE 4105 per
local utility requirements.
5.4.4 Dynamic Feed-in Limiter
With the Dynamic feed-in limiter the output of the system can
be adjusted. You can:
•
Limit the output of the system.
•
Limit the output to the grid after the point where the load
is connected to the grid.
5.4.5 Battery pack
You can change:
•
Type of battery pack
•
Size of battery pack
•
Depth of Discharge for self-use
•
Depth of Discharge during grid failures.
CAUTION
Wrong settings may harm the batteries.
29
5 Advanced settings
EN
PowerRouter • Solar Battery • Installation Manual
5.4.6 Battery charging
You can change:
•
The charging procedure to float charging.
•
The absorption voltage and float voltage.
•
The charge current.
CAUTION
Wrong settings may harm the batteries.
5.4.7 Maintenance charge
Set the interval of when to perform the maintenance charge.
5.4.8 Self-use battery settings
Change specific battery setting to optimise self-use. With the
battery power limiter enabled, the battery will not be used to
compensate peak loads, but only for the base load.
5.4.9 Wintermode
Wintermode controls the usage of the battery module during
the winter period.
30
PowerRouter • Solar battery • Installation manual
6
6.1
6 Operation
Operation
EN
Service menu
Open the service menu
•
Press any button on the display to open the service menu.
Navigate through the menu
•
Use the UP/DOWN buttons to navigate through the menu.
•
Use YES to open the selected item.
•
Use NO to return to the previous item.
Select and change settings
•
Use YES to change a selected setting.
•
Use the UP/DOWN buttons to change the selected setting.
•
Use YES to confirm the changed setting.
•
Use NO to cancel the change.
Main menu
Status
menu
History
menu
Settings
menu
Service
menu
System
Grid
Language
Status
Grid
Solar
Date&Time
Revision
Solar
Battery
Display
Reset
Battery
Internet
connection
Error
Install
Wizard
Maintenance
charge
31
7 Troubleshoot
EN
7
PowerRouter • Solar battery • Installation manual
Troubleshoot
7.1
Troubleshooting
If you encounter difficulty with the operation of your PowerRouter, follow the steps below:
•
Check the LED status.
•
Check the error message on the LCD display, and the error history.
•
If the difficulty remains, contact your installer/dealer.
Collect the following information before you contact your installer or dealer (figure 1):
•
Model number
•
Serial number
•
Brief description of the problem
•
LED status
•
Displayed error message
•
Error history
•
Software version and ID number
7.2
Check the LED status
When an error has occurred the LEDs will either be OFF or FLASHING as follows:
Operation
LED colour LED: ON
LED: OFF
LED: FLASHING
Operational
blue
when unit is
operational
when unit is off or there is an
error
standby
Charging
blue
trickle charging
discharging
charging
Grid
blue
when grid is
connected
when no grid power is available
or unit is off
Grid power available, but not
connected.
Error
red
when there is an
error (**)
no error
when one module/function is not
available (*).
* Requires service intervention.
** Error may resolve itself; other modules/functions active.
7.3
Check the error messages
The PowerRouter shows the latest error message on the display. The last ten error messages are stored
in the error history. For possible solutions see section 7.6.
Most errors are cleared automatically by the system if the error condition disappears. If an error message
does not clear itself, press the NO button for at least 3 seconds to clear the error.
32
PowerRouter • Solar battery • Installation manual
7.4
7 Troubleshoot
Error explanation
EN
7.4.1 Hard error
When a hard error occurs the PowerRouter goes into a safe mode and will not function until the user has
turned the system off and on or a reset is performed. A hard error is indicated when the error LED is
flashing.
7.4.2 Soft error
When a soft error occurs the module in which the error originated will go into a safe mode. Other modules
in the PowerRouter will continue to operate. The PowerRouter can recover from the error automatically. A
soft error is indicated when the error LED is on.
7.4.3 Error code
Example:
P027-H
P
The first letter indicates where the error originated within the PowerRouter
P - Platform
S - Solar module
B - Battery module
G - Grid module
027 The number indicates which error has occurred
H
The second letter indicates the level of the error that occurred
H - Hard error
S - Soft error
7.5
Procedures
7.5.1 Restart the PowerRouter
The PowerRouter can be restarted in any of the following ways:
•
Turn the system off and on with the on/off switch on the display
•
Use the restart function in the service menu
•
Use the restart function on myPowerRouter.com
7.5.2 Check the PowerRouter airflow
If an over-temperature condition occurs check the following:
•
Make sure the ambient temperature in the room where the PowerRouter is located does not exceed
40 degrees Celsius.
•
Make sure the airflow through the PowerRouter is not obstructed. Check the air output at the top and
the air input at the bottom.
•
Open the connection area of the PowerRouter and make sure the internal fans are turning (this step
must be performed by a trained service engineer).
33
7 Troubleshoot
EN
7.6
PowerRouter • Solar battery • Installation manual
Errors
Error
Level
Explanation
Action
P027-H
P028-H
P029-H
Hard
A grid error has occurred
•
•
•
Restart the system (section 7.5.1)
The system should recover from the error after the
restart
Contact your dealer if this error occurs frequently
G025-H
P058-H
Hard
After a firmware update one of the •
modules has an incompatible
firmware version
•
•
Contact your dealer for the correct firmware
package
Update the firmware of the system with the correct
version
Restart the system (section 7.5.1)
•
•
•
Restart the system (section 7.5.1)
Run the installation tool or install wizard again
Contact your dealer if this error occurs frequently
P081-H
Hard
The installation wizard or install
tool failed to write the antiislanding settings to the
PowerRouter
P092-H
Hard
The PowerRouter configuration is •
incorrect
Contact your dealer if this error occurs
Hard
The firmware in the PowerRouter
does not match the hardware
•
Contact your dealer if this error occurs
P100-S
Soft
There was too much load
variation during the sensor test
•
Turn off the loads connected to the same phase as
the PowerRouter
Restart the system (section 7.5.1)
P105-S
Soft
The PowerRouter needs a 1phase or 3-phase sensor to
operate in the selected scenario.
This sensor was not detected.
G034-H
B026-H
S019-H
P098-H
G036-H
B028-H
S021-H
•
•
•
P106-S
Soft
There is a problem reading the
data from the 3-phase sensor
•
•
P111-S
Soft
The PowerRouter was not able to •
configure the 3-phase sensor
•
P115-H
Hard
The PowerRouter cannot function •
correctly because some hardware
modules were not detected
•
34
Make sure the connection of the 1-phase or 3-phase
sensor is correct and in the right position. For
detailed information see the related section in this
manual.
Restart the system (section 7.5.1)
Make sure the 3-phase sensor is connected
properly
Restart the system (section 7.5.1)
Make sure the 3-phase sensor is connected
properly
Make sure the 3-phase sensor is not in the locked
position
Restart the system (section 7.5.1)
Contact your dealer if this error occurs
PowerRouter • Solar battery • Installation manual
G001-S
Soft
The internal temperature of the
grid module (G) is too high
•
•
G037-S
The output power of the module is •
reduced
7 Troubleshoot
Check the PowerRouter airflow (section 7.5.2)
Once the module cools down the error will
disappear and normal operation will resume
Contact your dealer if this error occurs frequently
EN
G002-S
Soft
An overvoltage occurred on the
•
power backbone. The grid module
(G) will be temporarily turned off
•
Once the voltage drops below the safe level the
error will disappear and normal operation will
resume
Contact your dealer if this error occurs frequently
G003-S
Soft
An undervoltage occurred on the •
power backbone. The grid module •
(G) will be temporarily turned off
(e.g. the load on the local out is
•
higher than the power available in
the PowerRouter)
Make sure the loads on the local out are turned off
After one minute the error will disappear and normal
operation will resume
Contact your dealer if this error occurs frequently
G007-S
Soft
The voltage level on the local out •
is too high in a situation where no
voltage is expected
•
If this error occurs during installation make sure the
grid is connected to the “AC GRID” connection
When this error occurs during normal operation an
error has occurred in connection with the antiislanding safety requirements
Restart the system (section 7.5.1)
Contact your dealer if this error occurs frequently
•
•
G011-S
Soft
An undervoltage occurred on the
local out. The local out will be
temporarily turned off.
•
•
G012-S
Soft
An overvoltage occurred on the
local out. The local out will be
temporarily turned off (e.g. a very
high load connected to the local
out was suddenly disconnected)
•
•
A short circuit was detected on
the PowerRouter local out
•
•
•
G013-H
Hard
•
•
G015-S
G023-H
Soft
Hard
Make sure the loads on the local out are turned off
After one minute the error will disappear and normal
operation will resume
Contact your dealer if this error occurs frequently
Make sure the loads on the local out are turned off
After one minute the error will disappear and normal
operation will resume
Contact your dealer if this error occurs frequently
Make sure the loads on the local out are turned off
Check the wiring connected to the local out for a
short
Restart the system (section 7.5.1)
There was an internal
communication error within the
PowerRouter
•
•
After one minute the error will disappear and normal
operation will resume
Contact your dealer if this error occurs frequently
The local out output was
overloaded
•
•
Turn off the loads connected to the PowerRouter
Restart the system (section 7.5.1)
•
•
Restart the system (section 7.5.1)
The system should recover from the error after the
restart
Contact your dealer if this error occurs frequently
G025-H
Hard
See P027-H
G028-H
Hard
An error occurred on one of the
internal voltage supplies of the
grid module (G)
G029-S
Soft
The grid module (G) start-up
procedure failed
G031-H
Hard
There was an overpower on the
output of the PowerRouter
G034-H
Hard
See P092-H
G036-H
Hard
See P098-H
•
•
•
After one minute the error will disappear and normal
operation will resume
Contact your dealer if this error occurs frequently
•
•
Turn off the loads connected to the PowerRouter
Restart the system (section 7.5.1)
35
7 Troubleshoot
EN
PowerRouter • Solar battery • Installation manual
G039-S
Soft
The output power of the grid
module (G) has been reduced
because the grid frequency was
too high
•
The error will disappear and normal operation will
resume when the grid frequency is within approved
limits
G040-S
Soft
The output power of the grid
module (G) has been reduced
because the grid voltage was too
high
•
The error will disappear and normal operation will
resume when the grid voltage is within approved
limits
G041-S
Soft
The output power of the grid
•
module (G) has been reduced
because the 10 minute average of
the grid voltage was too high
The error will disappear and normal operation will
resume when the 10 minute average of the grid
voltage is within approved limits
B004-S
Soft
The temperature sensor on the
•
batteries indicates the
temperature of the batteries is too
high
•
Check the ambient temperature of the room where
the batteries are located. The ambient temperature
of the room in which the PowerRouter is located
must not exceed 40 degrees Celsius.
The error will be cleared when the temperature
decreases
B007-S
B008-S
B009-S
Soft
The internal temperature of the
battery module (B) is too high
•
•
The output power of the module
has been reduced
•
Check the PowerRouter airflow (section 7.5.2)
When the module cools down the error will
disappear and normal operation will resume
Contact your dealer if this error occurs frequently
B014-S
B015-S
B016-S
B017-S
B018-S
B019-S
B030-S
B010-H
B012-H
Hard
The voltage level of an internal
•
battery module (B) circuit was out
of bounds
•
•
Check the following:
– the battery capacity settings (with the install tool
or the wizard on the display)
– the quality of the batteries
Make sure the loads on the local out are turned off
Restart the system (section 7.5.1)
•
•
Make sure the loads on the local out are turned off
Restart the system (section 7.5.1)
B011-H
B013-H
B021-H
Hard
An overcurrent was detected in
one of the internal circuits of the
battery module (B)
B020-S
Soft
An overvoltage occurred on the
•
power backbone. The grid module
(G) will be temporarily turned off
•
When the voltage drops below the safe level the
error will disappear and normal operation will
resume
Contact your dealer if this error occurs frequently
B024-H
Hard
The battery module (B) detected a •
short on the module input
•
Check the wiring of the battery to the PowerRouter
Restart the system (section 7.5.1)
B026-H
Hard
See P092-H
B028-H
Hard
See P098-H
B038-S
Soft
There was an internal
communication error within the
PowerRouter
•
•
After one minute the error will disappear and normal
operation will resume
Contact your dealer if this error occurs frequently
B055-H
Hard
The battery module (B) detected
an overvoltage on the module
input
•
•
Check the wiring of the battery to the PowerRouter
Restart the system (section 7.5.1)
36
PowerRouter • Solar battery • Installation manual
S002-S
Soft
The internal temperature of the
solar module (S) is too high
•
•
The output power of the module
has been reduced
•
S023-S
7 Troubleshoot
Check the airflow of the PowerRouter (section 7.5.2)
When the module cools down the error will
disappear and the normal operation will resume
Contact your dealer if this error occurs frequently
S004-S
Soft
The solar string voltage
connected to one or both of the
inputs exceeds 600 volts
•
•
Check the solar panel configuration and wiring
The error will disappear when the voltage on both
strings drops below 600 volts
S005-S
Soft
An overvoltage occurred on an
internal bus of the solar module
(S)
•
•
The error will disappear when the voltage drops
below the limit
Contact your dealer if this error occurs frequently
S007-S
Soft
An overcurrent occurred on an
•
internal circuit of the solar module
(S)
•
After ten minutes the error will disappear and
normal operation will resume
Contact your dealer if this error occurs frequently
S013-S
Soft
The output power of the solar
panels exceeds 6000 watts
This error will disappear when the power drops
below 6000 watts
Contact your dealer if this error occurs frequently
•
•
S016-S
Soft
There was an internal
communication error within the
PowerRouter
S019-H
Hard
See P092-H
S021-H
Hard
See P098-H
•
•
The error will disappear automatically and normal
operation will resume
Contact your dealer if this error occurs frequently
i
Check www.PowerRouter.com for the latest version of the errorlist.
37
EN
7 Troubleshoot
EN
7.7
PowerRouter • Solar battery • Installation manual
Check the internet connection
The display will show information about the internet status like: Internet connection status (ok, error,
counting), Last date and time when the PowerRouter was connected to the internet, the IP number and
status of the firmware distribution.
7.8
Look up the software versions and id number
Open the service menu and navigate to revision. Here you will find:
•
The firmware versions of the various internal modules.
•
The PowerRouter's unique identification number here.
7.9
Reset the PowerRouter
If the PowerRouter is not working as expected, it may help to perform a restart.
CAUTION
Notify the end-user before you do a restart. A restart of the PowerRouter can result in a temporary power
failure. This means that no power will be available for the end-user. The restart takes less than 1 minute.
1.
Notify the end-users that there may be a brief power interruption.
2.
Open the service menu.
3.
Navigate to the restart procedure.
4.
Activate the restart procedure.
7.10 Self test (for Italy)
i
The self test is required safety check for Italy.
The self test simulates grid voltage and frequencies. The PowerRouter must respond safely to these
simulated abnormalities. If the PowerRouter within the Italian specifications, the self test is OK. If the self
test fails, the PowerRouter will switch off.
1.
Open the service menu, and navigate to the option ‘Self test’.
2.
Start the ‘Self test’ and wait until it is finished.
i
If the PowerRouter switches off during the test. Restart the PowerRouter and redo the test. If the ’Self test’
fails the second time, contact your local supplier.
38
PowerRouter • Solar battery • Installation manual
8
8 De-installation
De-installation
EN
DANGER
To safely de-install the PowerRouter, you must follow the instructions in this chapter.
8.1
De-install
To de-install the PowerRouter:
1.
Switch the PowerRouter unit OFF.
2.
Switch the DC switches OFF.
3.
Switch the AC switches OFF.
4.
Wait at least 5 minutes, to ensure the unit is completely de-energised.
5.
Disconnect the communication wires.
6.
Disconnect any optional connections.
7.
Disconnect the solar panel string wiring with the special tool (figure 9).
8.
Disconnect the AC wires.
9.
Disconnect the DC wires.
10. The PowerRouter can now be removed for disposal or repair.
DANGER
The wires from the solar panels are always energised. The voltage from a string of solar panels can
be as high as 600 V. The current can be as high as 15 A.
CAUTION
De-installation must be carried out by qualified personnel. Contact your installer/dealer.
8.2
Disposal
When the PowerRouter reached the end of its service life, or is defect beyond repair:
•
Dispose of the PowerRouter according to local regulations.
•
Submit the PowerRouter to a collection point for electrical and electronic waste recycling.
CAUTION
The PowerRouter must not be disposed of with household waste.
39
9 Technical specifications
EN
9
9.1
PowerRouter • Solar battery • Installation manual
Technical specifications
Technical specifications of the PowerRouter
AC output
PR50SB-BS
PR37SB-BS
PR30SB-BS
Continuous output power at 40 C (P nom) 5000 W (DE: 4600 W)
3700 W
3000 W
AC output current
25 A (DE: 22A)
16 A
13 A
Cos Phi
1 (DE: 0.9 ind. … 0.9 cap. adjustable)
o
Nominal output voltage
230 Vac, 50 Hz
AC output range
180-264 Vac 45-55 Hz (limited by local anti-islanding regulations)
AC output voltage (local out)
230 Vac ± 2%, 50 Hz ± 0.2%, true sine wave <3% THD, single phase
Peak power (local out)
2 x Pnom., 10 sec.
Protection
electronic, fused
Standby losses
< 11W
User interface
display with 4-button operation
Connectivity
ethernet (RJ45), TCP/IP
User-selectable relays
2 provided. NO/NC, 250Vac, 1 A, 24 Vdc, 5 A
Solar panels
PR50SB-BS
PR37SB-BS
PR30SB-BS
Max. input
5.5 kWp and 15 A per
string
4 kWp and 15 A per
string
3.3 kWp and 15 A
No. of inputs
2
2
1
No. of MPP trackers
2, fully independent
2, fully independent
1
DC disconnect switch
4-pole, 600 V, 15 A
4-pole, 600 V, 15 A
2-pole, 600 V, 15 A
Solar voltage
100-600 Vdc per string
PR37SB-BS
PR30SB-BS
MPP voltage
180-480 Vdc per string
Solar connections
MC4
Max. efficiency
94% (93% EU)
Max. MPP efficiency
99.9%
Lead-acid (wet/gel) and AGM
PR50SB-BS
Battery voltage range (Vout)
21 - 31 Vdc
Charge current
25 - 200 A continuous, 25 - 155 A continuous, 25 - 125 A continuous,
programmable
programmable
programmable
Battery capacity
min. 100 Ah, at 25A charge current
Charging curve
3-stage adaptive with maintenance
Short circuit protection
electronic, at max. charge current, switch off <1 sec
Battery temperature compensation
included
Battery voltage sense
integrated
Current shunt
integrated
40
PowerRouter • Solar battery • Installation manual
9 Technical specifications
Environmental
PR50SB-BS
PR37SB-BS
Operating temperature range (full power)
-10 oC to +50 oC (derating above 40 oC)
Storage temperature
-40 oC to +70 oC
Humidity
maximum 95%, non-condensing
Regulatory approvals and standards
CE, VDE-AR-N 4105:2011-08, EEG2012, C-Tick
Safety
EN 60950-1, EN 62109-1, EN 60335-2-29
Emission
EN 55014-1, EN 61000-3-2, EN 61000-3-3, EN 61000-6-3
Immunity
EN 55014-2, EN 61000-6-2
Anti-islanding protection
VDE 4105, VDE 0126.1.1, G83/1(UK), RD1663/2000(ESP), DK5940
E.d. 2.2, CEI0-21 pending (IT), AS4777(AUS) (check
www.PowerRouter.com for other country certifications)
Warranty
five years (optional: extension to ten years)
General
PR50SB-BS
Dimensions (W x H x D)
765 x 502 x 149 mm
Protection category
indoor use (IP20)
Weight
20.5 kg
PR37SB-BS
Topology
galvanically isolated transformer
Cooling
forced airflow
9.2
EN
PR30SB-BS
PR30SB-BS
Example of possible battery types
The PowerRouter functions with any lead-acid batteries. Below you find an example of some possible
batteries.
Enersys PowerSafe SBS
Battery type
Number of
batteries
Battery pack
size (C10 Ah)
Maximum
charge current
Bulk voltage
Float voltage
SBS 190F
2
190 Ah
47 A
28,8 V
27,5 V
4*
380 Ah
95 A
* two batteries in serie, and two paralel string
HOPPECKE OPzV bloc Solar.power
Battery type
Number of
batteries
Battery pack
size (C10 Ah)
Maximum
charge current
Bulk voltage
Float voltage
6V 4 OPzV 250
4
205 Ah
41 A
28,8 V
27,0 V
6V 5 OPzV 300
4
250 Ah
50 A
6V 6 OPzV 370
4
308 Ah
61 A
BAE Secura PVV BLOCK Solar
Battery type
Number of
batteries
Battery pack
size (C10 Ah)
Maximum
charge current
Bulk voltage
Float voltage
6V 4 PVV 280
4
229 Ah
45 A
28,2 V
27,0 V
6V 5 PVV 350
4
286 Ah
57 A
6V 6 PVV 420
4
344 Ah
68 A
41
9 Technical specifications
EN
42
PowerRouter • Solar battery • Installation manual
www.PowerRouter.com
[email protected]