1
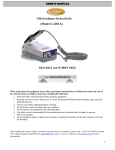
LCD Portable Metal Detector With In Built Speaker User Manual 1 Assembly 1. Relax the end of the bend-shape tube sleeve clockwise, and insert the aluminum tube which connects the search coil into the tube sleeve, adjusting the length so that you can stand comfortably and straighten your arms,when the search coil is from the ground about 1/2 inches,then lock the tube sleeve anti-clockwise.( Fig.1 and Fig.2) 2. Fig. 1 Fig. 2 3. Let the plastic pillar with two nuts on the bottom of the detector control box align with the two holes of the bend shape aluminum tube,and then lock it with bolts. (Fig.3) Fig. 3 Coil the cable of the search coil onto the stem,elasticity within measure so that the cable won’t sway, and then insert the cable plug into the lower right plug of the 2 control box.(Fig.4) Fig. 4 4. The arm support has two positions,t he initial position is that the arm support is in longer location, if your arms are shorter then you can adjust the arm support position. Please release the left and right screw under the arm support when regulation to loosen the left and right arm support, and remove the arm support forward to another position,then tighten the two screws.(Fig.5) Fig. 5 Batteries Please use 6 x Alkaline AA batteries (not included). 1. Press the “key” on the battery cover in the direction of the arrow,pull out the battery cover.(Fig 6) 3 Fig. 6 2. Insert the 6 x AA batteries into the compartment as indicated by the polarity symbols marked inside the compartment. (Fig 6) Fig. 7 3. Close the battery cover. Please notice the “UP” direction indication on the battery cover. 6 x Alkaline batteries can operate up to 40 hours battery life . If you don’t use detector for a week or more, please remove the batteries from the battery box. Function and indicator 1. LCD screen (Fig 8) Fig. 8 4 On the top of LCD screen is the TARGET ID,namely target identification cursor. On the bottom is the DEPTH-SENS, namely the depth and sensitivity shared cursor. The central left is the low-voltage indication cursor. When searching,the target identification cursor divide the metal targets into three categories : Silver Higher conductivity metals,such as silver, aluminum and copper. MID RANGE——Medium conductivity metals, such as nickel and some coins. Generally golden rings can be also illumined at this point. IRON——Low conductivity metals, such as iron and all types of ferrous metals can be illumined at this point. When presetting the Target Identification button to discriminate mode,it indicates as the discrimination mode. When turning on the unit,the DEPTH-SENS instructs the sensitivity cursor, turn to the initial state, the three segments of the left is lighted,it means the sensitivity is in the third level. Press the "SENSTIVITY" "+" key,the detector sounds four tones,the four segments of the DEPTH-SENS are all lighted, it means the sensitivity is in the fourth level,that is the most advanced level. Press the "SENSTIVITY" "-" keys,the tones of the detector are reduced one time,and the segments of lighted are also reduced one section, it means the sensitivity is reduces a level. When searching,the DEPTH-SENS directs the target depth. The first segment that is also the "0" segment illuminated and flickered,it indicates the metal target is near the ground. The fourth segment that is the "6" segment illuminated and flickered, it indicates the target is at about the 6 inches position. Of course, It only shows the relative depth of the metal objects, rather than the precise depth. When it find the targets, The TARGET ID and DEPTH ID will flicker about 5 seconds, and then the cursor of the discriminate mode and the sensitivity instruction will come back to the pre-set position,and will remain unchanged until find the metal targets next time. The low battery indication cursor When the cursor on the left of the LCD is lighted,which indicates you it’s the time to change the battery. 2,Three kinds of sounds Press the “POWER ON” button, the detector will sound the three frequencies of “low,medium,high” tones,the sensitivity ruler mark illumines three segments,which means the sensitivity is in the third level. The Target Indication cursor isn’t illuminated, which means the discrimination mode is set in the ALL METAL state. When sweeping the four types of metals 2 inches above the top of search coil,the detector will respond with different sound.,the target identification on LCD will be illumined correspondingly. 5 Target categories Indication sound TARGET ID indication Iron nail Low tone IRON is illumined and flickered about 5 seconds Nickel,coins Medium tone MID RANGE is illumined and flickered about 5 seconds 25 cents High tone SILVER is illumined and flickered about 5 seconds 3, Four kinds of discrimination modes The detector is automatically set to the ALL METAL mode,when it’s powered on,n amely it will respond to all types of metals. Press the “MODE” button,it will eliminate the metals that you don’t want, press“MODE”button for several times,the operator can choose from the four kinds of different discrimination settings. Four kinds of modes Indication sound TARGET ID indication Initial state High tone Not illumined press“MODE”button Low tone Iron is illumined press“MODE” button again Medium tone press“MODE”button again Low tone and medium tone by turns Mid range is illumined Iron and Mid range are all illumined press“MODE” button again High tone Not illumined The Eliminated metals Can’t eliminate any metals Iron is eliminated Nickel, Coins Iron, nickel, coins are eliminated at the same time Can’t eliminate any metals and in the ALL METAL state Note:the times of the detector sounding the tone is the same with the sensitivity level,which means when the sensitivity is at the fourth level,the detector will sound four times. Quick Start 1. Lay the metal detector properly In order to avoid the metals influencing the detector, be sure to lay the the metal detector properly. Place the detector on a wooden or plastic table. Let the search coil exceed the table edge about more than 15cm, and adjust the search coil so that the flat part points upwards.(Fig 9) 6 Fig. 9 Please take off any watches, rings or other metal objects on your hand or arm. Keep the detector away from any walls, floors and other metal objects. Be sure to keep the detector away from the light, TV, computer or mobile phones, which can cause electro-magnetic interference. 3. Turn on Press the POWER ON button,the detector will sound the three frequencies of low, medium and high tones,and together with three “ID” tones. The liquid crystal pattern scans once, and then shows the discrimination mode and the sensitivity. TARGET ID——Not illumined It means it’s in the ALL METAL state. DEPTH –SENS——illumines the third segment It means the sensitivity is at the third level. Note:if you don’t change the discriminate mode and the sensitivity level, the LCD will hold the line. When the detector finds the metal,the TARGET ID will indicate the kind of the metal,and the DEPTH-SENS will show the approximate depth of the target objects. After flicking about 5 seconds,the LCD comes back to the setting state. 4. All metals 7 When turning on the unit, the detector is at the ALL METAL state,sweep the metal sample above the center of the search coil (5cm) Operate Turn on Indicatio n tone LCD TARGET ID Turn on indicatio n Nothing displayed Sweep iron nail a low tone Nickel, coins a medium tone Silver a high tone The IRON is illuminate d and flicker MID RANGE is illuminate d and flickers SILVER is illuminate d and flicker LCD DEPTHSENS Chart Note SENS-3 is illuminated DEPTH-2 is illuminated and flickers If the height of the metal sample from the search coil is changed, the lighted segments of the LCD height mark cursor will be changed correspondingl y. DEPTH-2 is illuminated and flickers DEPTH-2 is illuminated and flicker 5. Eliminate iron Operate Press MODE button Indicatio n tone Three low tones LCD TARGET ID IRON LCD DEPTH-SENS SENS-3 is illuminated 8 Chart Note Press the MODE button,the times of the detector d h Sweep iron nail Nickel, coins Silver SENS-3 flicker sonce Silent IRON flickers once A medium tone MID RANGE is illuminated and flicker DEPTH-2 is illuminated and flickers SILVER is illuminated and flicker DEPTH-2 is illuminated and flickers A high tone 6. Eliminate the medium conductivity metals Operate Press MODE button Sweep iron nail Nickel, coins Silver Indication tone LCD TARGET ID Three medium tones MID RANGE is illuminated A low tone Silent A high tone IRON is illuminated and flickers MID RANGEis flickers once SILVER is illuminated and flickers LCD DEPTH-SENS SENS-3 is illuminated DEPTH-2 is illuminated and flickers SENS-3 flickers once DEPTH-2 is illuminated and flickers 9 Chart Note 7. Eliminate the iron and the medium conductivity metals at the same time Operate Press MODE button LCD TARGET ID LCD DEPTHSENS IRON、 MID RANGE is illuminated at the same time SENS-3 is illuminated Silent IRON、 MID RANGE flicker sonce SENS-3 flickers once A high tone SILVER is illuminated and flickers DEPTH-2 is illuminated and flickers Indicatio n tone It responds with low, medium tone alternate ly,and repeats three times Nickel, Coins Silver Chart Note Pres the MODE button again,it comes back to ALL METAL mode Operating the detector outdoors 1.Turn on Press the “power on” button, the cursors on the LCD screen will be illuminated one by one, and the detector will sound the three frequency tone of low,medium and high, the detector is now ready. It’s the Initial State: TARGET ID cursor is not lit,which means it’s in the ALL METAL state. DEPTH-SENS 3 segments are lit,which means the sensitivity is at the third level. 2.Choose the sensitivity Press the “SENSTIVITY ” “+”or “-” button, you can regulate the sensitivity. Generally speaking,we set it to the highest level,if there is much electromagnetic interference around or the soil is highly mineralized, the detector will have an erratic tone, and if this happens, you should reduce the detector’s sensitivity. 10 Note: If you detect with your more than one metal detector, please keep at least 5m apart. 3.Choose the discrimination modes Press the Mode button, you can choose from the four discrimination modes,if you are not interested in iron targets, you can choose to reject the iron,if the pull-tabs off cans disturb your detection, you can choose to reject the pull-tabs. Please be sure,not to reject the noble metal such as gold. Generally, you can choose ALL METAL mode, which is used to detect all metals, when you find a metal target, adjust the different discrimination mode to determine the kind of the object. This would help you to determine whether it is worth digging. Note:Once you’ve set the sensitivity and discrimination mode, if you don’t reset the settings, it will not change until you turn the unit OFF,. Every time the detector find the target object,the TARGET ID will show the target category, while the DEPTH-SENS will show the approximate depth of the target object,and will flicker for about 5 seconds, the LCD will come back to the state which you have set. 4.Motion detect When detecting,slowly sweep the search coil, let the search coil parallel with and about 1-5cm)above the surface. Never sweep the search coil as if it were a pendulum.(Fig 10、11) Fig. 10 Fig. 11 Most worthwhile metal objects will bring a repeatable tone, if the signal can’t be repeated it is more than likely trash metals. When a clear sound is heard to show you the buried target objects, you can get the approximate target type and depth on the LCD screen,and you can also try sweeping the detected targets above the search coil 11 quickly,to help you get the more steady signal. 5.Pinpoint the target When there is a clear signal to show you the location of the buried target objects,you can “X” the target at different angles to zero on the exact spot on the ground where the “beep” occurs. You can do a "X" scan in this district, generally the bottom of the intersection point is the target object.(Fig 12) Fig.12 6.Power off prompt If you forget to power off the metal detector after use, the metal detector will emit three short beeps every 10 minutes, and start the automatic scanning procedure as power on to remind you power off the unit in time. 12