1
HYTEX User’s Manual
Rob J Hyndman
Version 7.0, April 2007
HYTEX is a LATEX style file for producing even better documents. It is a collection
of commands that I have found useful and think other LATEX users probably will
too. It is intended for use with LATEX 2ε .
HYTEX 7.0 is a trimmed down version of HYTEX 6.0. As more packages have become available, some of the facilities in HYTEX became obsolete. In particular:
• For compact lists, use the paralist package.
• For variations on description lists, use the mdwlist package.
• For bibliographies, use BibTEX with the natbib package.
• For bold mathematical symbols, use the bm package.
• For blackboard letters, use the amsfonts package.
• For variations on the verbatim environment, use the verbatim package.
• For better control in typesetting theorems, use the ntheorem package.
• For better control over numbering equations and floats, use the amsmath
package. (This is pretty useful for lots of other things too.)
Other trimming occurred by removing facilities that were hardly ever used.
To use HYTEX, simply begin your LATEX document like this:
\documentclass{article}
\usepackage{hytex}
\begin{document}
There is often no need for any other preamble. The page dimension commands
that many people include in the preamble are unnecessary as HYTEX does all this
for you. HYTEX may also be used with the report, book or letter document styles.
When the HYTEX style file is loaded in this way, a number of additional commands become available. Almost everything else in LATEX will work exactly as
normal.
It is assumed in this manual, that readers are familiar with LATEX as described in
Kopka and Daly’s excellent book “Guide to LATEX”.
If you have any suggestions for inclusion in future versions of HYTEX, or if you
have found a bug, please let me know at [email protected].
Some of the HYTEX commands I have borrowed from similar style files developed by other LATEXers.
1
HYTEX User’s Manual
2
Abbreviations Some LATEX commands are typed repeatedly. Therefore, I have provided some
abbreviations for commonly used sequences of commands. Of course, the full
commands can still be used. The abbreviations are:
\bt
\et
\biz
\eiz
\ben
\een
\begin{center}\begin{tabular}
\end{tabular}\end{center}
\begin{itemize}
\end{itemize}
\begin{enumerate}
\end{enumerate}
Blank page The command \blankpage will give you just that!
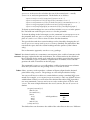
Boxed An equation can be placed in a box using the command \eqnbox:
equations $$\eqnbox{\E\hat f (y|x) - f(y|x) = \sigma_K^2
\left\{ a^2 \frac{h_X’(x)}{h_X(x)}\frac{\partial f(y|x)}{\partial x} +
\smallfrac12 a^2 \frac{\partial^2 f(y|x)}{\partial x^2} +
\smallfrac12 b^2 \frac{\partial^2 f(y|x)}{\partial y^2} \right\}}$$
produces
(
Efˆ(y|x) − f (y|x) =
2
σK
0
2 hX (x) ∂f (y|x)
a
hX (x)
∂x
+
1 2∂
2a
2 f (y|x)
∂x2
+
1 2∂
2b
2 f (y|x)
)
∂y 2
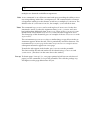
Boxed To place a paragraph (including displayed equations) in a centered box, use the
paragraphs command \boxpar. For example,
\boxpar{10.5cm}{\textbf{Definition:} If $Y_1,\dots,Y_n$ denote observations
with mean $\bar{Y} = \frac{1}{n}\sum_{i=1}^n Y_i$, then their \textit{sample
standard deviation} is defined as
$$s = \sqrt{\frac{1}{n-1} \sum_{i=1}^n (Y_i-\bar{Y})^2}.$$}
produces
Definition: If Y1 , . . . , Yn denote observations with mean Ȳ =
1 Pn
i=1 Yi , then their sample standard deviation is defined as
n
v
u
u
s=t
n
1 X
(Yi − Ȳ )2 .
n − 1 i=1
Note that you must specify the width of the box.
If the color package is loaded, you can also \shadebox in the same way, but the
box will be shaded.
Chapter heads Even among well printed books, there is great variation in the format of section heads. The font may be bold, sans serif, or small caps, in sizes ranging from
normal to rather large. If a section number is present, it may be followed by a
period or by a long space. The changes here give the casual LATEXer more control
over the style of headings.
The format of chapter heads may be controlled by the command
HYTEX User’s Manual
3
\mychapter{<head1>}{<head2>}
Here <head1> is the chapter heading to use with the \chapter command (when
the chapter is numbered) and <head2> is the heading to use with the \chapter*
command (when the chapter is not numbered). The text of the \chapter command is referenced in <head1> and <head2> by writing #1.
For example, the default chapter head is defined by
\mychapter{\huge\bf\chapapp\ \thechapter\\[20pt]\Huge\bf #1}
{\Huge \bf #1}
Here, the command \chapapp is usually defined to be “Chapter” but the LATEX
command \appendix changes it to “Appendix”. The command \thechapter
refers to the chapter number.
If you prefer smaller headings in smallcaps without the word “Chapter” prefixed, you could try:
\mychapter{\LARGE \sc \thechapter. #1}{\LARGE \sc #1}
There are three inbuilt chapter formats.
\sfchapter
\sfbchapter
\boxchapter
Makes chapter headings in sans serif font
Makes chapter headings in sans serif bold font
Places chapter number in a box
Any of these commands can be placed in the preamble.
Chapters always begin on a new page; \chaptopsep is the amount of blank
space at the top of the page before the chapter head, and \chapaftersep is the
amount of blank space placed between the chapter head and the text. They are
initially 1.8cm and 1.4cm respectively. They may be changed by the \setlength
command.
An alternative approach is possible using the fncychap package.
Columns Use the package multicol to set text in columns. HYTEX adds a new command
\newcolumn to force a column break.
Date and To get today’s date, use the TEX command \today. HYTEX adds an optional arTime gument to this command to control the date format and to provide Australian
rather than American formats. The options are given below with examples of
the format.
0 (default) 23 July 1999
1
23 Jul 99
2
Friday, 23 July 1999
3
23.07.99
Other formats can be created using the commands \Dow, \Date, \Month, \Mon,
\Year and \Yr.
The current time is available using the new command \clock. For example, if
we type
HYTEX User’s Manual
4
This document was processed at \clock\ on \today.
the printed document will read
This document was processed at 8.18pm on 3 April 2007.
This is used in the command \draft to add a time stamp to each page.
These commands refer to the date and time at which the dvi file is produced.
Double For theses and journal articles, it is often necessary to use widely spaced
spacing text. This is made possible using the setspace package. The command
\doublespaced in the preamble will give ‘double-spaced’ text throughout the
document. Single spacing can be turned back on for parts of the document (such
as for tabular) using \begin{singlespace} and \end{singlespace} Note that
double spacing is automatically turned off within footnotes and floats (figures
and tables).
The amount of spacing can be controlled via the \setspacing command. The
command \doublespaced actually uses \setspacing{1.75}. If this is too
much, try \setspacing{1.5} (or some appropriate value) in the preamble.
\setspacing can be used throughout the document to change spacing.
The newspacing environment can be used for setting the spacing within a section. e.g., \begin{newspacing}{1.6} . . . \end{newspacing}.
Drafts Placing the command \draft in the preamble has the effect of printing DRAFT
followed by the time and date at the bottom of each page. This is useful for
keeping track of documents for which many drafts are printed. The color package must be loaded first.
Figures To include graphics, put the command \usepackage{graphicx} in the preamble. The graphs can be pulled in with the command
\graph[<placement>]{<options>}{<file>}{<caption>}
The first argument is optional and positions the figure (as with the table or figure environment). The second argument provides any optional arguments to the
\includegraphics command; it can be left empty but would normally contain
something like width=15cm. The third argument is the name of the file. Note the
file extension is not required—it is assumed to be eps if LATEX is used and jpg or
pdf if pdfLATEX is used. The caption is given in the fourth argument.
All figures are automatically numbered (using the figure counter). They may be
referenced by their file name. For example Figure \ref{file} will produce the
text “Figure 3” if it is the third figure to be included in the document.
Fonts Bold sans serif fonts can be obtained using \sfb instead of \sf or \textsfb
instead of \textsf.
PostScript fonts are available using, for example, \timesroman in the preamble. This changes the roman font to Times-Roman, but leaves the maths, sans
serif and typewriter fonts unchanged. This is not the same as using the times
package which changes the roman, sans serif and typewriter fonts. Similarly,
HYTEX User’s Manual
5
\bookman, \palatino, \newcentury, \avantgarde, \helvetica, \courier
change to other PostScript fonts. Several of these commands can be used together to define san serif, roman and typewriter fonts.
To have both maths and text in palatino font, use the package mathpazo.
To obtain page numbers in sans serif, place \sfpage in the preamble. For sans
serif section headings use \sfsection, and for sans serif chapter headings use
\sfchapter. Also, \sfbpage, \sfbsection and \sfbchapter work as above.
This document uses \sfbsection and \sfbpage.
Headers and The default pagestyle produces a ‘running header’ containing section names
footers and page numbers. The headers and footers can be easily modified using the
following commands.
The commands
\lhead{<item>}
\chead{<item>}
\rhead{<item>}
set the left, center, and right parts of the headers. The corresponding commands
for footers are
\lfoot{<item>}
\cfoot{<item>}
\rfoot{<item>}
The first version of these commands was developed by Lance Berc. They have
been modified for use in HYTEX.
If the twoside style option is invoked before HYTEX, the macros switch the right
and left items on even numbered pages. If you require different headers and
footers for even numbered pages, as often with books, use the commands
\elhead{<item>}
\elfoot{<item>}
\echead{<item>}
\ecfoot{<item>}
\erhead{<item>}
\erfoot{<item>}
to define them. They should follow the commands, \lhead, chead, etc.
These commands work with the pagestyle threepartheadings which
is the default. If no headers and footers are desired, use the command
\pagestyle{empty} in the preamble.
To force page headers to be uppercase, use the command \uppercasehead.
The preamble command \underhead places a rule of length \textwidth and
width \underheadwidth a distance of \underheadsep under the header text.
The preamble command \boxhead places a box around the header as shown
in this document. Shaded headers are available using \shadehead although
the graphicx package must be loaded before using this command and it is
only available for postscript printers. For footers use \overfoot, \boxfoot and
\shadefoot.
The font used in headers can be changed using \headstyle. For example, to
make all headers sans serif, put \headstyle{\sf} in the preamble (as was
done for this document). For footers, use \footstyle. Any font command included in a \lhead, \rhead, etc., will override the \headstyle. The default is
\headstyle{\sl}.
HYTEX User’s Manual
6
Marginal notes \mnote{Comment} can be used to place text in the margins. \setmarginparleft
or \setmarginparright should be called first to ensure there is enough space in
the margins. The text is set in footnotesize.
Mathematical Several new commands have been added to produce mathematical symbols:
symbols
\invstackrel{}{} Same as \stackrel but inverted. E.g.,
$\invstackrel{\longrightarrow}{n\rightarrow0}$
produces −→
n→0
\dist
\smallfrac{}{}
\bddots
d
Produces the ‘distributed as’ symbol, =
Produces small fraction like 21
.
Produces backwards diagonal dots: . .
The E symbol for expectation and Pr for probability should appear in roman font rather than maths italics when used in equations. This can be easily
achieved using \E and \Pr. Similarly, \var, \cov and \corr produce Var, Cov
and Corr in maths mode. To obtain these in sans serif font use \sfE somewhere
before you need them.
Page size The command \a4page makes the page size A4. A similar command
\letterpage does the same for the US letter size. A4 is the default.
Three new commands assist with setting the page size. \setsidemargin describes the space to appear in the margins on each side of the page. These are
equal in size by default. The command \setbinding adds some space to the inner margin in case the document is to be bound. The default settings have zero
binding space and 3cm side margins. Note these commands look after the settings for \oddsidemargin and \evensidemargin and take into account whether
the page is A4 or US letter.
The command \setmarginparleft is used to set a wide margin on the left (or
odd side) of the page. The argument is the length of \marginparwidth. It also
ensures all marginal notes are on the inner side of the page
The command \setmarginparright does the same but on the right (or even
side) of the page.
Paragraph By default, HYTEX sets paragraph indentation to zero and the default interindentation paragraph space is 1.8 ex.
Customised changes are possible using \setlength.
Quotations There is a new environment smallquote which is identical to quote except that
the quotation is set in a small font.
Section heads The format of section heads may be controlled by the command
\mysection{<sec>}{<style>}{<preface>}
Here <sec> is the section level: section, subsection, etc. The style in which
the section is to be set is specified by <style>; e.g., \large\sf. The argument
HYTEX User’s Manual
7
<preface> is the text to be set before the text of the section head — usually
\thesection and some punctuation. The defaults are as follows.
\mysection{section}{\Large\bf}{\thesection~~}
\mysection{subsection}{\large\bf}{\thesubsection~~}
\mysection{subsubsection}{\normalsize\bf}{\thesubsubsection~~}
\mysection{paragraph}{\normalsize\bf}{\theparagraph~}
\mysection{subparagraph}{\normalsize\bf}{\thesubparagraph~}
To obtain section headings in a sans serif font, include \sfsection in the preamble. For bold sans serif font, put \sfbsection in the preamble.
To obtain headings in the left margin, use the command \setmarginparleft in
the preamble, then use \msection in place of \section and \msubsection in
place of \subsection. This is what was done for this document.
The space before and after section headings can be altered by changing the values of \presectionskip and \postsectionskip. Similarly for subsections. But
note that the space after the section headings must be positive (I don’t know
why).
For an alternative approach, use the sectsty package.
Table of In technical articles it is sometimes convenient to place a table of contents on the
contents first page, right after the title and abstract. The section entries in the default table of contents for the article style tend to be too widely spaced for this purpose.
The command \tighttoc produces a tighter table of contents. It was used to
generate the table of contents on the first page.
The command \tighttoccols will produce a table of contents in two columns.
Note that you need to use the package multicol for this to work.
Tables Often, you may wish to produce a column of figures aligned on the decimal
point while using tabular. The package dcolumn will provide this facility.
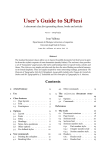
You can set all lines in a table to a certain thickness using a standard LATEX command. For example, \setlength{arrayrulewidth}{0.5mm} sets all lines to have
width 0.5mm. Where you want some lines thicker than others, HYTEX provides
two new commands, \bhline and \bvline to be used in place of \hline and
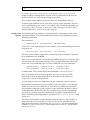
\vline. The next example illustrates the use of \bhline; the use of \bvline is
similar.
\begin{tabular}{c}
\bhline{4}
\bf Numbers\\
\hline
123\\
456\\
789\\
\bhline{4}
\end{tabular}
which produces
Numbers
123
456
789
The thicker lines are four times the width of the other lines in this case. Different
HYTEX User’s Manual
8
multiples are obtained with different arguments.
Tabs A new command \tab will insert some hard space providing the ability to inset
text using tabbing, rather like a word processor. The command takes a numerical argument which gives the distance to tab in as a multiple of \tabwidth. The
default value of \tabwidth is 1cm. So, for example, \tab3 will tab in 3cm.
Titles The command \hytextitle can be used in place of \maketitle for the documentstyle ‘article’. It takes the arguments from \title, \author and \date
but formats them differently from \maketitle. There is also a \boxtitle command which, if used before \hytextitle, causes the title to appear in a box.
The front page of this document gives an example of the use of \boxtitle with
\hytextitle.
The environment hytexboxtitle does a similar thing, except all text in the environment appears below the title. This is particularly useful for abstracts. The
environment hytextitlepage is the same as hytexboxtitle except it causes
subsequent material to appear on a new page.
To make the title appear in the header, put \titlehead in the preamble.
The font used for the title and author can be altered using \titlefont and
\authorfont. (The date is in the same font as the author.)
Two up To obtain pages “two up” (i.e., two pages printed at half size on each sheet of
paper), use the command \twoup in the preamble. This calls the package 2up
and figures out the page dimensions for you.