1
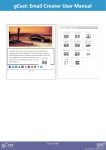
gCast: Email Creator User Manual Page 1 of 18 Last updated 2 July 2015 gCast: Email Creator User Manual Contents Overview 3 The Canvas 4 Layout Area 5 Edit Area 6 Styling Area 12 Page 2 of 18 Last updated 2 July 2015 gCast: Email Creator User Manual Overview The following document will outline the functions of the Email Creator. The Email creator is designed to create a beautiful, mobile responsive* email without any coding! Before each element is covered – there’s a few things you might want to know. 1) Width. The email is set to a fixed width of 600 pixels wide on desktop/webmail email clients. This has been locked this down so the email doesn’t “blow out”. 2) Autosave When a new campaign is accessed and hadn’t been saved previously the following message will appear. If you want to load the previous campaign, select “Ok”. If you do not want to load the last campaign, press “Cancel”. Please note: This is based on your local settings. It is highly advised you save your campaign as often as possible. 3) Aviary photo editor The Email Creator is plugged into Aviary, frames, stickers, intuitive retouching tools and more. where you can use beautiful filters, *Not all smart phones and email clients will support “responsive emails”. Responsive will work on Native iPhone and most Native Android email clients. View the full list of devices that support responsive email. Credit to Style Campaign for the list. Page 3 of 18 Last updated 2 July 2015 gCast: Email Creator User Manual The Canvas The following options are available to assist building and email using the email creator. 1. To undo a step, press this button. 2. To redo a step that was undone, press this button. 3. Mobile Preview. Provides an indication of what the email could look like on a supported mobile device. Note: The preview is an indication only of how the email could look on a supported mobile device so we recommend you test your email. 4. Desktop/Webmail Preview. Provides an indication of what the email could look like in a Desktop/Webmail email client. Note: The preview is an indication only of how the email could in a Desktop/Webmail email client so we recommend you test your email. 5. Elements from the layout area are “dropped” here to build the email. 1. Move. Move your elements up or down. If you drop the element on top of another it will slot it above. 2. Duplicate. Duplicate the element. 3. Delete. Delete the element. Page 4 of 18 Last updated 2 July 2015 gCast: Email Creator User Manual Layout Area The numbered list will give a summary of the element. For further detail view the details in the Edit Area. 1. Layout. This area will always display the elements available to drag and drop onto the canvas. 2. Edit. This will display the editing properties for element. See Edit Area for more information. 3. Styling. Allow styling for the Email Background (outside of the elements), Content Style and Content Background Style (inside of the elements). See Background Area for more information. 4. Text (1 column). 1 column text element. Content will display across the whole screen. Page 5 of 18 Last updated 2 July 2015 gCast: Email Creator User Manual 5. Text (2 column). 2 columns of text element. In a standard email client the columns will display side by side. When viewed on a supported mobile device the right column will drop underneath the left column. 6. Image. 1 column image element. Image will display across the whole screen. If the image is less than 600 pixels the image will centre align. 7. Image Block. 2 column image element. In a standard email client the images will display side by side. When viewed on a supported mobile device the right image element will drop underneath the left image element. Page 6 of 18 Last updated 2 July 2015 gCast: Email Creator User Manual 8. Image and text. 2 column image and text element. In a standard email client the images will display side by side. When viewed on a supported mobile device the right image element will drop underneath the left text element. 9. Image and text. 1 column image and text element. Image will display across the whole screen. If the image is less than 600 pixels the image will centre align. Content in the text element will display across the whole screen. Page 7 of 18 Last updated 2 July 2015 gCast: Email Creator User Manual 10. Image and text. 2 column image and text element. In a standard email client the images and text content will display side by side. When viewed on a supported mobile device the right image and text element will drop underneath the left image and text element. 11. Image and text. 2 column image and text element. In a standard email client the images will display side by side. When viewed on a supported mobile device the right text element will drop underneath the left image element. Page 8 of 18 Last updated 2 July 2015 gCast: Email Creator User Manual 12. Divider. Drop in a divider to separate elements. Apply width and colour (Note: Width and colour style not supported in all email clients). 13. Connect. Choose from up to 11 ways clients can connect with you from your email campaign. To remove a connect option simply uncheck the option from the connect menu. See edit area for more information. 14. Share. Choose up to 3 ways recipients can share your email campaign. See Edit Area for more information. Page 9 of 18 Last updated 2 July 2015 gCast: Email Creator User Manual Edit Area The following options are available when an element is selected for editing. 1. WYSIWYG. Applies when text elements are selected. This editor is a “slimmer” version of the current WYSIWYG editor. Edit the text in this editor and it will reflect in the template. Whilst the content style for the element can be selected via the background option, any specific font styles specified within this area will overwrite the content style selected. Page 10 of 18 Last updated 2 July 2015 gCast: Email Creator User Manual 2. Edit Image Applies when an image is selected Image. Browse to swap the image over. Link. Apply a link to the image. Description. The text you would have recipients of the email see if the image is blocked. Size (H x W). Resize the image by pixel. Constrain proportions will ensure the image doesn’t look “stretched”. Border. Apply a border to the image. Default is 0. Update. Updates the changes applied in these settings. Edit with Aviary. Aviary is designed to easy edit your images. No Photoshop skills required. Page 11 of 18 Last updated 2 July 2015 gCast: Email Creator User Manual Example of Aviary in action: 1) Before 2) Edited 3) After Page 12 of 18 Last updated 2 July 2015 gCast: Email Creator User Manual 3. Divider Applies when a divider is selected Width up to 5 can be applied Colour can be applied 4. Connect Choose from up to 11 ways clients can connect with you from your email campaign. To remove a connect option simply uncheck the option from the connect menu. Alignment can be selected to the left, centre or right of the element. To set your social sites as default for future campaigns, go to Settings and select Campaign Settings then enter the URLs for your social sites under the Social heading. Your website and email address will continue to be drawn from the settings in Company Details. Page 13 of 18 Last updated 2 July 2015 gCast: Email Creator User Manual 5. Share Choose up to 3 ways recipients can share your email campaign. Alignment can be selected to the left, centre or right of the element. The email can be shared to facebook, tweeted to twitter or the email can be sent to a nominated email address. Page 14 of 18 Last updated 2 July 2015 gCast: Email Creator User Manual Styling Area The Styling area allows you to specify styles to the email and its elements. You can also apply a content style to all text blocks. Page 15 of 18 Last updated 2 July 2015 gCast: Email Creator User Manual Email Background Style The following apply to the entire email (including the online viewing and footer text). Background Colour Link Colour Font Colour Select from the colour picker/slider of enter a hexidecimal code. This colour will be the background colour used in the canvas of the email. Select from the colour picker/slider of enter a hexidecimal code. This colour will apply to links used in the email. Select from the colour picker/slider of enter a hexidecimal code. This colour will apply to font used in the email. Page 16 of 18 Last updated 2 July 2015 gCast: Email Creator User Manual Content Style Background Colour Border Border Colour Select from the colour picker/slider of enter a hexidecimal code. This colour will change the background colour of the content block. Apply a Border to the Select from the colour content block and choose picker/slider of enter a from the following options hexidecimal code. This will add a colour to the border of Size 1 – 5 pixels the content block if it is Border selected for use. Page 17 of 18 Last updated 2 July 2015 gCast: Email Creator User Manual Content Style The following options are available for the content block Font Family Font size Font colour Text align Line Height Padding This clicking this option will apply the selected style to all existing text blocks. To apply an updated style, simply uncheck and re-check the check box. Page 18 of 18 Last updated 2 July 2015