1
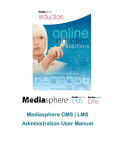
Powerhouse LMS User Manual Contents Powerhouse LMS Introduction ..................................................................................................................... 4 Powerhouse Portals ...................................................................................................................................... 4 User Portal ................................................................................................................................................ 4 Administration Portal ................................................................................................................................ 5 Logging In ...................................................................................................................................................... 5 Creating Accounts ......................................................................................................................................... 6 User Accounts ........................................................................................................................................... 6 Setting Course Access for an Individual User ............................................................................................ 8 Creating Groups ........................................................................................................................................ 9 Administration Accounts ......................................................................................................................... 11 Creating a New Course ................................................................................................................................ 12 Adding Topics and Pages to your New Course ....................................................................................... 14 Re‐Arranging Page Order ........................................................................................................................ 16 Adding Content to a Page ....................................................................................................................... 16 Adding a Heading to a Page .................................................................................................................... 19 Adding Images to a Page ......................................................................................................................... 21 Linking to a PDF ....................................................................................................................................... 24 Adding Flash Content to a Page .............................................................................................................. 24 Adding Voice over audio to a Page ......................................................................................................... 25 Assessments ................................................................................................................................................ 26 Pre‐Test ................................................................................................................................................... 26 Practice Test (Formative) ........................................................................................................................ 26 Section Test (Summative) ....................................................................................................................... 26 Post Test (Summative) ............................................................................................................................ 26 2 | P a g e Adding an Assessment ................................................................................................................................ 27 Setting Properties ................................................................................................................................... 30 Reports ........................................................................................................................................................ 31 Conclusion ................................................................................................................................................... 33 3 | P a g e Powerhouse LMS Introduction The Powerhouse LMS is a complete online training solution with a number of powerful features that make creating and maintaining your online course easy. Key features include: • • • • • • • Simple course & assessment authoring platform Ability to author and publish unlimited courses Ability to add unlimited users Ability to group users together and control the courses accessed by the group Administration to manage users and teachers Automatic reports and users assessment Customisable Users Portal login page This user manual is intended to step you through the process of creating your course, adding topics and pages, adding assessments and finally setting up accounts so users can access your training material. Let’s begin by having a look at the Powerhouse Portals. Powerhouse Portals Powerhouse LMS has two portals, the User Portal and the Administration Portal. So, what is the difference between these two portals? Let’s have a look. User Portal Depending on your requirements, the user portal can be a customizable mini website that can display images of your business, latest news and contact details. Regardless of whether you choose to have content pages on the user portal or not the portal is where users will login to your online courses and access course materials and assessments. Once logged in the user will be presented with the courses landing page that will allow them to select the courses they need to complete. The content of the user portal is updateable using the Administration Portal. User Portal 4 | P a g e Courses Landing page Administration Portal This is the “backend” of your training website. You will use the administration portal to add new courses and assessments, update existing courses, review user results and manage the content of the user portal. Let’s look at the administration portal in more detail. Logging In The web address of the administration portal is the same as the user portal but with /phcms added at the end of the address in the Internet Explorer address bar. Once the page has loaded type your username and password into the spaces provided and hit the Login button. The Home page of the administration portal will open. It will look like this: The administration portals features can be accessed either by the left menu or from the icons that are arranged across the top of the page. To begin, we will look at the features available from the home page and what they do. Administration Accounts: Administration Accounts is where you will create usernames and passwords to allow people to edit and add content to your training website. As these accounts will allow the holder to access all areas of the administration portal including user results we recommend that you only provide accounts to trusted staff. Web Content Editor: If the user portal of your site has extra pages in addition to the user portal home page this is where you will be able to edit the content on those pages. 5 | P a g e Course Editor: Course Editor is used to create new courses and to manage existing courses. We will look at Course Editor in more detail in the next section of the manual. News Editor: If the user portal has a News page then the News Editor module of Powerhouse is where you will add stories that will appear in the latest news section of the user portal. Reports: Powerhouse LMS offers 4 different reports that you can run on the assessment results of users who have undertaken your courses. Powerhouse Settings: This module is also related to the pages of the user portal. In this module you can adjust the Google Analytics and Maps settings and also the email addresses that are used on the user contact us page. User Accounts: User Accounts can be created and managed by clicking on User Accounts in the left menu or on the User Accounts icon at the top of the home page. User Accounts give users access to your courses and assessments through the User Portal. Before we begin to add course to the training site, let’s have a look at adding user and administration accounts to the site. Creating Accounts User Accounts When you have created your new courses and added assessments, you will need to let users access the material. As mentioned at the beginning of this guide, the Powerhouse LMS has 2 portals, the Administration Portal that is used to create the course and the User Portal. To create an account for the User Portal, click on User Accounts in the left menu or on the User Accounts icon at the top of the Home page. This will open the User Accounts page. On this page you can Add, Search, Group, Import and Export users. Clicking on the Add icon will open the Add New User pop up. In the fields provided, fill in the details of the new user. Any field marked with a star must be filled in before the account can be created. If the new user is to be added to a pre‐existing user group, then you can select the group using the drop down provided. In this example you can see that we have created a new account for Mary Smith. 6 | P a g e Click Create to add the new account to the database. You can see Mary’s name in the screen shot below. As well as creating individual user accounts, you can also import user details in bulk using the Import Users feature. This uses a CSV file to add user details to the database. A sample CSV file is provided on the Import Users page. To import user information in using a CSV file, follow the step below: 1. Download the sample CSV file by clicking on Download Sample CSV. This Excel sheet will show you the information and format that you will need to follow in order to make a new CSV file. Please note that in order for the CSV file to import correctly, anywhere that your data has a comma you will need to replace it with ,. So for example if your data is: 21 John Street, Carindale, then the CSV file should be: 21 John Street,Carindale. When the information is imported the , will be converted back into commas. 2. When you have completed creating the CSV file, save the file and make sure that the file extension is .CSV. 3. In Powerhouse, click on User Accounts in the left menu and then select the Import button at the top of the screen. 4. On the Import Users screen click on the Browse button, navigate to the location of your CSV file and select it. Click the Import button below the Browse field. The details of the users listed in the CSV file will appear on screen. 5. Click the Import button below the on‐screen table to Import the users into Powerhouse. 6. Once the users have been imported you can assign them to a group using the Groups function and also set the courses that they will be given access to. When the users have been assigned to a group, use the Export feature in the User Accounts section to export the details of the users in a group including their username and passwords. 7 | P a g e Now that we have added a new account we need to grant the user access to the view the courses. This can be done in two ways. If the user has been assigned to a group then the new user will have access to the courses that have been assigned to that group. If the user is not part of a group then you will need to setup access to courses for the user. Setting Course Access for an Individual User To set the course access for an individual user we have to assign courses to them. In the User Accounts list, click on the Assign Course to User icon on the right hand side of the page next to the user you want to assign courses to. The icon looks like this: The Assign Course Access to User page will open and you will see a list of all of the courses currently on the site. If this user was assigned to a group, some of these boxes would already be ticked. To assign courses to the user, tick the box next to the course title and using the drop down menu, set the status to Allowed. You can give access to as many of the courses listed as you like. When you have finished assigning courses, click the Update button to save the changes you have made. You can also assign an individual user to a group after their account has been created. We will look at Groups next. 8 | P a g e Creating Groups You can choose to create Groups and assign users to a Group. This is a handy feature if you wish to gather users together that belong to a particular department or area of your business. You might have a workshop group for example or an HR group. To create a new Group, click the Groups button at the top of the User Accounts screen. The Groups page will open and if there are already Groups on the site they will be listed on this page. To add a new Group, click the Add Groups button at the top of the page. The Add Group pop up will open and you will be able to fill in the details of the new Group including the name and a short description of the group you are adding. You can also set the status of the Group using the drop down. Click the Create button to add the Group. The new Group will be added to the list. Next you will need to assign users and courses to the Group. Assigning Courses and Users to a Group On the right hand side of the Groups page is the Action column that has four icons. These icons from left to right are: Assign Courses to Group: Click this icon to choose the courses that the Group will have access to. Edit Users to Group: This icon will allow you to assign users to the Group 9 | P a g e Edit this Group: Using this icon you will be able to edit the details of the Group such as its name, description and status. Delete This Group: This will remove this Group from the site. The users in the Group will not be deleted, but you will need to either re‐assign them to a new Group or set course access for their account. To assign courses to a Group, click on the Assign Courses to Group icon. The Assign Courses to Group page will open. This looks very similar to the Assign Course Access to User page. Tick the box next to the course you wish to assign to the Group and then click the Update button to save the changes. When you have assigned courses to a Group you will need to add users to the Group. Click on the Edit Users to Group icon to open the Assign Users to Group page. Tick the box beside the users you want to assign to the selected Group and then click Update to save the changes. 10 | P a g e Administration Accounts Administration accounts allow access to the Administration Portal of Powerhouse LMS. By giving someone an administration account you are granting them the ability to add courses, add assessments, create user accounts and view the personal details and assessment records of users. We recommend that only trusted people are given these accounts. To create a new administration account, click on Administration Accounts in the left menu or on the Administration Accounts icon on the home page. The Administration Account page is almost identical to the User Account page. To add a new administration account, click on the Add Account icon at the top of the page. The Add New Account pop up will open. Fill in the details of the new account holder. Next we will need to select the user level. Click on the drop down to select from a list of account levels. An Admin account will give the new account holder access to all areas of Powerhouse. Finally fill in the login details for the new account. You can see in the screen shot that we are creating a new administration account for Joe Bloggs with a user level of Administrator. Click on Create to add the new account to the account list. Email the account details and the web address of the Administration Portal to the new account holder. 11 | P a g e Creating a New Course To begin creating a new course, click on Course Editor in the left menu. This will open the Course Editor page. Click on the New Course icon at the top of the page. This will open the Add New Course pop up: 12 | P a g e Enter the title of your course in the field provided. The pass rate defines the score that any user will have to achieve on their final assessment submission to pass the course. Finally set the Course Status. Draft will allow you to work on a new course without it showing in the user portal. Published will make the new course available to user right away. You can change the course status at any stage. When you have finished, click Create to add your new course. The pop up will close and the new course will be at the top of the list on the Course Editor page. In the example below I.T. Policies and Access (in the red box) is the new course. If you place your mouse over the new course a green bar with icons will appear. These icons give you a number of options. From left to right the icons are: View Course: This will open the Course Editor page for the selected course so you can view the pages of the course. Edit Course: This icon opens the Course Editor for the selected course and allows you to edit the page content of the course. Update Image: You can select a thumbnail image to represent the course on the Course Landing page of the User Portal. Course Settings: Click on this icon to open the Edit Course pop up and change details including the course title, pass rate for the course and the course status. 13 | P a g e Duplicate Course: This will create a copy of the selected course complete with all content. This is handy if you need to create a backup of a course before making changes or if you need to create several courses with similar content but with some unique pages. Delete Course: This will remove the course and all of its content from the site. Once a course has been deleted it cannot be retrieved unless you made a duplicate of the course before deleting. Next we will look at editing and adding content to a course. Adding Sections and Pages to your New Course When you created your new course, Powerhouse automatically added Section 1 and first page to that section. Immediately above the first section of the course you will see that Powerhouse has added an Introduction page for your course. This is the page that the user will see after they have logged in to the user portal and selected your new course. A section is like a chapter in a book and contains pages of information about that section. To give your first section a name, click on the blue Rename Section title text. A text field will appear and you can give your new section a name. The process is the same for the title of your first page. Click on the Rename Page 1 text and give your first page a title. Your screen will look like the screen grab below when you have finished: 14 | P a g e You can add as many sections and pages to your new course as you need. To add a new section, click on the New Section icon at the top of the screen. Each time you add a new section it will appear in the section list and will automatically have a new first page. To add additional pages to a section, click on the New Page icon next to the section name. You can see in the screen grab below that 3 new sections have been added to this course and two extra pages have been added to the first section. Beside each page is a set of icons that let you edit and change the page. The icons from left to right are: Duplicate Page Content: This will make a copy of the selected page with all of its content. Clicking on the icon will open the Duplicating Course Page pop up. From the drop downs you can select where the page will be copied to. By default the Select Course drop down will be set to the course where the page is located. You can choose any other course on the site to copy the page to. In the Select Section/Topic drop down, select the section of the course the page should be copied to. When you have made your 15 | P a g e selections, click the Duplicate button to copy the page. The page will be added to the selected course and section. Preview Page Content: This feature allows you to view the selected page as it will appear on the user portal. You will need to be logged into the user portal to be able to view a course page. Edit Page Content: This icon will open the selected page so you can edit the content on the page. Delete Page: Clicking this icon will remove the selected page from the site. As with the Delete Section icon, once a page has been deleted it cannot be restored. Re‐Arranging Page Order In addition to the functions accessed by these icons, you can also re‐arrange the order of the pages in a section. To do this, place your mouse over the icon that looks like a piece of paper beside the page title. The mouse cursor will change to a four pointed cross. Click and drag the page to its new location and then release the mouse button. The page will drop into place. The page order is saved automatically. In the next section we will add content to a page. Adding Content to a Page To add content to a page, click on the Edit icon beside the page in the Course Editor list. This will open the Edit Page pop up. If you have given the page a name, it will be displayed in the heading box at the top of the pop up. Next is the Browser Window Title field. The browser title is the name that appears at the top of the internet browser and identifies the page. Try to make the title something descriptive. Browser titles usually follow a format of a fixed first name and a variable second name, for example: How it all began – Introduction. The information you add in this field will also be displayed as a link in the index that appears on the left hand side of the page in the user portal. 16 | P a g e Below the browser title field is Powerhouse’s inbuilt content editor. You will use this to add the content of all of the pages of the course. The editor has features that are very similar to Microsoft Word and if you are familiar with that program, you will not have too many problems here. If you move your mouse over any of the icons in the toolbar, a pop‐up will appear that explains the function of the icon. In . addition the editor has a comprehensive help feature that is accessed by clicking on the Help icon When the About CKEditor box appears, click on the further information link (highlighted in red in the image below). This will take you to the CKEditor web site where you will find the User’s Guide. To add written content to a page, you can type directly into the text window, or you can copy and paste content from a word document, web site or any other text source. Depending on which Internet browser you are using and your security settings you may see a permission box asking if you want Powerhouse to have access to your clipboard when pasting content. If this is the case, click on the Allow access button. When you have pasted your content into the editor, the page will look something like this: 17 | P a g e Click on Save to update the page or Close to leave the page without keeping the changes. The pop up will close and you will be taken back to the list of sections of your course. To view the way the page will look on the User Portal you can use the Preview Page Content icon described earlier or you can have the User Portal page you are working on open in another browser window. As you make changes and save them, refresh the page on the User Portal to see the changes. By viewing the page each time you make a change you will be able to assess the formatting of your content. The page as it appears on the user portal will look slightly different to the way it looks in Powerhouse. That is because the user portal applies some pre‐set styling to a page in order to keep all the pages of a course looking consistent no matter who is entering the content. 18 | P a g e Adding a Heading to a Page To add a heading to a page, click on Edit to go back into your page. Above your first paragraph add the heading. Now select the heading and from the Format drop down choose the heading type. Heading 1 is usually the largest heading on a page. In the example shown below, Introduction is the heading 1. Sub headings on this page will be heading 2. Select heading 2 from the drop down list. The page should now look like this: 19 | P a g e Save the page and then click Preview or refresh the page in the separate browser window. The page will look like this in the user portal: Notice that the heading 2 text is grey. This is a pre‐defined style that the user portal applies to heading 2 texts. This means that all heading 2 text will be grey. Next we will add an image to the page. 20 | P a g e Adding Images to a Page You can add images to pages in the course using the editor. Web sites usually use images saved in the JPG format with a resolution of 72dpi. For a standard web site the maximum recommended width of an image to upload is 500 pixels. An image of that size will span the width of the content section of the site. It is important to note that scaling an image once it is in Powerhouse does not change the size of the image file. If an image is 3meg in size when uploaded it will still be 3meg after upload and scaling in the editor. Images that are larger than the recommended width and resolution will have an adverse effect on the speed that an image will load on the site. To add an image, click on the position on the page where you want the image to appear and then click on the Image button in the toolbar (highlighted in red in this image) . This will open the Image Properties box. First we need to upload the image into Powerhouse: • Click on the Browse Server button at the top of the pop up window. • The Upload window will appear. Images that have already been uploaded to the site will be displayed in the window. To choose one of the images, run your mouse over an image and click Insert when the button appears. 21 | P a g e • If you want to upload a new image to the site, click on the Browse button at the top of the window and navigate to the location of the image you want to add. When you have found the image you want, select it and then click on the Open button. • The name and location of the image will appear in the Upload File from your local hard drive field. Click the Upload button to upload the image to Powerhouse. Once the image is uploaded it will appear in the window and you will be able to insert it into a page. • When you have selected the image it will appear in the Preview window of the Image Properties pop up. You can add some Alternative Text in the field provided. It is best practice in web design for all images to have a written description. Type a description of the image into this field. You can also control how the image is aligned on the page using the Align field. • Click OK to add the image to the page 22 | P a g e Save the page and then click Preview. In the screen grab below we can see the image that we just uploaded: Adding images is that easy in Powerhouse. Next we will look at another common task, adding a link from a page to a document. 23 | P a g e Linking to a PDF It is common practice to provide additional information on websites by linking to documents that the user can download and print out. The most widely used format is PDF because of its compact file size, even when dealing with large documents. It is very easy to add links to documents in the Powerhouse LMS. Just follow these steps: • First select the text on the page that you want to attach the link to • Next, click on the link icon in the editor menu bar • The Link box will appear. Click on the Browse Server button and the Upload Document window will open. This works the same way as the Image Upload window. Use the Browse button to locate the document you want to link to and then upload it to the site. • Next click on the Target tab at the top of the Link box. From the target drop down box select New Window (_blank). This will open the document you are linking to in a new browser window. Click OK. • The document will now be linked to the selected text. Go to the front end version of your page and hit refresh. You will see the text you selected is now highlighted and will underline when you place your mouse over it. Click on the link to open the PDF. That covers the basics of adding and editing content to the course pages of your site. Next we will look at assessments. Adding Flash Content to a Page Adding Flash content to a page works in exactly the same way as adding an image. Select the point on the page where you want to add the Flash content and left mouse click. Click on the Flash icon in the toolbox (in the red box shown in this image) . The Flash Properties box will open and you will be able to browse and upload the SWF that you wish to put into the page. Once you have selected the file that you want to use, set the width and height size for the SWF and then click OK to add it to your page. 24 | P a g e Adding Voice over audio to a Page Powerhouse gives you the option of adding voice over audio to a page in a course. You will need to have a microphone and sound card setup on your computer and you will need to be logged into the Administration Portal and the User Portal. Once you have logged in to both portals, navigate to the page in a course on the User Portal that you want to add audio to. You will notice on the top right hand side of the page that there is an Add Voice Over button. Clicking on this button will open the Add Voice over pop up. To record audio click on the Record button and read the content of the page. When you have finished, click the Stop button. You can playback the audio using the Play and Pause buttons. If you are happy with the recording, click the Save button. The audio will be added to the page. Any page of a course that has audio voice over will have a Play Voice Over button that the user can click to hear the audio. 25 | P a g e Assessments Now that you have finished adding content to your new course you can begin to think about adding assessments. There are four types of assessment that can be added in Powerhouse LMS. Pre‐Test A pre‐test sits before the first topic of your course. A pre‐test is designed to test the knowledge of your users prior to them undertaking your course. The results of the pre‐test are recorded to the database against the user’s account to act as a record of the user’s knowledge of a topic prior to undertaking training. The user can use their results in the pre test to gauge their own level of understanding and find weak points in their knowledge. Practice Test (Formative) Practice or Formative tests can be inserted between any of the pages of a topic in your course. The practice test is designed to give users the chance to test their retention of the information they have just viewed. A practice tests results are not saved to the database and the user can repeat a practice test as many times as they like. Section Test (Summative) A section test sits at the end of a section and acts as a summary test of the knowledge the user has gained after reading the selected section. A section test can contain questions on material from any of the pages of a section. As with the pre‐test, the results of the section test is recorded to the database against the user’s account. Post Test (Summative) The post test sits at the end of your course. This test is designed to assess the knowledge gained by the user having completed the whole course. If you have designed your course around a set of compliance standards, then the topic test is designed to make sure that your users have met those standards. Once saved to the database, user results can be placed into reports to keep track of the number of attempts made and the pass or fail rate of the users who have submitted results. 26 | P a g e Adding an Assessment The process of adding any of the assessment types in Powerhouse is the same. In this example we will add a Post Test to a course. To begin, click on the Add Test button at the top of the Course Editor page. The Adding a Test pop up will open and from the drop down you can choose what type of test you want to add. Enter the title of the test in the field provided and then click Create to add the test. The new test IT Assessment has been added at the end of the list of sections of the course. 27 | P a g e To begin adding questions to the new test, click on the Edit icon (shown here in the red box) in the new test listing. The Test Editor screen will open. There are two types of questions that can be added as part of any test and these are the same as many written test papers. You can choose between Multiple Choice and True/False questions. Whatever option you choose, all of the questions in the test will be of that type. In addition to these options you can also choose to have a mixture of the two types in the one test. To do this, click on the Combination of Questions icon at the top of the Test Editor. For this assessment we will choose to add a combination of multiple choice and true false. Clicking on the Combination of Questions icon will open the Insert pop up. Using the drop downs, we choose the number of each type of question to add to the assessment. In the image below we are going to add two of each type of question to make a test with 4 questions in total. Once the number of questions of each type has been set, click Create to add the blank questions to the assessment. 28 | P a g e The Test Editor screen now lists each of the new blank questions that we added. To add a question, click on the Q1 Test Question Title text and type in the first question. In the example shown below, the first question is a multiple choice and we have added the question text ‘In what year was the first microprocessor manufactured?’ Next we will need to add a set of answers for this question. We do this by typing the possible answers into the Type your responses text field below the question. In this example we have added 3 possible choices. Notice that as we added the answers the Answer Preview box filled in automatically with a copy of the answers. We need to indicate which answer is the correct one for this question. To do this we simply select the answer by clicking in the box beside the question in the Answer Preview box. The selected answer will be marked with a tick. Now that we have finished adding the question and answers question we click on the Save icon. We then repeat the process for each of the other questions in the assessment. 29 | P a g e Setting Properties Once all of the blank questions have been filled we will need to set the properties of the assessment. To do this, click on the Properties tab at the top of the Test Editor. On the Properties page we are presented with a couple of options. These are: Question Bank: The Question Bank refers to all of the questions that have been added to an assessment. In our example course the Question Bank has 6 questions. Using the options in the Question Bank section of the Properties page, we can control how Powerhouse displays questions. If we select Do not use a question bank (Show all questions), Powerhouse will display all of the questions in the bank one after another. The other option available under Question Bank in to Present questions in a bank of. With this option selected, Powerhouse will only display the number of questions selected in the drop down. In addition to this, Powerhouse will display the selected number of questions in a random order. Question Order: If you have selected not to use a question bank, Question Order gives you the option to show all of the questions in your assessment in a random order. To do this make sure you have selected Do not use a question bank (Show all questions) in the Question Bank section of the page. In Question Order, select Randomise all questions. You should be aware that if you have chosen the Present questions in a bank of option in Question Bank then any option you choose in Question Order will be overridden. 30 | P a g e Attempts: You may want to control the number of attempts a user can make to pass an assessment before they are locked out of the assessment. Click on the Attempts drop down to choose the desired number of attempts. You can also choose to give an unlimited number of attempts. You would choose this option if you were creating a practice test for example. Marks: You can choose how you assign marks to each question in your assessment. If you choose to set the total score for the test, Powerhouse will automatically divide the selected total number of marks between the questions of your assessment. You can also choose to set the mark weight for all the questions. In our example, if we set a mark weight of 2 for each question, then the total assessment will be worth 12 marks. Pass Rate: Pass rate, as the name suggests, lets you set the pass rate for the new assessment. Choose a percentage from the drop down that is acceptable for the user to achieve in order to complete the course. As a general rule, 80% is considered to be a minimum pass rate for most courses. Test (Assessment) Status: Using this option you can set a test to Publish or Draft. If you choose Publish, the new test will appear on the course menus. Draft will save the assessment but it will not appear on the course menu. Once you have set the properties of the assessment click on the Save button. Next we will look at adding user accounts so people can access your new course. Reports Once your users have begun to submit results from the course assessments, you will want to be able to view these results in a meaningful way. To enable you to do this, Powerhouse offers 5 inbuilt reports that will interrogate the database of results to provide you with a range of information. These reports are: Report 1: Generates a report on users who have submitted results and have passed from a certain date to another date Report 2: Generates a report on users who have been created that have not submitted and passed from a certain date to another date Report 3: Generates a report on Average aggregated results of all users Report 4: Generates a report on the number of attempts that a user has made at a module in the course Report 5: Report on Status: A list of all registered users of the course, which modules they have completed and which they have yet to attempt 31 | P a g e In the example provided we will generate a Report 1. To do this, click on Reports in the left menu. On the Reports page click on Report 1 or on the View Report button beside Report 1. This will open the Report 1 screen shown in the screen grab below: Click on the Start Date field and then select the start date for the report by choosing the desired date from the pop up calendar. Do the same for the end date of the report. Next select a course from the drop down list. In this example we will select I.T. Policies and Access. If the selected course has multiple assessments the Select Assessment drop down menu will become active. You can choose to run the report on All Assessments, or on just the Pre Test, Section Test and Post Test. Click Generate Report to create the Excel spreadsheet with the selected results. When the File Download window appears you can choose to Open or Save the new spreadsheet. Click Save and choose a destination for the spreadsheet. 32 | P a g e When the spreadsheet has been saved, open it to review the displayed results. There are a couple of things to bear in mind when reviewing the spreadsheet: • If no user has submitted a pass result for an assessment, then the Report 1 spreadsheet may be blank. This can apply for other report types as well. • When creating a spreadsheet with the option view all assessments selected, the resulting spreadsheet will have multiple sheets, one for pre‐assessment results and one for assessments. The separate sheets can be accessed by clicking on the tabs at the bottom of the spreadsheet document. Conclusion That concludes the Powerhouse LMS User Manual. You should now have a good understanding of the basics of using the software. 33 | P a g e