1
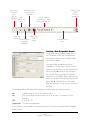
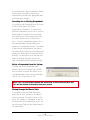
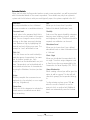
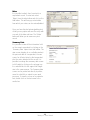
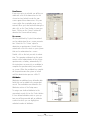
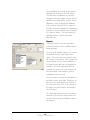
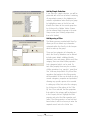
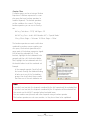
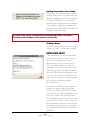
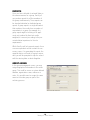
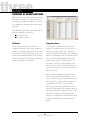
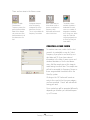
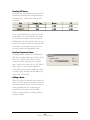
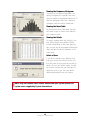
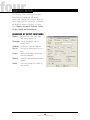
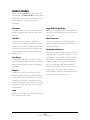
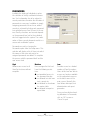
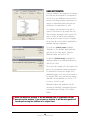
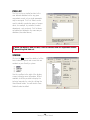
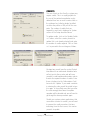
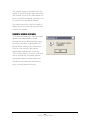
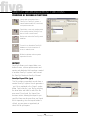
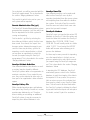
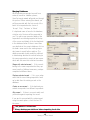
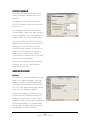
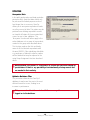
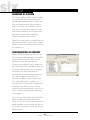
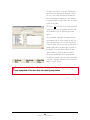
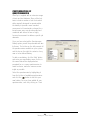
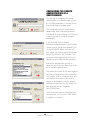
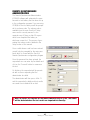
USER MANUAL
for Windows™
USER MANUAL
for Windows™
CONTENTS
Chapter 1: GENESYS INTEGRATED ASSESSMENT SOFTWARE . . . . . . . . . . . .
Introduction . . . . . . . . . . . . . . . . . . . . . . . . . . . . . . . . . . . . . . . . . . . . . . . . . . 5
Entering GeneSys . . . . . . . . . . . . . . . . . . . . . . . . . . . . . . . . . . . . . . . . . . . . . . 5
Overview Of GeneSys Control Screen . . . . . . . . . . . . . . . . . . . . . . . . . . . . . . . . 6
5
Chapter 2: GENESYS RESPONDENT/GROUP SCREEN . . . . . . . . . . . . . . . . . .
The Respondent Mode . . . . . . . . . . . . . . . . . . . . . . . . . . . . . . . . . . . . . . . . . . 7
Overview of the Respondent Screen . . . . . . . . . . . . . . . . . . . . . . . . . . . . . . 7
Creating a New Respondent Record . . . . . . . . . . . . . . . . . . . . . . . . . . . . . . 8
Searching for an Existing Respondent . . . . . . . . . . . . . . . . . . . . . . . . . . . . . 9
Delete a Respondent from the System . . . . . . . . . . . . . . . . . . . . . . . . . . . . . 9
Moving through the Master Table . . . . . . . . . . . . . . . . . . . . . . . . . . . . . . . . 9
Extended Details . . . . . . . . . . . . . . . . . . . . . . . . . . . . . . . . . . . . . . . . . . . . 10
Notes . . . . . . . . . . . . . . . . . . . . . . . . . . . . . . . . . . . . . . . . . . . . . . . . . . . 11
Summary Data . . . . . . . . . . . . . . . . . . . . . . . . . . . . . . . . . . . . . . . . . . . . . 11
Test Entry . . . . . . . . . . . . . . . . . . . . . . . . . . . . . . . . . . . . . . . . . . . . . . . . . 12
Answer Sheet . . . . . . . . . . . . . . . . . . . . . . . . . . . . . . . . . . . . . . . . . . . . . . 12
Raw Scores . . . . . . . . . . . . . . . . . . . . . . . . . . . . . . . . . . . . . . . . . . . . . . . 13
On-screen . . . . . . . . . . . . . . . . . . . . . . . . . . . . . . . . . . . . . . . . . . . . . . . . 13
Attributes . . . . . . . . . . . . . . . . . . . . . . . . . . . . . . . . . . . . . . . . . . . . . . . . . 13
Reports . . . . . . . . . . . . . . . . . . . . . . . . . . . . . . . . . . . . . . . . . . . . . . . . . . 14
The Group Mode . . . . . . . . . . . . . . . . . . . . . . . . . . . . . . . . . . . . . . . . . . . . . . 15
Creating a Group . . . . . . . . . . . . . . . . . . . . . . . . . . . . . . . . . . . . . . . . . . . 15
Adding Members to a Group . . . . . . . . . . . . . . . . . . . . . . . . . . . . . . . . . . . 15
Deleting members from a Group . . . . . . . . . . . . . . . . . . . . . . . . . . . . . . . . . 18
Deleting a Group . . . . . . . . . . . . . . . . . . . . . . . . . . . . . . . . . . . . . . . . . . . . 18
Batch Data–Input . . . . . . . . . . . . . . . . . . . . . . . . . . . . . . . . . . . . . . . . . . . . . . 18
Reports . . . . . . . . . . . . . . . . . . . . . . . . . . . . . . . . . . . . . . . . . . . . . . . . . . . . . 19
Group Assign . . . . . . . . . . . . . . . . . . . . . . . . . . . . . . . . . . . . . . . . . . . . . . . . . 19
Data Input from a Bitmap Scanner . . . . . . . . . . . . . . . . . . . . . . . . . . . . . . . . . . 20
7
Chapter 3: NORMS . . . . . . . . . . . . . . . . . . . . . . . . . . . . . . . . . . . . . . . . . .
21
Overview of Norm Functions . . . . . . . . . . . . . . . . . . . . . . . . . . . . . . . . . . . . . . 21
Creating a User Norm . . . . . . . . . . . . . . . . . . . . . . . . . . . . . . . . . . . . . . . . . . . 22
Creating SD Norms . . . . . . . . . . . . . . . . . . . . . . . . . . . . . . . . . . . . . . . . . . 23
Creating Frequency Norms . . . . . . . . . . . . . . . . . . . . . . . . . . . . . . . . . . . . . 23
Editing a Norm . . . . . . . . . . . . . . . . . . . . . . . . . . . . . . . . . . . . . . . . . . . . . 23
Viewing the Frequency Histogram . . . . . . . . . . . . . . . . . . . . . . . . . . . . . . . . 24
Viewing the Norm Table . . . . . . . . . . . . . . . . . . . . . . . . . . . . . . . . . . . . . . . 24
Viewing the Details . . . . . . . . . . . . . . . . . . . . . . . . . . . . . . . . . . . . . . . . . . 24
Deleting a Norm . . . . . . . . . . . . . . . . . . . . . . . . . . . . . . . . . . . . . . . . . . . 24
II
Genesys 3 – User Manual
Chapter 4: GENESYS SETUP . . . . . . . . . . . . . . . . . . . . . . . . . . . . . . . . . . .
25
Overview of Setup Functions . . . . . . . . . . . . . . . . . . . . . . . . . . . . . . . . . . . . . . 25
Report Options . . . . . . . . . . . . . . . . . . . . . . . . . . . . . . . . . . . . . . . . . . . . . . . . 26
Passwords . . . . . . . . . . . . . . . . . . . . . . . . . . . . . . . . . . . . . . . . . . . . . . . . . . . 27
User Attributes . . . . . . . . . . . . . . . . . . . . . . . . . . . . . . . . . . . . . . . . . . . . . . . . 28
Pick List . . . . . . . . . . . . . . . . . . . . . . . . . . . . . . . . . . . . . . . . . . . . . . . . . . . . 29
System . . . . . . . . . . . . . . . . . . . . . . . . . . . . . . . . . . . . . . . . . . . . . . . . . . . . . 30
Credits . . . . . . . . . . . . . . . . . . . . . . . . . . . . . . . . . . . . . . . . . . . . . . . . . . . . . 30
Remote Admin Screen . . . . . . . . . . . . . . . . . . . . . . . . . . . . . . . . . . . . . . . . . . 31
Chapter 5: GENESYS DATAMANAGEMENT FUNCTIONS . . . . . . . . . . . . . . . . .
33
Overview of Database Functions . . . . . . . . . . . . . . . . . . . . . . . . . . . . . . . . . . . 33
Import . . . . . . . . . . . . . . . . . . . . . . . . . . . . . . . . . . . . . . . . . . . . . . . . . . . . . 33
Export . . . . . . . . . . . . . . . . . . . . . . . . . . . . . . . . . . . . . . . . . . . . . . . . . . . . . 36
Export Wizard . . . . . . . . . . . . . . . . . . . . . . . . . . . . . . . . . . . . . . . . . . . . . . . . . 37
Backup/Restore . . . . . . . . . . . . . . . . . . . . . . . . . . . . . . . . . . . . . . . . . . . . . . . 37
Data Location . . . . . . . . . . . . . . . . . . . . . . . . . . . . . . . . . . . . . . . . . . . . . . . . 38
Utilities . . . . . . . . . . . . . . . . . . . . . . . . . . . . . . . . . . . . . . . . . . . . . . . . . . . . . 39
Updating your System . . . . . . . . . . . . . . . . . . . . . . . . . . . . . . . . . . . . . . . . . . . 40
Chapter 6: CUSTOM . . . . . . . . . . . . . . . . . . . . . . . . . . . . . . . . . . . . . . . . .
41
Overview of Custom . . . . . . . . . . . . . . . . . . . . . . . . . . . . . . . . . . . . . . . . . . . . 41
Customisation of Reports . . . . . . . . . . . . . . . . . . . . . . . . . . . . . . . . . . . . . . . . 41
Customisation of Questionnaires . . . . . . . . . . . . . . . . . . . . . . . . . . . . . . . . . . . 43
Chapter 7: REMOTE QUESTIONNAIRE ADMINISTRATOR
Overview of RQA Functions . . . . . . . . . . . . . . . . . . . . . . . . . . . . . . . . . . . . . . . 45
Configuring the Remote Administration of a Questionnaire . . . . . . . . . . . . . . . . . . 46
Remote Questionnaire Administration . . . . . . . . . . . . . . . . . . . . . . . . . . . . . . . . 47
Importing test results into a Genesys3 Database . . . . . . . . . . . . . . . . . . . . . . . . 48
Chapter 7: APPENDICES . . . . . . . . . . . . . . . . . . . . . . . . . . . . . . . . . . . . . .
49
Appendix A: GeneSys\Windows Installation Guide . . . . . . . . . . . . . . . . . . . . . . . . 49
System Requirements . . . . . . . . . . . . . . . . . . . . . . . . . . . . . . . . . . . . . . . . 49
Installing GeneSys3 Remote Questionnaire . . . . . . . . . . . . . . . . . . . . . . . . . . 49
Uninstaling Genesys3 . . . . . . . . . . . . . . . . . . . . . . . . . . . . . . . . . . . . . . . . 50
Appendix B: Keyboard User’s Guide . . . . . . . . . . . . . . . . . . . . . . . . . . . . . . . . . 51
Appendix C: Psytech Manuals and Acrobat Reader . . . . . . . . . . . . . . . . . . . . . . . 52
Getting Hold of Acrobat Reader . . . . . . . . . . . . . . . . . . . . . . . . . . . . . . . . . . 52
What is Acrobat Reader? . . . . . . . . . . . . . . . . . . . . . . . . . . . . . . . . . . . . . . 52
Accessing Psytech Manuals from within GeneSys . . . . . . . . . . . . . . . . . . . . . 52
III
Genesys 3 – User Manual
IV
Genesys 3 – User Manual
one
GENESYS INTEGRATED ASSESSMENT SOFTWARE
INTRODUCTION
ENTERING GENESYS
GeneSys is a software system capable of
administering, scoring and producing reports
on a wide range of ability tests, personality
questionnaires and interest questionnaires.
GeneSys comes in two parts:
■ The system
■ The tests and associated files
To start GeneSys, double–click the GeneSys
icon in the GeneSys group that was created
by the installation routine. The screen will
present you with the logo and prompt you for
your password. Note at this point the system
is case sensitive – i.e. it will only accept the
password with capitals and lower case letters
in the correct places.
You may expand the range of tests you use
on GeneSys as and when you require by contacting your supplier.
To use GeneSys you will require a ‘Dongle’
and a password to enter the system. A
‘Dongle’ is the means by which access to
GeneSys is restricted and is one of a number
of measures designed to ensure the security
of data held on the system. The ‘Dongle’ fits
into the printer port of your computer and
contains a number of ‘credits’ that are gradually used up as you access GeneSys.
‘Dongles’ remain the property of Psytech
International and ‘credits’ can be purchased
and added to the ‘Dongle’ over the telephone.
A default password, to enable you to enter
the GeneSys system, ‘SYSTEM’, is installed on
your system when purchased.
When you type in the password and click on
‘OK’ the main menu will be displayed in the
format illustrated on page 7.
The items present the main operations available on the system into 6 categories and it is
only from this screen that you can exit from
the system (by clicking on ‘Exit’). To select an
item from the menu screen click once on the
desired option. Later on in this user guide you
will be presented with sub–menus based on
your selection of certain main menu options.
If you attempt to enter information into
GeneSys in an incorrect format you will not do
any harm to the system but the machine will
‘beep’ at you. For example, you may try to
enter a score value that is out of range for the
test you have selected and GeneSys will not
accept it. Simply re–enter the data correctly.
While GeneSys is a completely menu–driven
system it is essential that you spend some
time reading this User Guide before using
GeneSys in order to make the most of the
system.
5
Genesys 3 – User Manual
OVERVIEW OF GENESYS CONTROL SCREEN
In brief the main sections of the system are:
Respondent/Group
This is the area of GeneSys in
in which the process of creating
respondent records, entering
rpersonal and test data, altering and viewing personal and test data, administering
tests and printing reports on either individual respondent or respondent groups
groups.
Setup
Profile
Data Management
This allow the user to back up
data that have been collected on
the system, restore the system to
a previously backed up database, import data
and export data to and from various file formats and clear all data from the current
system. It also allows the you to anonymise
all or a sub–set of the respondent records
and Optimise the performance of the database.
This screen is related to information collected on jobs. It is used
for creating new job profile
records, entering, altering and viewing the
associated data, administering profile questionnaires and printing reports on job profiles
which can be compared to appropriate
respondent data held in the GeneSys database.
Norms
This option provides the facility to
create and add to norm tables.
Norms will almost always be used
and are an integral part of the system,
enabling you to compare a particular respondent’s test score to an appropriate
comparison group of people who have sat the
test. This has the advantage of setting an
individual’s score ‘in context’. Some norms
are provided with the system and norms can
be user–definable.
This allows the user to define and
review a number of settings related to the operation of the system
e.g. report options, setting passwords and
user security levels, setting user definable
respondent attributes and viewing all the
tests, questionnaires and reports on the system.
Custom
This allows you to create your
own test batteries from individual
questionnaire within the system
and generate your own report styles from
sections of existing reports.
6
Genesys 3 – User Manual
two
GENESYS RESPONDENT/GROUP SCREEN
When selecting the Respondent/Group option,
you first enter the Respondent mode of the
Respondent/Group Management screen. By
clicking on the Group button on the bottom of
side toolbar of the screen, you enter the
Group mode, both of which will be described
below.
THE RESPONDENT MODE
The respondent mode is the area of GeneSys
in which activities related to single respondents are carried out. The respondent screen
is used for inserting personal data, altering
and viewing personal & test data, entering
test data, administering tests and printing
reports on an individual respondent.
Respondents on your system are held in order
of surname and the respondent screen will
default to the first respondent listed.
Overview of the Respondent Screen
At the left of the respondent screen six main
options are displayed:
Extended
Details
Displays all the
main respondent details
including the
system attributes.
Notes
Add any notes
added to the
respondent’s
record.
Summary
Data
Test Entry
Capture test
data via raw
Inspect all the
respondent data score or item
held in the data- response data
base including input or
the user–attrib- on–screen testing.
utes and the
activity log.
To leave the GeneSys respondent screen and
return to the GeneSys control screen click on
the ‘Exit’ button.
7
Genesys 3 – User Manual
Attributes
Reports
Select system or Produce reports
user defined
on the responbio–data for the dent’s results.
current respondent.
Move to the
first record
in the
GeneSys
database
Add a new record
to the GeneSys
database
Move
forward one
record
Delete current
record.
NB This is
irreversible!
Select the search
parameter i.e. Family
Name, First Name etc.
Move back
Search for one
one record
or more
Move to the last records
record in the
database
Enter text for the
search
Creating a New Respondent Record
To create a new respondent record click on
the Plus button on the top. You will be presented with a clear screen and will be able
the following details:
First you will be prompted to enter the
respondent’s Family Name. Type the Family
Name as you would wish to see it printed and
press the TAB ➠ to move to the next input
box. You will then be prompted to give the
respondent’s First Name. Again, type the First
Name as you would wish to see it printed and
press TAB ➠ . Alternatively, by choosing a
field and clicking on it you can gain access to
that field.
The following data is also requested and may be entered using the same procedure:
Age
Sex
A whole number. Use 99 as a missing value.
Click on the down arrow to select one of M for male, F for female or U for
unknown.
Title
e.g. Mr, Ms, Dr.
Organisation The relevant organisation.
Further details may be added to the respondent record. These are described under ‘Extended
Details’ below.
8
Genesys 3 – User Manual
It is possible at any time to amend the details
that has been recorded for a particular
respondent by selecting the appropriate field
and making the changes.
Searching for an Existing Respondent
It is possible to find respondents on the basis
of their Family Name, First Name,
Organisation or Reference. To search for a
particular respondent record, first click on the
down arrow to the right of the search field
and selecting one of the criteria. Next enter
the search text and click on the [binoculars~~] icon to complete the process. Once
the requested data is found it will be displayed on the respondent screen. The number
of matches will be displayed to the right of
the search field in which case the system will
produce the match which is listed first alphabetically. It is now left to you to find the next
match by clicking the arrow keys on the
right–hand side to find the desired record(s).
Delete a Respondent from the System
To delete the current respondent from
GeneSys click on the ‘Delete’ icon. You will
then be asked to confirm the delete. To proceed with deletion of the current respondent
click on ‘Yes’, to quit click on ‘No’.
Note: This is a destructive function and, once used, all data, both personal and
test, will be deleted irretrievably from your system.
Moving through the Master Table
It is possible to move through the respondents held on your system one at a time in
order of surname. This may be done by clicking on the ‘forward’ or ‘backward’ arrows on
the top toolbar of the respondent screen. You
can also press [Page Up] and [Page Down] to
the same effect.
9
Genesys 3 – User Manual
Extended Details
When you first enter the Respondent mode or create a new respondent, you will be presented
with the extended details of the current respondent. These details may vary from system to
system and the list below is what you would typically expect for systems supplied in the U.K.
Reference
Any unique identifier such as a National
Insurance number or a candidate reference.
NVQ
Allows you to choose from 5 possible
National Vocational Qualification levels.
Password Level
‘Level’ refers to the password level that is
required to access the details of the respondent. You can change the access level by
clicking on the down arrow and selecting
Low, Medium or High by highlighting the
desired level and clicking once more. The
prompt for ‘Level’ will default to Low.
Disability
Enter one of the generic disability categories,
learning, visual, auditory, physical, speech
and language or other. Should more detail be
required, user attributes can be used.
Pick–List
‘Pick List’ items can be used to identify a
particular group of respondents, for example, by location, position etc. Each
respondent can be identified with one ‘pick
item’. Respondents can be identified with a
more advanced selection of characteristics
by using the ‘Attributes’ function (see later
~~).
Status
Did they complete the assessment as an
applicant (e.g. for selection) or a non–applicant (e.g. for guidance).
Career Area
Select one of the categories to indicate the
broad career or vocational area in which
they are working.
Educational Level
Allows you to choose from 5 pre–defined
educational levels or state if educational level
is ‘Unknown’
Ethnic Origin
Allows you to indicate the respondent’s ethnic origin. The ethnic origin categories used
in GeneSys are those recommended by the
Commission for Racial Equality (CRE, 1991).
Group Membership
When creating a record you will be given the
option to add to a group. This box will indicate which group(s) the respondent belongs
to.
To skip entering any item, press TAB ➠
when the cursor is beside it or use the
mouse to click on another field. Additional
details are automatically saved to the database.
10
Genesys 3 – User Manual
Notes
It is possible to attach free–form text to a
respondent record. To enter text select
‘Notes’ from the side toolbar and click on the
Add button. This will bring up a text editor
from which your notes can be entered/edited.
Once you have finished entering/editing text,
clicking on any option will save the entry with
a record of the date and time. The ‘Delete’
button will allow you to remove any text
record.
Summary Data
It is possible to view all the information held
on the current respondent by clicking on the
‘Summary Data’ option from side toolbar. The
view screen displays (in a scrollable window)
the personal data of a respondent, the raw
scores for all tests taken by that respondent
plus the notes attached to the record. It is
possible to enlarge the summary data screen
to full height by clicking on the enlarge icon.
It is reduced back to the original half height
size in the same manner. The Summary data
screen can be printed out directly to printer,
saved to a disk file or output to your word
processor. To view the scores on a particular
test, double click on the test name in the
results box.
11
Genesys 3 – User Manual
Test Entry
In Respondent mode, data can be entered
into GeneSys from paper & pencil administered tests or from on–screen
questionnaires. Select Test Entry form the
side toolbar.
Three methods of data entry are offered to
you: Answer Sheet, Raw Scores or
On–screen. You have the option to display
complete test batteries or elements of batteries by checking the ‘Show All Battery
Elements’ box.
Which ever option you select, you will be presented with a list of all tests which are
available in the data entry mode chosen.
Highlight the test or test battery and click on
the ‘Proceed’ button.
Answer Sheet
If item data entry is selected an on–screen
answer sheet is provided. Either the number
keys on the top of the keyboard or those on
the numeric keypad can be used to enter
data. If the numeric keypad is chosen the
[Num Lock] key must be on before these
keys will work. It is also possible to enter the
data with the letter keys with A=1, B=2,
C=3, etc.
If a mistake is made in data entry the up &
down cursor keys can be used to move
backwards and forwards within the answer
sheet. Pressing the correct key while on the
incorrect item will correct it. When you have
finished entering the data, click on the ‘Yes’
button to save your items. Clicking on the
‘No’ button will abandon the screen without
saving, and clicking on the ‘Cancel’ button
will revert to the data entry screen for you to
make further changes.
12
Genesys 3 – User Manual
Raw Scores
If raw score entry is selected you will be provided with a list of the dimensions for the
chosen test and asked to enter the raw
scores against these dimensions. Only raw
scores within the acceptable range can be
entered. When you have finished entering the
data, click on the ‘Save’ button to save your
items. Clicking on the ‘Cancel’ button will
abandon the screen without saving.
On–screen
All tests published by Psytech International
can be administered by on–screen presentation. Select the ‘On–Screen’ option to
administer a questionnaire. You will be presented with a list of the tests on your system
that can be administered on–screen.
Double–click on the test you wish to administer. The computer software from this point
carries out the administration of the chosen
questionnaire, or battery, automatically. All
the instructions necessary for a candidate to
complete the questionnaire(s) are provided
on–screen. When the candidate has completed the questionnaire the system is locked
until the administrator presses <Alt> F1.
Attributes
Attributes are additional user definable data
fields that can be added to the respondent
record. These attributes are defined in the
Attributes section of the Setup menu.
To assign user–defined attributes to the
respondent record click on the ‘Select button.
If user–defined attributes exist on your system you will be presented with an attribute
screen into which you can highlight an
unlimited number of attributes.
13
Genesys 3 – User Manual
Select attributes by clicking on the desired
attribute and clicking on the ‘Add’ button.
This will enter the attributes as currently
assigned to the respondent’s record. One all
attributes have been added, exit the ‘Select
Attributes’ screen to display the attributes
that have been selected. At this stage it is
possible to deselect attributes by highlighting
a previously chosen attribute and clicking on
the ‘Remove’ button’. This will remove the
attribute from the ‘Currently Assigned
Attributes’ box.
Reports
Choosing ‘Reports’ from the respondent
screen will result in all the available reports
being displayed.
For a list of all available reports, see System
Information from the main Setup menu
option. Select the report you require by double clicking on the mouse. Once a report has
been selected, a list of norms available for
the report chosen will then be displayed for
selection. Click on the generate button to
complete this process. Once the report has
been generated, it will display in your rtf
compatible word–processor.
Once the report or reports are displayed, it is
possible to edit or print them. Printing is carried out in the usual manner by clicking on
the ‘File’ menu then ‘Print’ or by clicking on
the printer icon (both options are standard
print functions).
On exiting your word–processor, you will be
returned to the GeneSys report screen and
are then able to generate additional reports
as required.
14
Genesys 3 – User Manual
THE GROUP MODE
A powerful feature of the GeneSys system is
the facility to create subsets of the data held
on your master table. These subsets are
called Groups. Group functions provide the
user with a number of facilities related to the
batch processing of assessment data collected on a number of respondents.
Enter the Group mode of the Respondent
Group Management area by clicking on the
‘Group’ button at the bottom of the side toolbar.
Displays all the
group members,
allows creation of
deletion of groups.
Allows reports to be
generated for a
group in batch
Allows Data input in
either item or raw
score form for a
group.
Creating a Group
To create a new group, click on the Add
Group (+) icon. Enter the name to describe
the group and click on the tick to register the
group or the cross to abandon. Once created,
you will be placed in the Members mode and
from here you will be able to assign respondents to the group.
Adding Members to a Group
You can add respondents to the group by
simply selecting the names from a list or by
using filters (filtering the names from the
main database).
15
Genesys 3 – User Manual
Permits the assignment of certain
values to a group.
Add by Simple Selection:
If you select the ‘simple selection, you will be
presented with a list box as below, containing
all respondents names in the database presented in alphabetical order. Build your group
by highlighting names in the list box and
transfer the names to the current group box
by clicking on the ‘Update’ button. Names
can be removed from the group in the main
Group screen (see ‘Deleting respondents
from a list’ below).
Add by using a Filter:
The filtering process provided with GeneSys
allows you to use almost any information
contained within the GeneSys to find respondents to make up the group.
There are five categories of information on
which the GeneSys database can be filtered
including main details, additional details,
attributes, tests and groups. Within each filter
category, there are several filter properties
(sub–categories) which can be used. On
each filter property there may be a number
of filter operations (e.g. ‘equal to’ ‘great than’
‘like’) that may be possible. Only those filter
operations that pertain to the filter property
will be available. A filter can be built up using
several categories, properties and operations
allowing very specific queries to be created.
In setting up a filter, first select the category
by clicking one of the options in the ‘Filter
By’ box. Once selected, the filter properties
that relate to this category will be displayed
in the Property list box. Highlight the filter
property and select the filter operation and
value. If the filter property is a free field text
based value, it will be necessary to enter the
required search text in the ‘Value’ box.
16
Genesys 3 – User Manual
Complex Filters
A complex query can be set using a Boolean
Expression. A Boolean expression is a complex query that uses boolean operators to
combine keywords. The boolean operators
set the conditions for a search. The three
boolean operators you can use in GeneSys
are:
AND e.g. Test done = ‘15FQ’ AND Age > 50
AND NOT e.g. Sex = ‘male’ AND Education NOT = ‘Special Needs’
OR e.g. Ethnic Origin = ‘Unknown’ OR Ethnic Origin = ‘Other’
The boolean operators are most useful when
combined to produce a more complex, specific query. Use brackets (parentheses) to
group parts of the boolean expression together that must be evaluated first. To set
brackets, highlight the first statement to be
grouped and then click the bracket button.
Next, highlight the last statement and click
the bracket button to set the combined set.
Example:
In the example opposite, GeneSys3 will
first search through the database finding
all who are in one of the Constabulary
groups, then it will select those records
that have one of the rank attributes set.
Note:
If you don’t use brackets, the keywords combined by the AND operator will be evaluated first.
If you don’t use brackets, the keywords combined by the OR operator will be evaluated last.
You cannot use the AND NOT operator before bracketed terms.
You can combine exact phrases with other keywords using a boolean operator.
The boolean operators are not case sensitive, i.e. they do not have to be capitalized.
17
Genesys 3 – User Manual
Deleting Respondents from a Group
Respondents may be deleted from a group in
the main Group screen. First select the group
and then highlight the names from the group
for deletion. By default, the record will be
removed from the group but will be retained
in the database. Optionally, the names can
be permanently deleted from the database by
ticking the option box below.
!
If there is any chance of unintentionally deleting valid records, first make a
backup of your database as this process is irreversible.
Deleting a Group
To delete a group that has been saved, select
‘Delete’ icon (trash can) from the top menu.
BATCH DATA–INPUT
If you have data on a group of respondents,
you can process them as a batch. First create the Group Management screen as
described above. From the Group screen,
click on the Respondent tab to enter the
respondent screen. When you create a new
respondent, you will be prompted to add the
name to a GROUP before creating the record.
Once the record has been created, the only
way to add the respondent to the group will
be by using the simple filter method
described above.
Once all the records have been created and
assigned to a group, return to the Group
Screen and select the ‘DATA ENTRY’ option.
Once selected, you will be prompted to enter
test scores in either raw or item response
form. Highlight the test(s) for which you have
results and click on the ‘Proceed‘ button. You
will be prompted in enter the results for each
respondent in the group and once completed, you will be presented with a transaction
summary.
18
Genesys 3 – User Manual
REPORTS
Once you have collected (or entered) data on
the same measures for a group, GeneSys3
can produce reports for all the members of
the group simultaneously. These reports can
be standard individual or dedicated group
reports. A group report is a single document
that combines the results from a number of
respondents in a group. An example of a
group report might be a listing of all applicants rank ordered by their test results,
weighted, if necessary according to the perceived relative importance to the role
requirements.
While GeneSys will only present reports if one
or more respondent records contain the necessary scores, if in generating the report, the
required data is not found for a given respondent, you will be prompted to skip the record
with the missing data or abort altogether.
GROUP ASSIGN
In the group management screen, you may
assign biographical information to the entire
group. This could be a user or system defined
attribute, organisation name, reference or
notes. It is possible even to assign the same
name to the entire group as part of the
archiving process.
19
Genesys 3 – User Manual
DATA INPUT FROM A BITMAP
SCANNER
This facility, once implemented, will enable
GeneSys3 to accept data read data from specially developed answer sheets scanned by
compatible Bit–map scanners. It also provides the facility to add data from additional
tests to existing records.
For details about installing your scanner module please refer to the suppliers
documentation. Once successfully installed, it
should be possible to drive your scanner
directly from within the GeneSys system.
20
Genesys 3 – User Manual
three
NORMS
OVERVIEW OF NORM FUNCTIONS
Although your GeneSys3 system may be supplied with a number of norms for each test,
you are provided with a number of functions
for creating and managing your own normative data.
Two different methods of storing normative
data are available on GeneSys:
● SD Norms and
● Frequency Norms
SD Norms
These norms are based on means and
Standard Deviations such as are commonly
found in norm tables supplied in a tests technical manual. If a GeneSys user has a set of
means and standard deviations for a particular test then these can be easily entered into
GeneSys through an input table.
Frequency Norms
These norms are based on the actual frequency of a particular test score found in a
specific normative group. Thus, unlike the
case of standard norms where only summary
data for a normative group is required, actual
test scores must be available before a frequency norm can be constructed. This is
achieved in GeneSys by the facility to take
the test scores held on the master table, or a
subset of those scores, and form a frequency
norm from them.
Both normative methods will result in the
same mean and standard deviation. For SD
norms, held only in mean and standard deviation format it is only possible to produce a
‘normalised percentile’, i.e. a percentile
based not on the true distribution of scores
but one that assumes the normative group is
normally distributed. Frequency norms, on the
other hand, produce accurate percentiles
based on a respondent’s actual position within the true distribution for that normative
group.
21
Genesys 3 – User Manual
There are four views in the Norms screen.
Available for both
Standard and
Frequency norms, the
general view provides
detail of the sample
size, mean and standard deviations for all
the dimensions of a
test.
Histogram view provides a frequency
histogram for all the
dimension of a test.
This is only available for
frequency norm data.
Norm Table view provides either a sten or
stanine norm table on
frequency data .
Alternative will be available in the future.
The details, where
available, provides a
breakdown for each
norm on a number of
biographical variables
such as age, sex, ethnic
origin etc. Note that
norms developed prior
to GeneSys3 may not
have details.
CREATING A USER NORM
To create a new norm, select click the test
you wish to create/edit a norm for. Select
Frequency if you plan to use GeneSys resident data and SD if you have external
information in the form of mean scores and
standard deviations of for the test dimensions. Add the sample size at this stage to
avoid having to enter it later. The sample size
will not be accepted for Frequency Norms as
these are generated from data held in the
GeneSys system.
Clicking on the ‘OK’ button will create an
entry to the norm list for the norm category
you have specified. ‘Cancel’ will exit without
saving your work.
Once created you will be prompted differently
depending on whether you selected frequency or SD norms.
22
Genesys 3 – User Manual
Creating SD Norms
Once the norm information has been entered,
you will be presented with a table displaying
the dimensions, sample size, mean and SD
as follows:
If you already entered the sample size, it will
be displayed. For each dimension the values
for the specified sample should be entered.
Highlight the box and enter the value. You can
move to the next box either by clicking it with
the mouse or by using the arrow keys once
you have entered the appropriate value.
Creating Frequency Norms
Frequency norms can only be created from
data that is resident within the GeneSys database. Once a blank norm table has been
created, it will be displayed in the general
view. To add to the norm, click on the ‘Add to
Norm’ button. Scores can be added to a
norm either from the entire database or from
a specific group already specified within the
Group Area of GeneSys3.
Editing a Norm
When you select the general view, you will be
able to edit SD norms in the same manner as
they were entered. Please note that some SD
norms provided with the system may be
closed and can therefore not be edited.
Norms created using the Frequency format
cannot be edited.
23
Genesys 3 – User Manual
Viewing the Frequency Histogram
GeneSys has the facility to generate a frequency histogram for a specific test norm
group in relation to a particular dimension. To
view this histogram, select the ‘Frequency
Histogram’ view and select a dimension.
Viewing the Norm Table
By selecting the Norm Table view, GeneSys
will create a sten or stanine norm table for
any Frequency norm.
Viewing the Details
For norms created within the GeneSys3 system, further details are available. Details
include a breakdown of the norm group by
age, sex and any other biographical data that
may have been set for the members of the
norm group.
Delete a Norm
If you wish to delete a user–defined norm
from your system, first select the test, and
then the name of the norm that you wish to
delete. Click on the ‘Delete’ button. You will
be asked to confirm that you really wish to
delete this norm. If yes, the norm will be
deleted permanently from your system.
!
NOTE: only user-defined norms can be deleted from your system and not the
system norms supplied by Psytech International.
24
Genesys 3 – User Manual
four
GENESYS SETUP
The GeneSys Setup contains the functions
that allow you to view and edit various
options and settings of the system. When you
select Setup from the main menu a submenu
will display a number of options to choose
from: Reports, Passwords, Attributes, Picklist,
System, Credits and Remote Admin.
OVERVIEW OF SETUP FUNCTIONS
Reports
set customer name, font, logo
and display options, etc.
Passwords change passwords and set
access levels.
Attributes set up user–defined attributes.
Pick list Set up user defined pick list contents
System
displays information concerning
system information.
Remote
unlock the remote administration
system.
Credits
check and update the credits on
your system.
25
Genesys 3 – User Manual
REPORT OPTIONS
When selecting System you will first be presented with the Report Options that will allow
you to alter various items of information concerning the way in which reports are
displayed.
Customer
The client name is the one used to head the
produced reports and is typically the company name.
Logo Width/Height/Align
Allows you to adjust the size and alignment of
your logo. Please test print or print preview to
check size.
Font Size
The preferred font size (it is advisable to
leave this as the default or smaller as report
graphs may not fit on a single page). Should
you wish to change the font size please test
print or print preview to ensure that the formatting is OK.
Word Processor
Provides the option to set the respondent
name and page number in the header and
footer respectively.
Font Name
The preferred font type. Should you wish to
change the font please test print or print preview to ensure that there are no formatting
problems.
Margins
Allows you to set the Left, Right, Top and
Bottom margins displayed in either metric or
imperial measurement, whichever is set. The
defaults are advisable. Should you wish to
change the margins please test print or print
preview to ensure that there are no formatting problems.
Respondent Reference
Allows you to set the form of address for the
respondent within Psytech reports. For a formal address i.e. Ms Smith, tick both title and
Family name. To address the respondent by
their first name only, tick the First name box
only. For First name and family name, tick
both boxes. By default, this is set to First and
Family name. Should you wish to change
these settings, preview a test page to ensure
that the correct form has been set.
Logo
Allows you to locate your own logo, which will
then appear on each report.
26
Genesys 3 – User Manual
PASSWORDS
Inevitably the testing of individuals involves
the collection of strictly confidential information. Such information has to be subject to
security restrictions therefore the allocation of
passwords is necessary. In addition to simply
assigning passwords for each user, added
security is achieved by linking each password
to a specified access level. Access to the various GeneSys functions and records depends
on the password level set for the individual
who has logged onto the system. The combination of these security elements results in a
secure and confidential system.
Passwords are set by choosing the
Passwords option from the Setup menu. This
selection will display a list of Users into which
the names of the users who are to be
assigned passwords are added. To complete
the process, add the password itself and the
user access level.
High
Allows users access to all
GeneSys functions without
exception.
Medium
Users assigned to this level
have the following restrictions:
● not permitted access to
the password function
● not allowed to install new
tests, reports etc.
● not allowed to clear down
the master table
● not allowed to import or
export data
27
Genesys 3 – User Manual
Low
Provides access to a limited
number of GeneSys options.
Users at this level are able to
access any function available
on the respondent screen or
on the batch menu of the
main screen. Basically this
level allows data input, test
administration and report
generation.
Once you have finished making alterations to Passwords,
click on ‘OK’ to save or
‘Cancel’ to quit.
USER ATTRIBUTES
GeneSys attributes are categories of information that may be assigned to a respondent’s
record. Once set, attributes are used for the
purpose of finding individual respondents or
groups of respondents with particular specialisations or combinations of skills.
For example, you may wish to be able to
search in the future for all people who can
offer a foreign language or who have a PhD,
and so choose to specify these attributes.
You may wish to create a norm of all graduate recruits who successfully completed the
graduate training programme.
To set up an attribute header, highlight
‘Attributes’ in the attribute display window
and click on the ‘Add’ button. Enter the
Attribute header and click on ‘OK’.
To add the attribute content, highlight the
attribute header in the attribute display box
and click on ‘Add’.
Click on the first empty cell in the matrix and
type up to a maximum of twenty characters.
It is advisable to restrict the length of the
attribute/category, as it may not be visible on
the display. When you have finished making
alterations to the attribute list, click on ‘OK’
to save or ‘Cancel’ to quit.
Attribute headers and attributes may be
renamed or deleted by highlighting the item
to be deleted and clicking on the ‘delete’
button.
!
When you delete an attribute, it will be removed from all respondent records
possessing that attribute. If you rename an attribute, it will be reassigned to all
records possessing the attribute in its original form.
28
Genesys 3 – User Manual
PICK LIST
The Pick list has a similar function to the
user defined attribute but for any given
respondent record, only a single parameter
may be assigned. ‘Pick List’ items can be
used to identify a particular group of respondents, for example, by customer, location,
department, cost centre etc. Pick list items
are added and deleted in the same way as
attributes (described above).
!
When you delete a pick list item, it will be removed from all respondent records
possessing that item set.
SYSTEM
Click on the + to reveal the details of all the
tests, batteries, reports and norms that are
resident on your GeneSys system.
Use the scrollbar to the right of the display
screen to display more information. Where
available, it will be possible to display the
technical manuals for a test by clicking the
View Manual button. You will need to have
Adobe Acrobat installed.
29
Genesys 3 – User Manual
CREDITS
The use of tests on the GeneSys system may
require credits. This is a royalty payable for
the use of the particular application and is
deducted from one or more counters held on
the software key (called a dongle) installed
on either the printer or USB port of the computer. The number of credits that are
required by each test is displayed in System
section of the Setup described above.
To update credits, click on the ‘Update Credits
>>’ button, select the counter you wish to
update (if it is not already selected) and enter
the number of credits required. Click on ‘Next
>>’ to proceed to the next stage as follows:
At stage two you will need to contact Psytech
International or an authorised distributor who
will ask you for these codes and will issue
you with a credit update authorisation code to
transfer the required number of credits. Enter
these six letters into the ‘Authorisation Code’
box and click ‘Update’. If you made a mistake
in entering the code you will be asked to type
it in again. In the unlikely event that you enter
the code wrongly three times the update
operation will be aborted and you will need to
go through the above procedure again.
Should your system contain applications that
use another counter for credits, you will need
to resume the credit procedure, this time
indicating, from the first screen, the counter
you wish to update.
30
Genesys 3 – User Manual
Your supplier keeps an automatic log of the
number of credits that have been transferred
and received and once the credit update has
been successfully completed you will be sent
an invoice for the appropriate amount.
You should ensure that a stock of credits is
always kept in the event that you are unable
to reach your supplier.
REMOTE ADMIN SCREEN
To continue functioning, the GeneSys remote
questionnaire administration system
(described in below) will periodically require
an unlock code which is generated in the
Remote Admin section of the Setup menu.
Enter the code issued by the Remote
Administrator software and click on the
‘Unlock Code’ button. This unlock code must
now be entered into the remote questionnaire administrator to release further use.
Should the code have been entered incorrectly, you may repeat the process.
31
Genesys 3 – User Manual
32
Genesys 3 – User Manual
ffive
GENESYS DATAMANAGEMENT FUNCTIONS
OVERVIEW OF DATABASE FUNCTIONS
Import data and updates from a
GeneSys3 or GeneSys2 system, a
remote administration file, new norms
and questionnaires etc.
Export data, norms and questionnaires
to be used by another GeneSys3 system or in text or excel format.
Backup and restore the GeneSys main
database.
Connect to an alternative GeneSys3
database on the local machine or
across a network server.
Utilities to optimise and anonymise
respondent records.
IMPORT
GeneSys3 allows you to import data, user
defined norms, custom questionnaires and
reports and attributes that have been created
in another GeneSys3 system. It will convert
the GeneSys2 data into GeneSys3 format.
GeneSys Export File (.gse)
This file contains respondent records from a
remote GeneSys3 system. How to generate a
‘.gse’ file is explained in the ‘Export’ section
below. First locate the ‘.gse’ file by selecting
the drive letter and folder in which the file
was saved. Once found, the ‘Import’ box
becomes active, allowing the import to proceed. As there may be more than one Export
file for importing, once the import button is
clicked, you are given an opportunity to
select the file you require.
33
Genesys 3 – User Manual
Once selected, you will be presented with the
GeneSys3 merge wizard. This is described in
the section ‘Merging databases’ below.
Only results for which tests exist on your current system will be imported.
Remote Administration File (.gsi)
The GeneSys3 Remote Administration system
generates item response (.gsi) files which can
then be imported into the main system for
scoring and reporting.
First locate the ‘.gsi files by selecting the
drive letter and folder in which the files have
been saved. Once found, the ‘Import’ box
becomes active, allowing the import to proceed. As there may be many .gsi files for
importing, once the import button is clicked,
you are given an opportunity to select the
records you require using the GeneSys3
merge wizard. This is described in the section
‘Merging databases’ below.
GeneSys Attribute Definition
User defined attributes (described in an earlier section) may be shared by different
GeneSys3 systems within one organisation to
maintain consistency. Once created by one
user, they can be exported to other users to
form part of an organisation’s data collection
regime.
GeneSys Battery File
While standard questionnaires and batteries
form part of any GeneSys3 install set, custom
questionnaire batteries do not. Therefore,
when installing or reinstalling an additional
GeneSys3 system, it may be necessary to
import any user defined batteries in use.
GeneSys Norm File
User defined norm files can be made available to other GeneSys3 users by first
exporting (see below) from the source system
and importing them from within the destination system. First select GeneSys norm file
from the menu and select those norm categories that you wish to import.
GeneSys2 database
GeneSys2 users can transfer their entire GS2
database to GeneSys3. Select the option and
locate the folder that contains the GeneSys2
database files, GS2M.DB, GS2M.PX and
GS2M.MB. This will usually reside in a folder
called ‘C:\GS2’. Once located, the IMPORT
button will become active allowing you to
process the database.
As there may be many records for importing,
once the import button is clicked, you are
given an opportunity to select those records
you require using the GeneSys3 merge wizard. This is described in the section ‘Merging
databases’ below.
In importing the GS2 database, GeneSys3
momentarily passes control to the Paradox
database to verify the integrity of the data to
be imported. If for any reason, this process
halts or returns an error, this indicates that
there may be a fault in your GeneSys2 database. This will need to be fixed from within
the GeneSys2 system by deleting the offending records before the import can take place.
If in doubt, contact Psytech for assistance.
34
Genesys 3 – User Manual
Merging Databases
When importing respondent records from
external, remote or satellite systems,
GeneSys import wizard will guide you through
the process. When entering the wizard, you
will be presented with the first record of the
batch to be imported and a choice of
‘Accept’, ‘Skip’, ‘Continue’ or ‘Abort’.
If a duplicate name is found in the database,
a further set of choices will be presented to
you. This split screen presents details of the
respondent record being imported at the top
of the screen and details of the first duplicate
in the database below. If there is more than
one duplicate in the current database, click on
the down–arrow next to the existing respondent name to reveal further matches. The
details presented should usually be sufficient
in determining whether the records belong to
the same respondent or simply to two respondents with the same first name and surname.
Merge with selected record — If the records
belong to the same respondent but they represent results of different measures, perhaps
completed at different times.
Replace selected record — If it is your judgement that the record being imported is more
up to date than the existing record on the
database.
Create as new record — If the duplicate presented corresponds to a different respondent.
Skip record — If there is an exact match and
you decide against importing the record.
If you wish to proceed with the entire import
using the same options, check the box ‘Do
the same…’
!
This process is irreversible.
Always backup your database before importing fresh data.
35
Genesys 3 – User Manual
EXPORT
GeneSys3 supports a wide range of export
formats providing very flexible output possibilities.
GeneSys Export (.gse) — The ‘.gse’ is the
GeneSys3 native format and will contain a
complete set of necessary database files
including respondent’s attributes, raw and
item scores, notes and group data. It is possible to export the entire database or a
selection of records associated with a group.
GeneSys Battery File (.gsb) — All the custom
questionnaire batteries within a GeneSys3
system may be exported to satellite systems.
Although there is no option to make a selection of batteries that are required for export,
unwanted batteries may easily be deleted
after import.
Delimited Text File — This function allows
you to export selected portions of your
GeneSys master table to a comma separated
text file. On selecting this function you will be
presented with a window displaying the
GeneSys3 export wizard which is used for
both export to text and to excel file and is
described below.
GeneSys Norm file (.gsn) — All user defined
norms within the geneSys3 system may be
exported to satellite systems. There is no
option to select which norm groups to export
at this stage. Although it is possible to
remove any unwanted norms later.
Microsoft Excel (.xls) — This export function
creates an (.xls) file that can be read by
Microsoft Excel and many other proprietary
software systems. On selecting this export
option, you will be presented with the
GeneSys3 export wizard which will guide you
through the export process.
GeneSys Attribute Definition file (.gsa) —
User defined attributes (described in section )
may be exported so that they may be shared
by different GeneSys3 systems within one
organisation.
36
Genesys 3 – User Manual
EXPORT WIZARD
The GeneSys3 export wizard allows you to
specify the exact information that is to be
exported.
First provide a name for the export file or
click on the ‘Browse’ button to be assisted in
this process.
Four categories of data may be exported;
Personal details, Raw scores, Item responses
and User Attributes. The system attributes are
contained within the Personal detail options.
First use the mouse to check the Personal
details you wish to export. You may select as
many items as you wish. When you have
ticked all that are required, click on the next
category to select the tests for which you
require raw score data to be exported.
Continue with the same process for the item
responses and User attributes.
Once all the information has been selected
for export, click on the ‘Export’ button to
commence the process.
BACKUP/RESTORE
Backup
The GeneSys3 respondent database is at the
basis of the system’s operation. If the data
becomes corrupt or is accidentally deleted,
the system will not be able to function properly. It is for this reason that you are advised
to back up your databases regularly.
To backup a database, choose Backup from
the side menu and indicate the name and
location by clicking on the ‘browse’ button.
By default GeneSys3 will save the backup file
to its working directory. It is recommended
that you retain at least two backups of your
main database in different locations.
37
Genesys 3 – User Manual
Restore
To restore a previously backed up database,
click on the Restore button and use the
browse facility to find the backup file. Unless
you selected another location, this will reside
in the default GeneSys3 working directory.
!
When you execute this option, your entire database will be over written by the
backup and therefore should only be considered when the current database is
either unusable or unstable.
DATA LOCATION
GeneSys3 will allow you to connect to a
database at another location, a facility that
may be of use in a multi–user environment
with more than one user independently collecting assessment data. The other location
needs to be a GeneSys3 implementation,
complete with subfolders. You will need user
rights to access a database that was not created by your local system.
When connecting to a database that is not
resident on your machine, do take care as
you may be able to make irreversible
changes to another users’ database and/or
lock resident users out of their own systems.
To connect to another database, use the
browse window to locate it and click on
‘Update Location. If the data location you
have selected is valid, you will be connected.
38
Genesys 3 – User Manual
UTILITIES
Anonymise Data
In line with good practice and data protection
principles which state that data should only
be processed for limited purposes and not
kept longer than is necessary, GeneSys
allows you to anonymise respondent records
once they are out of date. This option may be
preferred over deleting respondent records
as it would still retain all the associated test
scores for use in later validation. The
‘Anonymise’ function will either apply to the
entire database or to a group of respondents,
created in the group area described above.
This function replaces the first and family
name of all the selected respondents with
the word ‘ANON’. Other identifying data fields
e.g. employee or National Insurance number
will be retained but may be replaced in the
using Group Assignment function described
above.
!
Once executed, this process is irreversible, so ensure that you have backed up
you database if there is any possibility of unintentionally erasing records that
are needed in their entirety.
Optimise Database Files
This procedure reformats the GeneSys3
database to make sure they are in the most
efficient format for access, leading to an
increase in performance.
!
This process should not be carried out if there are any other users
logged on to the database
39
Genesys 3 – User Manual
UPDATING YOUR SYSTEM
Your GeneSys system will be supplied with
tests already installed. The update option will
only be required if, at a future date, you
decide to add further facilities (tests, norms,
reports etc.) to your system or if your
GeneSys supplier updates your existing system. In either event you will be supplied with
an update file either on disk or by email. The
procedure for doing this is entirely taken care
of by the GeneSys installation procedure. Full
on–screen instructions are then provided to
ensure the update procedure is carried out
correctly.
40
Genesys 3 – User Manual
six
CUSTOM
OVERVIEW OF CUSTOM
The Custom features within GeneSys include
the specification of new report styles and
questionnaire batteries based on report sections and questionnaires that are resident
within the system. Thus a battery of measures can be constructed to address specific
work relevant demands and a single associated report compiled that provided the
specific information that is sought.
When the Custom option is selected from the
main GeneSys3 menu, select either customisation of reports or questionnaires by clicking
the relevant icon.
CUSTOMISATION OF REPORTS
Reports contained within the GeneSys3 system have mostly been designed in a modular
manner based on sections which can be
organised to your own requirements.
Sections may include the main narrative section, the profile charts, interview prompts and
the various derived styles such as management team roles. Most measures are
provided with an extended report which contains most available sections for that
measure. In addition, many include a feedback style report which is written in the
second person in a form that is designed for
respondent use. All the sections of these
reports may be combined by the user to construct a specific report tailored to particular
circumstances.
Once you have selected the Report Definition
option you will be presented with two list
boxes. The list box on the left presents all the
reports available on your system and the box
on the right the sections of your new or to be
defined report.
41
Genesys 3 – User Manual
To add a new report, click the ‘Add’ button
and enter your new report definition name.
As this is the name that will be displayed
when prompted for reports on respondents,
to avoid confusion, make the name as meaningful as possible.
Click the + to the left of the existing report
name to reveal the associated sections that
are available to you in defining your new
report.
Once revealed, highlight the report section
you require and click the button to add it to
your new definition. Click on the ‘Generate
Contents page’ box if you wish to start with a
header page which includes the contents of
the report. Once you have added all your
report sections, you may wish to review
where you would like line or page breaks.
Should you require a line or page break after
a section, highlight the section and click the
button of your choice.
!
Your new report definition will only be displayed for those respondents who
have completed all the tests that are called by any section.
42
Genesys 3 – User Manual
CUSTOMISATION OF
QUESTIONNAIRES
GeneSys is supplied with an extensive range
of tests and test batteries. Many of the batteries include a number of sub–tests which
while originally designed to operate within
the battery to provide a more rounded
assessment of characteristics relevant for a
broad career area, may be unbundled and
combined with others to form a highly
focussed assessment to address specific job
demands.
Once you have selected the Questionnaire
Battery option you will be presented with two
list boxes. The list box on the left presents all
the questionnaires available on your system
and the box on the right the contents of any
new or to be defined battery.
To add a new battery, click the ‘Add’ button
and enter your new battery name. As this is
the name that will be displayed when
prompted for on–screen questionnaires, to
avoid confusion, make the name as meaningful as possible.
Select the questionnaire by highlighting it
from the list box of available questionnaires
and click the
button to add it to your
new battery. Once you have added all your
questionnaires, save it by clicking on ‘Save’
43
Genesys 3 – User Manual
44
Genesys 3 – User Manual
seven
REMOTE QUESTIONNAIRE ADMINISTRATOR
OVERVIEW OF RQA FUNCTIONS
The GeneSys3 Remote Questionnaire
Administrator allows users configure one of
your GeneSys on–screen questionnaire batteries to be run as an external program
entirely separate from your GeneSys system.
This external program will administer the
specified questionnaire battery and save a
respondent’s data in a user specified data
file. No dongles are required to run this external program as the external program carries
out no scoring of the questionnaire. Instead
data files created by the questionnaire
administration program must be imported
into the GeneSys system. Credits for scoring
the questionnaire are deducted from the
GeneSys system during the import stage.
The GeneSys questionnaire administration
program can be used to administer a questionnaire battery to a number of individuals
simultaneously, either on a number of
stand–alone PC’s or a number of PC’s connected via a network. If the administration
program is run on a network, it can be copied
into a directory that is accessible by all network users. Individual data files will, in that
case, be stored in this same directory making
collection of the data and import into
GeneSys an extremely simple process. If the
administration program is used on a number
of stand–alone PC’s then it will be necessary
to physically remove the individual data files
from these machines in order to present
them to GeneSys for import.
Two programmes are required to use the
Remote Questionnaire Administrator, one to
set up the battery for use and the other to
administer the selected battery. Both programmes are installed from the main
GeneSys3 CD directly on to the remote
machine. Installation instructions are provided
in the Appendix.
45
Genesys 3 – User Manual
CONFIGURING THE REMOTE
ADMINISTRATION OF A
QUESTIONNAIRE
The first step in configuring the remote
administration of the questionnaire is to run
the GS3RQA programme by clicking its icon
from the desktop or program group.
The Configuration, like the actual remote
administrator itself is password protected.
The default (or factory setting) is SYSTEM (all
in uppercase) which should be changed
immediately.
If you are using GeneSys Remote
Questionnaire Administrator for the first time,
you will need to change the password. Click
on the PASSWORD button and enter and
then repeat your new password before registering it by clicking on the OK button. This
password will be required both for the configuration and the Administration programs.
Indicate the questionnaire you wish to
administer by clicking the down arrow on the
list of available questionnaires.
Next select the location for the item response
files that are generated for each respondent.
This location could be a network server folder into which item response files from a
number of workstations could be stored to
facilitate the import process. By default, the
data folder will be set C:\Program
files\GS3RQA\Data.
Once the questionnaire and data directories
are have been set, click on the SAVE button
to register your choices.
46
Genesys 3 – User Manual
REMOTE QUESTIONNAIRE
ADMINISTRATION
The Remote Questionnaire Administration
(GS3RQA) software will administer the questionnaire or test battery that has been set up
in the configuration program. If you are using
GS3RQA for the first time you will be prompted for a release code. The release code is
available from the main GeneSys3 Setup
menu and for security reasons is also
required every 60 days or after 50 respondents have completed the battery or
whichever comes first.. The process of generating this release code is detailed in the
Setup section of this manual.
Once a valid release code has been entered
you will only be prompted for the main password, which is shared with the GeneSys
Remote Questionnaire configuration program.
Once the password has been entered, the
respondent can now enter his/her details and
click on the ‘Proceed’ button to commence
the test.
On finishing, the respondent will be presented with a screen requesting that the
administrator be called.
The administrator will then press <Alt> F1
and the respondent’s details and test results
are saved in an individual file on disk.
!
Note: No credits are required for the remote administration of a test. The credits
will be deducted when the test results are imported into GeneSys.
47
Genesys 3 – User Manual
IMPORTING TEST RESULTS INTO
A GENESYS3 DATABASE
Once you have selected the location of your
Remote Administration data files e.g. C:\program files\gs3rqa, the ‘Import’ button will
become active. Before initiating the import,
you have the option to add the respondents
to an existing group. This will allow you to
access all respondents in group mode and
produce one or more reports for the group as
a whole rather than each of the respondents
individually.
The import wizard will then be loaded and
you will then be prompted with each of the
names of the respondents who have completed the remote assessment.
GeneSys imports all the details and item
responses of the respondent(s) whose file(s)
are found in the folder you have selected.
48
Genesys 3 – User Manual
eight
APPENDIX A
GENESYS\WINDOWS INSTALLATION GUIDE
System Requirements
Processor
P166 or above
RAM
32MB recommended
Disk Space
25MB – will depend on
amount of tests, reports
etc. installed).
Operating System Windows 95, 98, Me,
NT, 2000
Installing GeneSys3
GeneSys3 will install by default to directory
C:\Program Files\Genesys 3. This can be
changed by the user.
Press the ‘Start’ button and choose ‘Run’.
Type ‘d:genesys3.exe’ where ‘d’ denotes the
letter assigned to your CD Rom drive. The CD
Rom may have been assigned a different
drive letter such as ‘e’ in which case replace
the ‘d’ drive letter with ‘e’.
Follow the on–screen instructions.
Installing GeneSys3 Remote
Questionnaire (GS3RQA & GS2RQC)
The GS3 remote software will install by
default to directory C:\Program
Files\GS3RCA. This can be changed by the
user.
Press the ‘Start’ button and choose ‘Run’.
Type ‘:GeneSys3.exe’ where ‘D’ denotes the
letter assigned to your CD Rom drive. The CD
Rom may have been assigned a different
drive letter such as ‘e’ in which case replace
the ‘d’ drive letter with ‘e’.
49
Genesys 3 – User Manual
Uninstalling GeneSys3
Both GeneSys3 and the GeneSys Remote
Questionnaire Administrator software may be
uninstalled completely using the windows
Add/Remove Programs facility which is available from the Control Panel.
50
Genesys 3 – User Manual
APPENDIX B
KEYBOARD USER’S GUIDE
This manual assumes that the GeneSys3 system is being used with a mouse and that the
respondent (completing a test on–screen) will
be using the keyboard. However, it is possible
to access all GeneSys options using the keyboard alone. In addition, it is assumed, by
default that respondents completing questionnaires on–screen will use the keyboard.
This is to maintain standardisation which is
not possible given the variety of mouse configurations that exist. Consequently
instructions for mouse use are omitted from
instruction screens for all Psytech tests.
Should you or your organisation wish to standardise your testing practices using the
mouse as the primary input device, alternative instructions screens can be supplied.
To use GeneSys without mouse support, you
will notice that by pressing the <TAB> key on
the keyboard, different options will become
active. Once active, you can press the
<ENTER> key to perform the command. In
addition, most GeneSys functions buttons
have one letter that is underlined. In order to
select the function, hold down the <Alt> key
and press the underlined letter of whichever
menu you want to access. E.g. To create a
new norm from the Norm area, press <Alt>
N. To exit from any screen press <ALT> X.
To select an item from a list box, use the cursor keys to highlight the item and press enter.
In GeneSys, this is the equivalent of
double–clicking the item. For list boxes where
you can select more than one item e.g.
extended group details, use the cursor keys
to select the first item and then hold down
the <SHIFT> key while using the cursor keys
to select further items.
51
Genesys 3 – User Manual
APPENDIX C
PSYTECH MANUALS AND
ACROBAT READER
Getting Hold of Acrobat Reader
Adobe Acrobat Reader is ‘freeware’ and you
can obtain a copy from the cover CD of the
vast majority of computer magazines. You can
also download the Reader from Adobe’s website. If you cannot access the Internet and do
not have a CD–Rom drive, call Psytech for
advice.
Accessing Psytech Manuals from
within GeneSys
To access the Psytech test manuals from
GeneSys3, select the Setup option from the
main menu and click ‘System’. If you select a
test under the ‘Tests’ category and a manual
is available, a ‘View Manual’ button will
appear.
What is Acrobat Reader?
The reader is basically an advanced ‘file
viewer’ for the Adobe compressed format
‘PDF’ files, the format chosen by Psytech to
present its test manuals. It allows you to
browse the contents of the file much as you
would browse the contents of a magazine.
Specific pages can be viewed in any number
of sizes and printed as desired.
Once located, the reader will be launched
and the manuals loaded in to it for you to
browse.
52
Genesys 3 – User Manual