1
User's Manual
TERMINATOR
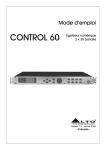
DIGITAL AUTO FEEDBACK
R
LTO
www.altoproaudio.com
Version 1.0 April 2002
English
SAFETY INSTRUCTIONS
HEAT:
The appliance should be situated away from heat
sources such as radiators, stoves, or other appliance
(including amplifiers)that produce heat. No naked flame
sources, such as lighted candles, should be placed on
the appliances.
CAUTION
RISK OF ELECTRIC SHOCK
DO NOT OPEN
This symbol, wherever it appears, alerts you
to the presence of uninsulated dangerous
voltage inside the enclosure-voltage that may
be sufficient to constitute a risk of shock.
POWER SOURCE:
The appliance should be connected to a power supply
only of the type described in the operating instructions
or as maked on the appliance.
Only for the appliance equipped with Voltage Selector,
they should only be reset and re-equipped with a
proper plug for alternative voltage by a qualified service
technician. Do not attempt to alter this yourself.
This symbol, wherever it appears, alerts you to
important operating and maintenance instructions
in the accompanying literature. Read the manual.
CAUTION: To reduce the risk of electric shock, do
not remove the cover(or back). No user serviceable
parts inside; refer servicing to qualified personnel.
WARNING: To reduce the risk of fire or electric
shock, do not expose this appliance to rain or moisture.
GROUNDING OR POLARIZATION:
Precautions should be taken so that the grounding or
polarization means of an appliance is not defeated.
ON: Denotes the appliances turn on.
OFF: Denotes the appliances turn off.
Alternating current / voltage ( if the appliances
use the symbol)
Direct current /voltage(if the appliances use the
symbol)
POWER-CORD PROTECTION:
Power supply cords should be routed so that they are
not likely to be walked on or pinched by items placed
upon or against them, paying particular attention to
cords and plugs, convenience receptacles and the
point where they exit from the appliance.
DETAILED SAFETY INSTRUCTIONS:
All the safety and operation instructions should be read
before the appliance is operated.
CLEANING:
Clean only with dry cloth.
RETAIN INSTRUCTIONS:
The safety and operating instructions should be retained
for future reference.
NON-USE PERIODS:
The power cord of the appliance should be unplugged
from the outlet when left unused for a long period of
time or during lightning storms.
READ WARNINGS:
All warnings on the appliance and in the operating
instructions should be adhered to.
SERVICING INSTRUCTIONS :
The appliance should be serviced by qualified service
personnel when:
-The power supply cord or the plug has been damaged;
or
-Objects have fallen, or liquid has been spilled into the
appliance; or
-The appliance has been exposed to rain; or
-The appliance dose not appear to operate normally
or exhibits a marked change in performance; or
-The appliance has been dropped, or the enclosure
damaged.
Caution: These servicing instructions are for use by
qualified service personnel only, To reduce the risk of
electric shock do not perform any servicing other than
that contained in the operating instructions unless you
are qualified to do so.
FOLLOW INSTRUCTIONS:
All operation and user instructions should be followed.
WATER AND MOISTURE:
The appliance should not be used near water (e.g.near
a bathtub, washbowl, kitchen sink, laundry tub, in a
wet basement, or near a swimming pool etc. )
The appliance shall not be exposed to dripping or
splashing and no objects filled with liquids, such as
vases, shall be placed on the appliance.
VENTILATION:
The appliance should be situated so that its location
or position does not interfere with its proper ventilation.
For example, the appliance should not be situated on
a bed, soft rug, or similar surface that may block the
ventilation openings: or placed in a built-in installation,
such as bookcase or cabinet that may impede the
flow of air through the ventilation openings.
The appliance should be placed on a solid surface
with a minimum distance of 1m from the back of side,
top plate to the wall.
If the appliance have openings, please do not block
any ventilation openings.
SERVICING NOTE :
Disconnect power cord before servicing.
Replace critical components only with factory parts
or recommended equivalents.
For AC power supply units-Before returning repaired
unit to user, the unit should be subject to insulation
resistance test.
1
Preface
Dear Customer,
Thanks for choosing
job and researches.
LTO TERMINATOR and thanks for choosing the one of the results of
LTO AUDIO TEAM
For our LTO AUDIO TEAM, music and sound are more than a job ...are first of all passion and let us say...our
obsession!
We have been designing professional audio products for a long time in cooperation with some of the major brands
in the world in the audio field.
The Alto line presents unparalleled analogue and digital products made by Musicians for Musicians in our R&D
Centers in Italy, Netherlands, United Kingdom and Taiwan. The core of our digital audio products is a sophisticated
DSP (Digital sound processor) and a large range of state of the art algorithms which have been developed by our
Software Team for the last 7 years.
Because we are convinced you are the most important member of LTO AUDIO TEAM and the one confirming
the quality of our job, we'd like to share with you our work and our dreams, paying attention to your suggestions
and your comments.
Following this idea we create our products and we will create the new ones! From our side, we guarantee you and
we will guarantee you also in future the best quality, and the best fruits of our continuous researches and the
best prices.
Our LTO TERMINATOR is the result of many hours of listening and tests involving common people, area experts,
musicians and technicians.
The result of this effort is the realization of a multi-mode and configurable DSP Audio Processor, devoted to preserve
the cleanness of on-stage events from being disturbed by Feedback between loudspeakers and microphones.
Nothing else to add, but that we would like to thank all the people that made the LTO TERMINATOR a reality
available to our customers, and thank our designers and all the LTO staff, there to make possible the realization
of products containing our idea of music and sound and there to support you , our customers, in the best way,
conscious that you are our best richness.
Thank you very much.
LTO AUDIO TEAM
2
TABLE OF CONTENTS
1. INTRODUCTION.............................................................................................................4
2. FEATURE LIST...............................................................................................................4
3. FRONT AND BACK PANELS DESCRIPTION....................................................................4
3.1 Control panel (Front Panel)
a. Analog levels
b. LED and Illuminated Power Switch
3.2 Analog Connections (Back Panel)
a. Analog Inputs/Outputs
b. MIDI Connectors
c. Power Connector
4. INSTALLATION & CONNECTION.....................................................................................5
4.1 Audio Connections and Power Up
a. Audio Connections
b. Power Up Setting
4.2 Analog
a. Levels Setting
4.3 Installation
a. Standard Use
b. Application Examples
- Line Instrument
- Mixer
5. OPERATIONAL OVERVIEW ......................................................................................................7
6. GET IT STARTED .......................................................................................................................8
7. PROCESSES FUNCTIONAL DATA ...........................................................................................9
8. TERMINATOR BLOCK SCHEME ..............................................................................................9
8.1 System Menu
8.2 Utility Menu
8.3 MIDI
9. TECHNICAL SPECIFICATIONS ...............................................................................................11
10. WARRANTY ...........................................................................................................................12
3
1. INTRODUCTION
Purchasing LTO TERMINATOR, you purchased a very powerful unit, easy to use and contained in a very
efficient signal-rack unit package.
LTO TERMINATOR is a multi-mode and configurable DSP Audio Processor, devoted to preserve the cleanness
of on-stage events from being disturbed by Feedback between loudspeakers and microphones.
With LTO TERMINATOR we offer to the performer a new freedom of movements and an increased monitor
level, and let them concentrate on music, instead of having to do with Feedback concerns.
All the algorithms used in this device are completely original and innovative, and take care of the suggestions
of professional users worldwide. The whole design has been developed, modified and optimized thanks to
the experience of LTO AUDIO TEAM researchers.
2. FEATURE LIST :
Robust and Compact design
24/32 bits Digital Audio Processor
MPU Control
Variable Input / Output Gain
Illuminated Power Switch
Digital Saturation LED
Easy to Operate Front Panel Controls
SMT Design for Greater Reliability
Optimized signal path to Provide Superior Sound
Manufactured Under ISO9001 Quality system
3. FRONT AND BACK PANELS DESCRIPTION
3.1 Control panel (Front Panel):
R
LTO
8
1
2
UP
PROCESS
OVERFLOW
MODE
3
4
5
TERMINATOR
ON
OFF
6
7
10
OFF
10
DOWN
ENTER
ESC
TERMINATOR
UTIL
CHSEL
INPUT LEVEL
OUTPUT LEVEL
9
10
11
12
13
14
15
16
DIGITAL
AUTO FEEDBACK
OFF
POWER
17
1. Digital Overflow
2. Terminator searching LED
3. Enable/disable Terminator LED
4. Utility LED
5. Enable/disable channel select led
6. Dual Function Vu-Meters (filter manual inserted LED s / vu-meter if bypass system).
7. LCD alphanumeric display 20 2
8. Up key
9. Down key
10. Enter key
11. Esc key
12. Terminator key
13. Utility key
14. Channel select key
15. Analog Input volume
16. Analog Output gain
17. Power ON/OFF Switch
a. Analog levels
- Analog Input Level Potentiometer (15) : The input level control sets the main input gain, before the
signal reaches the input bus. It controls both the INPUT 1 and INPUT 2 levels simultaneously.
- Analog Output Level Potentiometer (16) : The output level control set the level going to the amplifier
or mixer from this apparatus.
b. LED and Illuminated Power Switch
- Digital Saturation LED (1) : Displays the signal level coming into the input during normal operation, if
the signal level is too high, this LED will turn red and you will begin to hear the signal distortion.
4
- Power On/Off Switch (17) : Turns the apparatus on and off.
3.2. Analog connections (Back Panel):
PUSH
PUSH
NEW
NEW
AC INPUT
95-120V /210-240V 60-50Hz
Rated Power Consumption 9W
FUSE:
210-240V: T250mAL 250VAC
95-120V: 500mA 250VAC
REPLACE FUSE WITH CORRECT
TYPE ONLY
MODEL
2
TIDE
3
1
2
TIDE
3
1
SERIAL
OUTPUT
THRU
INPUT
OUTPUT2
OUTPUT1
INPUT2
INPUT1
MIDI
a. Analog Inputs/Outputs
- Inputs : These are XLR balanced connectors which connect to sources such as the effects sends of
mixing console. They may be used with nominal input levels from consumer to professional audio.
- Outputs : These are XLR balanced connectors which connect to devices such as the effects returns
on a mixing console or power amplifier inputs.
b. MIDI Connectors
- MIDI In : DIN connector for the MIDI input to the TERMINATOR.
- MIDI Thru : DIN connector for the MIDI thru.
- MIDI Out : DIN connector for the MIDI output from the TERMINATOR.
c. Power Connector
- Power Connector : This is a plug for connecting the power supply to the TERMINATOR .
4. INSTALLATION & CONNECTION :
4.1. Audio Connections and Power Up
a. Audio Connections
The connections between the TERMINATOR and the other audio devices have to be made using high
quality cables so to prevent bad performances of the TERMINATOR itself. So it should be good to use
low-capacitance shielded cables with a flexible internal conductor. Connect the cables to the TERMINATOR
properly by observing the following precautions:
Do not bundle audio cables with AC power cords.
Avoid place audio cables and TERMINATOR, near sources of electromagnetic interference such as
transformers, monitors, computers, etc.
Always unplug cables by firmly grasping the body of the plug and pulling directly outward.
Do not place cables where they can be stepped on
Avoid twisting the cable or having it make sharp, right angle turns.
b. Power Up Setting
After making your connections, turn on the system's power using this procedure:
Before turning on the TERMINATOR's power, check if:
All connections have been made correctly
The volume controls of the amplifier or mixer are turned down
Insert the Power plug into the POWER input on the rear panel of the TERMINATOR and plug the power cable
into an AC outlet.
Turn on the power of the TERMINATOR, pushing the ON/OFF button on the front panel.
Turn on the power of the amplifier/mixer, and adjust the volume.
4.2. Analog
a. Levels Setting
Proper setting of the input and output levels is crucial in order to achieve the maximum signal-to-noise
ratio. It is possible to say that it is usually best to set both input and output level controls at 3/4 or 75% of
full. This will decrease the possibility of overload distortion and keep the amount of background noise to
a minimum.
If the VU-Meters or the Digital Saturation LED on the TERMINATOR begin to clip (turn red), turn down
the Input level or decrease the volume of the source (instrument, mixer send, etc.). If the output level is
causing the mixer or amp to distort, turn the Output Level down.
4.3. Installation
a. Standard Use
The TERMINATOR may be placed almost anywhere: on a table, on top of an amp, next to a mixing console.
5
If it will be on furniture, check the rubber feet provided to the bottom of the unit. Make sure to place the
TERMINATOR away from other audio equipment that may induce fields, and away from the signal wiring.
It is possible that TERMINATOR may pick up noise fields generated by other equipment such as large
power amplifiers; in this case, move the TERMINATOR until the noise goes away.
b. Application Examples
- line instrument
When connecting audio cables and/or turning power on and off, make sure that all devices in your system
have their volume controls turned down.
TERMINATOR has two XLR balanced inputs and two XLR balanced outputs allowing the TERMINATOR
to be used in a classical Stereo in and Stereo Out connection.
Connect two audio cables to the INPUT 1 and INPUT 2 of the TERMINATOR from a double source, and
two other audio cables from the OUTPUT 1 and OUTPUT 2 of the TERMINATOR to a double channel
amplification system or two mixer inputs.
To Amplifier or Mixing Console
From Stereo Audio Source
INPUT 1
INPUT 2
R
LTO
OUTPUT 1
UP
PROCESS
OVERFLOW
MODE
DOWN
ENTER
ESC
OUTPUT 2
TERMINATOR
ON
10
OFF
TERMINATOR
UTIL
10
OFF
INPUT LEVEL
CHSEL
DIGITAL
AUTO FEEDBACK
OFF
OUTPUT LEVEL
POWER
- mixer
Interfacing to a Mixing Console
The TERMINATOR can accept stereo sends at all system levels. The input circuitry of the TERMINATOR
can easily accept professional levels while having enough input and output gain to interface with the low
signal levels of home recording systems.
The TERMINATOR may be connected to a mixing console connecting the unit directly to the channel insert
socket of a single channel that is to be processed. Another way of interfacing the TERMINATOR to a mixer
or recording console would be in-line between the output of your mixing console and the input of a tape
deck or power amplifier. This last setup would be used only if you wanted to process the entire mix.
Using Inserts
Inserts
INPUT 1
MIXING CONSOLE
R
LTO
INPUT 2
OUTPUT 1
UP
PROCESS
OVERFLOW
MODE
DOWN
ENTER
ESC
OUTPUT 2
TERMINATOR
ON
OFF
TERMINATOR
UTIL
CHSEL
10
INPUT LEVEL
OFF
10
OUTPUT LEVEL
DIGITAL
AUTO FEEDBACK
OFF
POWER
In the above figure it is described the situation in which you want to apply the TERMINATOR to a couple
of channels arriving to a mixing console, in order to apply the desired dynamic process to single instruments'
signals; in this case you will have to use a mixer which features individual channel inserts. Insert jacks
on the back of a mixer provide a way of 'inserting' external processing equipment into the signal path.
The insert occurs after the input amplifier, and before the channel fader; essentially it is the same as
connecting the source (instrument or mic) into the TERMINATOR before the mixer's channel input. Usually,
insert connections require a special, stereo-splitting Y-cord to be connected, known as TRS connector.
This connector has a stereo jack which plugs into mixer's channel insert socket, and a couple of jacks
(input and output) which will plug into TERMINATOR via suitable jack-XLR adapters. Fitting this kind
of cabling will virtually insert into one mixer's channel the compression processing. Take good care in
adjusting TERMINATOR input and output levels, in order to satisfy the dynamics needs of both the
processed channels.
Do not use for the TERMINATOR the effects send/return connections found on most mixers for effect
modules, as they could lead to heavy frequency response alterations.
Improper level setting when using a dynamic processor is the most common cause of noise and distortion
problems
6
5. OPERATIONAL OVERVIEW
Switching ON the TERMINATOR , after an initialization procedure, the last stored preset will be loaded.
Changes not saved will be lost .
To load exactly the last preset configuration running before shutdown of the TERMINATOR , it's necessary
to store these modifications using the STORE Function available into the UTILITY Menu. After the
initialization procedure, on the LCD it will appear the first field of the UTILITY Menu and the UTILITY LED
Button will turn ON.
Utility Button(13): To access the UTILITY Menu it's necessary to push the UTILITY Button (13).
If the unit is already working on Utility Menu (Utility LED (4) = ON) each further use of the button will have
no effect.
Using the Utility Menu is possible to access the following functions :
Load Preset: this function allows the loading of one of the 65 available presets, where the first preset is
factory preset, and the presets from 2 to 65 are the User's configurable presets and all not initialized
(Empty) when the unit is shipped.
To Load a preset:
Select "Load Preset" using up/down buttons
Press enter button to access further sub menu
Select the chosen preset using up/down buttons
Press enter to load the preset or press esc button if you decide to not load anymore the preset
Once terminated the sequence above, on the display will appear the name of the selected preset and the
system will go back to the starting menu.
Store Preset: this function allows the storing on one of the 64 available memory locations the modified
(using the Editing Menu) user's presets, starting from the available factory preset.
To Store a preset:
Select "Store Preset" using up/down buttons
Press enter button to access the further sub menu
Select the memory location (Empty or already occupied from a previous user's preset) where to store the
new user's preset using up/down buttons
If you want to give up, press esc to go back to the main menu without storing the new preset otherwise
press enter to store the new preset. The user can choose the identification name for the new preset using
6 characters max. The blinking character show the character will be modified using the up/down buttons.
When chosen the character, press enter to confirm the character itself and pass to the next one. Pressing
th
esc before the 6 character, the old name will be maintained as name of the new preset. Pressing enter on
as confirmation of the 6 th character, the new preset will be stored with the new name. There is no possibility
to correct a confirmed character, if necessary to change again the name, repeat the storing process from
the beginning.
Once terminated the sequence above, on the display will appear the name of the new stored preset and
the system will go back to the starting menu.
MIDI Setup: the MIDI SETUP utility allows the user to set up the TERMINATOR MIDI configuration. The
configurable MIDI parameters are:
MIDI Channel: allows to define the MIDI CHANNEL to associate to the TERMINATOR when connected
to remote MIDI devices. When MIDI CHANNEL is set to OFF, the TERMINATOR will ignore whatever
MIDI command coming from the external MIDI devices.
MIDI Output: When this function is set as ON is possible to ECHO on the MIDI output of the TERMINATOR
all the incoming MIDI messages.
Terminator Setup: This utility is designed to set the operating modes of the unit:
Terminator mode that allows the user to select between the use of feedback suppression filters with
constant or variable Q. When variable Q is selected, the system, in the case of persistent feedbacks, uses
the previously set filters, enlarging their band, in order to suppress feedbacks which change moderately
in frequency.
Search Mode selects the channel to be processed, in order to optimize speed of the DSP engine.
Gain Mode allows the user to set the automatic feedback suppression filters timeout; if Gain Mode =
7
Gain Var, in absence of feedbacks the suppression filters are slowly excluded from the signal path, unless
a feedback occur again. If Gain Mode = Gain Cst , suppression filters are left in place, until they are
required by a feedback at another frequency.
Threshold Setup: this utility allows to set the threshold value (0,..,99) beyond which a monochromatic
(sinusoidal) signal is treated as a feedback and intercepted.
Filter Edit: accessing this utility it is possible to set the single filter's operational mode:
1.Filter Mode: In MANUAL mode the user can assign a filter that won't be changed by the machine
(advisable for fixed mics), while in AUTOMATIC mode the filter will be available to the DSP engine's
needs (advisable for hand mics).
2.Frequency Adjust: selects the filter central frequency from 20Hz to 20 KHz with steps of 10/27 Oct
(27 steps).
3.Frequency Fine: selects the filter central frequency from 20Hz to 20 KHz with steps of 1/729 Oct.
4.Band Width: selects the filter band with from 1/70 Oct 20Hz to 1/3 Oct in 6 steps.
5.Gain: selects the filter gain from 0dB up to -45dB with steps of 3dB (16 steps)
Filter Reset: It resets all the active filters either manual or automatic, of the selected channel.
Filter View: This function shows the user all the characteristics of the filters' settings: mode, frequency,
band width, attenuation.
Bypass System: This utility allows the accurate setting of the analog signal level; the TERMINATOR
stops processing the signal and on the VU-meters it is shown the level of the input signal. To exit, push
Enter or Esc.
SelCh Key (14) : This key selects the channel on which to edit parameters. When (ChSel LED (4)) is off,
it is possible to select the channel, when this LED is on, the SelCh key is disabled.
Terminator Key (12) : This key starts the feedback search engine. This is confirmed by the LED (Terminator
LED (2)) on and by the display, on which there will be on a double row the list of the inserted suppression
filters. Each filter will be indicated by a symbol:
The symbol 'M' indicates the filter is Manual
The symbol '*' indicates the filter is Automatic but not yet active
The symbol '0' indicates the filter is Automatic and has parameters:1/70 Oct / -45dB
The symbol '1' indicates the filter is Automatic and has parameters: 1/50 Oct / -45dB
The symbol '2' indicates the filter is Automatic and has parameters: 1/30 Oct / -45dB
The symbol '3' indicates the filter is Automatic and has parameters: 1/7 Oct / -45dB
The symbol '4' indicates the filter is Automatic and has parameters: 1/5 Oct / -45dB
The symbol '5' indicates the filter is Automatic and has parameters: 1/3 Oct / -45dB
The Terminator Search LED (2) is blinking when the feedback control engine is running; the blinking
speed varies according to the number of found feedbacks.
The Manual Filters LEDs (6) show (LED = ON) the number of manual filters inserted by the user . during
Bypass operation, they act as VU-meters.
Output Attenuation This control allows the digital output volume setting. This parameter is a "system
parameter" and its modification acts on all the presets.
Up/Down Button (8/9): these buttons are used to move inside the menus and to modify the parameter's value
Enter/Esc Button (10/11): these buttons are used to access or to leave the several menus, or to confirm
or not the parameter's value.
6. GET IT STARTED
1. Setup your system with correct microphone levels.
2. From Utility Menu access "Bypass System" function.
3. Using the provided VU-meters adjust the input level of the TERMINATOR to match your system dynamics.
4. Use the Output level control to feed correct levels to Mixer or Power amp.
5. Position the micr o phones on stage, and do a sound check, trying to stimulate feedbacks (ie. loud singing
in the vicinity of a loudspeaker system). Access the "Threshold Setup" function from the Utility Menu and set
the threshold value at the highest possible level still allowing a fast (about 1 sec) elimination of feedback bursts.
8
7. PROCESSES FUNCTIONAL DATA
Terminator Setup:
Selectable Manual Filters Number: 0-12 notch filters.
Threshold: min-max in 100 steps.
Antilarsen Mode: Only Ch1, Only Ch2, Ch1 & Ch2.
Reset All Filters.
Automatic Larsen Search with constant Q notches.
Automatic Larsen Search with variable Q notches.
Automatic notch filter Erase.
Manual user-selectable filters.
Manual Filter Edit:
Frequency Adjust: 20 Hz/20kHz step 1 oct.
Fine Frequency Adjust: 20 Hz/20kHz step 1/60 oct.
Filter Attenuation: 0/-45 dB step 3 dB.
8. TERMINATOR BLOCK SCHEME :
8.1 System Menu
Input1
12 Notch filter
Terminator
Actived ?
yes
Terminator Block
Larsen ?
no
no
G Mode =
Gain Var ?
yes
no
Notch(Nfilt)
Automatic ?
yes
no
Gain(Notch(Nfilt))
=0dB ?
Gain + 3dB
no
NFilt<11
NFilt=0
yes
NFilt++
9
Insert Notch
Output1
8.2 Utility Menu
start
Load Preset
StorePreset
Up/Down
Enter/Esc
Select preset 1,...,65
Select Preset 2,...,65
Preset User
Enter
Edit Name 1
Edit Name 2
Up/Down
Esc
Edit Name 6
Enter/Esc
Terminator Setup
Up/Down
Teminator Mode
Notch Qvar / Notch Qcst
Search Mode
Ch1 / Ch2 / Ch1&2
Gain Mode
Gain Cst / Gain Var
Threshold Setup
Filter Edit
Thr = 0,...,99
Filter 01
Up/Down
Filter 12
Mode
Manual / Automatic
Freq Adj
20Hz/20KHz; step 10/27Oct
Freq Fine
20Hz/20KHz; step 10/729 oct
Band Width
1/70, 1/50, 1/30, 1/7, 1/5 ,1/3 oct
Gain
0dB/-45dB step 3dB
Filter Reset
MIDI Setup
Yes (enter) / no (esc)
MIDI Channel
OFF,1,...16,OMNI
MIDI Output
OFF / ON
View Filter
Bypass
Filter 01,...,12
Enter / Esc
10
Bypass System
8.3 MIDI
a. Change Preset
MIDI 1 st byte PROGRAM CHANGE
nd
MIDI 2 byte 0,...,64
nd
Preset
Legend
0
Preset 1
Factory Preset
1,...,64
Preset 2,...,65
User Preset
MIDI 2
byte
b. Change Channel
st
MIDI 1 byte CONTROL CHANGE
Parameter
Select Channel
MIDI 2
nd
MIDI 3
byte
rd
Legend
byte
0,1
14
Ch1, Ch2
9. TECHNICAL SPECIFICATIONS
Analog Input section
Inputs:
Input Impedance:
Max. input Level:
Sensitivity:
Analog variable gain, 2 XLR-F electronically balanced
44 kOhms
15 dBu (4.4V RMS)
-22 dBu (63mV RMS)
Analog Output section
Outputs:
Output Impedance
Max. output level:
Analog variable gain, 2 XLR-M electronically balanced
<150 Ohms
17 dBu on 600 Ohms (5.5V RMS)
Digital / Analog Interface
Amplitude Response:
Signal to Noise Ratio
THD+N
Group Delay
Sampling Frequency
Conversion
Digital
Processor Speed:
DSP Resolution:
Control:
MIDI Section
Connections:
Sockets
Mode
20 Hz - 20 kHz + 0.1 / - 1 dB
90 dB("A"-20Hz/ 20KHz)
0.03 % @ 1kHz -6 dB (VU-meter level)
700 s
46.875 kHz
1 bit Sigma-Delta
12 MIPs
24 32 bits
Microprocessor
Input/Output/Thru
5-poles DIN (female)
Photocoupled
Power Supply
Connector type:
Type:
Mains supply:
Power Rating:
3-pole IEC, grounded
Servo controlled, stabilized
115V or 230V 50/60 Hz
9W
User Interface
Alphanumeric LCD Display:
Keyboard:
VU meter:
2 20 characters
7 user keys / 5 LEDs
2 6 LEDs(double function)
Physical
Size:
Dimensions (W/H/D):
Net weight:
Standard 19'' rack mounting
483mm 44mm 232.5mm (19.32''
3.8kg
11
1.76''
9.3'')
10. WARRANTY
1 WARRANTY CARD
To be protected by this warranty, the buyer must complete and return the enclosed warranty card (signed
/stamped by retail dealer) within 14 days of the date of purchase to LTO. Failure to return the card in
due time (date as per postmark) will void any extended warranty claims.
2 WARRANTY CLAIMS
1. LTO warrants the mechanical and electronic components of this product to be free of defects in material and
workmanship for a period of one (1) year from the original date of purchase, in accordance with the warranty
regulations described below. If any defects occur within the specified warranty period that are not caused by
normal wear or inappropriate use, LTO shall, at its sole discretion, either repair or replace the product.
2. Warranty claims other than those indicated above are expressly excluded.
3 RETURN NOTICE
1. To obtain warranty service, the product must be returned in its original shipping carton. A description of the problem
will be appreciated.
2. Shipments without freight prepaid will not be accepted.
4 WARRANTY REGULATIONS
1. Warranty services will be furnished only if the product is accompanied by an original retail dealer's invoice.
Any product deemed eligible for repair or replacement by LTO under the terms of this warranty will be
repaired or replaced within 30 days of receipt of the product at LTO.
2. If the product needs to be modified or adapted in order to comply with applicable technical or safety standards
on a national or local level, in any country which is not the country for which the product was originally developed and manufactured, this modification/adaptation shall not be considered a defect in materials or
workmanship. The warranty does not cover any such modification/adaptation, irrespective of whether
it was carried out properly or not. Under the terms of this warranty, LTO shall not be held responsible for any
cost resulting from such a modification /adaptation.
3. Free inspections, maintenance/repair work and replacement of parts are expressly excluded from this
warranty, in particular if caused by inappropriate use. Likewise, the warranty does not cover defects of expendable parts caused by normal wear of the product.
Expendable parts are typically faders, potentiometers, switches and similar components.
4. Damages/defects caused by the following conditions are not covered by this warranty:
misuse, neglect or failure to operate the unit in compliance with the instructions given in the user or service
manuals.
Connection or operation of the unit in any way that does not comply with the technical or safety regulations
applicable in the country where the product is used.
Damages/defects that are caused by force majeure or by any other condition beyond the control of LTO.
5. Any repair carried out by unauthorized personnel will void the warranty.
6. Products which do not meet the terms of this warranty will be repaired exclusively at the buyer's expense.
LTO will inform the buyer of any such circumstance.
If the buyer fails to submit a written repair order within 4 weeks after notification, LTO will return the unit
C.O.D. With a separate invoice for freight and packing.
Such cost will also be invoiced separately when the buyer has sent in a written repair order.
5 WARRANTY TRANSFERABILITY
This warranty is extended exclusively to the original buyer (customer of retail dealer) and is not
transferable to anyone who may subsequently purchase this product. No other person (retail dealer,
etc.) shall be entitled to give any warranty promise on behalf of LTO.
6 CLAIM FOR DAMAGES
Failure of LTO to provide proper warranty service shall not entitle the buyer to claim (consequential)
damages. In no event shall the liability of LTO exceed the invoiced value of the product.
7 OTHER WARRANTY RIGHTS
This warranty does not exclude or limit the buyer's statutory rights provided by national law, in particular,
any such rights against the seller that arise from a legally effective purchase contract.
12