1
with SmartCard
User Manual
© 2009 Koninklke Philips Electronics N.V. and its aliates. All rights reserved.
TABLE OF CONTENTS
Chapter : Package Contents ................................................................................................................
Chapter : Warnings and Cautions ......................................................................................................
. Warnings....................................................................................................................................
. Cautions ....................................................................................................................................
. Intended Use .............................................................................................................................
. Contraindications....................................................................................................................
. Precautions ...............................................................................................................................
Chapter : Introduction to the Device ..............................................................................................
. Definitions ................................................................................................................................
. What is Bi-level Ventilation? ..................................................................................................
. What is the Device? ..................................................................................................................
. Symbols ......................................................................................................................................
. How to Contact Respironics ..................................................................................................
Chapter : Device Controls and Display Features .............................................................................
. Pressure On/Off Button..........................................................................................................
. Control Panel .........................................................................................................................
.. Control Buttons ..........................................................................................................
.. Alarm and Power Indicators .......................................................................................
.. Display Screen ...............................................................................................................
.. Breathing Circuit Connection...................................................................................
.. Rear Panel .....................................................................................................................
Chapter : Setting up the Device .......................................................................................................
. Installing the Air Filters ......................................................................................................
. Where to Place the Device ...................................................................................................
. Connecting the Breathing Circuit .....................................................................................
. Complete Setup .......................................................................................................................
. Plugging the Device In ..........................................................................................................
.. Using AC Power ............................................................................................................
.. Using DC Power............................................................................................................
Chapter : Operating the Device.......................................................................................................
. Starting the Device................................................................................................................
. Changing the Device Settings..............................................................................................
.. Changing the Humidifier Setting ..............................................................................
.. Navigating the User Display Screens .........................................................................
... Changing the Flex Setting ................................................................................
... Changing the Rise Time Setting ........................................................................
... Changing the Ramp Starting Pressure..............................................................
... Changing the LED Backlight Setting ..............................................................
. Monitoring Measured Parameters .......................................................................................
Chapter : Alarms .................................................................................................................................
. Introduction to Alarms ........................................................................................................
. What to Do When an Alarm Occurs....................................................................................
. Alarm Tables ............................................................................................................................
.. High Priority Alarms ...................................................................................................
.. Medium Priority Alarms ..............................................................................................
.. Low Priority Alarms.....................................................................................................
Chapter : Troubleshooting ...............................................................................................................
Chapter : Cleaning and Maintenance .............................................................................................
. Cleaning the Device ..............................................................................................................
. Cleaning or Replacing the Inlet Filters .............................................................................
. Carrying Case..........................................................................................................................
Chapter : Accessories ......................................................................................................................
. Adding a Humidifier ............................................................................................................
. Adding Oxygen to the Device.............................................................................................
Chapter : Specifications ...................................................................................................................
Appendix A: EMC Information ............................................................................................................
1
CHAPTER 1: PACKAGE CONTENTS
Your device should include the following items. If any of these items are missing, contact your health
care professional.
Carrying Case
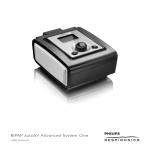
BiPAP autoSV Advanced
with SmartCard™
Disposable
Ultra-fine Filter
Reusable Gray
Foam Filters
User Manual
Filter Cap
Power Cord
Flexible Tubing
1.83 m (6 ft.) x 22 mm i.d.
External AC Power Supply
User Manual
2
CHAPTER 2: WARNINGS AND CAUTIONS
WARNING:
Indicates the possibility of injury to the user or operator.
CAUTION:
Indicates the possibility of damage to the device.
NOTE:
Places emphasis on an operating characteristic.
2.1 WARNINGS
•
This manual serves as a reference. The instructions in this manual are not intended to supersede
the instructions of your health care professional.
•
•
•
•
•
You should read and understand this entire manual before using the device.
The device is not intended to provide your total ventilatory requirement.
The prescription must only be adjusted by a trained health care professional.
Use only the breathing circuit provided by your health care professional.
When using a breathing circuit that contains a mask with an integrated exhalation port or a
circuit with a separate exhalation device, do not tape, seal, or otherwise block the vent openings.
If oxygen is used with the device, the oxygen flow must be turned off when the device is not in use.
If you are using oxygen, the device must be equipped with the Respironics Pressure Valve (Part
number 302418). Failure to use the Pressure Valve could result in a fire hazard.
Oxygen supports combustion. Oxygen should not be used while smoking or in the presence of an
open flame.
Do not use the device in the presence of a flammable anaesthetic mixture in combination with
oxygen or air, or in the presence of nitrous oxide.
Do not use the device if the room temperature is above 35°C. If the device is used at room
temperatures above 35° C, the temperature of the airflow may exceed 41°C, which could cause
irritation to your airway.
Do not operate the device in direct sunlight or near a heating appliance because these conditions
can increase the temperature of the air coming out of the device.
In order to ensure proper protection against electrical shock, only communications accessories
with an IEC 60601-1 approved power supply may be connected through the SleepLink interface.
All IEC 950 devices must only be connected to the 7-pin connector with the Respironics
Isolation cable (Part Number 1012865).
For proper use, the power supply must be placed feet down, in the upright position.
•
•
•
•
•
•
•
•
•
When the device is used with a humidifier, position the humidifier so that the water level in the
humidifier is lower than you, and the humidifier is on the same level or lower than the device.
•
Do not attempt to wear your mask without the device turned on. Doing so could result in
CO2 rebreathing.
User Manual
3
•
If you notice any unexplained changes in the performance of the device, if it is making
unusual or harsh sounds, if it and/or the power supply has been dropped or mishandled, if
the enclosure is broken, or if water has entered the device, discontinue use and contact your
health care professional.
•
Repairs and adjustments must be performed by Respironics - authorized service personnel only.
Unauthorized service could cause injury, invalidate the warranty, or result in costly damage.
•
Periodically inspect electrical cords, cables, and the power supply device for damage or signs of wear.
•
To avoid electrical shock, unplug the device before cleaning.
•
Pins of connectors identified with the ESD warning symbol should not be touched. Connections
should not be made to these connectors unless ESD precautionary procedures are used.
Precautionary procedures include methods to prevent build-up of electrostatic discharge (e.g., air
conditioning, humidification, conductive floor coverings, non-synthetic clothing), discharging
one’s body to the frame of the equipment or system or to earth or a large metal object, and
grounding oneself by means of a wrist strap to the equipment or system or to earth.
2.2 CAUTIONS
•
The device may only be operated at temperatures between 5°C and 35°C.
•
A properly installed, undamaged reusable foam inlet filter is required for proper operation.
•
Do not immerse the device or allow any liquid to enter the enclosure or the inlet filter.
•
Do not place the device in or on any container that can collect or hold water.
•
Condensation may damage the device. Always allow the device to reach room temperature
before use.
•
Use the power cable retainer to keep the power cord from being unintentionally disconnected.
NOTE:
Additional warnings, cautions, and notes are located throughout this manual.
User Manual
4
2.3 INTENDED USE
The BiPAP autoSV Advanced is intended to provide mask-applied non-invasive ventilatory support to
adult patients (>30 kg) for the primary treatment of obstructive sleep-disordered breathing with secondary
Central Sleep Apnea or Cheyne-Stokes Respiration (CSR). The device may be used in the hospital or
home. The device is intended for use with nasal masks and full-face masks as recommended by Respironics.
The device is to be used only on the instruction of a trained health care professional.
2.4 CONTRAINDICATIONS
The device should not be used if you have severe respiratory failure without a spontaneous respiratory
drive.
If any of the following conditions apply to you, consult your physician before using the device:
•
Inability to maintain an open airway or adequately clear secretions
•
•
•
At risk for aspiration of gastric contents
•
•
Epistaxis, causing pulmonary aspiration of blood
Diagnosed with acute sinusitis or otitis media
Allergy or hypersensitivity to the mask materials where the risk from allergic reaction outweighs
the benefit of ventilatory assistance
Hypotension
2.5 PRECAUTIONS
•
Immediately report any unusual chest discomfort, shortness of breath, or severe headache.
•
If skin irritation or breakdown develops from the use of the mask, refer to the mask instructions
for appropriate action.
•
The following are potential side effects of noninvasive positive pressure therapy:
— Ear discomfort
— Conjunctivitis
— Skin abrasions due to noninvasive interfaces
— Gastric distention (aerophagia)
User Manual
5
CHAPTER 3: INTRODUCTION TO THE DEVICE
3.1 DEFINITIONS
The following terms appear throughout this manual:
Apnea
A condition marked by the cessation of spontaneous breathing.
BPM
Breaths Per Minute
CPAP
Continuous Positive Airway Pressure
EPAP
Expiratory Positive Airway Pressure
Exhaled Tidal Volume (VTE )
The exhaled volume of each breath
High Priority Alarm
An alarm signal indicating a condition that requires immediate attention.
IPAP
Inspiratory Positive Airway Pressure
LED
Light Emitting Diode
LEAK
The amount of airflow leak detected by the device.
Low Minute Ventilation
A condition in which you are not receiving a specified volume of air on
a per minute basis.
Low Priority Alarm
An alarm signal indicating an informational message.
Max EPAP pressure
The maximum EPAP setting established by the health care professional.
Max PS pressure
The maximum Pressure Support setting established by the health care
professional.
Max Pressure
The maximum pressure setting established by the health care
professional.
Medium Priority Alarm
An alarm signal indicating a condition that requires operator awareness.
Min EPAP pressure
The minimum EPAP setting established by the health care professional.
Min PS pressure
The minimum Pressure Support setting established by the health care
professional.
Minute Ventilation (MinVent)
The volume of air received by the patient on a per minute basis.
Operate State
The state of the device when the device and the airflow are both on.
OSA
Obstructive Sleep Apnea
Ramp
A feature that may increase patient comfort when therapy is started. The
ramp feature reduces the pressure and then gradually increases (ramps) the
pressure to the prescription setting, so you can fall asleep more comfortably.
Respiratory Rate (RR)
The patient’s rate of respiration.
Rise Time
The time it takes for the device to change from EPAP to IPAP. You can
adjust this time for your comfort.
Standby State
The state of the device when the device is on, but the airflow is off.
User Manual
6
3.2 WHAT IS BI-LEVEL VENTILATION?
Bi-level ventilation with the device helps you to breathe by supplying two levels of air pressure. The device
provides a higher pressure—known as IPAP (Inspiratory Positive Airway Pressure)—when you inhale, and
a lower pressure—known as EPAP (Expiratory Positive Airway Pressure)—when you exhale. The higher
pressure makes it easier for you to inhale, and the lower pressure makes it easier for you to exhale.
IPAP
Pressure
EPAP
Pressure
Rise Time
Time
Figure 3–1 IPAP and EPAP Breathing Levels
You can adjust the Rise Time to make the pressure change more comfortable.
3.3 WHAT IS THE DEVICE?
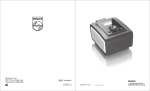
The device, shown in Figure 3–2, supplies air pressure through a breathing circuit.
Figure 3–2 The Device
User Manual
7
A breathing circuit, shown in Figure 3–3, consists of:
•
Circuit tubing to deliver air from the device to your interface (e.g., mask)
•
A mask or other patient interface device to deliver the prescribed pressure to your nose or nose
and mouth, depending on which interface has been prescribed for you
•
An exhalation device to vent exhaled air from the circuit
Patient
Interface
(Typical)
Patient
Interface
(Typical)
Exhalation
Port
Mask's
Connector
Exhalation
Device
Circuit
Tubing
Circuit
Tubing
Circuit with Separate
Exhalation Device
Flexible
Tubing
Connector
Circuit with Mask with
Integrated Exhalation Port
Figure 3–3 Two Typical Breathing Circuits
NOTE:
The exhalation port may be part of the mask or may be part of a separate exhalation device, but
is required to minimize the potential for CO2 rebreathing.
The system senses your breathing effort and changes pressure levels when you inhale and exhale depending
on the mode of operation.
WARNING:
The device can operate on AC or DC power. The DC power option is not intended as a
battery backup.
CAUTION:
When DC power is obtained from a vehicle battery, the device should not be used while
the vehicle’s engine is running.
User Manual
8
3.4 SYMBOLS
The symbols shown below are used on the device, the AC power supply, and throughout this manual.
Symbol
Meaning
Attention, consult accompanying documents
DC Power
Pressure On/Off
Type BF Applied Part
Class II (Double Insulated)
European CE Declaration of Conformity
Canadian/US Certification
Electrostatic Discharge
IPX1
Drip Proof Equipment
UL Recognized for Canada and the United States
TUV Safety Standard Compliance
No User Serviceable Parts
Compliant with the Waste Electrical and Electronic
Equipment/Restriction of the Use of Certain Hazardous
Substances in Electrical and Electronic Equipment
(WEEE/RoHS) recycling directives.
3.5 HOW TO CONTACT RESPIRONICS
To have your device serviced, contact your health care professional. If you need to contact Respironics directly,
call the Respironics Customer Service department at 1-724-387-4000 or +49 8152 93060. You can also use
one of the following addresses:
Respironics
1001 Murry Ridge Lane
Murrysville, PA 15668
Respironics Deutschland
Gewerbestrasse 17
82211 Herrsching, Germany
Visit Respironics web site at: www.respironics.com
User Manual
9
CHAPTER 4: DEVICE CONTROLS AND DISPLAY FEATURES
Figure 4–1 shows the location of the device’s alarm power indicators, control panel, Pressure On/Off
button, and the breathing circuit connection.
Alarm and Power
Indicators
Control Panel
Breathing Circuit
Connection
Pressure On/Off Button
Figure 4–1 Device Front and Top
4.1 PRESSURE ON/OFF BUTTON
The device’s Pressure On/Off
airflow.
button, located on the side of the device, starts and stops the device’s
•
To turn the airflow on, press the button in, as shown in Figure 4–2. This puts the device in the
Operate state.
•
To turn the airflow off, press the button again. This puts the device in the Standby state.
Airflow
Off
Airflow
On
HEAT
HEAT
Figure 4–2 Pressure Button On/Off Positions
When the device is in Standby, any ramp in progress is terminated, the alarms are reset (except for the
System Errors alarm), and the humidifier is turned off.
The
button is independent of the display screen.
User Manual
10
4.2 CONTROL PANEL
The control panel contains the following control buttons and indicators.
4.2.1 CONTROL BUTTONS
The control buttons on the control panel are shown in Figure 4–3.
Scroll
Button
RESET
Alarm
Reset
Button
RESET
RESET
HEAT
RAMP
Heated
Humidifier
Button
SILENCE
SILENCE
User
Buttons
Ramp
Button
Alarm
Silence
Button
Figure 4–3 Control Panel
HEAT
RAMP
When the optional REMstar Heated Humidifier has been
prescribed, this button controls the humidifier’s output. Follow
the instructions included with the humidifier. You can also use
this button to adjust the settings shown in the user menu screens.
When the airflow is turned on and the ramp function is enabled,
this button lowers the airflow pressure, allowing you to fall asleep
more easily. You can also use this button to adjust the settings
shown in the user menu screens.
Press the left and right user buttons to navigate the user menu
screens.
SILENCE
SILENCE
RESET
RESET
This button silences the audible portion of an alarm for one
minute. You can also use this button to exit the user menu
screens.
This button allows you to clear an alarm and reset the device for
alarm detection.
Use this button to scroll through the monitoring parameters.
User Manual
11
4.2.2 ALARM AND POWER INDICATORS
Figure 4–4 shows the device’s alarm and power indicators.
High Priority
Alarm LED (Red)
AC Power
Indicator (Green)
DC Power
Indicator (Green)
Low/Medium Priority
Alarm LED (Yellow)
Figure 4–4 Alarm and Power Indicators
The green AC Power LED lights up when the device is connected
to AC Power.
The green DC Power LED lights up when the device is connected
to DC power.
The red High Priority Alarm LED lights up when a high priority
alarm occurs.
The yellow Low/Medium Alarm LED lights up when a medium
or low priority alarm occurs.
NOTE:
All LED indicators temporarily turn on when the device is first plugged in.
4.2.3 DISPLAY SCREEN
The display shows you the measured pressure and displays alarm messages. A backlight activates when any
of the buttons are pressed and remains on until there are no buttons pressed for one minute. Figure 4–5
shows the display screen.
Figure 4–5 Display Screen
User Manual
12
The information shown on the display screen is defined as follows:
Indicates that the device requires user attention as indicated on the screen.
A
BPM
Indicates that an apnea alarm has occurred.
Indicates that a breath rate setting is being displayed. This symbol flashes when the device
is providing timed backup breaths.
Indicates that a SmartCard is inserted and detected.
cm H2O
EPAP
EPAP
FLEX
Indicates that the alphanumeric digits are displaying a pressure value.
Indicates that a maximum EPAP pressure setting is being displayed.
Indicates that a minimum EPAP pressure setting is being displayed.
Indicates that Bi-Flex is turned on and/or its setting is displayed.
Indicates that the humidifier is turned on and/or its setting is displayed.
Indicates that the Therapy Hour Meter is being displayed.
LEAK
Indicates that the Estimated Leak Rate is being displayed.
Indicates that the control pad LED backlight setting is being displayed or is active.
LPM
MinVent
ml
Indicates that the value displayed is in liters per minute.
Indicates that the Estimated Minute Ventilation is being displayed.
Indicates that the value displayed is in milliliters.
Indicates that a Patient Disconnect alarm is active.
Indicates that the maximum Pressure setting is being displayed.
Indicates that the maximum Pressure Support setting is being displayed.
Indicates that the minimum Pressure Support setting is being displayed.
Indicates that the Ramp function is in progress.
Indicates that the Ramp Starting Pressure is being displayed.
RR
Indicates that the Respiratory Rate (RR) is being displayed.
Indicates that a rise time setting is being displayed.
s
VTE
The small “s” on the right side of the display (above “cm H2O”) indicates that the
alphanumeric digits are displaying a time value, in seconds.
Indicates that the Estimated Exhaled Tidal Volume is being displayed.
User Manual
13
4.2.4 BREATHING CIRCUIT CONNECTION
Figure 4–6 shows where the circuit tubing connects to the device.
Patient Interface
Exhalation Port
Circuit
Tubing
Bacteria
Filter
(Optional)
Breathing
Circuit
Connection
Figure 4–6 Typical Breathing Circuit Connection
4.2.5 REAR PANEL
Figure 4–7 shows the device’s rear panel.
Communications
Connector Port
Power Inlets
Cord Retainer
SmartCard
Connector
Cord Retainer
Filter Cap
Figure 4–7 Rear Panel
NOTE:
The SmartCard Connector is located on the side of the device.
WARNING:
In order to ensure proper protection against electrical shock, only communications
accessories with an IEC 60601-1 approved power supply may be connected through the
SleepLink interface. All IEC 950 devices must only be connected to the 7-pin connector
with the Respironics Isolation cable (Part Number 1012865).
The rear panel contains the following:
Communications
Connector
This connector accepts the Respironics Communications cable for computer
and external communications or a remote alarm. (Use only with an IEC 60950
approved computer.)
Power Inlets
There are two power inlets on the rear panel, one for connecting the external AC
power supply and another for connecting the external DC power adapter.
Filter Cap
The filter cap can be removed to inspect the inlet air filters.
Cord Retainers
Two cord retainers are located on the rear panel to provide strain relief for the
power cord.
User Manual
14
CHAPTER 5: SETTING UP THE DEVICE
5.1 INSTALLING THE AIR FILTERS
The device uses one or two removable filters at the air inlet. The disposable white ultra-fine filter is optional.
You must install the gray foam filter before operating the device. The foam filter is washable and reusable.
CAUTION:
A properly installed, undamaged foam filter is required for proper operation.
Communication Port
Reusable Gray
Foam Filter
(required)
Filter Cap
Disposable Ultra-fine
Filter (optional)
Figure 5-1 Installing the Air Filters
To install the air filters, complete the following steps:
.
If you are using the optional white ultra-fine filter, place it against the gray foam filter so the soft side
of the ultra-fine filter touches the gray foam filter. When the filters are installed, the hard plastic side of
the white filter will touch the inside of the device.
.
Slide the filters into the air inlet at the rear of the device (with the white filter going in first, if it’s
used). Push them down into the recess as shown in Figure 5-1.
.
Position the cap so that the small opening on the cap is facing down.
.
Snap the cap into place.
NOTE:
The filter cap should be installed with the air inlet opening at the bottom.
See Chapter 9 for information about cleaning or replacing the filters.
5.2 WHERE TO PLACE THE DEVICE
Place the device on its base somewhere within easy reach of where you will use it. Make sure that the air
inlet on the rear of the device is not blocked. Place the device on a hard, flat surface. If you block the air
flow around the device, the device may not work properly.
WARNING:
Position the humidifier so the water level is lower than you, and the humidifier is on the same
level or lower than the device. See the humidifier instructions for complete setup information.
User Manual
15
5.3 CONNECTING THE BREATHING CIRCUIT
To connect your breathing circuit to the device, complete the following steps:
1.
Connect one end of the circuit tubing to the outlet of the bacteria filter (if using one) and connect the
inlet of the bacteria filter to the large connector on the device as shown in Figure 5–2.
If you are not using a bacteria filter, connect the end of the circuit tubing directly to the outlet
connector on the device.
NOTE:
Follow the recommendations of your health care professional for using the optional bacteria filter.
Circuit
Tubing
Bacteria
Filter
(Optional)
Figure 5–2 Connecting the Tubing to the Outlet
2.
Connect the tubing to the mask:
A.
If you are using a mask with a built-in exhalation port, connect the mask’s connector to the
circuit tubing, as shown in Figure 5–3.
Exhalation
Port
Mask's
Connector
Flexible
Tubing
Connector
Figure 5–3 Connecting a Mask with a Built-In Exhalation Port
User Manual
16
B.
If you are using a mask with a separate exhalation device, connect the open end of the circuit
tubing to the exhalation device as shown in Figure 5–4. Position the exhalation device so
that the vented air is blowing away from your face.
Circuit Tubing
Exhalation Port
Figure 5–4 Connecting a Exhalation Device
Connect the mask’s connector to the exhalation device, as shown in Figure 5–5. See the
mask instructions for complete setup information.
Mask or Other Interface
Mask Connector
Exhalation Port
Figure 5–5 Connecting the Mask
WARNING:
3.
The exhalation device is designed to exhaust CO2 from the patient circuit. Do not block or
seal the ports on the exhalation device.
Attach the headgear to the mask. See the instructions that came with your headgear.
User Manual
17
5.4 COMPLETE SETUP
Figure 5–6 shows the completed breathing circuit setup.
Patient Interface
Exhalation Port
Circuit
Tubing
Bacteria
Filter
(Optional)
Breathing
Circuit
Connection
Figure 5–6 Complete Breathing Circuit
5.5 PLUGGING THE DEVICE IN
You can use AC or DC power to operate the device.
WARNING:
The DC power option is not intended as a battery backup when using AC power.
WARNING:
For proper use, the power supply must be placed feet down, in the upright position, as
shown in Figure 5–7.
5.5.1 USING AC POWER
Complete the following steps to operate the device using AC power:
1.
Plug the pronged end of the AC power supply’s cord into an electrical outlet.
2.
The external AC power supply features a cord retainer to provide strain relief for the AC power cord.
Wrap the cord around the AC power supply’s cord retainer, using the wire tie supplied with your
power supply.
WARNING:
Never plug the AC power supply into an outlet that is controlled by a wall switch.
WARNING:
Route the wires to avoid tripping.
User Manual
18
3.
Leaving a small amount of slack in the cord, connect the cord on the other side of the power supply
to one of the power inlets on the device, as shown in Figure 5–7. The power cord has a locking
connector. To properly plug the cord in:
a.
Pull the locking mechanism back.
b.
Push the connector into place.
c.
Release the lock.
Figure 5–7 Plugging in the AC Power Supply
NOTE:
You can plug the cord into either of the power inlets on the back of the device.
4.
Wrap the cord around the device’s power cord retainer, which provides strain relief for the power cord.
5.
Ensure that all connections are secure.
NOTE:
If you need to disconnect the power cord from the device, slide the locking connector back and
then remove the power cord.
5.5.2 USING DC POWER
You can operate the device on DC power by using the Respironics DC power adapter accessory. See the
DC power adapter instructions for more information.
CAUTION:
Use only the Respironics DC power adapter available from your health care professional.
Using any other system may cause damage to the device or the vehicle.
CAUTION:
When using DC power from a vehicle battery, the device should not be used while the
vehicle’s engine is running. Damage to the device or the vehicle may occur.
User Manual
19
CHAPTER 6: OPERATING THE DEVICE
6.1 STARTING THE DEVICE
1.
Plug in the device to an AC or DC power source to power up the device. A confirmation alarm
sounds, and the control pad buttons light up.
NOTE:
If the alarm does not sound or the buttons do not light up, the device requires servicing. Call
your health care professional.
Several screens appear initially during this step:
a.
The first screen that appears is the Self Test screen, shown in Figure 6–1. This is the internal test
performed by the device.
Figure 6–1 Self Test Screen
b.
The next screen displays the software version, as shown in Figure 6–2:
Figure 6–2 Software Version Screen
NOTE:
c.
The version number (1.0) shown in Figure 6–2 is an example. Your device may have a higher
software version installed.
The third screen to appear is the Blower Hours screen, which displays the blower hours time meter:
Figure 6–3 Blower Hours Screen
User Manual
20
NOTE:
d.
With the exception of the
button, the control pad is inactive during these first three
screens. Each of these screens appears for approximately 1-3 seconds.
The next screen that appears is the Standby screen, shown in Figure 6–4. This indicates that the
device is in the Standby state (the blower is off).
Figure 6–4 Standby Screen
2.
Press the
button to put the device into the Operate state (and turn on the airflow). The
Monitoring screen, shown in Figure 6–5, appears.
Figure 6–5 Monitoring Screen
Both the Monitoring and the Standby screens display the , A , and
symbols if these features
are enabled. Additionally, the
symbol displays if a SmartCard is inserted. The Monitoring screen
displays
, if ramp is enabled and the
button has been pressed. The actual measured pressure
is displayed with 0.1 cm H2O resolution once a breath has occurred.
3.
Put on your mask assembly when the air starts to flow.
4.
Make sure that no air is leaking from your mask into your eyes. If it is, adjust the mask and headgear
until the air leak stops. See the instructions that came with your mask for more information.
NOTE:
A small amount of mask leak is normal and acceptable. Correct large mask leaks or eye
irritation from an air leak as soon as possible.
5.
If you are using the device while sleeping, try placing the tubing from the device over your headboard.
This may reduce tension on the mask.
6.
Relax. Take normal, relaxed breaths through your nose.
NOTE:
If you are having trouble with your mask, see Chapter 8, Troubleshooting, for some suggestions.
User Manual
21
6.2 CHANGING THE DEVICE SETTINGS
You can view the following settings and indicators on the display screen:
•
Measured pressure
•
Backlight settings
•
Humidifier, SmartCard and Ramp status
•
Patient alarms
•
Measured parameters (Leak, Respiratory Rate, Minute Ventilation, Exhaled Tidal Volume)
Additionally, you can view and modify the following settings using the display screens:
•
Humidifier (heat)
•
FLEX Setting
•
Rise Time
•
Ramp start pressure
•
LED backlight
NOTE:
When changing any setting (except for the Ramp Start Pressure setting), once a maximum
setting is reached, the setting rolls back over to the minimum setting, and likewise, once a
minimum setting is reached, it rolls back over to the maximum setting provided.
For example, the minimum humidifier setting is 1 and the maximum is 5. Once the humidifier
setting is increased to 5, if you press the
button again, the setting will go back to 1. Or,
button again, the setting will
once the humidifier setting is decreased to 1, if you press the
go back to 5.
HEAT
RAMP
6.2.1 CHANGING THE HUMIDIFIER SETTING
If you are using the REMstar Heated Humidifier with your device, you can adjust the humidifier heat
setting by completing the following steps:
1.
From either the Standby or Monitoring screen, press and hold the
Humidifier Setting screen appears, as shown in Figure 6–6.
HEAT
button for several seconds. The
Figure 6–6 Humidifier Setting Screen
2.
Press the
button to increase the humidifier setting, or press the
button to decrease the setting.
You can adjust the setting from 1 to 5. The change takes effect immediately as you adjust the setting.
RAMP
HEAT
User Manual
22
3.
You can exit this screen by pressing the Left or Right User buttons or the
information on using a humidifier with the device, see Chapter 10.
4.
To turn the humidifier ON/OFF, press the
symbol appears/disappears.
HEAT
button. For additional
SILENCE
SILENCE
button until the device beeps twice and the
6.2.2 NAVIGATING THE USER DISPLAY SCREENS
You can navigate the rest of the user display screens by pressing the Left and Right User keys.
You can change the settings on any of the display screens by pressing the
or decrease the setting.
You can exit any of the user display screens by pressing the
SILENCE
SILENCE
HEAT
and
RAMP
buttons to increase
button.
Figure 6–7 shows how to navigate the user display screens using the right and left user buttons. These
screens time out after 60 seconds of inactivity.
Flex Setting Screen
Only displayed if the flex feature
is prescribed.
FLEX
Right User
Button
Left User
Button
Right User
Button
Left User
Button
Rise Time Setting Screen
Only displayed if the rise time feature
is prescribed.
Ramp Start Pressure Setting Screen
cm
H2O
Only displayed if the ramp feature
is prescribed.
Right User
Button
Left User
Button
LED Backlight Setting Screen
Figure 6–7 Navigating the User Display Screens
User Manual
23
6.2.2.1 CHANGING THE FLEX SETTING
The Flex screen is displayed only if it is prescribed. If the Flex feature is enabled, you can adjust the Flex
setting to find the setting that provides you with the most comfort.
If the screen shown in Figure 6–8 does not display, you cannot adjust this setting.
Change the Flex setting by completing the following:
Figure 6–8 Flex Setting Screen
1.
From either the Monitoring or Standby screens, press the Right User button until you reach this screen.
2.
Increase or decrease the FLEX setting by pressing the
or
buttons until the correct setting
appears. You can adjust the pressure from 1 to 3 in increments of 1.
HEAT
RAMP
6.2.2.2 CHANGING THE RISE TIME SETTING
Rise time is the time it takes for the device to change from EPAP to IPAP. When enabled, you can adjust
the rise time to find the setting that provides you with the most comfort.
If the Rise Time Setting screen shown in Figure 6–9 does not display, you cannot adjust this setting.
Change the Rise Time setting by completing the following steps:
Figure 6–9 Rise Time Setting Screen
1.
From either the Monitoring or Standby screens, press the Right User button until you reach this screen.
2.
Increase or decrease the rise time setting from 1 to 6 by pressing the
or
button until you
find the right setting. A setting of 1 is the fastest rise time, while 6 is the slowest.
HEAT
User Manual
RAMP
24
6.2.2.3 CHANGING THE RAMP STARTING PRESSURE
The device is equipped with an optional ramp feature. This feature will reduce the pressure and then
gradually increase (ramp) the pressure to the prescription pressure setting so you can fall asleep more
comfortably.
The ramp feature is not prescribed for all users. If the screen shown in Figure 6–10 does not appear on your
display, you cannot adjust this setting.
To change the ramp starting pressure setting, complete the following steps:
1.
From either the Monitoring or Standby screens, press the Right User button until the Ramp Start
Setting screen appears, as shown in Figure 6–10.
Figure 6–10 Ramp Start Setting Screen
2.
RAMP
Press the
or
button to increase or decrease the ramp starting pressure as needed. You can
adjust the setting from 4 cm H2O to the current Min EPAP pressure setting.
HEAT
6.2.2.4 CHANGING THE LED BACKLIGHT SETTING
When airflow is turned on and the device is in the Operate state, you can turn the control pad lighting
behind the buttons on or off using the LED backlight setting.
NOTE:
The lights are always on when the airflow is off and the device is in Standby.
To change the LED backlight setting, complete the following steps:
1.
From either the Monitoring or Standby screens, press the Right User button until the LED Backlight
Setting screen appears, as shown in Figure 6–11.
Figure 6–11 LED Backlight Setting Screen
2.
RAMP
Press the
or
button to select a new setting. A setting of 1 means the light is on, while 0
means the light is off.
HEAT
User Manual
25
6.3 MONITORING MEASURED PARAMETERS
You can view four measured parameters—leak, respiratory rate, minute ventilation, and exhaled tidal
volume. To access these screens from the Monitoring or Standby screens, press the small circular Scroll
button ( ) located near the
button.
RESET
RESET
Figure 6–12 shows how to navigate the measured parameter screens.
LEAK
Leak Screen
LPM
Scroll
Button
Respiratory Rate Screen
RR
BPM
Scroll
Button
Minute Ventilation Screen
MinVent
LPM
Scroll
Button
Exhaled Tidal Volume Screen
VTE
ml
Scroll
Button
Figure 6–12 Measured Parameter Screen Navigation
To return to the Monitoring or Standby Screen from these Measured Parameter screens, press the
NOTE:
1.
SILENCE
SILENCE
button.
If you view these screens from the Standby screen, each of these screens will display a value of
zero, because no therapy is being delivered.
Leak Screen
This screen, shown in Figure 6–13, shows the average of the leak values for the previous six breaths.
Figure 6–13 Leak Screen
User Manual
26
2.
Respiratory Rate Screen
This screen, shown in Figure 6–14, shows the average rate of respiration for the previous six breaths.
The display is updated at the end of each breath.
RR
BPM
Figure 6–14 Respiratory Rate Screen
3.
Minute Ventilation Screen
This screen, shown in Figure 6–15, shows the estimated Exhaled Minute Ventilation (the volume of air
received on a per minute basis) based on the average of the previous six breaths.
MinVent
LPM
Figure 6–15 Minute Ventilation Screen
NOTE:
4.
The value shown for Exhaled Minute Ventilation is an estimate. The display flashes during
transient conditions such as low tidal volumes, erratic breathing, or rapidly changing leak.
Exhaled Tidal Volume Screen
This screen, shown in Figure 6–16, shows the estimated Exhaled Tidal Volume, which is the volume
of each breath. The display is updated at the end of each breath.
VTE
ml
Figure 6–16 Exhaled Tidal Volume Screen
NOTE:
The value shown for Exhaled Tidal Volume is an estimate. The display flashes during
transient conditions.
User Manual
27
CHAPTER 7: ALARMS
7.1 INTRODUCTION TO ALARMS
The device provides three alarm levels: high, medium, and low priority.
High Priority
These alarms require immediate response. The alarm signal consists of a red LED
indicator and a sound that is either a periodic pattern consisting of a two-second
beep followed by two seconds of silence or a pattern of three beeps, a pause, and
then two more beeps. The display has the
symbol at the top of the screen. The
tables in Section 7.3 display these sounds using the following symbols: • • • • •
or
Medium Priority
These alarms require prompt response. The alarm signal consists of a yellow LED and
a sound that repeats a pattern of three beeps. The display has the
symbol at the
top of the screen. The tables in Section 7.3 display these sounds using the following
symbols: • • •
Low Priority
These alarms require your awareness. The alarm signal consists of a yellow LED and
a sound that repeats a pattern of two beeps. The display has the
symbol at the
top of the screen. The tables in Section 7.3 display these sounds using the following
symbols: • •
Some audible alarms are self-cancellable. This means that the alarm sound stops when the cause of the
alarm is corrected.
The alarm LED indicators are shown in Figure 7–1.
High Priority
Alarm LED (Red)
Low/Medium Priority
Alarm LED (Yellow)
Figure 7–1 Alarm LED Indicators
In addition to the alarm LED indicators, the control panel also contains Alarm Reset and Alarm Silence
buttons, as shown in Figure 7–2.
SILENCE
Alarm
Reset
Button
Alarm
Silence
Button
Figure 7–2 Alarm Buttons
User Manual
28
7.2 WHAT TO DO WHEN AN ALARM OCCURS
The following example applies to most alarm conditions. Follow these steps unless otherwise directed by
the alarm tables that follow.
1.
Look at the alarm indicators and listen to the alarm sound.
Alarm LED
Lights Up
Figure 7–3 Alarm LED Lights Up
Note the color of the LED and whether the LED is solid or flashing.
2.
Look at the display for text.
Figure 7–4 Sample Alarm Display
The
symbol appears at the top of the screen to indicate an alarm. Additional codes and symbols
may also appear depending on the type of alarm.
3.
Press the
button to temporarily silence the alarm (for one minute). The display returns to the
screen that was showing when the alarm occurred.
4.
Look up the alarm in the alarm tables shown in Section 7.3 and perform the action specified.
5.
Press the
SILENCE
SILENCE
RESET
RESET
button to clear the alarm.
User Manual
29
7.3 ALARM TABLES
The following tables summarize the high priority, medium priority, and low priority alarms.
7.3.1 HIGH PRIORITY ALARMS
Alarm
LED
Red Flash
Alarm
Sound
••• ••
Display
Message
Device
Action
Possible
Cause
Operates
Breathing circuit is
disconnected or has
a large leak.
Press the
button to reset the alarm.
Reconnect the circuit
or fix the leak.
Operates
An apnea event
occurred during
therapy.
Press the
button to reset the alarm.
Continue using the device.
Report the alarm to your
health care professional.
Operates
A low minute
ventilation event
occurred during
therapy.
symbols
flash
Your
Action
RESET
RESET
RESET
RESET
Red Flash
••• ••
symbols
flash
Red Flash
••• ••
MinVent
symbols
flash
Red Flash
••• ••
Red Flash
••• ••
Press the
button to reset the
alarm. Continue using
the device. Report the
alarm to your health care
professional.
RESET
RESET
RESET
RESET
Shuts down.
symbol
Blower cannot
flashes
be restarted.
and an error
code ("Exx")
displays
Device failure
Press the
button to reset the
alarm. Remove
power from the unit.
Restore power. If the
alarm continues,
contact your health care
professional.
RESET
RESET
Operates
and
cm H2O
symbols
flash
Red Solid
Blank
screen
Excessive leak
or blockage;
malfunctioning unit.
Press the
button to reset the
alarm.
Check for the
following: dirty inlet
filters, blocked air
intake, excessive leak
in the circuit. If the
alarm continues, call
your health care
professional.
Shuts down
Battery is discharged.
Press the
button to silence
the alarm.
-or-
Power was lost
while the unit was
providing therapy.
Remove the DC power
source from the unit.
Replace the battery and
restore power to the
unit. Or, seek a reliable
AC power source.
Restore power. If the
alarm continues,
call your health care
professional.
User Manual
30
7.3.2 MEDIUM PRIORITY ALARMS
Alarm
LED
Yellow Flash
Alarm
Sound
Display
Message
•••
Device
Action
Possible
Cause
Operates
Battery is nearly
discharged.
DC Power
LED Flashes
Your
Action
RESET
RESET
Press the
button to reset the
alarm. Replace the
battery. If the
alarm continues,
contact your health
care professional.
7.3.3 LOW PRIORITY ALARMS
Alarm
LED
Alarm
Sound
Yellow Solid
••
Display
Message
Operates
symbol
flashes
and
card error
code ("Cxx")
displays
Yellow Solid
Possible
Cause
Device
Action
••
There is a problem
with the SmartCard
inserted in the
SmartCard
connectivity slot.
Perhaps the
SmartCard is
inserted upside down
or backwards.
Operates
DC power
LED flashes
The device lost AC
power and is now
operating on DC
power.
At start-up only,
alarm notifies you
that a battery is
being used
to provide power.
Yellow Solid
••
Unchanged
Operates
AC power
LED flashes
Yellow Solid
••
Operates
and cm H2O
symbols
flash
Your
Action
Confirm that the
SmartCard is properly
inserted.
If the alarm continues
to occur, remove the
SmartCard from the
device and contact
your health care
professional.
RESET
RESET
Press the
button to reset the
alarm. Check the
AC power. Seek a
reliable power
source. Provide AC
power if you do not
want to use a battery;
otherwise, no further
action is needed.
The AC power
supply is out of
spec (<22V) or
there is a defective
battery sense line
on the DC power
adapter.
Remove power from
the device and then
restore power. If alarm
continues to occur,
contact your health
care professional.
The device
has successfully
downloaded the
prescription from
the SmartCard.
Remove the
SmartCard from the
device. If alarm
continues to occur,
contact your health
care professional.
User Manual
31
CHAPTER 8: TROUBLESHOOTING
This chapter describes problems that you may experience with your device or mask and provides
possible solutions.
Problem
Why It Happened
What To Do
The device does not
operate when you
press the
button.
If the power LED is off, there’s
Check the outlet power and verify that
no power at the outlet or the
the device is plugged in. If the problem
device is unplugged. If the
continues, call your health care professional.
power LED is on, the problem is
in the device.
The air out of the
mask is much warmer
than usual.
The inlet filters may be dirty.
The device may be operating in
direct sunlight or near a heater.
Clean or replace the inlet air filters as
described in Chapter 9. Make sure the device
is away from bedding or curtains that could
block the flow of air around the device. Make
sure the device is away from direct sunlight
and heating equipment.
If the problem persists, contact your health
care professional.
The mask feels
uncomfortable to
wear.
This could be due to
improper headgear
adjustment or improper mask
fitting.
Check the headgear adjustment as described
in the headgear instructions.
There is significant
air leakage round the
mask.
This could be due to
improper headgear
adjustment or improper mask
fitting.
Check the headgear adjustment as described
in the headgear instructions. Refer to your
mask instructions to make sure the mask is
properly fitted. If the problem continues,
contact your health care professional for a
refitting or a different size mask.
Refer to your mask instructions to make
sure the mask is properly fitted. If the
problem continues, contact your health care
professional for a refitting or a different size
mask.
User Manual
32
Problem
Why It Happened
What To Do
Redness occurs
when the mask
cushion comes in
contact with the skin.
This could be due to
improper mask fitting or
improper mask cleaning.
Be sure to rinse the mask thoroughly
after cleaning to remove residue. See the
mask cleaning instructions for detailed
information. If the problem continues,
contact your health care professional for a
refitting or a different size mask.
Redness occurs
when the mask
cushion accessory
comes in contact with
the skin.
Irritation or allergic reaction to
the mask material.
Use a barrier between your skin and the
mask, such as 3M’s Microfoam® or Squibb’s
Duoderm®. Refer to your mask instructions
for additional information.
Sore or dry eyes.
The mask may not be positioned Check the headgear adjustment as described
correctly, or the mask is not
in the headgear instructions. Refer to your
properly fitted.
mask instructions to make sure the mask is
properly fitted.
If the problem continues, contact your health
care professional for a refitting or a different
size mask.
There are unexplained
changes in the
performance of
the device.
The device or power supply has
been dropped or mishandled,
or water has been spilled onto
or into the device or the power
supply.
Discontinue use.
A patient
disconnect alarm
occurs.
The tubing has become
disconnected from the system.
Press the
Contact your health care professional or
Respironics for directions on how to have
your device serviced. Please have the serial
number ready when you call.
RESET
RESET
button to reset the alarm.
Reconnect the tubing.
If the alarm continues, the device may not be
operating correctly. Contact your health care
professional or Respironics for directions on
having the device serviced. Please have your
serial number ready when you call.
User Manual
33
Problem
Why It Happened
What To Do
The mask feels
uncomfortable
to wear.
This could be due to improper
headgear adjustment or
improper mask fitting.
Check the headgear adjustment as described
in the headgear instructions.
Runny nose.
Nasal reaction to the air flow.
Call your health care professional.
The device’s
display is erratic.
The device or power supply has
been dropped or mishandled, or
the device or power supply is in
an area with high EMI
emissions.
Unplug the device and the power supply.
A SmartCard
error occurs.
The SmartCard is not inserted
properly. It may be inserted
upside down or backwards.
Remove the SmartCard and reinsert it so that
the printed side of the card is facing up and
the end with the arrow goes into the device
first.
Refer to your mask instructions to make
sure the mask is properly fitted. If the
problem continues, contact your health care
professional for a refitting or a different size
mask.
Relocate the device to an area with lower
EMI emissions.
If the error message appears again, contact
your health care professional or Respironics
for directions on having your device serviced.
Please have your serial number ready when
you call.
User Manual
34
CHAPTER 9: CLEANING AND MAINTENANCE
9.1 CLEANING THE DEVICE
Before cleaning or performing any routine maintenance, always make sure the device is not operating and
disconnect the device from the power source.
NOTE:
The following cleaning instructions are for the device only. To clean the accessories, refer to
each accessory’s instruction sheet.
CAUTION:
Do not immerse the device or allow any liquid to enter the enclosure, inlet filter, or
any openings.
Clean the front panel and exterior of the enclosure as needed using a cloth dampened with water and a
mild detergent. Allow the device to dry completely before plugging in the power cord.
Gently wash the reusable circuit tubing in a solution of warm water and a mild detergent. Rinse
thoroughly and allow to air dry.
9.2 CLEANING OR REPLACING THE INLET FILTERS
The device has two removable filters at the air inlet. The gray foam filter is washable and reusable. The
optional white, ultra-fine filter is disposable. The gray foam filter should be cleaned at least once every
two weeks under normal usage and replaced with a new one every six months. The white ultra-fine filter
is disposable and should be replaced after 30 nights of use or sooner if it appears dirty. Do not attempt to
clean the ultra-fine filter because this will damage the filter.
NOTE:
Dirty inlet filters may cause high operating temperatures and may affect performance.
Regularly examine the inlet filters as needed for integrity and cleanliness.
1.
Make sure the device is not operating, and disconnect the power cord from the wall outlet or DC source.
2.
As shown in Figure 9–1, remove the filter cap by gently pressing in on the sides of the filter cover and
pulling the cap out, away from the device.
Figure 9–1 Removing the Filter Cover
User Manual
35
3.
Remove the filters from the enclosure by gently pulling around the edges of the filters. The top filter
is the reusable gray foam filter. The bottom filter is the optional disposable white ultra-fine filter, as
shown in Figure 9–2.
Reusable Gray
Foam Filter
Disposable
Ultra-fine
Filter
Figure 9–2 Removing the Filters
4.
Examine the filters regularly for cleanliness and integrity.
5.
If needed, wash the gray foam filter in warm water with a mild detergent. Rinse thoroughly to remove
all detergent residue. Allow the filter to dry completely before reinstalling it. If the foam filter is torn,
replace it. (Only Respironics-supplied filters should be used as replacement filters.)
CAUTION:
Never install a wet filter into the device. It is recommended that you clean the filter in the
morning and alternate using the two gray foam filters provided with the system to ensure
sufficient drying time for the cleaned filter.
6.
If the ultra-fine filter is dirty or torn, replace it.
7.
Reinstall the filters. If you are using the optional white ultra-fine filter, place it against the gray foam
filter so the soft side of the ultra-fine filter touches the gray foam filter. Slide the filters into the air inlet
at the rear of the device and push them into the recess. When the filters are installed, the hard plastic
side of the white filter will touch the inside of the device.
8.
Reinstall the filter cover. Contact your health care professional to order additional filters.
9.3 CARRYING CASE
A carrying case (reorder number: 1005965) is included with your device system. The case is designed to
hold your device, along with your circuit accessories and humidifier.
When you are travelling, the carrying case can be used for carry-on luggage only. The carrying case will not
protect the device if it is put through checked baggage.
NOTE:
If travelling with your humidifier, make sure you empty the water chamber before placing
it in the carrying case.
User Manual
36
CHAPTER 10: ACCESSORIES
10.1 ADDING A HUMIDIFIER
The REMstar Heated Humidifier, REMstar Passover Humidifier, and H2 Heated Humidifier are available
from your health care professional. The humidifiers may reduce nasal dryness and irritation by adding
moisture (and heat, if applicable) to the airflow.
CAUTION:
For safe operation, the humidifier must always be positioned below the circuit
connection at the mask and the air outlet on the device. The humidifier must be level for
proper operation.
Refer to the humidifier instructions for complete setup information.
10.2 ADDING OXYGEN TO THE DEVICE
Oxygen may be added to the mask connection. Please note the warnings listed below when using oxygen
with the device.
WARNING:
If you are using oxygen, your device must be equipped with the Respironics Pressure Valve
(Part number 302418). Failure to use the Pressure Valve could result in a fire hazard.
WARNING:
Oxygen accelerates fires. Keep the device and the O2 containers away from heat, open
flames, any oily substance, or other sources of ignition. Do not smoke in the area near the
device or the O2 container.
WARNING:
When using oxygen with your device, the oxygen supply must comply with the local
regulations for medical oxygen.
WARNING:
When using oxygen with this system, turn the device on before turning the oxygen on.
Turn the oxygen off before turning the device off. This will prevent oxygen accumulation
in the device.
User Manual
37
CHAPTER 11: SPECIFICATIONS
ENVIRONMENTAL
Operating
Storage
Temperature
5ºC to 35ºC
-20ºC to 60ºC
Relative Humidity
15 to 95%
(non-condensing)
15 to 95%
(non-condensing)
Atmospheric Pressure
(5600 feet to sea level)
83 to 102kPa
PHYSICAL
Dimensions:
24.8 cm L x 16.8 cm W x 11.2 cm H
(9.75 in. L x 6.625 in. W x 4.4 in. H)
Weight:
1.8 Kilograms
ELECTRICAL
AC Voltage Source:
100 to 240 VAC, 50/60 Hz
DC Voltage Source:
12 VDC (when operated with the external DC
power adaptor accessory)
AC Current:
1.25 A maximum
DC Current:
3.0 A maximum
Protection against electric shock:
Class II
Degree of protection against electric
shock:
Type BF Applied Part
Degree of protection against harmful ingress of water:
BiPAP autoSV Advanced device:
Ordinary Equipment, IPX0
AC Power Supply
(Reorder number 1012832):
Drip Proof, IPX1
DC Power Adapter
(Reorder number 1012975):
Drip Proof, IPX1
Modes of Operation:
Continuous
Electromagnetic
Compatibility:
The BiPAP autoSV Advanced device meets the
requirements of EN 60601-1-2, second edition
(2001).
Fuses:
There are no user-replaceable fuses.
User Manual
38
PRESSURE
Output:
4 to 30 cm H2O
CONTROL ACCURACY
Parameter
Range
Accuracy
Max Pressure
4 to 30 cm H2O
*
Min EPAP
4 to 25 cm H2O
*
Max EPAP
4 to 25 cm H2O
*
Min Pressure Support
0 to 26 cm H2O
*
Max Pressure Support
0 to 26 cm H2O
*
Breath Rate
4 to 30 BPM
Greater of ± 1 BPM or
± 10% of the setting (when
measured over a 4 minute
period)
Timed Inspiration
0.5 to 3.0 seconds
± (0.1 + 10% of the setting)
seconds
Ramp Duration
0 to 45 minutes
± 10% of the setting
Rise Time
1 to 6 **
± 25%***
*
Dynamic pressure accuracy is ± 1.5 cm H2O measured at the patient end of the
circuit with a Whisper Swivel II and varying flow conditions. Static pressure accuracy
is ± 1.25 cm H2O measured at the patient end of the circuit with a Whisper Swivel II
and no patient flow.
**
The range of values correspond to tenths of seconds (e.g., a setting of 4
indicates a Rise Time of 0.4 seconds).
*** Measured at the patient end of circuit with a Whisper Swivel II exhalation
device and no patient flow.
MEASURED PARAMETER ACCURACY
Parameter
Accuracy
Respiratory Rate
Greater of ±1 BPM or ±10% of reading when
measured over a four minute period
Exhaled Tidal Volume
± (25 + 0.15 of reading) ml
Exhaled Minute
Ventilation
± (1 + 0.15 of reading) L/min
Leak Rate
± (5 + 0.15 of reading) L/min
WEEE/ROHS RECYCLING DIRECTIVES
If you are subject to the WEEE/RoHS recycling directives, refer to www.respironics.com for the
passport for recycling this product.
User Manual
39
APPENDIX A: EMC INFORMATION
GUIDANCE AND MANUFACTURER’S DECLARATION - ELECTROMAGNETIC EMISSIONS: This device is intended for use in the
electromagnetic environment specified below. The user of this device should make sure it is used in such an environment.
EMISSIONS TEST
COMPLIANCE
ELECTROMAGNETIC ENVIRONMENT - GUIDANCE
RF emissions
CISPR 11
Group 1
The device uses RF energy only for its internal function. Therefore, its
RF emissions are very low and are not likely to cause any interference
in nearby electronic equipment.
RF emissions
CISPR 11
Class B
Harmonic emissions
IEC 61000-3-2
Class A
The device is suitable for use in all establishments, including
domestic establishments and those directly connected to the public
low-voltage power supply network.
Voltage fluctuations/Flicker emissions
IEC 61000-3-3
Complies
GUIDANCE AND MANUFACTURER’S DECLARATION - ELECTROMAGNETIC IMMUNITY: This device is intended for use in the
electromagnetic environment specified below. The user of this device should make sure it is used in such an environment.
IMMUNITY TEST
IEC 60601 TEST
LEVEL
COMPLIANCE LEVEL
ELECTROMAGNETIC ENVIRONMENT GUIDANCE
Electrostatic Discharge (ESD)
IEC 61000-4-2
±6 kV contact
±8 kV air
±6 kV contact
±8 kV air
Floors should be wood, concrete or ceramic
tile. If floors are covered with synthetic
material, the relative humidity should be at
least 30%.
Electrical Fast Transient/Burst
IEC 61000-4-4
±2 kV for power supply lines
±1 kV for input-output lines
±2 kV for supply mains
±1 kV for input/output lines
Mains power quality should be that of a
typical home or hospital environment.
Surge
IEC 61000-4-5
±1 kV differential mode
±2 kV common mode
±1 kV differential mode
±2 kV for common mode
Mains power quality should be that of a
typical home or hospital environment.
Voltage dips, short
interruptions and voltage
variations on power supply
input lines
IEC 61000-4-11
<5% UT
(>95% dip in UT) for 0.5 cycle
40% UT
(60% dip in UT) for 5 cycles
70% UT
(30% dip in UT) for 25 cycles
<5% UT
(>95% dip in UT) for 5 sec
<5% UT
(>95% dip in UT) for 0.5 cycle
40% UT
(60% dip in UT) for 5 cycles
70% UT
(30% dip in UT) for 25 cycles
<5% UT
(>95% dip in UT) for 5 sec
Mains power quality should be that of a
typical home or hospital environment. If
the user of the device requires continued
operation during power mains interruptions,
it is recommended that the device be
powered from an uninterruptible power
supply or a battery.
Power frequency (50/60 Hz)
magnetic field
IEC 61000-4-8
3 A/m
3 A/m
Power frequency magnetic fields should be
at levels characteristic of a typical location in
a typical hospital or home environment.
NOTE: UT is the a.c. mains voltage prior to application of the test level.
User Manual
40
GUIDANCE AND MANUFACTURER’S DECLARATION - ELECTROMAGNETIC IMMUNITY: This device is intended for use in the
electromagnetic environment specified below. The user of this device should make sure it is used in such an environment.
IMMUNITY TEST
IEC 60601 TEST LEVEL
COMPLIANCE LEVEL
ELECTROMAGNETIC ENVIRONMENT - GUIDANCE
Portable and mobile RF communications equipment should be
used no closer to any part of the device, including cables, than
the recommended separation distance calculated from the
equation applicable to the frequency of the transmitter.
Conducted RF
IEC 61000-4-6
3 Vrms
150 kHz to 80 MHz
3 Vrms
Radiated RF
IEC 61000-4-3
3 V/m
80 MHz to 2.5 GHz
3 V/m
Recommended separation distance:
d = 1.2
150 kHz to 80 MHz
d = 1.2
d = 2.3
80 MHz to 800 MHz
800 MHz to 2.5 GHz
Where P is the maximum output power rating of the transmitter
in watts (W) according to the transmitter manufacturer and d is
the recommended separation distance in meters (m).
Field strengths from fixed RF transmitters, as determined
by an electromagnetic site survey a, should be less than the
compliance level in each frequency range b.
Interference may occur in the vicinity of equipment marked with
the following symbol:
NOTE 1: At 80 MHz and 800 MHz, the higher frequency range applies.
NOTE 2: These guidelines may not apply in all situations. Electromagnetic propagation is affected by absorption and reflection from structures,
objects, and people.
a: Field strengths from fixed transmitters, such as base stations for radio (cellular/cordless) telephones and land mobile radios, amateur radio, AM
and FM radio broadcast and TV broadcast cannot be predicted theoretically with accuracy. To assess the electromagnetic environment due to
fixed RF transmitters, an electromagnetic site survey should be considered. If the measured field strength in the location in which the device is
used exceeds the applicable RF compliance level above, the device should be observed to verify normal operation. If abnormal performance is
observed, additional measures may be necessary, such as re-orienting or relocating the device.
b: Over the frequency range 150 kHz to 80 MHz, the field strengths should be less than 3 V/m.
RECOMMENDED SEPARATION DISTANCES BETWEEN PORTABLE AND MOBILE RF COMMUNICATIONS EQUIPMENT AND THIS DEVICE:
The device is intended for use in an electromagnetic environment in which radiated RF disturbances are controlled. The customer
or the user of this device can help prevent electromagnetic interference by maintaining a minimum distance between portable and
mobile RF communications equipment (transmitters) and this device as recommended below, according to the maximum output
power of the communications equipment.
RATED MAXIMUM POWER
OUTPUT OF TRANSMITTER
(W)
SEPARATION DISTANCE ACCORDING TO FREQUENCY OF TRANSMITTER
( M)
150 KHZ TO 80 MHZ
d = 1.2
80 MHZ TO 800 MHZ
d = 1.2
800 MHZ TO 2.5 GHZ
d = 2.3
0.01
0.12
0.12
0.23
0.1
0.38
0.38
0.73
1
1.2
1.2
2.3
10
3.8
3.8
7.3
100
12
12
23
For transmitters rated at a maximum output power not listed above, the recommended separation distance d in meters (m) can be
estimated using the equation applicable to the frequency of the transmitter, where P is the maximum output power rating of the
transmitter in watts (W) according to the transmitter manufacturer.
Note 1: At 80 MHz and 800 MHz, the separation distance for the higher frequency range applies.
Note 2: These guidelines may not apply in all situations. Electromagnetic propagation is affected by absorption and reflection from
structures, objects, and people.
User Manual
41
NOTES
User Manual
42
NOTES
User Manual
LIMITED WARRANTY
Respironics, Inc. warrants that the BiPAP autoSV Advanced system shall be free from defects of workmanship
and materials and will perform in accordance with the product specifications for a period of two (2) years
from the date of sale by Respironics, Inc. to the dealer. If the product fails to perform in accordance with the
product specifications, Respironics, Inc. will repair or replace – at its option – the defective material or part.
Respironics, Inc. will pay customary freight charges from Respironics, Inc. to the dealer location only. This
warranty does not cover damage caused by accident, misuse, abuse, alteration, and other defects not related
to material or workmanship.
Respironics, Inc. disclaims all liability for economic loss, loss of profits, overhead, or consequential damages
which may be claimed to arise from any sale or use of this product. Some states do not allow the exclusion
or limitation of incidental or consequential damages, so the above limitation or exclusion may not apply to
you.
This warranty is given in lieu of all other express warranties. In addition, any implied warranties – including
any warranty of merchantability or fitness for the particular purpose – are limited to two years. Some states do
not allow limitations on how long an implied warranty lasts, so the above limitation may not apply to you. This
warranty gives you specific legal rights, and you may also have other rights which vary from state to state.
To exercise your rights under this warranty, contact your local authorized Respironics, Inc. dealer or contact
Respironics, Inc. at:
1001 Murry Ridge Lane
Murrysville, Pennsylvania 15668-8550
1-724-387-4000
Deutschland
Gewerbestrasse 17
82211 Herrsching Germany
+49 8152 93060
REF 1058267
1056937
JB 11/25/2008