1
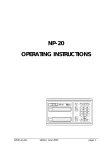
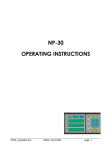
NP-20 z
OPERATING INSTRUCTIONS
z
1/2
Zs
1/2
NP20z_ang.doc
edition: December 2002
page: 1
© Copyrights 2002
Iskra TELA d.o.o.
Printed in Slovenia 2002
NP20z_ang.doc
edition: December 2002
page: 2
CONTENTS
1. SCOPE OF DELIVERY .......................................................................................... 5
2. GENERAL DESCRIPTION .................................................................................... 5
3. INSTALLATION AND CONNECTION OF THE DEVICE ...................................... 6
3.1. External dimensions and fastening ................................................................ 6
3.2. Connection ..................................................................................................... 6
3.3. Connectors ..................................................................................................... 7
4. ADJUSTMENT TO THE MACHINE ..................................................................... 10
4.1. Entry of machine parameters ....................................................................... 10
4.2. Entry of technological parameters ............................................................... 14
5. MEASURING FUNCTIONS.................................................................................. 15
5.1 Reference mode............................................................................................ 16
5.1.1. Calibration of absolute position with reference mark ............................ 16
5.1.2. Determination of reference value with reference pulse ........................ 16
5.1.3. Manual entry of reference values in the p90 parameter ....................... 17
5.2.Absolute mode…………………………………………………………………….18
5.2.1. Preset of absolute position ……………………………………………...19
5.2.2. Reset of absolute positions ………………………………………………20
5.2.3. Mm/inch switching-over……………………………………………………20
5.2.4. Radius/diameter switching-over…………………………………………..20
5.2.5. Halve of measured value in z axis………………………………………..21
5.2.6 Freeze of absolute position………………………………………………..21
5.2.7 Datum points (dp00...dp99) ………………………………………………...22
5.2.7.1 Datum point selection………………………………………………22
5.2.7.2 Setting the datum points by position enter ………………………23
5.2.7.3 Datum points setting by manual parameter entry……………….23
5.3.Relative mode………………………………………………………………………24
5.4.Distance to go mode………………………………………………………………27
5.5. Axis shift velocity measuring mode ......................................................... 27
6. SERIAL DATA TRANSFER................................................................................. 28
7. STATUS AND ERROR INDICATION .................................................................. 30
8. TECHNICAL DATA .............................................................................................. 32
OF DELIVERY
NP20z_ang.doc
edition: December 2002
page: 3
NP20z_ang.doc
edition: December 2002
page: 4
1. SCOPE OF DELIVERY
Position readout NP-20z for lathes.
Possible options: R, K, B.
Spare fuse (link) 0.3 A T for 220 V~, i.e. 0.6 A T for 110 V~.
Power cable with safety plug for 220 V, 50 Hz and three-pole socket, length 3 m.
NOTE: Meanings of options designations:
R connector RIE (only for rotary transducers)
K interface RS 232 C for serial communication
B battery backup
2. GENERAL DESCRIPTION
Position can be measured both in transverse and longitudinal axes (X, Z) and in an
additional axis (Zo) that is parallel to longitudinal. Position value in the auxiliary axis can
be continuously added and is indicated in the position of the related main axis (Z), or
can be display separately on the display Zo. X ,Zo and Z displays indicate the absolute
or the relative position. When the relative mode is selected in one or in both axes, the
related indicator REL is lit. In the relative mode it is possible to measure depending on
the relative zero, which can be selected by pressing the key REL in the current
position. Incremental linear or rotary measuring transducers with square or sine
wave measuring signals are used for position measuring.
Built-in "monitoring functions" assure reliable operation, assistance at work and
easy troubleshooting of eventual errors in the measuring system or during the
operation. If an error occurs a message appears on the appropriate display, indicating
the cause for the error, e.g.: pressure on a wrong key (<Err type>), exceeded max.
Movement speed (<Err 1>), undetermined parameter (<Err PAr>) etc. The messages
are deleted and reception acknowledged by the key DELETE.
Position readout NP-20 is optionally equipped with battery backup system. This system
assures, in the case of power failure, storage of absolute position in the moment of
power failure. When the power is set readout shows the last absolute position before
power failure.
NP20z_ang.doc
edition: December 2002
page: 5
3. INSTALLATION AND CONNECTION OF THE DEVICE
3.1.
EXTERNAL DIMENSIONS AND FASTENING
S – compact table version
101
250
mm
inch
Iskra
ref
D/R rel
150
161.5
X
NP 20
Z
ref
1/2
rel
60
205
Mounting dimension - M5
P – Panel (Build in) version
Panel mounting dimension: 244+0.5 x 145+0.5
Sheet thickness: 1.6 mm max.
250
mm
inch
Iskra
ref
147.5
X
NP 20
150
D/R rel
101
Z
ref
1/2
rel
243
T – Tabletop version
NP20z_ang.doc
edition: December 2002
page: 6
250
25
mm
°
NP 20
inch
X
Iskra
ref
150
12
72
Z
ref
1/2
rel
227
D/R rel
60
205
Mounting dimension - M5
80
°
99
c – Console version
250
25
Supply Unit
Power supply output (5V)
mm
inch
NP 20
Iskra
Z
ref
1/2
rel
150
D/R rel
60
ref
193
X
Power supply input (100~250V)
Power switch ON/OFF
L
90
O5.6, 4x
100
50
L=150, 200 ... 450
255.4
263.4
Clearance of at least 120 mm has to be provided for accommodating the electrical
connections at rear of the device.
NP20z_ang.doc
edition: December 2002
page: 7
3.2.
CONNECTION
Correct connection of the device and of the measuring system are very important for
reliable operation, especially when the device is applied in strenuous working
conditions (close to power cables, inductive load switches etc.). The following basic
rules should therefore be observed during the connection of the device:
• The housing of the device must always be grounded in the same grounding point
as the machine, either via the grounding conductor of the mains power supply cable
with safety plug or by connecting a special grounding conductor to the grounding
screw at rear of the device. The cross-section of the grounding conductor shall not
be less than 1.5 mm², and by the shortest route should be connected to main
grounding point of a machine.
<1.5mm2 by shortest way to
machine ground point
•
Cables with measuring and control signals of the device (connectors X, Z, Z', RIE,
RS232) have to be laid as far as possible from the power cables on the machine
and from the other powerful sources of electromagnetic disturbances (relays,
contactors, motors, transformers, switch-mode power supply).
> 100mm
M
•
> 200mm
> 100mm
=
Inductive sources of disturbance on the machine or in the environment of the
device (couplings, relays, magnetic valves etc.) have to be choked by parallelconnecting corresponding standard choking elements (diodes, zener diodes, RC
elements for the DC power supplied elements and RC elements for the AC power
supplied elements).
R
Recommended value for protection elements
C
V
C
D
125 V dc
220E/5W
2 uF /600V
250 V dc
220E/5W
0.5uF 1000V
115 V ac
220E/1W
0.5 uF /600V
230 V ac
220E/5W
0.5 uF /1000V
440 V ac
220E/5W
0.5 uF /2000V
< 60 dc
DC relays
R
R
C
Switches
NP20z_ang.doc
R
S
T
M
3
1N4004
Relays and AC motors
edition: December 2002
page: 8
3.3.
CONNECTORS
Axes Connectors for square-wave
Encoders:
Viewing the rear plate
Connector contacts:
A
B
C
D
E
F
G
H
J
K
L
M
Connector for RIE switches
(option R):
Viewing the rear plate
Shield (grounding)
GND (0 V)
Signal A
Signal A_
Signal B
Not connected
Signal RI
Signal RI_
Not connected
+5 V
Signal B_
Not connected
Connector contacts:
1
2
3
4
5
6
7
8
9
RIEx
RIEz'
RIEz
Not connected
5V
Input RIEz' (auxiliary axis)
Input Ryes
Not connected
Not connected
NOTE: The RIE switches are only required when rotary measuring transducers are used. The
installation of the switch has to assure that it is only active for the particular reference pulse at
which we want to set the reference value (the transducer generates one reference pulse at each
rotation). The break contact of the switch is used.
Connector for serial interface RS 232
(option K):
Viewing the rear plate
NP20z_ang.doc
Connector contacts:
1
2
3
4
5
6
7
8
9
edition: December 2002
Shield (grounding)
RXD input (data reception)
TXD output (data transmission)
Not connected
GND (0 V)
Not connected
RTS output (Request to send)
CTS input (Clear to send)
Not connected
page: 9
4. ADJUSTMENT TO THE MACHINE
4.1. ENTRY OF MACHINE PARAMETERS
The device is adjusted to the machine by entering the appropriate machine
parameters. These values are stored in the permanent, non-volatile memory, until the
new values are entered.
Numbers from P1 to P49 are assigned to machine parameters and higher numbers to
technological parameters.
Machine parameters can only be set by entering first the value 3.14 (P0 = 3.14) for the
P0 parameter. This is the protection code that protects the parameters against
unintentional entry or deletion. This code entrance is active until the device is switched
off.
Use the delete code P0 = 6.28 for deleting all parameters. This is recommendable
especially when the installed EPROM circuit is replaced by a new one, i.e. by another
software version.
The following diagram shows the procedure for calling, monitoring and entering the
parameters in different modes of selection, by entering the machine parameter
P0=3.14:
PROCEDURE:
P
3
DISPLAY X:
Parameter selection
0
.
NOTES:
1
4
P00 codE
codE _ _ _
3.14.
Alternate designation/value display. Dashes for
"empty" parameter.
Value selection, right point is flashing
P00 codE
3.14
P01 Incr
Value entry, alternate indication of designation
and parameter value.
Switchover to next parameter.
Abandon of parameter settings or reviewing
Having entered the protection code, continue entering the remaining machine
parameters. When you have set any parameter by pressing the key ENTER, the next
parameter appears on the display.
In case you do not want to set or change it, press the key ENTER in order to choose
the following parameter. For direct selection of a particular parameter, press the key P
and enter the parameter number (e.g. P 090). In case of a typing error, press the key
DELETE and start again the entry.
NP20z_ang.doc
edition: December 2002
page: 10
<P01 Incr>
The counting direction, the measuring mode, the number of decimal
places, and the weight factor by which a measuring increment affects the
last digit in the X or Z displays.
The weight factor is a fraction with any two or three-digit whole number
in the numerator and the denominator (altogether 5 digits). Also the "00"
or "000" numbers, meaning 100 or 1000, respectively, are admissible.
+A.B.CCC.DD
Weight factor. Define influence of one measuring
increments to displayed values.
Xmeas = (number of increments / DD) *CCC
Number of decimal places
•
Type of measurement: 0 .. Linear measurement
1 ..Angular measurement
In decimal format
Counting direction: +.. Positive direction
- .. Negative direction
Weight factor (CCC.DD):
Define the influence of measuring increments to displayed values:
Xmeas = (number of increments / DD) *CCC
Number of increments ………counted number of increments
From linear or rotary encoder
Xmeas …….……………………. measured value
(Number of increments/DD)…. integer representation of
divide value without a rest
•
Number of decimal points (B)
Define the number of digits on the right side of decimal point. Can be
any number between 0 and 4.
•
Type of measurement (A)
Define the type of measurement
0 ………………………… Linear measurement
1 ………………………… Angular measurement in decimal
Format.
Counting direction
Define the direction of counting, when a positive transition of A signal
precede a positive transition of B signal.
Empty………………….. Positive direction
- ………………………. Negative direction
•
Examples:
Scale resolution
NP20z_ang.doc
P01
edition: December 2002
Display resolution
page: 11
0.5 µm
1 µm
5 µm
0.4.005.01
0.3.001.02
0.3.005.10
0.3.001.01
0.3.005.05
0.2.001.10
0.3.005.01
0.3.010.02
0.2.001.02
0.0005
0.001
0.005
0.001
0.005
0.01
0.005
0.010
0.01
<P03 Lin.c.> The linear correction factor. Values from -65535 to +65535 are
admissible. The entered value represents the coefficient in particles per
million particles with which the device corrects the measured value
before indicating it.
Xdisp = Xmeas * ( 1 + P03 * 10-6 )
Xdisp ………………….. displayed value (compensated)
Xmeas …………………. measured value
P03 ………………….. Value of parameter 3
The zero of the correction line is set by the device in the last written
position (PRESET, RESET, absolute position entry by means of RI,
relative position entry by means of key REL).
EXAMPLE: The last written position is Xp = 100.00 mm, P07 = -10000 (this
corresponds to -10000 particles per million particles, i.e. -1%).
xd = x + (x - Xp) · P03 · 10-6
For x = 0:
xd = 0 + (0 - 100) · (-10000 · 10-6) = +1.00
For X = 200: xd = 200 + (200 - 100) · (-10000 · 10-6) = +199.00
Usage of linear compensation is recommended:
• for older machine with bended guide ways with purpose of eliminating
Abbe error;
• for usage of angular measurement on the rotary table by means of rotary
encoder, with purpose to adjust required displayed resolution with
encoder’s line number, and gear ratio of rotary table mechanism;
In a case if angular measurement on the appropriate axis is selected, and linear
o
compensation is different then 0, displayed value can be in the range of +(360
o
+ 15 ), Reason for that limitation is to avoid arithmetical error caused by limited
number lengths.
NP20z_ang.doc
edition: December 2002
page: 12
<P05 doff>
<P06 toll>
When the digits change too quickly, the last display digits are shaded:
P05 = 0:
Shading off.
P05 = 1:
Shading on.
Counting error tolerance.
P06 = 0:
Counting error monitoring is off.
P06 = 1..15: Counting error value in measuring increments that causes
device error indication <Err 2>.
NOTE: Counting error monitoring (patented by ISKRA) is active in the
manual mode even when the measuring system is not calibrated by
means of the reference value. Every time the reference point on the
measuring transducer is passed over, the device measures the
reference value and compares it with the reference value recorded at the
previous passage over the reference point. In case the values are not
equal and the difference between them exceeds the tolerance (P06), the
device indicates the error <Err 2>. When this message is deleted, the
device also indicates the value of this difference.
<P07 232c> Define the baud rate for serial communication interface (option K).
Possible values are: 300, 600, 1200, 2400, 4800, 9600,
<P08 n.LF> Define the number of empty lines, which are outputs after print out a one
message. Possible values are 1 to 50.
<P11 Hold> Define the function of key RES :
P11 = 0 ……. Key “RES” will reset absolute position of appropriate
axis
P11 = 1 ……. Key “RES” will freeze (hold) current absolute position
of appropriate axis.
<P15 dCr> Define type of reference mark used on the measuring encoders for main
axes
P15 = 0:
Standard reference mark.
P15 = 1:
DCR reference marks
NP20z_ang.doc
edition: December 2002
page: 13
4.2.
ENTRY OF TECHNOLOGICAL PARAMETERS
Technological parameters are entered into permanent memory in the same way as the
machine parameters except that it is not necessary to enter first the protection code P0
= 3.14.
<P90 rEF>
Reference value for X or Z axis. In the auxiliary axis the 0 value is
assumed automatically.
Reference value represent a distance in position (or angular) units from
of absolute zero point and reference point on the linear (or rotary)
encoder.
Reference point in
Z axis
x
Absolute Zero point
Reference point in
X axis
z
Ref. value in Z axis
Reference
value in X axis
Ref. value in Zo axis
In the case, if Distance coded reference is used Reference value
represent a distance in position (or angular) units from zero point of
st
absolute zero and 1 reference point on the linear (or rotary) encoder.
<P101 dP01> Coordinates of the datum point DP1 in the X, Zo and Z-axis.
<P199 Dp99>Coordinates of the datum point DP99 in the X, Zo and Z-axis.
NP20z_ang.doc
edition: December 2002
page: 14
5. MEASURING FUNCTION
NP 20 can be set in different modes of operation, performing the proper measuring
functions or settings. The conditions which cause transitions between different modes
is shown in diagram bellow:
Relative mode
Reference mode
Determination
Calibration
P
Calibration
REF
(option B)
P
abs
rel
abs
rel
finished
REF
Switch on
procedure
7 8 9
4 5 6
1 2 3
0 +- .
Distance to go
mode
abs
rel
Absolute mode
0
Parameters settings
and reviewing
P
P
0
1
Velocity
measurement
Print out
Selected mode in which NP 20 temporary operate is marked by indications on the
display according to table bellow:
Indications
Mode
Calibration status
Ref
X or Z
Rel
Off
Off
Off
Absolute
Calibrated
Off
On
Off
Absolute
Calibrated
Off
Off
On
Relative
Calibrated
Off
On
On
Relative
Calibrated
On
Off
Off
Absolute
Non-calibrated
On
On
Off
Absolute
Non-calibrated
On
Off
On
Relative
Non-calibrated
On
On
On
Relative
Non-calibrated
Pulse
On
Off
Reference –
Non- calibrated main axis
Calibrated auxiliary axis
calibration
Pulse
On
Pulse
Reference –
Non- calibrated main axis
Non-calibrated auxiliary axis
calibration
Pulse
Off
Off
Reference –
Calibrated both axes
calibration
Pulse
Pulse
Off
Reference –
Determination of reference
determination
value
NP20z_ang.doc
edition: December 2002
page: 15
5.1 REFERENCE MODE
If the NP20 is equipped with battery back-up system (option B) , after switch on it is set
to absolute mode, REF indications lights steady indicating that absolute position is not
calibrated. If user like to calibrate absolute position, he should by pressing to key
“REF” enter into the reference mode.
If the NP20 is not equipped with battery back-up system (without option B), the device
after a switch on is automatically set to the reference mode. Axes indications lights
steady, indicating that these axes have not been calibrated.
5.1.1 CALIBRATION OF ABSOLUTE POSITION WITH REFERENCE MARK
Calibration of absolute position requires, that device is set to the reference mode, and
reference value should be entered into the parameter P90.
If reference value has not been entered into P90, when device is set to reference
mode, message: “ref ___” will appear on the display of corresponding axis. In that
case user should enter reference value by procedure describe in chapters 5.1.2 or
5.1.3.
PROCEDURE:
DISPLAY
NOTES:
Entrance in the reference mode calibration; If
reference value have not be entered “ref___” is
displayed
After reference mark is passed display starts to
display the position. In the case if auxiliary axis
is used, first pass the reference in that axis, and
than in main axis. When calibration procedure is
finish NP 20 automatically return to absolute
mode.
REF
Pass over the
reference points on
the encoders
5.1.2. DETERMINATION OF REFERENCE VALUE WITH REFERENCE PULSE
It is used when we want to "save" an already selected absolute coordinate system so
that we can re-establish it in case it gets lost when the device is switched off or for
other reasons.
PROCEDURE:
DISPLAY
NOTES:
Set the NP20 to
Absolute mode
Drive the tool to
known position
Preset the known
position to axes
REF
P
Pass the reference
marks on both axis
NP20z_ang.doc
Shows
position
Shows
position
In this point NP 20 is set to the absolute mode
Presetting
Shows
position
Use the procedure describe in chapter 5.2.1
Set the NP 20 to reference mode – determination
It can be done by turning diameter, and then measure
it (by calliper, or micrometer)
In the case if auxiliary axis is used, first pass the
reference marks in that axis, and after in main axis. NP
20 will inform the receiving of reference mark by
sound. After passing of reference mark, NP20 will be
set to absolute mode, and reference value will be
entered into the P90
edition: December 2002
page: 16
EXAMPLE:
Turning
Measuring
Presetting
Determination
NP 20 is set to ABSOLUTE mode
NP 20 is set in
REFERENCE mode
X 20.000
z
20.000
x
x
Z 0.000
z
REF
P
x
x
z
z
5.1.3. MANUAL ENTRY OF REFERENCE VALUES IN THE P90 PARAMETER
This mode is generally used only for testing, e.g. when we want to enter the zero
reference value in both axes:
NOTE: Do not enter the parameter for the auxiliary axis as it automatically assumes
the zero value.
NP20z_ang.doc
edition: December 2002
page: 17
5.2. ABSOLUTE MODE
Absolute mode is basic operation mode of NP 20. In this mode NP 20 display the
absolute position, which can be calibrated or non-calibrated in this mode it is possible to
switch display of Zo axis to be displayed separately or added with axis Z.
40
z
X ref
R rel
5.000
1/2
Zo ref
rel
25.000
Z ref
rel
15.000
1/2
X ref
R rel
Zs
5.000
Zo ref
rel
1/2
Z ref
rel
1/2
40.000
x
Zo
5
Z
0
0
5 10 15 20 25
5 10 15 20 25 30
If NP 20 is set to any other mode of operation, it will be returned to absolute mode after
specified task in the other mode is performed. In the absolute mode is possible to
preset the absolute position, reset the absolute position, switch over the metric or inch
measuring units, switch over the radius or diameter position display in tool axis, halving
the measured value in longitudinal axis, operate in a different datum points or preset
datum points value.
Separate display of Zo axis is very useful, in the case when taper’s shape should be
machined.
z
X ref
R rel
5.000
1/2
Zo ref
rel
25.000
Z ref
rel
15.000
1/2
x
Zo
Z
NP20z_ang.doc
edition: December 2002
page: 18
5.2.1. PRESET of ABSOLUTE POSITION
The absolute position of the measuring system can be selected optionally, by manually
entering the axis position value. First select the axis (the axis indicators is lit) then the
position value (the right decimal point on the axis display is flashing) and then confirm
the entry by pressing the key ENTER (the right decimal point goes out). Preset of
absolute position can be done in radius or in diameter.
X ref
R rel
20.000
X ref
R rel
20.000
Z ref
R rel
10.000
Z ref
R rel
0.000
z
20
10
Z
7 8 9
4 5 6
1 2 3
0 +- .
x
PROCEDURE
X
7 8 9
4 5 6
1 2 3
0 +- .
z
x
DISPLAY
Axis indicator light
steady
Axis indicator light
steady;
Decimal point on
last typed digit
pulsate
New position is
displayed
No number on the
axis display
Old
absolute
position
NOTE
Device is set to absolute mode, no axis
is selected.
Choose the axis in which you like to
preset new absolute position
On numerical keyboard type
required new absolute position
the
Confirmation of new absolute position.
The old absolute position is loosed
Deleting of typed numbers due to typing
failure, or other reason.
Abandon of absolute position preset;
Old absolute position is maintained.
Device is set to Absolute mode
NP20z_ang.doc
edition: December 2002
page: 19
5.2.2. RESET of ABSOLUTE POSITIONS
If the parameter P11 is set to “0” (see chapter 4.1), the absolute position of the
measuring axes can be directly reset by RESET key of corresponded axes.
X ref
R rel
20.000
X ref
R rel
0.000
RES
20
z
z
x
x
Reset of absolute position will cause:
• loss of old absolute position
• if axis was calibrated it will became non-calibrate
5.2.3. Mm/Inch SWITCHING-OVER
The units in which the position is displayed can be toggle between metric’s and
Inch’s units, by pressure to key: mm/inch. Unit selection is valid for both axes.
Conversion rate is: 1 inch = 25.4 mm
The status indicator shows selected units. After switch on of the NP20, position will be
displayed in units, which was active before switch off.
X ref
R rel
z
20
20.000
0.7874
mm
inch
z
x
20
X ref
R rel
x
5.2.4. RADIUS/DIAMETER SWITCHING-OVER
z
D
z
20
R
x
X ref
R rel
NP20z_ang.doc
10
Position of tool axis (X-axis) can be displayed in Radius or Diameter. After switch on
NP 20 display position of tool axis (X) in diameter, by pressure to key R/D position
display will be toggle to radius. Selected display mode is indicated on R/D status
indicator.
x
20.000
X ref
R rel
edition: December 2002
10.000
page: 20
5.2.5.
HALVE OF MEASURED VALUE IN Z AXIS
Halve of measured value in Z axis is purposed to simply find the middle point
between two points along the Z-axis. Halve function is activated only if Z-axis is
selected by key R/D.
20
R
20
= =
D
20
= =
D
z
z
z
x
x
x
Z ref
1/2 rel
5.2.6.
R
20.000
Z ref
1/2 rel
0.000
Z ref
1/2 rel
10.000
Z ref
1/2 rel
Freeze of absolute position
10.000
RES
If the parameter P11 is set to “1” (see chapter 4.1), the pressure to key
will
cause freeze of current position on the display. Pulsating of proper axis designator on
axis status display indicates freeze of proper axis. In the back position is followed, and
following pressure to key “RES” will release position display.
NP20z_ang.doc
edition: December 2002
page: 21
5.2.7. DATUM POINTS (DP00...DP99)
Datum points are used for reversible shifting of the coordinate origin point of the
measuring system in one or in both axes. When datum point is selected, position
display will show the position described by following equation
XdispDPx = Xdisp0 - P9x
XdispDPx ……... position display in X datum point
Xdisp0………… position display in absolute system
P9x ………….. value of parameter P9x
Datum point’s shift of coordinate origin can be used for:
• processing an identical work piece at several different working locations;
z
2
1
x
•
Preselecting some points in the absolute coordinate system;
z
2
x
•
1
3
presetting tool offsets
3
2
9
z
1
x
0
1
2
3 ……... 99
The position of datum points DP1...DP99 depending on the absolute starting point is
determined by setting, for each axis separately, the P101...P199 parameter values.
Datum point can be set by position preset, or by datum point offset value entry in
corresponded parameter
The datum point DP00 has always the X = 0, Z = 0 value, meaning that it is situated in
the starting point of the absolute measuring system.
NP20z_ang.doc
edition: December 2002
page: 22
When the absolute coordinate starting point is shifted to some other point, the datum
points are also automatically shifted, by keeping the same relative position depending
on the starting point as they had before.
5.2.7.1.
DATUM POINT SELECTION
Pressing the key DP and the appropriate number select the datum point:
mm
inch 00
mm
inch 22
X ref
R rel
20.000
Z ref
R rel
10.000
7 8 9
4 5 6
1 2 3
0 +- .
X ref
R rel
0.000
Z ref
R rel
0.000
10
z
20
z
2
20
10
2
x
x
If corresponded parameter P9X of datum point DPX is not defined (empty), after
selection of datum point is done position display(s) will show: ”dP0X ___”.
When datum point is selected, indication “ref” is switch off, and information about
calibration status is hidden.
All settings (mm/inch, R/D…) will stays the same as in previous datum point, except
axis selection, which through any transitions became deselected.
5.2.7.2.
SETTING THE DATUM POINTS BY POSITION ENTRY
Datum point’s offsets (values of parameters P1xx), can be set by position preset
procedure if position preset is done when datum point is selected
The device automatically calculates the corresponding parameter values of the datum
point and enters them into the memory, e.g.:
1
mm
inch
X ref
R rel
0.000
Z ref
R rel
0.000
X
7 8 9
4 5 6
1 2 3
0 +- .
X ref
R rel
20.000
Z ref
R rel
0.000
10
20
10
z
1
1
x
NP20z_ang.doc
1
z
20
mm
inch
x
edition: December 2002
page: 23
In the above example, the device will enter the following value of parameter P91:
P91x=20.000, P91z = 0.000. You can check it by selecting this parameter.
PROCEDURE
DISPLAY
Axis indicator light
steady
X
Axis indicator light
steady;
Decimal point on
last typed digit
pulsate
New position is
displayed
7 8 9
4 5 6
1 2 3
0 +- .
No number on the
axis display
Old
absolute
position
NOTE
Device is set to absolute mode, datum
point 1; no axis is selected.
Choose the axis in which you like to
preset new absolute position
On numerical keyboard type
required new absolute position
the
Confirmation of new DP 1 position. The
previous offset of DP 1 is lost. The
new datum point offset is calculated
and entered in P101 parameter.
Deleting of typed numbers due to typing
failure, or other reason
Abandon of absolute position preset;
Old absolute position is maintained.
Device is set to absolute mode, datum
point 1; X axis is selected
5.2.7.3.
DATUM POINTS SETTING BY MANUAL PARAMETER ENTRY
The entry is similar as for the other parameters (Item 4.1):
5.3.
RELATIVE MODE
The relative mode is useful, when machining parts according to drawings where
measures are made in relative manner (sketch bellow). Absolute position in relative
mode is not lost, only displayed position when entrance in relative mode is 0.000.
Abandon of relative mode will set NP20 in to a absolute mode, and position according
to old absolute coordinate system will be displayed.
z
abs
rel
x
Pressing to key abs/rel does toggle from absolute mode to relative mode.
NP20z_ang.doc
edition: December 2002
page: 24
Relative mode is indicated by “rel” indications on the axis status display.
Procedure is shown bellow:
PROCEDURE DISPLAY
NOTE
Device is set to absolute mode; no axis
is selected.
Axis indicator light Select the axis, which you like to set in
X
steady
relative mode. If no axis is selected,
settings to relative mode are valid for all
axes.
Position display of
selected axis is set
abs
rel
to 0.000; “rel“
Setting into a relative mode
indicator lights
steady
Operation
in Position
display Position display follow relative position
relative mode
follow
relative based on relative origin
position
abs
rel
“rel” indicator switch
off; position display
shows
absolute
position
Abandon of relative mode. Position
display shows absolute position based
on an absolute origin
In relative mode is admissible to make radius-diameter toggle, mm – inch conversion
and freeze the position display. Reset or preset of position in relative mode set the
NP20 in “distance to go” mode.
NP20z_ang.doc
edition: December 2002
page: 25
5.4.
DISTANCE TO GO mode
Distance to go mode is purposed to simplify positioning operation on the machine tool.
Operator simply (through specified procedure) enters the wished absolute position, and
position display of selected axis show you distance remaining to target position. When
position display shows “0.000” target absolute position is reached.
z
x
Z ref
R rel
0.000
Into “distance to go” mode is possible to enter from absolute mode through relative
mode and presetting in relative mode target position.
Procedure is described in the diagram bellow:
PROCEDURE DISPLAY
NOTE
Device is set to absolute mode; no axis is
selected.
Rel indications
abs
rel
light steady;
Entrance into the relative mode.
position display
(s) is set to 0.000
Axis indicator light
Choose the axis which will be position by
X
steady;
“distance to go” mode
7 8 9
Decimal point on
Type in a target absolute position. Position
4 5 6
last typed digit
display shows typed numbers
1 2 3
+
0 - .
pulsate
Distance to target
Confirmation of typed target absolute
position is
position. After confirmation distance from
displayed
current to target position is shown
No number on the
Deleting of typed numbers due to typing
axis display
failure, or other reason
Old relative
Abandon of target absolute position preset;
position
Device is set to relative mode.
abs
rel
Distance to target
position is shown
Displayed position
on selected axis is
zero
Driving toward zero value on the display
Rel indications
switch off, target
absolute position is
displayed
Device is toggled to Absolute mode
Target absolute position is displayed
Target position is reached
Device is set to absolute mode, X axis is
selected
NP20z_ang.doc
edition: December 2002
page: 26
5.5.
AXIS SHIFT VELOCITY MEASURING MODE
In axis shift velocity, measuring mode position displays shows axis shift velocity. The
velocity is indicated in m/min or in inch/min, depending of the selected measuring units
(mm or inch).
This mode is useful for settings of optimal and repeatable turning conditions.
When velocity mode is selected, it is valid for both axes. Abandon of this mode is done
by key “DELETE”.
V 6. STATUS
AND ERROR INDICATION
mm
1
X ref
R rel
20.000
Z ref
R rel
0.000
P
0
1
mm
inch
X ref
R rel
0.00
Z ref
R rel
0.00
10
z
20
10
1
7 8 9
4 5 6
1 2 3
0 +- .
x
NP20z_ang.doc
1
1
z
20
inch
x
edition: December 2002
page: 27
6. SERIAL DATA TRANSFER
6.1) Cabels for connection with PC and Printer
PRINTER RS 232
(25-pol D-SUB male)
NP
30
RS
232
connector
(9-pol D-SUB male)
Signal
Cool
Pin
1
2
3
4
5
6
7
8
9
GND
RxD
TxD
GND
CTS
RTS
shield
Red
White
Black
Green
Yellow
IBM PC RS232
(25-pol D-SUB female)
IBM PC RS 232
(9-pol D-SUB female)
Pin
Signal
Cool
Pin
Signal
Cool
Pin
Signal
colour
1
2
3
GND
TxD
RxD
Shield
Red
White
1
2
3
GND
TxD
RxD
Shield
Red
White
1
3
2
GND
TxD
RxD
Shield
Red
White
7
GND
Black
7
GND
Black
5
GND
Black
5
20
RTS
CTS
Green
Yellow
20
CTS
Yellow
4
CTS
Yellow
6.2) Structure of serial data and baud rates
Baud rates are set by parameter P7. Possible baud rates are: 300, 600, 1200, 2400,
4800, and 9600.
Data is received and transmitted in following data format (1start bit, 8data bits, 1stop bit,
no parity):
S
D
D
D
D
D
D
D
D
S
Stop bit
8 data bits
Start bit
6.3) Data transfer command and output shapes:
6.3.1) Transfer of label data:
This transfer can be initialised:
•
by typing keys <P> <ENTER> on the NP 30 keyboard or,
•
by sending a CTRL B ASCII character (hex code $02) through RS232
channel.
NP20z_ang.doc
edition: December 2002
page: 28
After initialisation NP 30 will send a following data (message start with CR and end with
number of LF which is define in parameter P8):
Number of datum point
Actual position on display
Selected measurement unit (mm or inch)
Selected mode of measurement (relative: “rel”,
Or absolute: empty)
Selected halving function
DP00
X = -0.500 mm
Zo = 0.000 mm
Z=
0.000 mm
rel
1/2
1/2
rel
6.4) Transfer of current position
This transfer can be initialised:
•
by sending a CTRL H ASCII character
channel.
After initialisation NP 30 will send a following data:
(hex code $08) through RS232
Preamble
Actual position of X-axis
and mode of measurement
Actual position of Zo axis
and mode of measurement
Actual position of Z-axis
and mode of measurement
Selected measurement unit
(mm or inch)
Datum point
#2
-0.500;rel 1/2;
NP20z_ang.doc
0.000;rel 1/2;
0.000;rel 1/2; mm ; 00
edition: December 2002
page: 29
7.
FAILURE DIAGNOSTICS
With a purpose to assure stabile, safety and accurate operation of measuring system
on the machine tool, NP20 device is equipped with several diagnostic functions.
Failure diagnostic functions in the case of any irregularity in operation of NP20, or
periphery units, which are connected to it (linear or rotary encoders), warn the operator
by message on the position display(s).
Proper procedure, when warning message is displayed will avoid expenses caused by
improper machining, and simplify repair or maintenance operation.
After switch on, during initialisation procedure for approx. 0,5 sec all segments of light
elements are switch on, with purpose to recognise if some light elements is out of
function.
<Err tyPE>
This message is displayed if operator type a command which can’t be
executed or which is out of sense.
Example: NP20 is set to axis shift velocity mode, operator press the key
“REL” – message Err tyPE will be displayed, and disappear after 1
second.
<Err 1>
Two neighbouring edges of input signals A and B are to close together.
This message can be caused by:
• Exceeding of maximal axis shift velocity;
• Influence of Electromagnetic disturbances on measuring system or
any of its component (linear or rotary encoder, DRO);
• Linear encoder installation (alignment) is not properly done;
• Machine guide ways are looseness;
Message can be deleted by pressure to key “DELETE”. If any other
reason except exceeding of velocity caused this message
maintenance/repair activities should be done.
This diagnostic function is available upon a special order.
<Err 2>
Position measuring error. Difference of Absolute positions during current
and previous pass over reference mark (in increments) is bigger then
value, which is set to parameter P6.
If absolute coordinate system is not calibrated diagnostic is active.
If value of P6 is set to 0, this diagnostics is inactive.
If distance coded reference is used this diagnostics is active.
Possible reasons for this failure:
• Settings of parameter P15 or P16 (define type of reference mark)
does not correspond to used linear encoder;
• Use of encoders with multiple reference marks;
• Exceeding of maximal axis shift velocity;
• Influence of Electromagnetic disturbances on measuring system or
any of its component (linear or rotary encoder, DRO);
NP20z_ang.doc
edition: December 2002
page: 30
•
•
Linear encoder installation (alignment) is not properly done;
Machine guide ways are looseness;
Err 2 message can be deleted by key “DELETE”, position display of axis
in which failure was happened will show the value (in increments) of
difference in absolute position between current and previous pass, press
to key “DELETE” will return NP20z to the mode which was set before
failure happened. See diagram:
PROCEDURE DISPLAY
NOTE
Pass over a reference mark
“Err 2« message
appears on the
failed axis
Absolute position during current pass over
the reference mark is different then during
previous pass
On the position
display of failed
axis number is
shown
This number is difference in increments
between absolute position and previous
position
Position display
shows position
<Err 3>
<Err 4>
NP 20 is set to mode which vas selected
before failure happened. Position displays
shows position. Old absolute position in
failed axis is lost. If axis was calibrated it
became non-calibrated.
A damage of one or multiple memory cells in internal structure of
2
E PROM. The parameter storing is not stable.
This failure can be caused by too often changing of parameters value
(>150.000). During normal operation, calculated lifetime for internal
2
E PROM is more then 41 years.
Counting logics error. This failure can be caused by:
• Settings of parameter P02 to any value if NP20 is not equipped with
option Q or Z (auxiliary axis);
• Break down of electronic component(s)
<Err 5>
Break down of internal RAM circuit.
<Err 6>
Calculating error (exceeded max. arithmetic value)
<Err PAr>
One or several positioning parameters have not been entered (display X)
<Err SOFt> Error in the device software
NP20z_ang.doc
edition: December 2002
page: 31
8. TECHNICAL DATA
Power supply voltage:
On request:
Network frequency:
Power consumption:
Ambient operating temperature:
Relative humidity:
Protection degree:
Vibrations*
Shocks*:
Power cable interferences*:
EM field*:
Electrostatic discharge*:
Safety class:
Dimensions (width x height x depth):
Weight:
220 V +10% - 15%
110 V +10% - 15%
48 to 52 Hz
20 VA approx.
0 to 45°C
5 to 75%
54 (front plate, housing)
IP 42 (rear plate)
1 g from 10 to 150 Hz
15 g
symmetrical 2.5 kV
asymmetrical 2.5 kV
10 V/m from 27 MHz to 200 MHz
13 kV
group 1 according to IEC 348
250 mm x 163 mm x 126 mm
cca. 2.200 g
*NOTE: Tested according to the IEC standards.
SQUARE-WAVE MEASURING SIGNALS:
RS-422-A, EIA standards,
Max. signal frequency:
NP20z_ang.doc
12-pole connector
120 kHz
edition: December 2002
page: 32
NP20z_ang.doc
edition: December 2002
page: 33
9. FRONT AND REAR PLATE – OPERATING ELEMENTS
inch indications
mm indications
display DP
mm
inch
axes indications
D/R-indications
REL-indications
REF-indications
X
NP 20z
D/R key
REL key
REF key
mm/inch key
Iskra
ref
D/R rel
Z0
ref
1/2
rel
Z
ref
1/2
rel
Numerical keyboard
DP (Datum point key)
P-key
ENTER-key
DELETE-key
axes displays
axes keys
axes reset keys
X axis input conn.
1
0
Power switch
on/off
Fuse
Power supply
input
RS 232
Connector
Z axis input conn.
Z0 axis input conn.
RIE Connector
Clearance of at least 120 mm has to be provided for accommodating the electrical
connections at rear of the device.
NP20z_ang.doc
edition: December 2002
page: 34
NOTES:
NP20z_ang.doc
edition: December 2002
page: 35