1
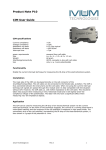
Product Note P9 ModuLight User Guide The ModuLight-module is a programmable light source that has been designed to investigate photo-electrical devices, such as solar cells. The add-on module will operate in combination with Ivium potentiostats, through the peripheral I/O-port. The ModuLight, by default, contains 7 LEDs with wavelengths ranging from 460-740 nm. On request LEDs can be exchanged for others from the same product range (see table below). During operation an LED can be programmatically selected. The sinewave generator of the potentiostat can then be used to modulate the intensity of the LED with a frequency of 10uHz-2MHz. The extensive Solar cell applications that are included in the Ivium software allow a full characterization of the solar cell. The functionality includes E/I curves as function of the light intensity, IMVS/IMPS, and solar cell modelling resulting in all characteristic values of the studied object. Ivium Technologies © P9.10 1 1. Modulight specifications Mode 1 2 3 4 5 6 7 Color Cool White Blue Green Amber Red Deep Red Far Red Cool White Violet UV IR IR Dental Blue* Wavelength [nm] 6500 K 460 523 590 623 660 740 5500 K 405 365 940 850 460 Power/Intensity [mW] / [lm] 250 lm 40 lm 200 lm 105 lm 160 lm 900 mW 705 mW 250 lm 1400 mW 1470 mW 1150 mW 800 mW 1100 mW Digital Code IIO IOI IOO OII OIO OOI OOO Optional Optional Optional Optional Optional Optional * Dental Blue LED emitter provides superior radiometric power in the wavelength range specifically required for dental curing light applications. Table 1 Wavelength specification, specification subject to change as LED technology progresses. Light intensity Bias resolution Wavelength Power Bandwidth Light aperture Power requirements Size Weight Interfacing/connectivity Use can be modulated with the FRAoutput of the build-in sinewave generator of the IviumStat/CompactStat from 10 µHz to 2 MHz. 16 bit, 0.0015% set programmatically 460-740 nm in 7 steps 0 - 1430 mW (depending on LED) 0 => 2 MHz circular, d = 34mm, 9.08cm2 external adapter: 100-240 V, 45-65 Hz at DC-connector: 5 V, 1A w x d x h = 12 x 13 x 2.5 cm 0.5 kg DB37, connects to the potentiostat peripheral port D-Sub 15pins only i.c.w. Ivium potentiostats 2. Installation Connect the ModuLight to the potentiostat using the cable that is included with the instrument. Insert the connection cable into the SD37connector at the back of the Modulight and the other end into the peripheral port connetor of your potentiostat: - The SD37-SD37 cable connects the ModuLight to the IviumStat and CompactStat; - The SD37-SD15 cable connects the ModuLight to the Vertex.s and sModule. The HD15 connector at the front of the Modulight is intended for the connection of the light-intensity meter. This Ivium product will be available soon. Insert the external 5V power adapter. The ModuLight is now ready for operation, using the IviumSoft-software. The test object (solar cell) can be connected to the cell cable and illuminated with the ModuLight. The operation of the ModuLight is independent of its position, i.e. the ModuLight can be placed under, on top, to the side, etc. of the test object. At the bottom of the ModuLight a screw socket is available to put the ModuLight on a common camera stand. Ivium Technologies © P9.10 2 3. Direct operation The ModuLight can emit a modulated light flux of 6 different wavelengths and 1 wavelength spread (white), using 7 different LEDs as light source. The present specifications of each wavelength are given in table 1 (above). Wavelength Selection The wavelength/LED can be selected by using the 3 digital outputs of the peripheral port. The digital codes are given in table 1. (Note that these codes are according to the electronic standards, i.e. counting from right to left). The digital outputs can be accessed in the IviumSoft from the "Direct" tab in the "Extern" tab below. As an example, to choose the color "white", the digital code is "IIO". This means that "Dig out 3" and "Dig out 2" need to be checked and "Dig out 1" is unchecked. DC Intensity The DC intensity of the light is controlled via the Analog output11. This output has a range of 0 – 4V, which corresponds to a light output of 0–100% of the full output power. For example enter "1V" into the ch1 field and click on "ch1". This will result in a light output of the chosen colour corresponding with 25% of full-drive current2. AC Modulation The AC modulation of the light is controlled via the AC-output of the peripheral port. The ACoutput is accessed in IviumSoft from the "AC" tab which is found under the Direct control menu tab. The rate of modulation is controlled by the Frequency setting. An AC amplitude setting of 0 – 1V corresponds to a modulation of 0 –100% of the full output power3, which is added to the selected dc power. Examples 1Set DC Voltage (Analog output ch1) = 2V; click "Ch1" Set AC Voltage (AC signal Amplitude) = 0.500V Set Frequency (AC signal Frequency) = 2Hz; click "Apply" Now the light will start modulating between 100% intensity and 0% intensity at the chosen frequency of 2 Hz. The 2V DC sets the light amplitude at 50% of maximum drive current3, then 0.5V AC adds a modulation intensity of 50% of full output current3, and so the combined signal oscillates between full output power and zero. The DC intensity/Analog output1 can also be controlled directly from within some methods (Mixed Mode) and as a Direct command from Batch Mode. 2 See paragraph 7. Ivium Modulight Photometry 3 See paragraph 7. Ivium Modulight Photometry 1 Ivium Technologies © P9.10 3 2Set DC Voltage = 3.6V (90% of max power) Set AC Voltage = 0.1V (10% of max power) Set Frequency (AC signal Frequency) = 100Hz This produces a modulation between 80% of full-on and 100% of full on with a dc offset power at 90% of full-on, at a frequency of 100Hz4. 3- Overdriving to non-linearity (not recommended): DC Voltage = 4V (100% of max power) AC Voltage = 0.05V (5% of max power) This produces a modulation between 95% intensity and 100% intensity. Because more than 100% intensity is not possible, the first half of the sine wave will modulate between 95% and 100%, the second half of the sine wave will yield 100%. This could produce a non-linear modulation and is not recommended. Note1: When controlling the ModuLight from the direct mode, it should be taken into account that communication between PC and Ivium device only takes place once per second. This means that there may be a delay of up to one second before a change takes effect. Note2: The peripheral port signal output depends on the Ivium instrument type. I.e. when the "Plus-module" option is checked, the AC-output signal is a factor of 5.33 lower than the set value; when the "E extended range" option is checked, the AC-output signal is a factor of 2 lower than the set value. This means that in these cases the amplitude of the light intensity variation is equally less. If this is an issue, please contact Ivium Technologies for a solution. Note3: Due to the non-linear nature of the LED light output as a function of the driving current4, the DC voltage control 0 - 4V also shows a non-linear control function. 4 See paragraph 7. Ivium Modulight Photometry Ivium Technologies © P9.10 4 4. Running a Method 4.1 Single method A single method can be run by first setting the desired parameters of the ModuLight, such as wavelength and intensity, in the "Direct" mode tab (see paragraph 3). Then in the "Method" mode tab, a method can be run. For example, to measure an E/I curve of a solar cell, set the desired wavelength (Digital outputs) and intensity (DC Voltage, Ch1), then the E/I curve can be measured using the linear sweep method 5. To run an impedance measurement, the ModuLight parameters such as wavelength and DC intensity need to be set first in the "Direct" mode tab. In the "Method" mode tab select the desired impedance technique (for example "Constant E"). Then activate the "Advanced" method, now the “MeasConfig” is available in the parameter list. The “MeasConfig” parameter determines how and which signals are recorded and shown in the graph (see also paragraph 5). 4.2 Automated methods Batch mode In is possible to run several methods successively in the "BatchMode". In between methods it is possible to change the wavelength (light colour) and DC intensity of the ModuLight. To do this add a "DirectCommand" line in the appropriate place in the batch program. When this line is selected in the Line-properties, the wavelength can be chosen by ticking the "SetDigOut" box. The boxes for the individual digital outputs become available and by ticking the relevant boxes the wavelength can be chosen. In the same way ticking the "SetDAC" box will make the analog outputs available. Inserting the desired value in the "DAC 1" field (=Analog output 1, ch1) will set the intensity of the light. Mixed mode In the transient technique "MixedMode" a sequence of operations can be programmed in in the method parameter "Stages" (pop-up). In the "Properties for Level", at the bottom of the list, the following parameters allow operation of the ModuLight: o AnOut1: when ticked, a value can be entered from 1 - 4 V which determines the DC intensity of the light from 0 - 100% (in the same way as in the direct mode operation, see paragraph 3). o Digouts: when ticked, an integer value can be entered to select the wavelength. This integer corresponds to an 8 bit conversion for the digital outputs, i.e. 0 = 000= Far Red, 6 = 110 = Cool White. o The AC modulation of the light can be controlled by ticking the "Record ac" box. In the main method parameters the modulation Frequency (Hz) and AC amplitude can be set (amplitude: 0 - 1V corresponding with 0 - 100% intensity; in the same way as in the direct mode operation, see paragraph 3). Modulation cannot be applied while performing a DC sweep – only during EIS. If an AC modulation was selected under the Direct Mode tab, it will simply switch off during the DC sweep. (However, note that sweep measurements incorporating pulsed modulation of the light amplitude can be achieved using Mixed Mode by segmenting the sweep into levels and having different values of the analogue output in each sweep level.) 5 Ivium Technologies © P9.10 5 5. Measurement/signal configuration (AC transfer function) Standard electrochemical impedance is determined from measurements of the AC current and AC potential at the instrument's cell connectors. A standard impedance (Z) sweep is derived from E/I, where the Y-input/signal is E (voltage) and the X-input/signal is I_we (current at the working electrode). In the table 2 (below) this situation is given in line 0: MeasConfig = standard. However, with Ivium potentiostats/IviumSoft it is possible to select other signals for the X- and Y-inputs. In the Impedance techniques the advanced method parameter “MeasConfig” is available. This parameter allows various signals to be used for the Xand Y-inputs. These signals can then be plotted in the impedance Result graph as if these were I_we and E respectively. Table 2 below shows alternative choices which are accessible in IviumSoft from the “MeasConfig” parameter in the Impedance techniques (Advanced mode only). For the Modulight the relevant choices are lines 0, 1 and 2 (BOLD), corresponding with standard, INT_ac I and INT_ac E. Table 2 MeasConfig 0 standard 1 INT_ac I 2 INT_ac E 3 EXT_ac EI 4 EXT_ac I 5 EXT_ac E 6 EXT_I INT_E 7 EXT_E INT_I 8 DirectE 9 DirectE_INT_I 10 DirectE_EXT_I 11 BiStat 12 EXT_I BiStat X I we ac intern I we X periph. X periph. I we X periph. ac intern I we ac intern X periph. I we X periph. Y remarks E E Internal DSG not applied ac intern Internal DSG not applied Y periph. E Y periph. ac intern Y periph. E CE as reference, instead of (RE-S) E CE as reference, instead of (RE-S) E I we2 I we2 In the table: I_we and E: Are generated or measured as usual via the potentiostat/cell connector; AC intern: Is the internally generated (FRA) ac signal applied via the peripheral port connector (=AC-out in the pin-out in the instrument manual). It drives the ModuLight AC intensity. Internal DSG not applied: Signifies that the Internal Direct Signal Generator is not applied, so no AC perturbation is carried through to the E and I_we signals; these are DC signals only. When measuring impedance the IviumSoft always defines this as Y/X so, for standard impedance (Z), this would be E/I we in the table above. When other signals are used for Y and X the data is still displayed as impedance (Z=E/I) by the software however it is actually a transfer function which is defined by the MeasConfig selection and the user must interpret the data. To invert the transfer function to X/Y, select Admittance (Y) instead of Impedance (Z) in the software. Ivium Technologies © P9.10 6 Example 1: Solarcell IMPS - Intensity Modulated Photocurrent Spectroscopy The IMPS technique measures the transfer function between modulated light intensity and the resulting AC current generated by the cell 6. To run this technique: - Select from the method tree: Impedance> Constant E. - Activate advanced method parameters - Set parameter "MeasConfig" to "INT_ac E" With this parameter-setting, the internal applied AC signal is used as Y (light-intensity) and the photo current is used as X: IMPS = Y/X = light intensity/photo-Current = AC intern/I_we. This potentiostat’s dc potential may be set to short circuit conditions (E=0), but it may also be made at, for example, the maximum power point or Eoc (I=0). Note that the potentiostat’s DC potential may be set to short circuit conditions (E=0), but it may also be operated at other settings, for example maximum power point or E_oc (I=0). Example 2: Solarcell IMVS - Intensity Modulated Photovoltage Spectroscopy The IMVS technique measures the transfer function between modulated light intensity and the resulting AC voltage generated by the cell3. To run this technique: - Select from the method tree: Impedance> Constant I. - Activate advanced method parameters - Set parameter "MeasConfig" to "INT_ac I" With this parameter-setting, the internal applied AC signal is used as Y (light-intensity) and the photo potential is used as X: IMPS = Y/X = photo potential/light intensity = E/AC intern Note that the galvanostat current may be set to OCP conditions (I=0), but it may also be made at, for example, the maximum power point. There are no universal standards for display of IMPS and IMVS. If the inverse ratio is required then Admittance (Y) should be selected for display within IviumSoft. 6 Ivium Technologies © P9.10 7 6. Experimental example Experiments were conducted with a 1cm2 Dye Sensitized SolarCell (DSSC). The solarcell was connected to an Ivium CompactStat, with WE/S to the positive pole, and CE/RE to the negative pole (a negative current means that the solarcell is producing power). As light source, the Ivium ModuLight module was used with the 635nm setting, connected to the CompactStat peripheral port's AnalogOut1 for DC intensity and ACout for AC intensity modulation. - The DC LSV scans were done by first setting the illumination level with AnalogOut1 (in the Direct Mode) and thereafter performing a scan. - The DC experiments with pulsed light were done with the Mixed Mode technique (the the Anout1 parameter of the 2nd level was used to set the desired light intensity). - The EIS scans were done by first setting the bias-illumination level with AnalogOut1 (in the Direct Mode tab), and thereafter performing an EIS scan with “MeasConfig” parameter to “Int_AC_E” for potentiostatic scans and “Int_AC_I” for galvanostatic scans. The applied frequency range was 10kHz to 0.1Hz. mA DSSC E/I curve 0 Current -1 -2 -3 0.0 0.2 0.4 0.6 Potential V E/I curves for DSSC at various light intensities: 15lm, 30lm, 60lm Ivium Technologies © P9.10 8 Screenshot of the solar cell modelling circuit, using the 15lm intensity curve Screenshot of the solarcell modelling circuit, using the 60lm intensity curve Ivium Technologies © P9.10 9 V DSSC at OCP 0.6 0.2 Potential 0.4 0.0 0 200 400 600 800 time ms Open Cell Potential of DSSC for variable intensity light pulses mA DSSC at 0V 0 -1 Potential Current -2 -3 -4 0 100 200 300 400 500 time ms Current response of DSSC at Estat 0V, for variable intensity light pulses Ivium Technologies © P9.10 10 ohm DSSC at OCP 0 -200 -400 -E'' -600 -800 -2.5 -2.0 -1.5 -1.0 -0.5 0.0 E' kohm IMVS photo-electric-impedance of a DSSC at OCP, at various light intensities, left to right: 15lm, 18lm, 23lm, 30lm ohm DSSC at constant current -0 -10 -E'' -20 -30 -60 -40 -20 E' -0 ohm Photo-electric-impedance of a DSSC at various constant currents, 0.1Hz to 1kHz, at fixed light intensities of 60lm, left to right: 0mA (OCP), 1mA, 3 mA Ivium Technologies © P9.10 11 mS DSSC at variable DC bias 0.0 -0.5 -F'' -1.0 -1.5 0 1 2 3 F' mS Photo-electric-admittance of DSSC at various DC bias, at fixed light intensity of 60lm, left to right: 0.7V, 0.6V, 0.0V (IMPS) mS DSSC at 0.6V 0.0 -0.5 -1.0 -F'' -1.5 -2.0 -2.5 0 2 4 F' 6 mS Photo-electric-admittance of DSSC at 600mV DC, at various light intensities, left to right: 15lm, 30lm, 60lm Ivium Technologies © P9.10 12 7. Ivium ModuLight Photometry Luminous Flux The applied LED series is adapted to the so-called luminous efficiency function. This function describes the average sensitivity of the human eye to light at different wavelengths. This means that to obtain a relatively equal light output at different wavelengths the radiant power will vary. The relationship between luminous and radiant intensity can be described as: I V 683 I Y ( ) IV Luminous Intensity in I Radiant Intensity in Y ( ) Luminous Function sr Steradium W Lm sr sr Luminous efficiency function Luminous Intensity In the graphs in paragraph 8 and 9, the relative light output (%) as a function of the driving current is given for each of the LEDs used in the ModuLight. 0 mA corresponds to 0% light, 1000mA corresponds with 100% relative light output. In the ModuLight the LED intensity is controlled via the setting of Analog output 1, linear from 0 - 4V. The setting of 0V corresponds to a driving current of 0 mA, 4 V corresponds to a driving current of 1000mA. Example Using a the RED LED (623nm, 260lm/W, output 160lm at 100%): - setting 0V will give 0 light - setting 4V will give 100% light (1000mA), corresponding with 160lm or 615mW (= 160/260) - For 50% light output, a driving current is needed of ca. 430mA (see also graphs in paragraph 8 and 9). To achieve 50% a setting of 1.72V (4V * 0.430/1) is required, corresponding with 80lm or 307.5mW or (= 80/260) Ivium Technologies © P9.10 13 8. LED specifications (Default configuration) Cool White 6500k Blue 460nm 200lm @ 1A 40lm @1A Green 523nm 200lm @1A Amber 590nm 105lm @1A Ivium Technologies © P9.10 14 Red 623nm 160lm @1A Deep Red 660nm 900mW @1A Far Red 740nm 705mW @1A Ivium Technologies © P9.10 15 9. LED specifications (Optional) Cool White 5500k 227lm @1A Warm White 3000k 180lm @1A Violet 400nm 1400mW @1A UV 365nm 1120mW @1A Ivium Technologies © P9.10 16 IR 940nm 1150mW @1A IR 850nm 1150mW @1A Dental Blue* 460nm 1100mW @1A * Dental Blue LED emitter provides superior radiometric power in the wavelength range specifically required for dental curing light applications. Ivium Technologies © P9.10 17 10 Luminous Efficacy Tables Photopic Scotopic Wavelength Luminous Photopic Luminous Scotopic Conversion Conversion Efficacy Efficacy lm/W lm/W Vλ V'λ λ (nm) 380 0.000039 0.027 0.000589 1.001 390 0.000120 0.082 0.002209 3.755 390 0.000120 0.082 0.002209 3.755 400 0.000396 0.009290 15.793 0.270 410 0.001210 0.826 0.034840 59.228 420 0.004000 2.732 0.096600 164.220 430 0.011600 7.923 0.199800 339.660 440 0.023000 15.709 0.328100 557.770 450 0.038000 25.954 0.455000 773.500 460 0.060000 0.567000 963.900 40.980 470 0.090980 62.139 0.676000 1.149.200 480 0.139020 94.951 0.793000 1.348.100 490 0.208020 142.078 0.904000 1.536.800 500 0.323000 220.609 0.982000 1.669.400 507 0.444310 303.464 1.000.000 1.700.000 510 0.503000 343.549 0.997000 1.694.900 520 0.710000 0.935000 1.589.500 484.930 530 0.862000 588.746 0.811000 1.378.700 540 0.954000 651.582 0.655000 1.105.000 550 0.994950 679.551 0.481000 817.700 555 1.000.000 683.000 0.402000 683.000 560 0.995000 679.585 0.328800 558.960 570 0.952000 650.216 0.207600 352.920 580 0.870000 594.210 0.121200 206.040 590 0.757000 0.065500 111.350 517.031 600 0.631000 430.973 0.033150 56.355 610 0.503000 343.549 0.015930 27.081 620 0.381000 0.007370 12.529 260.223 630 0.265000 180.995 0.003335 5.670 640 0.175000 119.525 0.001497 2.545 650 0.107000 73.081 0.000677 1.151 660 0.061000 0.000313 0.532 41.663 670 0.032000 21.856 0.000148 0.252 680 0.017000 11.611 0.000072 0.122 690 0.008210 5.607 0.000035 0.060 700 0.004102 2.802 0.000018 0.030 710 0.002091 1.428 0.000009 0.016 720 0.001047 0.715 0.000005 0.008 730 0.000520 0.355 0.000003 0.004 740 0.000249 0.000001 0.002 0.170 750 0.000120 0.082 0.000001 0.001 760 0.000060 0.041 0.000000 0.000 770 0.000030 0.020 0.000000 0.000 Source: Table 6-1 of Williamson & Cummins, Light and Color in Nature and Art, Wiley, 1983. The Photopic conversion (lm/W) is obtained by multiplying Vλ by 683 and the Scotopic conversion is obtained by multiplying V'λ by 1700 as suggested by those authors. www.ivium.com Ivium Technologies © P9.10 18