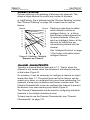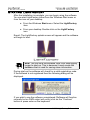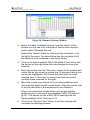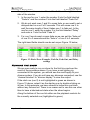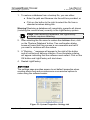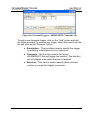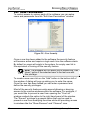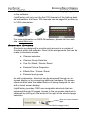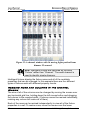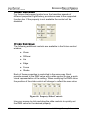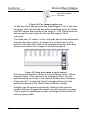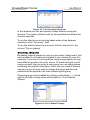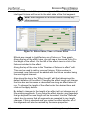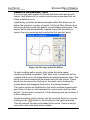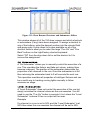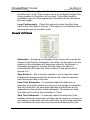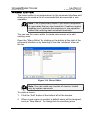
1
LightFactory User Guide V1.1.0 Copyright © 2005 LightFactory Software Ltd Auckland, New Zealand LightFactory User Guide The software described in this book is furnished under a license agreement and may be used only in accordance with the terms of the agreement. Copyright notice Copyright © 2005 LightFactory Software Ltd. All Rights Reserved. This document may not, in whole or in part, be copied, photocopied, reproduced, translated or reduced to any electronic medium or machine-readable form without prior consent in writing from LIGHTFACTORY SOFTWARE LIMITED, of Hobson Street, Auckland, New Zealand. ALL EXAMPLES WITH NAMES, COMPANY NAMES, OR COMPANIES THAT APPEAR IN THIS BOOK ARE IMAGINARY AND DO NOT REFER TO, OR PORTRAY, IN NAME OR IN SUBSTANCE, ANY ACTUAL NAMES, COMPANIES, ENTITIES OR INSTITUTIONS. ANY RESEMBLANCE TO ANY PERSON, COMPANY, ENTITY OR INSTITUTION IS COINCIDENTAL. Disclaimer Every effort has been made to ensure the accuracy of this manual. However, LIGHTFACTORY SOFTWARE LIMITED makes no warranties with respect to this documentation and disclaims any implied warranties of merchantability and fitness for a particular purpose. LIGHTFACTORY SOFTWARE LIMITED shall not be liable for any errors or for incidental or consequential damages in connection with the furnishing, performance or use of this manual or the examples herein. The information in this document is subject to change without notice. ii SOFTWARE LICENCE AGREEMENT These terms and conditions comprise a contract between you (“Licensee”) and LIGHTFACTORY SOFTWARE LIMITED (“LFL”) of 7B, 125a Hobson Street, Auckland, New Zealand. The Licensee will be permitted to use LightFactory (“the Software; encompassing all applications, and databases”) only if the terms of LightFactory Software Limited (“LFL”) are agreed to. If the Licensee is a company then the agreement of the person accepting the terms of this License shall be deemed to be acceptance by the Company. Acceptance should be indicated by clicking on the “Accept” button during installation. This will constitute acceptance of the Licence terms. If it is not intended to accept these terms, the “Cancel” button should be clicked. 1. Intellectual Property 1.1 The Licensee acknowledges that all intellectual property rights, including copyright relating to the Software, are the sole property of LFL. 1.2 The Licensee acknowledges that all source code and form definitions relating to the Software are the sole property of LFL and may not be modified in any way. 1.3 The Licensee acknowledges that all enhancements, modifications or customisations, including associated source code and form definitions, made by or on behalf of the licensee relating to the Software, are the sole property of LFL. 1.4 The Licensee does not obtain; either under this Licence or by reason of use of this Software, any right to copy the Software, or any right to use the Software after the Licence has terminated. 2. Licence 2.1 The Licensee is granted a non-exclusive, non-transferable Licence to install and use the Software for the Licensee's own internal business purposes, provided the Licensee pays the charges for the Licence. 2.2 The Licensee shall during the continuance of the Licence for internal use: 2.2.1 use the Software only as allowed for under this Licence. 2.2.2 not copy or reverse engineer the Software or allow it to be iii copied or reverse engineered by any third party, or modify the source code or form definitions in any way. 2.2.3 effect and maintain adequate security measures to safeguard the Software from access or use by any unauthorised person. 2.2.4 retain the Software and all copies thereof under the Licensee's effective possession and control. 3. Assignment 3.1 The Licensee may not transfer the benefits of this Licence or the Software to any other person or entity without the prior written consent of LFL. 4. Warranty and Limitation of Liability 4.1 LFL warrants that when the Software is used with reasonable skill and care it will provide the functionality specified. This warranty is valid for a period of 90 days from the date of purchase. 4.2 If a significant defect in the product is found in the 90 day warranty period, the Licensee may return the product for a refund. 4.3 LFL is not liable to any third party for any loss or damage arising directly or indirectly in connection with the Software, including (but without limitation) any loss of profit, business, revenue, goodwill or anticipated savings. This exclusion of liability applies to liability in contract tort, and any other principle of legal liability. 4.4 LFL is not liable to correct any fault due to: 4.4.1 User negligence. 4.4.2 Misuse. 4.4.3 Alteration, modification or attachment without the prior written consent of LFL. 4.4.4 Power surges or problems caused by external power supply. 4.4.5 Excessive temperature, humidity or other environmental factors. 4.4.6 LFL’s inability to gain access to the purchaser’s computer equipment. iv 4.4.7 Relocation or transportation. 4.4.8 Accident, earthquake or other disaster. 5. Termination 5.1 LFL may terminate this Licence at any time on written notice. 5.2 Upon termination by LFL, the Licensee will be required to return the Software to LFL and confirm in writing that no copies of the Software have been made and retained. 6. Governing Law 6.1 This Agreement shall be governed by the laws of New Zealand and is subject to the exclusive jurisdiction of the Courts of New Zealand. v Contents Lighting Concepts LightFactory A Guide for Users Contents Overview............................................................................. 10 Concepts .............................................................................11 Lighting Concepts .............................................................................. 11 DMX System .................................................................................... 11 Dimmers ...................................................................................... 12 DMX Value................................................................................... 12 DMX Universe.............................................................................. 12 Channels (Logical channels or Fixtures) ..................................... 12 Dimmer Patching ......................................................................... 13 Channel Characteristic ...................................................................... 13 Conventional fixtures ....................................................................... 14 Intelligent Fixtures............................................................................ 14 Fixture Properties (Attributes)...................................................... 14 Scene ............................................................................................... 17 LightFactory Concepts ...................................................................... 17 Channel Groups ............................................................................... 17 Override ....................................................................................... 18 Build ............................................................................................. 18 Exclusive...................................................................................... 19 Highest Takes Precedence .......................................................... 19 Lowest Takes Precedence........................................................... 20 Submasters and Shortcuts .......................................................... 20 Shows (Cue List).............................................................................. 21 Cue List Groups........................................................................... 21 Show Runners ............................................................................. 21 Cues ............................................................................................ 22 Cue Number...................................................................................... 22 Cue Trigger........................................................................................ 22 Cue Channels ................................................................................... 23 Cue Effects........................................................................................ 23 Intelligent Cue Execution................................................................... 23 Effects .............................................................................................. 23 Effect groups................................................................................ 24 Effect Runners ............................................................................. 24 Effect Play.................................................................................... 24 Effect Back................................................................................... 24 Effect Pause ................................................................................ 24 Effect segments ........................................................................... 24 1 LightFactory A Guide for Users Contents Lighting Concepts Intelligent preparing of fixture properties .....................................25 Exclusive groups..........................................................................25 Command Interface..........................................................................25 Command History ........................................................................25 Telnet Interface ............................................................................26 Palettes ............................................................................................26 Macros..............................................................................................26 Shortcuts ..........................................................................................26 Selection shortcuts.......................................................................26 Fixture properties shortcuts .........................................................26 Level group shortcuts...................................................................27 Computer Concepts ...........................................................................27 Mouse Scroll Wheel .........................................................................27 Drag-and-Drop .................................................................................27 Right-click pop-up Menus.................................................................27 Screen Real Estate ..........................................................................28 Window Docking ..............................................................................28 MIDI..................................................................................................28 SMPTE .............................................................................................28 SQL Server.......................................................................................28 Timecode..........................................................................................29 USB ..................................................................................................29 Ethernet............................................................................................29 Installing LightFactory ...................................................... 30 Installation Pre-requisites..................................................................30 Installation Procedure........................................................................30 Downloading LightFactory................................................................30 Installing LightFactory ......................................................................30 Starting LightFactory .........................................................................34 Registration & Licensing ...................................................................36 License Codes..................................................................................37 Installing DMX Hardware ...................................................................39 Soundlight / Sunlite USB DMX Dongle ............................................39 Soundlight / Sunlite USB DMX In Dongle ........................................42 Enttec Open USB DMX Dongle .......................................................42 Artnet DMX on Ethernet ...................................................................46 Enttec DMX on Ethernet ..................................................................46 Optional Hardware installation..........................................................46 Installing Cherry G80-1950 POS keyboard......................................46 Quick Start.......................................................................... 48 2 © 2004 LightFactory Software Ltd Contents Lighting Concepts LightFactory A Guide for Users Using the Channel Window ............................................................... 48 Patching a Moving Light.................................................................... 50 Controlling a Moving Light................................................................ 52 Creating a Basic Show....................................................................... 54 Creating Cue 1 ................................................................................. 55 Creating Cue 2 ................................................................................. 55 Creating Cue 3 ................................................................................. 56 The Cue List Editor .......................................................................... 56 Setting the transition between cues ................................................. 56 Running the show ............................................................................ 57 Reference/Window Overview............................................ 59 Command Interface............................................................................ 59 Command Structure ......................................................................... 60 Command History ........................................................................ 60 Channel Commands .................................................................... 60 Other Commands ........................................................................ 63 Blackout ............................................................................................ 63 Macro ................................................................................................ 63 File menu ......................................................................................... 63 Clear current show....................................................................... 64 Load show ................................................................................... 64 Save show ................................................................................... 65 Delete show ................................................................................. 66 System Properties ....................................................................... 67 System .............................................................................................. 68 Database........................................................................................... 70 Settings ............................................................................................. 71 Registration ....................................................................................... 73 Visualisation ...................................................................................... 73 External Triggers.......................................................................... 74 MIDI Control ...................................................................................... 74 PC Line-In ......................................................................................... 75 MIDI/SMPTE Timecode..................................................................... 76 Scheduled Tasks.......................................................................... 78 Create a scheduled task.................................................................... 78 Modify a scheduled task.................................................................... 81 Remove a scheduled task ................................................................. 81 Temporarily turn off a scheduled tasks .............................................. 81 Edit User Permissions ................................................................. 82 Submaster Options .......................................................................... 84 On-Screen Submasters ............................................................... 84 Hardware Submasters ................................................................. 85 3 LightFactory A Guide for Users Contents Lighting Concepts Shortcut Options ..............................................................................86 On-Screen Shortcuts ...................................................................87 Hardware Shortcuts .....................................................................88 Channel Display..................................................................................89 Resizing Rows and Columns in the Channel Window.....................90 Selection Options .............................................................................91 Inclusive Selection .......................................................................91 Exclusive Selection ......................................................................92 Select All / Unselect All ................................................................92 Select Inactive / Select active ......................................................92 Invert selection.............................................................................92 Undo last selection.......................................................................92 Select Next...................................................................................92 Select Previous ............................................................................92 ON................................................................................................92 OFF..............................................................................................92 Solo..............................................................................................93 DBO .............................................................................................93 Park..............................................................................................93 Release........................................................................................93 Release All ...................................................................................93 Modifying Selected Channels...........................................................93 Default Fade Time............................................................................94 Text Size...........................................................................................94 Intelligent Fixture Control .................................................................94 Pan & Tilt......................................................................................97 Position Presets & Options ............................................................... 98 Colour Wheels .............................................................................98 CMY Colour Mixing ......................................................................99 Gobo Control..............................................................................100 Effects ........................................................................................101 Control Channel .........................................................................101 Advanced Controls ....................................................................103 Beam Framing .................................................................................103 Speed Controls ................................................................................104 Other Controls............................................................................104 The right click menu .......................................................................105 Quick Selection ..........................................................................105 Adding channels to a channel group .........................................106 Add selected channels to group.......................................................106 Add selected channels to group (Snapshot current state)................107 4 © 2004 LightFactory Software Ltd Contents Lighting Concepts LightFactory A Guide for Users Remove selected channels from group ........................................... 107 Adding channels to a cue .......................................................... 107 Add active channels to a cue .......................................................... 107 Add selected channels to a cue ...................................................... 108 Add selected channels to a cue without dimmer ............................. 109 Update (replace) cue with active channels...................................... 109 Remove selected channels from a cue ........................................... 109 Add selected channels to a selection shortcut .......................... 109 Add selected channels to palette............................................... 111 Add active channels to simple chase step ................................ 111 Add selected channels to simple chase step ............................ 112 Create simple chase from selected fixtures .............................. 112 Level Groups ............................................................................. 112 Reset selected fixture properties ............................................... 113 Compact View............................................................................ 113 Autosize cells............................................................................. 113 Reset cell size to default............................................................ 113 Lock cell size ............................................................................. 113 Select odd fixtures of currently selected & Select even fixtures of currently selected....................................................................... 113 Channel Group Editor ...................................................................... 114 Group Name................................................................................... 115 Channels ........................................................................................ 115 Value .............................................................................................. 117 Fade Time ...................................................................................... 118 Behaviour ....................................................................................... 118 Submaster...................................................................................... 118 Shortcut.......................................................................................... 119 Toggle Shortcut .............................................................................. 119 Snap Properties ............................................................................. 120 Options........................................................................................... 120 Select All/Unselect All ................................................................ 120 Select Active/Select Inactive...................................................... 120 Sort View.................................................................................... 120 Cue List Editor.................................................................................. 121 Cue Lists ........................................................................................ 121 Active vs. Selected Cue Lists......................................................... 122 Cue’s .............................................................................................. 122 Right Click Menu........................................................................ 123 Copy this cue .................................................................................. 123 Insert a new blank cue below .......................................................... 123 5 LightFactory A Guide for Users Contents Lighting Concepts Insert a new cue below (Copy this cue) ...........................................124 Set “Pre-fetch” flag for all intelligent fixtures in this cue ...................124 Set “Pre-fetch” flag for all intelligent fixtures in show group .............124 Set “Force Prop” flag for all intelligent fixtures in this cue ................124 Set “Force Prop” flag for all intelligent fixtures in show group ..........124 Reset grid layout to default ..............................................................124 Cue Number...............................................................................124 Description .................................................................................125 Channels....................................................................................125 Setting a different fade time for each property .................................129 Edit Live ...........................................................................................130 Show dimmer values as percentages ..............................................130 Effects Sequences .....................................................................130 Timeline, Property and matrix Effects ..............................................131 Simple Chases.................................................................................132 Exec Shortcut.............................................................................132 Channel Groups.........................................................................133 Trigger........................................................................................134 Next Cue Number ......................................................................134 Delay..........................................................................................135 Fade In.......................................................................................135 Dwell ..........................................................................................135 Fade Out ....................................................................................135 Effects Delay..............................................................................135 Timecode ...................................................................................135 Testing a show................................................................................136 Cue Go.......................................................................................136 Cue Stop ....................................................................................136 Cue Back ...................................................................................136 Cue Reset ..................................................................................136 Playback 1 .................................................................................137 Cut to cue on double click..........................................................137 Print Cue List .............................................................................137 Effects Editor ....................................................................................138 Effect Groups .................................................................................138 Creating new effects.......................................................................139 Simple lighting chase.................................................................139 Time vs Fixture effect.................................................................140 Property / Attribute effect ...........................................................140 Matrix/LED Effect .......................................................................142 Selecting a different effect .........................................................142 Simple Chase .................................................................................143 6 © 2004 LightFactory Software Ltd Contents Lighting Concepts LightFactory A Guide for Users Adding channels to a step ......................................................... 144 Removing channels from a step ................................................ 144 Editing channel values............................................................... 144 Time vs. Fixture Effects.................................................................. 145 Start Offset Field ........................................................................ 148 Creating and Editing Segments................................................. 148 Options ...................................................................................... 152 Delete Segment .............................................................................. 152 Delete All Segments ........................................................................ 152 Cut, Copy, Copy All, Paste Segments ............................................. 153 Create a follow-on segment ............................................................ 153 Create a moving light path .............................................................. 154 Adding fade-in and fade-out to segments........................................ 156 Rotate Segment Right ..................................................................... 157 Auto Create Effects.................................................................... 157 Auto Offset................................................................................. 158 Property / Attribute effect ............................................................... 159 Channels / Fixtures.................................................................... 160 Path ........................................................................................... 160 Modifying a path .............................................................................. 160 Property ..................................................................................... 161 Length........................................................................................ 161 Offset ......................................................................................... 161 Scale.......................................................................................... 161 Start Position.............................................................................. 161 Stagger ...................................................................................... 161 Matrix / LED Effect ......................................................................... 162 Effect Length.............................................................................. 163 Zoom Matrix............................................................................... 163 Step to points only ..................................................................... 163 Stop at each point ...................................................................... 163 Media Effect ................................................................................... 163 Effect Playback Controls................................................................ 164 Dimmer Patching.............................................................................. 165 Standard Dimmers ..................................................................... 166 Intelligent Fixtures...................................................................... 166 Flip Pan & Tilt............................................................................. 167 Description 1& 2 ........................................................................ 167 Aux Dimmer ............................................................................... 168 Edit Fixtures ................................................................................... 168 Colour Wheels ........................................................................... 170 7 LightFactory A Guide for Users Contents Lighting Concepts Gobo Control..............................................................................170 Control Channel .........................................................................171 Channel Characteristic...................................................................172 Default Characteristics...............................................................173 Patch Options.................................................................................174 Reset Patch ...............................................................................174 Clear Patch ................................................................................174 Import Patch Data ......................................................................175 Print Patch .................................................................................175 Edit Matricis....................................................................................175 DMX Display......................................................................................177 Show Runners ..................................................................................178 Playback Control Buttons...............................................................179 Cue Go.......................................................................................179 Cue Stop ....................................................................................179 Cue Back ...................................................................................180 Cue Reset ..................................................................................180 Step Forward & Back .................................................................180 Shortcuts and Submasters.............................................................180 Go Submasters ..........................................................................181 Level Submasters ......................................................................181 Options ...........................................................................................182 Disable Reset.............................................................................182 Preview Next Cue in WYSIWYG ...............................................182 Go All .........................................................................................182 Reset All.....................................................................................182 Effects Runners ................................................................................183 Time vs. Fixture Effects Options ....................................................184 Chase Options................................................................................185 Property / Attribute Effect Options..................................................186 Matrix Effect Options ......................................................................187 Playback Controls ..........................................................................188 Macro Editor......................................................................................189 Additional Commands ....................................................................190 Level Group Editor ...........................................................................191 Palettes ..............................................................................................193 8 © 2004 LightFactory Software Ltd Lighting Concepts LightFactory A Guide for Users 9 LightFactory A Guide for Users Overview Lighting Concepts Overview LightFactory is a unique PC based lighting controller that combines the best of traditional lighting control with advanced features only available with the power of a PC. LightFactory was designed with the idea that every lighting engineer, operator or designer could own his or her own control desk. One desk they are completely familiar with, one desk that works for every situation and one desk they can rely on every time. Created by lighting designers for lighting designers, LightFactory allows you to quickly set up a new venue without having to learn a new lighting controller or have budget constraints restrict your choice of desk. With advanced features for all lighting situations, from museum to stage shows, LightFactory does it all. Control over 5000 dimmers with 2000 channels. Dimmers can be purchased in 512 dimmer blocks for a truly scalable system. This user guide will take you through all of the features of the software and show you how to use it to its fullest potential. 10 © 2004 LightFactory Software Ltd Concepts Lighting Concepts LightFactory A Guide for Users Concepts This section covers some lighting basics as well as introducing you to LightFactory’s main concepts and computer terminology required to use the software. Lighting Concepts DMX System DMX 512 is the standard protocol by which lighting control desks communicate with lighting equipment. The DMX 512 protocol is a stream of data that is sent via a cable system connected between the data transmitter (LightFactory) and a data receiver, which could be anything ranging from a basic light to intelligent lights, smoke machines, etc. Dimmer Pack Dimmer Pack Dimmer Pack Dimmer Pack LightFactory LightFactory uses the standard DMX 512 protocol to communicate with the equipment it controls. DMX is connected to the LightFactory software via either a USB-DMX connection (See “USB” on page 29 for more about USB) or Ethernet to DMX converters. http://www.lifact.com 11 LightFactory A Guide for Users Concepts Lighting Concepts Dimmers In the simplest terms, a dimmer is a physical apparatus used for controlling the intensity of a basic light. A dimmer can be fully on, fully off, or somewhere in-between. The setting of a dimmer is referred to as the DMX value. DMX values range from zero to 255. A value of zero means the light is off, and 255 means the light is fully on. By adjusting the DMX value up and down, the intensity of the light increases and decreases. Basic dimmers come as units known as Dimmer Packs, usually made up of 4 to 24 dimmers per pack. For example, a 12-pack consists of 12 dimmers. Each dimmer is a physical plug on that 12-pack, each of which operates independently of the other 11. DMX Value The setting of a dimmer is referred to as the DMX value. DMX values range from zero to 255. A value of zero means the light is off, and 255 means the light is fully on. By adjusting the DMX value up and down, the intensity of the light increases and decreases. DMX Universe A DMX universe consists of 512 DMX dimmers. In the case of the LightFactory system, this translates to one USB-DMX box. If more dimmers are required, simply add another USB-DMX box. Channels (Logical channels or Fixtures) A channel is a controller on a lighting console (eg, LightFactory) that is used for controlling dimmers. In the case of a simple light with one dimmer, a single channel would control one dimmer. More sophisticated lighting fixtures, which utilise multiple dimmers to control various properties or attributes of the fixture (such as intensity, position, colour, etc), are controlled by a single channel, i.e., multiple dimmers are controlled by one channel. LightFactory has 2048 channels. 12 © 2004 LightFactory Software Ltd Concepts Lighting Concepts LightFactory A Guide for Users Dimmer Patching Dimmer patching is the patching of dimmers into channels. This allows a single channel to control any number of dimmers. In LightFactory, this is achieved via the “Dimmer Patching” window. See “Dimmer Patching” on page 165 to learn how to use this feature. Channel 1 2 3 4 5 6 7 8 9 10 Dimmer 1 2 3 4 5 6 7 8 9 10 Figure 1: Patching - Multiple Dimmers per Channel Patching is also done to define which channel controls an intelligent fixture, i.e., a fixture that utilises multiple dimmers for its various features. When you patch an intelligent fixture, all the dimmers for that fixture are automatically patched into that channel. See “Intelligent Fixtures” on page 14 for further information about intelligent fixtures. Channel Characteristic Typically, a channel:dimmer level ratio is 1:1. That is, when the channel is at a certain value, the dimmers in that channel are also at that value (Figure 2). On occasion, it may be necessary to configure a channel to output levels other than 1:1. The actual level sent to the dimmer can be scaled up or down, or configured into a non-linear relationship. For example, a lamp may not perform well below a certain level. The Channel Characteristic curve can configure the channel to prevent the dimmer from ever reaching such levels (Figure 3). The Channel Characteristic can be used for configuring individual channels or for multiple channels at once. To learn how to use the Channel Characteristic, see “Channel Characteristic” on page 172. http://www.lifact.com 13 LightFactory A Guide for Users Concepts Lighting Concepts Figure 2: Default Channel Characteristic Figure 3: Example Channel Characteristic 1 Conventional fixtures Conventional fixtures are those that have only one property that can be controlled from the lighting desk, hence requiring a single dimmer to control it. Examples of conventional fixtures are: ♦ Standard luminaires – fresnels, P.C.’s (plano convex) T T ♦ Effects Equipment – smoke/fog machines, bubble machines, mirror balls etc T T Intelligent Fixtures Intelligent fixtures, in contrast to conventional fixtures, have multiple properties (sometimes called attributes) that can be controlled from the lighting desk. Fixture Properties (Attributes) Fixture properties can be 8-bit or 16-bit. This essentially determines how finely a property can be controlled. 14 © 2004 LightFactory Software Ltd Concepts Lighting Concepts LightFactory A Guide for Users A 16-bit property can be more finely controlled than an 8-bit property. For example, 16-bit pan and tilt enables the fixture to be moved much more slowly than 8-bit pan and tilt. ♦ 8-bit – has 255 settings, zero to 255 for the property T T ♦ 16-bit – has 65535 (255 x 255) settings, zero to 65535 for the property T T LightFactory’s Fixture Library stores property information about your fixtures. The library is divided into fixture brands. This helps to organise the wide range of fixtures that are available into manageable groups. See “Edit Fixtures” on page 168 to learn how to use the fixture library. Property Description Colour wheel (colour changer, colour scroller) A wheel-shaped device containing circles of coloured media (gels) that attaches to a luminaire in order to create a coloured beam of light. T T T T Can be manually controlled or motorised and controlled via a dimmer. Gobo A thin plate with a design cut out of it that can be placed in the path of the light beam, causing a pattern to be projected. Pan Horizontal movement of a lighting fixture Tilt Vertical movement of a lighting fixture Control Channel Advanced fixture properties, such as strobe, pulse, light on/off http://www.lifact.com 15 LightFactory A Guide for Users Concepts Lighting Concepts CMY Colour mixing CMY (cyan, magenta, yellow) colour mixing comprises three filters that can be combined together in varying proportions to achieve a desired colour of light. Effects Different fixtures have different special effects available, dependent upon the make and/or model of the fixture. LightFactory can support up to three effects per intelligent fixture. Framing control Achieved via a set of shutters, this enables the shape of the light beam to be altered. The shutters can be moved towards/away from the edge of the beam, as well as angled to create non-perpendicular corners. Zoom Zoom is a way of controlling the size of the light beam. It is achieved by moving the lens back and forward inside the fixture. Iris Iris is a set of shutters used for controlling the size of the light beam. Opening and closing the shutters allows more or less light through the iris. The light intensity is decreased, due to less light being allowed to pass through. 16 Edge Controls the hardness or softness of the beam edge. Focus Adjusts the beam so that the light is concentrated on the focal point © 2004 LightFactory Software Ltd Concepts LightFactory Concepts LightFactory A Guide for Users Diffusion Created using a filter, diffusion is the scattering of light. Strobe Flashing light, of which the speed can be configured via the control channel. Table 1: Intelligent Fixture Properties Scene A scene refers to a static lighting set. i.e. a number of standard lights all at some level of intensity. LightFactory Concepts Channel Groups Channel groups enable you to configure commonly used settings for groups of channels. This means that the settings in it can be readily applied to those channels at any time without re-configuring them. Channel groups allow the simultaneous control of multiple channels at once. A channel group can also be assigned to a slider on a lighting console by assigning a submaster to it. A channel group can be configured to have one of five types of behaviour. This behaviour defines what happens to the current channel settings when the group is being controlled. ♦ Override – ignore current settings of channels and apply settings of the group to all channels T T ♦ Build – build onto settings of other groups T T ♦ Exclusive – switch off all channels except for this group T T ♦ Highest Takes Precedence – the group with the highest settings for the channel will control that channel T T ♦ Lowest Takes Precedence – the group with the lowest settings for the channel will control that channel T T ♦ Independent – channels in an “Independent” group will override all other requests by the system. As soon as the http://www.lifact.com 17 LightFactory A Guide for Users Concepts LightFactory Concepts group level is above 0, channels within this group will be controlled by the group. These five behaviours are further explained below. Use the Group Editor to create and manage channel groups. See “Channel Group Editor” on page 114 to learn how to do this. You can also add channels to existing channel groups via the channel window. See “Add selected channels to group” on page 106 for more information. Override When a channel group is set to “Override”, it ignores the current settings of the channels in the group, and applies the settings for that group to those channels. Example: Channels 1 and 2 are set at 50%. Channel Group 1 contains Channels 1, 2, 3, and 4. If Channel Group 1 is set to 80%, all channels in the group will get set to 80%, regardless of what the individual channels’ original values were. T T Channel Current Channel Value Channel Group Value Resulting Value 1 50% 80% 80% 2 50% 80% 80% 3 0% 80% 80% 4 0% 80% 80% T T T T T T T T Build When a channel group is set to “Build”, it will take the current settings and add the settings of the channel group to them. This only applies to the channel settings of other groups. Channels that have been manually set will not be affected by a “Build” channel group. Example: Channels 1 and 2 are set at 50%. Channel Group 1 contains Channels 1, 2, 3, and 4. If Channel Group 1 is set to 80%, all channels in the group that are not currently in use get set to 80%, and the channels that are already in use retain their current settings. T T Channel T 18 T Current T Channel T Resulting T © 2004 LightFactory Software Ltd Concepts LightFactory Concepts LightFactory A Guide for Users Channel Value Group Value Value 1 50% 80% 100% 2 50% 80% 100% 3 0% 80% 80% 4 0% 80% 80% T T T Exclusive When a channel group is set to “Exclusive”, any channels that are not in the channel group will be set to 0% (off), and all channels in the group will be set as per the channel settings. Example: Channels 5 and 6 are fully on. Channel Group 1 contains Channels 1, 2, 3, and 4. If Channel Group 1 is set to 80%, all channels except those in Channel Group 1 are switched off. T T Channel Current Channel Value Channel Group Value Resulting Value 1 50% 80% 80% 2 50% 80% 80% 3 0% 80% 80% 4 0% 80% 80% 5 100% N/A 0% 6 100% N/A 0% T T T T T T T T Highest Takes Precedence If two or more channel groups are in effect together, only those settings that are the highest will be applied. Example: Channel Group 1 contains channels 1, 2, and 3. Channel Group 2 also contains channels 1, 2, and 3, but the two groups’ settings are different. The table below shows the settings for each group, and the result when both channels are activated. T T Channel T T Channel Group 1 T T http://www.lifact.com Channel Group 2 T T Resulting Value T T 19 LightFactory A Guide for Users Concepts LightFactory Concepts 1 50% 60% 60% 2 80% 50% 80% 3 20% 100% 100% Lowest Takes Precedence If two or more channel groups are in effect together, only those settings that are the lowest will be applied. Example: Channel Group 1 contains channels 1, 2, and 3. Channel Group 2 also contains channels 1, 2, and 3, but the two groups’ settings are different. The table below shows the settings for each group, and the result when both channels are activated. T T Channel Channel Group 1 Channel Group 2 Resulting Value 1 50% 60% 50% 2 80% 50% 50% 3 20% 100% 20% T T T T T T T T Submasters and Shortcuts Submasters and shortcuts are both ways of accessing your channel groups easily. A submaster is generally a slider on a lighting console desk that can be assigned to a channel group. The submaster can then control the output state of the group. A channel group shortcut is a convenient way of selecting a group through a single click or key press. Once selected the group value can be modified by using the mouse wheel. Submasters and shortcuts are both accessible via controls at the top of the Command Interface. 20 © 2004 LightFactory Software Ltd Concepts LightFactory Concepts LightFactory A Guide for Users Shortcuts Submasters Figure 4: Command Interface: Submasters and Shortcuts Shows (Cue List) A show is a series of cues (cue list) that define how the lighting is set during the various parts of a performance. Example: A band is performing a song in a concert. Rather than having simple lighting that does not change for the duration of the song, cues can be set up to change the lighting as the song progresses. As each “cue” in the song is reached, the lighting can be easily set for that part of the song by activating the relevant cue. T T Shows and cues are set up and managed via the “Show Groups Editor”. See “Cue List Editor” on page 120 to learn how. Cue List Groups To easily manage and organise of a large number of cues for a production, LightFactory enables cues to be grouped into “Cue List Groups”. Example: A concert contains 10 songs, all of which have different lighting. By creating a “Cue List” for each song, the cues for each song can be easily identified and kept separate. T T Show Runners The Cue List Editor is used for setting up and managing shows and cues. When it comes to running a show, the “Show Runner” window is used. The Show Runner window is a simple screen that enables cue lists to be set up in the desired order, defining the starting cue for each. http://www.lifact.com 21 LightFactory A Guide for Users Concepts LightFactory Concepts As the show progresses, the lighting technician simply presses the “Go” button for each cue list group to activate each cue. The display shows the current cue and the next cue so that the technician can see progress during the show. To learn how to use show runners, see “Show Runners” on page 178. Cues Cues define how the lighting is set during the various parts of a performance. Using the LightFactory software they can run automatically or be user-controlled. A cue can contain a number of channels, and defines all their states for a particular part of a performance. One or more effects can be included, as well as defining the fade times, dwell, and effect delays. Cue can also trigger executing system shortcuts such as macro’s and palettes. Cues can be sub-grouped into “Cue Lists”, enabling them to be easily identified and managed. See also: “Cue List Groups” on page 21. Cue Number Each cue within a show group has a unique number, known as a cue number. When a cue is created, it is automatically assigned a number. Cue Trigger A cue’s trigger defines the circumstances that cause a cue to become active. There are four types of trigger: ♦ Cue – he user must physically press a “Cue Go” button either in a show runner or on the show editor window. T T ♦ Auto – Cues set with the auto trigger will execute immediately after the previous cue has completed its delay, fade in, and dwell time. An auto cue will not wait for the fade out time so that cross fades can be achieved. T 22 T © 2004 LightFactory Software Ltd Concepts LightFactory Concepts LightFactory A Guide for Users ♦ Midi – The cue will be triggered by an external midi event occurring. See page 74 for information on how to set up MIDI triggers. T T ♦ Line In – The cue will be triggered by the line-in audio source. See page 75 for information on how to set up the software for audio triggers. T T ♦ Timecode – The cue will trigger when the specified timecode is reached. If the timecode has already passed when this cue is reached, the software will trigger the cue immediately. Enter the timecode value into the field provided. T T Cue Channels The channels that are used in a particular cue. A cue can contain any number of channels, limited only by the system resources of your PC. Cue Effects Known as “FX Sequences” in the Show Groups editor, these define the special effects, if any, that are part of a cue. Intelligent Cue Execution LightFactory uses Intelligent Cue Execution. This means that when changing from one cue to the next, it applies only those settings that are different from the previous cue. The channels do not reset themselves between cues if nothing has changed from the previous cue, hence avoiding the possibility of undesirable behaviour occurring between cues. Effects Effects are time-based programs of lighting changes, such as chase sequences, simple loops, colour changes, etc. The LightFactory Effects Editor allows effects to be easily created, tested, and adjusted using the intuitive graphical interface. Effects can be run from shows via cues (see “Cues” on page 22) or by using Effect Runners (see “Effect Runners” on page 24). For more about effects, see “Effects Editor” on page 138. http://www.lifact.com 23 LightFactory A Guide for Users Concepts LightFactory Concepts Effect groups To facilitate the management of large numbers of effects, effects can be grouped into Effect Groups. This is essentially a simple way of filing your effects away for easy access. You must have at least one group of effects, but a single group can contain as many or as few effects as you wish. Effect Runners The Effect Runners are simple controls for running effects. The LightFactory Effects Runner screen allows the lighting technician to see at-a-glance all the effects of interest and conveniently run them at the click of a button. Effect Play Just like playing any other kind of recording or program, effect play is simply playing back an effect. An effect can be played via the effects editor (when first setting up an effect), or via either Shows or Effect Runners. When run via shows (using cues), the effect runs automatically. However, when using the Effects Editor or the Effects Runners, the effects are run manually using the Effect Play button on either interface. Effect Back When an effect is running via the Effects Editor or an Effects Runner, it can be stopped and reset using the “Effect Back” button. This button will stop the effect and reset it back to the beginning. Effect Pause When an effect is running via the Effects Editor or an Effects Runner, it can be paused using the “Effect Pause” button. This button will stop the effect and remember where it was up to. By pressing the “Effect Play” button the effect will continue playing from where it was paused. Effect segments An effect segment is essentially a segment of time when a light is configured to be on as part of an effect. Each segment can be configured as to what DMX value the light has during that segment, 24 © 2004 LightFactory Software Ltd Concepts LightFactory Concepts LightFactory A Guide for Users or, in the case of intelligent fixtures, you can specify other properties that apply during the effect such as pan, tilt, gobo, etc. Using the Effects Editor, it is simple to add/remove segments, shorten/lengthen segments, and configure the properties for the fixtures involved. Intelligent preparing of fixture properties Intelligent fixtures will automatically work out when they are free to prepare for the next time the dimmer is on. During a dark period of the effect the fixture will automatically set up properties such as pan, tilt, and colour for the next segment. This means that the fixture is already set up prior to its next segment, thus reducing any delay in response when a segment becomes active. Exclusive groups To ensure that only one effect operates within a specified group, exclusive groups can be created. We may have a number of effects for the same group of lights where it makes no sense to run any more than one effect at a time. If we did, the effects would conflict and cause undesirable results. By placing an effect into an exclusive group, it will stop all other grouped effects when you attempt to start it. Command Interface LightFactory comes equipped with a command interface. This is similar to a simple text editor. It allows a technician to type commands directly to the system bypassing the graphical interface. It can be advantageous to do this if a quick change is required and the technician is familiar with the required commands. Command History The command history allows the viewing of past commands made via the command interface. This can be handy when something unexpected has happened and a technician needs to check exactly what commands were sent to the dimmers. http://www.lifact.com 25 LightFactory A Guide for Users Concepts LightFactory Concepts Telnet Interface Telnet allows a technician to connect to LightFactory remotely using a hand-held device or similar. Commands can be sent from the remote device using the command language used by the Command Interface. The freedom of remote access to the LightFactory software means that the technician can be almost anywhere while setting up the lighting fixtures and make changes without needing to go back and forwards to the lighting desk. Palettes Palettes are a way to configure a particular look that you may want to recall quickly and without executing several commands to the system. A palette may put a fixture into a specific position or setup a number of fixtures into a specific colour. LightFactory allows palettes to be assigned a specific list of fixtures or operate on currently selected fixtures. Macros Macros are simple programs made up of a sequence of commands. If a particular sequence of commands is used frequently, it makes sense to create a macro for them. This means that rather than retyping the commands every time, the macro can be run instead, automatically executing the commands. This saves time as well as reducing the chance of errors being made. Shortcuts A shortcut is a quick route to a particular setting or feature that is used frequently. There are 3 different types of shortcut: Selection shortcuts Selection shortcuts are designed to make programming easier by providing quick access to any number of channels with a single key press. Fixture properties shortcuts Fixture property shortcuts are a way to quickly set a fixture to a particular state. Using a fixture property shortcut is a static operation that will override the current state of a fixture. 26 © 2004 LightFactory Software Ltd Concepts Computer Concepts LightFactory A Guide for Users Level group shortcuts Level groups are a convenient way to select a particular DMX value by a simple description. Level groups created in the “Level Group Editor” will automatically become available in this menu. The Level Group Editor is available via the “Extras” button on the Command Interface. Computer Concepts In order to use the LightFactory software, it is necessary to understand a few basic computer concepts. Mouse Scroll Wheel A mouse is a small device that connects to a computer. It is used for navigating around computer software, by means of a pointer. Many types of mouse have what is known as a scroll wheel. This is a wheel set into the top of the mouse, usually located between the left and right buttons. In LightFactory, the scroll wheel is used for increasing/decreasing dimmer values in a similar way to the sliders on a lighting console desk Drag-and-Drop Drag-and-drop is a commonly used method of moving one or more items from one location to another using the mouse. Typically, it is done by left clicking on the item you wish to move, then, while still holding down the mouse button, moving the mouse to the required destination. Release the mouse button when the mouse pointer is over the destination. In LightFactory, drag-and-drop is used to assign fixtures into channels, dimmer patching, etc… Right-click pop-up Menus Right-click menus are hidden menus, accessible by right-clicking the mouse button. If there is a right-click menu available for a feature, it will appear. Once available, you can click on the desired menu item. If you right-click and a menu appears that you do not want to use, simply press the escape key on your keyboard (or click elsewhere on the screen) and the menu will disappear. http://www.lifact.com 27 LightFactory A Guide for Users Concepts Computer Concepts Screen Real Estate As the name suggests, screen real estate refers to the screen area you have available on your computer monitor for viewing information. The individual features of LightFactory are in their own separate windows and can be arranged/resized on the computer screen according to an individual technician’s preference. LightFactory will remember for next time. It is also possible to add one or more extra monitors, thus expanding the available screen real estate. Window Docking Some windows in LightFactory can be “docked” onto other windows. This means that the two windows are attached to oneanother, which is useful if you want to have two related windows remain next to each other at all times. MIDI Musical Instrument Digital Interface, an industry-standard interface used on electronic musical keyboards and PCs for computer control of musical instruments and devices. T T T T T T T T SMPTE Society of Motion Picture and Television Engineers T T T T T T T T T T SQL Server Structured Query Language server. A computer that provides client computers with highly efficient access to database files. Firebird SQL Server is a type of database. A database is an electronic way of storing information on your computer. When you use LightFactory, your entire lighting configuration is stored in a SQL Server database. This means that you can switch off your computer, even unplug everything, and LightFactory will still remember your set-up. LightFactory’s SQL Server database has built-in backup and restore features to safeguard you against data loss. 28 © 2004 LightFactory Software Ltd Concepts Computer Concepts LightFactory A Guide for Users Timecode A feature within a video tape that identifies individual frames to define how frames are counted throughout a project. It is similar to the page numbers of a book: if the pages of the book are out of sequence or have gaps, then things get confusing. Similarly, if a video tape does not have a timecode, then finding a particular clip on tape would be time-consuming and confusing. USB Universal Serial Bus. USB is a standard port that enables you to connect external devices (such as digital cameras, scanners, and mice) to Windows 98 and Macintosh computers. T T T T T T The USB standard supports data transfer rates of 12Mbps (million bits per second), a vast improvement over the serial port standard it is beginning to replace. Aside from speed advantages, USB devices can be connected or disconnected without the need to restart the computer. Many USB devices can work on either a Windows 98 PC or a Mac, provided the device manufacturer offers connectivity software for both computer systems. Many of the latest digital cameras offer USB as well as serial connections. LightFactory uses a USB device to transmit and receive DMX data. Ethernet A very common method of networking computers in a LAN using copper cabling. Ethernet will handle about 10,000,000 bits-persecond and can be used with almost any kind of computer. LightFactory can communicate with DMX systems using standard DMX over Ethernet protocols. http://www.lifact.com 29 LightFactory A Guide for Users Installing LightFactory Installation Pre-requisites Installing LightFactory This chapter tells you how to set up a PC to run LightFactory, how to install the software, set up any required hardware, and run LightFactory for use in any lighting situation. Installation Pre-requisites Before installing LightFactory, you need to ensure your PC meets the following minimum specifications. ♦ Pentium III or higher processor ♦ Minimum 128Mb Ram ♦ 300Mb of free hard drive space ♦ Minimum 1024 x 768 video display ♦ Windows 98, ME, 2000, XP Operating system It is also highly recommended that you attach an optical mouse with a working scroll wheel. To produce DMX output from LightFactory you must also have installed some form of DMX hardware. See “Installing DMX Hardware” (Page 39) for more information on this topic. Installation Procedure Installing LightFactory is a simple process, and requires no special knowledge. The installation procedure is almost completely automated and self-explanatory. LightFactory can be obtained on CD or by downloading the product off our website. Downloading LightFactory To download the latest version of the software go to the LightFactory website, click on the products page and then click on downloads. Alternatively you can go directly to this page by visiting; http://www.lifact.com/download.html Installing LightFactory To install LightFactory: 30 © 2004 LightFactory Software Ltd Installing LightFactory Installation Procedure LightFactory A Guide for Users 1. Find the Setup.exe file you have downloaded from the internet or on the CD that come with the product. If you are installing off a CD the Setup.exe will be found in the root directory of the CD. Some CD’s may start this setup program automatically when the CD is placed into the drive. 2. Double click on the Setup.exe and the opening page of the setup will be displayed. 3. Click on the “Next” button to begin the setup procedure. The License Agreement window appears: T T T T Please read this license agreement carefully (A copy of this can be found at the front of this user guide) before continuing with the installation. 4. If you accept the License Agreement, select the “I accept the terms in the license agreement” option and click the “Next“ button. T T 5. If you do not accept the terms of the agreement, click “Cancel“ (to abort the installation). http://www.lifact.com 31 LightFactory A Guide for Users Installing LightFactory Installation Procedure Result: The “Customer Information“ window appears. T T 6. Enter your name and company name into the fields provided and click on the “Next” button to continue. T T Result: The Destination Folder window will be displayed. T T 7. Accept the default destination folder (recommended), or click the “Change…“ button to browse for a replacement folder. T T When you are satisfied with the displayed folder, click “Next” to continue. T T Result: The “Ready to Install the Program“ window appears. T 32 T © 2004 LightFactory Software Ltd Installing LightFactory Installation Procedure LightFactory A Guide for Users 8. Confirm that all of the setup information is correct before clicking on the “Install” button. T T Result: The InstallShield wizard will begin installing the LightFactory software. 9. When the installation is complete, a final window will confirm that the installation was successful. 10. Click “Finish” to close the window. T http://www.lifact.com T 33 LightFactory A Guide for Users Installing LightFactory Starting LightFactory Starting LightFactory After the installation is complete, you can begin using the software. You can start LightFactory either from the Windows Start menu or from the icon on your desktop. ♦ From the Windows Start menu: Select the LightFactory item. T T T T ♦ From your desktop: Double-click on the LightFactory icon T T Result: The LightFactory splash screen will appear and the software will begin to load. Note: The first time the software runs it will take slightly longer to start-up. This is because it must create the database that is used for saving show information. T T During start-up the software will check for a valid registration code. If the software is not registered then the following dialog will be displayed. If you wish to use the software unregistered (Software will function normally but no DMX output will occur) click on the “Continue” button or press enter on the keyboard. 34 © 2004 LightFactory Software Ltd Installing LightFactory Starting LightFactory LightFactory A Guide for Users To purchase the software on-line or find a local reseller of the software click on the “Purchase” button provided. You must be connected to the Internet as this will open your default web browser and redirect you to the LightFactory web site. To enter a valid registration code received with purchase of the software click on the “Register” button. The following window will allow you to enter these details into the software. Registration of the software is based on the “Registration Name” and the “Registration Code”. The “User Name” field is optional and not used to authenticate a valid registration. Enter your registration details and click on the “OK” button to continue loading the software. A dialog will inform you if incorrect details have been entered and allow three attempts to correct the mistake before returning you to the previous window. Click on the “Cancel” button at any time to abort this process. Registration details can also be entered through the System Properties in the File menu once the software has started. After the software has loaded, the main window (Command Interface) will open. You are now ready to use the software. See the “Quick Start” section (Page 48) to begin finding your way around the software. Figure 5: Command Interface http://www.lifact.com 35 LightFactory A Guide for Users Installing LightFactory Registration & Licensing Registration & Licensing When the software starts the registration details are shown in the first few lines of the command interface. In the above example the software is registered to “LightFactory Software” and is registered to communicate with 10 DMX universes. If more DMX universes are connected than the registration allows the system will simply ignore the additional dimmers. Once the software is running you can access the registration information by clicking on the File menu and selecting System Properties. Click on the “Registration” tab to display the current registration details. Figure 6: Properties Window - Registration Page From this page you can access the LightFactory web site by clicking on the “LightFactory Online” button or “Online Purchase” for quick access to the on-line sales section of the web site. To change the registration details click on the “Edit Registration Details” button to open the following window. 36 © 2004 LightFactory Software Ltd Installing LightFactory Registration & Licensing LightFactory A Guide for Users Figure 7: Registration Window Registration of the software is based on the “Registration Name” and the “Registration Code”. The “User Name” field is optional and not used to authenticate a valid registration. Enter your registration details and click on the “OK” button close the window. A dialog will inform you if incorrect details have been entered and allow three attempts to correct the mistake before returning you to the system properties. Note: If you where previously using an invalid registration you will need to restart the software for it to begin communicating with DMX hardware. License Codes If you received a “License Code” when you purchased the software it will need to be converted into a “Registration Code” to unlock the software. A license code is a one time right to register you copy of the LightFactory. Unlike a registration code the license is not linked to your company name. License codes use the format “nnnnnnnnnnnn-cccccc-cccc” where “n” represents a number and “c” represents a character. You can convert license codes into a valid registration either online or using the “Convert License Code” option. Both options require a connection to the internet. If you are using a dialup connection connect to the internet before continuing with the procedures below. http://www.lifact.com 37 LightFactory A Guide for Users Installing LightFactory Registration & Licensing Note: Information collected during the registration process will be passed on to LightFactory Software Limited, Auckland, New Zealand. This information is treated strictly confidential and will not be used for any purpose than software security. Contact details will not be passed on to any other parties or used for marketing purposes. To convert you license code over the web visit the site: http://www.lifact.com/convert_license.html To use the built in conversion facility click on the “Convert License Code” button in the bottom left corner of the registration window. The above window will appear. Enter your details into the fields provided and click on the “Register Software” button. The fields in bold are mandatory and must be completed to register the software. We recommend that you keep the “Print registration code” check box active to record a record of the resulting registration code. This will print on your default printer. When the conversion is successful the window will close and the registration code will be automatically entered into the correct fields of the previous window. 38 © 2004 LightFactory Software Ltd Installing LightFactory Installing DMX Hardware LightFactory A Guide for Users Installing DMX Hardware Soundlight / Sunlite USB DMX Dongle To install the USB hardware on your computer make sure the computer is running and you are logged in with administrative privileges. 11. Connect the USB-DMX Interface to a free USB Port and check that the power LED indicator is lit. If this is not the case, check the USB cable and hub your hardware is plugged into. 12. Your computer should immediately indicate that it has found some new hardware and the installation wizard should start automatically. If this does not occur then use the Windows “Add new hardware” or “Computer Manager” (Win 2K/XP) option in the control panel to manually install the drivers. 13. Select the “Install from a list or specific location (Advanced)” option and click “Next” to continue. T T Result: The following window will prompt you for the location of the driver installation files. http://www.lifact.com 39 LightFactory A Guide for Users Installing LightFactory Installing DMX Hardware 14. If your LightFactory software was supplied on CD, then the hardware drivers can be found on the same media. Select the “Include this location in the search path” and browse to the “drivers” directory on the CD. Alternatively, your DMX hardware should have been supplied with a driver disk titled “Soundlight – USBDMX 1/2/-IN Driver and Installation Disk.” To use this disk, place it into the drive and enter the corresponding drive letter into the space provided. (e.g. A: ) 15. Click on the “Next” button to continue with the installation. You will be notified if the correct drivers are not found in the specified directory. If this occurs return to the previous window and try searching removable media. T T Note: The latest drivers can be downloaded from the LightFactory web site; http://www.lifact.com T T HTU UTH Result: The following window will be displayed. 16. Click on the “Next” button to continue. T T Result: The following warning will be displayed. 40 © 2004 LightFactory Software Ltd Installing LightFactory Installing DMX Hardware LightFactory A Guide for Users Unless you have specific security concerns with your computer click on the “Continue Anyway” button to proceed with the installation. T T Result: The firmware loader drivers will be installed and a progress window will be displayed as below. 17. When the driver has finished installing, a confirmation will be displayed. Click on the “Finished” button to close this window. Your driver is now installed. T T 18. You will now see that Windows has found more hardware on your system. The second part to the installation is to install the USB DMX Kernel. The following window will appear to step you through the second installation. http://www.lifact.com 41 LightFactory A Guide for Users Installing LightFactory Installing DMX Hardware 19. Repeat steps 2 through 6 above to complete this operation. At the end of the process, your DMX hardware should be ready to use. The next time you start-up LightFactory you will notice that the command window will indicate that DMX hardware has been found and the DMX universe number will be displayed next to the device description. Soundlight / Sunlite USB DMX In Dongle The installation procedure for DMX-IN hardware is exactly the same as installing the DMX2 device. 1. To install the USB hardware on your computer, make sure the computer is running and you are logged in with administrative privileges. 2. Connect the USB-IN Interface to a free USB Port and check that the power LED indicator is lit. If this is not the case, check the USB cable and hub your hardware is plugged into. 3. Your computer should immediately indicate that it has found some new hardware and the installation wizard should start automatically. If this does not occur then use the windows “Add new hardware” or “Computer Manager” (Win 2K/XP) option in the control panel to manually install the drivers. Follow the procedures described in the section Installing DMX Hardware (Page 39) to complete the installation. Enttec Open USB DMX Dongle The open DMX USB hardware solution provided to the community by ENTTEC. 42 © 2004 LightFactory Software Ltd Installing LightFactory Installing DMX Hardware LightFactory A Guide for Users This DMX USB interface is based on the FTDI 232BM chip; it's a USB to serial converter. LightFactory can send DMX512 through these devices using the built in driver. Limitations: It is important to release that unlike other DMX interface devices the Open USB DMX hardware requires output to be generated by the PC and can be sensitive to the load and speed of the computer. If the computer gets busy or is too slow you may experience unreliable DMX output. We have tested these devices running only LightFactory on windows 98, 2000, and XP without any problems on any P4 machine. Obtaining drivers The drivers for the Open DMX USB Dongle are contained in the driver directory of the LightFactory CD or can be downloaded directly from the Enttec web site. http://www.enttec.com/dmx_usb/ftdi_driver.zip Installing driver on Windows 98, 2000 1. Connect the USB-DMX Interface to a free USB Port. 2. Your computer should immediately indicate that it has found some new hardware and the installation wizard should start automatically. If this does not occur then use the Windows “Add new hardware” or “Computer Manager” (Win 2K/XP) option in the control panel to manually install the drivers. http://www.lifact.com 43 LightFactory A Guide for Users Installing LightFactory Installing DMX Hardware 3. Click on the “Next” button to begin the installation. T T 4. Select “Search for a suitable driver for my device” and click on the “Next” button to continue. 5. Select “Specify a location” and click on the “Next” button to continue. A dialog will be displayed asking you to select the directory containing the drivers for the hardware. Locate the file on the LightFactory CD or find the directory you extracted the files to. 6. A summary screen (above) will confirm the location of the driver. Click on the “Next” button to install the driver on your system. 44 © 2004 LightFactory Software Ltd Installing LightFactory Installing DMX Hardware LightFactory A Guide for Users 7. Click on “Finish” to complete the installation. Installing driver on Windows XP SP1 1. Connect the USB-DMX Interface to a free USB Port. 2. Your computer should immediately indicate that it has found some new hardware and the installation wizard should start automatically. If this does not occur then use the Windows “Computer Manager” option in the control panel to manually install the drivers. 3. Allow windows to install the driver automatically. (no user intervention should be required for this) 4. When finished windows will indicate the hardware is installed and ready to be used. 5. Unfortunately Window’s has not installed the correct driver and a special patch is required before the device can be used. 6. Locate a file called “fix_xp.bat” contained in the driver distribution on the LightFactory CD or the archive downloaded off the internet. 7. Run this batch file from within the directory it is found to complete the installation. http://www.lifact.com 45 LightFactory A Guide for Users Installing LightFactory Artnet DMX on Ethernet No special installation is required to communicate with ArtNet DMX on Ethernet or DMXDongle2 devices. Enttec DMX on Ethernet No special installation is required to communicate with Enttec DMX on Ethernet (ESP) devices other than a working Ethernet interface on your computer. Optional Hardware installation Installing Cherry G80-1950 POS keyboard The Cherry G80-1950 keyboard will arrive fully configured for use with LightFactory if purchased from a LightFactory dealer. If you purchased the keyboard from any other source, visit the LightFactory web site to download the keyboard layout template and configuration file. Figure 8: Cherry G80- 1950 Keyboard 46 © 2004 LightFactory Software Ltd Installing LightFactory Optional Hardware installation LightFactory A Guide for Users To install the keyboard, proceed as follows: 1. Switch off your computer 2. Plug in the Cherry keyboard 3. Switch your computer back on The keyboard requires no additional drivers to operate and you can begin working with it immediately. Note: If an error message is displayed when the computer is first turned on or meaningless characters are displayed on screen after the computer has been switched on, please check to make sure that the keyboard is properly connected to the computer. T http://www.lifact.com T 47 LightFactory A Guide for Users Quick Start Using the Channel Window Quick Start To get you started using your LightFactory system, the following describes a few quick examples of controlling a lighting system. ♦ Using the channel window ♦ Patching a moving light ♦ Controlling a moving light ♦ Creating a basic show When the software is started, the “Command Interface” window is displayed and the system is ready to go. On start-up, the software will interrogate your computer and look for DMX hardware. In this example, the software is setup to output to the Enttec DMX over Ethernet protocol and will output to the first 10 universes found on the network. Regardless of the dimmers found the software will create 2000 logical channels that will be patched 1:1 with the available dimmers. If you are using different DMX hardware with the system see “System” Page 68 for information about setting the output type. LightFactory will always remember the last lighting state that was used and will automatically load the current show. If you start the software and find channels already active then this is because it is the state when the software was last shutdown. Note: Make sure that the grand master (GM) is at full for all examples used in this section. T T Using the Channel Window The channel window is the main access to all of the channels and fixtures that are connected to the software. It allows you to modify 48 © 2004 LightFactory Software Ltd Quick Start Using the Channel Window LightFactory A Guide for Users the output of a channel and control the properties of intelligent fixtures. 1. Open the channel window by clicking on the “Channel Display” button on the right-hand side of the command interface. Figure 9: Channel Window If this is the first time you have used the software you should see the window above displayed on your screen. Each channel in the system is represented by a cell in a two dimensional grid. The grid will always try to fit as many channels across as it can and so resizing the window will allow you to see as many channels as possible. 2. A standard Windows scroll bar on the right-hand side can be used to scroll through the non-visible channels. 3. Select channel 1 by left clicking on it with your mouse. You will notice that the cell changes colour to a pale blue. 4. Now click on channel 3 and notice that this cell also changes colour. By clicking and “selecting” these channels, we have told the software what it is we want to work with. We can now issue commands to these channels. 5. On your keyboard, enter the number 30 and press enter. As you enter the numbers, you will see them appear along the title bar of the window. As soon as you press “enter” the numbers will disappear and the selected channels will now have a value of 30%. http://www.lifact.com 49 LightFactory A Guide for Users Quick Start Patching a Moving Light The lights connected to those channels should now be displaying 30% of their maximum output. 6. Un-select channel 1 by clicking on its cell with the left mouse button. You will see that the cell is now highlighted green. This indicates that the channel is not selected but is active. Note: An active channel is any channel with an output value above 0. T T 7. With channel 3 still selected, move the scroll wheel on your mouse up one click you should see the value increase by 5% to 35%. The mouse scroll wheel is a convenient way to control the intensity of selected channels when the exact value you want is unknown. Note: If you do not have a scroll wheel on your mouse, use the + and – keys as replacements. T T Channels can also be selected in large numbers by holding the mouse down and dragging it over the channels you want 1. Click on channel 5 and hold down the mouse button 2. Now drag the mouse over to channel 7 and release the button. You should now see channels 3, 5, 6 and 7 all selected. 3. Move the scroll wheel up and down and notice that all of the selected channels increase or decrease by 5% with every movement. Patching a Moving Light To use the channel window for controlling a moving or intelligent light we first need to tell the software where and how the fixture is patched into the DMX chain. In this example we have a Martin MAC 250 with its starting address set to 26. 1. Open the patching window by clicking on the “Dimmer Patching” button on the right of the command interface. T T 50 © 2004 LightFactory Software Ltd Quick Start Patching a Moving Light LightFactory A Guide for Users Figure 10: Dimmer Patching Window 2. Below the label “Available Fixtures” near the bottom of the window you will see a list of brands of fixtures and a special option called “Standard Dimmer” Expand the “Martin” brand by clicking on the small plus (+) to the left of the name. You should then see the complete list of the Martin fixtures contained in the fixture library. 3. Click on the fixture labelled “MAC 250 Mode 4” and notice that the picture on the right-hand side has changed to show your selection. 4. Move the mouse over the “Dimmers” section of the window and notice that as you move the mouse the 13 dimmers trailing your mouse are highlighted. This shows that the fixture we have selected uses 13 dimmers to control it and that we should consider these reserved for this light. 5. Move the mouse over dimmer 26 (our starting address) and click and hold down the left mouse button. Drag the mouse over to the left hand side of the window and over channel 6. When you release the mouse button you will see that the details column of channel 6 now displayed “MAC 250 Mode 4 @ 26”. This shows us that a MAC 250 is patched with the starting address of 26. See Figure 10. 6. Click on the “Save & Close” button to exit this window and complete the patching process. http://www.lifact.com 51 LightFactory A Guide for Users Quick Start Controlling a Moving Light We are now ready to use this fixture in the channel window as channel 6. To patch other moving lights, simply repeat the procedure above patching each light into the desired channel. Note: You can patch multiple fixtures of the same type all at once by changing the quantity (Qty) number in the available fixtures section of the window. T T Controlling a Moving Light This section assumes that you know how to open the channel window (see page 48) and have already done the example above in “Patching a Moving Light” (page 50). 1. Open the channel window again (if not already open) and click on the “Unselect All” button along the bottom of the window. You will now have only the channels that are active highlighted. 2. Have a close look at channel six and notice that the content of the cell has changed. It is now labelled “Fixture: 6” and below the label is the name of the fixture followed by its properties. To see all of the properties: i. Move the mouse in between the first and second row until the mouse pointer changes to the sizing cursor (two arrows pointing up and down separated by two horizontal lines). ii. Click and hold the left mouse button, and drag the mouse toward the bottom of the window about 2cm. iii. When the button is released, the top row will be resized to reveal all of the properties that can be controlled with this fixture. 3. Click and select channel 6 and as well as highlighting the cell. The fixture property window will appear and attach itself to the right-hand side of the channel window. 52 © 2004 LightFactory Software Ltd Quick Start Controlling a Moving Light LightFactory A Guide for Users Figure 11: Channel View window showing fixture properties The “Channel Fixture Properties” window can now be used to modify the properties of the moving light. At the top left of the window is the picture of the luminare. This is also the pan and tilt control. 4. Click and drag the mouse around this picture to change the X and Y values of the fixture in the channel window. If the fixture is physically attached to the system the changes will immediately take effect and you will see the fixture move. Only the controls that are applicable to the selected fixture will active and can be changed. In the above example (Figure 11), the MAC 250 does not have CMY colour mixing. The properties window will not allow you to change these values. 5. To control the dimmer of intelligent fixtures follow the same procedure for standard dimmers. Click on the “Channel View” window and either enter the desired value or use the scroll mouse to dim the light up and down. Note: The fixture properties window can only control one type of fixture at a time. If you select multiple fixtures and there is more than one type selected the window will disappear. You can, however, select as many of the same fixture type and control all of them at once. Standard dimmers can also be selected and will not be affected by property changes. T http://www.lifact.com T 53 LightFactory A Guide for Users Quick Start Creating a Basic Show Creating a Basic Show A basic show is a series of cues (often called a cue list) each containing a specific lighting state or scene. The transition between each lighting state can also be defined to control a fade in, fade out, and dwell time. Note: In this example we are not covering the use of the effects engine, but only basic cues. T T In the show we are going to create we will have three different scenes and will only use the first 12 channels. The table below shows the three cues and their contents. In this show, the cues transition from a very bright scene to a very dim scene and then back to a bright scene again. We have also use the moving light that we patched into channel 6 and placed it at a specific position. Cue 1 2 3 Channel Value 2 80% 3 80% 6 100%, 128X, 27Y 1 20% 6 30%, 128X, 200Y 7 20% 11 20% 8 100% 9 80% Table 2: Basic Show Cues Example Before we create these simple cues in LightFactory, open the channel window (see “Using the Channel Window” on page 48) and set all of the fixtures back to zero so that no channel is active. To do this: 1. Click on the button “Select Active” along the bottom of the window 2. Press the zero (0) and press enter. 3. Now press the “Unselect All” button to have no channels selected. 54 © 2004 LightFactory Software Ltd Quick Start Creating a Basic Show LightFactory A Guide for Users Creating Cue 1 1. Click on channel 2 and 3 to select them and then type the number 80 on your keyboard and press enter. The selected channels should now be set to 80%. 2. Unselect these channels and double click on channel 6 to bring it up to 100%. Because channel 6 is an intelligent fixture, the “Channel Fixture Properties” window will automatically appear. Set the pan and tilt to the desired location using the control described above (“Controlling a Moving Light” on page 52). 3. Once you have set the desired scene, right-click in the channel window. A pop-up menu will appear. Select “Add active channels to a cue” from the resulting pop-up menu. 4. The small dialog box at right will be displayed. You will need to select the show group and Group Cue number to add these channels. Enter the number 1 into the box labelled “Group Cue” press the “OK” button. The cue has now been recorded with the active channels in their current state. Creating Cue 2 1. Select channels 2 and 3 and set their value back to zero. 2. Now select channels 1, 7 and 11 and set all their values to 20%. 3. Click on the “Unselect All” button and then click on channel 6 only. Bring its intensity back to 30% by either typing 30 on your keyboard or using the scroll wheel. 4. In the “Channel Fixture Properties” window set the new position that you want the fixture in for cue 2. 5. Now that the second scene is set, right click and select “Add active channels to a cue” from the resulting pop up menu. 6. In the resulting cue selection dialog, cue 2 should already be set in the “Group Cue” edit box. If this is not the case, enter the number 2 and press the “OK” button. http://www.lifact.com 55 LightFactory A Guide for Users Quick Start Creating a Basic Show Creating Cue 3 1. Click on the “Select Active” button and reset all fixtures back to 0% using either the mouse wheel or by enter 0 on your keyboard and pressing the enter key. 2. Double click on channel 8 to bring it up to 100%. 3. Unselect channel 8 and select channel 9. Set the value of channel 9 to 80%. 4. Now that the third scene is set, right click and select “Add active channels to a cue” from the resulting pop up menu. 5. In the resulting cue selection dialog, cue 3 should already be set in the “Group Cue” edit box. If this is not the case, enter the number 3 and press the “OK” button. The Cue List Editor To view the newly created show, open the “Cue List Editor” by clicking the button on the right of the command interface. Figure 12: Show Editor Window This window will show the three cues we just created, and we will see in the channel field the fixtures we selected. Setting the transition between cues In this example, we have decided to apply the following transition between each cue. 1. Cue 1 will fade in slowly over 5 seconds 2. Cue 1 will fade out in 2 seconds 3. Cue 2 will then fade in quickly (1 second) 4. Cue 2 will fade out in 3 seconds while cue 3 fades in. 56 © 2004 LightFactory Software Ltd Quick Start Creating a Basic Show LightFactory A Guide for Users To apply these rules, we need to set the fields on the right-hand side of the window. 1. In the row for cue 1, enter the number 5 into the field labelled “Fade In” and the number 2 into the field labelled “Fade Out”. 2. We do not want cues 1 and 2 to cross fade, so we need to set a delayed start on cue 2 of 2 seconds. This will cause cue 2 to wait the same length of time it takes cue 1 to fade out. In the row for cue 2, enter the number 2 in the field labelled “Delay” and enter a 1 into the field “Fade In”. 3. For cue 3 we do want a cross fade so we can set the “fade out” of cue 2 to 3 seconds and the “fade in” of cue 3 to 3 seconds. The right-hand fields should now be set as per Figure 13 below, Figure 13: Basic Show Example, Fade In, Fade Out, and Delay settings Running the show We are now ready to run our show for the first time and see the result of the procedure above. If you have a real lighting rig connected to the system, you should see the result apply to your dimmer system. If you do not have any dimmers connected, use the “channel window” or “dimmer display” to view the output. If the start cue (cue 0) is not highlighted in green as shown in Figure 13 above, select it as the starting cue by double-clicking on its row. In this example, we have chosen to leave this cue blank without any fixtures set. There is no reason not to use this cue other than to have a blacked-out state when the show begins. Along the bottom of the cue list editor are the playback controls for the currently selected cue (highlighted in green). http://www.lifact.com 57 LightFactory A Guide for Users Quick Start Creating a Basic Show Figure 14: Cue Playback Controls Press the “Cue Go” button and notice how channels 2, 3, and 6 slowly fade from zero to their set values over a period of 5 seconds. Once this cue has finished, (A counter below the cue window will count down the number of seconds remaining, and display “Cue Complete” when finished) click the “Cue Go” button again to go from cue 1 to cue 2. This time cue 1 will fade out, then cue 2 will slowly fade in. The current cue will always be highlighted in green and you will notice the green line following the cue execution. Note: You can see the time remaining in an active cue below the cue window. When the cue is finished, it will say “Cue Complete”. T T At any time we can return to the previous cue by clicking on the “Cue Back” button and can stop a cue execution (i.e. Fade In) by clicking on the “Cue Stop” button. Note: A show can be run either via the Show Editor as per the example above, or via the Show Runners. T 58 T © 2004 LightFactory Software Ltd Reference/Window Overview Command Interface LightFactory A Guide for Users Reference/Window Overview Command Interface The LightFactory command interface is the first window you are presented with when you start the software. This window is where you can access all of the other features in the software such as the cue lists or effects editor. The grand master (GM) on the right-hand side of the window provides overall control of all fixture intensity levels. Figure 15: Command Interface Window This window also allows you to control your lighting system using a basic text interface. Traditional lighting desks have provided a command interface as a means to access large numbers of channels where individual buttons or faders were impractical. It may seem antiquated to include a command interface in LightFactory because it has the flexible channel window providing access to thousands of channels from one simple screen, but this is far from true. Once familiar with the command structure the command interface can be a very quick and powerful way of setting up scenes during complex programming sequences. http://www.lifact.com 59 LightFactory A Guide for Users Reference/Window Overview Command Interface Note: It is also useful to learn the command structure because you can enter the channel selection syntax anywhere you wish to enter a large number of channels. e.g. the Cue List Editor. T T Command Structure The following commands can be entered into the edit box provided along the bottom left of the window. To execute any command simply press enter or click on the “Execute” button to the right. Once a command is entered, it will automatically appear in the text box above. If the command was successful, the command will be proceeded by “OK” followed by the time (in milliseconds) it took to process and execute the command. If the command is followed by the word “Failed” then nothing will happen as the software did not recognise the command you entered. Command History LightFactory displays the last 100 commands entered in the text box just above the command entry edit. To re-process or review any command, simply double-click on the line and the command will reappear in the command entry edit. The command will not execute until you press enter or click on the “Execute” button. This enables you to edit the command before resubmitting it for processing. Note: Commands in the history text box can also be retrieved into the command entry edit using the up and down arrow keys on your keyboard. Pressing the up arrow will cycle through the last 100 commands starting with the last command entered. The down arrow will scroll back through commands you have passed with the up arrow. T T Channel Commands All commands take the following format. The square brackets ([]) indicate optional syntax. Channels [Property] @ [DMX] Value [fade Value] Channels – A list of all of the channels you want to apply some change to. Each channel is separated by either a comma (,) or plus T 60 T © 2004 LightFactory Software Ltd Reference/Window Overview Command Interface LightFactory A Guide for Users (+). A range of channels can be entered using the word “through” or the forward slash (/) symbol between two values. Channels can be removed form a selection using the minus (-) key. If you enter a channel list only the software will select the channels in the channel view. If the channel view is not visible it will be opened and brought to the front of your screen. T T Examples U 1,2,3,7,19 through 33 @ … Will select the channels 1, 2, 3, 7, and will also select channels 19 through to channel 33. 1+2+3+7+19/33-21 @ … Will also select channels 1,2,3,7 and channels 19 through to 33 with the exception of channel 21. Property – Allows you to access specific properties of fixtures that you have selected. By default, the software will operate on the dimmer as it is assumed that all fixtures have this function. (Not strictly true, however see “Convenience Options” on page 72 for more information on how LightFactory can assist working with fixtures without a dimmer function) T T The following properties can be entered: PAN, TILT, COLOUR, GOBO, CONTROL, CYAN, MAGENTA, YELLOW, EFFECT, ZOOM, DIFF, IRIS, EDGE, FOCUS, STROBE Some of these properties can accept a number following the command to access features where more than one of a property exists. E.g. Some intelligent fixtures have more than one colour wheel. If a command is entered with the word COLOUR then colour wheel 1 is selected by default. To select colour wheel 2 the command should read COLOUR2 Example U To access the gobo wheel 2 on the fixture patched to channel 24 through to 30, we could use the command: 24 through 30 gobo2 @ … Note: When fixture properties are selected, the command value is always a DMX value (i.e. 0 - 255). You are not required to enter the key word DMX in front of the value. T http://www.lifact.com T 61 LightFactory A Guide for Users Reference/Window Overview Command Interface Value – The value you want to set the fixture or fixture property to. If standard dimers are selected, the value will set the dimmer to the entered value as a percentage of full. Accepted values for standard dimmers can be any integer number between 0 and 100. T T If the selected channel is an intelligent fixture then the software will apply the value to the dimmer property unless a different property is specified. Example U 1+2+3+7+19/33 @ 25 This will set channels 1, 2, 3, 7 and channels 19 through 33 to 25% of full. DMX keyword – If the channel selection does not specify a property, the DMX keyword can be placed in front of the desired value to enter a number between 0 and 255 representing the real DMX output level. T T Example U 1+2+3+7+19/33 @ DMX 125 This will set channels 1, 2, 3, 7 and channels 19 through 33 to output 125 on the DMX line. Fade Value – With any command an optional fade time can be specified. This will determine how long the channels will take to get from the current value to the new desired value. The fade directive will also be apply to fixture properties. The syntax is in the format; fade X – where X is any integer value representing the time in milliseconds. Example U 24/30 cyan @ 150 fade 2000 This will set the cyan property of fixtures 24 through to 30 to the DMX value 150 and will take 2 seconds to reach this value from the current cyan property value. Note: When working with intelligent fixtures such as the one in this example, the term “fixture” replaces the term “channel” in LightFactory. T 62 T © 2004 LightFactory Software Ltd Reference/Window Overview Command Interface LightFactory A Guide for Users Other Commands Blackout One common function you may want to execute is to blackout the entire system. This can be achieved using either the “bo” (blackout) or “clr” command. Either of these commands can be followed by a channel list to limit which channels are reset. Example U BO 1/20 This will immediately blackout the channels 1 through to 20. Macro The macro command can be used to execute any of the macros added to the show. Enter the word “macro” followed by the name (or part name) of the macro you want to run. As soon as you enter the command the macro will execute. File menu The file menu is at the top left of the command interface, accessible by clicking on the word “File” with your mouse. There are 6 options in the file menu: ♦ Clear current show – clears all of the current system configurations T T ♦ Load Show – copying some or all settings of an existing show into the current show T T ♦ Save Show – saves a copy of some or all of the current show with a new name for later retrieval. T T ♦ Delete Show – completely removes an unwanted show from LightFactory. This is irreversible. T T ♦ System Properties – a series of options allowing you to configure hardware, database, default settings, and change your licensing information T http://www.lifact.com T 63 LightFactory A Guide for Users Reference/Window Overview Command Interface ♦ External Triggers - this feature allows you to set up shows that run without user interaction. T T ♦ Scheduled Tasks – Virtually all functions within LightFactory can be scheduled to execute automatically at set times. ♦ Edit User Permission – Use this feature to control access to various functions by a user name and password. See the following pages for full details about each of these options. Clear current show This option will clear all of the current system configurations. Cue Lists, effects, macros, etc. will be cleared and left in their default state. Note: There is no undo for this operation. A double warning will prompt you to confirm that you want to clear the system. T T Load show When you start-up LightFactory, the “current show” will be loaded automatically. Any operation done must always be on this internal show. Loading a show is the process of copying all of the settings of a selected show into the “current show” Note: LightFactory always has the “current show” loaded. All changes made to the system such as creating a new cue or effect is automatically saved to the current show. T T LightFactory provides the means to select which parts of a show you would like to load. You may for example want to only load the effects from a previous show into the current configuration. 1. Open the load show dialog by clicking on the file menu and selecting “Load Show”. See Figure 16. 64 © 2004 LightFactory Software Ltd Reference/Window Overview Command Interface LightFactory A Guide for Users Figure 16: "Load Show" dialog 2. Select the show you want to load from the drop-down field at the top of the window. Each of the tick boxes below it allow you to specify which items of the show you would like to load into the current show. 3. Click on the “Load” button to complete this operation or click “Cancel” to return to the current show. Save show Saving a LightFactory show is the process of copying the “current show” to a new show name. The current show remains loaded and does not change but a snapshot is made and stored for later retrieval. 1. Open the save show dialog by clicking on the file menu and selecting “Save Show”. See Figure 17 Figure 17: "Save Show" dialog 2. Select the parts of the show you would like to save. Like the “load show” option, you can select what aspects of the show you would like to save. http://www.lifact.com 65 LightFactory A Guide for Users Reference/Window Overview Command Interface Note: By default, all of the current show will be saved. Any aspects you do not wish to save can be un-ticked by clicking on the tick-boxes next to the relevant options. Only the ticked options will be saved. T T 3. You must enter a valid show name to save the current configuration. Either type a new name or select an existing name from the drop-down combo box. Note: If you select an existing show, all information will be overwritten by the “current show”. A warning dialog will inform you if you are about to overwrite an existing show. T T 4. Click on the “Save” button to complete this operation or “Cancel” to return to the current show. Delete show All saved shows are stored in an internal SQL database rather than as files on your hard drive. The delete show option is used to completely remove a show from the database. Warning! This operation is irreversible and it is recommended that if you want to cleanup your system (remove old shows) that you backup the database first. See “Database” on page 70 for database maintenance options. T T Note: You cannot remove the “current show” from the system. If you would like to clear all of the settings currently loaded use the “Clear Show” option in the file menu. T T 1. Open the delete show dialog by clicking on the file menu and selecting “Delete Show”. See Figure 18 66 © 2004 LightFactory Software Ltd Reference/Window Overview Command Interface LightFactory A Guide for Users Figure 18: "Delete Show" dialog 2. Select the show you want to delete from the database and click on the “Delete” button to complete the operation or “Cancel” to exit this window. Note: Clicking on the “Delete” button will pop up a confirmation dialog to ensure shows are not deleted accidentally. T T System Properties The “system properties” window can be accessed by selecting the option from the file menu. Note: Changes to these settings are applied immediately and automatically saved into the system. T T There are four groups of settings that you can configure here, each has its own tab: ♦ System – provides access to settings affecting overall operation of the software. This is primarily related to external hardware installed with your software T T ♦ Database – Backup and restoring of the files used to store all show information. T T ♦ Settings – Configuring default properties for creating show cues and providing some convenience options to make using the software easier. T T ♦ Licensing – Options for licensing your LightFactory software. Without a valid license, LightFactory will not produce any DMX output. T http://www.lifact.com T 67 LightFactory A Guide for Users Reference/Window Overview Command Interface ♦ Visualiser – Configures integration with WYSIWYG or Capture visualisation tool. System The system tab provides access to settings affecting overall operation of the software. This is primarily related to external hardware installed with your software. DMX Hardware (Input & Output) Use the drop down box’s provided to configure the input and output hardware used by the software to communicate with your DMX system. Supported hardware used to output to DMX networks: ♦ Soundlight USB-DMX Interface (Same as Sunlite hardware) ♦ Enttec DMX over Ethernet Protocol (ESP) ♦ ArtNet DMX over Ethernet Protocol ♦ Open USB DMX Interface Supported hardware used to input DMX into LightFactory (for use as submasters): ♦ Soundlight USB-DMXIN Interface (Same as Sunlite hardware) ♦ Enttec DMX over Ethernet Protocol (ESP) ♦ ArtNet DMX over Ethernet Protocol ♦ Open DMX USB Interface (coming soon) Note: After changing either of the hardware selection you will need to restart LightFactory for the changes to take effect. If you select either the Enttec or ArtNet protocols for use as input into LightFactory you will also need to specify the DMX universe that will be used. Enter this value into the spin edit provided. (only visible if one of these protocols are selected) 68 © 2004 LightFactory Software Ltd Reference/Window Overview Command Interface LightFactory A Guide for Users Figure 19: System Properties: System tab The mouse wheel sensitivity allows you to alter the percentage increment that will apply for each segment rotation. By default, rotating the mouse wheel by one increment will change the fixtures or groups by 5%. By default you can double click on a channel in the “channel view” to immediately turn it on. To disable this feature to prevent accidental operation check the box labelled “Disable double click in channel view” If you are running LightFactory on a slow computer system you way want to turn off some of the graphical options in the channel window. The “fade bar” is a blue (default) bar that displays the current channel level and appears just under the text. If you have patched an intelligent fixture you can display a picture in each cell of the channel view. You can also change the colour of this bar by clicking on the coloured box labelled “Channel view bar colour” To put a background image on the layout view (channel display) either enter the filename or click on the button to the right to bring up the file selection dialog. Telnet Options – To access the command interface remotely from any computer on the network enable the telnet interface. Once checked you can connect to LightFactory through port number 3100. http://www.lifact.com 69 LightFactory A Guide for Users Reference/Window Overview Command Interface Database A powerful feature of LightFactory is its built-in ability to backup and restore the files that store all of your show information. Click on the “Database” tab to access the backup and restore features. Figure 20: System Properties: Database tab Backup 1. To backup the database enter a valid path and filename (including desired file extension, e.g. c:/backups/backup.bu) where you want the backup written to. You can also press the “Browse…” button to select the folder you wish to save to, and type the filename you want to use (eg “backup.bu”) into the dialog box. 2. Click on the “Backup Database” button to begin the operation. A “Working…” message will appear to the right of the button and all controls will become inactive. Once complete the controls will become active again and the message will change to “Done!” You should be able to find the newly created file in the location you specified. Note: backups can be done directly to networked computers by entering a fully qualified UNC network address. T 70 T © 2004 LightFactory Software Ltd Reference/Window Overview Command Interface LightFactory A Guide for Users Restore 1. To restore a database from a backup file, you can either: ♦ Enter the path and filename into the edit box provided, or ♦ Click on the button to the right to select the file from a standard windows dialog box. Warning! Restoring a database will completely overwrite all shows (including the current show) currently in the LightFactory system. T T Note: After restoring a database, the LightFactory software requires restarting. T T 2. After selecting the file name to restore the database from, click on the “Restore Database” button. Two confirmation dialog boxes will warn that this process is non-reversible and ask if you want to continue with the restore. 3. A “Working…” message will appear to the right of the button and all controls will become inactive. Once complete a dialog will appear indicating that the software must restart. Click on the OK button and LightFactory will shut down. 4. Restart LightFactory. Settings The settings page provides access to set default properties when creating show cues and provides some convenience options to make using the software easier. Figure 21: System Properties: Settings tab http://www.lifact.com 71 LightFactory A Guide for Users Reference/Window Overview Command Interface Cue Defaults The cue defaults will apply every time a new cue is created. (By default, these settings are all set to zero seconds.) Set a cue default by either typing the desired time or using up and down arrow controls to the right of the edit box. On Level Use this to specify the value fixtures will be set to when clicking on the “ON” or “SOLO” buttons in the channel window. This also applies to the ON command in the command window. GM Submaster To assign a physical submaster to control the grand master set the submaster number in the box provided. Setting this value to 0 will disconnect the grand master from a physical submaster. Invert GM Submaster Checking this option will invert the operation of the submaster assigned to the grand master. Setting the submaster to 0 will result in the grand master being set to 100%. The flash button can now be used as a DBO function. Convenience Options ♦ Cue “Fade Out” applies to outgoing cue – Some lighting systems such as strand apply the fade out of a cue differently to LightFactory. With this mode turned on the fade out of a cue applies to the cue executed before this one. T T ♦ Automatically apply ‘Shutter open’ with dimmer – For moving lights that require a shutter open command to obtain light output, it can be cumbersome to remember to consider this when using the fixtures. LightFactory can simplify this task by automatically applying shutter open as soon as the dimmer level goes above zero. T T ♦ Snap Palettes – To ensure that palettes do not apply the set fade time check this option. ♦ Unpatch channels when clearing the show – By default when shows are cleared the channel patching is 72 © 2004 LightFactory Software Ltd Reference/Window Overview Command Interface LightFactory A Guide for Users reset to 1:1 and all intelligent fixtures removed. If this option is checked all channels are unpatched. Registration LightFactory uses a software license to ensure that the product has been legally purchased. Without a valid registration code, the software will still operate normally and no functionality will be restricted, however the software will not produce any DMX output. To enable the DMX hardware interface, a valid registration must be entered - whether at time of install, or through the “Registration” tab in this window. Figure 22: System Properties: Licensing tab Visualisation LightFactory supports integration with the popular WYSIWYG (Cast Group. http://www.cast-soft.com) and Capture (http://www.capturesweden.com) visualisation software. To use this feature select either the WYSIWYG or Capture check boxes. If you want to temporarily disable the output uncheck the “Output live data to visualiser” Because saving patch information can be a slow process LightFactory provides an option to delay this operation till you have finalised the patch. To automatically save the patch to the database http://www.lifact.com 73 LightFactory A Guide for Users Reference/Window Overview Command Interface as soon as it is received check the box “Automatically save patch when received” To send and receive selection commands from the visualiser use the “Send and receive fixture selection” option. Figure 23: System Properties: WYSIWYG tab External Triggers LightFactory provides the ability to connect external triggering devices to control the running of shows. This feature allows you to set up shows that run without user interaction. External triggering is designed to trigger the “Cue Go” function in shows, however LightFactory can also use the MIDI and Timecode triggers to execute any shortcut. Configuration of the external triggers can be found in the file menu. MIDI Control MIDI is a flexible musical instrument-to-PC protocol that provides a number of different messages in the form of notes. Figure 24: External Triggers: Midi Control 74 © 2004 LightFactory Software Ltd Reference/Window Overview Command Interface LightFactory A Guide for Users The “MIDI Control” tab provides the ability to add any number of triggers to the system. Click on the “Add” button to create a new line in the list of triggers. To remove a trigger click on the row you wish to remove and click on the “Remove” button. For LightFactory to respond to MIDI events you must enable it by clicking on the “Enable MIDI Control” Each trigger requires the following settings; ♦ Description – This provides a way to identify the trigger by entering a description for your reference. T T ♦ Channel – Identify the MIDI Channel to listen on (1-16) T T ♦ Device – Device number to listen to (default 0) T T ♦ Note – This is an instrument note that will trigger the event. T T ♦ Octave – An interval between two notes that are seven steps apart on a musical scale. T T ♦ Action – Each trigger can either execute the “cue go” operation or execute a system shortcut. Use the dropdown combo to select one of these options. T T ♦ Shortcut – If the action is set to “shortcut”, this field is used to specify what shortcut number you want this trigger to execute. T T PC Line-In The PC Line in triggers are only able to trigger the “cue go” function. There is no shortcut execution with this event. The “PC Line In” tab provides the ability to set the audio source, frequency range, trigger level, and minimum time between events. For LightFactory to listen to the selected audio source you must enable it by clicking on the “Enable Audio Line In Control” http://www.lifact.com 75 LightFactory A Guide for Users Reference/Window Overview Command Interface Figure 25: External Triggers: PC Line In ♦ Source – Select the audio source you want to use to trigger the system. Select from Line In, CD ROM, or PC Microphone using the combo edit provided. T T ♦ Frequency Range – The frequency range that the software will listen to. The default is 20Hz through to 20kHz. T T ♦ Cue Trigger Level – Select the audio level in dB that will trigger the cue go. T T ♦ Min Time – Set the minimum time between trigger events. MIDI/SMPTE Timecode The timecode configuration provides the ability to set up shortcuts that are triggered by the timecode values being reached. Note: There is no configuration required for using timecodes to trigger “cue go”. See “Timecode” on page 135 for more information on using timecodes with the cue system. T T To enable listening to MIDI/SMPTE timecodes, check the box marked “Enable MIDI/SMPTE timecode Control. To enable timecode support from Winamp check the box marked “Enable Winamp Timecode Control” 76 © 2004 LightFactory Software Ltd Reference/Window Overview Command Interface LightFactory A Guide for Users Figure 26: External Triggers: MIDI/SMPTE Timecode tab To add a new timecode trigger, click on the “Add” button and edit the fields provided. To remove any trigger, select the event from the list and click on the “Remove” button. ♦ Description – This provides a way to identify the trigger by entering a description for your reference. T T ♦ Timecode – Set the time code in the format HH:MM:SS:FF that will trigger the shortcut. The shortcut will only trigger once when the time is reached. T T ♦ Shortcut – This field is used to specify which shortcut number you want this trigger to execute. T http://www.lifact.com T 77 LightFactory A Guide for Users Reference/Window Overview Command Interface Scheduled Tasks Scheduled tasks allow you to setup recurring lighting events using the real time clock of Windows. Each task can be scheduled to run daily, weekly, monthly, one-time only, every hour, or every X seconds. Each task executes a LightFactory shortcut. Figure 27: Scheduled Tasks The following tasks are frequently performed when you want to schedule a task to run on your computer. Create a scheduled task Before a task can be scheduled to run, one or more tasks must be created. To create a new task click on the “New Task” button at the top left of the window. 1. As soon as you click select “New Task” the scheduled task wizard will start. Select the shortcut you want to execute on every occurrence of the task and click “Next” to continue. 78 © 2004 LightFactory Software Ltd Reference/Window Overview Command Interface LightFactory A Guide for Users 2. In the space provided on the second page enter a meaningful name to describe the task. (e.g. Hourly fountain show 1) Then select how often you want this task to run and click “Next” to continue. 3. The next page is specific to the frequency that you want the task to be performed. a. Daily b. Weekly http://www.lifact.com 79 LightFactory A Guide for Users c. Reference/Window Overview Command Interface Monthly d. One Time Only e. Every Hour or Every X seconds No additional information is required for this option. 4. Once you have selected the schedule options for the task click “Next” to continue to the final page. 5. To complete the setup of the new task click on the “Finished” button. The new task will now appear in the task list and will immediately become active. 80 © 2004 LightFactory Software Ltd Reference/Window Overview Command Interface LightFactory A Guide for Users Modify a scheduled task Created scheduled tasks can be modified. You can modify the shortcut to run, the schedule, or the specifics of a particular task. To modify a task double click on the desired entry or click once and select properties from the option at the top of the window. This will start the same wizard you used to create the task. Follow the same procedure to change any of the option or click cancel at any time to return to the task schedular window. Remove a scheduled task For scheduled tasks that are no longer needed, you can remove them entirely by selecting the corresponding row and clicking on the delete button at the top of the window. Temporarily turn off a scheduled tasks You can temporarily turn off or pause scheduled tasks from running using the pause button provided. The status field will show paused tasks. To turn a task back on simply slick on the pause button again. http://www.lifact.com 81 LightFactory A Guide for Users Reference/Window Overview Command Interface Edit User Permissions To control access to various parts of the software you can setup users and passwords from the “Edit User Permissions” window. Figure 28 : User Security Once a user has been added to the software the security feature will become active and require a login each time the software starts. By default no users will exists in the system. An empty user list is the equivalent of turning off the security feature. Note: The software will not allow you to disable the “Edit Users” option if the selected user is the last one with this privilege. To create a new user click on the “Add” button in the bottom left of the window. A dialog will pop up asking you to enter the name. Once the user has been added you can enter a password and define the security privileges. Most of the security features centre around allowing or denying access to the various windows within the software. For example, if you would like to prevent a user from opening the “Cue List” window uncheck the option to the right hand panel of the window. The “Record” privilege is a special option that can be used to prevent a user from modifying the show while still providing access to windows like the “Show Runners” and “Channel” view. 82 © 2004 LightFactory Software Ltd Reference/Window Overview Command Interface LightFactory A Guide for Users By default a new user will have all privileges enabled. Use the “Uncheck All” to remove all access to the user. You can then add access to the user as required. Once you have setup a user in the software the security will become enabled. The next time you start the software you will be asked to login with a username and password. Figure 29: User Login The user name will default to the last name used to login to the software and will automatically place the cursor into the password field. Enter the password for the user and press the enter key or click “login” to proceed to the main interface. http://www.lifact.com 83 LightFactory A Guide for Users Reference/Window Overview Command Interface Submaster Options Submasters can be assigned to perform a number of functions. Traditionally a submaster is a physical slide control that allows the user to input a value between 0 and 255. The following functions can be assigned to LightFactory submasters: ♦ Channel groups ♦ Show cue “go” execution ♦ Show cue intensity override ♦ Effect runners intensity override ♦ Chase step rate control ♦ Chase fade time control LightFactory provides up to 1000 submasters that are accessed through 10 pages. Obviously, computers do not typically come with a number of physical faders so LightFactory provides access to submasters through either an on-screen interface or through add-on hardware. Open submaster page Submaster page control On-Screen Submasters The on-screen submasters provide access to 240 submasters across 10 pages. Each of the 20 submasters per page is represented by a slide control and spin edit box. Note: LightFactory can support up to 1000 submasters by connecting external hardware to the system. T T Setting a submaster can be done by using your mouse to click-anddrag the slide control, or by typing a value in the edit box below the slider. If you move the slide control, the value in the edit box will change to reflect the new position and changes to the edit box will be reflected in the slide position. 84 © 2004 LightFactory Software Ltd Reference/Window Overview Command Interface LightFactory A Guide for Users Figure 30: Submaster window The “Flash” button at the bottom of each submaster can be used to temporarily set the submaster for full. Once this button is release the submaster will return to its previous state. Selecting the “Toggle” option at the bottom of the window will change the behaviour of the flash button so that you do not need to hold the mouse button down. With the toggle option on, clicking and releasing the flash button will take its position to full. To return to the previous state click the flash button again. T Note: If hardware submasters are being used, you will also see the slide position and edit box value change to reflect the hardware. Right clicking on a submaster will bring up additional options to help identity each fader. Change Description – Use this option to label the submaster. The label will appear along the top of the fader. Set Description Colour – The colour of the description can be changed by selecting it form this option. Reset Description Colour – Select this option to return the colour of the description back to its original colour. Hardware Submasters LightFactory provides the ability to add physical hardware to the system by using any standard DMX lighting desk. By connecting http://www.lifact.com 85 LightFactory A Guide for Users Reference/Window Overview Command Interface the DMX-IN hardware, you can connect your existing lighting desk to the software. LightFactory will only use the first 100 channels of the lighting desk as submasters, but these 100 channels can be paged to provide up to 1000 submasters. For more information on DMX-IN hardware, please visit our web site. www.lifact.com HTU UTH Shortcut Options Shortcuts are designed to provide quick access to a number of functions within the software. Some of the assignments that can be made to shortcuts include: ♦ Channel selection ♦ Channel Group Selection ♦ Cue Go / Back / Pause / Reset ♦ Execute Fixture Properties ♦ Effects Run / Pause / Reset ♦ Execute level groups As with submasters, shortcuts can be accessed through an onscreen display or by connecting additional hardware. On-screen shortcuts also have the added feature of being designed for use with a touch screen display. LightFactory provides 1800 user-assignable shortcuts that are accessed through 20 pages. Access to the on-screen shortcuts is obtained by clicking on the button to the right of the shortcut page selection. Open on-screen shortcut page Shortcut page control 86 © 2004 LightFactory Software Ltd Reference/Window Overview Command Interface LightFactory A Guide for Users On-Screen Shortcuts The shortcut window is a grid of 90 buttons each tagged with a number, description, and colour. Figure 31: On-Screen Shortcuts If a shortcut is not assigned the button will appear greyed out and cannot be selected. When a shortcut is assigned a default description is created and appears below the shortcut number. Right clicking on any of the active shortcuts will produce a pop-up menu that will allow you to edit the description and change the button and text colour. Note: Changes made to the description or colour will remain until the shortcut is reassigned. T T The size of the text displayed in each shortcut can be modified using the edit provided in the bottom left of the window. (Default size - 8 points.) Changes to the text size take effect immediately. The full screen button to the right of the text size edit box allows you to toggle the window into a borderless full screen mode. This can be useful when using the shortcuts page with a touch screen http://www.lifact.com 87 LightFactory A Guide for Users Reference/Window Overview Command Interface monitor. The window can be returned to its original size by clicking on the same button. Hardware Shortcuts Programmable keyboards can be connected to the LightFactory system to provide physical shortcut buttons. Programmable keyboards are most commonly used in point-of-sale environments but are perfect for this application. Each key can be assigned a sequence of characters to send to the computer and are generally designed for heavy continuous use. LightFactory has a built-in command sequence that will trigger shortcuts from programmable keyboards. For more information on shortcut hardware, please visit our web site. www.lifact.com HTU 88 UT © 2004 LightFactory Software Ltd Reference/Window Overview Channel Display LightFactory A Guide for Users Channel Display The channel display is your primary access to fixtures and lights. You may want to skip ahead and read the section on “Intelligent Fixture Control” (starts on page 94) before continuing to set up any moving/intelligent lights in your DMX chain. In the channel display you can: ♦ Select and modify the dimmer of each channel ♦ Select and modify properties of intelligent fixtures (e.g. moving lights) ♦ Set a the default fade time for the system ♦ Add channels to a channel group (see page 106) ♦ Add channels to show cue (see page 107) ♦ Add channels to a selection shortcut (see page 109) ♦ Add channels to palettes (see page 111) ♦ Create simple chase effects (see page ) ♦ Change the channel view from Expanded to Compact view ♦ Select all, unselect all, select active, select inactive, undo the last selection or invert the selection ♦ Change the selection mode from inclusive to exclusive Figure 32: A simple channel window with only simple fixtures http://www.lifact.com 89 LightFactory A Guide for Users Reference/Window Overview Channel Display Figure 33: A channel window with 16 moving lights patched from dimmer 25 onward. Note: Intelligent fixtures are identified by the word “Fixture” rather than “Channel.” The word channel is used to identify simple dimmers. T T Intelligent fixtures display the fixture name and all of the available properties that can be changed. In this example there are four different types of fixtures each with different property counts. Resizing Rows and Columns in the Channel Window The size of all of the columns can be changed by moving the mouse over any horizontal grid line, holding down the left mouse button and dragging the column to the required width. (Columns cannot be resized individually; resizing any column will resize all of them) Each of the rows can be resized independently to view all of the fixture properties in a cell. To resize a row, move the mouse over the lower 90 © 2004 LightFactory Software Ltd Reference/Window Overview Channel Display LightFactory A Guide for Users vertical grid line, hold down the left mouse button and drag to the required height. Selection Options Channels can be selected for editing by simply clicking on the desired grid cell. By holding the left mouse button down you can drag an area of the grid to select multiple channels or fixtures. At the bottom of the channel window are a number of options to help with channel selection. Each of the options is described below. ♦ Inclusive selection T ♦ Exclusive selection ♦ Select All/Unselect All ♦ Select Inactive/Select Active ♦ Invert Selection ♦ Select Next ♦ Select Previous ♦ ON / OFF ♦ Solo ♦ DBO (Dead Black Out) ♦ Park ♦ Release / Release All Note: Selected channels will appear green and active channels (channels where the value if greater than 0) will appear in a light blue. Inclusive Selection If the “inclusive selection” option is active then each selection made will be added to the previous selection. All channels currently selected will remain selected unless they are in the new selection area. Any selection will toggle the selection state of a channel. http://www.lifact.com 91 LightFactory A Guide for Users Reference/Window Overview Channel Display Exclusive Selection If the “exclusive selection” option is active then each selection made will unselect any currently selected channels. If the selection overlaps any currently selected channels then they will remain selected. If you hold down the control (ctrl) key while making selection in this mode you are able to add channels as per the exclusive mode. Select All / Unselect All Use these buttons to select or unselect all 2000 channels. The “unselect all” button is a useful way to reset the current selection. Select Inactive / Select active Active channels are channels where the dimmer is above zero. These channels are identified by the light blue (aqua) colour. Note: Selecting active channels will apply the inclusive/exclusive options. Invert selection Invert selection will select all channels not currently selected and de-select the current channels. Undo last selection The last selection operation made can be reversed by clicking on this button. Select Next This option will select the next patched channel relative to the current selection. If channel 1 is currently selected and this button is pressed then channel 2 will become selected and channel 1 will be unselected. Select Previous Click on this button to select the channel before the currently selected channel. ON Selected channels will immediately be set to the ON value set in the properties window. OFF Selected channels will immediately be turned off. 92 © 2004 LightFactory Software Ltd Reference/Window Overview Channel Display LightFactory A Guide for Users Solo Selected channels will be turned “ON” (value set in properties window) and all other channels will be turned off. DBO All channels will immediately be turned off. Park Parking selected fixtures will freeze the DMX output and prevent any changes happening to the fixture. Parked fixtures are identified by red text. Release Parked channels and fixtures will be released from the park state and changes will become active (operates on selected fixtures). Release All Release all of the fixtures regardless of what is selected. Modifying Selected Channels Once a channel is selected, you can modify its current dimmer value. To set the current dimmer as a percentage, enter a desired number between 0 and 100. As the number is entered, you will see it appear in the window title bar. The number entered will not apply until the “enter” or “return” key is pressed. Once enter is pressed the number will be cleared from the title bar and the channels will be set. The channel will fade over the time specified in the “fade time” field. Note: Corrections can be made to any entered value using the “backspace” key. Use the title bar to check the entered value before applying. To set the channel to a DMX value, (0-255) enter a “d” before the required value. In the title bar, you will see the letters DMX before the value you entered. Note: After applying the setting (press enter), you will see the dimmer value displayed as a percentage corresponding to the DMX value you entered. http://www.lifact.com 93 LightFactory A Guide for Users Reference/Window Overview Channel Display The current value can also be modified using the scroll wheel on your mouse (if equipped). This is a very useful way of controlling the dimmer of any lamp as its gives you a smooth control of the lamp’s intensity. By default, each increment of the scroll wheel will increase or decrease the current value by 5%. This figure can be changed in the properties window. See “System” on page 68. The “+” and “-“ key can also be used to increase or decrease the dimmer of the selected channels. Default Fade Time The default fade can be set for all channels by entering a value into a fade edit box at the bottom left of the window. Once you have set the desired fade all changes made to the fixture will apply over this time. The default fade time specifies the time a channel will take to get from its current value to the new value. Internally this value will be overridden by the show and effects controls so it is not necessary to have the default fade at zero when running shows. Text Size To change the size of the text in the channel grid change this number. The change will immediately be reflected in the view. Intelligent Fixture Control If a selection includes only one type of intelligent fixture then the “intelligent fixture control” window will appear on the right-hand side of the channel window. See Figure 34. 94 © 2004 LightFactory Software Ltd Reference/Window Overview Channel Display LightFactory A Guide for Users Figure 34: Intelligent Fixture Control By default, this window will be docked with the channel window. This option will ensure that the window remains attached to the right-hand side of the channel window. Moving the channel window will move the properties window and moving the properties window will move the channel window. To turn this option off and have the properties window floating free, un-tick the check box at the top of the window titled “Docked” Note: If more than one fixture is selected, the properties window will show the state of the first fixture, however any changes that are made will apply to all of the current selection. The fixture properties window will only allow access to properties that exist for the fixture. If a fixture does not have any gobo control then the gobo selection will be greyed out and will not respond to mouse clicks. http://www.lifact.com 95 LightFactory A Guide for Users Reference/Window Overview Channel Display Most of the fixture properties provide access to both a helper control and a real value control. The helper control is generated from the fixtures setup and is typically a way to access real world representation of what the light will do. In the colour example below, the DMX value of 64 can be meaningless to us but the box on the left shows us that the value 64 in colour wheel 1 will produce green. Real property value (DMX) Helper control Sometimes we do want values other than what is available in the helper control. It is optional when setting up new fixtures to provide help information such as all of the available colours in a colour wheel. For this reason, LightFactory always provides access to the actual DMX value and this number can be modified to override the selection in the helper control. When the fixture properties window is displayed, the helper controls will find the closest match to the current properties DMX value. Some controls that have a more ambiguous result do not provide a helper control. The effects are a good example because every brand of fixture may implement a different set of effects. All of the real value controls can be operated by either typing a value into the box provided, clicking on the up and down buttons to the right of the control, or using the mouse wheel to increment or decrement the value. 96 © 2004 LightFactory Software Ltd Reference/Window Overview Channel Display LightFactory A Guide for Users Pan & Tilt The pan and tilt helper is the large square with a picture of the selected fixture in it. Figure 35: Pan and Tilt Helper Note: if no picture is available the LightFactory logo will be displayed. To set the pan and tilt, left click and drag your mouse around the square. You should immediately see that fixture you have selected move relative to your mouse movements. Note: When you click and drag your mouse around the pan and tilt helper control you will notice that your mouse speed slows down. This is only a temporary change, your mouse speed will return to the windows default speed when the button is released. This is to make controlling the fixture easier and more manageable. Above the pan and tilt helper are the real value controls and the position options. Note: If you find that either the pan or tilt operation is inverted to your mouse movements, revisit the patching controls and click on the “flip pan” or “flip tilt” check boxes provided with every channel. See ”Flip Pan & Tilt” on page 167 in the “Dimmer Patching” section for more information about this. http://www.lifact.com 97 LightFactory A Guide for Users Reference/Window Overview Channel Display Position Presets & Options Home Fixture – Select this option to return the fixture to exactly midway for both pan and tilt. Move fixture relative to current position – When more than one fixture is selected this option will allow you to move the fixtures relative to where they currently positioned. Uncheck this option to ensure all selected fixtures move to the absolute position of the cross hairs. Lock Pan / Lock Tilt – This is a useful option to ensure that a fixture is only moved in one direction. If you lock the pan for example, only the tilt value will be changed when moving the mouse in the window. Position Presets - Position presets are a way to remember pan and tilt positions in the system. By default, the fixture’s home position is always available and cannot be removed. To add a position preset: 1. Set up the fixture to the pan and tilt setting required 2. Click on the “position preset” button 3. Select “Add current position to list” from the resulting drop down menu. 4. A dialog box will appear asking for a name to be assigned to the new preset. Enter short description and click “OK” To use a saved preset simply click on the “Position Preset” button and select it from the drop down list provided. The selected position can be removed by selecting “Remove current position from list” in the drop down menu. Colour Wheels LightFactory provides helper controls for up to 3 colour wheels. A colour wheel has a fixed list of available colours that can be selected by setting the DMX line to a specific value for each colour. Figure 36: Colour Wheel Controls 98 © 2004 LightFactory Software Ltd Reference/Window Overview Channel Display LightFactory A Guide for Users When fixtures are defined in LightFactory’s patching screens, specific colours can be assigned to DMX values thus making the real colours available in the helper control. To select one of these colours: 5. Click on the drop down arrow and pick the desired colour. Figure 37: Using the Colour Wheel Helper Control 6. On selection of a colour from the helper control, the real value will be displayed in the control to the right. In Figure 37 above, blue has been selected and the corresponding DMX value 180 is displayed in the control to the right. CMY Colour Mixing For fixtures that support CMY colour mixing, the property editor provides access to these settings. This section also provides access to CTC (Colour Temperature Control) for fixtures that have this feature. Figure 38: CMY Colour Mixing and CTC Controls To set the output colour of a fixture, edit the cyan, magenta, and yellow until the desired colour is found. Alternatively, the colour can be selected from a colour pallet by clicking on the “Chooser” button. http://www.lifact.com 99 LightFactory A Guide for Users Reference/Window Overview Channel Display Figure 39: Colour Chooser To use the colour chooser, you can either: ♦ Select one of the pre-defined basic colours by using the VGA or Internet tabs, or ♦ Create your own custom colour by using the HSB, RGB or CMY tabs. These pages provide colour mixing controls for different methods of building colour. Note: If the fixture selected only has RGB or CMY control such as LED fixtures then the colour dialog (Figure 39: Colour Chooser) will appear automatically replacing the fixture control. Gobo Control Gobo systems typically have two primary controls, the actual gobo selection and a rotation control. Note: Some fixtures combine both functions into one control channel. In this situation, only the gobo selection is used to control the feature. If rotation is combined into one channel then the gobo helper control will typically select the gobo in its stopped state. Gobo helper control Real gobo value (DMX) Gobo Rotation control Figure 40: Gobo Controls 100 © 2004 LightFactory Software Ltd Reference/Window Overview Channel Display LightFactory A Guide for Users As with the colour helper, the gobo control provides a graphical representation of the gobos available in a drop down combo. These can be set up and edited in the fixture editor. See “Edit Fixtures” on page 168 for more information. On selection of a gobo from the helper control, the real value will be displayed in the control below it. When the fixture properties window is shown the gobo helper will show the gobo that is closest to the value set. If gobo rotation is supported by the fixture, the speed and direction can be modified by setting the bottom control labelled “Rot”. If the fixture supports 16bit gobo values or gobo rotation values then the maximum value will be 65535. Effects For fixtures that support special effects such as prisms and beam splitter, the three effects controls can be used to set the feature. For more information about what effects your fixtures support, refer the documentation accompanying the fixture or visit the manufacturer’s web site. Figure 41: Effects Control The effect control does not have a helper function because the action is ambiguous and dependent on the fixture chosen. Control Channel The control channel is used to send special instructions to the fixture, such as turning on the lamp. In many fixtures, this control channel is also used for operations such as strobe. Figure 42: Control Channel Control http://www.lifact.com 101 LightFactory A Guide for Users Reference/Window Overview Channel Display To choose a control function, click on the button, a menu will pop up (Figure 43) listing all of the supported functions of the fixture. Alternatively, set the value of the control channel directly by editing the DMX value in the edit box provided. Note: When a control function is selected, the Control Channel Control button will display the name of the selected channel, rather than the default text “Control Channel Off”. Figure 43: Control Channel Functions Figure 43 is the complete list of available functions that the control channel can be used for. The values associated with each of these functions are set in the fixture editor of the patching window. See “Edit Fixtures” on page 168. Only the set values will be displayed, if one of these functions is not available then your fixture does not support it. 102 © 2004 LightFactory Software Ltd Reference/Window Overview Channel Display LightFactory A Guide for Users Advanced Controls To access the advanced options of a fixture click on the “Show Advanced” button in the bottom right of the window. If this button is not seen then the fixture does not support any of the advanced options. Beam Framing Beam framing is an advanced feature available on some fixtures to shape the output of a spot luminare. Framing is a similar process to using shutters on conventional profile luminaries and is controlled in a similar manner with intelligent fixtures. LightFactory provides 4 framing shutters controls each able to set the position and angle. Some fixtures also allow you to rotate the frame. The “Frame Rot” control can be used to implement this. Note: If your fixture does support framing control and the controls are unavailable, you can configure the framing control settings for the fixture using the fixture editor. See “Edit Fixtures” on page 168 for details. http://www.lifact.com 103 LightFactory A Guide for Users Reference/Window Overview Channel Display Speed Controls For fixtures that support control over the transition speeds of different properties LightFactory provides access to the supported function her. If the property is not available the control will be disabled. Other Controls The following additional controls are available in the fixture control window; ♦ Zoom ♦ Diffuser ♦ Iris ♦ Edge ♦ Focus ♦ Strobe Each of these properties is controlled in the same way. Each provide access to the DMX value with a slide control to give a quick visual representation of the setting. When modifying the DMX value the position of the slide control will change to reflect the new value. Figure 44: Property Slider Controls Use your mouse to click and drag the slide controls to quickly set the DMX value for the desired property. 104 © 2004 LightFactory Software Ltd Reference/Window Overview Channel Display LightFactory A Guide for Users The right click menu To assists with programming LightFactory many operations are available from a pop up menu in the channel window. Click on the right mouse button while over the channel grid to activate the menu. See Figure 45. Figure 45: Channel Window Right-Click Popup Menu Quick Selection If you have assigned channels to selection shortcuts then the “Quick Selection” menu item will be visible at the top of this menu. Selecting a shortcut from the sub menu will act exactly the same as using the shortcut itself. For additional convenience the first 9 shortcuts can also be accessed by holding down the control (CTRL) key and pressing the corresponding number on you keyboard. http://www.lifact.com 105 LightFactory A Guide for Users Reference/Window Overview Channel Display Adding channels to a channel group Channel groups can be viewed by clicking on the “Group Editor” button on the command interface or selecting it from the “Window” menu. For more information on channel groups see “Channel Groups” on page 17 and “Channel Group Editor” on page 114. Add selected channels to group This menu option allows you to add currently selected channels to a group. 1. Right click on the channel window. 2. Select the “Add selected channels to group” option in the resulting menu. 3. A dialog will appear. Select the group from the drop down selection or enter a new group name to create a new group. Figure 46: Channel Group Selector Selecting an existing group will add the channels to the group selected; if the channel already exists in the group, it will be ignored. If the entered group does not exist, it will be created and the channels added. The next available submaster will automatically be selected in the “submaster” field. If you do no want to assign a submaster enter 0 into this field. 4. To complete this operation press the “OK” button or press “Cancel” to return to the channel window. You can edit the created channel groups via the Group Editor. See Channel Group Editor” on page 114 for more information. 106 © 2004 LightFactory Software Ltd Reference/Window Overview Channel Display LightFactory A Guide for Users Add selected channels to group (Snapshot current state) This option is the same as above, with the current state of the channels as the maximum value that a channel will reach when the group is at 100%. This will create a snapshot of the currently selected channels in the form of a channel group. This will also record the current state of the properties for intelligent fixtures. As the group’s value travels from 0 to 100% the channel’s output value is the proportion of its set maximum. By default, the fixture properties will operate the same way. Note: An option in the group editor can be set to snap the properties. See “Channel Group Editor” on page 114 for more information. Remove selected channels from group This option will remove the channels you have currently selected from a group. Once this option is selected, the dialog in Figure 46 (page 106) will prompt for the group to remove the channels from. If the channels selected do not exist in the group selected then nothing will happen. To complete this operation press the “OK” button or press “Cancel” to return to the channel window. Adding channels to a cue Cues can be viewed by clicking on the “Show Editor” button on the command interface or selecting it from the “Window” menu. For more information on shows and the cue system see “Shows” on page 21 and “Creating a Basic Show” on page 54. Add active channels to a cue Active channels are those where the dimmer is greater than 0%. To create a new cue or add channels to an existing cue: 1. Set up the scene as you want it to look and select “Add active channels to a cue” from the right click menu. http://www.lifact.com 107 LightFactory A Guide for Users Reference/Window Overview Channel Display 2. The “cue selection” dialog will pop up to select the cue into which you want to add channels. Set the “cue list” and “cue” number that you want to add the channels to. Figure 47: Cue Selection Dialog Note: Drop down combos provide a list of available show groups and cues for you to select from. To create a new show group and/or a new cue, simply type the new entry into the input box provided. 3. If you want to add a short description to the cue being created, enter this into the field provided. 4. Select the “Record active effects” to add any running effects to the cue. 5. Select “OK” to complete this operation. Note: The “cue selection” dialog will default to the last selected cue list and the next available (integer) cue number. If you are adding channels to an existing cue, then channels that already exist in the cue will be overwritten with the current values. This operation will also record the current state of fixtures and all of their properties. To cancel the operation and return to the channel window click on the “Cancel” button. Add selected channels to a cue This operation acts exactly as with “Add active channels” above, however only channels that are currently selected will be added to the cue regardless of their active state. 108 © 2004 LightFactory Software Ltd Reference/Window Overview Channel Display LightFactory A Guide for Users Add selected channels to a cue without dimmer This is a useful way to program moving and intelligent lights without the dimmer being recorded into the cue. When using the cue system to create moving light effects you may sometimes want to control the dimmer (light output) using some manual control such as a submaster (to learn about submasters, see “Shortcuts and Submasters” on page 180). This operation works as above however every channel recorded will have the dimmer set to 0%. Update (replace) cue with active channels Use this option to change an existing cue so that the current look (channel settings) replaces what is currently recorded. This function operates exactly the same as recording a cue however existing if channels exist in the cue that are not currently active then they will be removed. Remove selected channels from a cue To remove channels from a cue select the channels in the channel window and select this option from the right click menu. A dialog (see Figure 47) will prompt you to select the “show group” and “cue” you want to remove the channels from. Add selected channels to a selection shortcut Selection shortcuts are designed to make programming easier by providing quick access to any number of channels with a single key press. To view the shortcuts currently assigned, click on the “Edit Selection Shortcuts” button in the top right of the channel window. Figure 48: Channel Selection Shortcuts http://www.lifact.com 109 LightFactory A Guide for Users Reference/Window Overview Channel Display This window demonstrates that channel selection shortcuts are simply a list of channels assigned to a shortcut ID. When the shortcut is pressed the channels in the list will toggle their selection state. See “Shortcuts” on page 26 and “Shortcut Options” on page 86 for more about shortcuts. The easiest way to create a new selection shortcut is to use the right click menu option in the channel view. 1. Select the channels you wish to include. 2. Right-click on the channel window and select “Add selected channels to a selection shortcut” from the right click pop up menu. 3. A small dialog box will appear asking you to enter the shortcut number to assign and an optional description. Figure 49: Assign Shortcut Number 4. Enter the number and click “OK” to create the new entry. Note: If the shortcut is already assigned, you will be prompted to confirm that you want to overwrite the shortcut. The shortcut edit window (available by pressing “Edit Selection Shortcuts” in the Channel Window) can be used to add, remove, or edit the selection shortcuts. To change any of the shortcuts simply click on the field and enter the new value. Note: Channels can be entered using the same channel syntax as the command interface. Click on the “Add” button to create a new blank entry and the “Remove” button to delete the shortcut at the position of the cursor. 110 © 2004 LightFactory Software Ltd Reference/Window Overview Channel Display LightFactory A Guide for Users Add selected channels to palette Palettes are a way to quickly set a fixture to a particular state. Using a palette is a static operation that will override the current state of a fixture. See “Palettes” on page 193 for more information. To add selected channels to a palette: 1. Set up the fixtures into the static state (dimmer, colour, pan and tilt etc) 2. Right click on the channel window and select “Add selected channels to a palette” from the right click menu. 3. The dialog in Figure 49 will prompt you to enter the shortcut number you would like to assign to the current state. Note: This operation only allows you to create new entries and cannot be used to add to an existing shortcut. 4. Enter the shortcut number you would like to assign and click the “OK” button to confirm the requested action. If you have changed your mind, click “Cancel” to return to the channel window. Add active channels to simple chase step This menu option can be used to either create a new simple chase or add a step to an existing chase. The keyboard shortcut control-s can be used as an alternative to the right click menu. A simple chase is a series of steps, each containing a set lighting state. This is similar to a cue list, however the transition control is limited and a chase can be run automatically from within a cue. To record a chase step, setup the channels to the state you want to record and select “add active channels to chase step” from the menu. The following dialog will ask you to select the chase you want to record to and provide the option to record into an existing step or a new step. http://www.lifact.com 111 LightFactory A Guide for Users Reference/Window Overview Channel Display Figure 50: Creating or selecting a chase step Select the chase you want to add the lighting state to or enter a new name to create a new chase. The step number will default to the next available step. To create a new step click “OK” and the system will record you chase step. To add the current lighting state to an existing step select the step number from the drop down list and click “OK” The default step and fade time can be set using the edit provided. These values are global to the entire chase and cannot be set per step. To cancel the operation at any time click on the “Cancel” button. Add selected channels to simple chase step This option works the same as “add active channels to simple chase step” however only channels selected will be recorded. Create simple chase from selected fixtures This option provides a very simple method for creating simple chases. Like the option above this works on selected fixtures and will automatically create a chase step for each of the fixtures. Level Groups Level groups are a convenient way to select a particular DMX value by a simple description. Level groups created in the “Level Group Editor” will automatically become available in this menu. The Level Group Editor is available via the “Extras” button on the Command Interface. To use a level group, select the desired level by its description and notice that all selected channels will be set to the associated value. 112 © 2004 LightFactory Software Ltd Reference/Window Overview Channel Display LightFactory A Guide for Users To learn about how to create level groups, see “Level Group Editor” on page 191. Reset selected fixture properties To reset all of the properties (or attributes) to their default state select “Reset selected fixture properties” from the menu options. In most cases this will simply set the properties to 0; however some special properties such as pan and tilt may be different. Compact View To fit more fixtures and channels on screen use the compact view to abbreviate the text and shrink the cell width and height. Once you have shifted into the compact view you can still modify the cell size by dragging the edges. To return to the full view right click and select “Expanded View” from the menu. (This will have replaced the “Compact View” option) Autosize cells Select this option to automatically set the height and width of the cells based on the fixtures patched. The auto size feature will leave a gap along the bottom of each cell to display the level bar. Reset cell size to default To return all of the cells to their original height and width select “Reset cell size to default” from the pop up menu. Lock cell size Toggle this menu item to enable or disable the ability to resize the cells. Select odd fixtures of currently selected & Select even fixtures of currently selected These options will only apply to channels currently selected and the first selected channel is considered an “odd” fixture. Selecting odd or even fixtures will unselect those that do not match the criteria. Once you have selected either odd or even fixtures, you cannot then use the opposite option to reverse the operation as the system will apply you new command to current selection. The best way to swap between odd and even fixtures is to use the “Undo last selection” option. http://www.lifact.com 113 LightFactory A Guide for Users Reference/Window Overview Channel Group Editor Channel Group Editor Channel groups are a convenient way to manipulate a number of channels and fixtures with one control. Channel groups can operate on any number of fixture properties and do not need to operate on the dimmer. You can also add groups into cues, thus creating stage looks that can be altered in one location and applied across all cues. Figure 51: Group Editor Channel groups are most commonly associated with traditional submasters, however you do not need submasters to use channel groups. A channel group is a snapshot of a lighting state where the output of each channel in the group is a proportion of the group value. To create a new blank group, click on “New Group.” This will create a group without any channels assigned and all fields set with default values. To remove a group from the system, click on the row containing the group and click on the button “Delete Group.” A dialog box will prompt you to confirm that you wish to remove the group. Click on 114 © 2004 LightFactory Software Ltd Reference/Window Overview Channel Group Editor LightFactory A Guide for Users the “OK” button to remove the group or “Cancel” to return to the previous window. Group Name The group name is a description field that provides easy identification of the group. Enter a meaningful description for future reference. Channels This is a list of the channels included in the group. This list can be edited by entering the channels separated by a coma (,). You can also enter channels using the same syntax as the command window. Example 1,3,4,10/20-15 This will add channels 1, 3, 4 and channels 10 through to 20 excluding 15 to the group. The channels included in the group can also be edited by clicking the ( ) button to the right of the field. This will bring up the “Channel Select” window. This window provides greater control over the maximum value the channel will reach when the group is at 100% and provides access to intelligent fixture properties. Channels included in this group Available Channels Figure 52: "Channel Select" Window On the left of this window are all of the channels available in the system. Channels can be selected individually or a range can be selected by clicking and dragging the mouse over the channels you want to include. Selected channels can be added to the group by clicking on the ( ) button. http://www.lifact.com 115 LightFactory A Guide for Users Reference/Window Overview Channel Group Editor Channels can also be added to the group using the command edit box at the bottom right of the window. Figure 53: Group add channels command interface Use this box to enter the same syntax as you are familiar with in the command line window. Press enter or click on “Add Channels” to process the command. e.g. “1/5@30” will add channels 1,2,3,4 and 5 to the group with their maximum value set to 30%. To remove channels from the group, select the channel from the right-hand channel list and click the ( ) button. To edit the maximum value that a channel will reach enter a value (as percentage) in the “Max Value” field. When the group reaches 100%, the channel will only reach the value in this field. E.g. if the maximum value of channel is 80% and the group is at 50% then the resulting channel output will be 40%. If the selected channel is an intelligent fixture with additional properties other than a dimmer, you will also see these as extra columns in the grid. These additional fields allow you to edit the “Max Value” for all of the properties contained in the fixture. This field operates exactly as with the “Max Value” for the dimmer and specifies the highest value that the property will reach when the group is at 100%. To set the value of an entire column of data click on the header of the column to highlight all channels and enter the desired value. Press enter when you have entered the desired value. To maximise the included channel side of the window you can hide the available channels by clicking on the “hide” button between the two sections. Minimise available channels Figure 54: Group channel selection splitter bar 116 © 2004 LightFactory Software Ltd Reference/Window Overview Channel Group Editor LightFactory A Guide for Users Value This is the current output state of the group and is a percentage value between 0 and 100%. This value can be set directly by entering a number into the field or using the up/down buttons provided. The resulting output of each of the channels will be determined by the “max value” for each of the channels included. When the value field of a group is greater than 0%, the row of the grid will highlight green. (Unless the entire row is selected). The value field can also be modified by selecting the row (click the grey box at the far left of the row) and using the mouse wheel to raise and lower the value. The value will be incremented by a percentage set in the system properties (see “System Properties” on page 67). By default the value will increment or decrement by 5% with each turn of the wheel. Note: If a submaster is assigned, the value will directly reflect its current position and will change in real-time with the control. See “ Submaster Options” on page 84 for more about submasters. http://www.lifact.com 117 LightFactory A Guide for Users Reference/Window Overview Channel Group Editor The value field can be set using a Level Group. To do this, select the entire row (click on the grey box at the left of the row), then right-click. You will see a list of your available level groups. Choose the one you wish to use, followed by the level. See “Level Group Editor” on page 191 to learn how to create a level group. Fade Time The fade time (in seconds) specifies how long the system will take to go from the current value to a new value. Whenever the “Value” field is changed the fade time will affect how long it takes to reach this new value. The fade time can be modified by clicking in the field and changing the value directly or by clicking on the up/down buttons to the right of the field. Behaviour A channel group can behave in one of five ways when setting the actual output values. ♦ Override ♦ Build ♦ Exclusive ♦ Highest Takes Precedence ♦ Lowest Takes Precedence ♦ Independent To change the behaviour of a group select the desired option from the drop down menu accessed by clicking on the small arrow to the right of the field. See page 17 for a description of how each behaviour operates and affects the final output of the system. Submaster To assign a submaster to a channel group, enter a valid submaster number (1 – 1000) into this field. Once entered, the submaster will automatically be assigned and become active. Note: The value of the group will not change until the next time the submaster changes. 118 © 2004 LightFactory Software Ltd Reference/Window Overview Channel Group Editor LightFactory A Guide for Users To learn how to use a submaster once it has been set up, see “ Submaster Options” on page 84. Shortcut A channel group shortcut is a convenient way of selecting a group through a single click or key press. Once selected, the group value can be modified by using the mouse wheel. To assign a shortcut to a channel group, enter a valid shortcut number into this field. Once entered the shortcut will automatically be assigned and become active. To learn how to use a shortcut once it has been set up, see “Shortcut Options” on page 86. Toggle Shortcut The toggle shortcut can be used to switch the group on or off. Pressing the assigned shortcut will cause the group to switch to toggle between full and zero. If a fade time is set for the group it will be applied to the operation. http://www.lifact.com 119 LightFactory A Guide for Users Reference/Window Overview Channel Group Editor To assign a toggle shortcut to a channel group, enter a valid shortcut number into this field. Once entered the shortcut will automatically be assigned and become active. Snap Properties When “Snap Properties” is checked, intelligent fixtures properties will immediately snap to their maximum value as soon as the group value is raised above 0%. If this option is not selected the value of the properties will operate the same as the dimmer and will rise and fall as a proportion of the group value. Options Select All/Unselect All To select all of the groups click on the “Select All” button in the bottom right-hand corner of the window. To unselect all of the currently selected groups click on the “Unselect All” button. Select Active/Select Inactive To select the currently active groups (groups where the value is greater than 0%) click on the button labelled “Select Active” Click on “Select Inactive” to select all of the groups where the value is currently 0%. Sort View Change the “sort view” to reorder the channel groups by group name, submaster, or shortcut. 120 © 2004 LightFactory Software Ltd Reference/Window Overview Cue List Editor LightFactory A Guide for Users Cue List Editor To access the cue list editor click on the “Cue List” button on the command interface window or select the option from the “Windows” menu. Figure 55: Show Editor Shows consist traditionally of a list of cues each of which contains a defined lighting state and/or effect sequence. When a cue is triggered, the lighting state becomes active and channels attached to the cue will be set to their preset levels. Cue Lists LightFactory provides the ability to create multiple cue lists to help manage and run complex shows. A “cue list” is a way to collect a number of cues and assign a name or short description. Examples of how groups can be used include; ♦ Separate different “Acts” within a show ♦ Manage a number of shows all running in a single venue ♦ Create separate shows for a number of songs likely to play in a concert or venue. To create a new cue list: 1. Click on the “Add Cue List” button in the lower left corner of the window. LightFactory will assign a default name and automatically create the starting cue. 2. To change the name, click within the “cue list group” field and type the desired name. As soon as you exit the field, the new name will be saved. Press “Escape” to cancel the changes you have made and the current group name will return. http://www.lifact.com 121 LightFactory A Guide for Users Reference/Window Overview Cue List Editor To remove a cue list: 1. Select the desired group 2. Click on the “Remove Show Group” button. 3. A confirmation box will prompt you to confirm this operation. If you are sure you want to delete the group, click the OK button. Active vs. Selected Cue Lists A selected cue list is the cue list you are currently editing. It can be identified by the small triangle to the left of the name. The name of the selected group will also appear above the list of cues. To select a different list simply click on the desired cue list name. The active cue list refers to the play controls in the bottom right of the window. The active cue list is the cue list currently loaded into this runner and is highlighted in green. The currently active cue within the list is also highlighted in the same colour. Note: To run shows it is recommended that you use the show runner screen, however while editing and testing your show it would be inconvenient to keep switching between windows. To assist with this, LightFactory provides a single show runner on the cue list editor window. For more information on show runners refer to ”Show Runners” on page 178. Cue’s The “cue list” is a series of cues each numbered between 0.000 and 99999999.999. The cue number determines the default order that cue will be run; however, the strict order is determined by the “next cue” field. To create a new cue: 1. Click the “Add Cue” button below the cue list editor. 2. The newly created cue will be added to the end of the list with a cue number one integer value above the last cue e.g., if the last cue number was 2.35 then the newly created cue will be 3.00. 3. LightFactory will assign the “next cue” field to the first cue, thus creating a show that will automatically wrap around. As the new cue is the last one in the sequence, LightFactory will also 122 © 2004 LightFactory Software Ltd Reference/Window Overview Cue List Editor LightFactory A Guide for Users change the previous cue and set its “next cue” value to the newly created cue. Note: Double clicking on a cue will automatically make it the currently active cue and make this cue list the currently active cue list. If a cue within this cue list is active then it will appear highlighted light green. To remove a cue: 1. Select the cue from the cue list. 2. Click on the “Delete Cue” button. 3. A confirmation dialog will prompt you to confirm this operation. Right Click Menu To assist with tedious tasks a popup menu provides several convenient options related to creating and managing cues. To access this menu move the mouse over a cue and click the right mouse button. Copy this cue Selecting this will create a new cue at the end of the cue list. The cue number will be the next available integer value. All of the properties of the cue (channels, trigger, etc) will be copied from the cue at the position of your mouse. Insert a new blank cue below This option will create a new cue directly below the cue at the position of you mouse. The cue number will be exactly half way http://www.lifact.com 123 LightFactory A Guide for Users Reference/Window Overview Cue List Editor between this cue and the next. The properties of the cue will be set to the system defaults. Insert a new cue below (Copy this cue) This option works exactly as above however all of the properties (channels, trigger, etc) will be copied from the cue at the position of your mouse. Set “Pre-fetch” flag for all intelligent fixtures in this cue By default the “Pre-fetch” flag for all fixtures is unselected. To set this flag on all intelligent fixtures within the cue your mouse is over select this form the menu. Set “Pre-fetch” flag for all intelligent fixtures in show group To set the “Pre-fetch” flag for all channels in all cues select this form the pop up menu. Set “Force Prop” flag for all intelligent fixtures in this cue By default the “Force Prop” flag for all fixtures is unselected. To set this flag on all intelligent fixtures within the cue your mouse is over select this form the menu. Set “Force Prop” flag for all intelligent fixtures in show group To set the “Force Prop” flag for all channels in all cues select this form the pop up menu. Reset grid layout to default If you have rearranged the grid (moved or resized columns) you can use this option to return the layout to how it was when first installed. Cue Number The cue number represents the order that the cues appear in the list and by default, it also determines the run order of the show. Cue 124 © 2004 LightFactory Software Ltd Reference/Window Overview Cue List Editor LightFactory A Guide for Users numbers can be set to any number you want by clicking within the field and typing the new value. Cue numbers must be between 0.000 and 99999999.999. When editing cues it is not necessary to enter the decimal part if all you want is an integer value. Note: LightFactory will automatically re-order the cue list as soon as you exit the field and thus save the new value. The “next cue” value will not be changed if you edit the cue number so you must manually ensure that the show follows the desired sequence. The most common use for editing the cue number is to insert a new cue between two existing cues. To do this, change the cue number to a valid number between the two cues. Example To insert a new cue between cues 2 and 3 we would create a new cue and change its number to 2.5. To ensure that the show follows the sequence 2, 2.5, 3 we would need to change the “next cue” number of cue 2 to 2.5 and the “next cue” of 2.5 to 3. Note: Changing the cue number can also be used to park a cue for use later. To do this, simply change the cue number to a high value and ensure that none of the other cues have the “next cue” set to this value. Description This field is for your own reference and provides the ability to describe the lighting state contained in the cue. By default, this description contains the cue number. This can be changed by clicking within the field and entering the new description. Channels This is a list of the channels included in the cue. This list can be edited by entering the channels separated by a coma (,) or a space. To edit, click inside the field and type the desired channel list or edit using left and right arrow keys. You can also enter channels using the same syntax as the command window. Example http://www.lifact.com 125 LightFactory A Guide for Users Reference/Window Overview Cue List Editor 1,3,4,10/20-15 This will add channels 1, 3, 4 and channels 10 through to 20 excluding 15 to the cue. The channels included in the cue can also be edited by clicking on the ( ) button to the right of the field. This will bring up the “Show Channel Select” window. This window provides greater control over the maximum value the channel will reach when the cue is executed, and provides access to intelligent fixture properties. Figure 56: Show Channel Select In the Show Channel Select window, you can also override the cue’s wait and fade time for individual channels. If for example you want one channel to come up 20 seconds after the cue has executed enter this value into the “wait time” field. Note: Overriding the “fade time” for a channel will always override the fade-in time and will only override the fade-out time if the cue also has a fade-out value greater than 0. On the far right of the channel grid are the fields titled “Pre-fetch” and “Force Prop”. Both features only apply to intelligent fixtures. When the “Pre-Fetch” is checked, the software will attempt to set up all of the fixtures’ properties before the cue executes. If the fixture does not exist in the previous cue then all of the properties (excluding the dimmer) will be set when this previous cue runs. When the light comes on in this cue the fixture should already be in the correct position and with all properties set (colour, gobo, etc). If 126 © 2004 LightFactory Software Ltd Reference/Window Overview Cue List Editor LightFactory A Guide for Users the fixture does exist in the previous cue, the software will “snap” the properties as soon as the previous cue ends. The “Force Prop” feature allows you to override the difference engine that always tries to figure out what has changed between cues. With this option checked all of the properties (including ones set to zero) will be applied when the cue runs. Note: The “Show Channel Select” window will only show the properties that the selected fixtures contain. If a fixture does not support a feature but the field is shown because other fixtures do, then the field will show “n/a” for “not applicable” On the left of the “Show Channel Select” window are all the channels available in the system. Channels can be selected individually, or a range can be selected by clicking and dragging the mouse over the channels to include. Selected channels can be added by clicking on the ( ) button. Channels can also be added to the cue using the command edit box at the bottom right of the window. Figure 57: Cue add channels command interface Use this box to enter the same syntax as you are familiar with in the command line window. Press enter or click on “Add Channels” to process the command. e.g. “1/5@30” will add channels 1,2,3,4 and 5 to the cue with their value set to 30%. To remove channels from the cue, select the channel from the righthand channel list and click on the ( ) button. To maximise the included channel side of the window you can hide the available channels by clicking on the “hide” button between the two sections. http://www.lifact.com 127 LightFactory A Guide for Users Reference/Window Overview Cue List Editor Minimise available channels Figure 58: Cue channels splitter bar To edit any of the values (excluding fields flagged “n/a”) in the righthand grid, click into the field and enter the desired value. All values are DMX values and must be in the range 0 – 255. Some fields can also accept decimal values for fixtures that support 16 bit resolution. The fields pan, tilt, control, colour, and gobo also provide assistance through drop down menus. To access any of these click on the button to the right of the field. In the example below the gobo field allows you to select from images of the fixtures gobo’s. Figure 59: Drop down menu for gobo control Clicking on the channel number in a row will bring up the “Fixture Property Editor” if the channel is an intelligent fixture. This will operate exactly as it does in the channel window (see “intelligent Fixture Control” on page 94), but all changes will be set to the selected channels in the “Show Channel Select” window. Multiple rows can also be selected by clicking on the channel number field and dragging the mouse over the channels you want. This is useful for selecting a number of intelligent fixtures with the fixture property editor. 128 © 2004 LightFactory Software Ltd Reference/Window Overview Cue List Editor LightFactory A Guide for Users Figure 60: “Show Channel Select” window with Docked “Fixture Properties” To edit entire columns of values (e.g. If you want to set the gobo for all fixtures in the cue) click on the column title to highlight and enter the desired value. To new value will appear in all fields as you type. Setting a different fade time for each property LightFactory supports the ability for each property / attribute to have its own fade time for every fixture. To avoid making the channel grid too large the fade time is set within the same cell as the value. If no fade time is set then the channel or cue fade time. Enter a separate fade time by typing it after the property value prefixed by the letter “f”. The fade value is set in seconds with decimal values representing fractions of a second. Examples; 230 Property will be set to DMX value 230 using the fade times of the fixture or cue. 230 f2.4 Property will be set to DMX value 230 using the fade time of 2.4 seconds. 255 f6 Property will be set to DMX value 255 (full) using the fade time of 6 seconds. http://www.lifact.com 129 LightFactory A Guide for Users Reference/Window Overview Cue List Editor Edit Live In the bottom left corner of the “Show Channel Select” window is a check box labelled “Edit Live” When this is checked, changes made to the channels will become visible in your lighting rig. When this is first checked you will notice nothing happen, but as soon as you click on a channel or range of channels the current values will become active in the DMX system. This feature allows to you confirm that the changes you make are what you expect in reality. When this field is checked and you are using the “Fixture Property Editor” to edit intelligent fixtures, the fixtures will automatically be set to the current state (pan, tilt, colour etc) and any changes can be seen immediately on stage. Show dimmer values as percentages Check this option to convert the dimmer levels to a percentage value rather then the real DMX values (0-255). Effects Sequences Effect sequences are an automated sequence of lighting states that run without user interaction. For more information and detail on how to create effects, see “Effects Editor” on page 138. A simple effect may be a traditional chase sequence or a more complex effect may perform a series of moving light changes. Often when a cue is executed, it is desirable to run an automatic sequence until the next cue is triggered. LightFactory allows you to add any number of effects and chases into any cue. The “FX Sequence” field is a non-editable field that will show how many effects the cue contains. To edit or add effects to the cue, click the ( ) button to the right of the field to bring up the “Show Effect Selection” window. 130 © 2004 LightFactory Software Ltd Reference/Window Overview Cue List Editor LightFactory A Guide for Users Effects included in cue Available Effects Figure 61: Show Effect Selection window, effects On the left of this window is the list of available effects in the system. The effects are grouped into a tree structure. To expand a group and view the effects contained in it, click on the small plus (+) to the left of the group description. The effect window has separate tabs for effects and simple chase’s. When an available effect is added to the cue it will automatically appear in the appropriate tab. Figure 62: Show Effect Selection window, simple chases To add an effect to the cue, select the desired effect from the available list and click the ( ) button. To remove an entry from the cue, select the effect from the right-hand grid and click the ( ) button. The delay field allows you to set a time for the system to wait before starting the effect after the cue executes. When the cue exits (i.e., the next cue is triggered), all effects will be terminated. Timeline, Property and matrix Effects Select the “loop” check box so that the effect will play continuously while the cue remains current. If this is un-checked, the effect will play once and then stop. http://www.lifact.com 131 LightFactory A Guide for Users Reference/Window Overview Cue List Editor All effects have a default length when the effect is created. To override this default time, set the “override length” field to the desired value. The effect will automatically be rescaled to run within the specified time. Simple Chases The direction field specifies how the chase steps will play. Select from forward, backwards, bounce, or random from the dorp down. The “run times” field allows you to specify how many times through the chase will run before stopping. “Step time” and “Fade time” is provided to override the default values when running the chase in a cue. Set the step time to 0 to run the chase manually using a step shortcut. Setting the “Step Shortcut” will allowing you to manually step the chase. This shortcut will be loaded when the cue enters and removed when the cue exits. This allows you to use the same shortcut in several cues. Fade and Step Submasters are also loaded when the cue enters and unassigned when the cue exits. This allows you to setup a submaster to manually control the fade transition and step time while the chase is running. Exec Shortcut Each cue can also execute any number of shortcuts when the cue runs. This allows you to run more complex operations such as executing macros, selecting channels, or jumping to another cue list. Shortcuts can be added by simple typing a comma (,) delimited list of shortcuts. Alternatively you can click on the button ( ) to the right of the field to bring up the edit window for “Cue Execute Shortcuts”. 132 © 2004 LightFactory Software Ltd Reference/Window Overview Cue List Editor LightFactory A Guide for Users Figure 63: Cue Execution Shortcuts In this window you can also specify a delay before running the shortcut. The system will then wait for the specified time before the shortcut executes. To run the shortcut on a recurring bases enter a time between execution in the “Fire every” field. To run the shortcut when the cue exits, tick the check box in the column “Fire on leaving” Channel Groups By adding channel groups to a cue you can setup “stage looks” that can be edited in one place and applied to any number of cues. For example, if you are on a touring show using moving lights you may have different positions for every venue. To avoid having to re-plot every cue each time you enter a new venue you can setup groups containing the position information. Each time you need to setup a new venue you will only need to change the group and the new positions will be applied to all cues containing this group. Channel groups can be added by clicking on the button ( ) to the right of the field to bring up the edit window for “Cue Channel Groups”. Figure 64: Cue Channel Groups http://www.lifact.com 133 LightFactory A Guide for Users Reference/Window Overview Cue List Editor You can add any number of channel groups to a cue. To add a channel group to the cue, select the desired group from the available list and click the ( ) button. To remove a group from the cue, select it from the right-hand list and click on the ( ) button. Trigger The cue trigger specifies what causes the cue to execute. By default, this is set to “Cue” indicating that the software is waiting for the “Cue Go” button to be pressed. The previous cue will remain active until the trigger is activated. To set the cue trigger, click the drop down combo button to the right of the field and select from the following options; ♦ Cue Go – The user must physically press a “Cue Go” button either in a show runner or on the show editor window. ♦ Auto – Cues set with the auto trigger will execute immediately after the previous cue has completed its delay, fade in, and dwell time. An auto cue will not wait for the fade out time so that cross fades can be achieved. ♦ Midi – The cue will be triggered by an external midi event occurring. See page 74 for information on how to set up MIDI triggers. ♦ Line In – The cue will be triggered by the line-in audio source. See page 75 for information on how to set up the software for audio triggers. ♦ Timecode – The cue will trigger when the specified timecode is reached. If the timecode has already passed when this cue is reached the software will trigger the cue immediately. Enter the timecode value into the field provided. Next Cue Number When this cue has finished (wait, fade in, and dwell), the “next cue” number specifies what cue should be execute next. LightFactory will look into the cue specified by the “next cue” number and wait for the specified trigger to occur before executing it. This field will only accept values of cues that currently exist. 134 © 2004 LightFactory Software Ltd Reference/Window Overview Cue List Editor LightFactory A Guide for Users Delay To specify a delay before the cue will execute, enter a valid time (in seconds) into this field. Internally a cue has finished just before the fade out executes to allow for cross fades between two cues. The delay can be used to stop this behaviour by setting its delay time to the previous cue’s fade out time. Fade In The fade in field determines the time (in seconds) that the cue takes for each channel to go from their current value to the value contained in the cue. The fade time will apply to all fixture properties that are set within the cue. Note: An override fade time for individual channels can be set in the “Show Channel Editor” window. See page 126. Dwell The dwell time is used when you want the cue to operate automatically. For example if you want the cue to fade in, wait for a specific time, and then fade out without any user interaction. The dwell time (in seconds) specifies how long the cue will wait after the fade in before executing the fade out. Fade Out The fade out field determines the time (in seconds) that the cue takes for each channel to go from the value contained in the cue to the value contained in the next cue. If the channel is not contained in the next cue then it will fade to 0. The fade time will apply to all fixture properties that are set within the cue. Effects Delay To specify a global delay before effects are started enter a valid time (in seconds) into this field. Timecode When timecode triggers are being used, this field will specify the timecode value that the software will wait for. See page 76 for more information about timecodes. http://www.lifact.com 135 LightFactory A Guide for Users Reference/Window Overview Cue List Editor Testing a show The “Cue List Editor” window provides convenient controls to allow you run and test a show. The four controls are the same as each of the 150 show runners and operate exactly the same way. If the show you are working on has only one cue list there is no reason to use any of the additional show runners and can run your entire show from the cue list editor window. For more about show runners, see page 21. Figure 65: Show Editor controls for testing a show Cue Go This will execute the next cue in the active cue list. If there is no current cue active the “cue go” button will execute the first cue in the list. As soon as this button is pressed, the cue will start and a cue progress time will start counting down the execution time. Note: If the cue is triggered by some external event, such as a timecode, then the “cue go” will override this and execute the cue immediately. Cue Stop This will stop the execution of the cue immediately. Any fades or waits will terminate and the current lighting state will be maintained. The will also stop the next cue from being executed regardless of its trigger. Cue Back The “cue back” button will execute the previous cue (the cue whose “next cue” value is the current cue) and terminate the current cue. Cue Reset “Cue Reset” resets the entire cue list and sets the current cue to nothing. Pressing the “cue go” after a reset will cause the first cue to start. Resetting the cue can be thought of as a “rewind to beginning” function. 136 © 2004 LightFactory Software Ltd Reference/Window Overview Cue List Editor LightFactory A Guide for Users Playback 1 A check box above the playback controls provides a special shortcut called “Playback 1.” With this option enabled and you have the LightFactory shortcut keyboard installed, you can use the large “Cue Go 1” and “Cue Back 1” buttons (external shortcut keyboard) to control the active cue list. Cut to cue on double click By default, when you double click on a cue the system will execute that cue applying all of the set fade and delay times. By selecting this option the double click operation will cause the selected cue to execute immediately. Print Cue List Click on the “Print Cue List” button to get a physical copy of all of the cues in the cue list. Clicking on this button will open a preview window that will show the layout of how the information will be printed. http://www.lifact.com 137 LightFactory A Guide for Users Reference/Window Overview Effects Editor Effects Editor An effect sequence is an automated sequence of lighting states that typically runs without user interaction. There are four types of effects supported in this version of LightFactory. Simple Chase - Simple chases, contains a number of lighting states and are similar to a basic cues list. Time vs. Fixture – This effect contains a list of fixtures each assigned a number of timed segments. All effects have a default length of time (in seconds) that they will run for. Attribute/Property – This effect allows you to assign a path to specific attributes of the fixture. As the effect runs over a set time the attribute or property follows the defined path. Matrix – Specifically designed for use with LED or grid lighting this effect provides an easy way to deal with a large number of lights. Media – To playback media files, flash animations, or control a DV desk. To access the effects editor, click the “Effects Editor” button on the command interface window or select the option from the command interface “Windows” menu Effect Groups LightFactory provides the ability to create “groups” to help manage and keep track of a large number of effects. An “effect group” is a way to collect a number of effects under one description. To create a new “effects group” click the “Add Group” button in the lower left corner of the window. A dialog will prompt you to enter a name to assign to the new group. Enter the desired name and click “OK” or click “Cancel” to return to the effects editor. To change the group name, click on the name in the tree view to select it, and then click again to edit. Type the new name then press the enter key to save the changes or escape to cancel what you have edited. Effect groups can be removed by selecting the desired group and clicking the “Remove Group” button. A confirmation box will prompt you to confirm that you want to remove the group and all of the effects within the group. 138 © 2004 LightFactory Software Ltd Reference/Window Overview Effects Editor LightFactory A Guide for Users Creating new effects To create a new effect first ensure you have at least one “effect group” available. (If not you must create at least one group). Select the group you want to create the effect in and click the “Add Effect” button. The “New Effect Builder” wizard will step you through the creating process. Figure 66: New Effects Builder Opening Page Select the type of effect you want to create from the options available. Select the type of effect you want to create and click “Next” to continue. Simple lighting chase A simple chase is a step based effect similar to an automated cue list. Each step contains a list of fixtures each in a specific state. Figure 67: New Effects Builder, Simple chase To complete building the effect, enter a name to identify the chase and set how many steps you want to include in the effect. http://www.lifact.com 139 LightFactory A Guide for Users Reference/Window Overview Effects Editor If you want to set the default step time (the time the system will wait before executing the next step) or fade time enter the values into the fields provided. Click on “Finished” to create the new chase and open the chase editor. The newly created chase will immediately become visible in the right-hand side of the effects editor. Time vs Fixture effect Provides the ability to build your effect by viewing its behaviour over a timeline. The effect has a fixed length and each fixture can be given a specific behaviour over that time. Figure 68: New Effect Builder, Timeline To complete the creation of an effect enter the name to identify the effect and set the length (in seconds) that you want the effect to run for. Set the fixtures you want to include in the effect by setting the starting fixture number and specifying how many fixtures after that to include. Alternatively you can provide a range of channels using the command syntax in “Channel Range” field. Click on “Finished” to create the new effect and open the effect editor. The newly created effect will immediately become visible in the right-hand side of the effects editor. Property / Attribute effect This effect type is based on time vs. level path that is assigned to a list of fixtures and specific attributes or properties. 140 © 2004 LightFactory Software Ltd Reference/Window Overview Effects Editor LightFactory A Guide for Users Figure 69: New Effect Builder, Prop/Attrib Effect (Page 1) Enter a name to identify the effect and set the default length. The channels or fixtures can be set using either a channel range (using command interface syntax) or by setting the start channel and number to include. When the effect is created with more than one fixture the wizard can place all fixtures into one path or create a sperate entry for each. Use the “All fixtures will use the same path” option to set how the fixtures in the effect are organised. Figure 70: New Effect Builder, Prop/Attrib Effect (Page 2) When you are happy with the settings click on the “next” button to move to page 2 of the effect wizard. Here you can specify the attribute that the effect will be applied to and the default path it will use. The predefined paths (sin, cos, saw, pwm) cannot be edited or changed. To create an effect using a one of these paths as a base that is will be changed select the option “Create a copy of this path for editing” Click on “Finished” to create the new effect and open the effect editor. The newly created effect will immediately become visible in the right-hand side of the effects editor. http://www.lifact.com 141 LightFactory A Guide for Users Reference/Window Overview Effects Editor Matrix/LED Effect The matrix effect is specifically designed for use with large arrays of lights such as LED fixtures. Figure 71:New Effect Builder, Matrix Effect To create a matrix effect you must have already defined the fixture matrix in the dimmer patching window (See Edit Matricis, Page 175). To complete the creation of an effect enter the name to identify the effect and set the light matrix that you want to use. Click on “Finished” to create the new effect and open the effect editor. The newly created effect will immediately become visible in the right-hand side of the effects editor. Selecting a different effect To change the current effect being edited, expand the group containing the effect and click on the desired effect name. The name of the currently selected effect will appear at the top of the effects grid to show which effect you are working on. 142 © 2004 LightFactory Software Ltd Reference/Window Overview Effects Editor LightFactory A Guide for Users Simple Chase A simple chase is a series of steps each containing a specific lighting state. Each step can contain any number of channels each in a different state. A chase can either run automatically or wait for a trigger before stepping onto the next state. Figure 72: Effect Editor, Simple Chase Each step can be renamed by clicking on the name and typing the new description. Clicking on each step will show the details in the right hand side. To add a new step click on the “Add Step” button found below the step list. New steps will always be added to the end of the list. To remove a step click on the entry you want to delete and click “Remove Step”. A dialog will ask you to confirm the deletion, click “Yes” to complete this operation or “No” to cancel. Use the up and down arrows found to the right of the add step button to move the step up and down the order. The default step time specifies the time waited before the next step will be executed. If this is set to zero (0) then the step will wait indefinitely so that the chase can be stepped manually using the play control. The default fade time specifies the time it takes to transition from step to step. Simple chases will always cross fade between steps by the time specified in the default fade time. http://www.lifact.com 143 LightFactory A Guide for Users Reference/Window Overview Effects Editor Check the live option to preview each step as they are edited. As soon as this option is checked the current step will be seen on your dmx output. Use “Show dimmer levels as percentage” to view the dimmer field as a percentage value. By default this field is shown as dmx values 0 to 255. Adding channels to a step On the left of the step display are all of the channels available in the system. Channels can be selected individually or a range can be selected by clicking and dragging the mouse over the channels you want to include. Selected channels can be added to the step by clicking on the ( ) button. Channels can also be added to the group using the command edit box at the bottom right of the window. Figure 73: Group add channels command interface Use this box to enter the same syntax as you are familiar with in the command line window. Press enter or click on “Add Channels” to process the command. e.g. “1/5@30” will add channels 1,2,3,4 and 5 to the step with their value set to 30%. Removing channels from a step To remove channels from the group, select the channel from the right-hand channel list and click the ( ) button. Editing channel values To maximise the included channel side of the window you can hide the available channels by clicking on the “hide” button between the two sections. Minimise available channels Figure 74: Simple chase channels splitter bar 144 © 2004 LightFactory Software Ltd Reference/Window Overview Effects Editor LightFactory A Guide for Users To edit any of the values (excluding fields flagged “n/a”) in the righthand grid, click into the field and enter the desired value. All values are DMX values and must be in the range 0 – 255. Some fields can also accept decimal values for fixtures that support 16 bit resolution. The fields pan, tilt, control, colour, and gobo also provide assistance through drop down menus. To access any of these click on the button to the right of the field. In the example below the gobo field allows you to select from images of the fixtures gobo’s. Figure 75: Drop down menu for gobo control To edit entire columns of values (e.g. If you want to set the gobo for all fixtures in the cue) click on the column title to highlight and enter the desired value. To new value will appear in all fields as you type. Time vs. Fixture Effects An effect segment has a start offset time, start state, length and end state. When an effect runs it will progress through the list of segments executing each one in turn. If for example the first segment has an offset of 10 seconds, the segment will execute 10 seconds after the effect itself has started. When a segment is executed, its start lighting state will be set immediately. The fixture will then perform a fade for the length of the effect to its end lighting state. If a segment is for an intelligent fixture then all of the properties (excluding dimmer) will be prefetched and set up for the start state at the end of the previous segment. If for example a moving light will start in a different position for the second segment then it will be moved to this new http://www.lifact.com 145 LightFactory A Guide for Users Reference/Window Overview Effects Editor position at the end of the previous segment. When the effect starts, intelligent fixtures will be set to the start state of the first segment. Note: Each segment of an effect cannot overlap any other segment. Figure 76: Effects Editor, Time vs. Fixture Effect Effects are viewed in LightFactory as a Fixture vs. Time graph. Along the top of the effect view, you will see a time scale from 0 to the length of the effect. On the left of the effect view is a list of the fixtures included in the effect. Along the top of the view is the “Number of fixtures in effect” edit. This can be used to add or remove fixtures. If this number is increased, new fixtures will be added with the fixture number being the next logical channel. Also along the top is the “Effect Length” edit that determines the default duration of the effect. Changing the effect length will change the time bar and increase or decrease how long an effect takes to run. To change the length of the effect enter the desired time and click on the apply button. By default, changes to the length of an effect will not change any of the existing segments. If you make the effect shorter, any segments that go beyond the new length will be truncated. Use the “Rescale” check box to ensure that all segments are rescaled to any length changes. If this is checked and you make the effect shorter, all of the segments will also be resized by the same proportion. 146 © 2004 LightFactory Software Ltd Reference/Window Overview Effects Editor LightFactory A Guide for Users Note: If you wish to use the re-scale feature, you must tick the box before editing the duration of the effect. Set the number of fixtures in this effect Length that effect will run Delete this fixture from the effect. Start offset control Open a grid view of this fixture’s segments Figure 77: Effect Editor Controls To the right of each fixture there is a trashcan button for deleting the fixture from the effect, and a grid button for opening a grid view of the fixture’s effect segments. Clicking on the small trashcan icon will remove this line (fixture) from the effect. A confirmation dialog will appear asking you to confirm that you want to delete the fixture. Click “OK” to confirm or “Cancel” to return to the effects editor. Clicking on the grid icon to the left of the trashcan button will bring up a grid view of the segments (Effect Detail Editor) associated with the fixture. Each segment is represented by two lines, one for the start state and the second for the end state. Every second line will have a pale grey background to assist with identifying the start state. The start segments will show the start time offset as a time value in the format HH:MM:MS (minutes, seconds, milliseconds). The end segment provides the length of the segment in milliseconds. Care must be taken when editing these values as no range or overlap checking is done. http://www.lifact.com 147 LightFactory A Guide for Users Reference/Window Overview Effects Editor Figure 78: Effect Detail Editor Along the top of the “Effect Detail Editor” shows the name of the fixture that you are currently editing. Only the properties that are available in the fixture are shown in the grid view. If for example, a fixture does not have any gobo control then none of the three gobo fields will show. The “Effect Detail Editor” provides a convenient way to set a fixture property across the entire effect. Clicking on the heading of a property (such as Gobo1 in the above example) will highlight the entire column. You can then enter any value to apply it to all segments’ start and end states. Start Offset Field Use to field to specify a delay (in seconds) before starting this part of the effect. This allows you to stagger the execution of the effect across all of the fixtures. Creating and Editing Segments The graphical view of the effect allows you to easily see when the fixture is doing something. Each segment shows us at a glance that the fixture is changing state. The software will automatically set up intelligent fixtures between segments to their next state; hence, we need not be concerned with fixture properties between segments. For example, often we may want the colour of a fixture to be set before the light becomes visible. In the LightFactory effects engine, this will be done automatically for us if the next segment has this property set. To create a new segment simply click inside the space provided to the right of the fixture, hold the mouse down and drag the segment to the desired length. 148 © 2004 LightFactory Software Ltd Reference/Window Overview Effects Editor LightFactory A Guide for Users Click here to start (holding down the left mouse button) Drag mouse to end position Figure 79: Example: Creating an Effect Sequence Note: By default, the newly created segment will have its start and end states set with the dimmer at full (100%) and all other properties set to zero. The size of a segment can be adjusted by clicking and holding the mouse button down at either end of the bar and dragging it to the new length. When the mouse is moved over the end of the bar, its cursor will change to indicate the resize operation (Figure 80). Figure 80: Resizing an Effect Segment To move a segment to a different start position (offset), hold the mouse button down over the centre of the bar and drag the bar to its new position. For more precise control over the position click on the “Effect Detail Editor” button to the right of the edit space. To adjust the start and end state of the segment, click once on the bar to bring up a small edit window. If the fixture is a simple light with no advanced properties, the following window will appear. Figure 81: Segment Properties Editor for a Simple Light http://www.lifact.com 149 LightFactory A Guide for Users Reference/Window Overview Effects Editor In this case, the only start and end state property available is the dimmer. Enter the desired values (DMX 0 – 255) into the space provided. As soon as you exit the window, the new values will be saved to the segment. You can exit this window by clicking on the small X in the top right of the window or by clicking anywhere outside the window. For intelligent fixtures, the segment properties editor is significantly more advanced. Figure 82: Advanced Segment Properties Window As well as the dimmer the “Advanced Segment Prop” window provides access to all of the intelligent fixture properties. Edit a property’s start and end state by clicking on the appropriate field and entering a value between 0 and 255. Note: The pan and tilt control is an exception to this rule as these are always viewed as 16 bit values and must be entered as numbers between 0 and 65025. If the end state of a property is zero, changes made to the start state will automatically be copied to the end state to assist with creating new segments. The properties pan, tilt, control, colour, and gobo also provide assistance through drop down menus. To access any of these click on the button to the right of the field. In the example below the pan and tilt helper is shown. 150 © 2004 LightFactory Software Ltd Reference/Window Overview Effects Editor LightFactory A Guide for Users Figure 83: Pan and Tilt helper popup Below the “Start State” and “End State” columns are buttons to bring up the fixture property editor that you are familiar with in the channel window. The “Edit Start” button enables you to edit the start values of the properties; the “Edit End” button is for editing the properties’ end values. (See “Intelligent Fixture Control” on page 94 to learn more about the fixture property editor). Note: Take care to observe in the top of the Intelligent Fixture Control window whether you are editing start or end values. Figure 84: Editing Advanced Segment Properties using the Intelligent Fixture Controls The “Edit Live” check box in the bottom left corner of the segment property editor allows you to see the lighting changes you are making immediately on stage. When this option is checked the fixture you are working on will reflect the changes you make immediately. http://www.lifact.com 151 LightFactory A Guide for Users Reference/Window Overview Effects Editor Note: The fixture will always reflect the last change you made, so if you change the end state, the fixture will move to and reflect the current end state settings. If you then edit the start state, the fixture will change to reflect all of the start settings. As you click on the “Edit Start” or “Edit End” buttons the fixture control window attached to the right of the effects editor will show in the title bar whether you are editing start states or end states. Options As you move your mouse over each of the segments in the effect, you will notice that they will be highlighted in a brighter green. Clicking on the right mouse button will bring up a number of advanced options to assist with creating effects. Figure 85: Effect Editor - Right-click Menu Options for Segments Delete Segment Click on the “Delete Segment” option to remove the currently highlighted segment from the effect. A confirmation dialog will ask you to confirm this operation before the segment is deleted. Delete All Segments Click on the “Delete All Segments” option to remove the segments for this fixture. A confirmation dialog will ask you to confirm this operation before the segment is deleted. 152 © 2004 LightFactory Software Ltd Reference/Window Overview Effects Editor LightFactory A Guide for Users Cut, Copy, Copy All, Paste Segments The cut, copy, and paste functions operate exactly as they do in most applications you use within windows. Cutting a segment will remove it from the effect and put on the clipboard for pasting somewhere else, while copying places a copy of the highlighted segment on the clipboard without removing it from the effect. “Copy all segments” ignores the currently highlighted segment and places all of the segments associated with the fixture onto the clipboard. To place a copied segment or segments onto a fixture, select the “Paste” option while the mouse is over the fixture you would like to paste to. Note: When pasting, if a segment conflicts with segments that already exist for this fixture you are pasting to, nothing will happen. After a paste operation, the segments will remain in the clipboard to allow you to paste segments to as many fixtures as desired. This feature is useful after creating a moving light path to copy the newly created path to all of the other fixtures in the effect. To do this, create a path for the first fixture and then select the copy all function. To create the path for all of the remaining fixtures simply paste to each one in turn. See “Create a moving light path” on page 154 to learn how to create moving light paths. Create a follow-on segment A follow-on segment is a segment that will start immediately after the highlighted segment with a start and end state copied from the end state of the highlighted segment. The default length of the new segment will be the same as the previous segment. This feature is a convenient way to create lighting states that look like a continuous sequence. If you would like a fixture to slowly fade between 4 different colours using the CMY colour mixing (if supported) then you could create the first segment (first colour fading to the second colour) and then create 4 follow-on segments. For each follow-on segment you only need change the end state to the new colour. http://www.lifact.com 153 LightFactory A Guide for Users Reference/Window Overview Effects Editor Create a moving light path A moving light path applies to fixtures that have both pan and tilt control, and allows you to create a continuous movement that will follow a defined curve. LightFactory provides an advanced path editor that allows you to define the minimum number of points. A Catmull-Rom Spline curve will automatically create the best-fit curve between each point. Two control points are automatically created to provide the ability to control the curve entering and leaving the first and last point. Figure 86: Moving Light Path Editor To start creating paths, simply click inside the white space containing dashed crosshairs. With each click, a new point will be created and a curve will automatically be placed between them. The points you have created will be shown as small red circles. These points can be moved by clicking on the small circle, holding the mouse down and dragging the point to the desired location. The control points are identified by the small numbers beside each point (there is also no line between the control point and the other points). Control point numbered 1 is the starting point and number 2 is the ending point. Points (excluding control points) can be removed from the curve by clicking on the ( ) button in the controls on the right-hand side. This will remove the last point added to the curve. Points must be removed in the order they where added. 154 © 2004 LightFactory Software Ltd Reference/Window Overview Effects Editor LightFactory A Guide for Users The “Path Editor” also provides the ability to test your curve before committing it to the effect. When you click the test button, the fixture will immediately start moving to the path you have created. The length of the path is determined by the “Path Time” field below the test button. The default value for “Path Time” is the length of the effect for which you are creating the path. This value (in seconds) cannot be set to a value greater than the effect length. The “Elasticity” figure below the time value is an advanced feature allowing control over the spline cure and determines the obtuseness of the curve. To change the size of the curve created use the resize buttons provided to the right of the edit space. Figure 87: Moving Light Path Resize Buttons These buttons will move all of the points toward or away from the centre of the effect, thus rescaling the distance the light will move while moving through the path. The four arrows below the resize control allow you to reposition the path around the pan and tilt space. Figure 88: Moving Light Path Repositioning Controls Pan and tilt can cover a large stage area. Often you only want the path to occur in a small section of the full range of the light. Clicking on these buttons will move all of the points in the direction clicked. If a point is at the edge of the edit space, it will not be moved. Below the position control are the auto-create buttons. Figure 89: Automatic Path Creation Controls http://www.lifact.com 155 LightFactory A Guide for Users Reference/Window Overview Effects Editor Each of these buttons allows you to automatically create some simple and common shapes. The first button will automatically create a circle, the second a figure eight, and the last an S. If a path already exists in the edit window, a confirmation dialog will ask you to confirm that you want to remove all of the existing points and create a selected shape. The result of each of these buttons can be seen in the following three diagrams. Once you are happy with the shape you have created you must commit it to the effect fixture you selected to edit the path. Clicking on the “OK” button will remove the entire segment list for this fixture and add the new path. The path will be a series of segments all connected to each other and will be approximately 200ms long. Note: If you set the elasticity of the path to 1 then a straight line will be created between points (not a curve) and the software will create a single segment for each line. Click on the “Cancel” button to return to the effect editor without committing the new path. Adding fade-in and fade-out to segments When an effect segment is created, its default start and end state will set the dimmer to 100%. This is known as a snap-on or snap-off because the light output changes immediately. To change this behaviour we could create three different segments, the first to fade the light in, the second to set how long the light remains on, and the last to fade the light out. This would be a tedious task and so LightFactory provides the ability to do this in one simple operation. Once we have created a segment to the desired length we can make the segment fade in, out, or both by selecting the desired option from the right click menu. 156 © 2004 LightFactory Software Ltd Reference/Window Overview Effects Editor LightFactory A Guide for Users When one of these options is selected, a dialog will appear asking how long we want the fade to be. The fade time cannot be more than half the length of the segment to avoid logic errors. Once you have set the desired fade time, click on the “OK” button and the segment will automatically be split up to contain the fade-in and/or fade-out. Note: To check the fade-in and/or fade-out you have just created, you can click on each individual segment and view the segment properties. Rotate Segment Right Select this option to move all of the segments associated with this fixture right by the specified time. If any segments extend past the end of the effect they will be wrapped around to the beginning of the effect. Auto Create Effects The “Auto Create Effect” button can be used to make simple effects and chase sequences with the channels currently assigned to the effect. Figure 90: Auto-create Effects Menu Automatically creating an effect will remove all of the existing segments and replace them with the selected option. If segments already exist, a dialog will prompt you to confirm this operation. http://www.lifact.com 157 LightFactory A Guide for Users Reference/Window Overview Effects Editor Auto Offset Auto offsets are a way of setting the start offset values for segments to enhance the final look. To offset the segments held by the selected effect, click on the “Auto Offset” button at the bottom of the effects editor. Figure 91: Auto Offset Options To cancel this operation click on the cancel button to return to the effects edit window. To create an offset, enter the maximum time (in seconds) that segments will be moved and click on the offset type required. Below are examples of each of the four different offset types. Original Effect 158 Linear Offset Exponential Offset Saw Offset Wave Offset © 2004 LightFactory Software Ltd Reference/Window Overview Effects Editor LightFactory A Guide for Users Property / Attribute effect Create this type of effect to assign a time vs. value path to specific attributes of fixtures. When the effect runs the selected properties will apply the set values over a set time. Figure 92: Effects Editor, Property / Attribute Effect In the above example a property effect has been created to operate in fixtures 25 through to 31. There are two elements in this effect, the first is a “sin” wave working on the pan property and the second is a “cos” wave on tilt. For each property you want to apply a path to you need to create a separate entry in the items table. In the above example 2 entries are required to create a circle with the fixtures. The first entry controls the pan property and the second the tilt. If the desired effect was a ballyhoo we might only require one entry applying a wave to the tilt property. To add a entry in the items table simply click on the “Add Item” or “Copy Item” button. This will create a new line with either blank http://www.lifact.com 159 LightFactory A Guide for Users Reference/Window Overview Effects Editor values or the same values as the previous line. To delete a entry click on the “Remove Item” button. Channels / Fixtures This is a simple list of fixtures that the path and property will operate on. Path The path is the key to this type of effect as it defines exactly what the selected property of the fixtures will do. As the effect plays, the output value (DMX value) is derived from a point in the path. A “sin” wave for example will output the DMX values 127 at time 0, 0 at ¼ of the way through the effect and full (255) at ¾ of the way through the effect. As you select a row in the items grid the path will be shown in the box in the bottom right of the window. To change the assigned path click on the desired path on the left of the graph. Modifying a path The first 4 paths cannot be edited and will always be available in the system. If you are currently using one of the default paths and would like to alter it, click on the “Copy Path” button. The currently selected path will be copied to a new name that can now be modified. To change the name click on the path twice and a small edit will popup allowing you to modify it. To delete a custom path (Only custom paths can be removed from the editor) that you have created and no longer need click on the “Remove Path” button. The path for the selected item will default to the first item in the list. Figure 93: Property effect, path editor section Once you have created a new path you can edit it by simply clicking inside the window and dragging points where you want them. If no point exists where you have clicked a new point will be created. To move an existing point click on it and (holding the mouse down) 160 © 2004 LightFactory Software Ltd Reference/Window Overview Effects Editor LightFactory A Guide for Users drag it to the desired position. To remove a point right click and select “remove point” from the resulting popup menu. Property This value specifies the attribute or path of each of the fixtures that values will be applied to. If the fixture does not support the selected property then any applied values will be ignored. Length The length specifies how long the path will play for. The length of the effect is the length of the longest item. Offset Offset sets where the DMX output values start from. When the path is at 0 the actual output will be the offset value. All resulting values from the path will be added to the offset up to a maximum of 255. Scale The scale is a percentage value that will be applied to the final output. A scale of 50% causes the resulting values from the path to be halved. The combination of offset and scale can be used to restrict the output to a smaller range. Start Position The start position is used to specify the point in the path that will be used when the effect begins. Stagger Staggering a path is a powerful way to make an effect more interesting. The stagger value specifies how many fixtures the effect will be staggered across. In the above example a stagger of 4 means that fixtures 1 through to 4 will be spread across the path so that each starts in a different position. Fixtures 5 though 8 will also be staggered in the same way. This results in the fixtures all working slightly different. Making a number of moving lights all perform a simple circle can look good but then to add variety we can use the stagger feature to make each fixture start at a different point in the circle. http://www.lifact.com 161 LightFactory A Guide for Users Reference/Window Overview Effects Editor Matrix / LED Effect This effect type is specifically designed for large arrays of lights and LED fixtures. Every LED fixture provides a different way to control all of the individual lights contained in it. To define the layout of the lights use the “Edit Matricis” option in the dimmer patching window (See Edit Matricis, Page 175). Figure 94: Effects Editor, Matrix/LED Effect Once you have created the effect you must define the background that the effect will operate on. The background can be a jpeg, bitmap or video (AVI) file. To set the background either enter the filename into the “Image or Video File” edit box or click on the button to the right to bring up the open file dialog box. Once the background has been set you can define a path that the matrix will use to play the effect. In the example above the matrix is defined as a red box and the path is the black line tracking around the image. To add a point, click on the desired location and the path will now trace to the newly created point. To move an existing point click on the point (holding the mouse button down) and drag the mouse to the desired location. To remove the last point in the path click on the ( ) button in the top left corner of the window. To remove any other point in the path right click on the desired point and select “Delete” from the resulting popup menu. When the effect is played from the editor the red box will track the path over the specified time. As the effect runs LightFactory will map the contents of the red box onto the defined matrix. The colour 162 © 2004 LightFactory Software Ltd Reference/Window Overview Effects Editor LightFactory A Guide for Users of each fixture will be mapped to the colour on the image or video clip. The preview ( ) button can be used to see the resulting output on screen. Figure 95: Matrix effect preview window Click on the “Show only assigned fixtures” to apply a mask over the preview that represents the fixtures in the real world. Effect Length The length defines how long the effect will play for and can be any value up to 1 hour. If a video file is selected the software will prompt you to set the length of the effect to the same length as the video. If the length of the effect is shorter then the video the video clip will be truncated. Zoom Matrix To change the size of the area that the matrix will use to generate output set the zoom field. When playing back the effect the image will be rescaled to the zoom setting to apply the correct colour. Step to points only Select this option to jump between points rather than tracking a smooth path. When the effect is started the length of the effect will be broken up into the number of control points. As the effect runs it will jump from point to point at equal time intervals. Stop at each point Set this option to run the effect more like a chase where each point becomes a step. The effect will play normally however when each point is reached the effect will pause and wait for a play command. Media Effect Not currently supported. http://www.lifact.com 163 LightFactory A Guide for Users Reference/Window Overview Effects Editor Effect Playback Controls Along the bottom of the effect editor are the three playback controls for testing and debugging your effects. When the effect is played, a progress line will follow the execution through the effect. Play Use the play control to start the effect running. In the case of simple chases the play control is also used to step through the chase. Pause Pausing an effect will stop its execution immediately but keep the position pointer at the current location. If you start the effect again (press “play” button), the effect will continue from this location. Rewind Pressing the rewind button will stop the effect and resets its position back to the start. If the effect is restarted, it will start from the beginning. 164 © 2004 LightFactory Software Ltd Reference/Window Overview Dimmer Patching LightFactory A Guide for Users Dimmer Patching LightFactory provides 2000 control channels that can be assigned any number of DMX dimmers or intelligent fixtures. Up to 5000 DMX dimmers are supported by the software and can be patched to the 2000 channels. To modify the patching of dimmers or intelligent fixtures to channels open the “Dimmer Patch” window by clicking on the “Dimmer Patching” button on the right of the command window. Available Dimmers System Channels or Fixtures Available fixture for patching Figure 96: Dimmer Patching Window The “Dimmer Patch” window is broken into three sections. ♦ Channel View – On the left of the window, this allows you to see all of the 2000 channels and how they are currently patched. ♦ Dimmer View – At the top right is the dimmer view, containing all of the available dimmers ♦ Fixture List – At the bottom right is the fixture list, containing all the different fixtures that can be patched into channels. When LightFactory is started for the first time or when the current show is cleared, all channels will be patched 1 to 1 with available dimmers. http://www.lifact.com 165 LightFactory A Guide for Users Reference/Window Overview Dimmer Patching Standard Dimmers By default the “Standard Dimmer” fixture is selected. Standard dimmers use only one dimmer to control the luminare. To change the dimmer associated with a channel: 1. In the dimmer view, click on the desired dimmer number and hold the left mouse button down. 2. Drag the dimmer over the channel in the channel view area. When you release the mouse the channel will automatically be patched to the new value. Multiple dimmers can be patched to a single channel by clicking in the “Detail” field and entering a list of channels separated by a comma (,). Note: Multiple dimmers connected to a channel will output the same value dependent on the channel value and the channel characteristic curve (for more on channel characteristics, see “Channel Characteristic” on page 172. To reset a channel back to its default 1 to 1 configuration click on the button to the right of the “Detail” field ( ). Intelligent Fixtures Intelligent fixtures use more than one physical dimmer to control various aspects or properties of the luminare. A channel can only be patched to one intelligent fixture and can be identified by the name of the fixture in the detail column of the channel view. To patch an intelligent fixture to a channel: 1. Select the desired luminare from the tree view under the title “Available Fixtures”. Note: All of the fixtures are grouped under the brand name and can be accessed by clicking on the small plus (+) to the left of the brand name. The brand will then be expanded showing all of the models available. 2. Click on the fixture model you want to patch and you will see a picture of the light on the right. 166 © 2004 LightFactory Software Ltd Reference/Window Overview Dimmer Patching LightFactory A Guide for Users 3. When you move the mouse over the “Dimmers” section of the window, click the mouse on the dimmer where the fixture starts and, while holding the mouse button down, drag the dimmer over the channel you want to patch. Note: When intelligent fixtures are selected, the dimmers will be highlighted in grey to show the number of dimmers that the fixture uses. The channel detail will now show the newly patched fixture followed by the “@” symbol and the start dimmer number. You can patch multiple intelligent fixtures at one time (consecutively) by changing the quantity (Qty) value at the top right of the “Available Fixtures” section. If more than one fixture is patched then additional fixtures will occupy the channels following the first one you drag the patch to. Figure 97: Quantity control for intelligent fixtures Once you have patched an intelligent fixture you can add more to the patch by holding down the shift key on the desired fixture and pressing the down arrow. Flip Pan & Tilt In the channel section of the window are two columns titled “Flip Pan” and “Flip Tilt”. These options give you the ability to reverse the operation of the pan and tilt control of moving lights. If you find that a moving light has been hung in reverse to the logical movement of the light then you can correct it without having to physically change the position of the light. Figure 98: Flip Pan and Flip Tilt Options Description 1& 2 Each control channel or fixture can be assigned two descriptions up to 128 characters long. The description information will be displayed in the channel view and also printed with the patch details. http://www.lifact.com 167 LightFactory A Guide for Users Reference/Window Overview Dimmer Patching Aux Dimmer Some fixtures require a separate DMX channel for dimmer control. The Vari-Lite VL5 for example does not have dimmer included in the list of control channels. This is because the dimmer is a separate power feed to the fixture. To aux dimmer can be used to set the channel number for this type of fixture. Edit Fixtures The fixture list can be edited by clicking on the “Edit Fixtures” button in the bottom left hand corner of the window. Figure 99: Fixture Editor Intelligent fixtures are grouped into their respective brands to help manage the vast list of fixtures that exist. To create a new brand: 1. Click on the “Add New Brand” button below the fixture list. 2. A dialog box will appear asking you to enter the name of the brand. Type the name of the brand and click “OK”, or “Cancel” if you have changed your mind. 3. The brand name can be changed by clicking on the desired name to highlight it and then clicking again to place it into edit 168 © 2004 LightFactory Software Ltd Reference/Window Overview Dimmer Patching LightFactory A Guide for Users mode (Do not double click). Type in the new name and press enter to save or escape to cancel. Entire brands can be deleted from the list by clicking on the red cross ( ) to the right of the “Add New Brand” button. A confirmation dialog will ask you to confirm this operation before anything is deleted. To add a new fixture: 1. Click on the brand you would like to add the fixture to. 2. Click on the button labelled “Add New Fixture”. 3. A dialog will appear asking for the name of the fixture, enter the model number or description and press OK to create the new entry. 4. The fixture name can be changed by clicking on the desired name to highlight it and then clicking again to place it into edit mode (Do not double click). Edit the name and press enter to save or escape to cancel. A fixture can be deleted from the list by clicking on the name of the fixture and then clicking the red cross button ( ) to the right of the “Add New Fixture” button. A confirmation dialog will ask you to confirm this operation before anything is deleted. When a fixture is selected, its properties will be displayed on the right-hand side. Each of the fields represent the offset from the fixture’s start address that the property can be found. A value of 0 indicates that the property is not available for this fixture. (The property offsets can be any number between 1 and 255.) Note: Once you have set up or modified a fixture, you must click on the save button to record the changes you have made. Unlike other changes made in LightFactory, the fixture library is saved as a separate file in the program directory. (All other functions are saved to a database). http://www.lifact.com 169 LightFactory A Guide for Users Reference/Window Overview Dimmer Patching The fixture library is called “fixtures.fif” and will be found in the same directory as the LightFactory program. Whenever a save is made to this file, a backup is created and called “fixtures.bak”. If a problem occurs and you are left with a corrupt fixture library, you can simply rename this backup file to restore the last save. Colour Wheels Alongside each of the three colour wheels (labelled Colour 1, Colour 2, and Colour 3) is a button ( ) to access the advanced options. Click on this button to bring up the window below and assign real colours to the DMX values of this property. Figure 100: Advanced Colour Wheel Properties Use the “Add” button to create a new row in the list of colours or click on the “Delete” to remove the row at the position of the cursor. The colour column shows the actual colour associated with the “DMX Value” column. Click on the small button to the right of the colour field to bring up a colour selection dialog. When the colour field has been set the default name will be displayed in the description field. Assign a DMX value for the new colour that will be used to reproduce the colour during a show. The fixtures user guide should contain a list of the default colours and their corresponding DMX value. Gobo Control Like the colour wheels, each of the gobo properties also has the ability to set up an association with the DMX values used. Click on 170 © 2004 LightFactory Software Ltd Reference/Window Overview Dimmer Patching LightFactory A Guide for Users the small button ( ) found to the right of the gobo property to access the advanced options. Click on this button to bring up the window below and assign images to the DMX values of this property. Figure 101: Advanced Gobo Properties Use the “Add” button to create a new row in the list of gobos or click on the “Delete” to remove the row at the position of the cursor. Click on the small button at the right-hand side of the “Image” field to bring up a dialog to select the gobo image from a bitmap file. An optional description of the gobo can be entered in the “Description” field and will be displayed along with the image. Control Channel The control channel provides access to special functions of the fixture. Open this window by clicking on the small button ( ) to the right of the “Control Channel” property. Figure 102: Control Channel Properties http://www.lifact.com 171 LightFactory A Guide for Users Reference/Window Overview Dimmer Patching By default the control properties provide a list of features most commonly found. Enter DMX values associated with the features or set the value to 0 if the feature is not available. You can also add additional control properties using the “Add” and “Delete” buttons provided. The default list of control properties cannot be renamed or removed from the system and any attempt will result in an error dialog. Channel Characteristic The channel characteristic is a way to adjust the relationship between channel value and the final output of the dimmers. The default relationship is 1:1 meaning that if the channel is set to 0 then the output is 0, if the channel is set to 50 then the output is 50 and if the channel is set to 255 then the output is also 255. Changing the output characteristic allows you to correct for older lamps or make special channels for fixtures that do not have full dimmer functions. (e.g. A smoke machine) To use the Channel Characteristic: 1. Before opening the “Channel Characteristic” window, select the channels you want to edit by clicking on the first channel and dragging the mouse over the desired range. 2. Once you have selected the channels, click the button labelled “Edit Channel Characteristic” (found at the bottom left of the “Dimmer Patch” window). Figure 103: Channel Characteristic Editor 172 © 2004 LightFactory Software Ltd Reference/Window Overview Dimmer Patching LightFactory A Guide for Users On the horizontal axis of the graph is the requested value of the channel (i.e. the value a channel can be set to). On the vertical axis is the actual output of the dimmers connected to the channel. Note: At any stage the default (1:1) line can be recreated by clicking on the button “Reset to default” in the bottom left corner of the window. 3. To change the curve, click inside the graph and using your mouse, move the red control points to the desired value. When the mouse is over a red point, a small box will follow showing the values that the curve is set to. LightFactory does not provide you with access to all 255 channel values, but only 50 control points. The values in between are calculated as a best fit between the points using a spline curve. Note: The speed with which you move your mouse when modifying the curve will determine how even your curve becomes. If you move fast, the curve will be very jagged; moving slowly will result in a smooth curve. 4. Once you have created the desired curve, click on the “Save” button to record the changes and return to the “Dimmer Patch” window. Click on the “Cancel” button to forget the changes and return without any modification. Default Characteristics In the bottom left corner of the characteristic edit is a drop down menu to automatically create common characteristic curves. Figure 104: Available default characteristic curves http://www.lifact.com 173 LightFactory A Guide for Users Reference/Window Overview Dimmer Patching Click on the button “Reset to default” to bring up the options available. Select the desired curve by clicking with the left mouse button. A warning dialog will prompt you to confirm that you want to replace the current characteristic curve. Patch Options A drop down menu at the bottom of the patch window provides access to various miscellaneous options. Figure 105: Patching options Reset Patch Selecting “Reset patch” from the menu will return all of the channels back to a 1:1 patch. Each channel will be patched to the corresponding dimmer number. To reset only a range of channels select the desired channels by clicking in the left of the system channels grid to highlight the desired channels. Select “Reset patch by range” to only reset the highlighted channels. Clear Patch Selecting “Clear patch” from the menu will remove all of the patch information form the system. Each channel will no longer be patched to dimmers. To clear only a range of channels select the desired channels by clicking in the left of the system channels grid to highlight the desired channels. Select “Clear patch by range” to remove dimmers and patching details form the channels. 174 © 2004 LightFactory Software Ltd Reference/Window Overview Dimmer Patching LightFactory A Guide for Users Import Patch Data To import patching from a delimited file format (csv) select “Import Patch Data” from this menu. An “open file” dialog will be displayed to select the file to import. The format for the imported data is channel, dimmer, fixture brand, fixture name. To supply a list of dimmers for a channel enclose the list in quotation (“) marks. If you are including an intelligent fixture in the patch information it is recommended that the brand and fixture name be enclosed in quotation marks. Print Patch Select “Print Patch” to print all patched channels to a system printer. Edit Matricis Before creating matrix or LED effects you must define how the fixtures and lights are laid out in thee real world. This window provides a simple interface to provide a rough layout of the fixtures. Figure 106: Edit Matricis A lighting matrix is a simple two dimensional grid where each cell can be assigned a channel or fixture from the system. On the left of the window is a list of available matricis that have been created previously. To edit any matrix, click on the name and the right hand grid will change to show the definition. To create a new matrix definition click on the “Add Matrix” button in the bottom left corner of the window. A dialog will ask you to enter a http://www.lifact.com 175 LightFactory A Guide for Users Reference/Window Overview Dimmer Patching name for the new matrix. Click on the “OK” button and the new definition will appear in the list on the left hand side of the window. To delete a matrix click on the “Remove Matrix” button in the bottom left corner of the window. A dialog will ask you to confirm the operation. Click on the “OK” button to delete it from the system. The size of the matrix can be changed at any time by setting the columns and rows spin edit boxes along the bottom of the window. By default a matrix will be empty with no fixtures assigned. In order to output a matrix effect to fixtures you must identify where the fixtures are in the grid. To do this click on the desired cell and a fixture number will appear. The “Next Fixture” edit at the bottom of the window will automatically increment so that the next fixture can be assigned. At any time you can change the “Next Fixture” number to any desired system channel (0-2000). By clicking in the grid (holding the mouse button down) and dragging the mouse over several cells you can assign a number of fixtures at the same time. Each cell will be assigned a unique fixture and the “Next Fixture” value will be incremented. 176 © 2004 LightFactory Software Ltd Reference/Window Overview DMX Display LightFactory A Guide for Users DMX Display The DMX display is provided as a means to debug the system output by showing the final output values being sent to the DMX hardware. Figure 107: Dimmer Display Window To open the “DMX Display” window click on the button on the command window or select it from the “window” menu. Each of the DMX dimmers are represented as a cell in the above grid. The DMX value is displayed to the right of the dimmer number. Whenever a DMX dimmer has a value greater than 0, it will be highlighted in grey. Note: In order to provide accurate and up-to-date information this window is constantly updated. This process can consume a significant amount of your computer’s processing resource. It is not recommended that this window be used continuously in a live environment. http://www.lifact.com 177 LightFactory A Guide for Users Reference/Window Overview Show Runners Show Runners The show runners are designed to execute multiple cue lists from one place. Each show runner is a repeat of functions seen in the cue list editor window. (See page 120 for more about cues and the show editor) Open the “Show Runners” window by clicking on the button at the right of the command interface or by selecting it from the “windows” menu at the top. Figure 108: Show Runners Window LightFactory provides the ability to assign cue lists to up to 150 show runners split across 10 pages. Each page displays 15 runners and the page you are viewing can be changed using the page control in the bottom left of the window. To use a show runner you must assign a “Cue List” and a “Starting Cue” number. This determines which cue will be executed when the 178 © 2004 LightFactory Software Ltd Reference/Window Overview Show Runners LightFactory A Guide for Users “Go” button is pressed for the first time. It also determines which cue the system will jump to when the “Reset” is pressed. Clear the cue list group and starting cue. This will disable the control buttons. Current cue status Cue progress indicator Starting cue number Cue list group Show Runner Number Playback controls Figure 109: Show Runner Example Select the cue list for a runner by selecting it from the “Cue List Group” drop down list by clicking on the small triangle to the right of the edit field. Once a cue list is selected, the starting cue edit will become active and the drop down will contain the cue list for this group. After you have selected a valid cue list and starting cue number, the playback controls will become active. You can now use them to run your show. Clicking on the “Clear” button in the top left of the frame will clear the “Cue List Group” and “Starting Cue” fields and disable the control buttons. See Figure 109. Playback Control Buttons Cue Go This will execute the next cue in the active cue list. If there is no current cue active, the “cue go” button will execute the starting cue number specified. As soon as this button is pressed, the cue will start, the cue progress time will start counting down the execution, and the progress indicator will show the cue progress. If the cue is triggered by some external event, such as a timecode then the “cue go” will override this and execute the cue immediately. Cue Stop This will stop the execution of the cue immediately. Any fades or waits will terminate and the current lighting state will be maintained. http://www.lifact.com 179 LightFactory A Guide for Users Reference/Window Overview Show Runners This will also stop the next cue from being executed regardless of its trigger. Cue Back The “cue back” button will execute the previous cue (the cue whose “next cue” value is the current cue) and terminate the current cue. Cue Reset “Cue Reset” resets the entire cue list and sets the current cue to zero. Pressing the “cue go” after a reset will cause the start cue number to be executed. Step Forward & Back Above the cue playback controls are two buttons for stepping forward and backward through the cue list without execution. Stepping though the cues sets the next cue that will be fired by the “cue go”. As you set through the cue the current cue state will change to reflect the next cue to run. Shortcuts and Submasters Alongside each of the playback button labels, you may notice a number enclosed in brackets. These numbers represent shortcuts that have been assigned to the button. In Figure 110 below, we see an example where the “Go” button is assigned shortcut 11 and the “Stop” button assigned shortcut 21. Figure 110: Show Runner Controls - Shortcut numbers Show Runner shortcuts are assigned by clicking on the “Edit Shortcuts & Submasters” button at the bottom of the Show Runner window. 180 © 2004 LightFactory Software Ltd Reference/Window Overview Show Runners LightFactory A Guide for Users Figure 111: Show Runner Shortcuts and Submasters Editor This window shows all of the 150 show runners and which shortcuts or submasters (if any) have been assigned. To assign a shortcut to any of the buttons, enter the desired number into the relevant field and press enter. A drop down list is also available on all of the shortcut fields to allow you to select the large “Cue Go” and “Cue Back” buttons on the LightFactory shortcut keyboard. Select “Off” from the drop down list or set the shortcut to 0 to remove the assignment. Go Submasters A “Go Submaster” allows you to manually control the execution of a cue. This overrides the fade-in and fade-out values, making them become irrelevant. The position of the submaster determines the proportion of all channels in the cue. Once the submaster is at full then returning the submaster back to 0 will execute the next cue. This operation overrides all properties of intelligent fixtures and can be a useful way to tracking moving lights manually to follow someone on stage. Level Submasters A “Level Submaster” does not control the execution of the cue but simply overrides the channel values as the cue executes. You still need to use the “Cue Go” button to execute it, but unless the “Level Submaster” is above 0 then no output will be seen. Example If a channel in a cue is set to 50% and the “Level Submaster” is at 80% then when the cue executes the channel will be set to 40%. http://www.lifact.com 181 LightFactory A Guide for Users Reference/Window Overview Show Runners Changing the submaster while the cue remains active will also change the output of the fixture. Options Disable Reset To avoid accidental executing the reset function in the middle of a show check the “Disable Reset” option at the bottom of the window. Preview Next Cue in WYSIWYG To help you visualise what the next cue will look like LightFactory allows you to preview it in WYSIWYG. When this option is checked the WYSIWYG live display will be the contents of the next cue to the last one executed. Go All Pressing “Go All” is the equivalent of pressing all of the Go buttons for all show runners at the same time. Reset All Click “Reset All” to reset all of the show runners. 182 © 2004 LightFactory Software Ltd Reference/Window Overview Effects Runners LightFactory A Guide for Users Effects Runners “Effect Runners” provide a quick and easy way to access effects in an ad-hoc manner. Once you have created your effects (See “Effects Editor” on page 138 to learn how), they can be used either within cue lists or manually from effects runners. Open the “Effects Runners” window by clicking on the “Effects Runners” button at the right of the command interface or by selecting it from the “windows” menu at the top. Figure 112: Effects Runners Window This window will remain empty until you begin adding runners by clicking on the “Add Effect Runner”. Runners can be removed by clicking on the small trashcan ( ) in the top right of the frame. To set up a newly created “Effect Runner”: Left click inside the runner to bring up the “Effect Runner Properties” window. Figure 113: Effect Runner Properties Windows http://www.lifact.com 183 LightFactory A Guide for Users Reference/Window Overview Effects Runners The description field can be used to easily identify the runner. By default, this will be set to the same as the effect name but can be changed as desired. To set the effect to the runner, select the effect group from the “FX Group” drop down edit field. As soon as a valid group is selected, the effect field will become active. Select the desired effect from the dorp down list and the effect runner will become active. Depending on the type of effect you have selected different options will become visible. Click on the “Edit Effect” button to open the effects editor and automatically show the effect assigned to this runner. Exclusive Group – When a runner is created it is automatically placed into the “Independent” group (exclusive group 0). Effects contained in the independent group will run independently and can all be run at the same time. Setting an effect into an exclusive group other than 0 will make it exclusive. Only one effects contained in an exclusive group (group other than 0) can be active at any time. If you start another effect in an exclusive group while another is already running then the existing effect will stop and the new one started. Time vs. Fixture Effects Options Submaster – Assigning a submaster to the runner will override the dimmer of the fixtures contained in the effect. As the effect runs the position of the submaster will determine output of the fixtures. Start/Stop Shortcut – Set a shortcut number to assign to the playback controls for this runner. Pressing the shortcut will start the effect running. Pressing the shortcut while the effect is running will pause the effect and pressing it twice within 2 seconds will rewind the effect to the start. 184 © 2004 LightFactory Software Ltd Reference/Window Overview Effects Runners LightFactory A Guide for Users Override Effect Length – Set this field to change the length that the effect will run for. If this value is set to 0, the default length (Set during creation of the effect) will be used. If the effect length is overridden then all of the segments in the effect will be rescaled to this new length. Loop Continuously – Check this option to make the effect loop back to the start when it finishes. If this option is not checked then it will stop as soon as the effect ends. Chase Options Submaster – Assigning a submaster to the runner will override the dimmer of the fixtures contained in the effect. As the effect runs the position of the submaster will determine output of the fixtures. A submaster assigned to a chase will also cause the effect to automatically start when the value is above 0 and pause with it returns to 0. Step Shortcut – Set a shortcut number to use to step the chase. Pressing the assigned shortcut will cause the chase to transition from the current step to the next. Fade Time Submaster – To manually adjust the fade time or transition time as the chase is running you can assign a submaster that will control this. As each step executes the fade time will be dependent on the position of the submaster. The maximum fade time that can be set by the submaster is 10min. Step Time Submaster - To manually adjust the step time (time between automatic executions of steps) as the chase is running you can assign a submaster that will control this. As each step executes the time before the next step executes will be determined by the http://www.lifact.com 185 LightFactory A Guide for Users Reference/Window Overview Effects Runners position of the submaster. The maximum step time that can be set by the submaster is 10min. Chase Direction – Use this drop down option to specify how chase will run. Forward – The chase will run from the first step to the last. If the chase is set to loop the chase will return to the first step after the last step. Backward – The chase will run from the last step to the first step. If the chase is set to loop the chase will return to the last step after reaching the first step. Bounce – The chase will run from the first step to the last step and then back to the first step. If the chase is setup to loop then this will operation will repeat. Random – Every step in the chase will execute in a random order. Step Time – To specify a step time other than the default defined in when the chase was created enter a value into this field. Setting the step time to zero (0) will cause the default step time to be used. Fade Time - To specify a fade time other than the default defined in when the chase was created enter a value into this field. Setting the fade time to zero (0) will cause the default fade time to be used. Property / Attribute Effect Options Submaster – Assigning a submaster to the runner will override the dimmer of the fixtures contained in the effect. As the effect runs the position of the submaster will determine output of the fixtures. Start/Stop Shortcut – Set a shortcut number to assign to the playback controls for this runner. Pressing the shortcut will start the 186 © 2004 LightFactory Software Ltd Reference/Window Overview Effects Runners LightFactory A Guide for Users effect running. Pressing the shortcut while the effect is running will pause the effect and pressing it twice within 2 seconds will rewind the effect to the start. Override Effect Length – Set this field to change the length that the effect will run for. If this value is set to 0, the default length (Set during creation of the effect) will be used. Loop Continuously – Check this option to make the effect loop back to the start when it finishes. If this option is not checked then it will stop as soon as the effect ends. Scale Submaster – Assign a submaster to this field to manually adjust the scale parameter of the effect while it is running. This can provide a dynamic way to vary the effect. Offset Submaster – Assign a submaster to this field to manually adjust the offset parameter of the effect. Matrix Effect Options Submaster – Assigning a submaster to the runner will override the intensity the all of the fixtures contained in the matrix. Start/Stop Shortcut – Set a shortcut number to assign to the playback controls for this runner. Pressing the shortcut will start the effect running. Pressing the shortcut while the effect is running will pause the effect and pressing it twice within 2 seconds will rewind the effect to the start. Override Effect Length – Set this field to change the length that the effect will run for. If this value is set to 0, the default length (Set during creation of the effect) will be used. http://www.lifact.com 187 LightFactory A Guide for Users Reference/Window Overview Effects Runners Loop Continuously – Check this option to make the effect loop back to the start when it finishes. If this option is not checked then it will stop as soon as the effect ends. Step to points only - Set this option to jump between points rather than tracking a smooth path. When the effect is started the length of the effect will be broken up into the number of control points. As the effect runs it will jump from point to point at equal time intervals. Stop at each point - Set this option to run the effect more like a chase where each point becomes a step. The effect will play normally however when each point is reached the effect will pause and wait for a play command. Playback Controls Along the bottom of the effect runner frame are the three playback controls and a progress time indicator. Play Use the play control to start the effect running. As soon as the effect starts the play control will be highlighted in green and the time progress will beginning counting. In the case of simple chases the play control is also used to step through the chase. Pause Pausing an effect will stop its execution immediately but keep the position pointer at the current location. If you start the effect again, the effect will continue from this location. At the bottom of the page is a button to pause all active effects. Pressing this is the equivalent of clicking on the pause button of all running effects. Rewind Pressing the rewind button will stop the effect running and reset its position back to the start. If the effect is started again, it will start from the beginning. At the bottom of the page is a button to reset all active effects. Pressing this is the equivalent of clicking on the reset button of all running effects. 188 © 2004 LightFactory Software Ltd Reference/Window Overview Macro Editor LightFactory A Guide for Users Macro Editor The macro editor is an enhancement to the command interface and allows you to create a list of commands that are executed in one operation. Note: This is particularly useful if you have a sequence of commands that you use frequently. Creating a macro enables you to activate the sequence in one operation rather than entering each command manually. You can use the macro editor to create new macros or to edit existing ones. Open the “Macro Editor” by clicking on the button at the right of the command interface or by selecting it from the “windows” menu at the top. Figure 114: Macro Editor Note: You can create any number of macros, limited only by system resources. To create a macro: 1. Click the “Add” button at the bottom left of the window. 2. When a new macro is created, a default name will be assigned, such as “New Macro”. To change this to something more http://www.lifact.com 189 LightFactory A Guide for Users Reference/Window Overview Macro Editor meaningful, click in the “Macro Name” field and type the new name. 3. Set the shortcut number to assign an execution shortcut. Pressing the shortcut will cause it to execute immediately. Set the shortcut to 0 to disable shortcut control Note: The edit space on the right-hand side of the “Macro Editor” shows the commands that the macro contains. The macro being edited is identified by the title just above the edit space. Clicking on a macro on the left will change which macro is being edited. 4. Type the commands for your macro into the window at the righthand side of the macro editor. 5. The “Run Macro” button can be used to execute the macro (or a shortcut if you assigned one). As the macro executes, each line will appear in the command interface window. Deleting a macro can be achieved by clicking on the appropriate row and clicking the “Delete” button. A confirmation dialog will prompt you to confirm the deletion before the macro is removed. Additional Commands Macros consist of the same commands that are available in the command window. In addition to these commands, you can also enter comments and an execution delay (sleep). ♦ C++ Style Comments – To add a line of text that will not be executed, place two back slashes (//) before the text. As the system executes each line, it will ignore lines that begin with these symbols. ♦ Sleep – The sleep command will cause the software to pause before continuing to execute commands after this line. In the above example (Figure 114 on page 189), the control channel is set to DMX 220 and then set back to 0 after a short delay of 3 seconds. Enter the time of the delay in brackets after the commands. (The time entered must be in milliseconds) 190 © 2004 LightFactory Software Ltd Reference/Window Overview Level Group Editor LightFactory A Guide for Users Level Group Editor Level groups are a way to put a label to a DMX value for use with either the channel view or channel groups. Each level group has any number of labels and associated DMX value. To open the level group editor, go to the Command Interface window and click on the “Extras” button. Select “Level Group Editor” from the pop-up menu. This can also be found under the windows menu of the command interface. Figure 115: Level Group Editor A new group can be created by clicking on the “Add Group” button and removed with the “Remove Group” button. To change the default name of the group, click on the field and type the new name. When you exit the field the changes will be saved or press escape to cancel. Add new dimmer levels to the current group by clicking on the “Add Dimmer Level” button. To remove, click on the row to be deleted, and then click the “Remove Dimmer Level” button. The description field is the label that will be seen when selecting from either the channel or group window, while the “Value” is what will be applied when selected. http://www.lifact.com 191 LightFactory A Guide for Users Reference/Window Overview Level Group Editor Note: The “Value” must be a DMX value between 0 and 255. When you use the Level Group in the Channel Display or the Group Editor, the value will display as a percentage. To apply the changes you have made close and reopen the channel window (Channel Display) or the channel group window (Group Editor). 192 © 2004 LightFactory Software Ltd Reference/Window Overview Palettes LightFactory A Guide for Users Palettes Palettes are a way to quickly and easily set a list of fixtures to a specific state. Only properties where the value is greater than zero will apply, allowing the shortcut to control a very specific attribute of the fixtures. In the example (Figure 116) below, the first four shortcuts are used to set a list of MAC 600 moving lights to specific colours and will override the existing state of the fixture regardless of what is controlling the light. You may, for example, have an effect that is controlling the pan and tilt; the shortcuts can then be used to manually set the colour. Open the “Palettes” editor window by clicking on the button at the right of the command interface or by selecting it from the “windows” menu at the top. Figure 116: Fixture Property Shortcuts Create a new palette by clicking on the “Add Palette” button in the bottom left corner of the window. The “Delete Palette” button will remove the currently selected row (A dialog will prompt you to confirm the delete operation). Note: The easiest way to set up new palette is to use the right click menu option in the channel window. See “Add selected channels to palette” on page 111 to learn how to do this. The currently selected palette is represented by a small triangle along the left of each row. The properties listed in the right-hand half of the window are the properties for the selected palette. http://www.lifact.com 193 LightFactory A Guide for Users Reference/Window Overview Palettes The description field can be used to identify the fixtures and properties that will be set. The description will be displayed in the on-screen shortcuts window. (See “Shortcut Options” on page 86 to learn about the shortcuts window). The “channel” field is the list of channels that the properties will be applied to. Enter the list of channels by separating each by a comma (,) or space. Note: Leaving the channel list blank will apply the properties to the selected fixtures in the channel view. 194 © 2004 LightFactory Software Ltd